How to Draw an Orchid – A Step-by-Step Orchid Drawing Tutorial
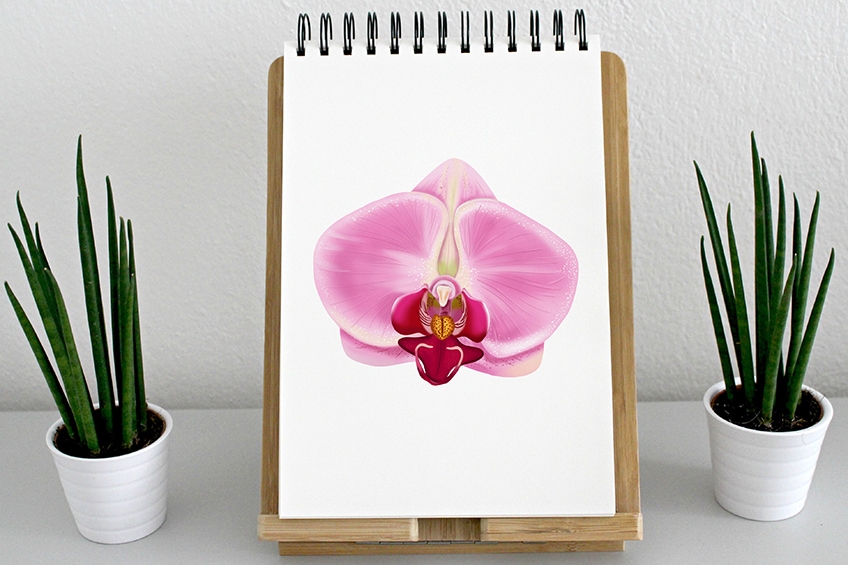
Orchids ooze luxury and glamour. These delicate and somewhat fickle flowers are expensive and need tender love and care to help them flourish. In this orchid drawing tutorial, we are going to show you how to draw an orchid step by step. We begin by creating a basic outline of our orchid sketch, before creating final details and adding realistic color to our orchid flower drawing. Let us begin!
How to Draw an Orchid: A Step-by-Step Tutorial
Orchid flowers are very symmetrical with unusually shaped petals, which can make them a little tricky to draw. To make our orchid flower drawing easier and help us create a realistic shape, we begin with a series of construction steps. These initial steps help us to create the base shape of the orchid sketch so we can then move on to add realistic coloring and texture. You can see a brief outline of the orchid drawing steps below.
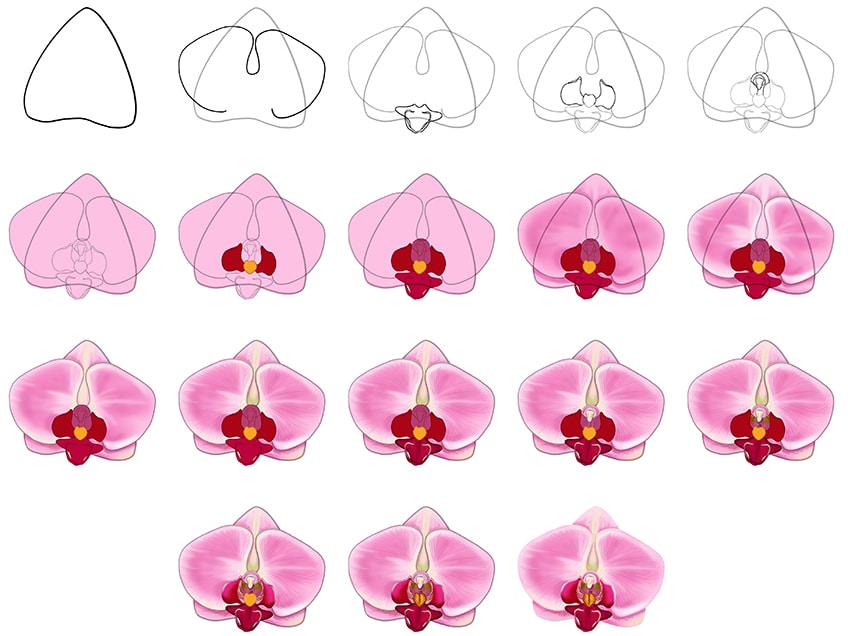
One of the great things about art is that there are so many different options. This orchid drawing tutorial is no different. You can follow this tutorial using paper and paint or coloring pencils, or you can use a digital drawing tablet. There is no limit to your creativity, so use a medium that you feel comfortable with, or choose something different if you want to challenge yourself.
Gather your drawing supplies and let us start learning how to draw an orchid step by step.
Step 1: Draw the Main Sepal of Your Orchid Drawing
To start your orchid drawing, you can begin by drawing the shape of the main sepal. Find the center of your canvas, and draw a curved triangular shape. If you have ever used a guitar pick, then this is similar to the shape that you are going for. The bottom of your triangle should curve upwards slightly.

Step 2: Draw the Base Shape of the Two Petals
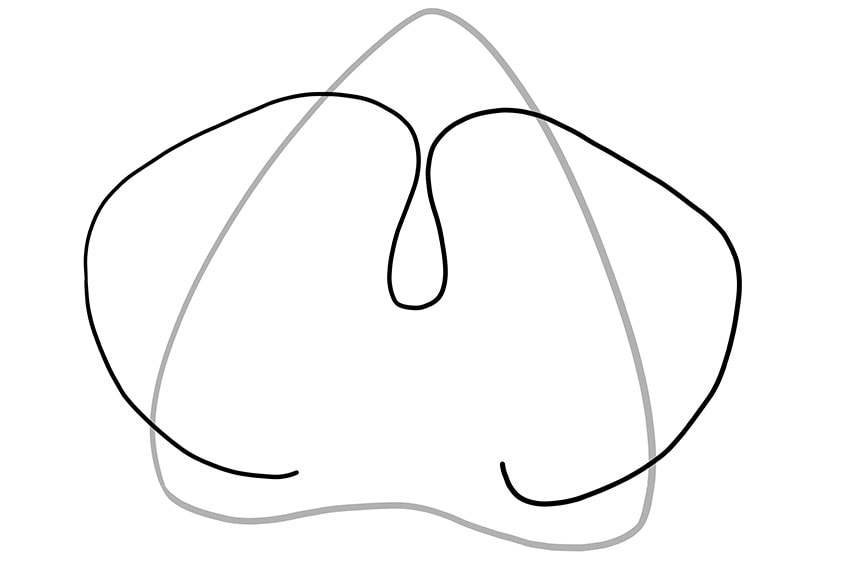
The sepal is the most posterior part of this orchid flower drawing, and the two petals sit in front of it. Now that you have the sepal drawn, you can draw the two petals overlapping it. Draw the two curving petals with a single line, swinging out and up from within the bottom of the sepal before coming back in to dip in the center.
The petals should protrude on each side of the sepal.
Step 3: Outline the Bottom Lip
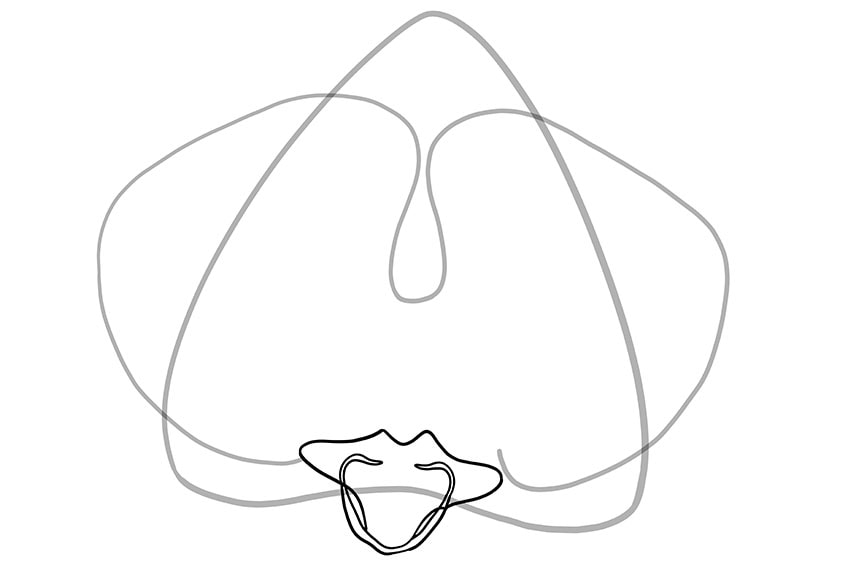
The bottom lip of an orchid flower is like a smaller petal, and you can draw it in this step. You can place the lip between the ends of the two petals within and overlapping the bottom of the sepal. Within the bottom of this lip, draw fine curving lines on either side for more definition.
Step 4: Continue Drawing the Center Details
Attached to the top part of the lip that you drew in the previous step, you can now draw a small round shape. Attached to either side of this round shape, draw two small petal shapes that curve out, down, and then up and in ending with a slightly rounded point.
Try to ensure that these shapes are as symmetrical as possible.

Step 5: Shape the Anther of Your Orchid Sketch
You can now complete the inner details of your orchid drawing by creating a curved shape between the two shapes you created in the previous step. The top of this new shape should look a little like a rainbow. You can then add a small upside-down bell shape in the center.

Step 6: Give Your Orchid Sketch a Base Color
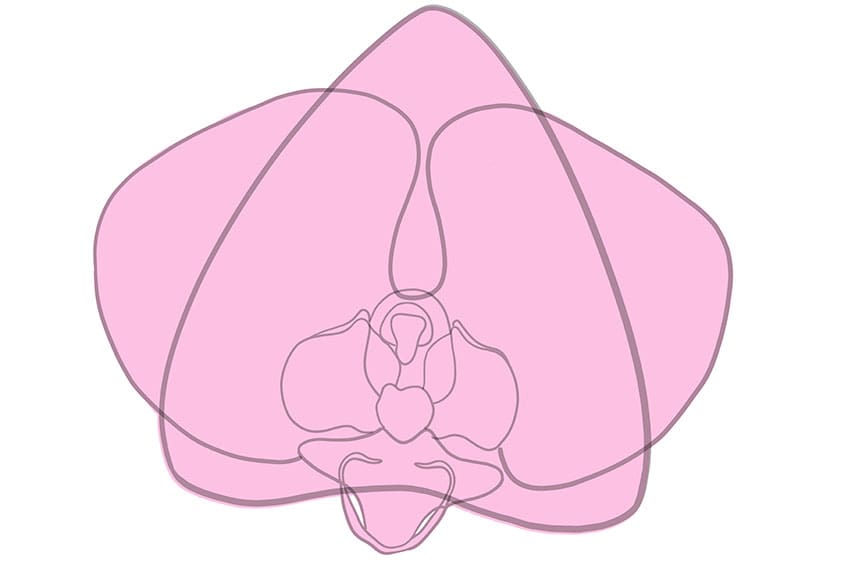
At this stage of your orchid flower drawing, you can choose what color you would like to make it. Orchids come in a range of different and beautiful color combinations, and you can decide which you find most appealing. For our example drawing, we are using various shades of pink. Start the coloring process with a regular paintbrush and a light shade of pink.
Apply an even coat of color to the entire orchid drawing.
Step 7: Add Color Details to the Column Petals
You will need two different colors for this step. We are using shades of dark gold and maroon. With a smaller brush, carefully fill the side petals of the column with the dark maroon shade. You can then finish this step by applying an even coat of gold to the center of the column.

Step 8: Color the Orchid Lip
There are two parts to this step and again, you will need two different colors. The first color is the same maroon as the previous step, and the second is a more purple shade of burgundy. Begin with the maroon paint and carefully fill the lower part of the orchid lip.
To finish this step, use the burgundy paint color to add a base coat to the anther.
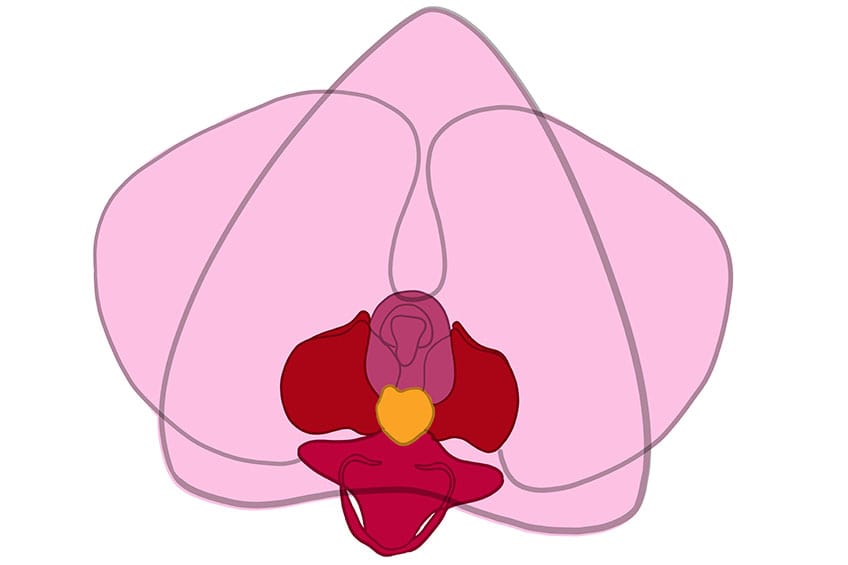
Step 9: Begin Contouring Your Orchid Flower Drawing
Now that we have all of the base colors down, we can begin to play with definition and structure. To do this, we are going to begin with a light contouring layer. Use a slightly darker pink to your main base shade and a small blending brush to gently contour in a fan-like motion from the center of the flower. You want to ensure that the central parts and the very edges of the petals are not darkened too much.
If you would like to, you can now erase any visible construction lines. You can also keep them to help you in the next step.
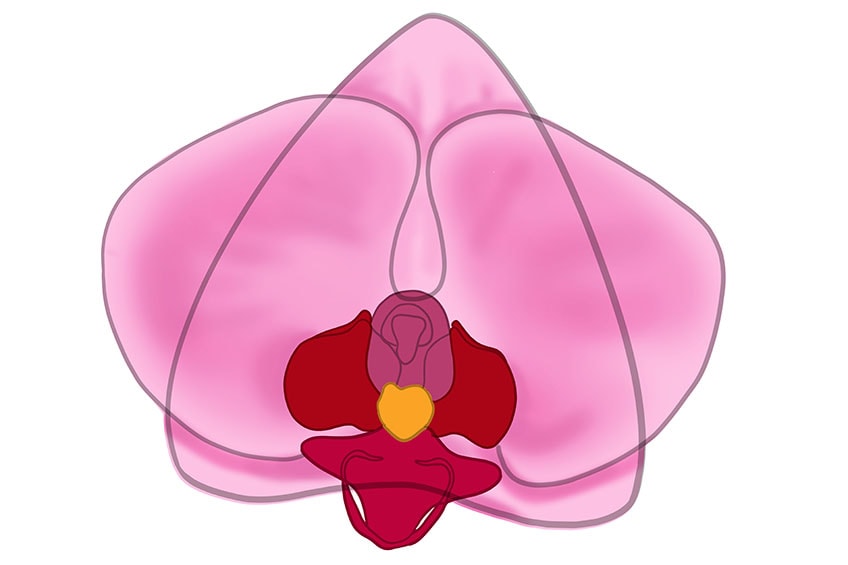
Step 10: Start Highlighting the Orchid Petals
Contours and highlights go together like peanut butter and jam. When it comes to creating depth and structural definition, they are the two sides of the same coin. With some white paint and a small blending brush, you can now apply some gentle highlights to the petals of your orchid flower drawing. Begin at the center and smooth them outwards. You can also add some highlights to the outer edges of the petals, focussing on the bottom edges of the two large petals.
If you did not remove the construction lines in the previous step, you can erase them now.
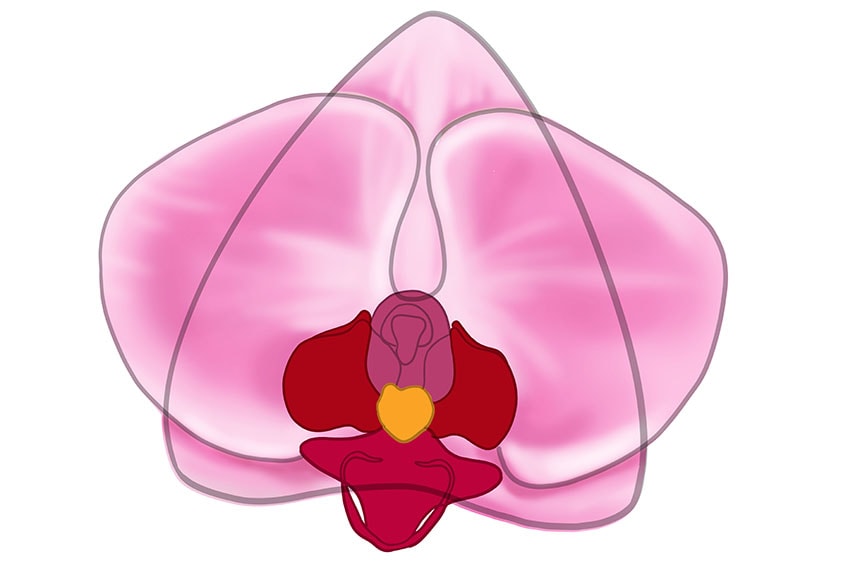
Step 11: Apply a Second Color to the Orchid Sketch
To create some color variation for a more realistic orchid drawing, you can now find a light cream shade of paint. Using a soft blending brush, carefully apply a layer of this shade to the center of the orchid and around the edges of the petals. This placement is very similar to the highlights from the previous step, but the cream should not cover the entire highlighted portion, only the center.
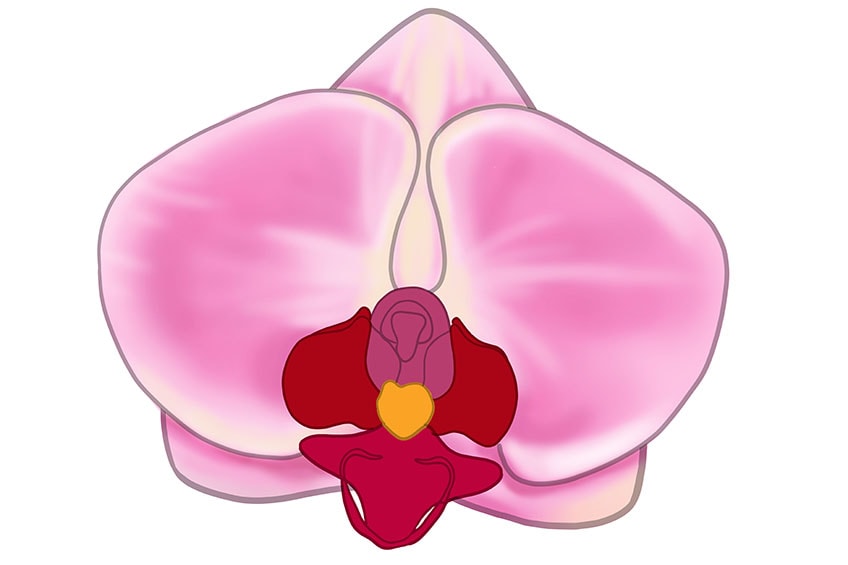
Step 12: Create Texture on the Petals
In this step, you are going to add some realistic texture to the large petals of your orchid flower drawing. Find a very sharp paintbrush and a slightly darker shade of purple. Carefully paint some fine hairlines that flow outwards on the petals and sepals. You can then repeat this step using white, to add some highlight definitions. To finish this basic texture step, use the same fine brush and some white paint to create a small dotted texture.
These dots can be placed in the center of the petals and around the edges, within the highlights.
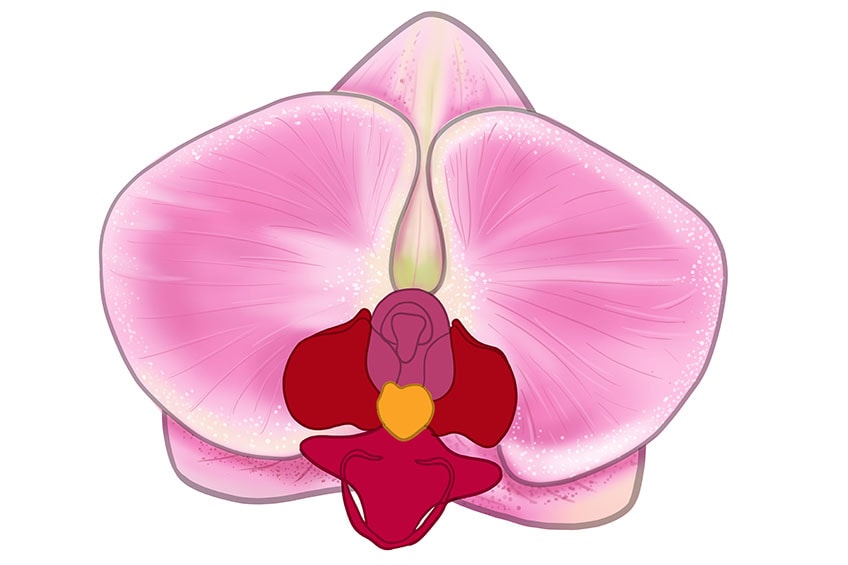
Step 13: Add Shading Definition to the Orchid Lip
For this step, you will need a small blending brush and a touch of black paint. When using black paint, always be very sparing, as it is almost impossible to remove it if you add too much. Begin to add some gentle shading around the edges of the bottom orchid lip, and then carefully blend it out onto the entire lip. You can then create a fine line of shading down the center of the lip to give it a little more dimension.
Finally, use a clean sharp brush to apply some cream paint to the upper portion of the lip lines.
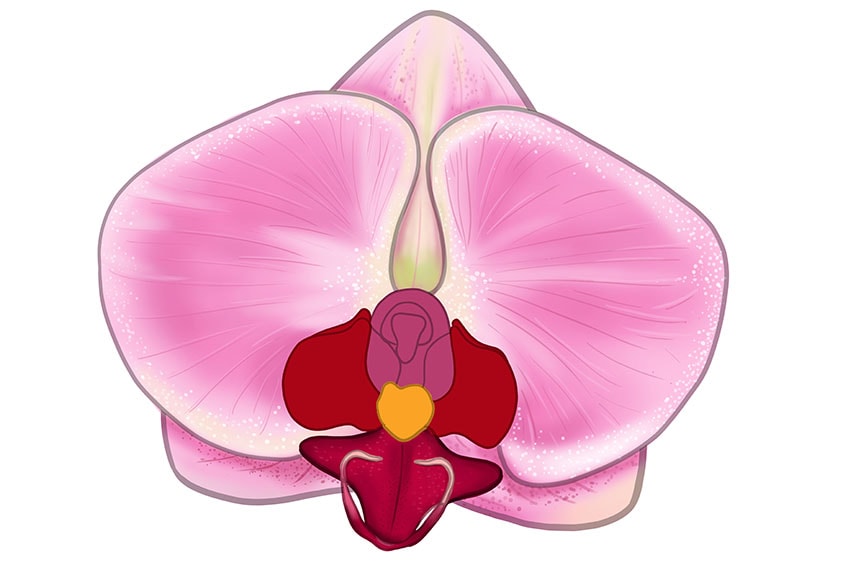
Step 14: Color the Anther and Column
In this step, you can now begin adding color details to the anther cap and arm. With a small blending brush and some white paint, carefully color around the inner bridges of the column arm and the anther cap. Leave some of the original base color visible. To finish this step, color the middle bell-like shape with some golden yellow and surround it with some white.
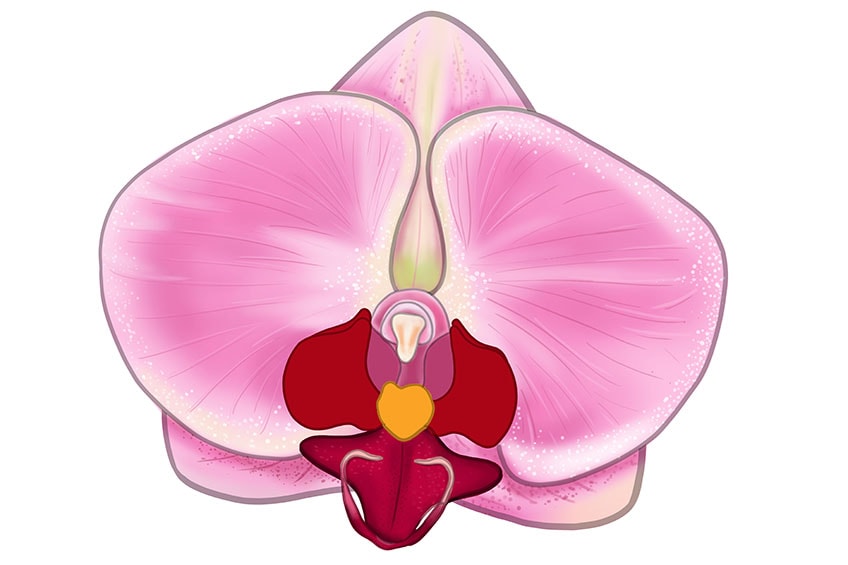
Step 15: Add More Color Detail to the Column Arm
For this step, you will need a small blending brush and some green and purple paint. Begin by using the blending brush to add some light green shading within the column arm, both above and below the anther cap.
You can then finish this step with a sharp brush and some dark purple paint, applying small dots and lines to create texture within the column arm.
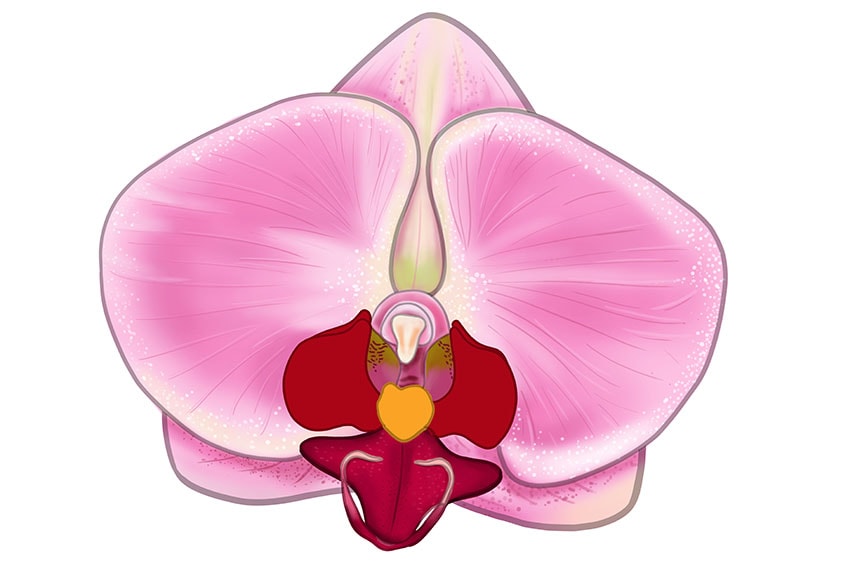
Step 16: Blend the Column Colors Together
With a small and soft blending brush, carefully apply a white coat along the edges of the column. You can then repeat this step on the inner edges of the column. Next, gently blend a bright purple shade onto each side of the column, using a clean brush to make this transition even smoother. Finally, to finish the step, use some dark purple paint and a sharp brush to create fine hairline stripes within the inner edge of the column.
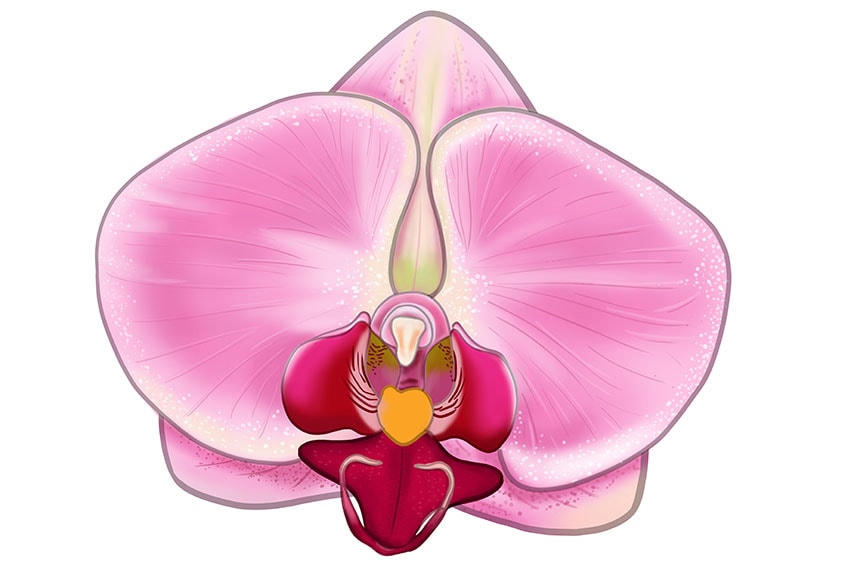
Step 17: Color the Central Details
We are now going to add coloring details to the pollen center of your orchid flower drawing. With a sharp brush and some dark purple paint, add some fine dots along the very center of the golden bean. Paint a fine midline in this dark purple, and then add some small dots around it.
You can finish this step by using a soft blending brush and a touch of black, to shade all around this pollen nub.
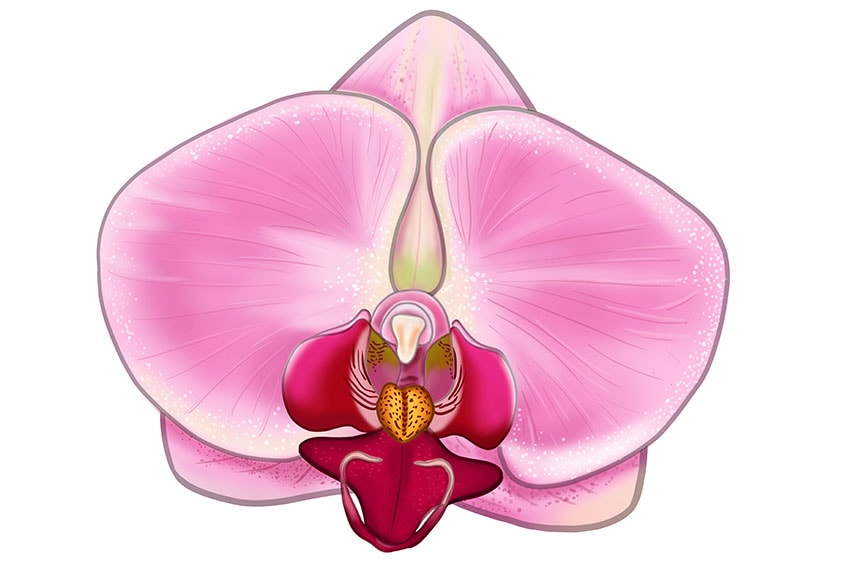
Step 18: Add the Finishing Touches to Your Orchid Drawing
In this step, you are going to finish your orchid flower drawing by removing the harsh outlines. With a very sharp brush and the corresponding color at each point of the outline, carefully trace over it. Repeat this process for all of the inner outlines too. This process will leave you with a beautiful and seamless orchid drawing.
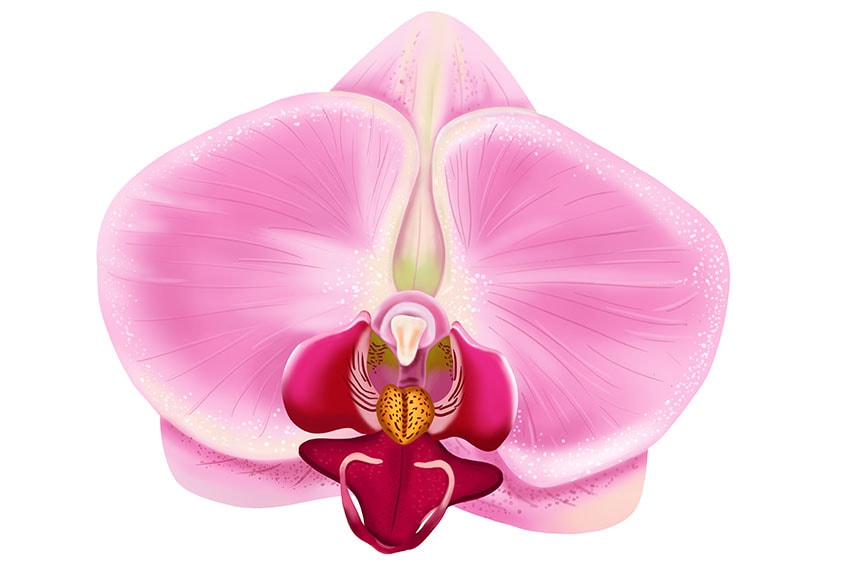
Congratulations on completing your very own beautiful and delicate orchid flower drawing! You now know how to draw an orchid step by step, and you can create different color variations, or even draw a whole orchid plant!
Our Flower Drawing Tutorials
- Flower Drawing Basics
- Tulip Drawing
- Hydrangea Drawing
- Lily Flower Drawing
- Poppy Flower Drawing
- Magnolia Flower Drawing
- Hibiscus Flower Drawing
- Calla Lily Drawing
- Lotus Flower Drawing
- Peony Flower Drawing
- Daffodil Drawing
- Dandelion Drawing
- Daisy Flower Drawing
- Sunflower Drawing
- Cherry Blossom Drawing
- Rose Drawing
- Forget-Me-Not Flower Drawing
Frequently Asked Questions
What Is the Hardest Part of an Orchid Drawing?
Orchid flowers have very unique shapes and elements, and the hardest part of learning how to draw an orchid is definitely creating these shapes. To help you with this process, our orchid sketch tutorial shows you how to create these shapes through a series of easy-to-follow construction lines.
What Color Is an Orchid Flower Drawing?
Orchids come in a wide range of different colors, from pink and purple to white or yellow. The colors that you choose are entirely up to you! You will need a variation of the main color, including lighter and darker shades.
Matthew Matthysen is an educated multidisciplinary artist and illustrator. He successfully completed his art degree at the University of Witwatersrand in South Africa, majoring in art history and contemporary drawing. The focus of his thesis was to explore the philosophical implications of the macro and micro-universe on the human experience. Matthew uses diverse media, such as written and hands-on components, to explore various approaches that are on the border between philosophy and science.
Matthew organized various exhibitions before and during his years as a student and is still passionate about doing so today. He currently works as a freelance artist and writer in various fields. He also has a permanent position at a renowned online gallery (ArtGazette) where he produces various works on commission. As a freelance artist, he creates several series and successfully sells them to galleries and collectors. He loves to use his work and skills in various fields of interest.
Matthew has been creating drawing and painting tutorials since the relaunch in 2020. Through his involvement with artincontext.org, he has been able to deepen his knowledge of various painting mediums. For example, watercolor techniques, calligraphy and lately digital drawing, which is becoming more and more popular.
Learn more about Matthew Matthysen and the Art in Context Team.
Cite this Article
Matthew, Matthysen, “How to Draw an Orchid – A Step-by-Step Orchid Drawing Tutorial.” Art in Context. May 16, 2022. URL: https://artincontext.org/how-to-draw-an-orchid/
Matthysen, M. (2022, 16 May). How to Draw an Orchid – A Step-by-Step Orchid Drawing Tutorial. Art in Context. https://artincontext.org/how-to-draw-an-orchid/
Matthysen, Matthew. “How to Draw an Orchid – A Step-by-Step Orchid Drawing Tutorial.” Art in Context, May 16, 2022. https://artincontext.org/how-to-draw-an-orchid/.


