How to Draw a Peony – Creating a Realistic Peony Drawing
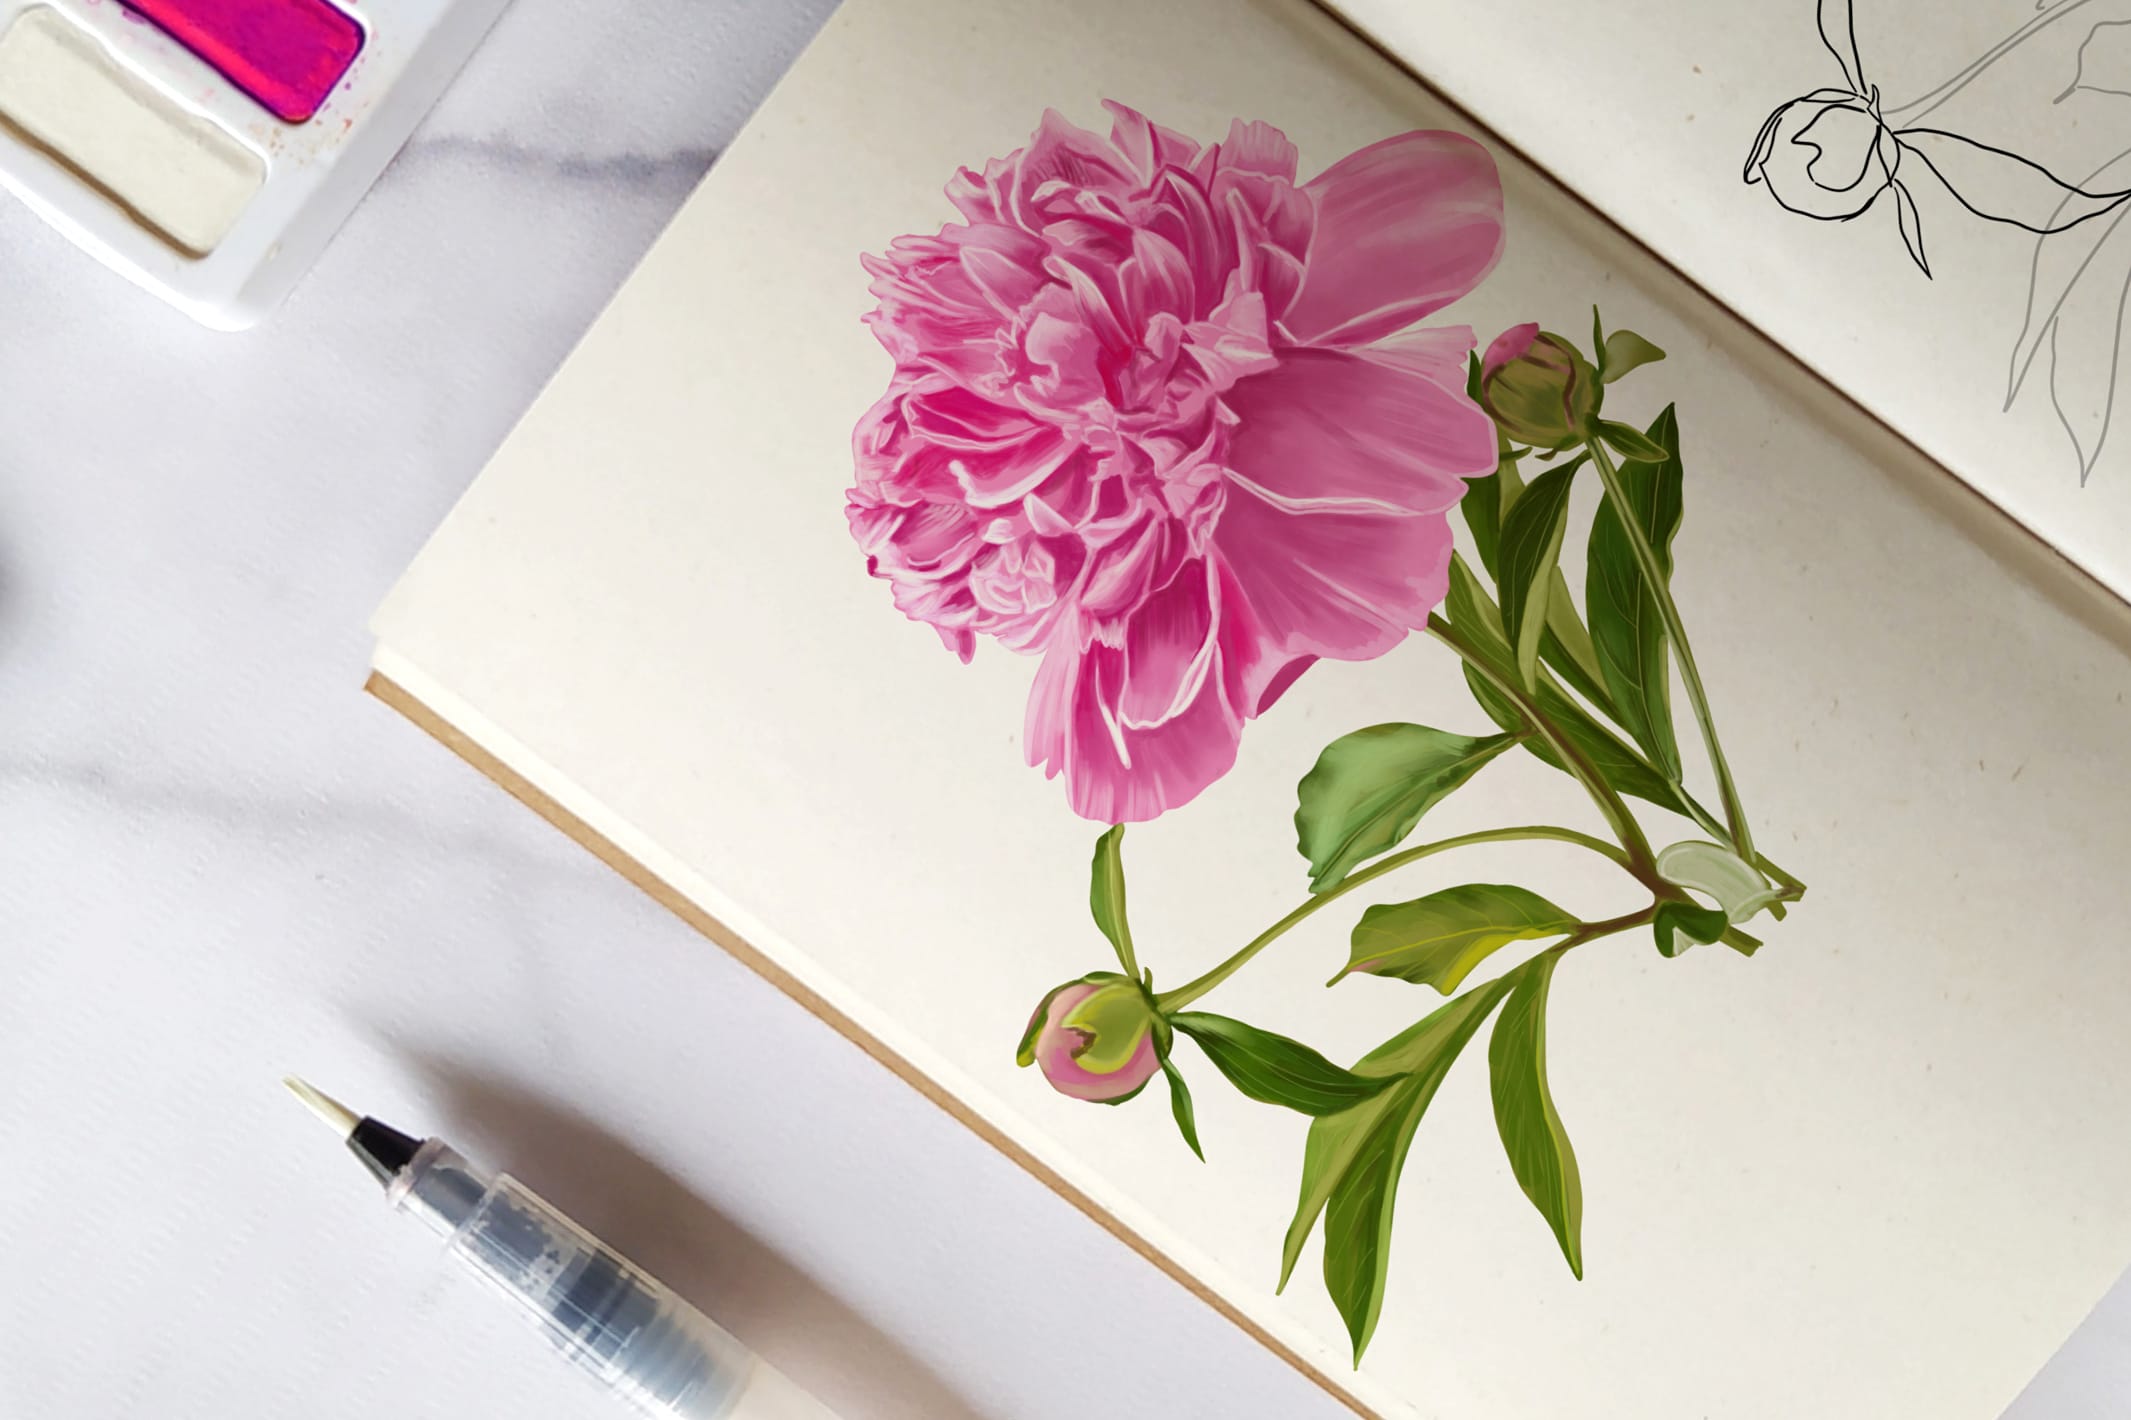
Known for their beautiful shape and color, peony flowers are said to represent wealth and honor. Blooming in a variety of colors, such as pink, purple, orange, and white, peonies make the perfect spring and summer addition to any garden or vase! In today’s drawing tutorial, we are going to show you how to draw a peony with our step-by-step instructions. Select the drawing supplies that you will be using today and let’s get started!
Table of Contents
- 1 How to Create a Realistic Peony Flower Drawing
- 1.1 Step 1: Construct the Middle of Your Peony
- 1.2 Step 2: Outline the Petal Shape
- 1.3 Step 3: Add in Your Centre Petals
- 1.4 Step 4: Draw Additional Petals to Fill Out the Main Body
- 1.5 Step 5: Complete the Body of Your Peony Drawing
- 1.6 Step 6: Create the Sepals for Your Flower
- 1.7 Step 7: Sketch the Stem for Your Peony Flower Drawing
- 1.8 Step 8: Draw the Leaves of Your Peony
- 1.9 Step 9: Outline the Unopened Flowers
- 1.10 Step 10: Add the First Color Coat to the Petals
- 1.11 Step 11: Color in the Peony Drawing’s Stem
- 1.12 Step 12: Add Detail to the Peony
- 1.13 Step 13: Highlight Your Peony Flower Drawing
- 1.14 Step 14: Add Some Shading to the Sketch
- 1.15 Step 15: Complete the Color Blending
- 1.16 Step 16: Highlight the Stem and Leaves of the Peony Illustration
- 1.17 Step 17: Shade the Stem and Leaves of the Peony Illustration
- 1.18 Step 18: Finalize Your Peony Drawing
- 2 Our Flower Drawing Tutorials
- 3 Frequently Asked Questions
How to Create a Realistic Peony Flower Drawing
Join us in learning how to draw a peony in this detailed step-by-step tutorial! Beginning with the basic elements of drawing, our tutorial will also cover how to add texture, coloring, shading, and highlighting to make your peony illustration pop.
Our easy peony drawing guide is great for both beginners and more experienced artists alike, so grab your drawing tools and let us try it out. At the end of our tutorial, you will be left with a beautiful peony flower drawing that is fit to frame!
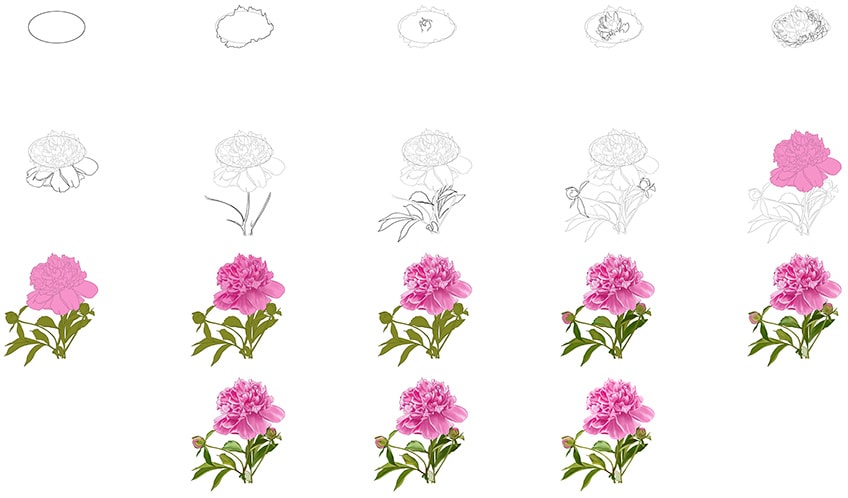
The above collage shows each of the 18 steps taken to achieve the final result and demonstrates what your peony drawing should look like at every stage. Follow along and you too will be able to draw and paint your own realistic peony flower!
Whatever medium you choose, our tutorial works well for both physical and digital drawings!
Step 1: Construct the Middle of Your Peony
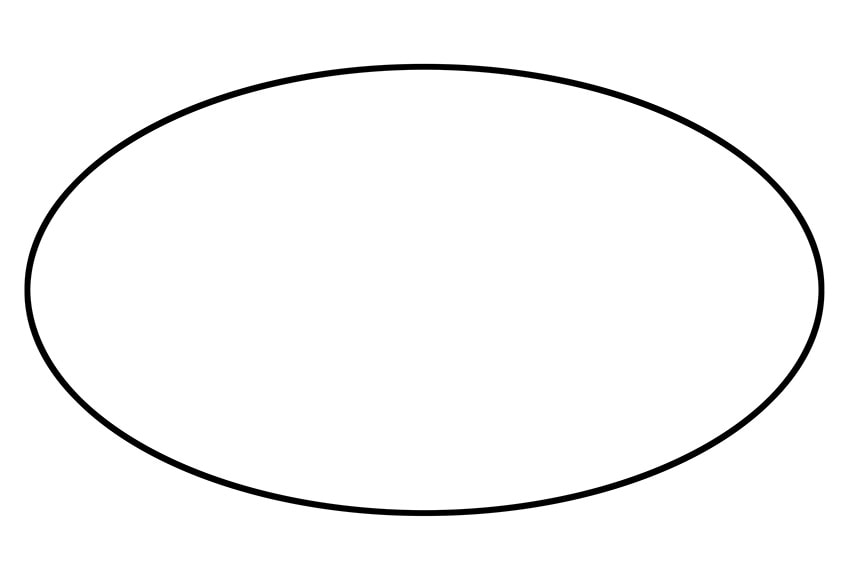
To start your drawing, you will need to begin with your peonies outline. Locate the center of your drawing area (whether it is on paper or a tablet), and simply draw a horizontal oval shape. Once this has been done, your oval should look slightly stretched out at the sides.
This will represent the main body area of your peony illustration.
Step 2: Outline the Petal Shape
We are now going to outline the petal shape for your peonies’ art. Making use of the oval shape that you drew in the previous step, outline a wilder petal shape around the neatly-drawn oval.

Step 3: Add in Your Centre Petals
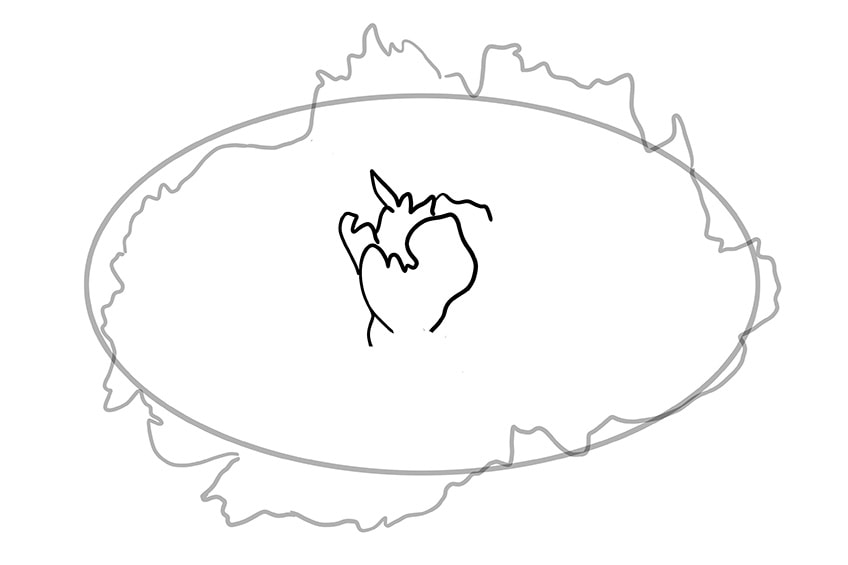
Now that the outer petals have been drawn, we will be moving on to the inner petals. These are the petals that are typically still unopened in the middle of the flower.
In the middle of the main oval, draw the center petals.
Step 4: Draw Additional Petals to Fill Out the Main Body
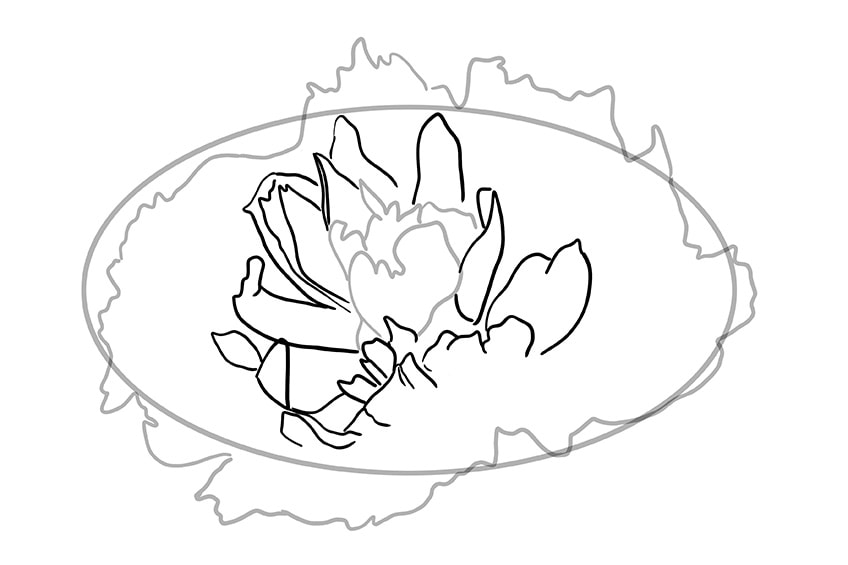
This step requires you to begin filling in the remainder of the petals of the peony. Within the main body of your peony drawing, draw the first later of petals so that they surround the center petals.
Step 5: Complete the Body of Your Peony Drawing
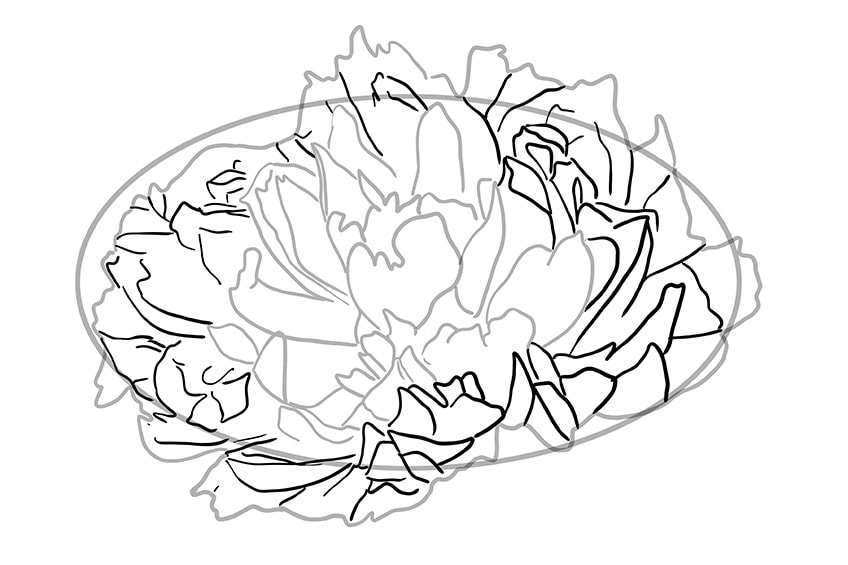
At this step, we are continuing to work on the main body of the peony. Once the first layer of inner petals has been drawn, as outlined in the previous step, carry on filling the main body with further outflowing petals.
Make sure that these petals do not overlap.
Step 6: Create the Sepals for Your Flower
Now that the petals for your peony drawing have been constructed, you can begin to work on the sepal. A sepal is the outer part of a flower that encloses the developing buds. Underneath the main oval shape, draw larger outflowing sepals. These should be drawn individually and layered on top of one another, rather than overlap each other.
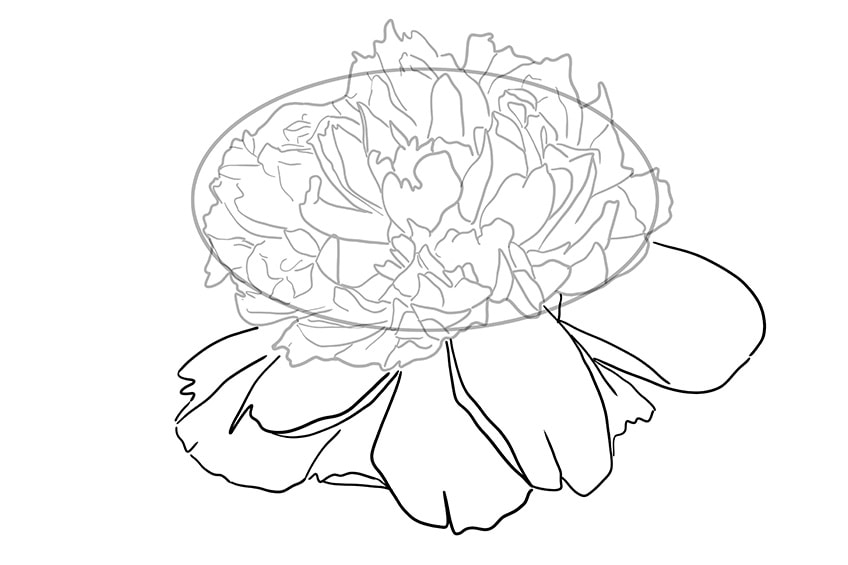
Step 7: Sketch the Stem for Your Peony Flower Drawing
At this step, we will be focusing our attention on the stem of the peony illustration. Locate the center sepal that you drew above, as your stem will be constructed from here.
From the middle of the sepal, sketch a curving stem that leads out onto smaller branches.
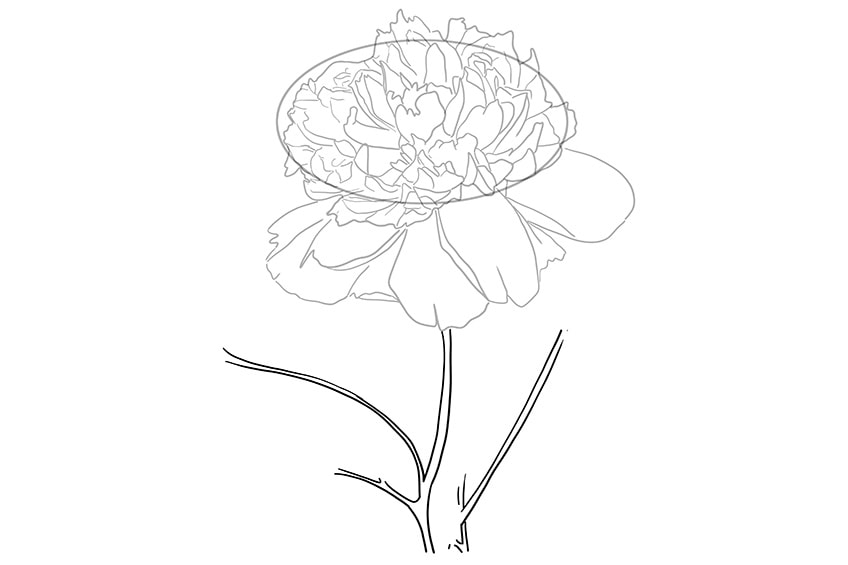
Step 8: Draw the Leaves of Your Peony
Once the stem has been drawn, you can begin to add some leaves to it. Working from the bottom to the top, attach some flowing leaves to both the stem and the branches. These can overlap the stem to help create a more realistic drawing.
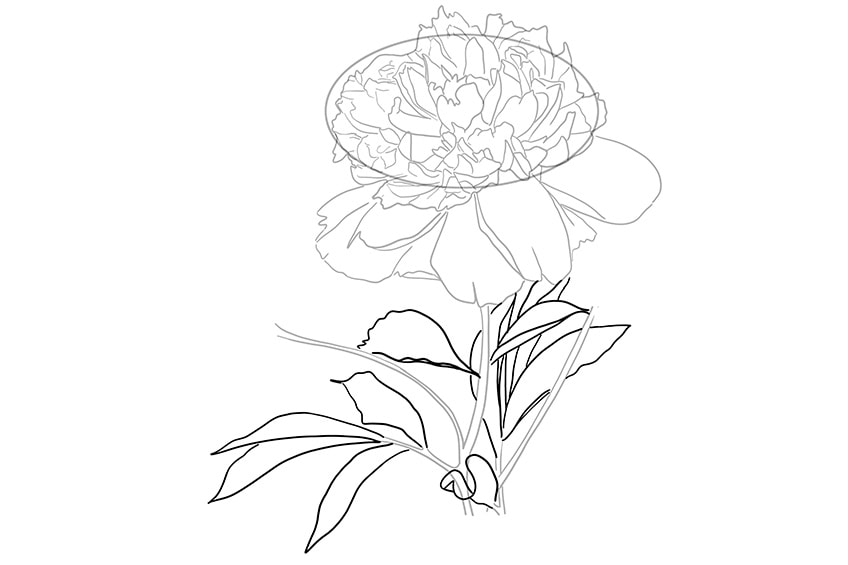
Step 9: Outline the Unopened Flowers
We will now be adding in some additional peonies. At the ends of any two of the branches, draw the unopened flowers as a ball with small sepals wrapped around them.
Once you have completed this step, you can erase any visible construction lines or overlapping lines.
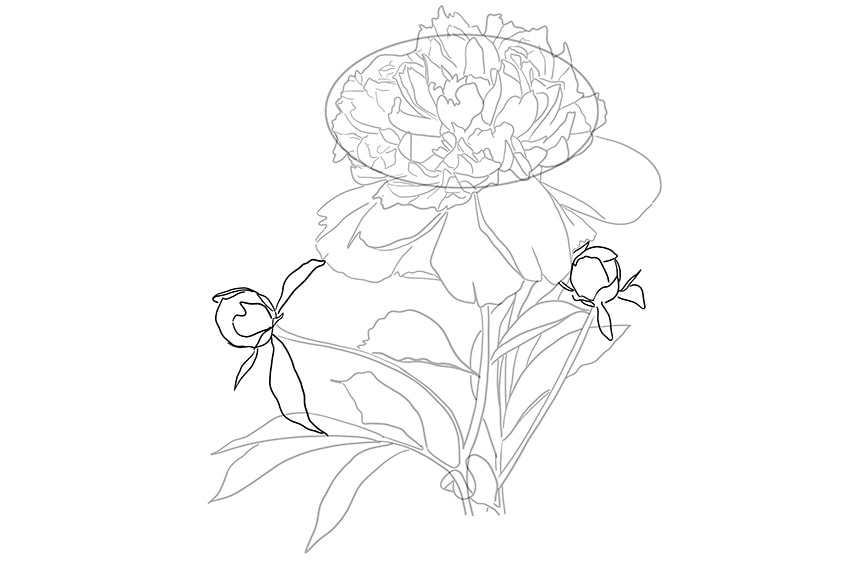
Step 10: Add the First Color Coat to the Petals
As all of the drawing is now completed, we can begin to add some color to our peony illustration! Making use of a regular paintbrush, select a color, and paint your first coat over the petals. For our peonies art, we have chosen pink but you are welcome to choose any color you like!

Step 11: Color in the Peony Drawing’s Stem
Once the petals have been given their first coat of paint, we can move on to the stem. Using a small and soft paintbrush, select a dark shade of green to fill the stems and leaves.
Remember to paint evenly.
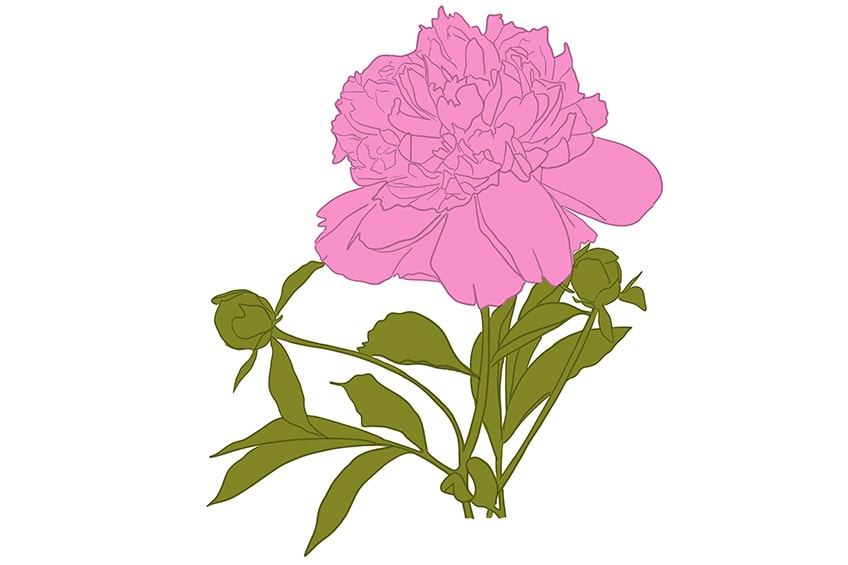
Step 12: Add Detail to the Peony
Now comes the exciting bit, as we are ready to start adding some detail to our peony flower drawing! Using a small and soft paintbrush, select a darker shade of pink and purple and begin adding some fine details and shading to each petal. Complete this step by adding some shading to each sepal to give it a realistic texture.
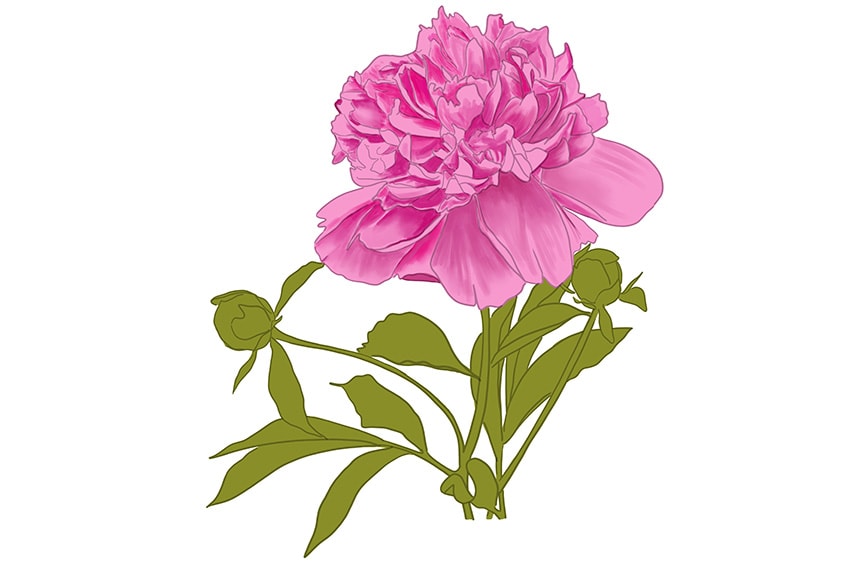
Step 13: Highlight Your Peony Flower Drawing
To make our drawing look more realistic, we will be highlighting our peonies art. Take a small and fine paintbrush, along with some white paint, to add some fine highlights onto the edge of each petal and sepal.
Complete this step by using a soft paintbrush and white paint to blend the highlights with the previous color coat.
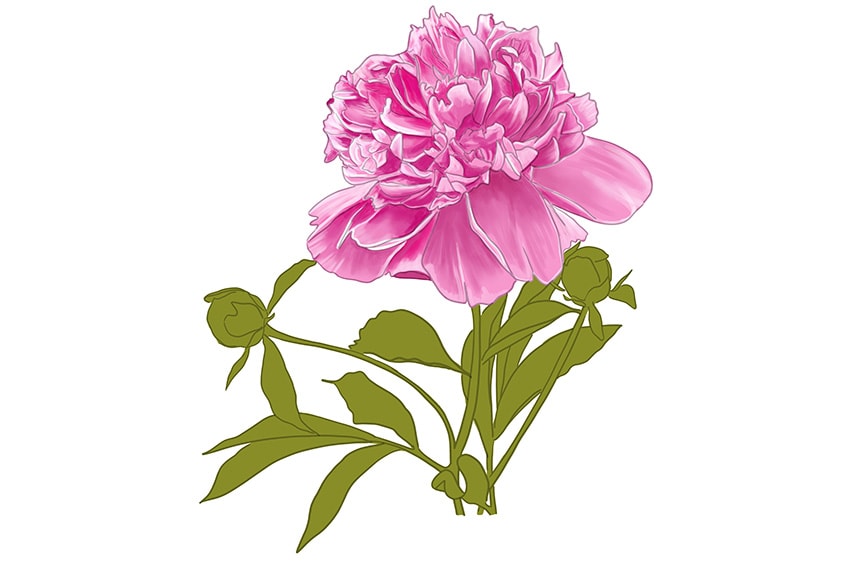
Step 14: Add Some Shading to the Sketch
Gently add some shading along the edges of the stem and branches with a small paintbrush and some dark green paint, making sure to repeat this step with the larger leaves. To soften the colors on the stem and leaves, use a soft brush to blend the paint. Finally, take a small paintbrush and paint the unopened buds.
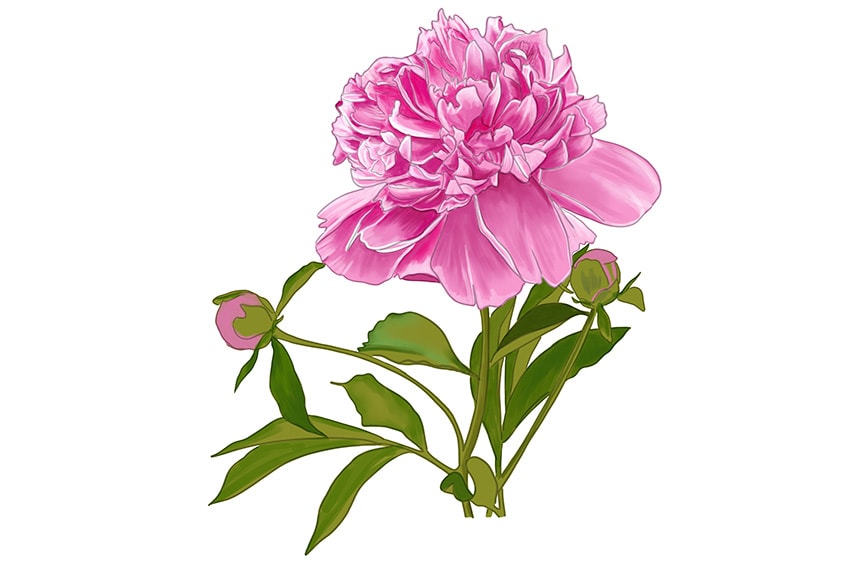
Step 15: Complete the Color Blending
We will now finalize the color blending for our peony flower drawing. Using a small paintbrush and a mixture of green and white paint, lightly blend the edges of the leaves and stems. To enhance the blending of our drawing, use a clean brush to blend further.
Repeat this step with the unopened flowers along the stem.
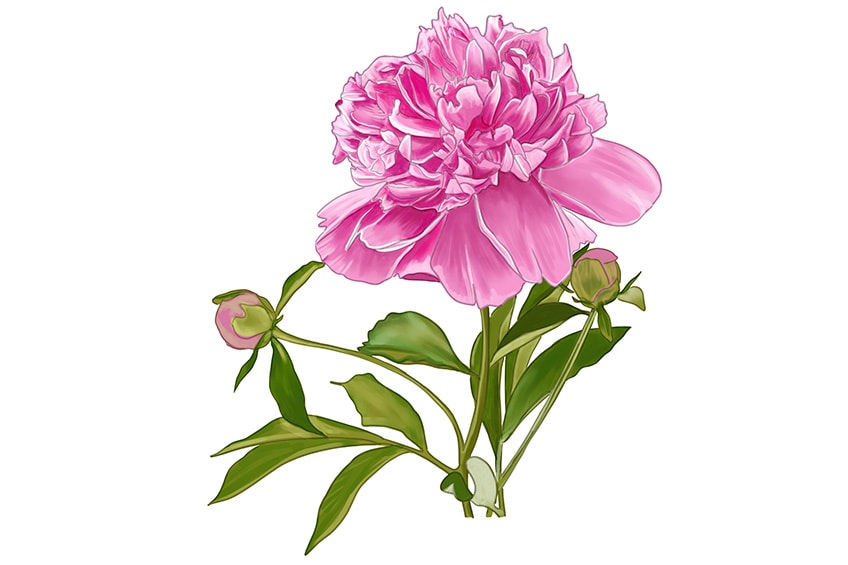
Step 16: Highlight the Stem and Leaves of the Peony Illustration
At this step, add some texture and highlights to the edge of each leaf, stem, and branch by using a fine paintbrush and white paint. With a softer brush, fade some white paint onto the sides and outer areas of each leaf. Finally, take some brown paint and begin filling the bottom and the edges of the stem and branches, making sure to paint the leaves wrapped around the unopened flowers as well.
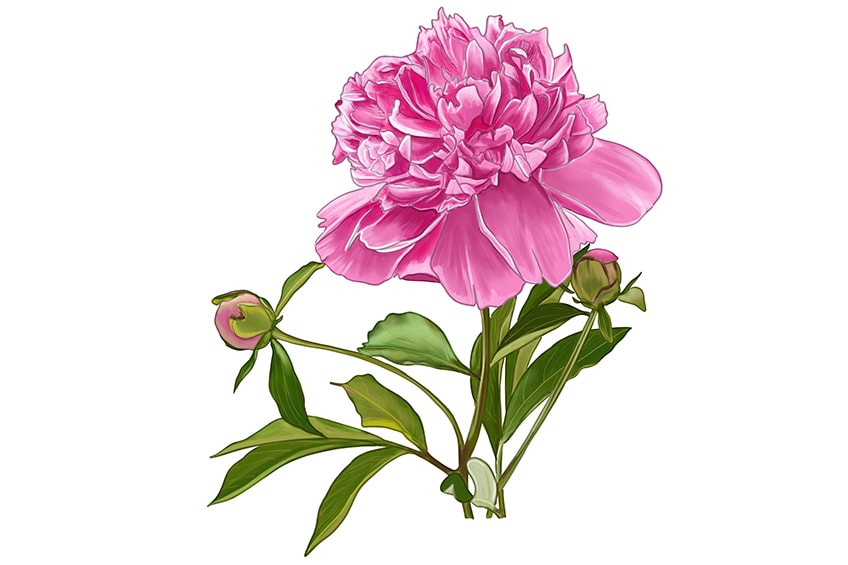
Step 17: Shade the Stem and Leaves of the Peony Illustration
Now that the highlights have been added, we can add some final shading to the stem and leaves of our peony drawing. With a small paintbrush, take some black paint and gently apply some shading to each leaf.
Focus on the bottom leaves, as shading these will help to achieve a more realistic effect.
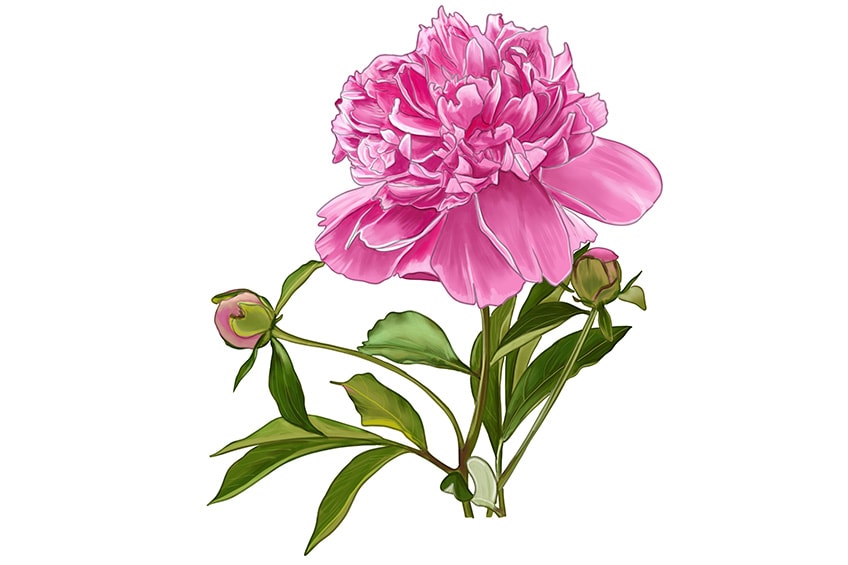
Step 18: Finalize Your Peony Drawing
In the final step, you will need a fine sharp paintbrush and the corresponding colors to trace over the outline of the entire peony illustration. Once you have finished tracing the outlines and inner texture lines, you should be left with a realistic and natural-looking peony drawing.
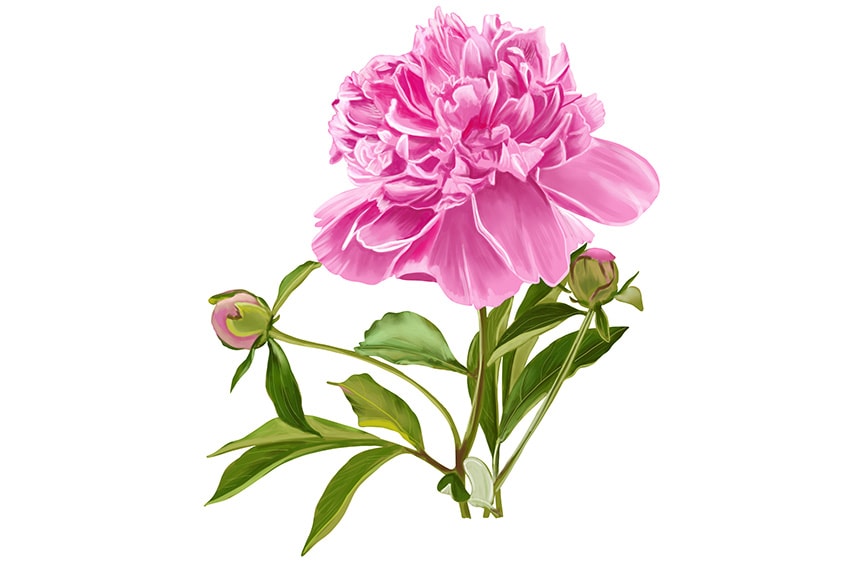
And voila, you have just learned how to create your very own peony flower drawing! From learning how to create your peonies outline to adding some shading and highlighting to your flower, you now know everything you need to do to create this drawing again. We hope that you enjoyed our tutorial on peonies art, and that you will join us again for more easy and exciting drawing guides!
Our Flower Drawing Tutorials
- Flower Drawing Basics
- Tulip Drawing
- Hydrangea Drawing
- Lily Flower Drawing
- Poppy Flower Drawing
- Orchid Drawing
- Magnolia Flower Drawing
- Hibiscus Flower Drawing
- Calla Lily Drawing
- Lotus Flower Drawing
- Daffodil Drawing
- Dandelion Drawing
- Daisy Flower Drawing
- Sunflower Drawing
- Cherry Blossom Drawing
- Rose Drawing
- Forget-Me-Not Flower Drawing
Frequently Asked Questions
Is It Difficult to Create a Peony Flower Drawing?
Not at all! In the above tutorial, we have outlined 18 straightforward steps for you to follow in order to create your very own peonies art piece! As our guide has been designed for both beginner artists and professional artists alike, the steps are easy enough to follow so that you feel at ease in no time.
Will I Be Able to Create a Realistic Peony Illustration?
With our easy peony drawing tutorial, we have provided easy-to-follow steps that will help you to sketch a peony. After following our guide for sketching and coloring, your peony drawing will look so realistic that you might confuse it for the real thing!
Matthew Matthysen is an educated multidisciplinary artist and illustrator. He successfully completed his art degree at the University of Witwatersrand in South Africa, majoring in art history and contemporary drawing. The focus of his thesis was to explore the philosophical implications of the macro and micro-universe on the human experience. Matthew uses diverse media, such as written and hands-on components, to explore various approaches that are on the border between philosophy and science.
Matthew organized various exhibitions before and during his years as a student and is still passionate about doing so today. He currently works as a freelance artist and writer in various fields. He also has a permanent position at a renowned online gallery (ArtGazette) where he produces various works on commission. As a freelance artist, he creates several series and successfully sells them to galleries and collectors. He loves to use his work and skills in various fields of interest.
Matthew has been creating drawing and painting tutorials since the relaunch in 2020. Through his involvement with artincontext.org, he has been able to deepen his knowledge of various painting mediums. For example, watercolor techniques, calligraphy and lately digital drawing, which is becoming more and more popular.
Learn more about Matthew Matthysen and the Art in Context Team.
Cite this Article
Matthew, Matthysen, “How to Draw a Peony – Creating a Realistic Peony Drawing.” Art in Context. May 7, 2022. URL: https://artincontext.org/how-to-draw-a-peony/
Matthysen, M. (2022, 7 May). How to Draw a Peony – Creating a Realistic Peony Drawing. Art in Context. https://artincontext.org/how-to-draw-a-peony/
Matthysen, Matthew. “How to Draw a Peony – Creating a Realistic Peony Drawing.” Art in Context, May 7, 2022. https://artincontext.org/how-to-draw-a-peony/.


