How to Draw a Poppy Flower – A Step-by-Step Tutorial
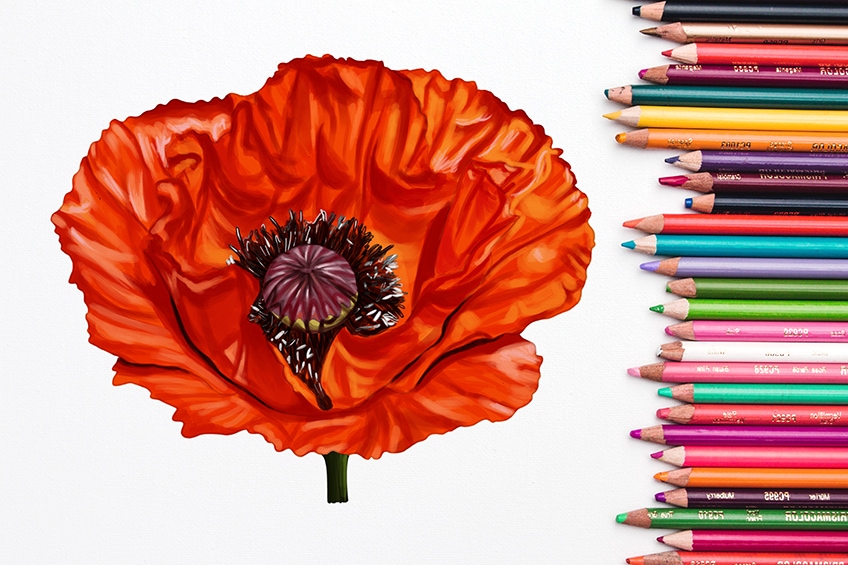
Poppies are iconic flowers, used as a memorial for military personnel. With large bright red and velvety petals, creating a realistic poppy flower drawing can be a great challenge for all artists. In this poppy illustration tutorial, we show you how to create the perfect poppy line drawing, and then how to breathe it into life with color and texture! If you want to learn how to draw a poppy flower in a few easy steps, then let us begin!
Your Guide to an Easy and Realistic Poppy Flower Drawing
When it comes to drawing a poppy illustration, it is always best to take it in gradual steps. We begin our poppy flower drawing tutorial with a series of basic construction steps that help you to create a realistic poppy outline. One of the largest elements of this poppy sketch is texture. We create realistic texture in our poppy line drawing using a series of coloring steps. You can see from the outline below that the coloring steps make up the majority of the tutorial.
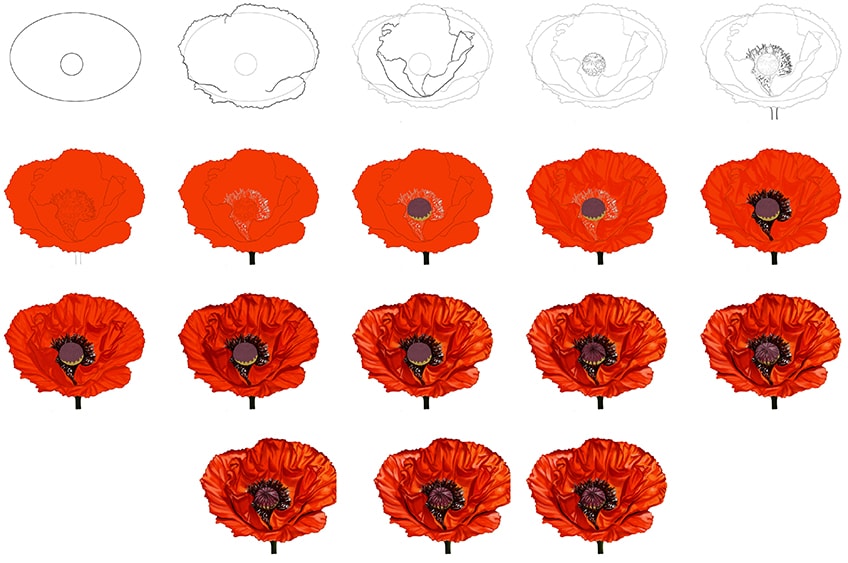
As always, our poppy illustration tutorial is compatible with almost every medium that you can choose. Whether you are a digital artist or you prefer to work with other painting mediums, the steps are easy to adapt. If you are using a graphic tablet, then we recommend creating the poppy outline on a separate layer from the coloring steps, as this will make removing it easy. For more physical mediums, we suggest using a very light pencil that can be easily erased for the outlines.
With that said, gather your drawing tools, and let us begin our poppy flower drawing!
Step 1: Begin Your Poppy Outline
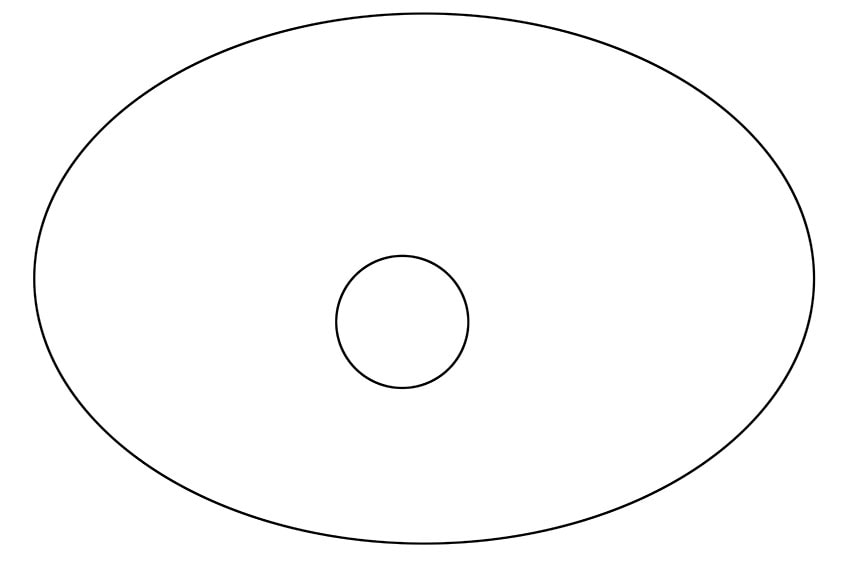
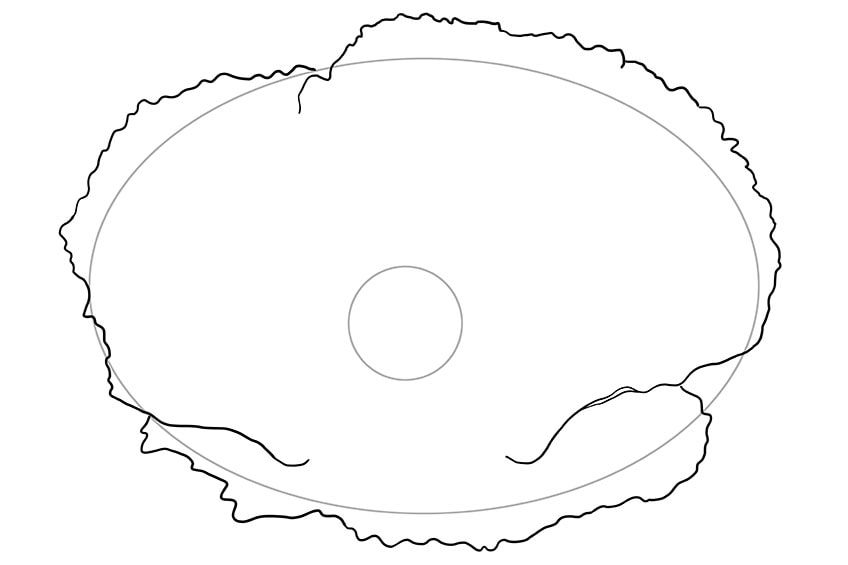
In the very first step, you are going to begin your poppy line drawing by drawing two construction lines. Begin by locating the center of your canvas area and draw a large oval shape here. Now, you can draw a small circle slightly off-center to the left.
Step 2: Outline the Outer Petal Edges
Using the construction shapes from the first step, you can now begin to create a rough-edged outline of your poppy petals. You want to have three primary petals, one on the bottom and two around the side and top.
Step 3: Draw the Inner Petal Outline
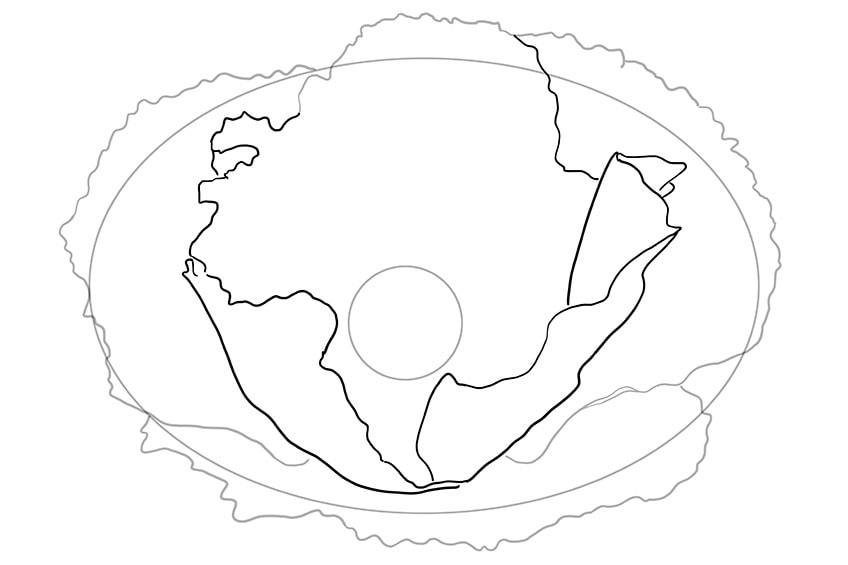
Now that you have the three outer petals outlined, you can move on to the inner petals of your poppy outline. Within the construction oval, draw some inner petals. Draw two side petals with a base below the construction circle. Add some folds and curls to these petals, and extend them up to just below the oval outline.
Finally, draw a squiggly outline that extends up to join the top outline of the outer petals.
Step 4: Draw the Seed Pod of Your Poppy Illustration
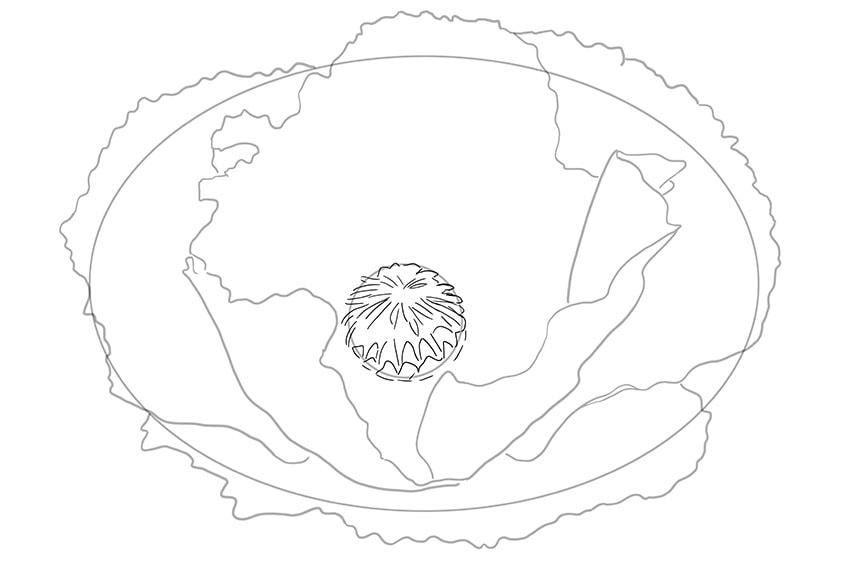
In this step, you are going to use the small construction circle from the first step to create a detailed outline for the seed pod. Begin in the center of the circle and create small petal shapes that extend down and around. You want to create a dome-like shape with your placement of these lines. You can then add some fine lines around the edge of the seed pod.
Step 5: Outline the Stamen and the Stem
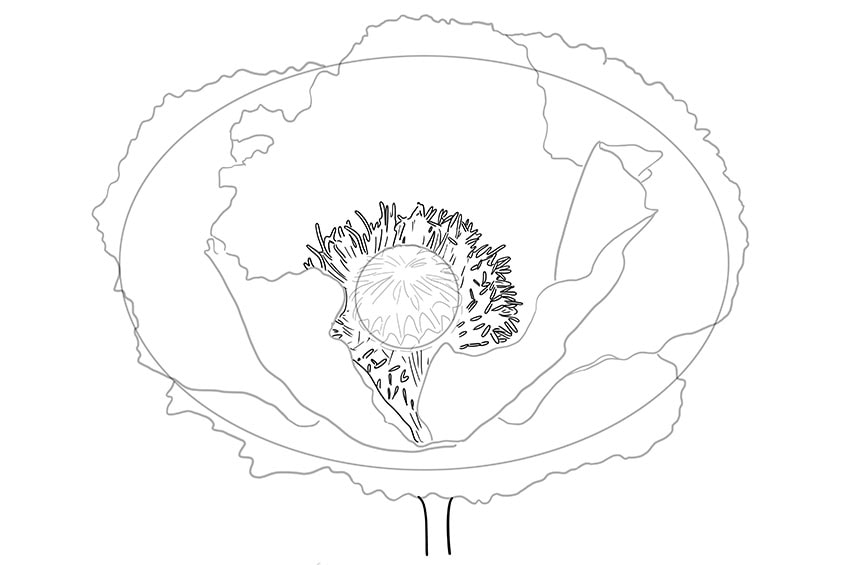
Poppies have quite a lot of stamen filaments all around the center seedpod. All around the seed pod, draw some fine lines within the cup of the flower. You can draw little long oval pollen pods on the tops of some of these lines. Next, draw a short stem at the bottom of your poppy sketch.
When you have finished with this step, you can erase any of the remaining visible construction lines.
Step 6: Apply a Base Color Coat
The key element of your realistic poppy flower drawing is building up the colors in a realistic way. We begin this realistic coloring process by applying a base coat. Find a regular paintbrush and a bright reddish-orange shade of paint. Carefully apply an even coat of this color to the entire flower head of your poppy line drawing.
Remember to leave the stem blank.
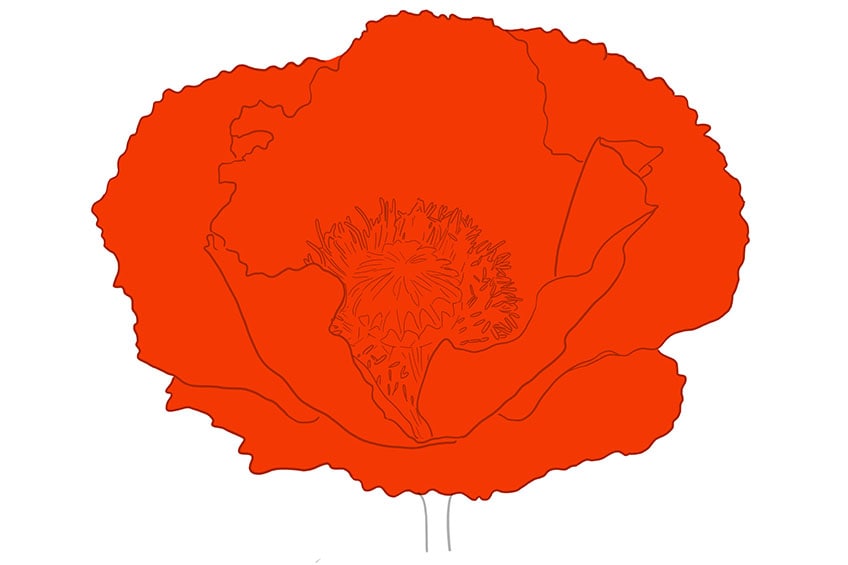
Step 7: Add Color to the Stamen Lines and Stem
For this step, you will need a sharp paintbrush and black, white, and light gray paints. Begin by using a light shade of gray to carefully trace the outlines of the stamens. You can then fill some of the pollen pods with some white paint. Finally, use the same sharp brush and some black paint to fill the stem with color.
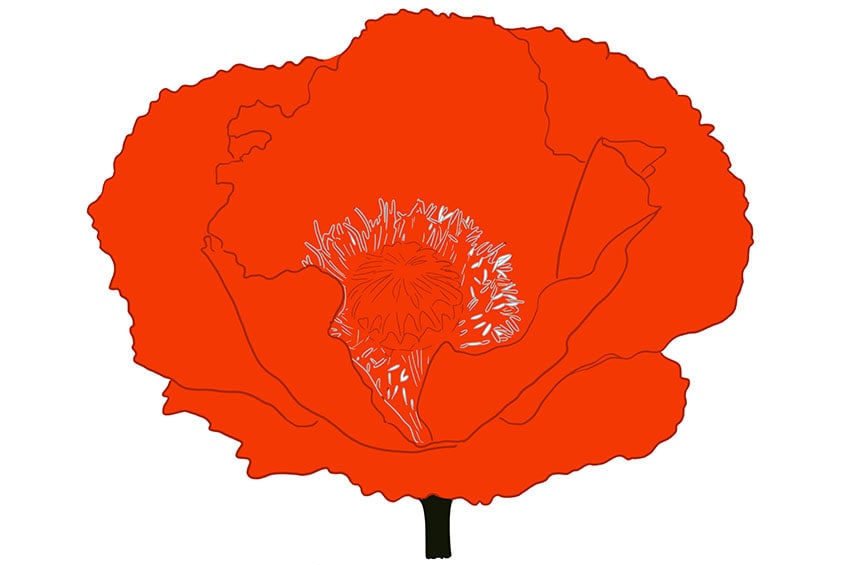
Step 8: Color Your Poppy Outline Seed Pod
For this stem, you are going to need three different colors. Begin with a sharp brush and some dark purple paint, and use this to fill the top part of the seed pod. For the bottom part, use a dark lime green shade and apply a leafy border.
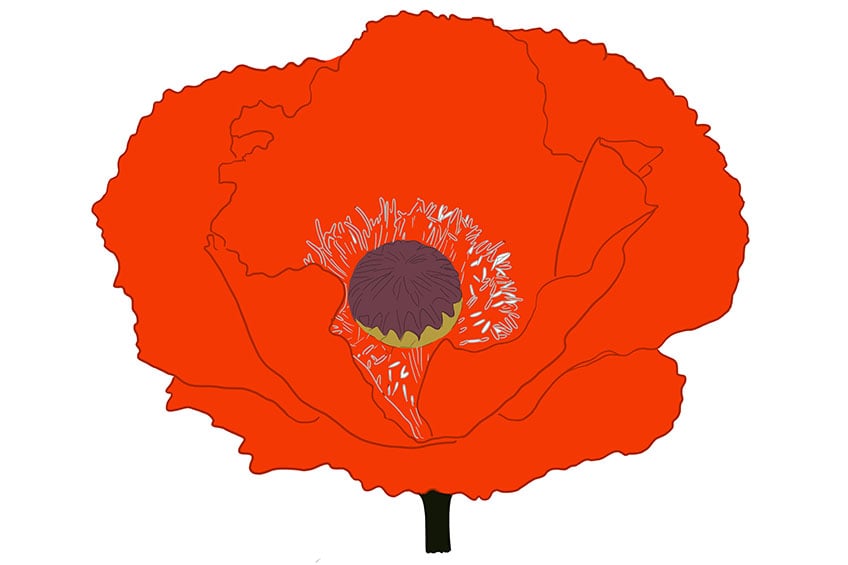
Step 9: Begin Creating Some Petal Texture
In this step, you are going to start the process of adding the characteristic poppy flower drawing texture. With a small blending brush and a slightly darker shade of red-orange, begin to add some brush strokes inwards from each of the crinkles in the outline. Repeat this process for all of the petals, including the innermost ones. For the inner petals, you can create some additional folding textures around the stamen lines.
Remember that this is the first texture step, it does not have to be perfect yet!
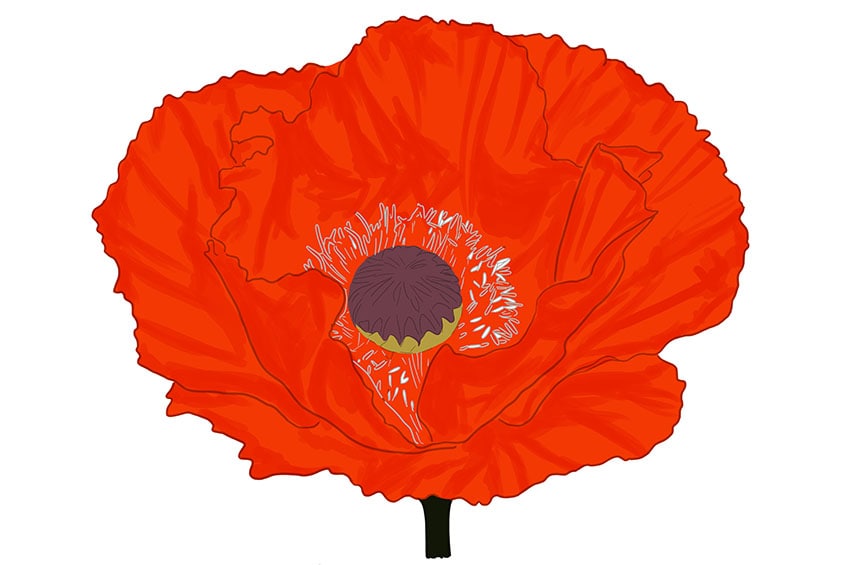
Step 10: Darken the Stamen of Your Poppy Line Drawing
In this step, you are going to darken the stamen lines of your poppy sketch. Use some black paint and a small brush to fill the stamen lines, avoiding the white lines you colored previously.

Step 11: Contour Your Petals
In this step, you can now deepen the contouring for your poppy flower drawing petal texture. Use a small blending brush and a second coat of slightly darker orange, and carefully emphasize the structure lines that you applied in step 9.
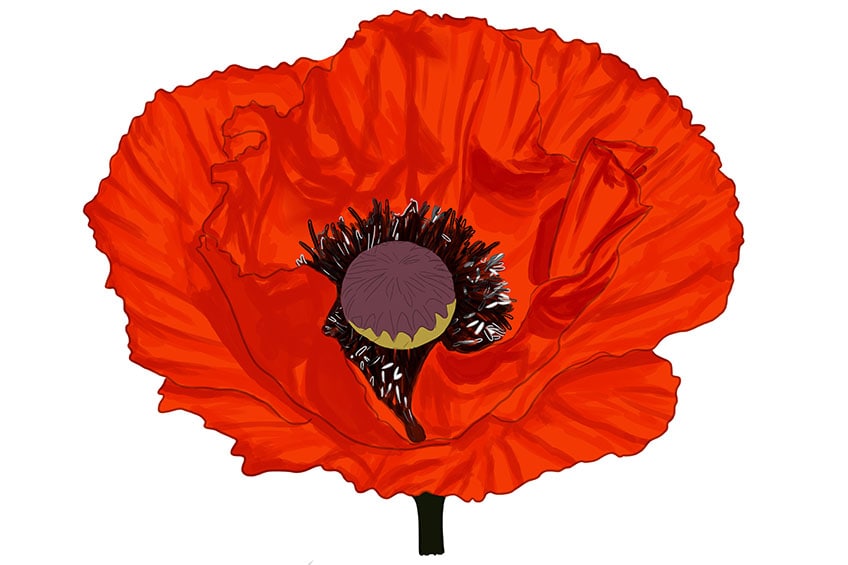
Step 12: Shade Your Petal Texture
Now that you have the contouring finished, it is time to add some shading to the texture of your poppy petals. Use a clean small blending brush and some dark gray or black paint, and carefully shade along your contouring lines. Be careful not to cover all of your contouring colors with this shading.
Remember that when you are using black paint, you should start with a very light layer and gradually build it up.
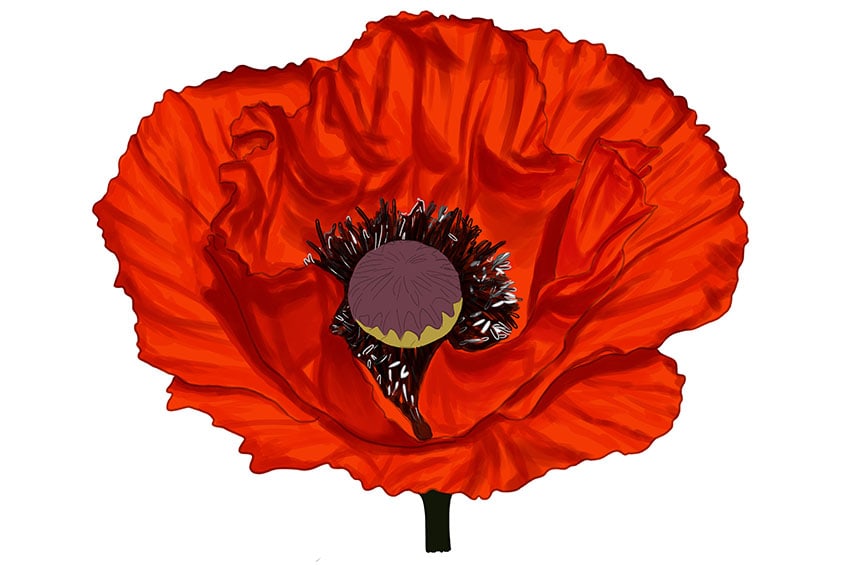
Step 13: Add a Highlight Shade
In the past few steps, you have been focussing on contouring and shading. It is now time to focus on highlighting shades. You will need light orange paint and a small blending brush. Carefully apply this lighter shade between the shaded areas on each of your petals. You can then finish this step by repeating this process with a touch of white paint.
Try to place the white paint in the central areas of the orange highlights, to create more dimension in your realistic poppy flower drawing.
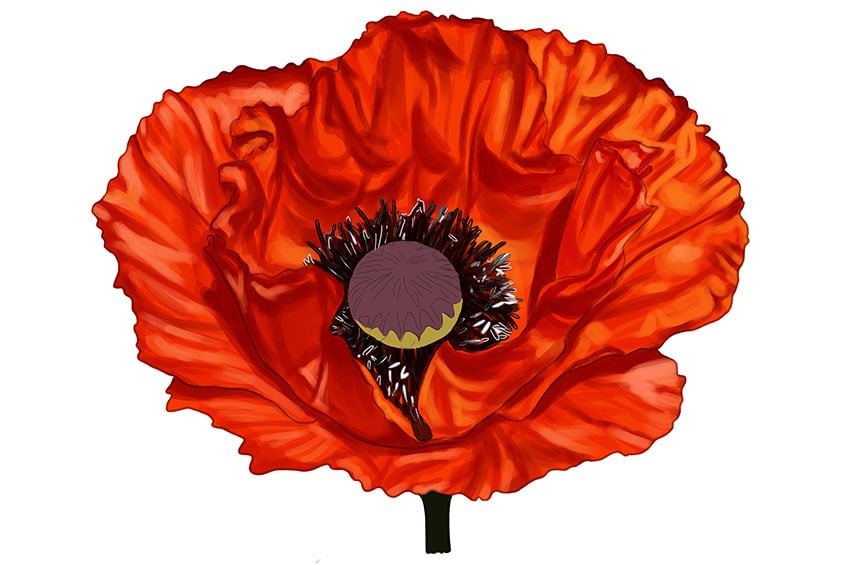
Step 14: Detail the Seed Pod with More Colors
Let us now move on to focus on the seed pod again. With a small blending brush, use some black paint to enhance the shading along the edges of the seed pod. Then, using soft brush strokes, use a bright purple color to trace along the curved lines.
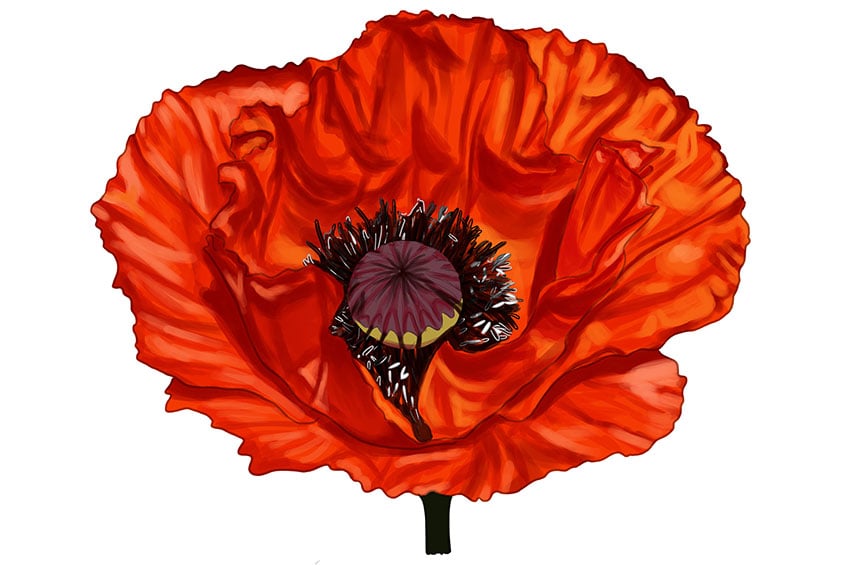
Step 15: Blend the Seed Pod Colors Together
To make the seed pod of your poppy illustration more realistic, you can now use a small blending brush and some purple paint to carefully blend and soften the top of the seed pod. Next, use a very small soft brush and some white paint to add some highlight strokes from the center. Sticking with the white paint, use a small fine brush to color in some more of the tips of the stamen lines around the seed pods. You can repeat this process with some light gray paint for additional variety.
Complete the step by applying enhanced shading along the edges of the petals to show separation between the layers.
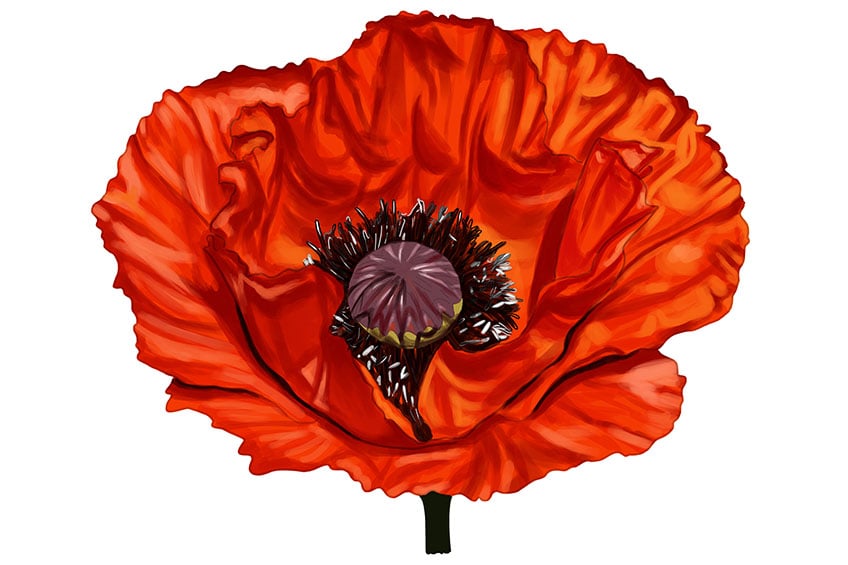
Step 16: Finish Detailing the Seed Pod
To complete the seed pod, make use of a small soft brush and white paint to apply additional curving lines including additional dark curving lines from the top of the seed pod around the edge. Apply final shading surrounding the bottom area of the seedpod. Finally, make use of green paint and a small soft brush to apply some color to the edge of the stem then gently darken the stem using a soft brush and black paint.
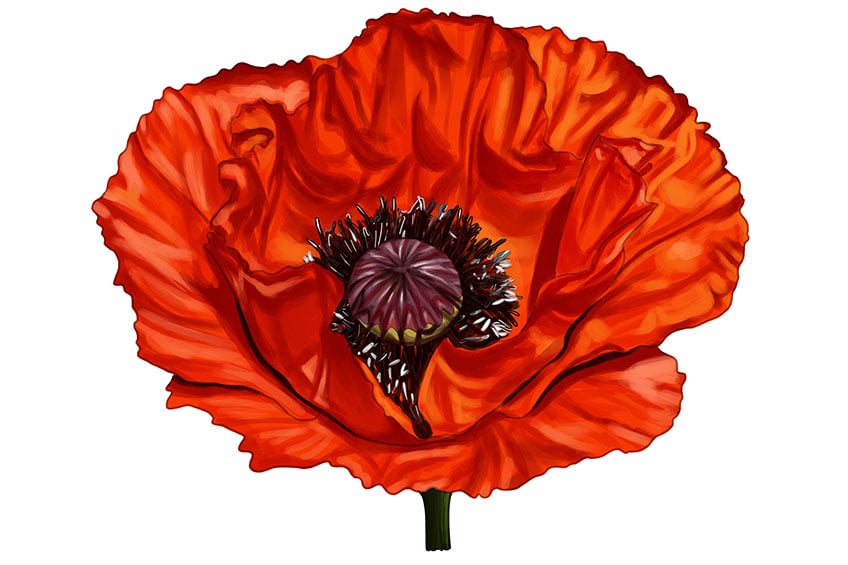
Step 17: Apply Final Highlights to Your Poppy Sketch
Before you finalize your poppy illustration, you can add some final highlights to the edges of the outer petals. Using a small blending brush and some white paint, follow the curves of the petal structures and outlines and apply some light highlights.
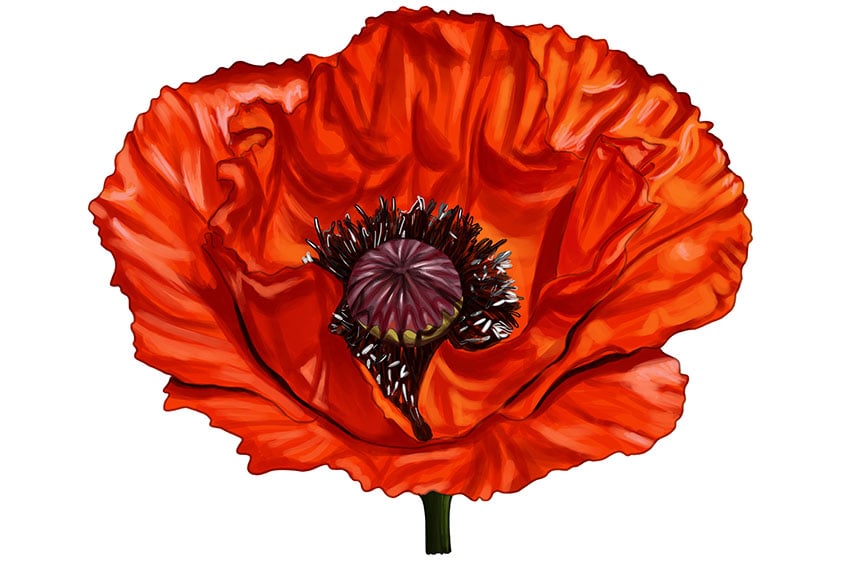
Step 18: Remove the Poppy Outline
This step is optional and may not be entirely noticeable, but to achieve a more seamless and realistic poppy flower drawing, you can remove the outlines. With a fine sharp brush, trace any dark outlines and inner texture lines with the corresponding color to the area being traced. The main areas being traced in this particular artwork tutorial will be the petal outlines.
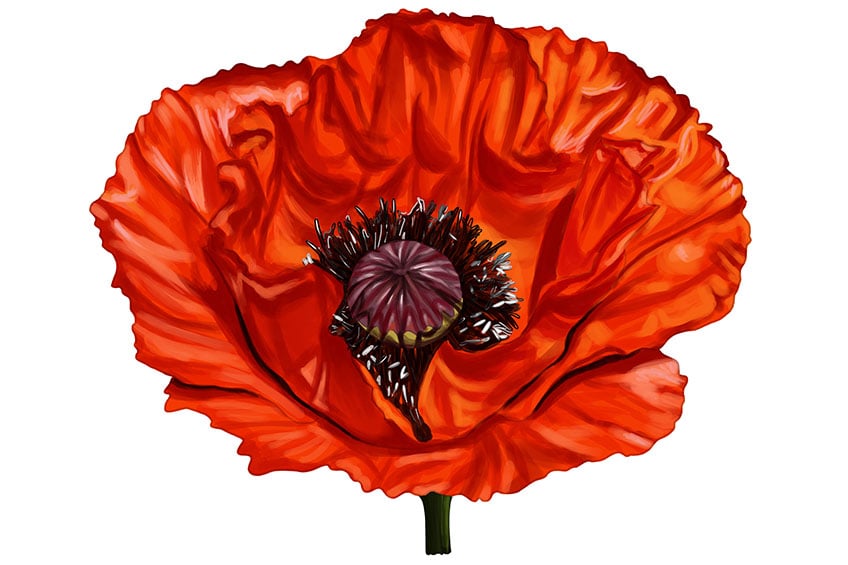
We hope that you have enjoyed our easy poppy flower drawing tutorial! This tutorial has focussed on how to create texture using different layers of colors, and a realistic poppy flower drawing is the perfect subject. Keep practicing how to draw a poppy flower, and if you want to create a colorful bouquet, check out some of our other flower drawing tutorials!
Our Flower Drawing Tutorials
- Flower Drawing Basics
- Tulip Drawing
- Hydrangea Drawing
- Lily Flower Drawing
- Orchid Drawing
- Magnolia Flower Drawing
- Hibiscus Flower Drawing
- Calla Lily Drawing
- Lotus Flower Drawing
- Peony Flower Drawing
- Daffodil Drawing
- Dandelion Drawing
- Daisy Flower Drawing
- Sunflower Drawing
- Cherry Blossom Drawing
- Rose Drawing
- Forget-Me-Not Flower Drawing
Frequently Asked Questions
How do You Draw and Paint a Poppy Sketch?
Like all flowers, poppies have unique challenges for drawing and painting. Poppies have very textured petals, so we need to ensure that we capture this in our realistic poppy flower drawing. We start out poppy illustration with a series of construction steps, and then we add colored texture detail to the poppy line drawing.
How to Create a Poppy Line Drawing?
In order to ensure that our final realistic poppy flower drawing has the correct shape and dimensions, we start by creating a poppy outline. The poppy line drawing is actually quite forgiving because the petals are quite variable and the outlines are a little squiggly. This leaves plenty of room for personal flair or accidental wiggles!
Matthew Matthysen is an educated multidisciplinary artist and illustrator. He successfully completed his art degree at the University of Witwatersrand in South Africa, majoring in art history and contemporary drawing. The focus of his thesis was to explore the philosophical implications of the macro and micro-universe on the human experience. Matthew uses diverse media, such as written and hands-on components, to explore various approaches that are on the border between philosophy and science.
Matthew organized various exhibitions before and during his years as a student and is still passionate about doing so today. He currently works as a freelance artist and writer in various fields. He also has a permanent position at a renowned online gallery (ArtGazette) where he produces various works on commission. As a freelance artist, he creates several series and successfully sells them to galleries and collectors. He loves to use his work and skills in various fields of interest.
Matthew has been creating drawing and painting tutorials since the relaunch in 2020. Through his involvement with artincontext.org, he has been able to deepen his knowledge of various painting mediums. For example, watercolor techniques, calligraphy and lately digital drawing, which is becoming more and more popular.
Learn more about Matthew Matthysen and the Art in Context Team.
Cite this Article
Matthew, Matthysen, “How to Draw a Poppy Flower – A Step-by-Step Tutorial.” Art in Context. May 19, 2022. URL: https://artincontext.org/how-to-draw-a-poppy-flower/
Matthysen, M. (2022, 19 May). How to Draw a Poppy Flower – A Step-by-Step Tutorial. Art in Context. https://artincontext.org/how-to-draw-a-poppy-flower/
Matthysen, Matthew. “How to Draw a Poppy Flower – A Step-by-Step Tutorial.” Art in Context, May 19, 2022. https://artincontext.org/how-to-draw-a-poppy-flower/.


