


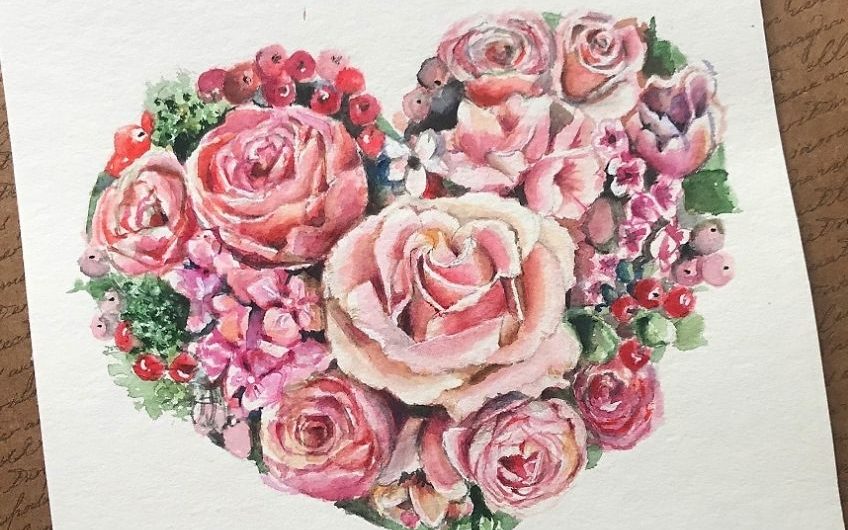
How to Draw a Rose – Create Your Own Rose Drawings
The rose holds special meaning and symbolism in many cultures. For some, it represents beauty and love. It can also represent perfection, grace, and all things joyful in life. This makes it a very popular symbol to draw among many artists and amateurs alike! Drawing a rose is very particular; it consists of much detail, many layers in the form of petals, as well as a lot of shading. Read on to learn how to draw a rose as we provide you with detailed steps on how to create this challenging flower. You will soon understand how to draw a rose perfectly, and even be able to paint this beautiful flower in watercolor as well!
Step-by-Step Single Rose Drawing Tutorial
Follow along and learn how to draw and paint a realistic rose in our full step-by-step tutorial showcasing the very basic elements of drawing a realistic rose to detailing and texturing as well as the entire coloring process. Learn how to draw a realistic rose the easy way with our full step-by-step tutorial. The collage below shows each step taken to achieve the final result, follow along and you too will be able to draw and paint your own realistic Rose flower!

For this first realistic rose drawing, you are welcome to use any medium that you feel the most comfortable with. If you are a digital artist, you can use a drawing tablet, or more physical artists can use paint, pencils, or coloring markers.
Step 1: Begin by Drawing the Right Side Petal
We start our rose illustration by drawing the first side petal on the right side of the page. Begin by finding the center of your drawing canvas, and to the right of it, draw the first petal. The bottom of this petal should be quite wide, and then get narrower as it curves up and around.
Just before the top of the petal, create a cross-over, giving the impression that the rose petal is folding outwards.

Step 2: Drawing the Bottom Rose Petals
You can now construct the bottom shape of the realistic rose drawing by shaping another large rose petal. This large petal should curve down the bottom and back up the left side. You can then curve the top down slightly, creating a cup-like shape. Finally, finish the bottom rose petal by adding a lip to the top.

Step 3: Outline the Top Petals of Your Rose Drawing
This next step is quite long and complex and adds depth of dimension to your drawing of a rose. You will notice that we leave the exact placement and shape of petals up to you so that your realistic rose drawing is unique. Attached to the bottom and side petals, you can now draw the remaining outer petals of your rose illustration.
These petals should be in separate layers, but they should not overlap.

Step 4: Draw the Inner Petals of Your Rose Sketch
We now finish the flower of your easy rose drawing by adding the inner-most petals. Using smaller curving and arching lines, create the rosebud. Again, these inner petals of your rose illustration should not overlap.

Step 5: Outline the Stem of Your Rose Drawing
Now that the easy rose drawing is complete, it is time to draw the leaves and the stem. Around the bottom of your rose sketch, draw the spikey outward-pointing sepals.
You can finish the outline of your drawing of a rose by drawing the stem from the bottom of the flower.

Step 6: Applying the Base Color Coat of Your Rose Sketch
To start coloring your drawing of a rose, find a bright red shade and use a regular painting brush to apply an even coat to the entire surface of the flower. Make sure that there are not any blotches in the coat.

Step 7: Coloring the Foliage of the Rose Illustration
We are now going to apply the base color coat to the sepals and stem of your easy rose drawing. Use light green paint and a very fine brush, and apply an even coat of color to the foliage of your rose drawing.

Step 8: Contouring Your Realistic Rose Drawing
In this step, you are going to add definition to the rose petals using contouring. Find a small blending brush and a dark gray shade of paint for the contouring. Lightly apply this color around the inner areas of the middle petals, around the edges, and on the areas between petal layers. Apply the contouring gently, allowing the base color coat to show through.
To make the contouring smooth, you can blend it out with a dry and clean blending brush.

Step 9: Deepening the Shading
In this step, you are going to deepen the shadows within your rose illustration with a touch of black paint and a small blending brush. Find the darkest areas of your contouring, and apply some black shadows to these areas. Blend it out gently, to create a gradient of shadows. To finish the step, use a small blending brush and some gray paint to apply light texture lines to the main body of the rose drawing.

Step 10: Highlighting Your Drawing of a Rose
You can now use a clean small blending brush and some white paint to add a touch of highlight along the edges of each petal. You can use this highlight shade to define the top curling edges of each petal, adding to the definition between them.

Step 11: Shading the Stem of Your Rose Sketch
Using a small blending brush and some darker green paint, add a light layer of shading to the sepals and stem of your rose drawing. The first color coat should still be visible.

Step 12: Adding Highlights to the Stem
You can now add some white highlights along the edges of the stem and on the sepals of your easy rose drawing.

Step 13: Finishing Your Drawing of a Rose
To finish your easy rose drawing, you can now either erase or trace over the outlines. If you are using a digital drawing tablet, you can simply remove the outline layer from your drawing. If you are working with a physical medium, use a fine brush and the corresponding color at each point of the outline to carefully trace over it.
This should create a final seamless rose illustration.

There you have it, a beautiful and easy rose drawing in 13 simple steps. If you are interested in learning how to paint a more fluid and less defined rose, then carry on reading our easy rose drawing tutorial!
How to Paint the Perfect Rose
When it comes to painting a rose, especially a watercolor-painted one, you have two paths that you are able to follow. Before you let your creativity overtake you, it is important to look at both approaches and be able to distinguish between them both.
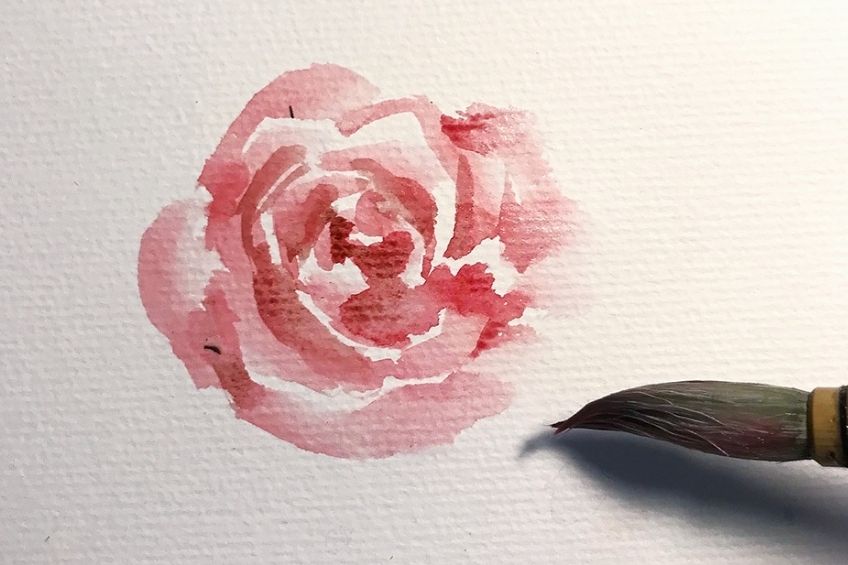
Loosely Styled Watercolor Rose
As can be seen by the image above, a loosely styled watercolor rose is exactly what you may think – there is no rigid form. To be able to execute this style properly, you will need to understand a rose’s anatomy quite well. This is so each brush stroke is placed correctly to form the rose’s petals.
Detailed Representation of a Watercolor Rose
More detailed rose drawings are those that look more realistic. First, begin by sketching your rose drawing with a pencil. Once complete, you will be able to precisely create a rose in all its contrast. The idea is to be able to create a watercolor rose that is as realistic as possible, all without looking like an actual photograph of one.
In other words, you want to pay attention to the petals and fine details without overdoing it. Do not fret if you leave a petal or leaf out, what matters is the final product shape.
Equipment You Will Need to Draw a Rose
We have created a list of all the materials you will need to draw this delicate flower. You will need everything on this list at the ready before moving onto the step-by-step instructions for rose drawings. You will also learn how to draw a rose and complete the rose in watercolor.
The Right Paper
It is essential that you use the correct paper when doing any watercolor painting. You may struggle to achieve the desired gradient should you use the incorrect paper. This is because when painting with watercolors, you use a lot of water. In order to learn how to draw a rose properly, one must choose the right paper first. Choosing a good quality watercolor paper is extremely important! If you would like a little more insight into how watercolors are done, have a quick glimpse at our handy tutorial for watercolor painting.
The Perfect Pencils
Just like having the right paper is so important, so is having the right pencils. And that means pencils of high quality! It does come in handy to have various pencils in different lead sizes and thicknesses, as this will help you find which you prefer for the different drawings you create. Each pencil in its varying softnesses will offer you varying results. While rose drawings may seem like a simple task, having a couple of options for pencils is never a bad thing!
The Ideal Brush
There is a wide range of choices when it comes to the best watercolor brushes. While there may be suitable and higher-quality synthetic brushes on the market these days, nothing quite compares to a good brush made from natural fibers. That said, if you are on a budget, a good-quality synthetic brush will also do. If possible, having a large range of brushes in many sizes, shapes, and thicknesses can help you to paint the perfect rose with all its finer details and effects.
The Proper Paints
Try to use the best possible quality of paint that you can afford, because it is the more expensive artist-grade paints that contain more pigments, thus providing a more vibrant, long-lasting color. That said, while you are still learning the ins and outs of painting a watercolor rose, it is perfectly fine to start with cheaper paints geared more to beginners. You will easily be able to mix and match shades and colors just by adding more water to the same colors.
Other Utensils You May Need
Of course, you will need more than just paint, paper, and brushes! It is important to be prepared and have all your materials and extra utensils ready and within reach. Your watercolor painting will require a couple more utensils, such as a kitchen towel for blotting, some water in a glass for wetting and rinsing your paintbrush, and an eraser for working on your simple rose drawing.
A Step-by-Step Guide on How to Draw a Rose
Ready? It is now time to gather all your equipment and draw your very first rose! Now that you understand all the aspects needed for your creation, all that is left is to follow our simple steps, and you will soon have your perfect rose watercolor creation.
Sketch the Rose
First, choose a finer pencil for this important step, and be sure to only press lightly, as this will allow you to erase any mistakes. This will also ensure the pencil does not show through the watercolor paint. This first sketch is to be used for the rough orientation, and so you will be able to erase any pencil that shows through when finished with the paint.
With some types of paper, you may not be able to erase pencil marks very easily, so this is something to consider. Be sure to use a color that is similar to the color you plan on using for your rose. If you so wish, you could also trace the outline of an already drawn rose.
Remember, there is absolutely nothing wrong with needing to trace to practice – it can actually help you learn and better your drawing skills in the long run.
Shadow and Light Definition
By looking at a rose closely, you will be able to determine and take note of exactly where the shadows form, or in other words, where less light reaches. The least shadowy parts will be brightest. This step is essential; it is important to be accurate when observing shadow and light, particularly if you want your rose to look lifelike and have depth.
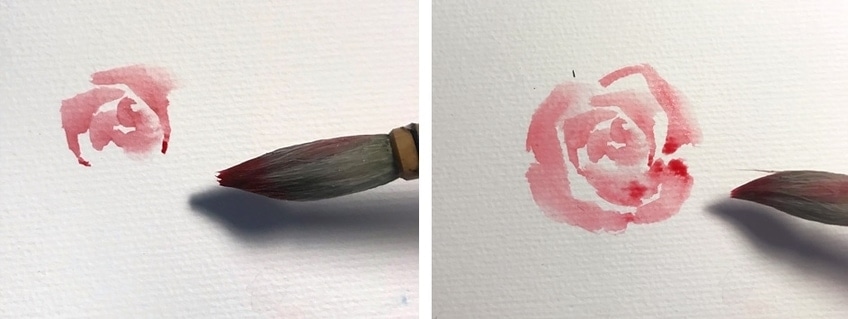
Wet-on-Wet Technique: Painting a Loosely Styled Rose
When you look at a rose, it is obvious that the innermost petals are tighter and closer to one another. This also means that light does not reach this area as easily. As the rose unfolds on the outer areas, more light hits these petals. Thus, each of these petals will be lighter in color. Remember, there is also a lot of overlapping of petals when doing a drawing of a rose.

Once you have chosen the color you will be using for your watercolor rose, remember to keep in mind that you want a watery consistency. In your mind, picture a circle.
- Begin on the inner part of the circle with narrow, crescent-shaped strokes.
- As you reach the outer part of the circle, you can increase your brush strokes and make them both larger and wider.
- Do not forget the overlapping of petals.
You will now be able to create the shape of a rose with ease!
Remember, while you paint your loose-styled rose in watercolor paint, you can use what is known as the wet-on-wet technique. This easy technique can be achieved by taking water up with your brush and then by painting a rose as we explained above, but with only water (and no paint).
Then, choose your watercolor paint and allow your brush to take up the color. All you do now is apply the color to the same areas as to where you applied the water-only petals. This will allow for a gorgeous gradient of color while the water runs unpredictably across the surface.
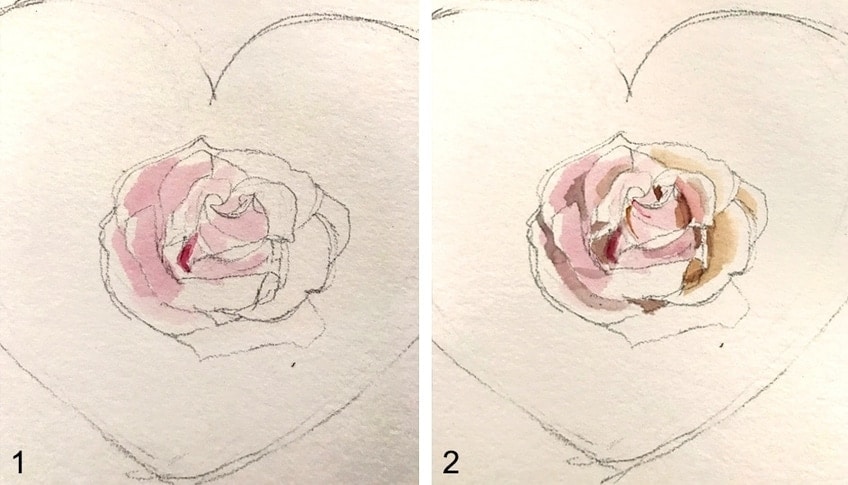
Wet-on-Dry Technique: Painting a Detailed Rose
The wet-on-dry technique can be seen as the opposite of the wet-on-wet method detailed above. With this approach, you will be painting on dry paper. This method allows for better control and prediction of where the color will bleed as well as what sorts of gradients to expect. To begin, create your sketched pencil outline of the rose.
- Once completed, you will choose the lightest color and shade for your flower. Be careful when deciding exactly where the brightest areas of the rose are. These could be white areas, and right from the start must be excluded from color. As we know, we should always start working with light colors before moving on dark. You will struggle to lighten up areas that are too dark, but lighter ones can be darkened easily. Using your lightest tone, color your entire rose in paint, remembering to exclude the white areas.
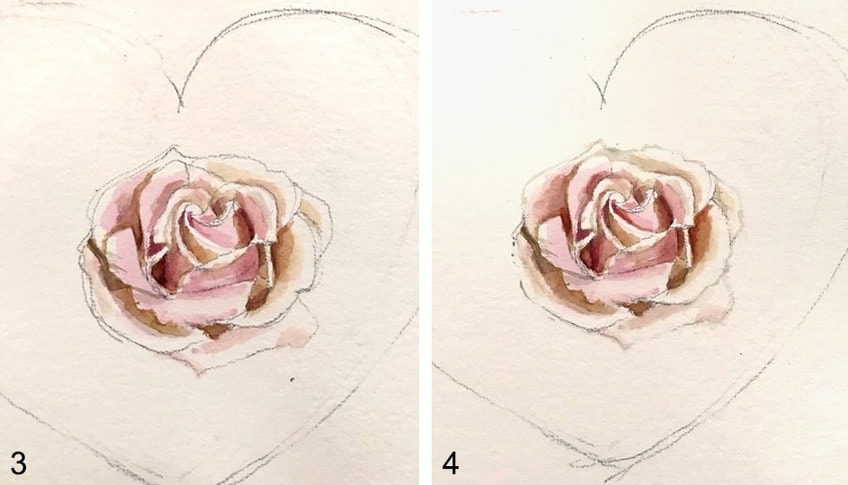
- Continue your painting from lightest to darkest. Remember that once dry, watercolor paint will appear lighter. Thus, you may even need to recoat the paint once it has dried in order to achieve the perfect dark shade.
- As is the case with most flowers, a rose’s darkest areas are its innermost petals and structures. Keep in mind that these areas include those where the petals meet one another, as well as where they are held together at the stem. These areas should be a little darker in tone than the base tone used for your rose.
Using a tiny bit of darker earth-toned paint, you can darken some of the rose. Brown is a good option for this.
- As we reach our next layer of watercolor painting, we arrive at the sections of the rose that are neither dark nor light. Here, we will apply a layer of color more intensely – it should be a shade darker than our base tone.
- Each of our different colors will now be fading into one another ever so slightly, resulting in beautiful transitions and gradients. The rose is starting to take proper form! If you want to create a little more fading, just dampen your brush and apply it to the areas you desire. This will help to bring those colors into one another, blending them a little more.
- You may notice that some of your darker areas need some reworking. You can blend and apply various colors and shades, or even allow the art to dry before applying more. This will allow you to create a great deal of depth and expression in your rose watercolor artwork.
By now, you will be able to see the contrast of dark and light within the rose’s petals.
- Now is the time to go back to applying your basic tone on your rose wherever you feel some color brightening is needed.
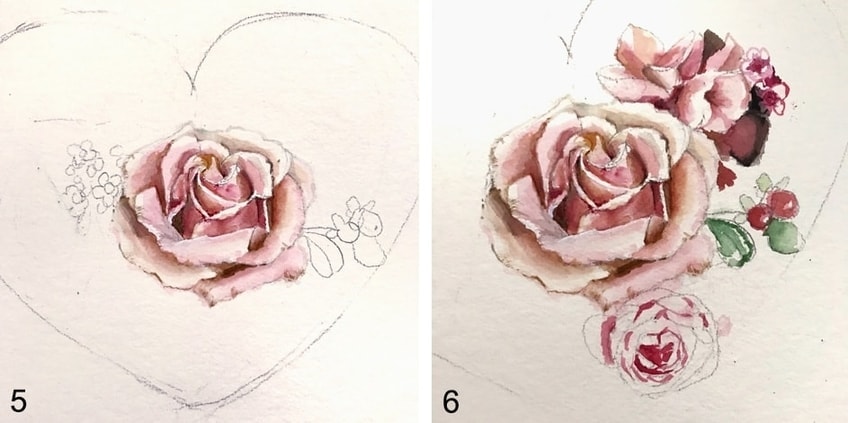
- And, you’re almost done! Once dry, all that is left to do is to erase any visible pencil lines on your artwork.
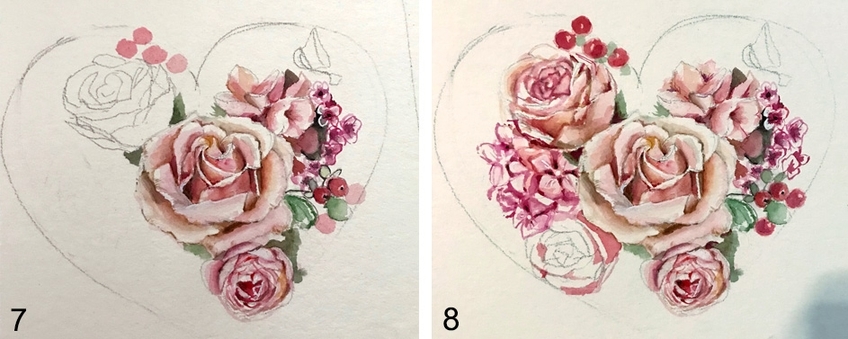
- Looking at the image above, you will be able to notice that more contrast is needed, and that the lightening and softening of the veneer will finish it up nicely.
- It may be necessary to place your finished painting down and have a look at it from another perspective. This will help you notice any mistakes and possible proportional blunders that were harder to see up close. Make sure that it is completely dry before adding any final finishing touches.
Well done – your rose drawing is now complete!
Tips to Make Rose Drawing Easy
- When you first start painting roses, you should try finding an image and style of the one you like best, and then try to recreate this exact rose. Remember: Do not post images of these online, because the original artist may be able to file a copyright infringement against you if you do not mention or credit them as your inspiration.
- It is very important to look as closely at the image as you possibly can in order to recreate it to the very best of your ability.
- Another tip is to look for photographs of roses to use a reference. This is because using a real, live rose in front of you can be tricky. It seems to be a lot easier using an image of a rose instead, especially when it comes to proportions.
- Practice, and then practice some more! Once you feel more confident in your drawing of rose skills, you can move on to using a live flower or rose rather than an image if you so wish!
Painting in general, but especially themes such as roses and nature, can really be a wonderful, calm, and relaxing experience! By following our easy guide on how to draw a rose step by step, you will be well on your way to drawing a beautiful rose in no time. Remember to practice and to have fun!
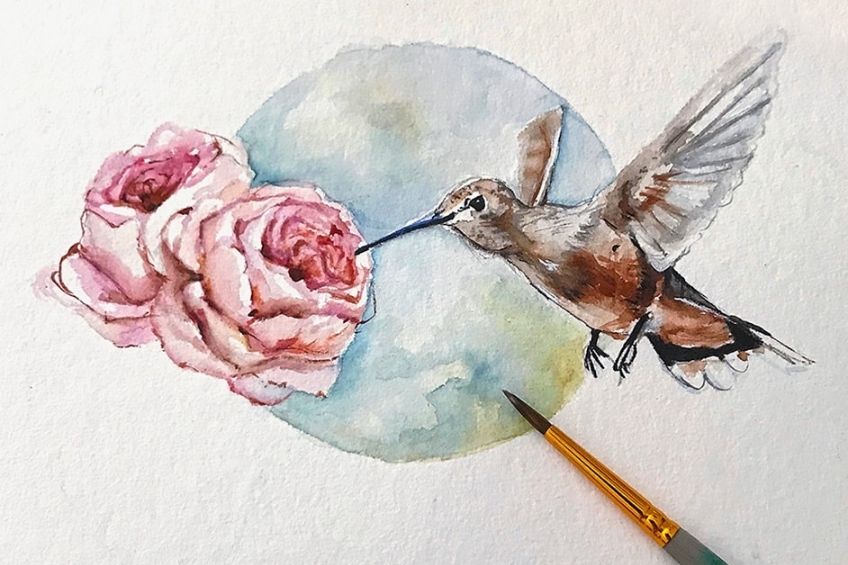
Our Flower Drawing Tutorials
- Flower Drawing Basics
- Tulip Drawing
- Hydrangea Drawing
- Lily Flower Drawing
- Poppy Flower Drawing
- Orchid Drawing
- Magnolia Flower Drawing
- Hibiscus Flower Drawing
- Calla Lily Drawing
- Lotus Flower Drawing
- Peony Flower Drawing
- Daffodil Drawing
- Dandelion Drawing
- Daisy Flower Drawing
- Sunflower Drawing
- Cherry Blossom Drawing

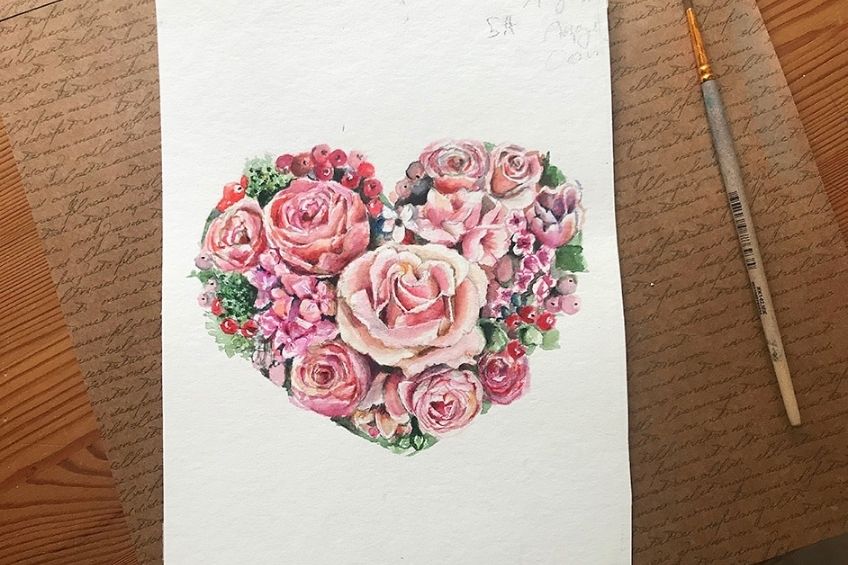
Josephine Cordes
When Josephine Cordes was in just elementary school, her teacher noticed her innate talent for art. She encouraged Josephine's parents to find a way in which to nurture this talent. Thus, Josephine wound up spending time with an elderly female painter once a week throughout her school years, up until she had graduated from high school. This painter taught Josephine the basics, and it was through this that our young artist discovered her love for watercolor.
Despite her obvious talent, Josephine ended up studying dentistry after graduation, not picking up a paintbrush once throughout her student and working career. In fact, she achieved both her doctorate and license to practice and worked as a dentist for three years. Josephine then got married in 2009 and gave birth to three children. It was only years later in 2016 that Josephine began to practice hand-lettering, thus reigniting her passion for painting.
Since then, Josephine Cordes has been exploring and working with watercolors once again, honing in on her skill through research and practice. Josephine does not limit herself to just watercolor, however, as she also enjoys painting with acrylic and gouache mediums as well. Roses have always been a fascinating subject for Josephine, which is the reason behind her motivation to study many different approaches so as to develop her own style. Today, Josephine resides in the countryside of Lower Saxony with her family, where it is her dream to own a small studio.

Matthew Matthysen is an educated multidisciplinary artist and illustrator. He successfully completed his art degree at the University of Witwatersrand in South Africa, majoring in art history and contemporary drawing. The focus of his thesis was to explore the philosophical implications of the macro and micro-universe on the human experience. Matthew uses diverse media, such as written and hands-on components, to explore various approaches that are on the border between philosophy and science.
Matthew organized various exhibitions before and during his years as a student and is still passionate about doing so today. He currently works as a freelance artist and writer in various fields. He also has a permanent position at a renowned online gallery (ArtGazette) where he produces various works on commission. As a freelance artist, he creates several series and successfully sells them to galleries and collectors. He loves to use his work and skills in various fields of interest.
Matthew has been creating drawing and painting tutorials since the relaunch in 2020. Through his involvement with artincontext.org, he has been able to deepen his knowledge of various painting mediums. For example, watercolor techniques, calligraphy and lately digital drawing, which is becoming more and more popular.
Learn more about Matthew Matthysen and the Art in Context Team.
Cite this Article
Matthew, Matthysen, “How to Draw a Rose – Create Your Own Rose Drawings.” Art in Context. May 4, 2021. URL: https://artincontext.org/how-to-draw-a-rose/
Matthysen, M. (2021, 4 May). How to Draw a Rose – Create Your Own Rose Drawings. Art in Context. https://artincontext.org/how-to-draw-a-rose/
Matthysen, Matthew. “How to Draw a Rose – Create Your Own Rose Drawings.” Art in Context, May 4, 2021. https://artincontext.org/how-to-draw-a-rose/.


