


How to Draw a Snowflake – Fun and Easy Snowflake Drawing Tutorial
Just like each and every one of us, every snowflake is completely unique. These beautiful ice crystals are formed in the clouds and gently float down to earth. In today’s drawing tutorial, we take you step-by-step through the process of how to draw a snowflake. As we go through the steps, you are welcome to follow along exactly, or you can add a few tweaks to make your snowflake drawing unique! Let us get started, and learn how to draw and color an easy snowflake drawing.
A Beautiful Step-by-Step Snowflake Drawing Tutorial
Along with their uniqueness, snowflakes are also very symmetrical. In order to capture this perfect symmetry, we are going to begin our snowflake drawing with a series of construction steps. Using circles and straight intersecting lines, we are going to create the base shape of our easy snowflake drawing, before we begin adding intricate detailing and color.
You can see an outline of the tutorial below.

You will see from the outline above that we begin to color our snowflake drawing in the last five steps of the tutorial. We use a light blue shade to emulate the ice crystals. The method of coloring that you choose is entirely up to you. Our tutorial is written for a painting medium, like gouache or acrylic, but you are welcome to use the coloring medium that you feel most comfortable with.
So, whether you are using a digital drawing tablet, or coloring pencils, gather your drawing supplies and let us start to draw a snowflake.
Step 1: Begin with a Circle
The pattern of our snowflake drawing is built from a series of circles expanding outwards from a center point. To begin our snowflake drawing, we are going to draw a small circle in the center of our canvas. Make sure that this circle is small, as we will be adding four larger circles around it. It is also important to ensure that your first circle is at the center of your canvas, with plenty of space on all sides.
For all of the construction steps that follow, use a light and easily erasable pencil, or a separate layer on your drawing tablet to make sure that you can easily erase it later.

Step 2: Adding the Second Circle
This step is quick and simple. All you need to do is draw a slightly larger circle around the first one. Make sure that this circle is equidistant around the first circle at all points.
Your snowflake drawing should be looking a little like an archery target at this stage.

Step 3: Continuing the Circles
You can now add the third circle to your snowflake construction. Keeping the distance between the first two circles consistent, draw a larger circle around the first two.
Your snowflake drawing should now look like our example below.

Step 4: Drawing the Fourth Circle
Around the third circle, you can now draw a slightly larger circle. The gap between this circle and the previous one can be smaller than the gap between the first few.

Step 5: Laying Down the Final Circle
In this step, you can now draw the final circle. In contrast to the last step, you want the gap between the fourth and fifth circles to be slightly wider.
Phew, luckily this was the last circle!

Step 6: Draw Six Star Points
In this step, we are going to begin laying down the foundation for the points of your snowflake drawing. Around the fifth circle, draw six pyramidal shapes.
These shapes should sit at equidistance away from each other, creating a star-like shape.

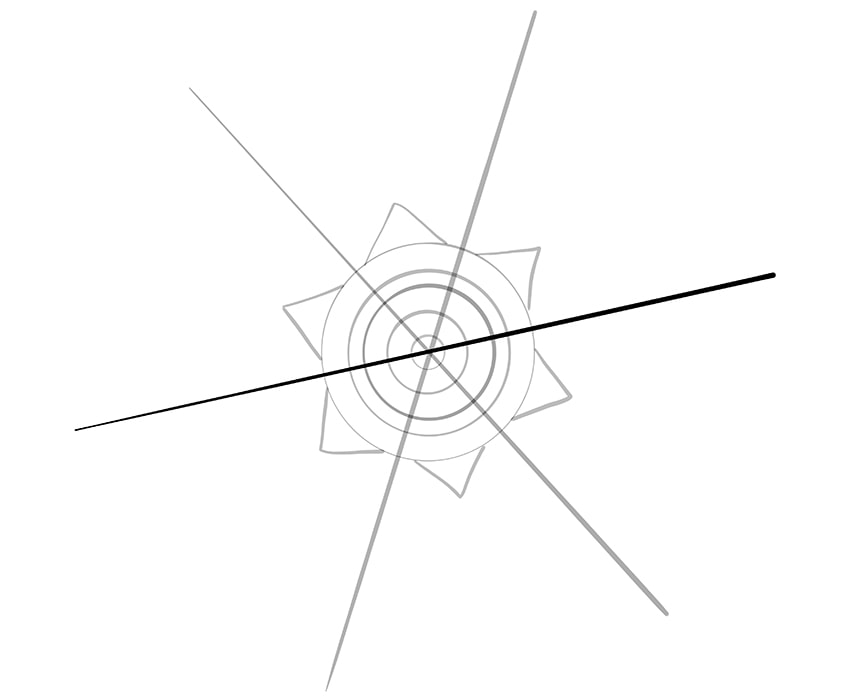
Step 7: Drawing the First Intersection Line
You can now start the process of creating the intersection lines of the easy snowflake drawing. You can see from our example below the importance of your construction circles being small and at the very center of your canvas. Begin the intersects with a tilted line that cuts the circles in half.
This line should sit between four of the pyramidal shapes from the last step.

Step 8: Creating the Second Division Line
For this step, you are going to repeat the previous step but at a different angle. This time, draw the tilted intersection line on the opposite side.
You will now have four quarters in your snowflake drawing.

Step 9: Drawing Your Final Division Line
Your final division line can now be drawn through the final four pyramidal shapes. All of these division lines should intersect right at the center of the smallest circle. This will create the six points of your snowflake drawing.
We are now ready to begin adding the detailed patterns of our snowflake drawing.

Step 10: Start Adding the Details on Your Snowflake Drawing
We now begin to add the signature arms on our easy snowflake drawing. Begin with the intersecting line you drew in the last step, adding two sets of extending arms just before the ends. On the arms closest to the circles, draw two more, smaller arms.
You can see what we mean in our example below.

Step 11: Finish Detailing Your Arms
Just as you did in the previous step, you can now finish adding the arms to each of your intersecting lines. Try to make these lines as symmetrical as possible. On each intersecting line, the arms should be placed in roughly the same place. Do not fret if you cannot get it perfect, as each snowflake is individual.
At this stage, you are also welcome to alter or add any further details if you wish to create a more complex or unique snowflake drawing.

Step 12: Adding Details to the Center of the Snowflake Drawing
Now that we have added some detailing to the outer arms of your snowflake, we can begin adding details to the center of your snowflake. Begin at the central circle, drawing two hexagons. You can then draw a larger hexagon around these two but within the second circle. Now, within each of the six sections of the inner circles, draw two rectangular shapes that get larger as they go out.
Finish with a straight line around the fourth circle in each segment.

Step 13: Detailing the Star of Your Snowflake Drawing
You now have another opportunity to make your snowflake drawing your very own unique creation. Surrounding the rectangular shapes that you drew in the last step, outline and detail the star in any manner you please. You can copy our details in our example below, or you can create any shapes that you please.
Just make sure that your patterns are as symmetrical as possible.

Step 14: Detailing the Inner Arms
In this step, you can outline and detail the inner arms on each of the division lines. Use rounded lines and add some small round particles in and around these details.
Again, try to make these details as symmetrical as possible.

Step 15: Adding the Final Details to Your Snowflake Drawing
You can now simply repeat the process of the previous step on the final outer arms of your easy snowflake drawing. These patterns should be as symmetrical as possible, and you can complete the step by adding some fine particles around the shapes.
Once you have completed your details and you are happy with your final snowflake drawing, you can erase the construction lines.

Step 16: Begin Coloring Your Easy Snowflake Drawing
Now that all of the detailed drawing is complete, you can now begin to color in your snowflake drawing. Use a small brush and some light blue paint, and add an even coat of color to the entirety of your snowflake drawing. Make sure that you color the entire snowflake, including all of the little particles.
You also want to ensure that the coat is even, without any splodges.

Step 17: Creating the Second Coat of Color
In this step, you are going to add a very light shade of light gray to your snowflake drawing. Use a fine blending brush, and carefully add a light coat to the whole snowflake.
Make sure that the base blue coat is still visible through the gray.

Step 18: Adding Highlights
We are now going to add highlights of white to our easy snowflake drawings. Use a clean fine blending brush and some white paint to add highlights to the points of the snowflake that would naturally catch the light. You want to capture the three-dimensionality of your snowflake with these highlights. As with the previous coloring step, you do not want the white highlights to cover the first two color coats.
Instead, the highlights should blend seamlessly with the previous two colors.

Step 19: Finishing Your Easy Snowflake Drawing
To finish your easy snowflake drawing, you can now erase all of the harsh outlines. This will create a seamlessly finished drawing. If you are working on a graphic tablet, you can simply delete the outline layer. If you are working with a more physical medium, you can simply use the corresponding color at each point of the outline to carefully trace over it.

Congratulations on finishing your very own, beautiful, unique, and easy snowflake drawing. We really hope that you have enjoyed the drawing process and that your snowflake is as beautiful and individual as yourself! Now that you have the basics under your belt, you can create any number of stunning snowflake designs.
Frequently Asked Questions
How Do You Create a Simple Snowflake Drawing?
Snowflakes are wonderfully complex and unique, but you can easily create a simple snowflake drawing by following our detailed step-by-step tutorial. We use construction lines to create a symmetrical shape before adding details and color.
What Colors Should You Use for an Easy Snowflake Drawing?
Snowflakes tend to appear white, but we use a light blue shade to create an icy appearance. Using light blue, gray, and white, we create a three-dimensional snowflake drawing.

Matthew Matthysen is an educated multidisciplinary artist and illustrator. He successfully completed his art degree at the University of Witwatersrand in South Africa, majoring in art history and contemporary drawing. The focus of his thesis was to explore the philosophical implications of the macro and micro-universe on the human experience. Matthew uses diverse media, such as written and hands-on components, to explore various approaches that are on the border between philosophy and science.
Matthew organized various exhibitions before and during his years as a student and is still passionate about doing so today. He currently works as a freelance artist and writer in various fields. He also has a permanent position at a renowned online gallery (ArtGazette) where he produces various works on commission. As a freelance artist, he creates several series and successfully sells them to galleries and collectors. He loves to use his work and skills in various fields of interest.
Matthew has been creating drawing and painting tutorials since the relaunch in 2020. Through his involvement with artincontext.org, he has been able to deepen his knowledge of various painting mediums. For example, watercolor techniques, calligraphy and lately digital drawing, which is becoming more and more popular.
Learn more about Matthew Matthysen and the Art in Context Team.
Cite this Article
Matthew, Matthysen, “How to Draw a Snowflake – Fun and Easy Snowflake Drawing Tutorial.” Art in Context. January 31, 2022. URL: https://artincontext.org/how-to-draw-a-snowflake/
Matthysen, M. (2022, 31 January). How to Draw a Snowflake – Fun and Easy Snowflake Drawing Tutorial. Art in Context. https://artincontext.org/how-to-draw-a-snowflake/
Matthysen, Matthew. “How to Draw a Snowflake – Fun and Easy Snowflake Drawing Tutorial.” Art in Context, January 31, 2022. https://artincontext.org/how-to-draw-a-snowflake/.


