How to Paint Watercolor Roses – Easy Rose Watercolor Painting Tutorial
Learning how to paint watercolor roses is a very simple task. However complicated roses seem to appear, this rose tutorial provides a step-by-step way to paint roses easily. Roses are a great subject for painting if you know the right steps. Knowing how to paint a rose is a great skill to have, especially for adding it to other paintings as a feature. Roses are beautiful flowers that can be used in paintings for a variety of reasons or they can be a great painting by themselves. Either way, this rose tutorial helps to develop your watercolor skills as well as assist you in a beautiful rose watercolor painting.
An Easy Watercolor Tutorial For Beginners
In this tutorial, we will be going through a few simple steps that break down the rose watercolor painting into digestible steps for you to follow. This watercolor rose tutorial is aimed at showing you a unique way of painting a rose that is much freer and looser.

When learning how to paint watercolor roses, we want to allow the water to do most of the work. This means that we want to use the full potential of what the water can allow. Creating various marks in our rose watercolor painting will help us to enhance our watercolor skills. Flowers often come out beautifully when approached with a loose hand as this achieves a more painterly quality in an image.
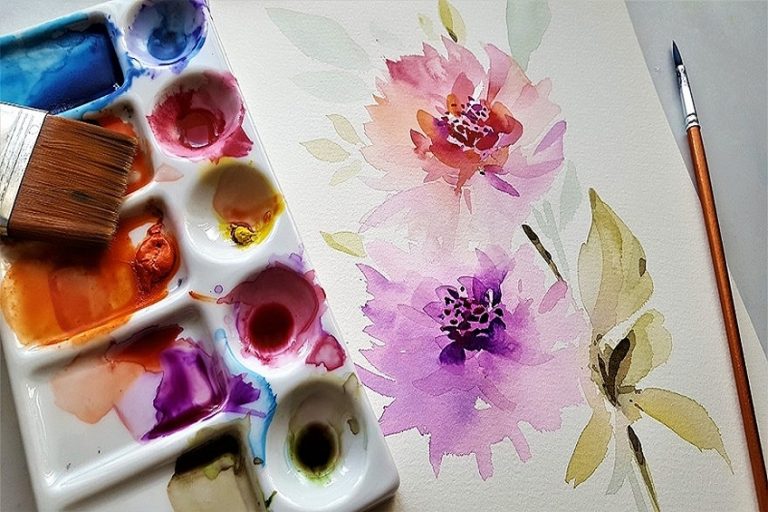
Necessary Materials
We want to have the correct materials for our painting as it will have the best outcome for a rose watercolor painting. As we learn how to paint watercolor roses we want to make sure that we have the right paper, having the right paper makes all the difference so preferably try to get paper that is about 300Gsm. We do want to make sure that we have the right tools such as watercolor brushes, the correct paper, and lastly the correct watercolor paint. A good suggestion is pan paints as they are quite easy to control in their containers. Here are a few items that you can purchase online:
Preparation
Once we have all the right materials we want to make sure we have a nice even surface to place our paper on. Painting is a very calming and relaxing process however, often we can find ourselves being interrupted by our environments. Try to place yourself somewhere where you might not be interrupted. Another good idea is to maybe listen to some music whilst you do this tutorial because the most important part of this tutorial is about being relaxed and having fun.

Step-by-Step Instructions on How to Paint Roses
In this rose tutorial, we will go through the various steps of how to paint a watercolor rose. The process is quite simple, however, there does need to be some focus in the process. When learning how to paint watercolor roses we want to start by simply painting the rose shape with a very loose approach which we then add some finer details onto once it has dried. Then we will paint the leaves and the stem to contextualize the rose in greater detail. That is it!
A simple rose tutorial that requires a little bit of focus, with that said let us get started on how to paint a rose with watercolor.
Step 1: Painting the First Layer of the Rose
We begin this rose tutorial by painting the general shape of the rose with water. What is meant by this is that we want to take a clean brush with water and begin to paint the general shape of the rose. Let us add some strokes with our watered brush to indicate the shape and scale that we would like our rose to be.

Once we have applied water onto the page that indicates the shape of the rose we can now begin to add color into the watered area of the page. This is where we begin to form the rose with color, let us use red. The rose shape is not specific, it is quite abstract. try to loosely make strokes of the brush to start loosely defining the rose with a light wash of red paint.

As you make these strokes, think about how the rose petals are seen as larger near their outer layers and thinner near the inner layers. This is because the inner layers are more closely placed together and the outer layers display more of their surface area. Make some larger marks near the bottom portion of the rose to indicate the outer area and smaller marks near the top to indicate the inner area.

A rose is very abstract, so there is no specific description of how to paint the head of the flower. However, we do so by understanding the general shape of a rose which we then make more loose and gestural marks that indicate that shape. For instance, largely painted areas for defining larger surface area of the petals and smaller lines for indicating the inside of the rose or petals that are faintly seen behind the rose.

Step 2: Painting the Second Layer of the Rose Tutorial
Whilst the first layer of the rose is still wet we will then proceed to paint details in the petals to indicate texture and definition. Again, once we have the general shape of the rose our painting action should be loose and gestural. This means we do not want to try and paint a rose perfectly but rather the abstract quality of loosely painting will slowly describe a rose.

Adding darker tones in the rose is done by darkening your red with hints of black paint. We want the paint to be slightly darkened. We then proceed to add strokes in various directions that indicate a shadow-like quality in the rose.
Keep these strokes moving in a circular fashion that indicates the rose has a center.
The strokes should not have circular or curved lines rather work with more jagged-like qualities. This is because it provides a more abstract quality to the painting for one, and secondly, it indicates a more familiar quality of rose petals in our rose watercolor painting.

The last effect we want to add to the rose whilst it is still wet is moments of highlights. With a dry and clean brush, proceed to make marks as if you were painting strokes to indicate petals, however, the dry brush will lift some paint leaving moments of light tonality. This gives the rose more texture and definition.
Step 3: Painting the Third Layer of the Rose
Here is where we become a little more playful with our mark-making. What we want to do is add different tonal qualities to the rose. A good suggestion is to make a more bright or pure red mix of paint which you will then proceed to apply near the top of the rose.

Try to add these strokes and lines in a spiraling motion around the center of the rose. These marks should indicate the structure of the rose. These marks can be simple strokes of lines with red paint that suggest movements of the petals in different directions.


Play around with making lighter marks near the top of the rose and darker marks near the base or bottom portion of the rose. This helps to add texture and depth to the rose, allowing for it to have more body as opposed to seeming flat with a singular color.

Step 4: Adding the Leaves to Your Rose Watercolor Painting
We can now begin to paint the leaves of the rose. We do this by making a mix of green, brown and black, However, make sure the mix is predominantly green. We can then proceed to paint spearheaded shapes with pointed tips on either side.

Painting these spearheaded shapes indicates the quality of the leaves that roses have. However, a nice feature to add to the roses is to give the edges of the leaves jagged ridges. This makes the leaves seem more authentic to the quality of the rose. We do this by painting little green lines on the edges of our leaves with a thin brush.

These jagged edges can be painted with the same color green the leaf is painted in. Alternatively, you can pull the paint out of the leaf with little strokes of the brush using a small thin brush.

Lastly, whilst your paint on the leaves is still wet you can take a dry brush and make a line or stroke with your brush through the center of the leaf. This gives a nice quality to the leaf and indicates its center ridge. You can’t paint these leaves anywhere around the rose which we will connect to each other by painting branches and a stem.

Step 5: How to Paint a Rose Branches and Stem
Lastly, we will paint the branches and stem of the flower. We begin by painting a little triangular leaf feature near the bottom of the rose to indicate the area where the stem sprouts from. We can do this by painting two little upside-down green triangles near the base of the rose.

Once that is done, we can paint a thin green stem vertically down the page from the bottom of the rose. Roses often have very thin stems, so try to not paint them too thick. From there we simply connect our stem to our leaves by painting little branches and that is the last step.

Tips for Your Watercolor Rose Tutorial
Learning how to paint watercolor roses is a great introduction to the watercolor medium as it describes various watercolor processes in a single painting. If you are new to watercolor painting, here are a few of our top tips and tricks to help you paint roses easily.
- Painting a rose is about understanding the general shape of the petals. So take some time analyzing a source image if need be for better reference of the shape.
- Always have two jars of water, one for the first rinse and another for a second rinse to completely clean the brush before a new application of paint.

- Play around with darkening a single color by using browns and blacks in your mix of paint. By doing so we can achieve darker tones for moments of shadow.
- Allow yourself to not get hung up on perfect details, roses are abstract which means we can get away with various marks that still resemble the quality of a rose.
- Painting a rose is a layering process so try to work from light to dark.
We can see that at the beginning of the rose watercolor painting we need to work slightly fast so that we can add details to the wet paint before it dries. In this rose tutorial, we also learned how to add details onto the dried paint as well as some lifting techniques which help to add highlights to rose watercolor painting. Learning how to paint watercolor roses is a great painting exercise for someone who is a beginner with watercolor as this rose tutorial breaks it down in a few simple steps.
Frequently Asked Questions
How to Paint Loose Watercolor Roses?
Painting loose watercolor roses are quite easy once you understand the general shape of the rose and its petals. A rose has a somewhat octagonal shape that could be painted quite loosely. How one does this is by understanding the composition of the petals and then, instead of trying to perfect the petals, you should try to make more loose strokes that describe the general shape of the petal. It is a combination of these marks that eventually begin to make up the shape of the rose. However, it is always good to leave some negative space in some areas of the rose to create a good sense of depth in the flower. Simply, it is about understanding the general shape and then practicing to make loose marks that resemble those general shapes.
How Do You Easily Paint Roses?
The best way to paint a rose easily is to not draw the rose first. Drawing a rose and then painting it can often make the process seem more difficult because there is now an expectation of how it should look that is defined by the pencil marks. However, learning the general shape of a rose and then applying paint that resembles a rose as opposed to mimicking a rose can often create a beautiful painterly quality in the flower. The easiest way of painting a rose can often create the most beautiful looking flowers because of the loose and fluid style that it is.
How Do You Paint Roses in Watercolor?
There are many ways to paint a rose in watercolor. However, in this tutorial, we go through a few steps that describe how to paint a rose in a really easy and fun way. Painting a rose with a more loose approach, as opposed to drawing and then trying to paint, is fun and allows for more creative expression. The best thing to do is to perhaps use a source image to get a general idea of the shape of the rose petals. Then we begin by applying a small amount of water on the page in the shape of the rose which we then add strokes of color in the general shape of the petals. By general shape, I mean that we do not have to make them perfect which can often result in a more loose and painterly effect that looks beautiful. This is a more simple way of painting a rose.

Matthew Matthysen is an educated multidisciplinary artist and illustrator. He successfully completed his art degree at the University of Witwatersrand in South Africa, majoring in art history and contemporary drawing. The focus of his thesis was to explore the philosophical implications of the macro and micro-universe on the human experience. Matthew uses diverse media, such as written and hands-on components, to explore various approaches that are on the border between philosophy and science.
Matthew organized various exhibitions before and during his years as a student and is still passionate about doing so today. He currently works as a freelance artist and writer in various fields. He also has a permanent position at a renowned online gallery (ArtGazette) where he produces various works on commission. As a freelance artist, he creates several series and successfully sells them to galleries and collectors. He loves to use his work and skills in various fields of interest.
Matthew has been creating drawing and painting tutorials since the relaunch in 2020. Through his involvement with artincontext.org, he has been able to deepen his knowledge of various painting mediums. For example, watercolor techniques, calligraphy and lately digital drawing, which is becoming more and more popular.
Learn more about Matthew Matthysen and the Art in Context Team.
Cite this Article
Matthew, Matthysen, “How to Paint Watercolor Roses – Easy Rose Watercolor Painting Tutorial.” Art in Context. February 1, 2022. URL: https://artincontext.org/how-to-paint-watercolor-roses/
Matthysen, M. (2022, 1 February). How to Paint Watercolor Roses – Easy Rose Watercolor Painting Tutorial. Art in Context. https://artincontext.org/how-to-paint-watercolor-roses/
Matthysen, Matthew. “How to Paint Watercolor Roses – Easy Rose Watercolor Painting Tutorial.” Art in Context, February 1, 2022. https://artincontext.org/how-to-paint-watercolor-roses/.