

Hand-Lettering for Beginners – Comprehensive Hand-Lettering Guide
What is hand-lettering? This is the art of writing letters and words decoratively, which has once again become a popular art form. With our step-by-step guide for lettering for beginners, you will be able to learn everything you need to know about hand-drawn lettering quickly. The pens and materials needed to master this art will also be discussed.
The Basics of Hand-Drawn Lettering
Hand-lettering is a technique of writing letters artistically. With practice, you will be able to develop your own unique, beautiful handwritten letter font styles. By using our hand-lettering how-to guide and with regular practice, you will soon be able to write beautifully.
Calligraphy, Hand-Lettering, and Brush Lettering
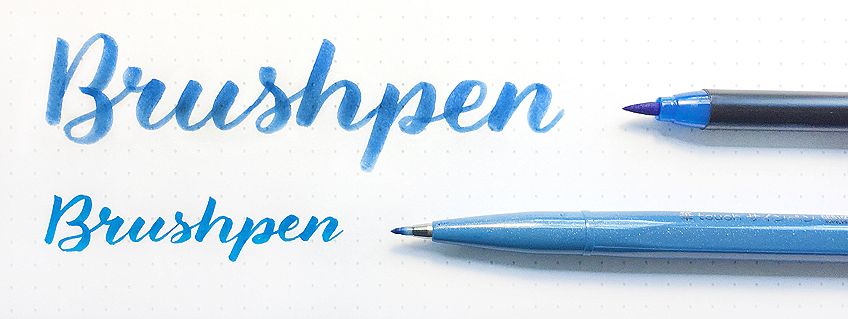
Although many people might be familiar with calligraphy, which is the art of writing with inked nib pens, the technique has developed into a more modern version over the decades, referred to as hand-lettering. With hand-lettering, brush pens and paintbrushes are used to create letters with contrasting thin and thick lines.
If you hope to complete craft projects where you need paint that will work well for any number of surfaces, then craft paint is your go-to! The consistency is smooth, creamy, and easy to use.
The Basic Structure of How to Hand-Letter
Consistency of style is the cornerstone of successful hand-lettering. As a beginner, your early attempts at lettering may result in different letter sizes, line widths, as well as varied spacing between letters. Once you have mastered the consistency of your letters, you will be amazed at how beautiful your letters are. This will come with patience and practice and, with each practice session, your awareness of the structural shapes of letters will improve, thus giving you the confidence to start practicing different styles and fonts.
Holding and Using Your Pen
Although posture is one factor that could negatively affect the success of your lettering, the position of your arm and hand is crucial for successful lettering. Difficulty with the pressure, the flow of movement, or the consistency of the letters is often due to the position of the arm.
Strange as it may seem, instead of our fingers, hands, and wrists moving the pen on the paper as we were taught in our early years of writing, using the shoulder to move the pen is the ultimate technique to master for successful hand-lettering.
The “school work” form of writing with hand, fingers, and wrist restricts the flow of hand-lettering with disappointing results.
Practice this technique by moving the whole arm, either gliding without restriction or with the elbow slightly lifted off the table, moving the wrist and fingers as little as possible. As with all muscles not used regularly, your shoulder muscles will probably ache because of the unusual movements, but this will ease up with practice, and the wrist and fingers will eventually stop the urge to dominate the movements.
Step-by-Step Instructions on How to Hand-Letter
Our beginner’s hand-lettering how-to guide will take you through all the steps you need to learn to create beautiful hand-drawn lettering, including the techniques and the right pens and paper you will need.

First Steps
Practice writing slowly. Beginners should take the time to focus on the steps by writing slowly, and remember that our normal handwriting has nothing in common with brush lettering. As an example, when writing in our school books, we wrote in real-time, our writing flowing with our thoughts. Do not be fooled by the speed of hand-lettering examples you may find in videos – they are usually sped up to avoid the video from being too long.
With brush-lettering, you need to remove the pen after each stroke, and then add the next stroke or element as you would with paint. Take the time to practice writing basic lettering slowly, and as often as possible.
Thick and Thin Hand-Lettering Strokes
The thick downward stroke and thin upward stroke is considered the most important rule of hand-lettering. To achieve a wide downward stroke, press the pen firmly on the paper from the top downward, and for an upward stroke, just touch the paper with the tip of the pen from the bottom upward. Initially, the thin strokes may tend to be uneven or even shaky, but this will quickly improve with practice. The more practice your shoulder and hand muscles get, the quicker their muscle memory will be reprogrammed.
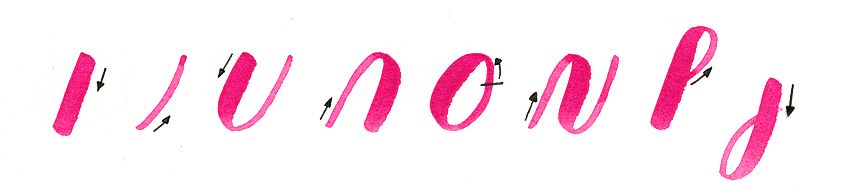
The classic hand-lettering alphabet consists of the eight basic strokes shown above, which provides the building blocks of all the letters in the alphabet. Practicing these basic strokes regularly will help you achieve the consistency needed to enhance your lettering.
Keeping dated practice sheets to track your progress is a great motivator for continued progress.
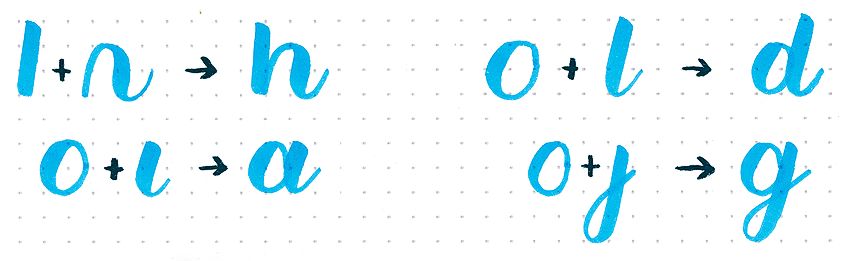
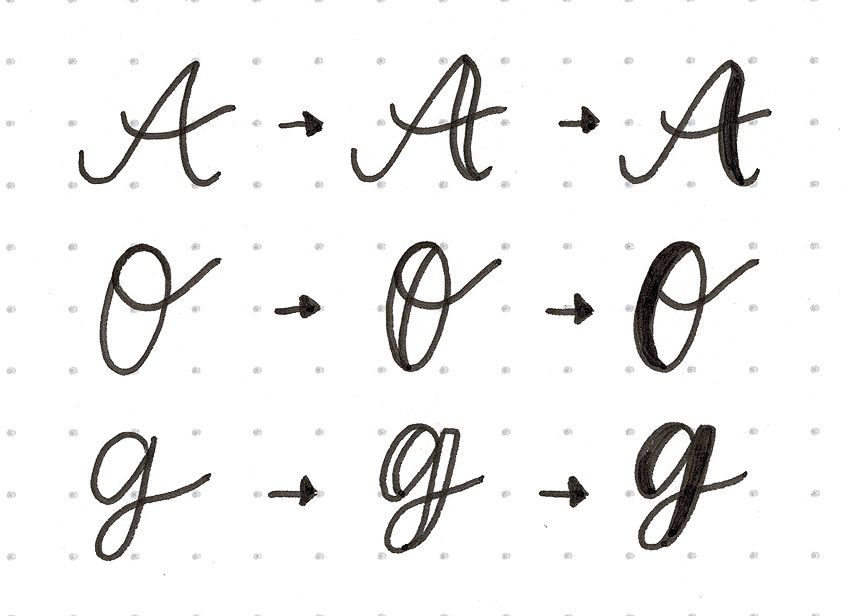
Create Letters Using the Base Lines
Once you have achieved a comfortable flow with practicing the basic strokes, you can practice combining strokes to create the letters of the alphabet, as in the example below:
Common Mistakes to Avoid
As mentioned earlier, consistency is key to beautiful hand-lettering, and knowing what to look out for as well as the common mistakes to avoid from the outset will make your hand-lettering journey all the more rewarding.
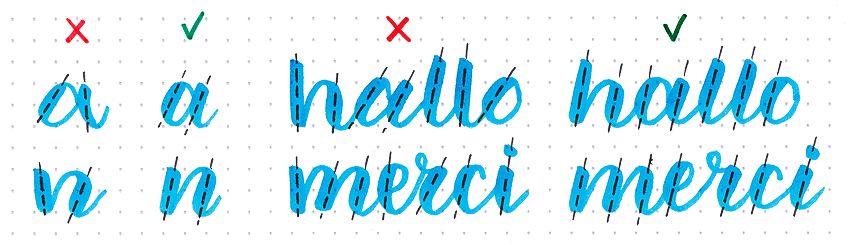
Keep the Font Parallel
As you progress, continue checking that your strokes remain parallel within each letter, word, and across the page.
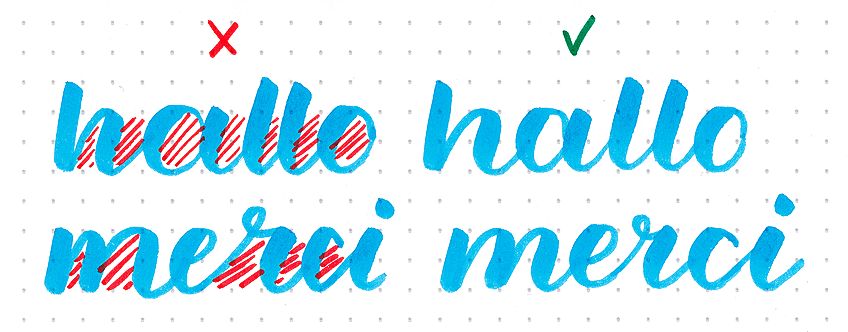
Confusing the Thick with the Thin Strokes
Remember: Downward-slanting lines will have thick strokes, and those going upwards will have thin strokes. So:
Down = Thick strokes
Up = Thin strokes
Line Width on the Baseline
Remember to adjust your wide downstroke to a thin upstroke as it reaches the baseline.
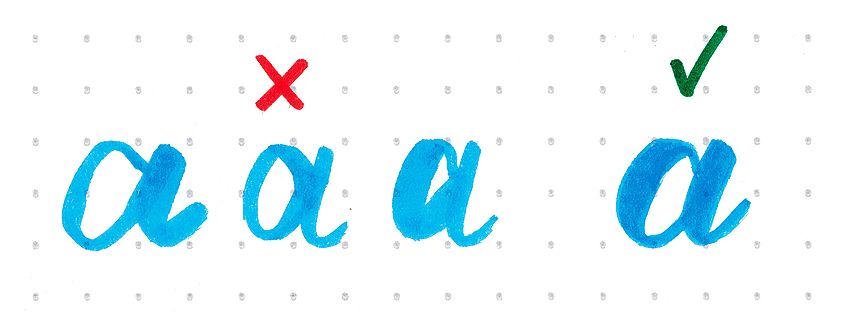
Inconsistent Interspaces
Gaps with different widths will result in untidy lettering. Practice to keep them uniform.
Quick Techniques
There are a few quick techniques that are great for beginners to practice their hand-drawn lettering styles, while also providing a means for experimenting with mediums and effects.
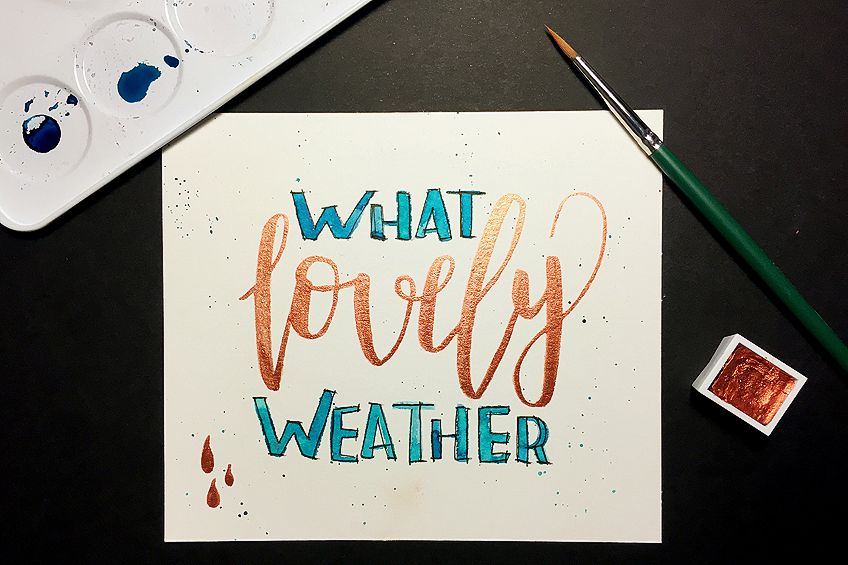
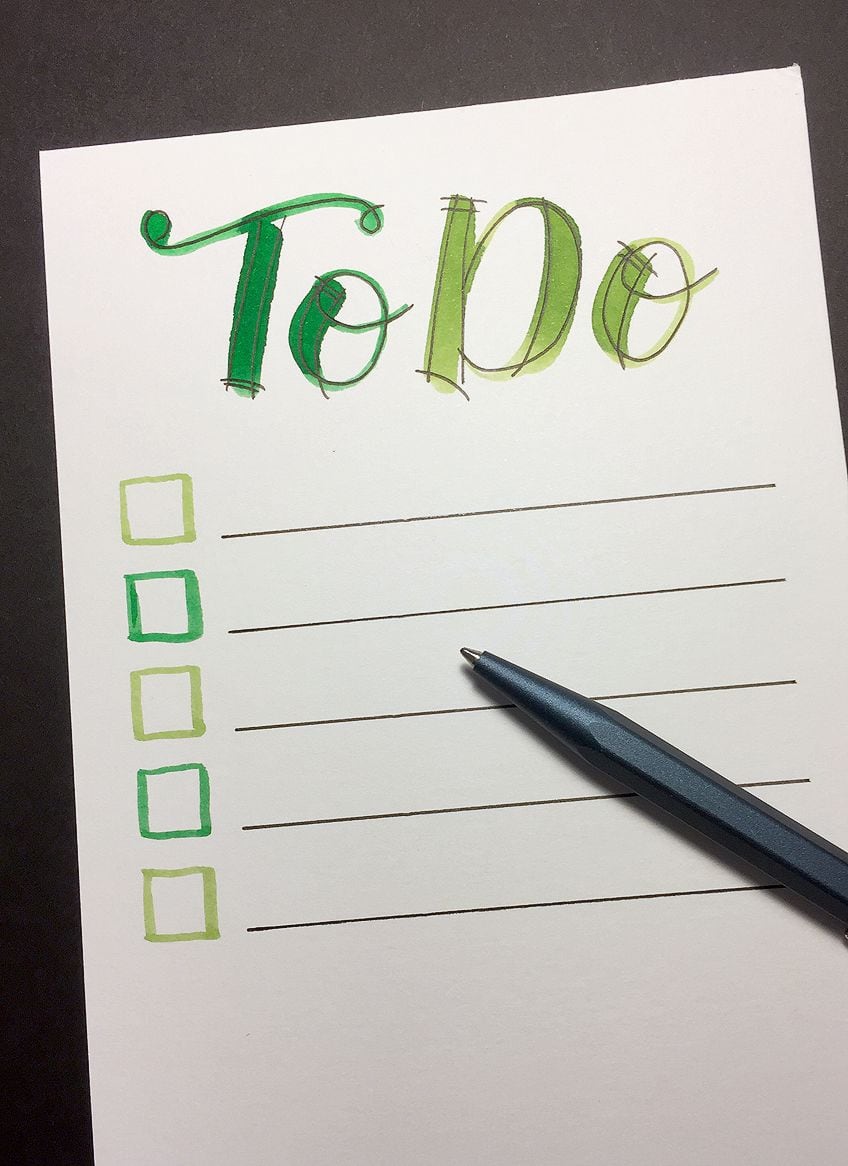
Imitation Calligraphy
You can create beautiful lettering even without your brush pen or brush. Simply write the letters as you normally would, then thicken the downward stroke with another line and fill in the blank spaces. You can also fill in the space with your own decorations or illustrations.
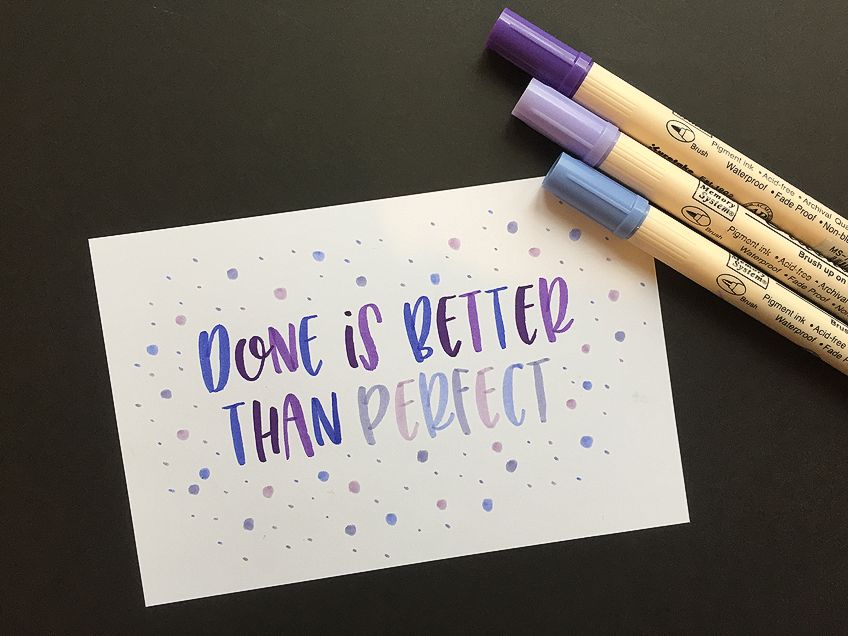
Bouncing Letters
Once you feel comfortable with basic lettering, you can start playing with different effects, such as bouncing or dancing letters. Simply make the second stroke of the letter longer than the others. YouTube has a good selection of bounce-lettering videos for inspiration and tips.

Great Results with Small Changes
Change the look of the alphabet simply by adjusting the center length (or the Y-axis) of your letters. Although this effect is not usually applied using the brush pen technique, it is fun to try using different font styles.

Practice, the Golden Rule to Success…
To learn hand-lettering, you have to commit to regular practice. You will find plenty of sites on the internet that offer free practice sheets to download and print to get started. Before you begin, we recommend reading the next chapter, which covers the materials and paper best suited for hand-drawn lettering. Exercise books are inexpensive and can also be used for practice. Another alternative is to write on a sheet of tracing paper secured over the lined paper. This allows your book or printed sheet to remain blank for practice with the added advantage that the fine tracing paper will not damage your brush pens.
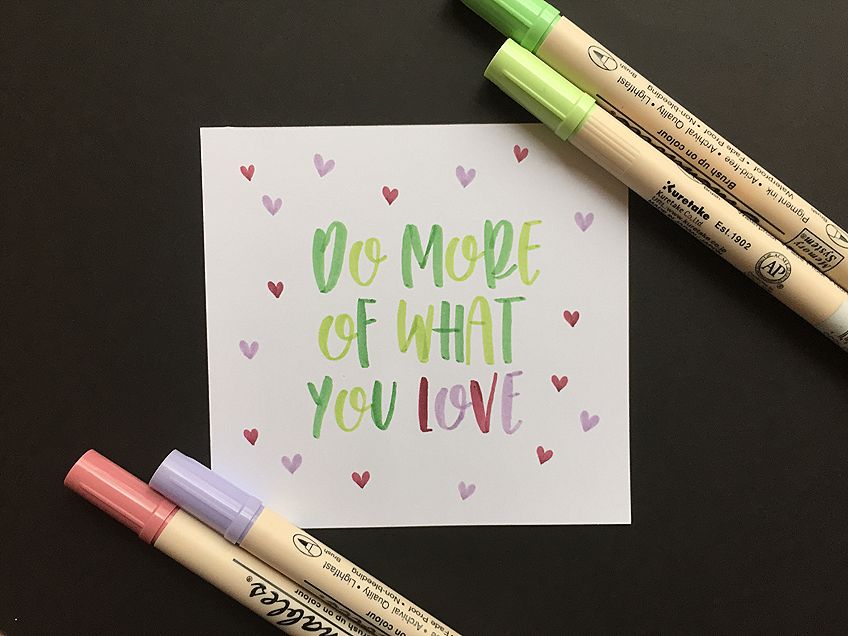
Sparking Creativity
While continued practice is important, do not be afraid to take the plunge and create hand-lettering projects to use not only in your day-to-day activities but also as gifts for others. There are many great ideas to be found on the internet. Try some of these basic and practical ideas to get your creative juices flowing:
- Post-it message for your love
- Shopping and to-do lists
- Labels for containers and homemade treats
- Invites to parties or dinners
- Thank-you notes
- Special event cards
What to Consider When Learning How to Hand-Letter
Following this hand-lettering guide when starting on your journey will help to increase your awareness of both the big and little details that could end up spoiling the finished result of your project. For the perfect hand-lettering results, you will have to consider many small details.
Brushpens and Frayed Tips
Brushpens have felt tips that are sensitive and prone to fraying when used incorrectly or on rough paper. Frayed tips will negatively affect your lettering, as they will be unable to draw fine, thin upstrokes. Depending on the extent of the damage, frayed pens can still be used for practice purposes or painting. Some felt tips are quite sensitive while others can withstand more stress. The information below will help to prolong the life of your pen’s tips.
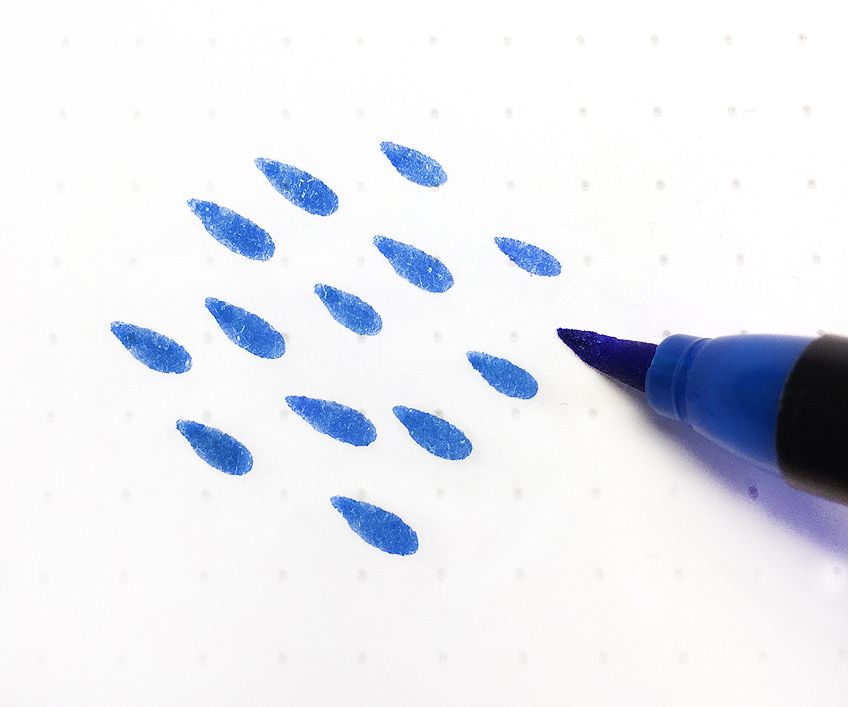
The Correct Position to Use a Brushpen Pen
The correct position for using the brush lettering pen is at an approximately 45-degree angle to the paper. Hold the pen as you normally would in your hand and fingers and press it onto the sheet of paper. This should leave a nicely shaped drop on the page.
The Preferred Paper for Hand-Lettering
The best paper to use for hand-drawn lettering is one that is smooth with a satin-like texture. You can get specialized hand-lettering paper packs with specially formulated coatings that make it perfect for this art form. These papers allow the brush pens to glide and flow over the page without any drag, thus protecting the pen tips.
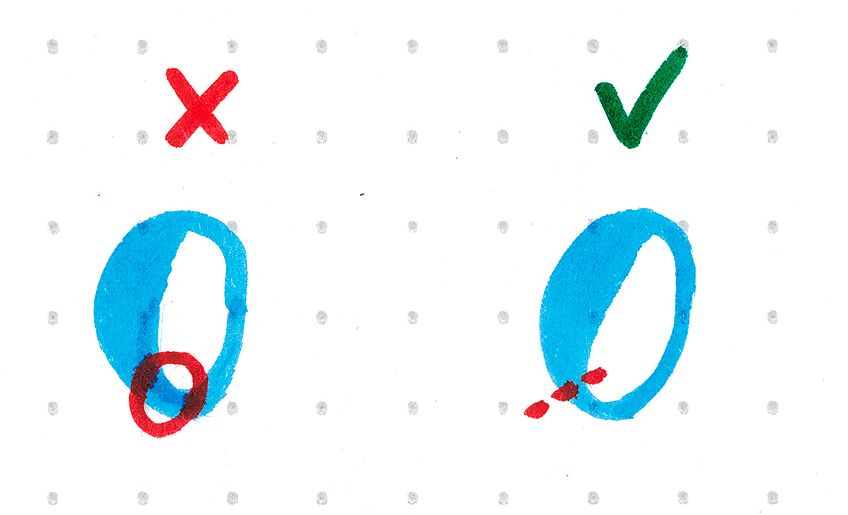
Creating Ovals
There will be times when you will need to draw letters that require you to use your brush pen slightly differently. Oval shapes, for example, such as when forming the letter “O”, require the brush pen to be pushed instead of pulled, resulting in more stress being placed on the tip of the pen. To avoid applying too much stress on your brush pen’s tip, gently push the pin upwards, and only after reaching the apex make the thick downward stroke in an anti-clockwise direction. Watch the hand-lettering how-to video below for more information.
Brush Pens with Changeable Tips
In some instances, a frayed tip can be replaced by gently pulling the tip out using tweezers and using the other side of the tip instead. Unfortunately, not all pen tips can be replaced this way. However, you will be able to change your brush pen tips by using those provided by Edding’s Color Happy series, Faber-Castell’s Pitt Artist pens, as well as Ecoline’s watercolor brush pens.
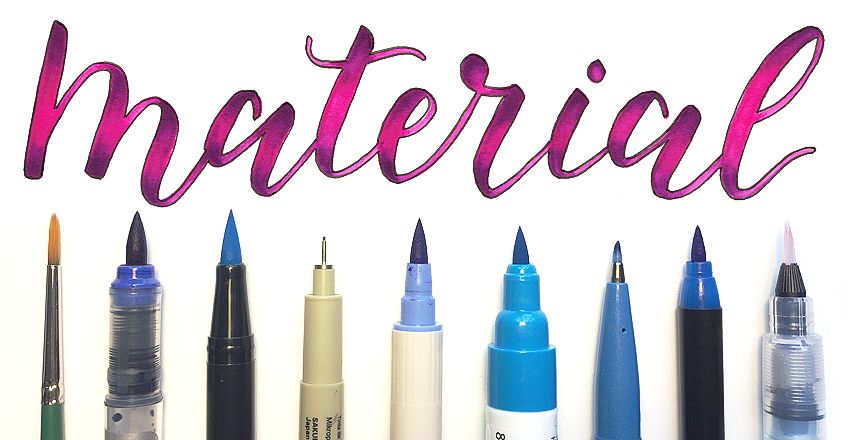
Materials Suitable for Hand-Lettering
You will need certain tools and materials to create beautiful hand-lettering. Below, you can find our recommendations for the best paper, brush pens, and brushes that you will require for your hand-drawn lettering artwork.
Paper for Hand-Lettering
The best paper to use for hand-drawn lettering projects is one that is very smooth, fine, and coated. Some copy papers are suitably smooth, less expensive, and ideal for practicing. Use the smoothest copy paper you can find and print practice sheets on a few to use under the plain copy paper. You can also use fine tracing paper for practicing your hand-lettering.
We recommend using Calligraphy Corner’s Calligraphy and Hand-Lettering Practice Notepad for its perfectly smooth paper, which is available in three options: with blank, lined, or fine-dotted pages. Created specifically for brush pen hand-lettering, these papers are very smooth and able to cope well with a lot of ink or water. If you are planning to use brush pens with watercolors, we suggest using mixed media paper, such as this pad from Canson.
Brush Pens and Lightfast Colors
One important factor in your brush pen colors is their level of lightfastness. This refers to a pigment’s ability to retain its color after exposure to the sun’s UV rays. Those that are not lightfast are likely to fade and change in color over time. Thus, you should always keep in mind whether your artwork will be stored or displayed in the sun or not. We suggest using Faber-Castell’s Pitt Artist Brush Pens for a top-quality, lightfast set of watercolor brush-lettering pens.
Using Large and Small Brush Pens
Your choice of brush pen or the size of the tip will determine the size of your hand-lettering. A big brush pen is ideal for writing capital letters and a smaller brush pen for small letters. It is a good idea for beginners to opt for brush pens of either size in order to achieve various effects with your lettering.
Quality Brushes
Using a traditional brush to create your brush lettering can add a further element, which is that of using color effects. Writing with a brush is quite a different experience when compared to using a pen and will need a lot of practice, but it is well worth the effort. We recommend getting high-quality brushes at the outset, as the higher cost is worth every cent and you can expect them to last longer than less expensive brushes.
Recommended Books for Hand-Lettering
There are many great books available that will inspire and provide a multitude of techniques, helpful tips, and templates for learning hand-lettering for beginners. These books come highly recommended and are perfect how-to lettering guides for practicing and developing your hand-lettering skills. Below is our top book recommendation to get you started.
Pretty Simple Lettering: Modern Calligraphy & Hand-Lettering for Beginners
This lovely book is the perfect hand-lettering and calligraphy book to help you get started on your hand-drawn lettering journey. Written by Whitney Farnsworth, this is a very comprehensive guide to learning how to beautify your writing with 10 different alphabets (in both upper and lower case). This is the ideal book for those that want to learn how to hand-letter and to be inspired to keep practicing!
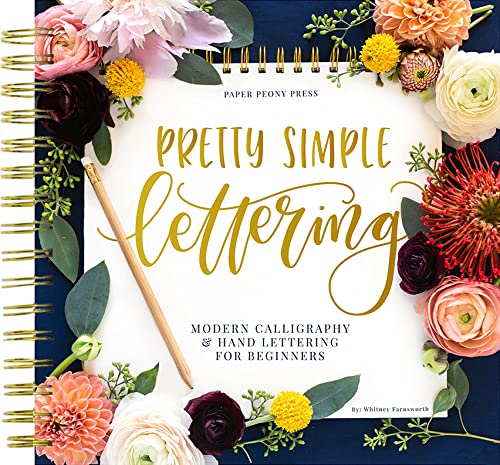
- Learn the art of hand lettering with this comprehensive how-to book
- The perfect book for any hand letterer, both new and experienced
- Simple step-by-step tutorials on the basics of hand-lettering

Marianne Baumann
Living in Switzerland, Marianne Baumann is a happily married mother to three wonderful children. Currently, Marianne works as a graphic designer and layout artist, although she was formally trained in computer science. From a young age, Marianne was intrigued by many things, including paint and design. After school, she attended a one-year preliminary course at the Zurich University of the Arts. Photography was one of her favorite mediums until she became a mother, which is when sewing took preference. Since 2018, hand-lettering has become one of Marianne’s favorite arts. She started off making greeting cards, and this is one of the ways she chooses to relax after her busy lifestyle of being a working mom.
While many people are losing their ability to write well using pen and paper since the onslaught of electronic communication, many more are rediscovering the joy of actually putting pen to paper. With hand-lettering, you can express your creativity in beautiful ways and share them with your friends and the world. Practice, have fun, enjoy, and share!
Frequently Asked Questions
How Do You Start Hand-Lettering?
Start with your favorite letter or a word and draw it in several different ways, using the guidelines. Do not stress too much if all the letters are not perfect. Keep going and fill up the page, using as many as you want. This will help you get into the rhythm and flow of using the brush pen, activating your muscle memory. Some of the hand, finger, and shoulder muscles have never been used in this way, so they will need daily practice daily to maintain and strengthen them.
What Are Brush Markers?
Brush pens usually have felt tips and are excellent tools to use for hand-lettering. These pens are often used with watercolor paints and a water brush for creating special effects.
How Long Does It Take to Master Hand-Lettering?
When you first learn hand-lettering, the progress will ultimately depend on how often you are able to practice. That said, with regular practice, one should have the skills to create beautiful hand-lettered invitations, greeting cards, gift tags, and more within about two months. By then, you will also know if your new skills have in fact uncovered a natural talent, thus allowing you to take it to the next level of turning it into art.

Matthew Matthysen is an educated multidisciplinary artist and illustrator. He successfully completed his art degree at the University of Witwatersrand in South Africa, majoring in art history and contemporary drawing. The focus of his thesis was to explore the philosophical implications of the macro and micro-universe on the human experience. Matthew uses diverse media, such as written and hands-on components, to explore various approaches that are on the border between philosophy and science.
Matthew organized various exhibitions before and during his years as a student and is still passionate about doing so today. He currently works as a freelance artist and writer in various fields. He also has a permanent position at a renowned online gallery (ArtGazette) where he produces various works on commission. As a freelance artist, he creates several series and successfully sells them to galleries and collectors. He loves to use his work and skills in various fields of interest.
Matthew has been creating drawing and painting tutorials since the relaunch in 2020. Through his involvement with artincontext.org, he has been able to deepen his knowledge of various painting mediums. For example, watercolor techniques, calligraphy and lately digital drawing, which is becoming more and more popular.
Learn more about Matthew Matthysen and the Art in Context Team.


