How to Draw a Forest – Step-by-Step Drawing Tutorial
Forests are perhaps the most magical places one could find themselves. A forest drawing can be used in many ways because of its versatile imagery. For one, it can be a landscape that exists on its own or it can be the setting of an interesting event taking place. Learning how to draw a forest also provides an artist with a set of skills of depth, color values, and shadow placement. A forest drawing is a great exercise to enhance ones sketching techniques, and in this easy forest drawing tutorial, we will learn how to slowly transform a simple pencil forest drawing into a unique, color-filled forest drawing.
Step-by-Step Instructions on How to Draw a Forest
In this tutorial on how to draw a forest, we will begin by creating a loose sketch of a forest using pencil. From there, we will proceed with our forest drawing by using blue pencils to establish a color value for the background, midground, and foreground. From there, we will work with our ballpoint pens and markers to create more distinct and significant linework within the forest drawing to give the forest elements a more defined structure.
Step 1: Sketching the Forest
We want to begin by drawing a border around our page with our pencils. We do this by taking our HB pencil and ruler and proceeding to create an evenly measured border around the page.
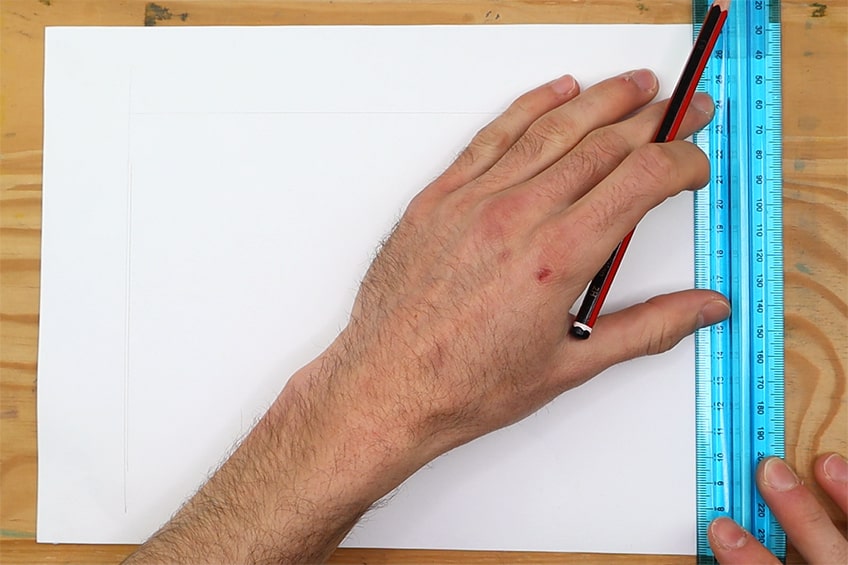
We now want to use our HB pencils to create a light sketch of a forest. To give the forest a unique feel, we want to establish a little stream that runs through the center of the forest. We want to draw banks that slope upward so that the stream can disappear into the background.

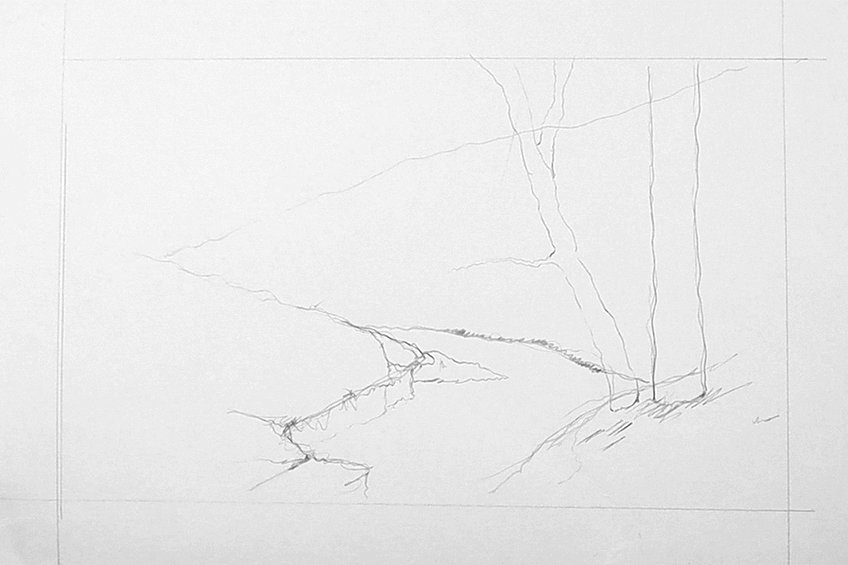
We want the stream to establish the foreground of the forest as it flows into the distance. Once we have the foreground established, we can draw some trees along the banks in the foreground of the forest.
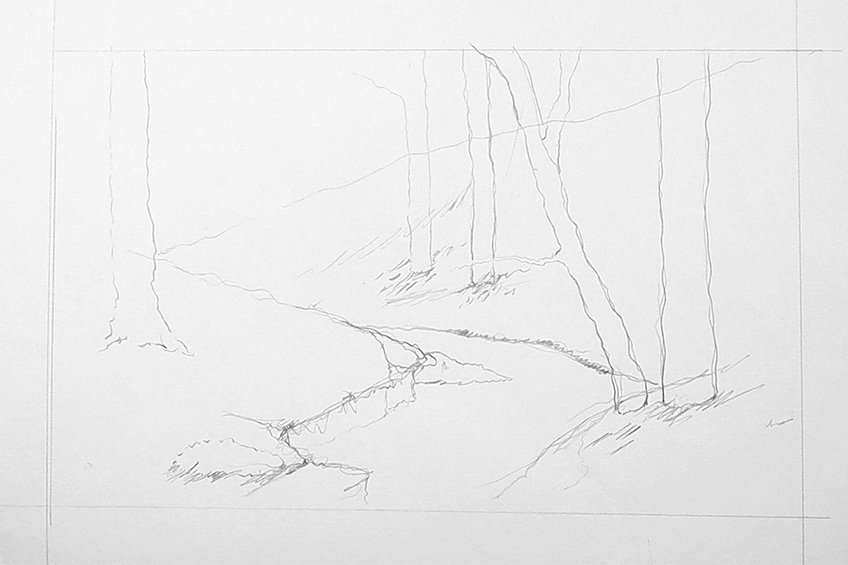
As we draw the trees in the foreground, we can allow them to extend out of the scene for scale. As you continue drawing your forest, proceed to draw thinner tree trunks as you draw trees further in the distance.
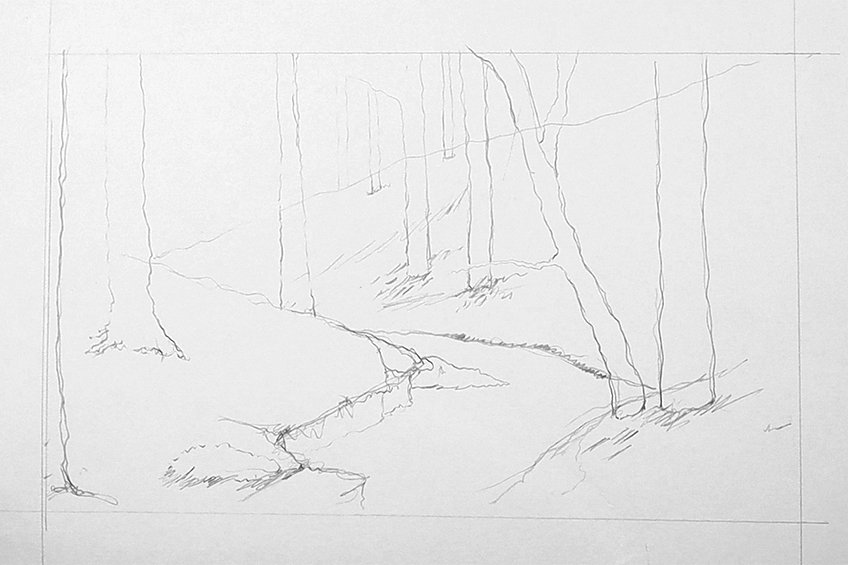
Try to establish the basic depth formation within the forest drawing by creating sets of different tree sizes. When we draw tree trunks in the foreground, they can be large.
The midground trees can be slightly smaller, and then the trees in the background should be the smallest.

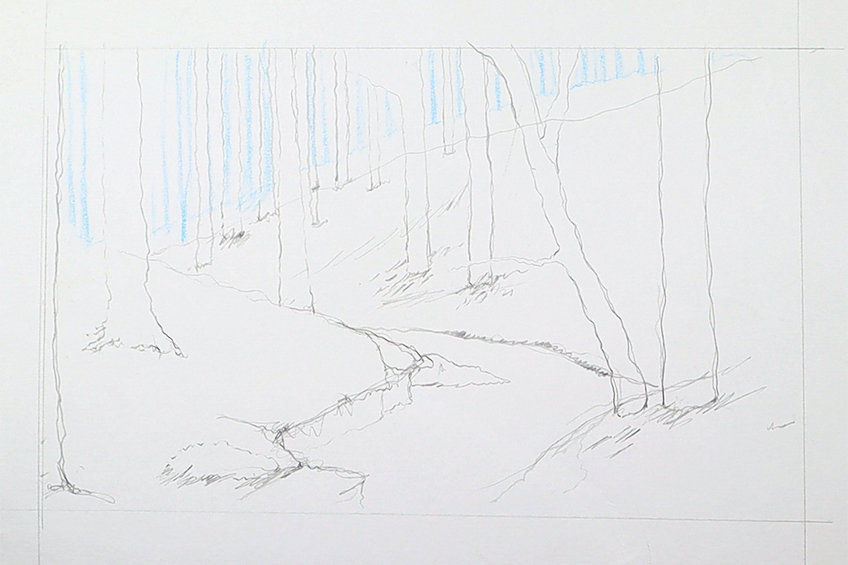
When sketching your trees in the background, you want to draw them in between the foreground and midground trees. You can also use a light blue pencil, giving them a distant appearance. We want to ensure that we establish depth with, a background, midground, and foreground. By doing so, we will establish a more realistic quality within our forest drawing. How we do this effectively is by the use of color.
Step 2: Using Color to Create Depth in the Forest
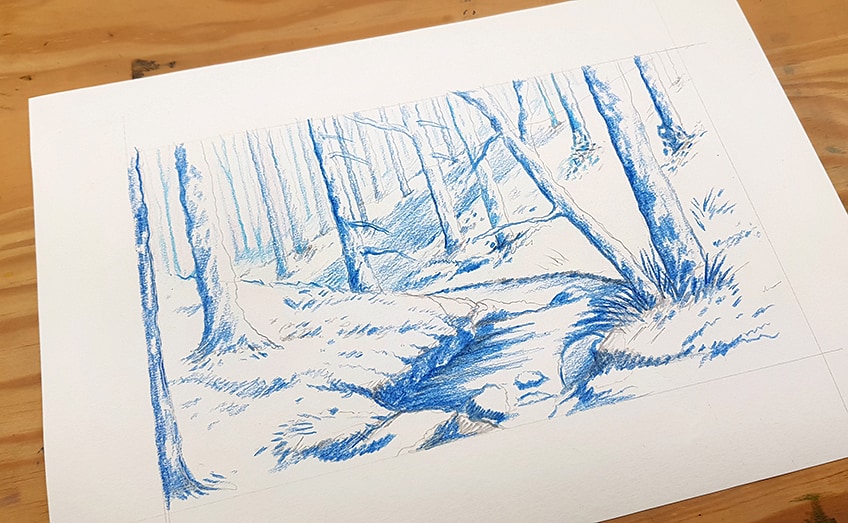
Once we have a background, midground, and foreground of the forest drawing, we can now start to work with color. Starting with the background, take a light blue pencil and proceed to draw light lines in between the sketched trees to suggest trees in the distance.
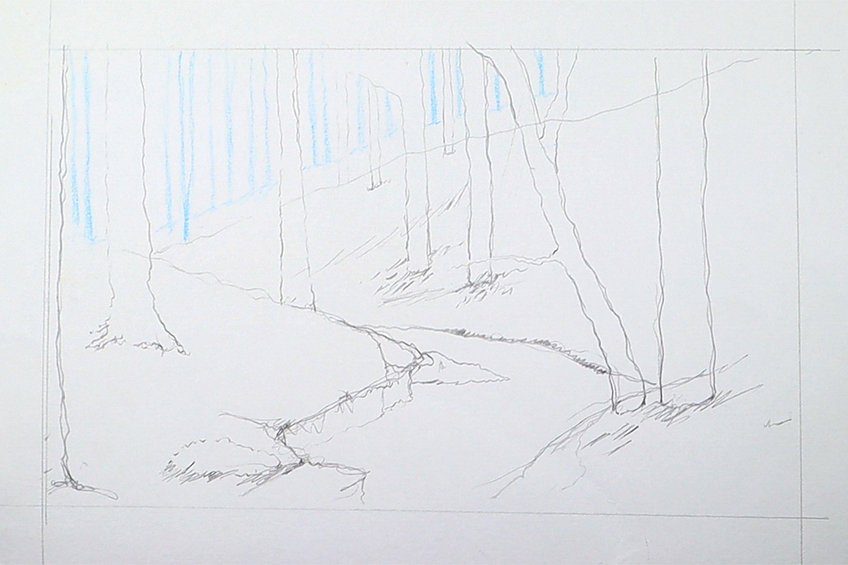
We want to lightly draw trees in the distance, which should be small and thin. As you slowly proceed to draw trees within the midground, we want to slightly darken them. Make sure that the trees start to darken as they come to the foreground.
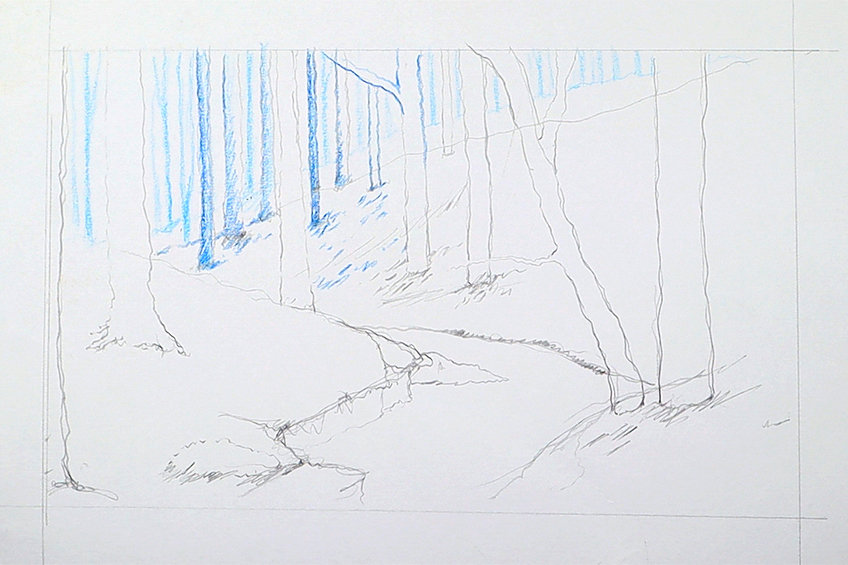
As you draw the forest, moving from the background to the midground, you can begin to sketch in foliage. You want to make sure that you use a slightly darker blue pencil for the midground details.
That being said, we don’t want to color in the elements too much.

As you shade with your blue pencil, you also want to keep the shading on the same side of each element in the forest. We want to slowly establish a sense of shadow within the elements of the forest as we go through the forest drawing.

The aim is to strategically establish the different tonal values within the forest as we add little details with different colored pencils. From the background, we want to work lightly with a light blue pencil, slowly darkening the scene as we come to the foreground.

Using linework is a great way to establish stillness within the water, whereas scribbling styles are useful for suggesting bushes and foliage. By making the water darker we will create the effect of reflection on the surface of the water.
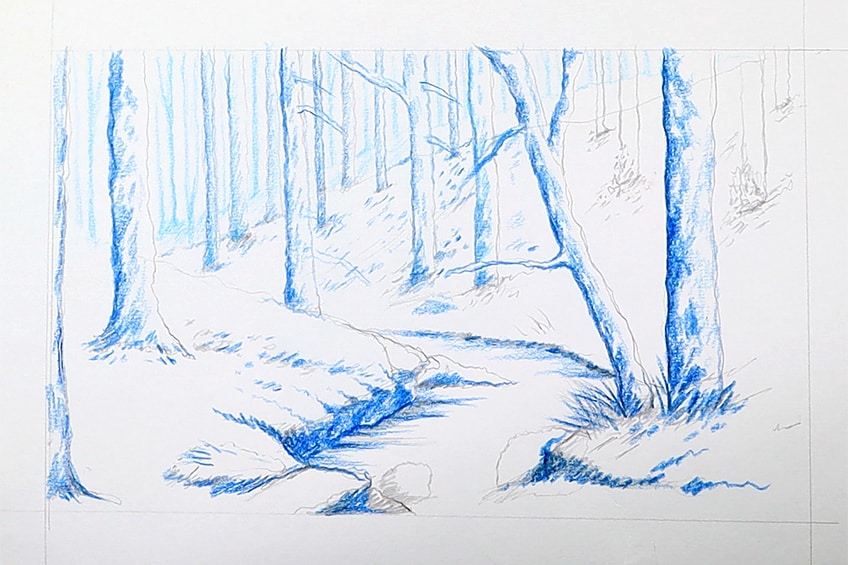
We also want to use straight and horizontal lines to suggest that the water exists on a horizontal plane.
Step 3: Adding Features to Our Forest Drawing
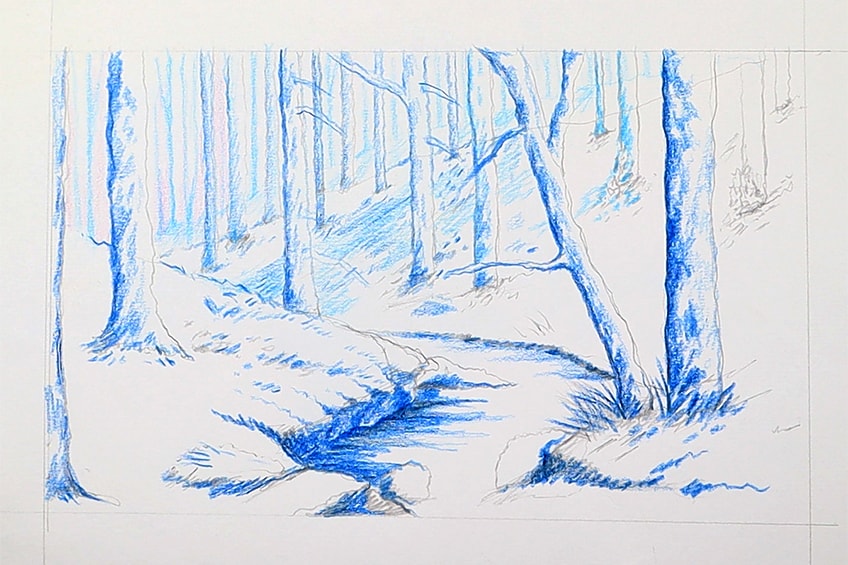
At this point, we should have three different color values that establish depth within the forest. We can add in rocks, grass, and flowers using the different color values for depth within the forest.

Have a looser and more scribble-like approach, when shading tree trunks. As you shade the trees, you also want to keep the shading to one side for every tree to create shadows within the forest drawing.

With the water, you want to have the edges of the water darkened, leaving the lightest part of the stream to run through the center of the stream. This makes it seem as if the elements around the water are casting shadows on its surface.
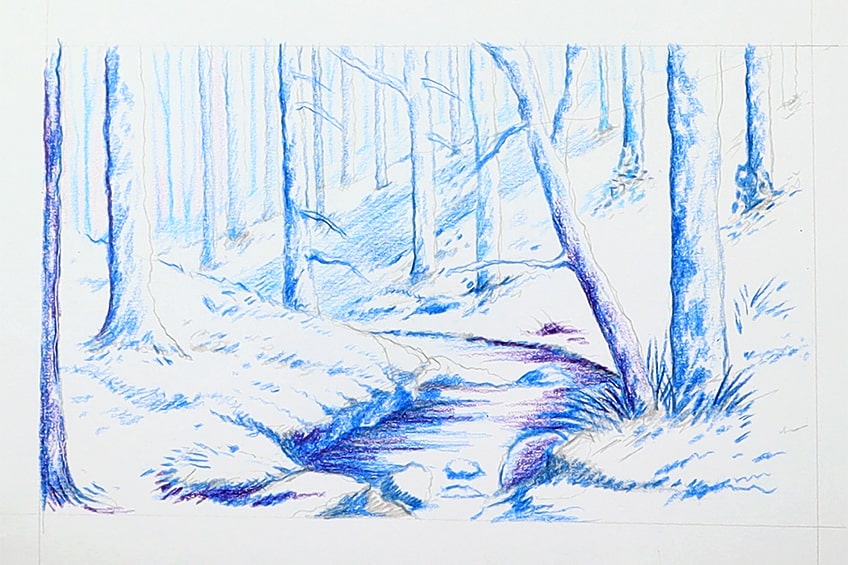
Step 4: Darkening the Foreground and Midground of the Forest
Using a dark purple pencil, we want to start going over the shading marks in the foreground and midground. We want the foreground to be slightly darker and as we move through to the midground, we want to lighten the shading a little.
Remember, we want to make sure that the foreground is the darkest, with a lighter midground, and then the background is the lightest in its color value.
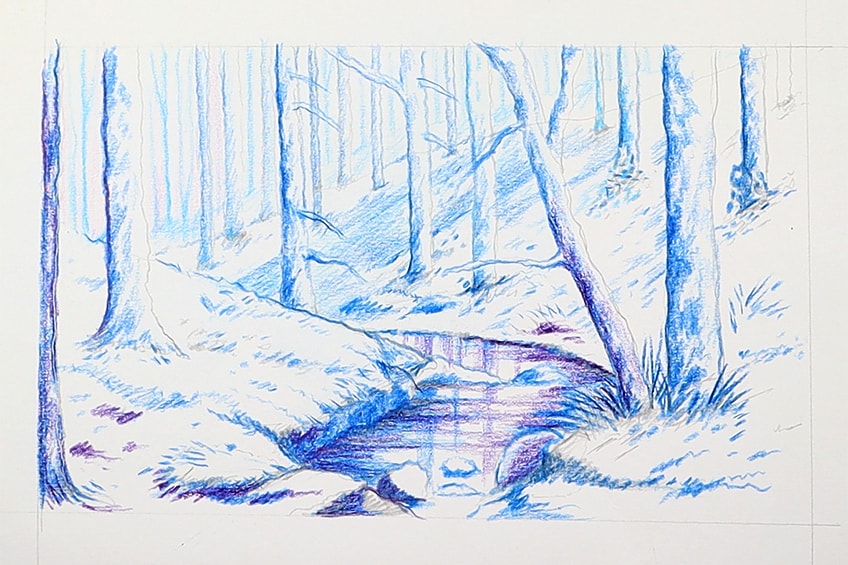
We can also start to add reflections to the stream by drawing a light reflection of the trees that are positioned directly above the stream.
Take your time adding in dark purple marks to the already existing elements of the forest, whilst adding in some new features as you work your way through to the background.
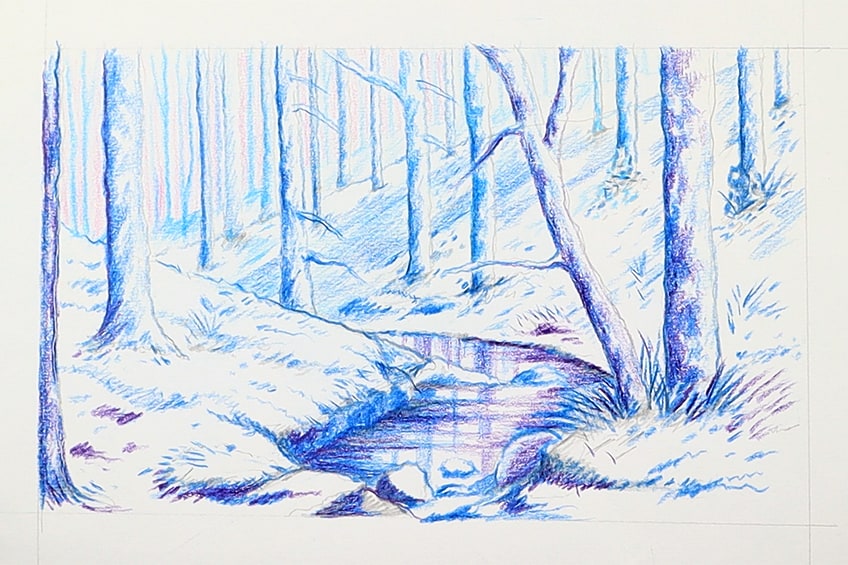
Step 5: Using Pen and Marker to Add More Contrast to the Forest
Once we feel that we have successfully created a three-dimensionality in the forest drawing, we then want to add in some more refined and distinct features with the use of a pen and marker.
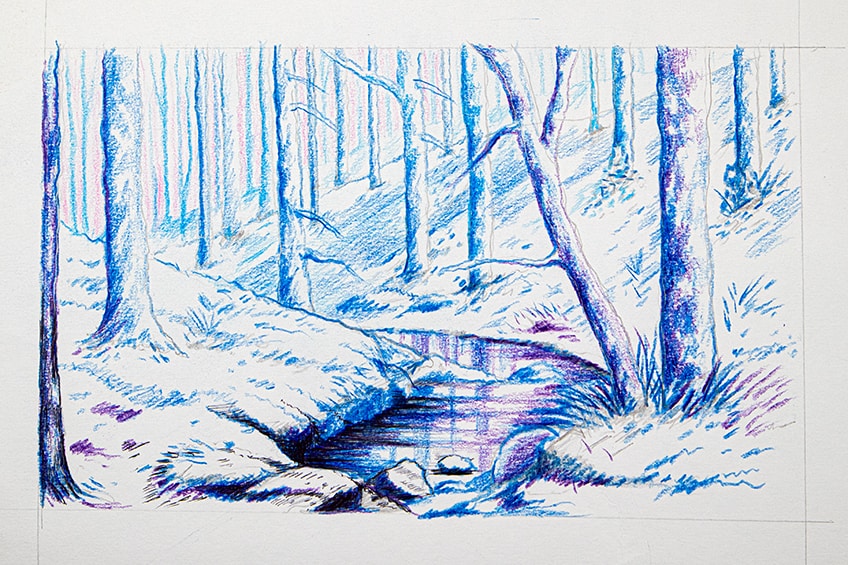
The aim is to take your time to add in details and go over already existing details. You want to use your pen and marker strategically, whereby you don’t overpower elements but slightly darken them. You can darken the details in the water along the edges of the bank.
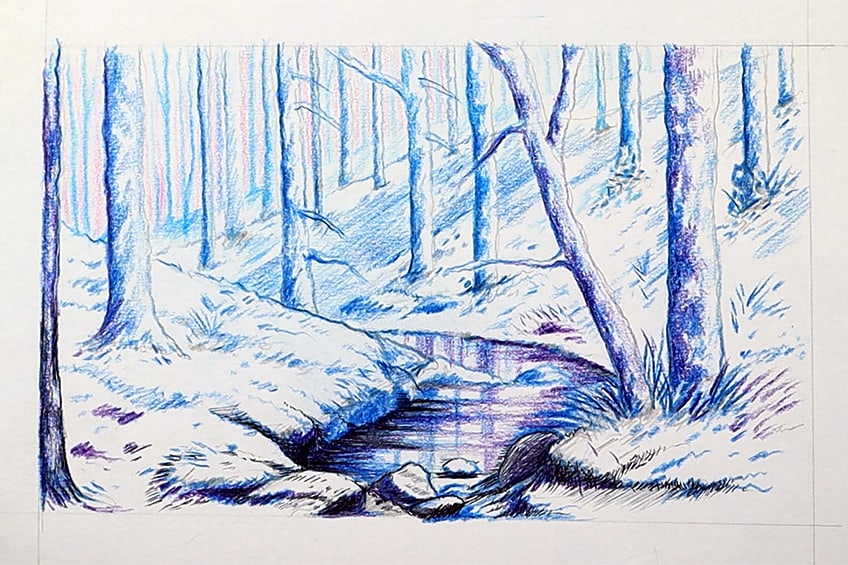
You can also use your marker and pen to add line work and strokes to the elements that sit in the foreground.
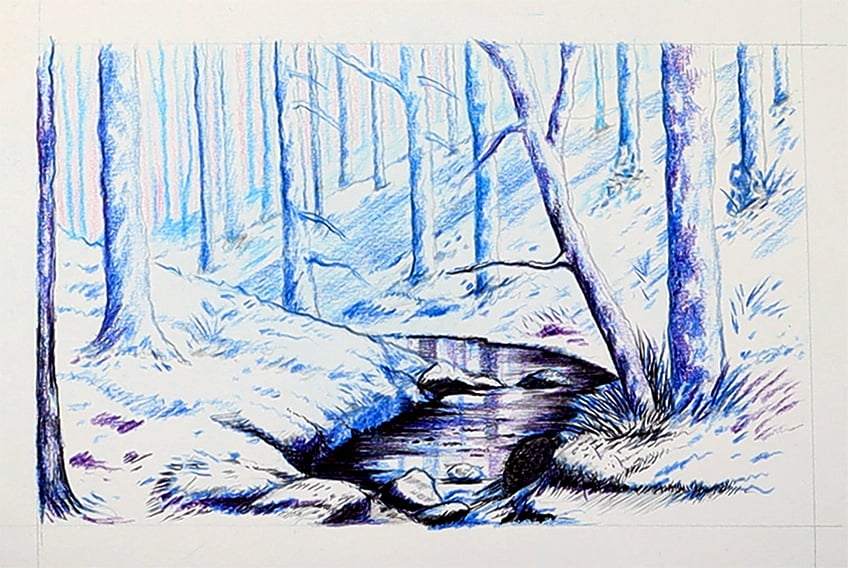
Your marker and pen can also be a great way to enhance shadowed areas within the drawing. For some elements, this is a great way to add shadows to objects that seem very lit up on one side.
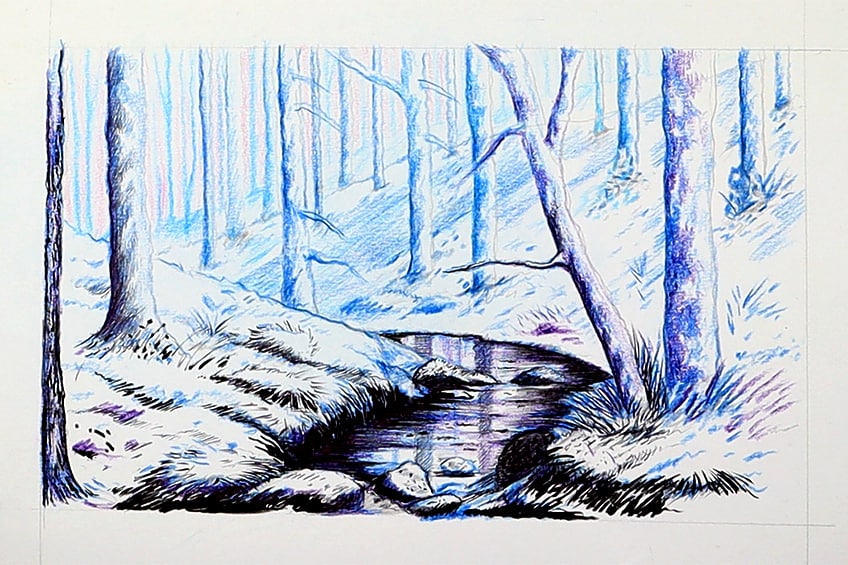
Explore the different thicknesses of both the pen and the marker to see how they might contribute to different features within the drawing.

Remember, you want to keep the darkest features within the foreground of the forest drawing. By doing this, the different blues will start to effectively create different depth qualities.

You want to take your time when using pen and marker to add more contrast and detail to the drawing. This is because it is easy to make mistakes with these mediums. As you slowly work your way into the forest, moving from the foreground to the background, you want to make sure you lighten the details.
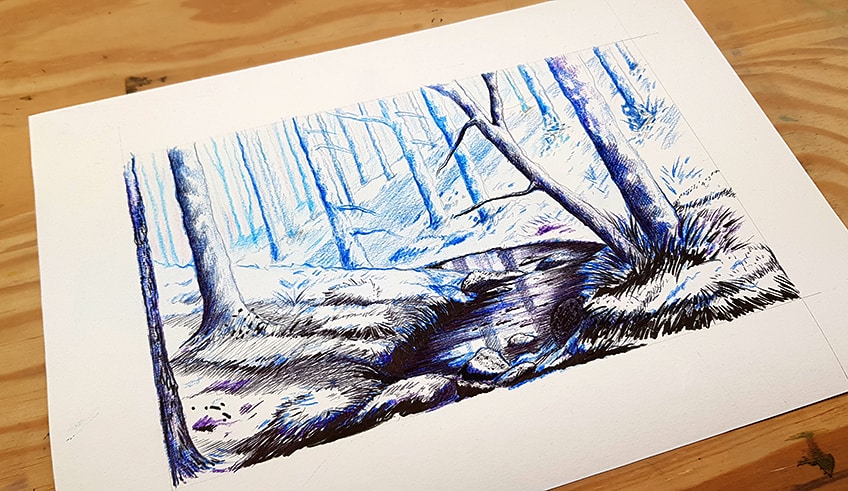
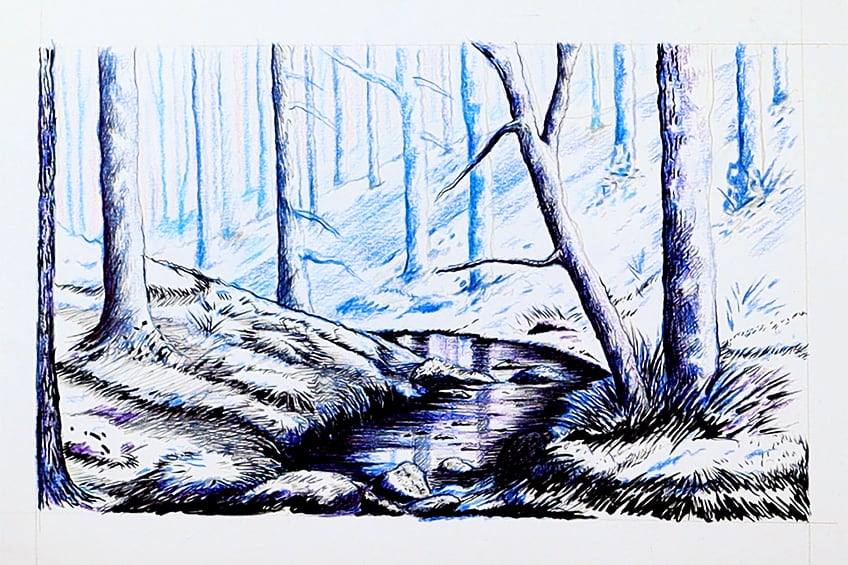
We want to be aware of how the darkest marks made with a marker work in the foreground whilst the lighter pen marks can be a great way to capture details in the midground.

Imagine the process as going through the different layers of the landscape. Make sure your workout the details of the foreground first before moving onto the midground and then lastly the background.

As long as you slowly work your way through the forest drawing you will end up with a realistic forest drawing. At this point, you can play around with adding in more details as you go along.
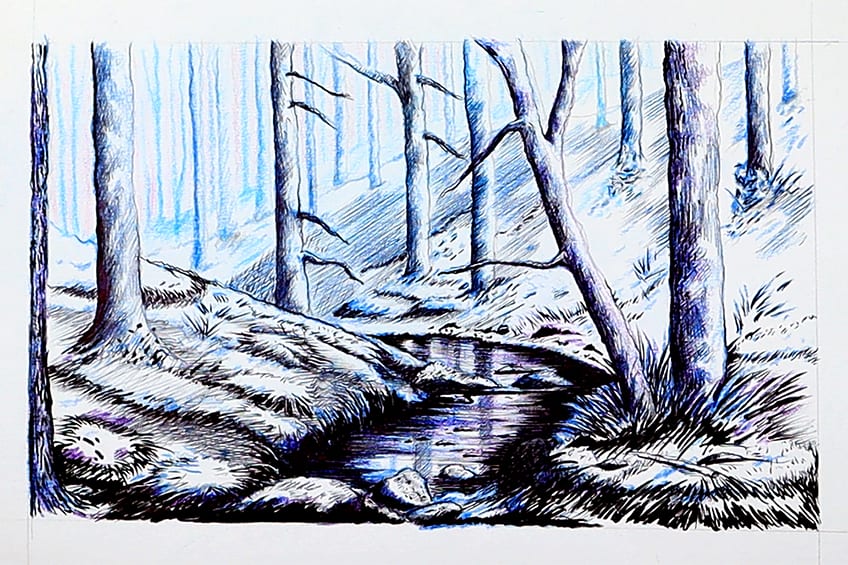
Again, making sure that the shadows are consistently on one side of the elements within the forest is important. Making sure that the shadows, shading, and details get lighter as they move into the background is also important. By the time you get to the background of the forest drawing, you want to have the detailing of the forest as light as possible.
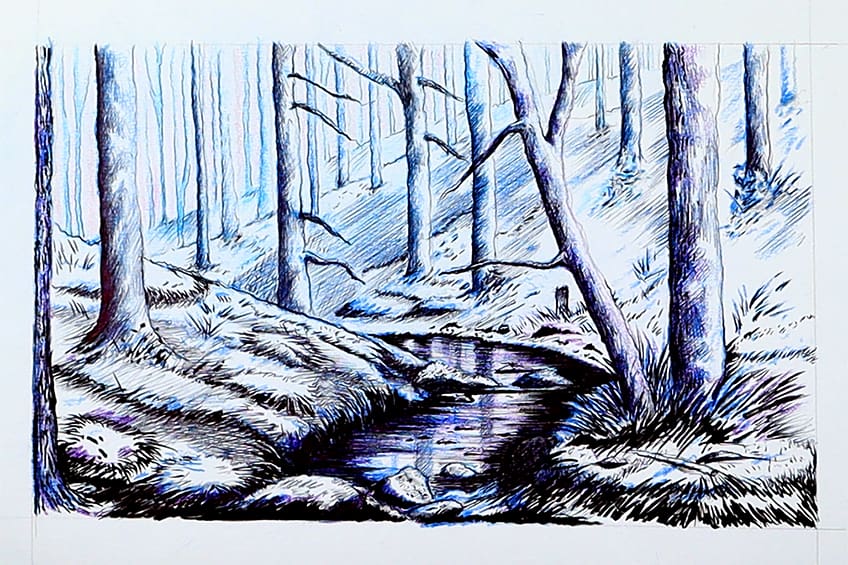
As the forest fades into the distance, so should the details and shadows.

That is how to draw a forest in a few simple steps! Remember to take a moment of rest and come back to your drawing a day later to see if it needs any further details, linework, or shading. Otherwise, that is the basic process of creating a realistic forest drawing.

Tips to Remember
- Take time on each step. You want to make sure you work out the forest sketch in pencil before moving on to using color and markers.
- Consider light and shadow. You want the shadows to be significant on a single side of the elements within the forest drawing to maintain consistency.
- Use color for depth. This means that the lighter the elements, the further away they seem, and the darker the elements, the closer they will appear.
- Consider the style of drawing for different elements. Scribbling styles work well for shrubbery and foliage whereas clean linework does well to create a sense of stillness within the water.

A forest drawing is a unique drawing exercise and there are many ways to create a forest drawing, but what makes a forest drawing interesting is how depth is created. Knowing how to create a sense of vast depth within a forest drawing is a great skill to have and in this easy forest drawing tutorial, we learn how to use color to create this effect. This forest drawing teaches you the value of color and how it can be used to create depth.
Frequently Asked Questions
How Do You Create Depth in a Forest Drawing?
The further away an object is, the lighter it appears to be. This is because the color is struggling to travel the distance to meet the eye. However, objects nearby have a more distinct color value because the object’s color values travel a shorter distance and therefore reach the eye easily. If you use color more lightly within the backgrounds of a landscape and more vividly within the foreground, you will find that it creates a sense of depth within the image. For instance, if you were to use light blues for backgrounds and slightly darken the blues as they come into the foreground, you will have created a sense of depth within the landscape. This works well for a forest drawing as you can make the background trees light and the foreground trees darker for depth.
How Do You Draw Light and Shadows Within a Forest?
Shadows and light are essential elements that give a forest drawing a more realistic and evocative effect. This is because shadow and light effects objects and how they exist within a space. Using light and shadow effectively within a drawing can give objects a real-life quality. Keeping the light source to a single side, we will have a more accurate representation of how the shadows form. The aim is to keep consistency within the shadow formations and light. By doing so, we suggest that the light source is coming from the sun, which is always a singular directional stream of light. So firstly, make sure that all the shadows and shading are mostly to one side of each element within the forest. Secondly, keeping the lightest parts of the elements on the opposite side of the shadowed sides suggests a singular light source coming from a single side.
Matthew Matthysen is an educated multidisciplinary artist and illustrator. He successfully completed his art degree at the University of Witwatersrand in South Africa, majoring in art history and contemporary drawing. The focus of his thesis was to explore the philosophical implications of the macro and micro-universe on the human experience. Matthew uses diverse media, such as written and hands-on components, to explore various approaches that are on the border between philosophy and science.
Matthew organized various exhibitions before and during his years as a student and is still passionate about doing so today. He currently works as a freelance artist and writer in various fields. He also has a permanent position at a renowned online gallery (ArtGazette) where he produces various works on commission. As a freelance artist, he creates several series and successfully sells them to galleries and collectors. He loves to use his work and skills in various fields of interest.
Matthew has been creating drawing and painting tutorials since the relaunch in 2020. Through his involvement with artincontext.org, he has been able to deepen his knowledge of various painting mediums. For example, watercolor techniques, calligraphy and lately digital drawing, which is becoming more and more popular.
Learn more about Matthew Matthysen and the Art in Context Team.
Cite this Article
Matthew, Matthysen, “How to Draw a Forest – Step-by-Step Drawing Tutorial.” Art in Context. July 26, 2023. URL: https://artincontext.org/how-to-draw-a-forest/
Matthysen, M. (2023, 26 July). How to Draw a Forest – Step-by-Step Drawing Tutorial. Art in Context. https://artincontext.org/how-to-draw-a-forest/
Matthysen, Matthew. “How to Draw a Forest – Step-by-Step Drawing Tutorial.” Art in Context, July 26, 2023. https://artincontext.org/how-to-draw-a-forest/.


