How to Draw a Waterfall – Create your Own Stunning Drawing
A waterfall drawing is a great way to exercise your landscape drawing skills because a waterfall is the culmination of various features as opposed to just a body of water. In this easy waterfall drawing tutorial, we will explore how to draw multiple features that contextualize the waterfall scene. Waterfall drawings are also great subject matter for refining your drawing skills as they allow you to explore various mark-making styles in a single drawing. A waterfall drawing is a unique landscape that can function as a backdrop or setting for various drawing ideas. There are many skills to be learned from a waterfall sketch and many ways to utilize a waterfall drawing in art.
Step-by-Step Instructions on How to Draw a Waterfall
Waterfall drawings seem complicated because they encompass a variety of features that contextualize the waterfall scene. In this tutorial, we will break down the process of drawing a waterfall, slowly constructing the various elements through a set of digestible steps. We will learn how to utilize simple shading and sketching techniques to create a beautiful and realistic waterfall drawing that encompasses a variety of different features.
In this tutorial on how to draw a waterfall, we will begin by creating a light waterfall sketch, working out the layout of the landscape. We will then proceed to contextualize the scene by lightly sketching details around the waterfall drawing such as rocks, trees, and so on. We will then work with our darker pencils to enhance the contrast within the drawing, slowly refining the details and giving the waterfall sketch more dimension. We will carry on with this process until we have reached a point where the entire landscape has been enhanced with shading.
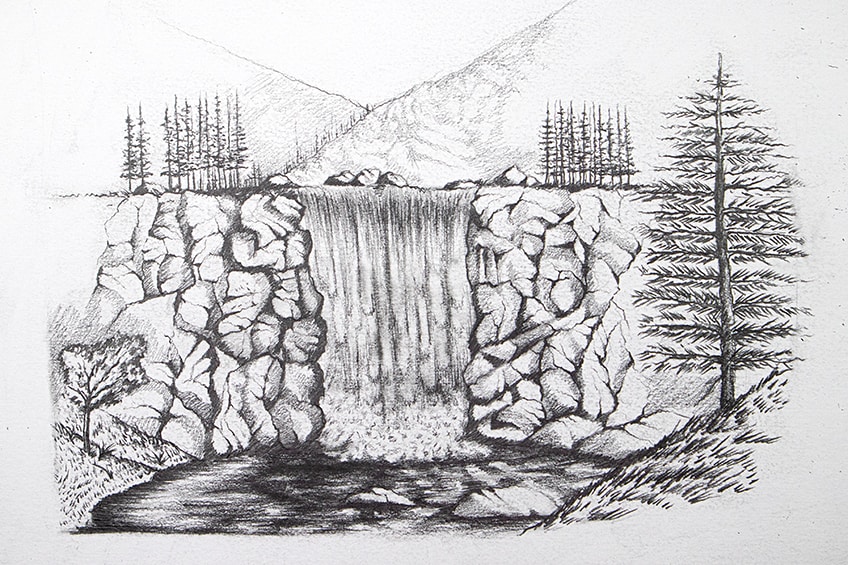
Now that we know what to expect, let us go through the different steps on how to draw a waterfall.
Step 1: Lightly Sketching the Waterfall Scene
We want to start by drawing a horizon line along the page. You need to ensure that the horizon line is higher and placed in the upper section of the page so that there is more space below the horizon line.

From there, we want to lightly sketch a space that will demarcate where the waterfall will be drawn. By doing this, we also demarcate how large the waterfall will be in scale.
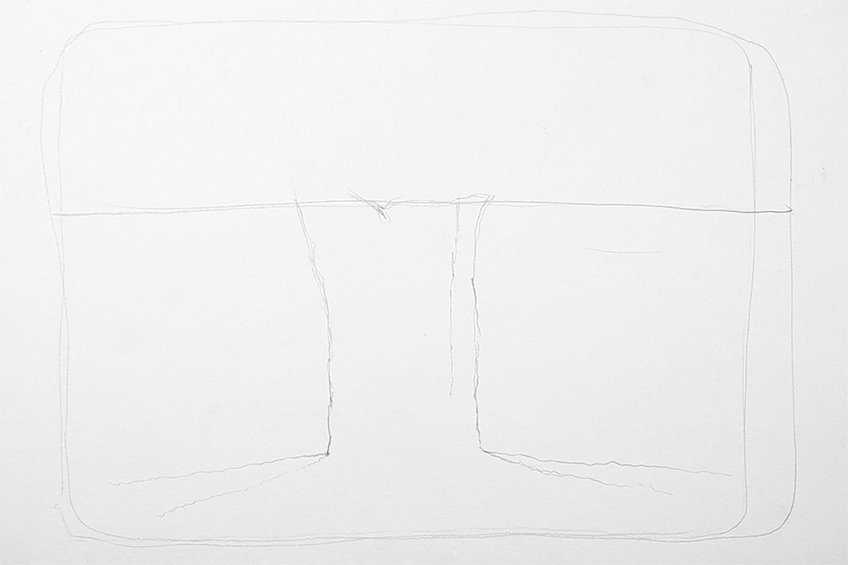
We now want to start lightly contextualizing the waterfall scene by drawing rocks on either side of the waterfall. Remember, everything is relative in scale, which means that we want to consider how large different elements will be within the waterfall landscape.

By adding rocks along the sides of the waterfall, we start to define how large the waterfall is, how large the surrounding environment will be, and so on. As we sketch out features surrounding the waterfall, we can now extend the lower body of water out towards either side of the page.
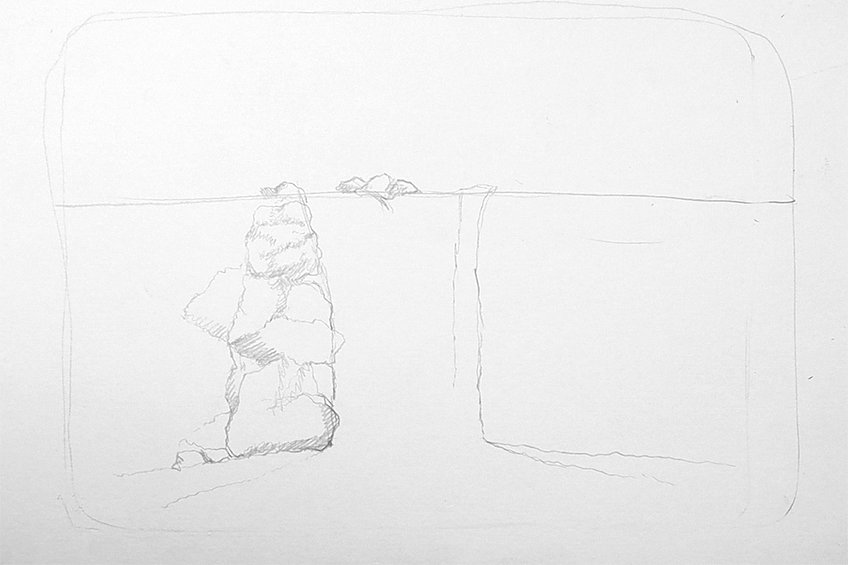
By doing this, we start to bring the settled body of water towards the foreground.
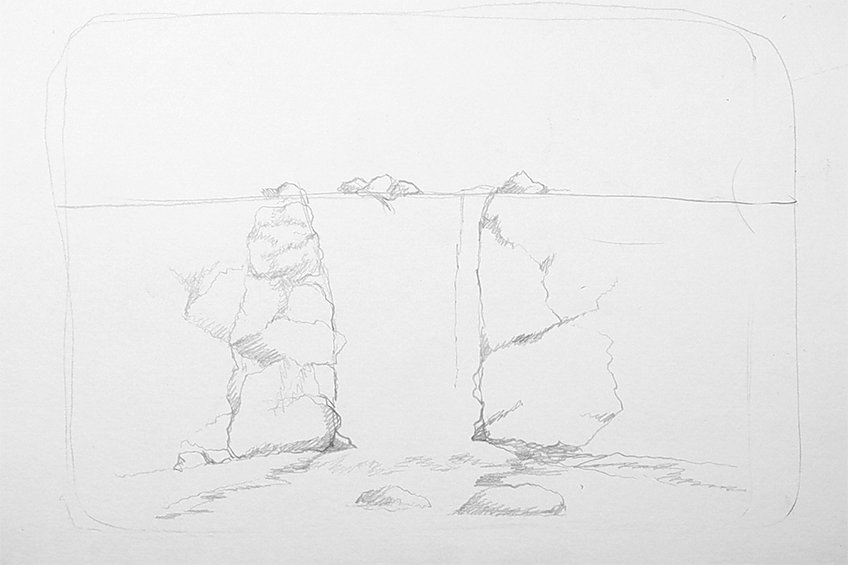
Step 2: Utilizing Shading and Linework in Different Features
As you slowly add a light sketch of various features into the waterfall drawing, you can play around with some light shading to bring more structure to them. The rocks in particular are an important part because of their structure. Again, we want to consider how large they will be in comparison to the waterfall and the surrounding environment. This means we want to know the shading effect on the rocks.

The utility of linework is really important for different features. For instance, we can use diagonal lines to establish rock forms, whereas horizontal lines are a great way to emphasize a flattened stillness in the settled water at the bottom of the waterfall.
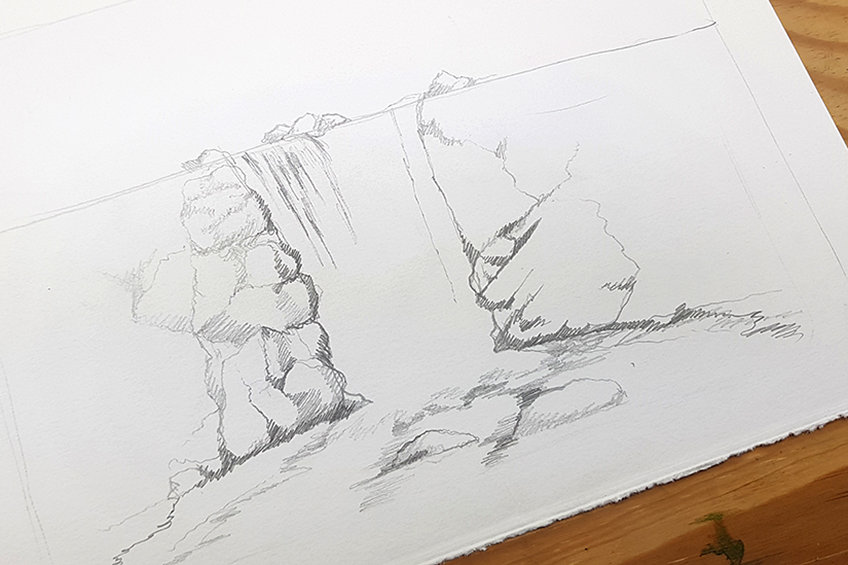
With the falling waterfall itself, we want to be very gentle and precious as we add in vertical linework to establish the vertical movement in the water. Linework is an essential concept to consider for various features.

As you slowly refine different features with some shading and linework, you start to establish the different surfaces and textures within the waterfall drawing. We should take time on working out the different features and their formations with some light shading and linework.
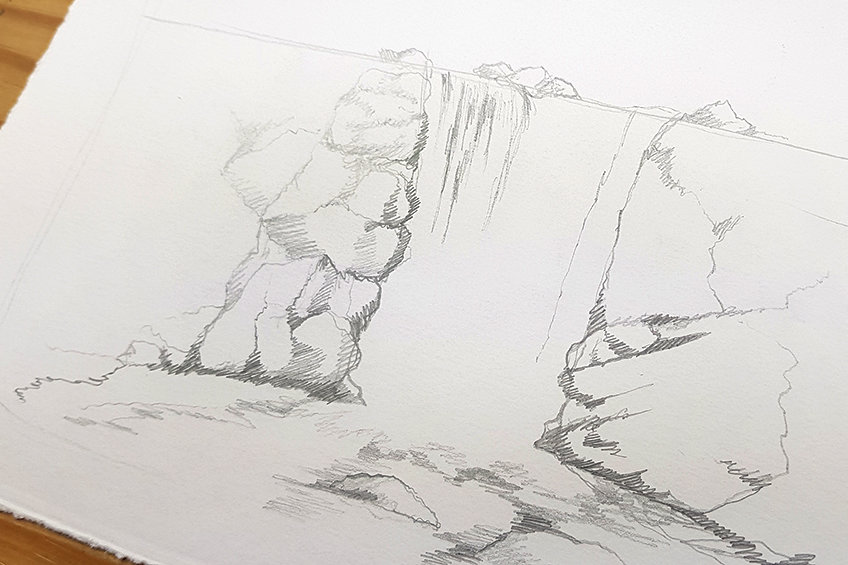
We want to establish the foundations and guidelines for darker shading later on.
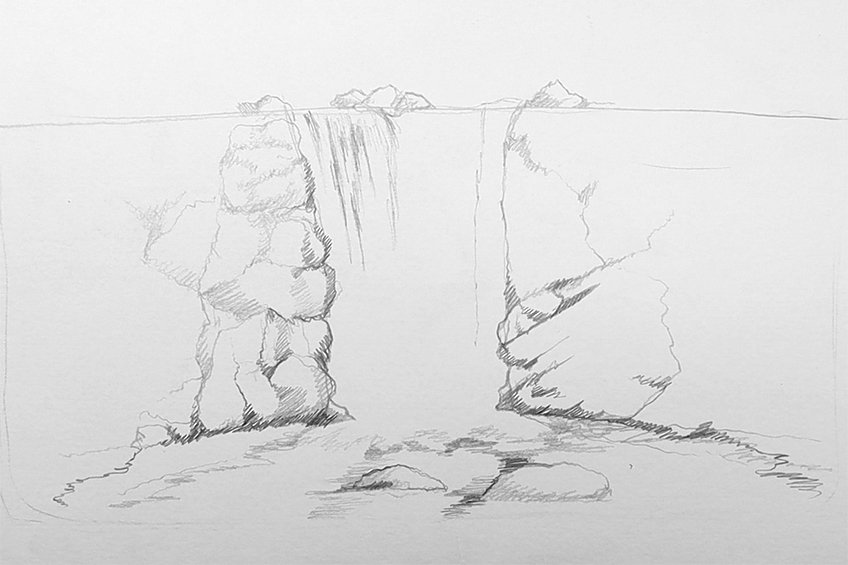
With the falling water, we want to work cautiously with vertical linework. We want to establish both highlights and shadows in the falling water by strategically using linework and negative space. With the settled water at the bottom of the waterfall, we want to utilize horizontal-styled shading and linework to establish a horizontal plane within the water.
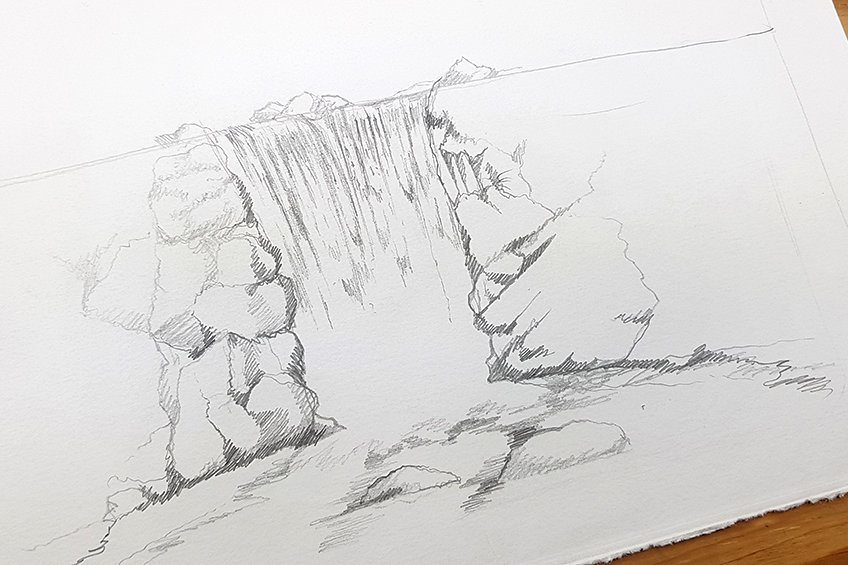
With the surrounding rocks, we want to continue sketching different rock formations. Don’t be afraid to zig-zag your lines in all sorts of directions to create different rock formations. As we slowly work in light shading and linework to the existing features, we start to establish a more defined setting for our waterfall drawing.
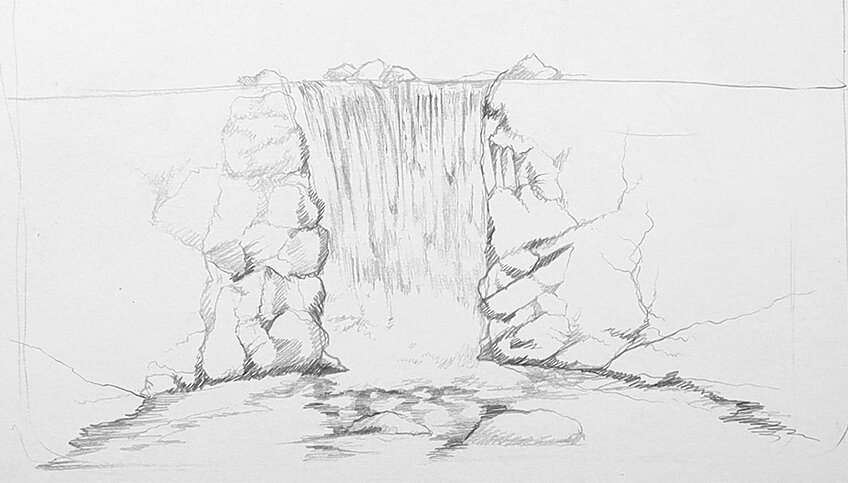
Step 3: Adding More Features for Context
We can now start to use our lightly shaded waterfall sketch as a general setting, so we can now add more features. For instance, we can start to add some rocks to the settled water. By adding rocks into the still, settled water at the bottom of the waterfall, we start to establish scale by bringing objects to the foreground. A good suggestion is to add embankments along the sides of the stream at the bottom of the waterfall.
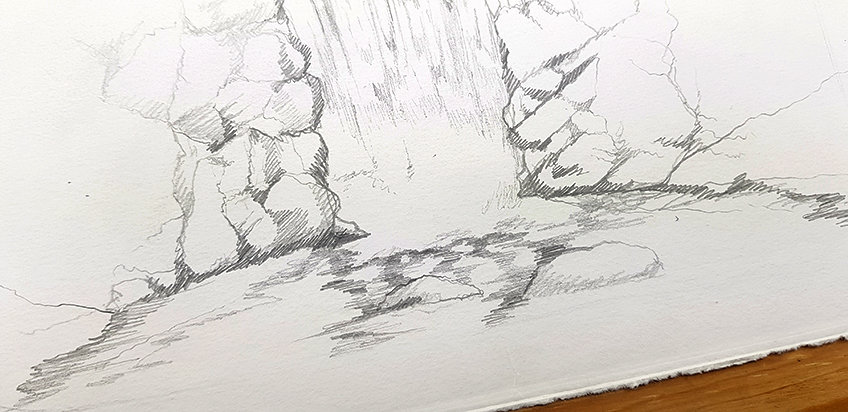
We can also start to be more strategic with scale by establishing new features within the midground.

By establishing new features and scaling them in different ways, we start to establish depth within the waterfall drawing. Ultimately, we are drawing a landscape and therefore should be mindful of scale for different features.
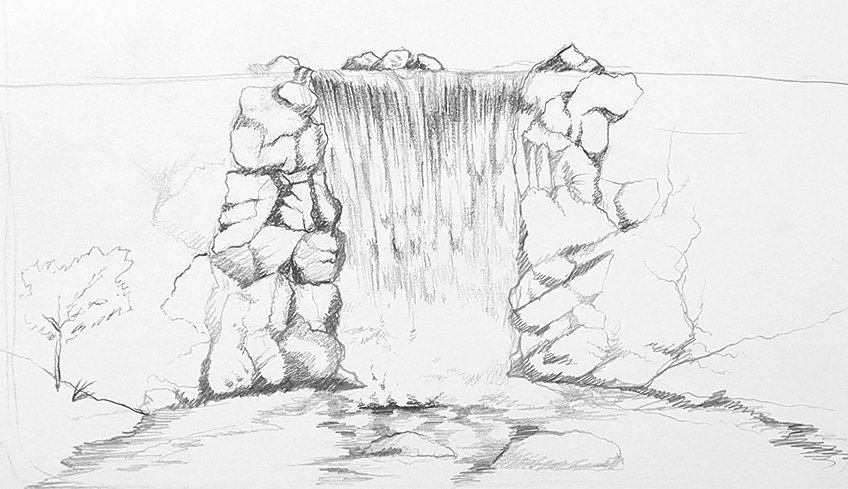
With the waterfall itself, we want to leave some negative space in the area where the falling water meets the still water. By doing so, we start to create a crashing water effect in the waterfall.
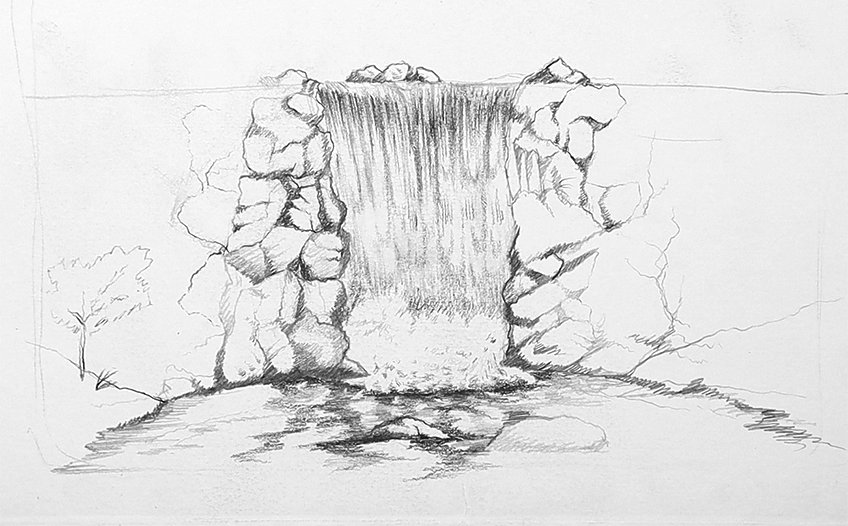
We can also start to establish features along the upper section of the horizon line, such as trees and rocks. Again, consider how large you make them. We want to keep consistency within the depth of the landscape. We can add another embankment to the waterfall drawing, but this time, we can make it slightly larger within the foreground.
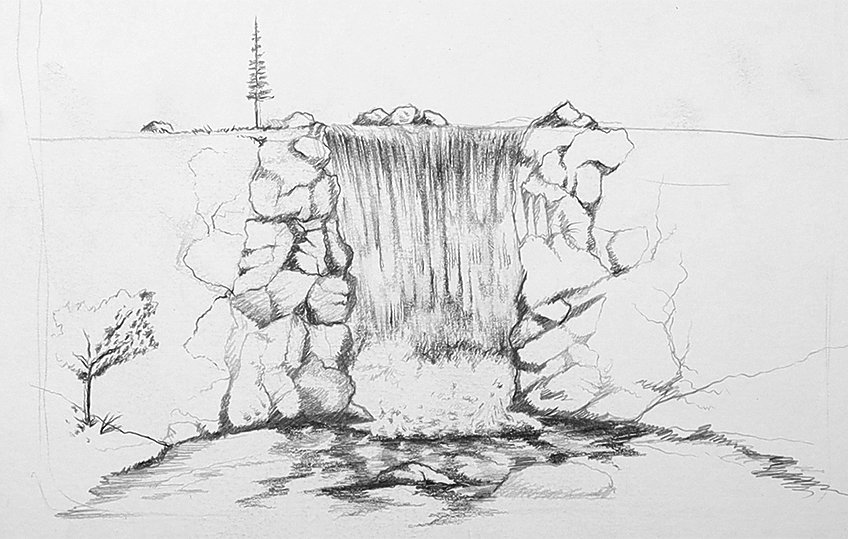
By doing this, we further the three-dimensional quality of the waterfall drawing.
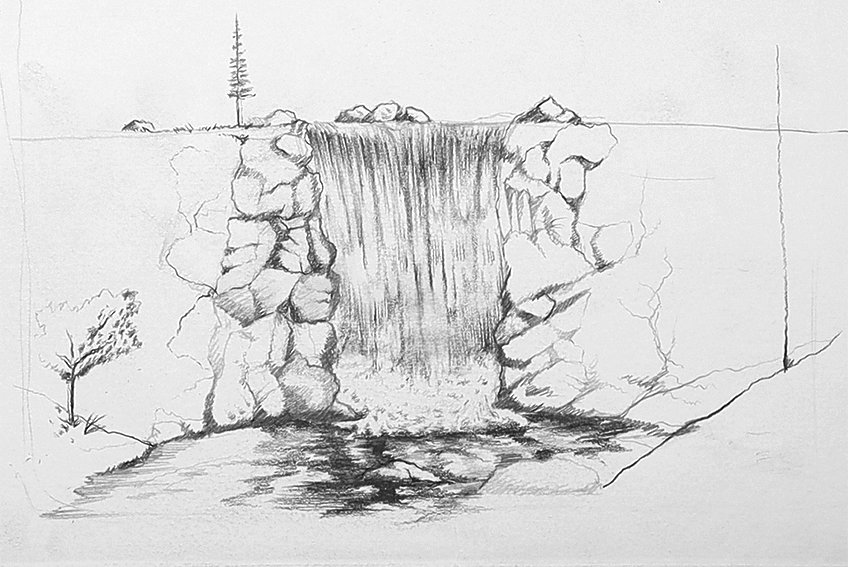
Step 4: Enhancing Features With Contrasted Shading
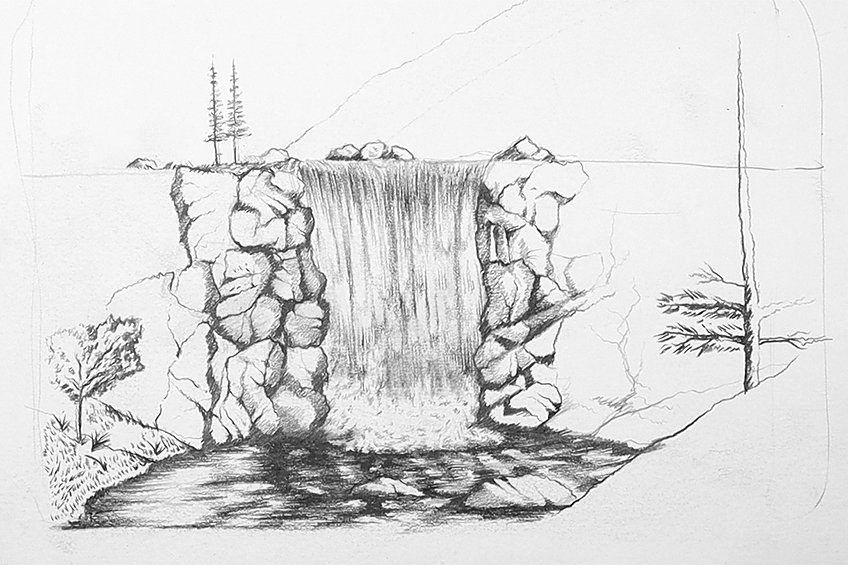
At this point, we should have established the waterfall scene, allowing us to add in features and create contrast with some darker shading. This is especially useful for creating different textures within the falling and settled water.

We can also draw features larger within the foreground. This is a great opportunity to draw a beautiful tree or rock formation or whatever you would like to enhance the waterfall drawing.

We want to darken the water that is settled below the waterfall and keep the falling water lighter. By doing this, we give a reflective quality to the settled water and a rushing effect to the falling water. Make sure you keep the linework and shading horizontal for the settled water. We also want to make sure we utilize vertical strokes within the falling water.
By doing this, we create different motions within the different waters.
Step 5: Adding More Features as We Go
At this point, we should be aware of how to enhance features with shading and linework. This gives us the freedom to add more features to the waterfall drawing with the knowledge of how to make them more realistic in the landscape.
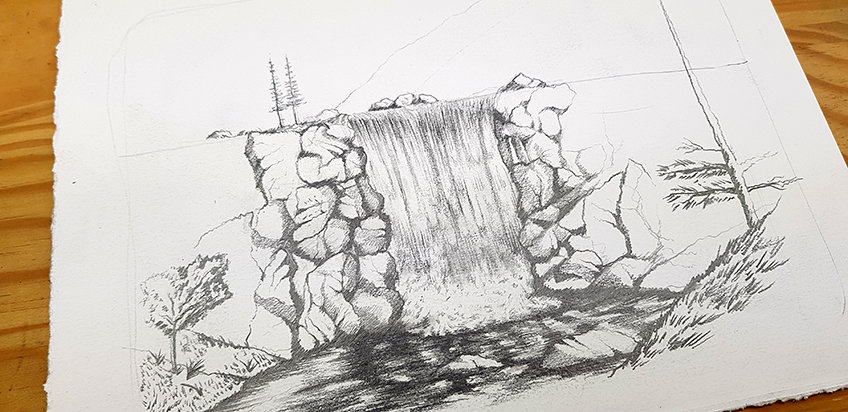
Another important note to remember is that we can keep any features- such as mountains- that might sit in the far background fairly light. By doing this, we create the effect of distance, by making features less distinct in the distance.
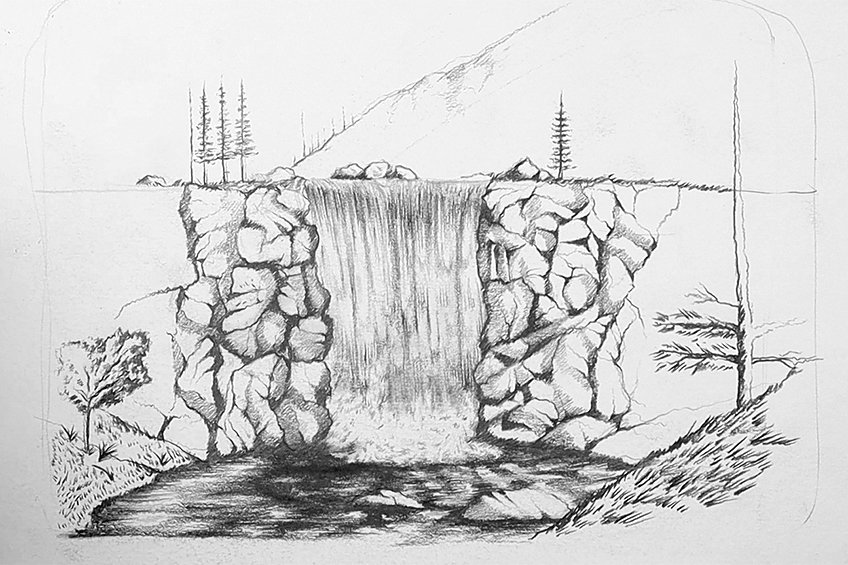
Continue adding in more features as you please, ensuring that you take note of the scale for the background, midground, and foreground.
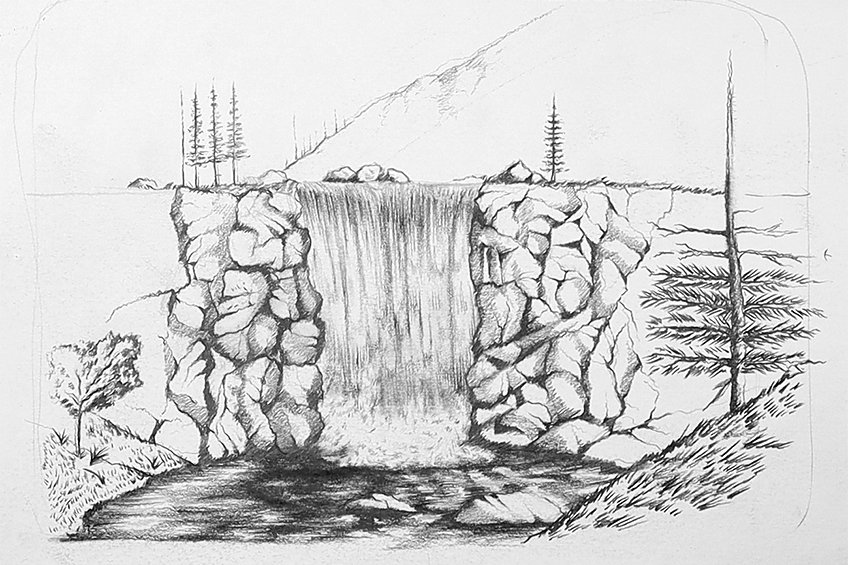
Remember to utilize different shading styles to establish different qualities for the various features. Emphasize the falling water with vertical linework and enhance the rocks by the use of various tonal values. If you work light, mid, and darker tones into the rock formations, you can develop a more realistic interaction with light.
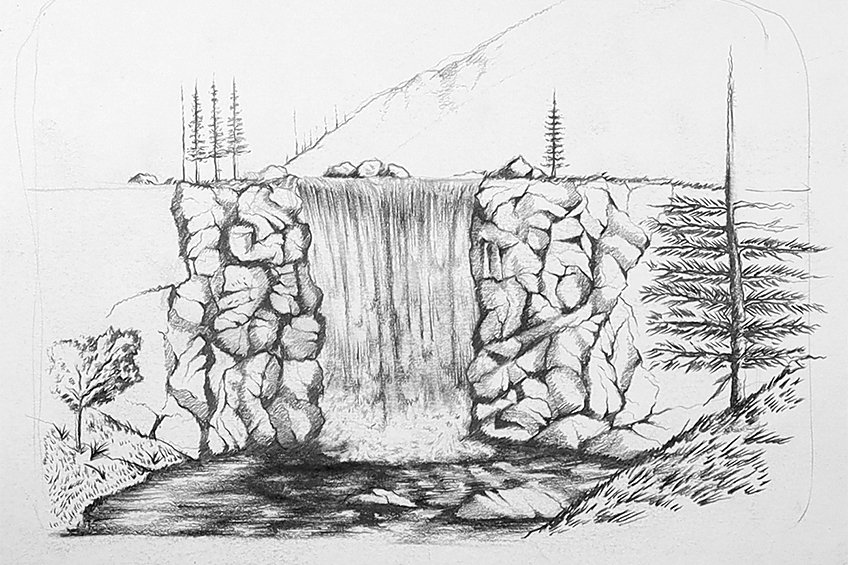
This gives the rock a more three-dimensional quality, thus making it more realistic.

Make sure that you work on the details within the foreground, as this is an essential part of creating a realistic waterfall drawing. By giving the features in the foreground the most detail, we emphasize the quality of objects being visible nearby.
Step 6: Adding Final Details to the Waterfall
Take a moment to work on the rushing water by using both pencil and eraser to create some negative strokes and to add in some linework. We can also add subtle U-shaped arches in the water to establish the falling quality of large masses of water.
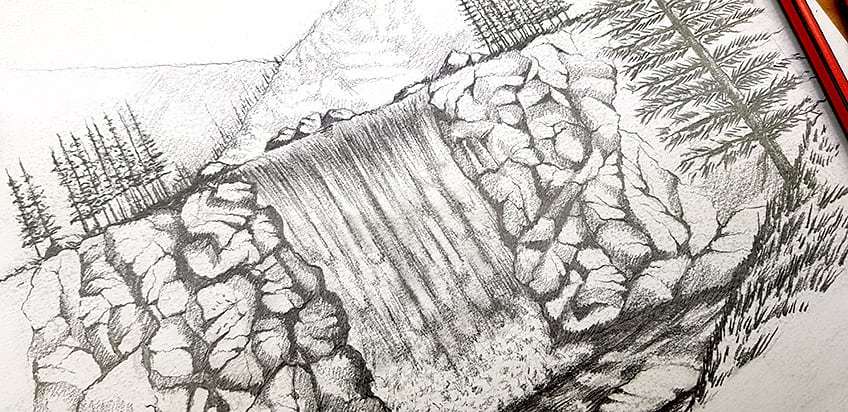
Make sure you keep the crash at the bottom of the waterfall light, which will create the effect of crashing water. Use your eraser to create vertical streaks in the falling water and to erase any unnecessary marks in the crashing water.
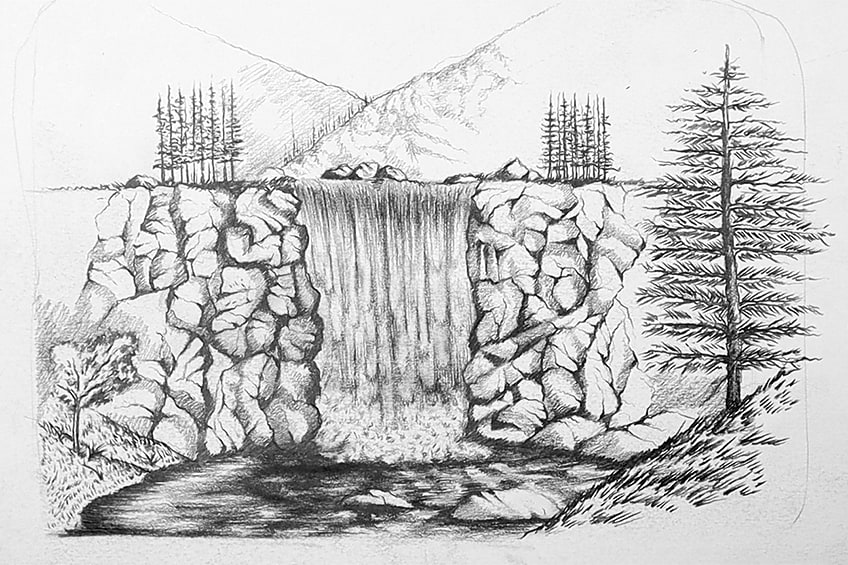
From there, erase any little smudges or silly mistakes within your drawing. And that is the process for a waterfall drawing! Most importantly, remember to take your time and trust the process.

Tips to Remember
- Use the eraser as a tool for drawing. Using the eraser is a great way to create clean, negative strokes, especially in the falling water of the waterfall drawing.
- Take your time with early sketching. Establish the scene with lighter layers of sketching and then only start adding in darker shading.
- Consider depth. Think about scale within the landscape to establish depth in the scene for a more realistic waterfall drawing.
- Think about different mark-making styles. Consider different styles of linework and shading for different textures and features.
- Trust the process. Be patient and allow the drawing to slowly unfold- the more time you take, the more likely you are to end up with a realistic waterfall drawing.
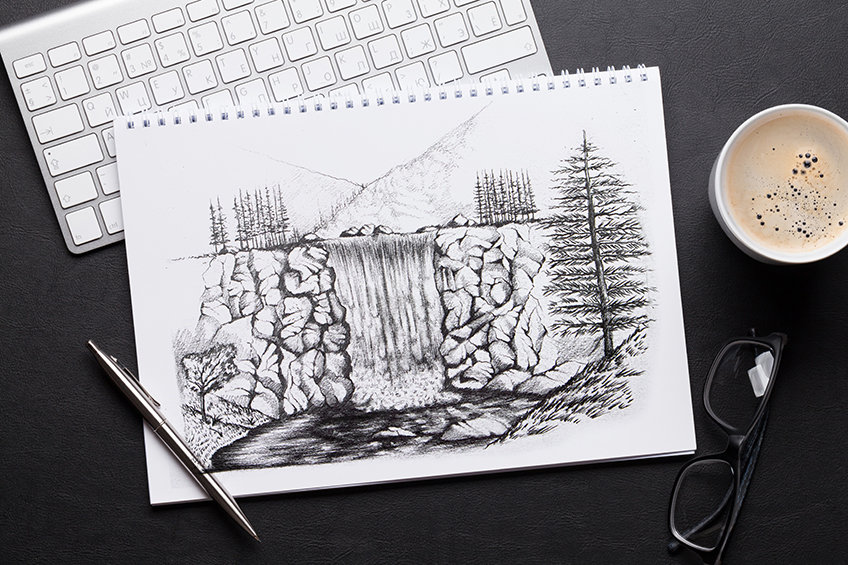
Waterfall drawings are not just about the waterfall itself, but are landscapes that encompass various elements that work together to create a realistic waterfall drawing. This means that you will want to think through the entire scene, including various depths of the field and how to integrate features at different scales. In this easy waterfall drawing, you get the opportunity to create this through the process of a few simple steps.
Frequently Asked Questions
How Do You Draw Water in a Waterfall?
There are three types of water to draw in a waterfall that will make it more realistic. The first is the falling water that flows from the stream or river into the waterfall. This can be drawn with mostly vertical lines or strokes, which define a swift vertical motion in the water. Then there is the crashing water that hits the ground. This can be drawn in a more scribbled and jagged-like fashion, although, we want to keep this water quite light to describe the bubbling, foamy nature of the water. Lastly, there is the still water that we see in the stream below the waterfall. This water can be drawn with zig-zagging horizontal strokes to emphasize its soft rippling along a horizontal plane.
How Do You Draw Details Around a Waterfall?
There are many different ways to draw a waterfall, but, the most helpful way to contextualize the flow of the water is by the use of rocks. Drawing large and small rocks within the background and foreground is a great way to emphasize both depth and distance in the drawing. Another great feature to place within a waterfall drawing is that of trees. Utilizing features to emphasize the scale of the waterfall is essential. This means that if we draw smaller trees at the top of the waterfall, we further contextualize the scale of the waterfall. Depending on how small or large you would like your waterfall drawing to be is key to how large or small you will draw other features around the waterfall.
Matthew Matthysen is an educated multidisciplinary artist and illustrator. He successfully completed his art degree at the University of Witwatersrand in South Africa, majoring in art history and contemporary drawing. The focus of his thesis was to explore the philosophical implications of the macro and micro-universe on the human experience. Matthew uses diverse media, such as written and hands-on components, to explore various approaches that are on the border between philosophy and science.
Matthew organized various exhibitions before and during his years as a student and is still passionate about doing so today. He currently works as a freelance artist and writer in various fields. He also has a permanent position at a renowned online gallery (ArtGazette) where he produces various works on commission. As a freelance artist, he creates several series and successfully sells them to galleries and collectors. He loves to use his work and skills in various fields of interest.
Matthew has been creating drawing and painting tutorials since the relaunch in 2020. Through his involvement with artincontext.org, he has been able to deepen his knowledge of various painting mediums. For example, watercolor techniques, calligraphy and lately digital drawing, which is becoming more and more popular.
Learn more about Matthew Matthysen and the Art in Context Team.
Cite this Article
Matthew, Matthysen, “How to Draw a Waterfall – Create your Own Stunning Drawing.” Art in Context. July 26, 2023. URL: https://artincontext.org/how-to-draw-a-waterfall/
Matthysen, M. (2023, 26 July). How to Draw a Waterfall – Create your Own Stunning Drawing. Art in Context. https://artincontext.org/how-to-draw-a-waterfall/
Matthysen, Matthew. “How to Draw a Waterfall – Create your Own Stunning Drawing.” Art in Context, July 26, 2023. https://artincontext.org/how-to-draw-a-waterfall/.


