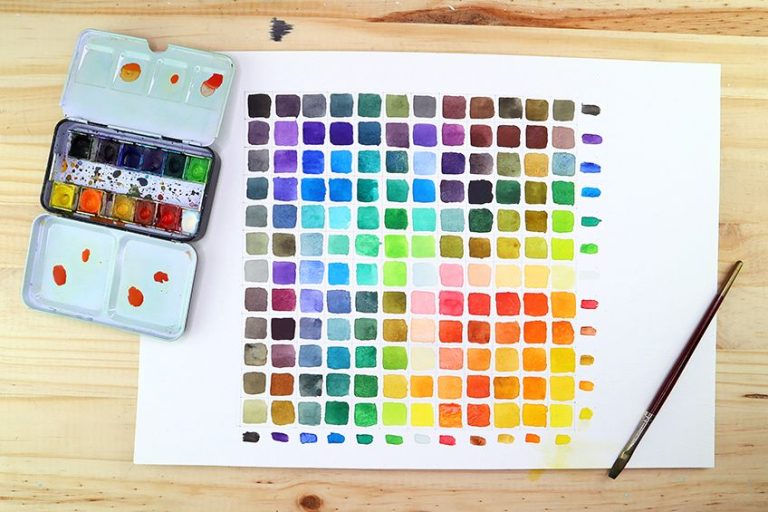
Watercolor Techniques – A Comprehensive Guide to Watercolor Basics
If you have ever looked at watercolor art, you would have noticed how beautifully it flows. This medium is easy to be drawn to because of how fun and vibrant it is! When learning how to paint with watercolor, you must first discover and practice some essential watercolor techniques. Once you have learned all the watercolor basics and watercolor painting tips, you should know how to paint with watercolor properly, as well as be able to explore how to watercolor more in-depth. In this easy watercolor painting tutorial, we will give you all the important watercolor basics to help you on your journey into the magical and beautiful world of painting with watercolors. Let us get started!
Before You Start Painting With Watercolors
Watercolors are easy to get drawn into, but one must not rush and first make sure to learn how to watercolor correctly. Understanding these watercolor basics and learning about all the wonderful watercolor painting tips is very important if you want to create beautiful pieces. Luckily, learning this medium is easy, watercolor paintings are quite literally for everyone, no matter their skill level. Before you start painting with watercolors, learning these watercolor techniques will greatly benefit you and your future with this medium. Remember to relax and have fun!
Materials Needed
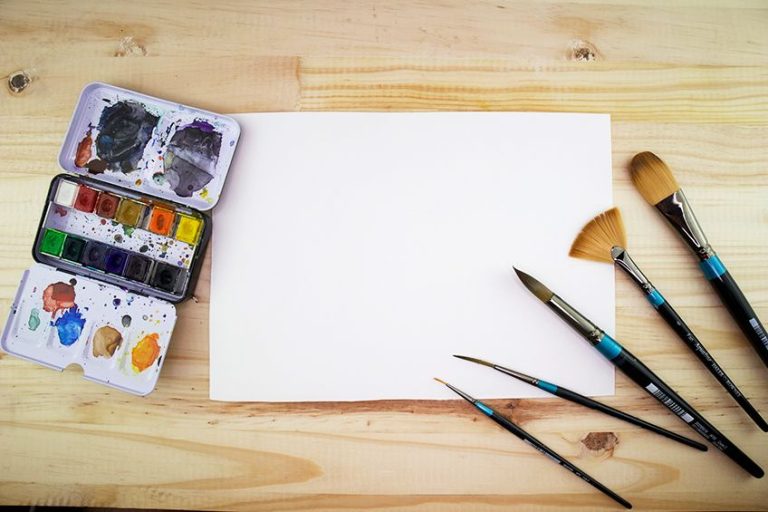
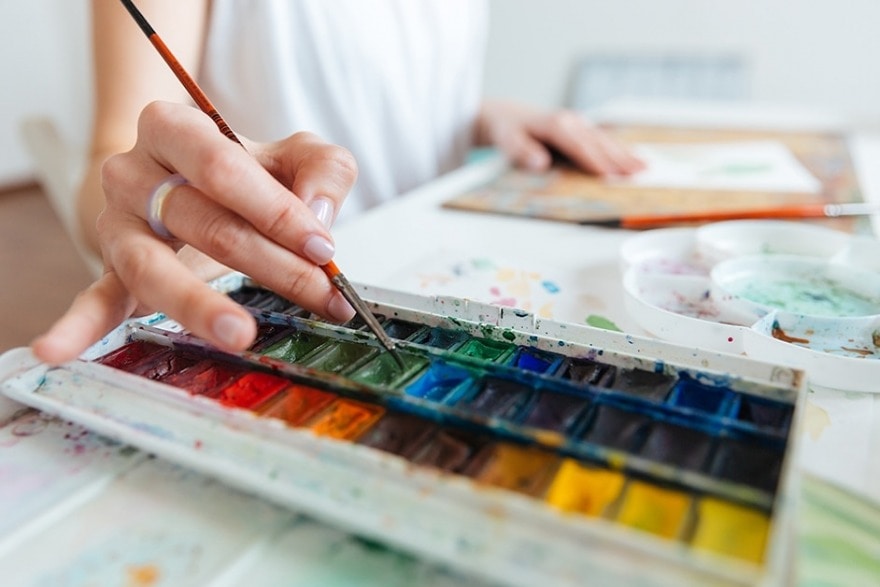
First things first, when learning how to paint with watercolor, you will need good-quality paper. The best type of paper to use is a 300 GSM or higher grammage paper which can be purchased at most craft stores or online. You will also need some good-quality brushes specifically made for easy watercolor painting. Of course, you will need paint in order to create your artwork.
Your choices are endless and completely depend on what you can afford and what is available to you.
Always, where possible, purchase the best quality paintbrushes you can afford. Higher quality products are easier to use and also last for longer. Last on our list of needed materials is a roll of masking tape. This is to ensure your paper does not move while you are painting with watercolors. Here is a list of the materials you will need:
- A set of watercolor paintbrushes
- Watercolor paper of at least 300 GSM
- A watercolor paint set
- A ruler
- A roll of scotch or masking tape
Proper Preparation
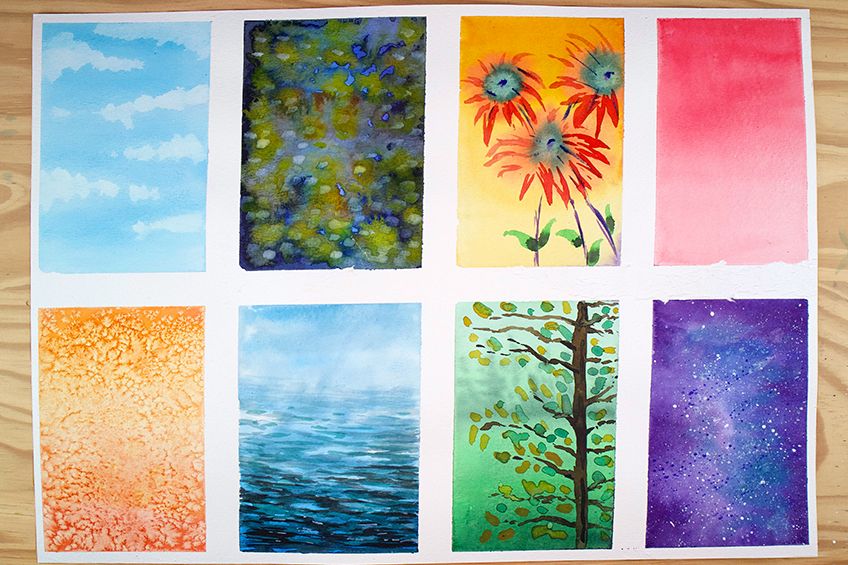
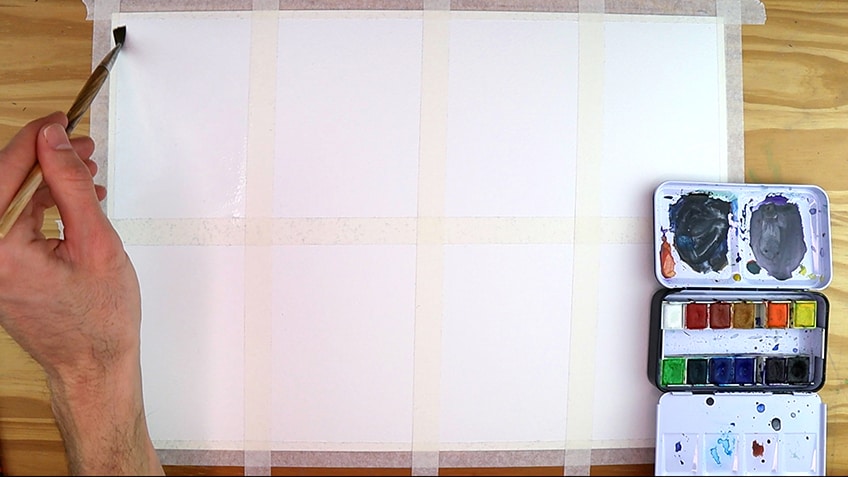
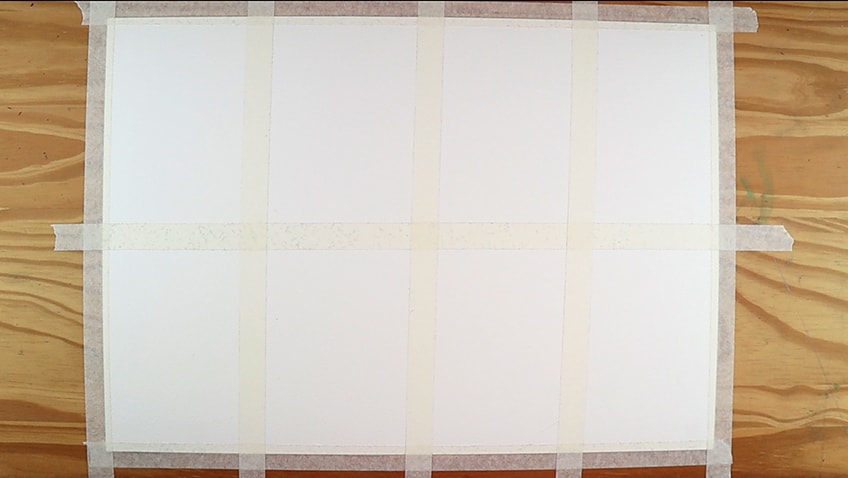
If you want to be able to paint with watercolor, decent paper is very important. Without good paper, your painting will never reach its full potential. Poor paper quality will affect even the best artist’s work. Another factor to take into account is that when we use this medium, we are using water. This means that our paper needs to be able to withstand the water and not warp. Using scotch or masking tape to hold your paper down will help keep everything in place and restrict your paper from shifting. For this “how to watercolor” tutorial, we have divided our paper into eight sections using a ruler and some masking tape. Resulting in eight equal spaces to practice each of the upcoming watercolor techniques.
A Beginner’s Guide to Watercolor Techniques
When painting with watercolors, you will notice that they are hard to control. The paint tends to go where it wants, making it a very loose medium. You need to accept and allow this lack of control and let the paint move, so being relaxed is important. You will struggle with watercolor basics if you cannot let go of control or perfectionism.
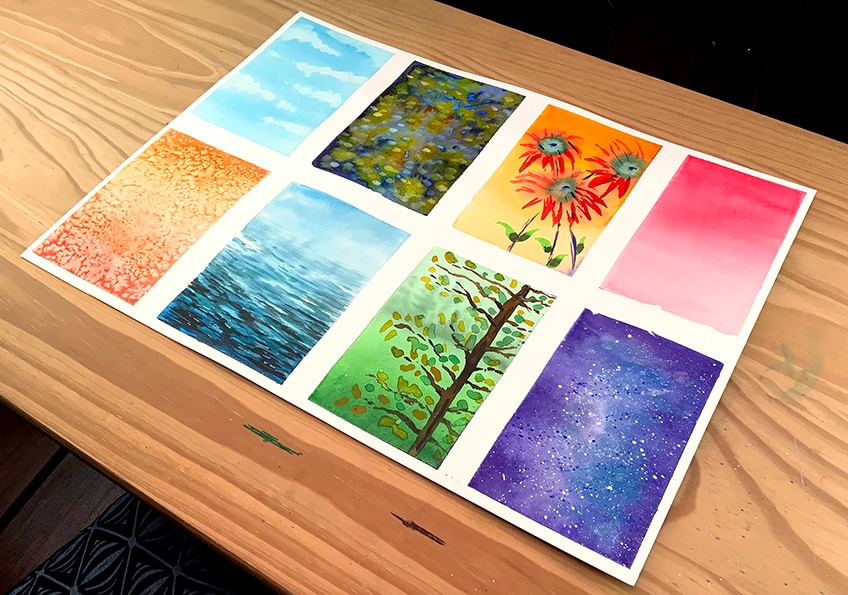
By learning these watercolor painting tips and watercolor techniques, you should be able to eventually gain confidence as well as create a small amount of control within your artwork. We will now teach you eight different watercolor techniques and you can try each one out on the demarcated space within your paper.
Remember to relax and try to be carefree – your artwork will be all the better for it!
Paint Lifting Technique
Lifting is a useful watercolor technique when one wants to make negative space to paint within or to create effects such as clouds or light marks. This specific technique involves actually lifting the paint from your paper’s surface. Here we show you how to make clouds using the lifting technique.
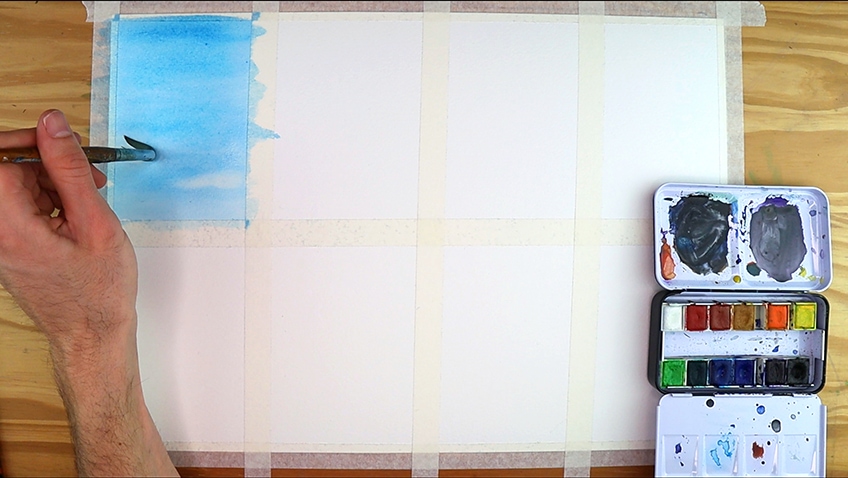
To start, you will paint your first block with a light coat of water. This is an essential watercolor basic that you will use for all your artwork. When your water is thinly spread over the demarcated block you can use some blue watercolor paint. Apply the paint all over the section of the paper and use a lighter shade. You now need to act quite fast as the paint needs to still be wet in order to lift. Using a clean, dry brush, firmly begin rubbing the paint off.
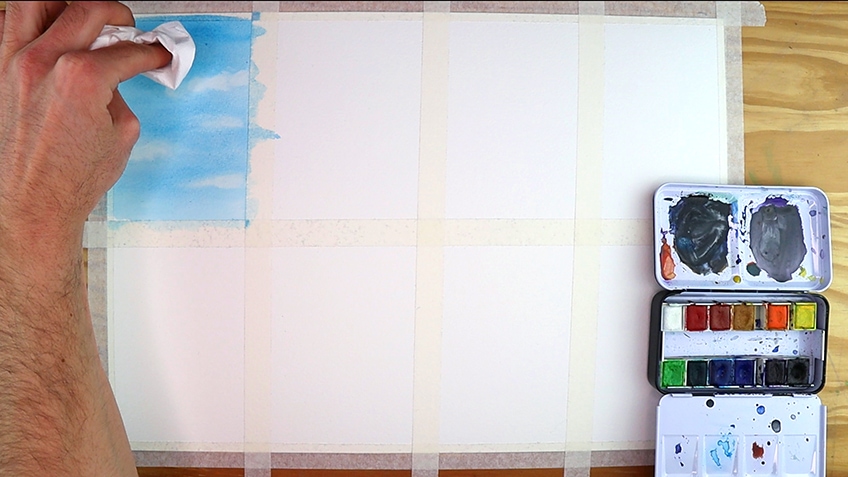
You could also use a paper towel or tissue paper if you prefer not to use a brush. Remember, you are creating clouds so squiggle your hand while you rub in order to give it a natural effect. This is one of the most well-known and easy watercolor painting techniques around. Everyone should learn how to do it.
There are so many different things you can create with this watercolor technique aside from clouds, your imagination is key!
Dark to Light Effect Technique
Usually, when we paint, we start in light and end in dark. This is what makes this watercolor technique so unique – we do it the opposite way! In other words, we use the darker color before the lighter one. You can start by once again coating your demarcated block with a thin water layer.
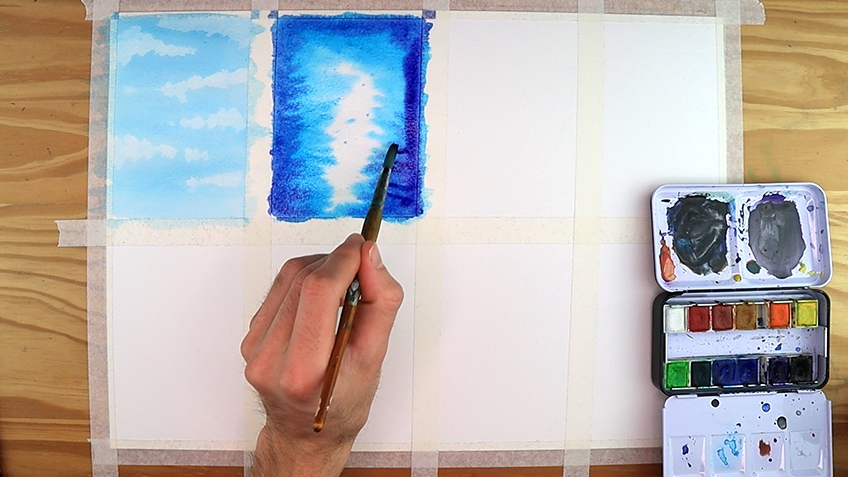
Now, you can apply a very dark color. Our example shows us using a dark blue shade of paint. You will start using a lighter shade, we have used the light blue that was used in our first block. You will again have to act fast when applying the darker blue.
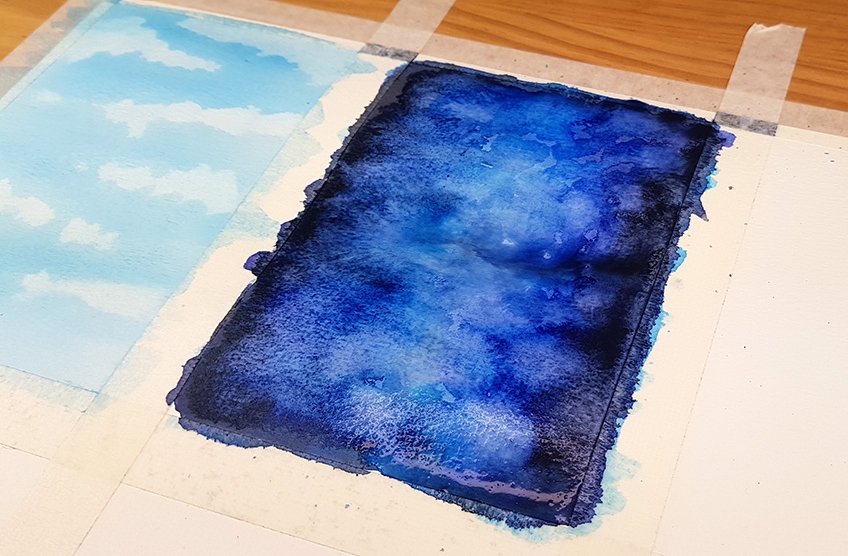
While still wet, you may want to try adding some other colors to the paper’s edges. These colors will seep and mix into your paint creating beautiful and unpredictable combinations of color. You will now need to allow the page to dry ever so slightly so that it is damp rather than wet.
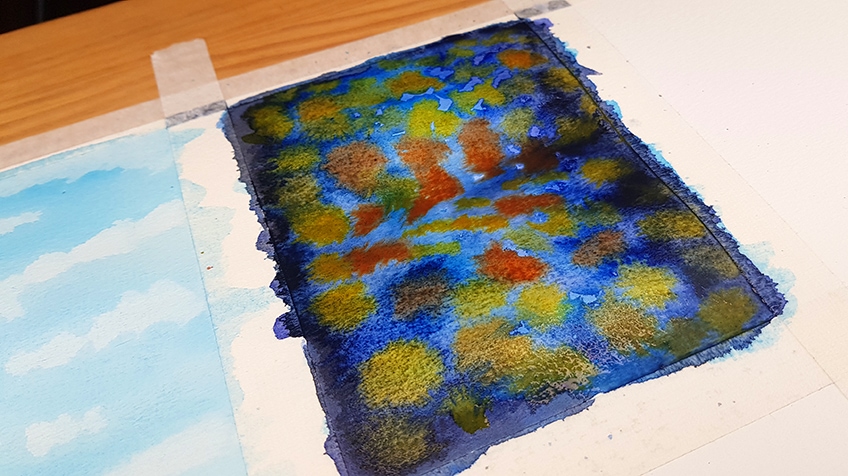
Next, we add a bit of color in splotches onto the damp paper. We have used yellow and red in our example. You are essentially creating what is known as a cauliflower back run. Allow your paper to dry totally, it should take roughly one hour. You can now apply more light color paint dots and flecks.
The end result will be quite abstract and organic, much like water lilies on a dark and beautiful pond or even fireflies in the night sky.
Seamless Gradient Technique
Our next watercolor technique is a sure watercolor basic. A simple, yet efficient, gradient. While you may think it is very easy, in order to create a seamless gradient does require proper technique. Your full attentiveness is needed and, if you do it correctly, you should be left with a beautiful result. Gradients are useful when painting horizons, sunsets, or landscape backgrounds especially.
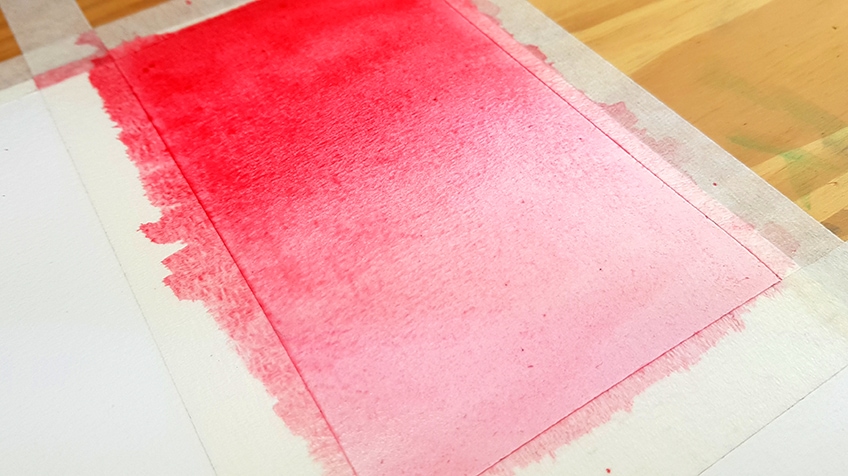
For our example, we have chosen a shade of red. Again, we will prime our demarcated area of paper with a thin water layer. Next, use a thick stroke of paint to the top of your paper. While the paper is still wet, we again must act swiftly in order to create a smooth and effortless effect. Using gentle, swift motions from left to right we now bring the paint down to the bottom of our paper section. You must try to stay consistent throughout the process. As your brush loses pigment and becomes less saturated, the amount of paint on the paper will decrease, ultimately creating the gradient effect.
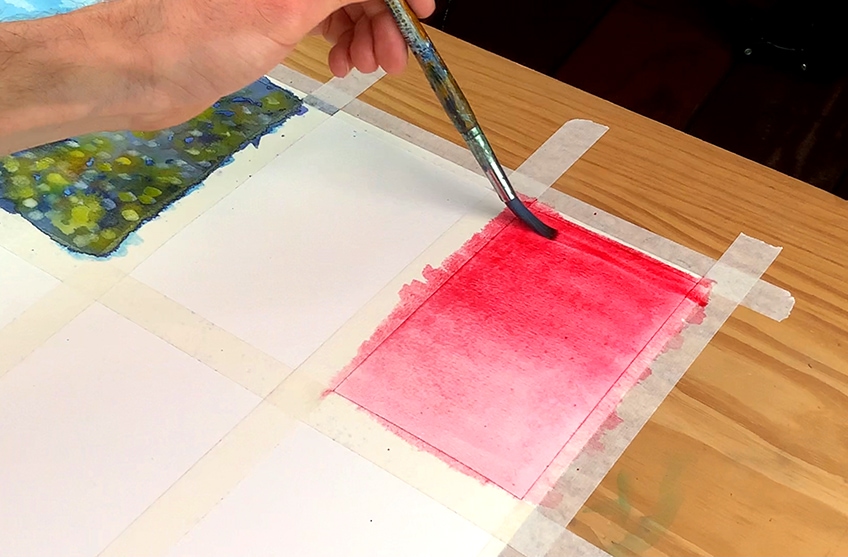
If you wish, you can go over the paint with another layer or even with a different color. This must be done while your page is still wet and using the same motion and movement pattern. To ensure a seamless gradient, you will simultaneously be stroking the paint downwards. After the page has fully dried, your gradient should appear completely seamless without any lines. You may find that you need to practice this one a few times in order to get it just right.
Another thing to remember is the amount of paint used for the space, if you start with too much, you will struggle to bring your gradient down to a very light color.
Splatter Technique
This watercolor effect is a firm favorite and helps create the perfect galaxy. It is fun to do and works very well when painting with watercolors. In our example, we have created a mesmerizing cosmos.
Just like before, we need to first apply our thin water layer to the section of paper to be used. We will now build up the layers, similar to the dark and light technique. Firstly, apply a light blue to your wet paper along both sides of the section.
See our image that follows for a better understanding of what to do. Making sure the page is still wet, add another layer of the same light blue shade. Next, we will add a layer of darker blue and we can darken it even more by using some purple or even a little bit of black.
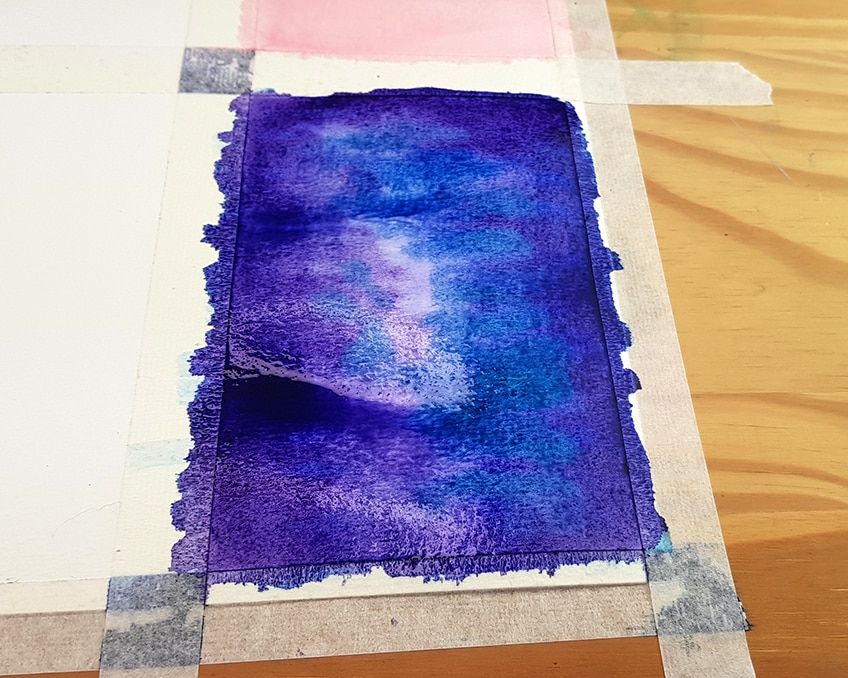
The center of the page should remain somewhat blank and unpainted as the colors will all seep towards it, creating a beautiful and unpredictable blend. Add some more purple and black along the sides once again to help darken it up and create more texture. You should notice the colors bleed into one another and sort of gather in the center, helping to create darker edges and a lighter middle. Your Milky Way or nebula is now taking form nicely.

Allow the page and paint to dry fully before doing the final touch of this watercolor technique. Use a paintbrush to drip or an old toothbrush and dip it into white paint. You can rub your thumb along the bristles of the toothbrush to create the splatters. If you are using a paintbrush for this, you will need to tap it. In our example, we have used an old toothbrush to create our spray of paint. If you accidentally drop a larger blob onto your art, some paper toweling should work in removing it if done while the paint is still wet.
When you are finally happy with your spray, you can allow the artwork to dry. It should look just like a little galaxy!
Wet on Dry Technique
We are halfway through our eight easy watercolor painting techniques and hope you are feeling more confident! Our first few involved using wet paint and wet paper. Now, we will try some wet to dry techniques. As the name suggests, we will paint onto a dry surface. It will help when adding details that you want to stand out prominently. We will create a mini landscape for our example.
First, we want to create a background to work with, so we will start with a thin coat of water evenly applied to the demarcated area Using a nice green, we will create a gradient, this time moving upwards and beginning at the bottom.
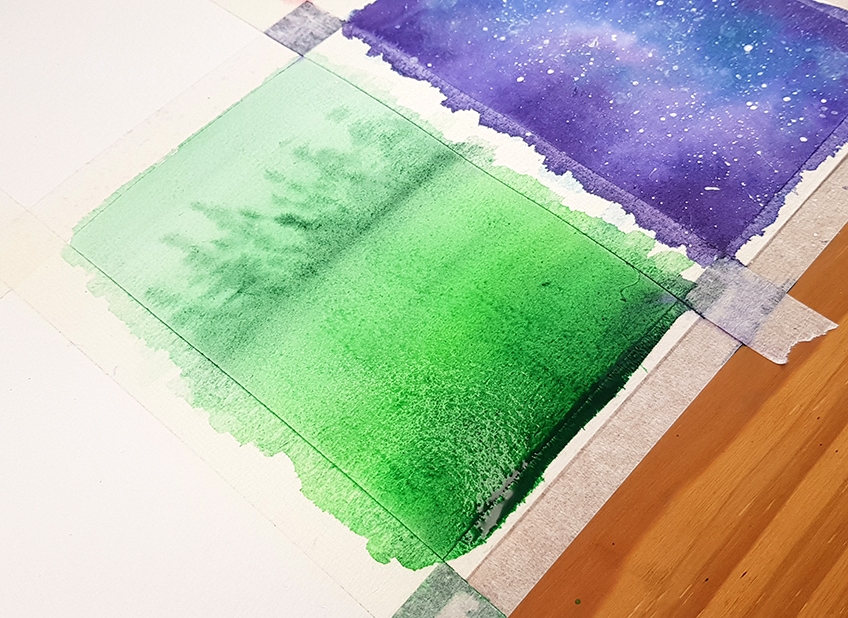
While our paper is still wet, we can add another coat of green at the very bottom of the marked-off section. This will help create contrast. Once done, you can make swift and quick side-to-side strokes, moving your hand up all the way to the top of the paper. The next step is to take your brush and saturate it with green paint, this is to paint the line as seen towards the top of the paper. Do not paint a line right across, but rather use short and little side-to-side markings which move upwards.
Your paper must still be wet for this to work correctly.
You should now have what looks like a row of trees in the distance. Once your page has completely dried, you will have a beautiful background to paint on. Using this technique allows you to create beautiful watercolor backgrounds with more detailed foreground paintings. You can now mix up or choose a dark brown shade of watercolor paint and create one vertical line along the page. See the image that follows if you are confused.
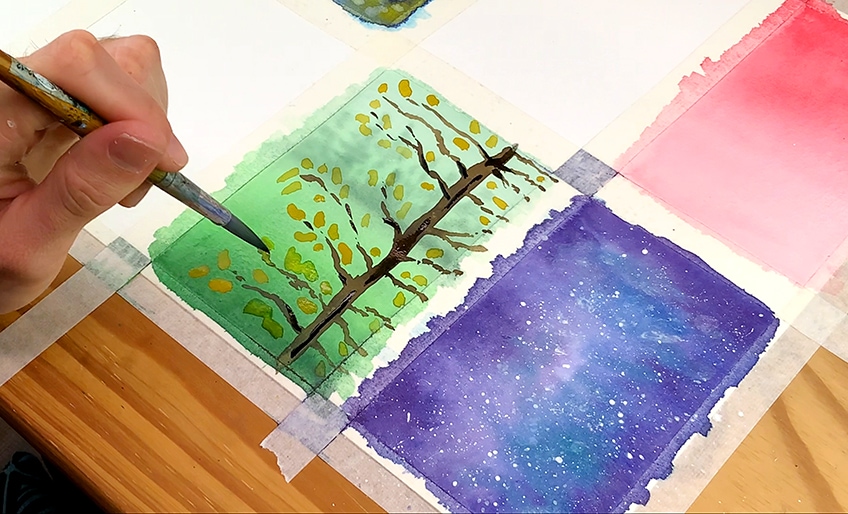
This line will be the trunk of your tree. Now, we will create branches that will extend horizontally from the trunk. To help create a natural-looking branch, keep your wrist loose and lightly allow it to squiggle. Allow this layer of paint to dry and then you can add leaves to your branches. Use some yellow paint and create flecks along each tiny branch in a dotting action. Again, you will need to add some detail when this layer of paint is fully dried.
You could use darker brown to create more depth on your tree trunk and branches and add some darker leaves using various green shades.
Wet on Wet Paired With Wet on Dry Technique
For this part of our easy watercolor painting tutorial, we will learn how to paint water using watercolor paint! You can use this method to create an ocean or a lake. The same method is often used when painting a sunset with watercolor or even for other kinds of landscapes. Water, however, may seem quite challenging to create with paint. That said, if done correctly and the right technique is used, you should be pleased with your end results. First, we once again paint our section with a thin water layer.
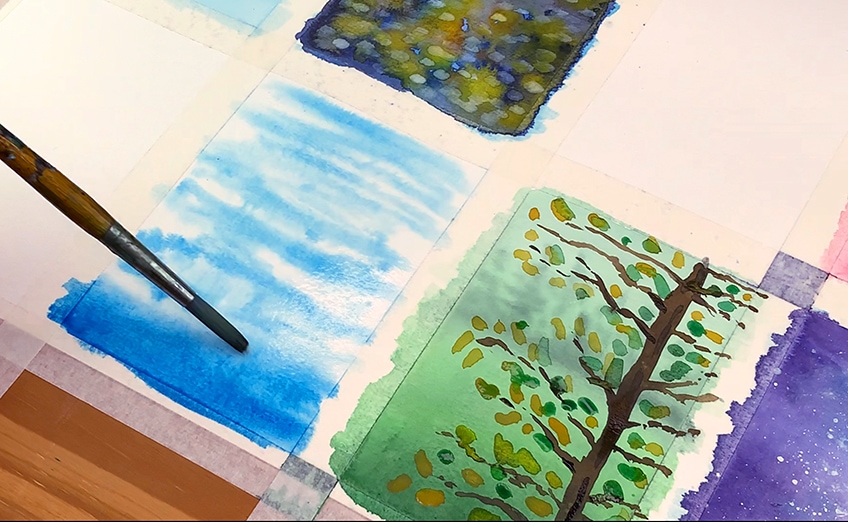
While still wet, we will use a very similar action as we used for the gradient effect but, instead of covering the entire page or section, we will create negative space by pulling our hand back to interrupt the motion. While the paint is still wet, we will create some darker contrast using a small amount of black or very dark blue. Then, using the same darker blue shade of paint we will put darker strokes starting at the bottom of the page. You should fade this darkness as you reach the top of the page by using less frequent strokes with less pressure.
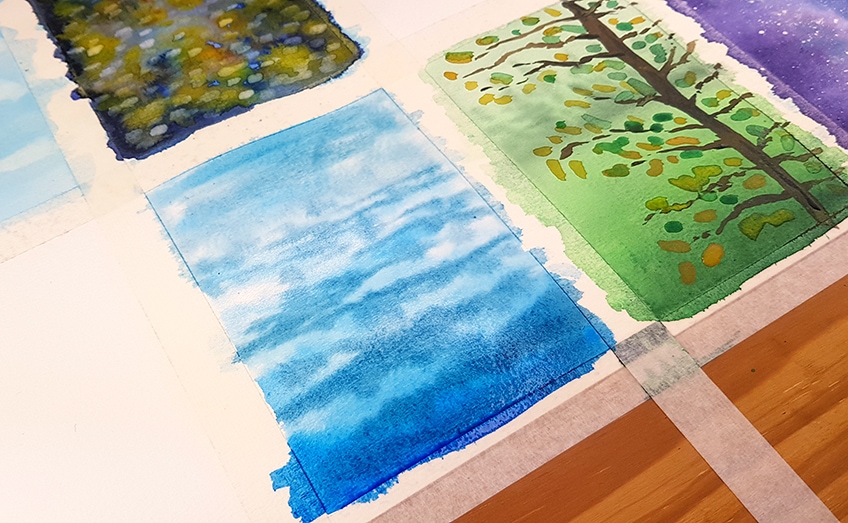
The idea is to allow the darker blue to seep and intertwine with the lighter blue paint. This will help create the illusion of water or waves and create depth. Once this layer has dried, we will add some blue strokes again. Use a side-to-side motion while moving your hand up the page swiftly, allowing the color to fade as before. You want your strokes to be slightly jagged, so allow your wrist to move freely from side to side.
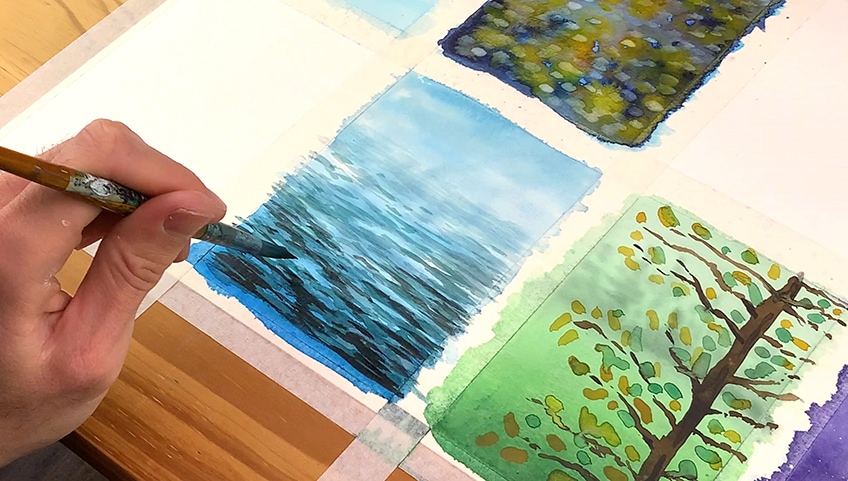
At the same time, you want to also move your hand in a slight wavy up-down motion and then allow it to dry again. Lastly, you will apply your dark blue onto the paper. Focus on the bottom of your section to create depth. Remember to be cautious when using your dark paint and be wary of applying too much. You still want the light colors to show in order to create the rippled water effect. Every layer must dry before another is applied, so take your time and be careful of over application.
To finish your piece off, you can add some final flecks and strokes with white paint to help create the light reflections on the water.
Back Runs or the Cauliflower Technique
The black runs or cauliflower technique is very common and used quite frequently amongst watercolor painters. It can help create some very beautiful color combinations and effects that are hard to replicate. In our mini-tutorial for this technique, we will show you how to create abstract flowers. Another excellent method to master.
First, we apply a water layer to the demarcated section of the paper. You can use a bright and vivid orange color or mix one yourself. Apply a stroke at the top of your section and allow your hand to move left and right as you move towards the bottom of the page.
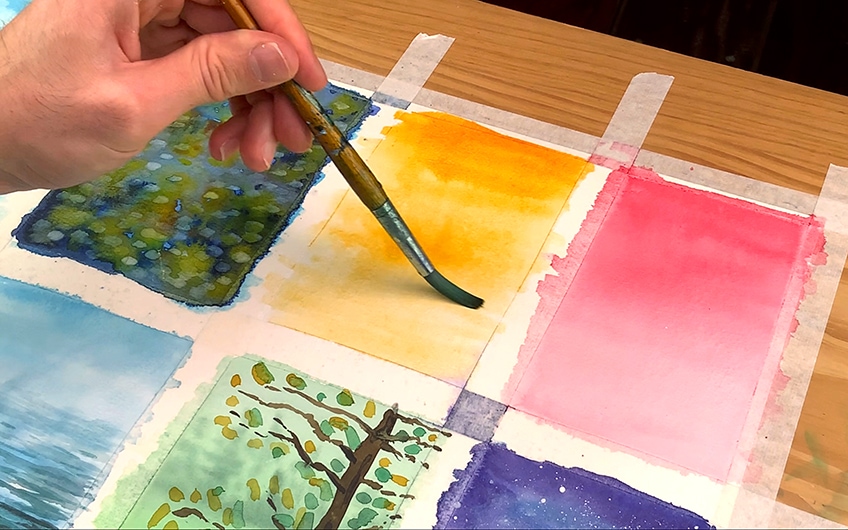
This time, we want to leave the page to dry until damp and not fully dry. You will now select another color (we have used red) and dot the page with a blob of paint. Once the red paint seeps into the dampness of the page, you can add another blob of color over it. We have used blue for this. You will notice that the paint has what is called a “back run effect” and it stops as the page dries. This creates a beautiful and classic watercolor effect.
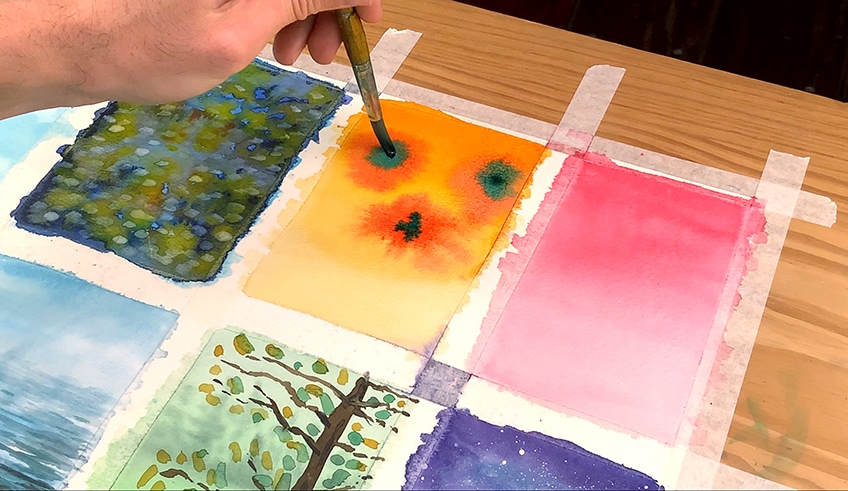
Again, when the blue paint is damp, we will again apply another color. In our example, we have used white. As can be seen in the image above and below, you are creating a layered flower. This flower will have lots of unique contrast and color because you allowed it to seep in and then applied more color before it dried completely. Once the page has dried you can start adding more detailed and general lines to your image. Adding a dot to the center of each flower will also help give it depth and that little bit of extra detail. Add more of these where you feel they are necessary. To polish this piece off, you can add some green to the petals.
Do not get too precise about this or the shape of the petals. Keep your hand loose and body relaxed.
Salt and Watercolor Technique
Head to the kitchen and grab some salt to master this awesome and fun watercolor technique. Often, the best effects can be achieved by using items that are not normally in your artist’s closet. If you want to paint abstract pieces or even snowflakes falling, the salt technique will be right up your alley.
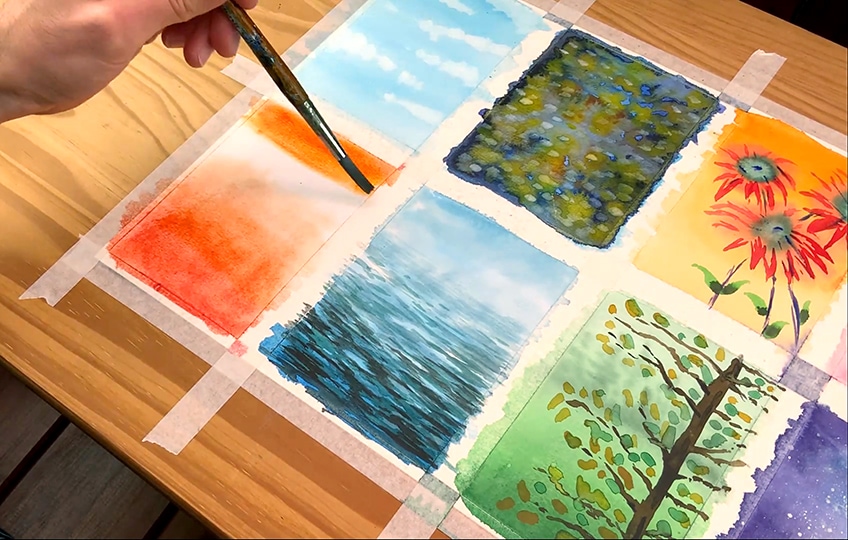
You should have one last demarcated section of paper left. Begin by applying a thin and even layer of water to this section in order to prime it. Now, choose an orange paint or mix up your own (make sure if you are mixing your own colors to do so beforehand because you do not want the paper to dry). This time, you will be fading your color from both top and bottom with the lightest color being in the center of the page.
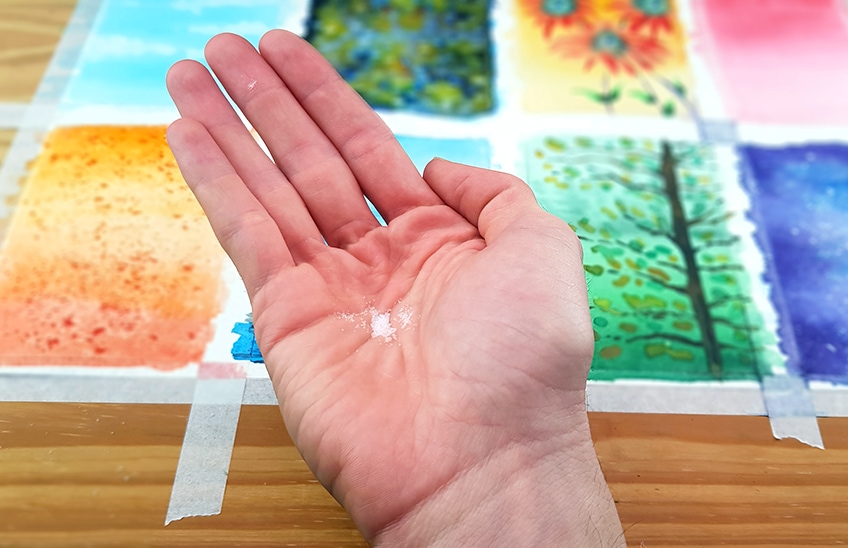
While your paint is still wet, take a pinch of salt and sprinkle it onto the painted section. Remember to act fast as you need the paint to be wet, not damp. You will see that once the paint has dried, the salt has pulled some of the pigment off of the page. The effect can be very interesting and organic as well as very unique. This is the perfect effect for a desert landscape, a snowy landscape, or other types of surfaces. Your imagination is all that you need!
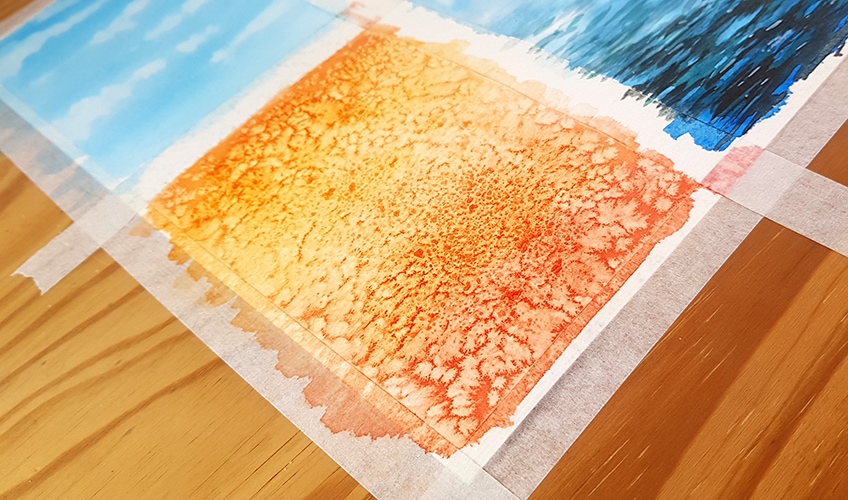
When the paper is completely dry, you can simply use a finger to glide over the image and remove the salt. A quick and easy way to create a beautiful and unique effect on your watercolor artworks.
Now that you have completed all eight watercolor techniques, you can carefully remove the masking tape. And, that’s that! You have learned eight of the watercolor basics needed to create stunning but easy watercolor paintings. Learning how to watercolor has never been more fun!
Easy Watercolor Painting Tips and Tricks
This medium is so diverse and beautiful and there are so many more exciting and interesting techniques you will still learn. Experimentation is always encouraged when it comes to watercolor painting, there are no hard and fast rules. That said, here are some more watercolor painting tips to help you on your way.
- Slow and steady wins the race. Take breaks, breathe, go slowly! Rushing will never give you the best results when painting with watercolor.
- Tape down your page every time. This underestimated tip could be your saving grace because it will prevent your page from warping and also prevent it from moving
- A porcelain plate is a great artist’s palette. This is because of the smooth texture of porcelain, which helps tremendously when mixing and blending watercolor paint.
- Jars of water are very useful. Keep a jar of water on your desk to make the brush clean up faster. You will want to clean your brush before loading it with a new color every time.
Watercolor painting is so much fun, why would you not want to dabble in this beautiful art form? Not only is it a relaxing way to unwind, but it is such a rewarding medium. Once you begin learning the various techniques, many ideas will come to mind. Remember to allow that creativity to flow and your imagination to run free! We hope that our easy-to-follow tutorial has given you some motivation to get started with your watercolor journey!
Take a look at our watercolor painting techniques webstory here!
Frequently Asked Questions
What Are the Basic Watercolor Techniques?
There are quite a lot of different ways you can use watercolor paint, all of them resulting in different and beautiful effects. The most commonly used techniques are wet-on-wet or wet-on-dry. As you learn about watercolor and how to use these methods, you will soon realize that the door has only just been opened. There are so many different techniques that fall under each method. For the wet-on-wet method, you prime your paper with a thin layer of water and then apply wet paint. For the wet-on-dry method, you allow your surface to dry first, or paint on a blank page without any water priming.
What Are the Top Watercolor Painting Tips?
When you first start learning how to watercolor, you should start with a good quality paper of at least 300 GSM or thicker. You will also want to make sure to use masking tape to tape your page down. This is to avoid the paper from warping and of course, to keep your page in place while working with it. It is also highly beneficial to purchase the highest quality brushes you can afford as good brushes make painting so much more pleasant. They will also last longer!
What Are the Different Watercolor Techniques?
There are so many different watercolor techniques out there for you to try, and each technique can be adjusted. experimented with. It is entirely possible that while you are learning how to watercolor that you stumble upon a technique or method that nobody else has! Some of the most commonly used watercolor techniques include the gradient technique, which is when you paint a seamless fade of color. Another awesome one to try is dry brushing, which helps to add texture to your artwork as well as some details.
Matthew Matthysen is an educated multidisciplinary artist and illustrator. He successfully completed his art degree at the University of Witwatersrand in South Africa, majoring in art history and contemporary drawing. The focus of his thesis was to explore the philosophical implications of the macro and micro-universe on the human experience. Matthew uses diverse media, such as written and hands-on components, to explore various approaches that are on the border between philosophy and science.
Matthew organized various exhibitions before and during his years as a student and is still passionate about doing so today. He currently works as a freelance artist and writer in various fields. He also has a permanent position at a renowned online gallery (ArtGazette) where he produces various works on commission. As a freelance artist, he creates several series and successfully sells them to galleries and collectors. He loves to use his work and skills in various fields of interest.
Matthew has been creating drawing and painting tutorials since the relaunch in 2020. Through his involvement with artincontext.org, he has been able to deepen his knowledge of various painting mediums. For example, watercolor techniques, calligraphy and lately digital drawing, which is becoming more and more popular.
Learn more about Matthew Matthysen and the Art in Context Team.
Cite this Article
Matthew, Matthysen, “Watercolor Techniques – A Comprehensive Guide to Watercolor Basics.” Art in Context. April 13, 2022. URL: https://artincontext.org/watercolor-techniques/
Matthysen, M. (2022, 13 April). Watercolor Techniques – A Comprehensive Guide to Watercolor Basics. Art in Context. https://artincontext.org/watercolor-techniques/
Matthysen, Matthew. “Watercolor Techniques – A Comprehensive Guide to Watercolor Basics.” Art in Context, April 13, 2022. https://artincontext.org/watercolor-techniques/.


