How to Paint a Sunset With Watercolors – Guide to Depicting Light
Learning how to paint a sunset with watercolors is such a fun exercise to practice with watercolor paints. There are many ways to paint a sunset, however, in this tutorial, we will learn how to paint a sunset with watercolors using various unique tricks. When painting a sunset in watercolor, we will find that there is such a freedom to explore various watercolor techniques that work well with the formation of a sunset. Learning how to paint a sunset with watercolors can be understood through various methods, however, this tutorial breaks down the process in a few simple steps. Sunset water paintings can look beautiful when explored with various colors, so let us explore how to create a colorful landscape.
A Step-by-Step Guide on How to Paint a Sunset
There are many ways to learn how to paint a sunset with watercolors, however, in this tutorial we will learn some interesting tricks that can be really helpful in creating features within the painting. We begin with creating the sky which we will be followed by creating the ocean.
In this tutorial, we will use a coin as a way to create negative space in the painting. This will be the way we create the lightest color in our painting, which will be the sun. We will find that as we learn how to paint a sunset with watercolor there are really simple ways to create qualities like water and clouds. Again, this tutorial is a guide to teach you a specific way of how to paint a sunset with watercolors. With that being said let us go through the various steps.
Step 1: Dividing the Page
Firstly we want to divide the page. When painting a watercolor sunset, you don’t want the page to be in equal halves. This is because the ratio of water to sky should never be even as it generally has a better aesthetic look. Try to divide your page just under halfway with some scotch tape.
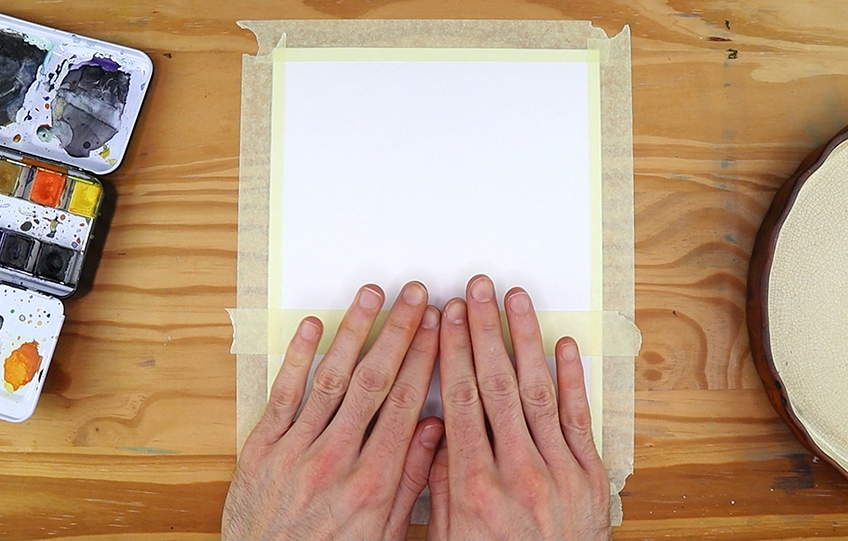
Step 2: Painting the Sky
Firstly, we want to have a coin. The coin is going to create a negative space that will be the brightest part of the sun. With water on our brush, hold your finger pressed down onto the coin where you would like your son to be placed. Then begin to add water around that coin with your brush.
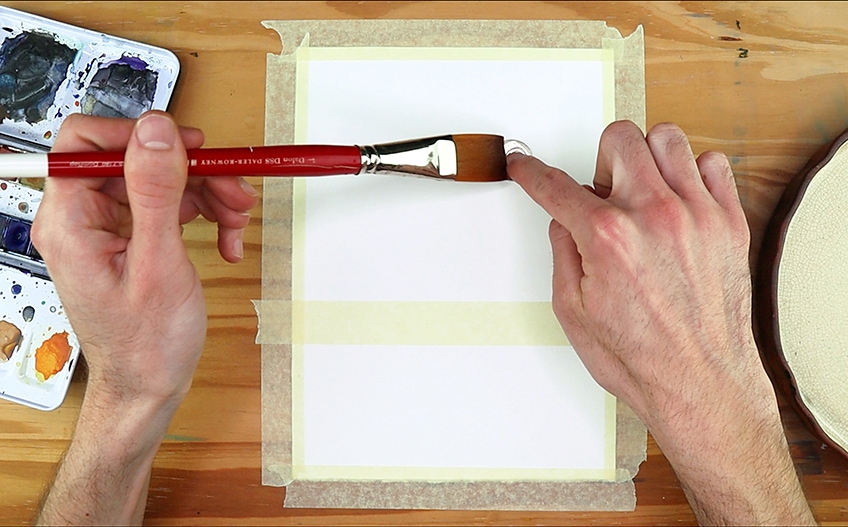
We want that circle area to be dry so that as we add color it will naturally repel from going into the dry area. We can now add our first layer of the sunset which can be any light color such as yellow.
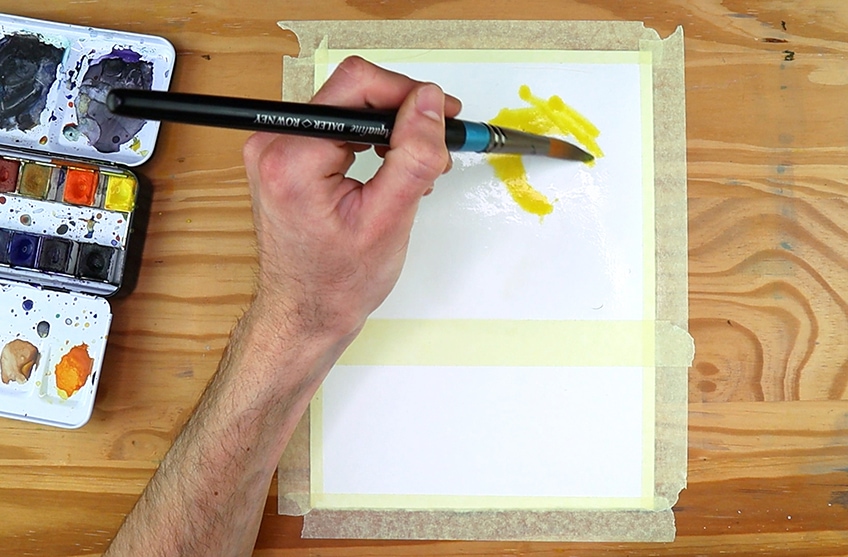
We want to fill the area where we will be painting the sky with our light color. This will serve as the base for the other colors that we will be painting over.
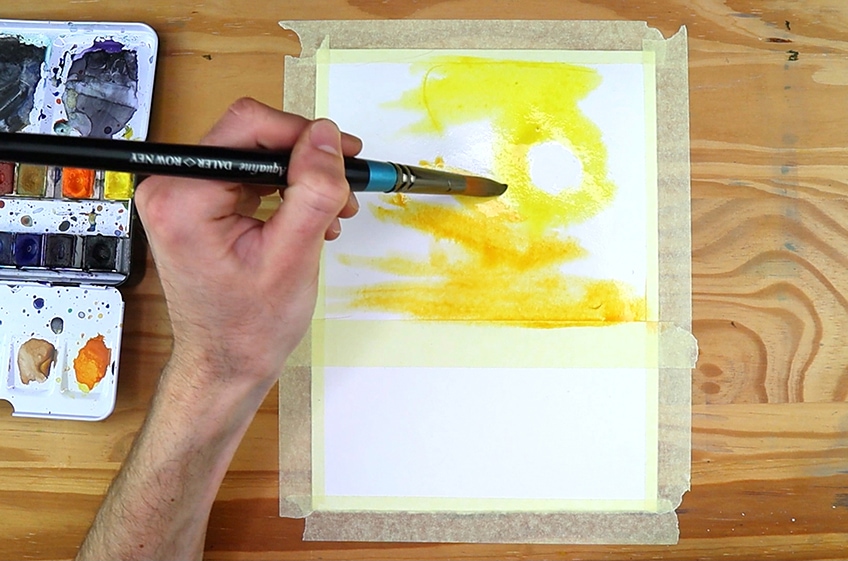
You can also add some highlights of orange into your already existing mix of yellow. Then proceed to make some strokes in your sky with your orange color to create a gesture of moody clouds. Sunsets are never the same so feel free to make all kinds of marks whilst the paper is still wet.
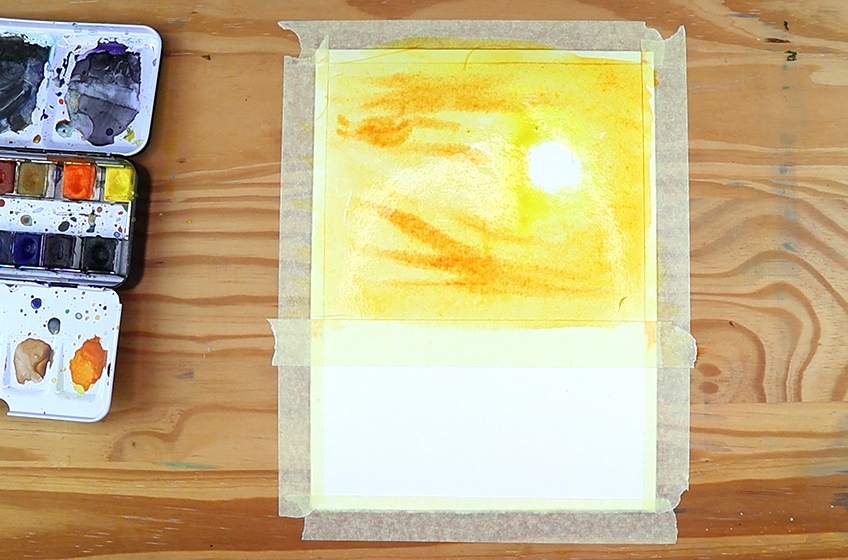
Step 3: Adding Color onto the Wet Surface
Whilst the sky is still wet, begin to be playful with color combinations that you might want to exist in your sunset. For example, a good idea is to slowly build from your yellow to darker tones moving from reds to blues and purples.
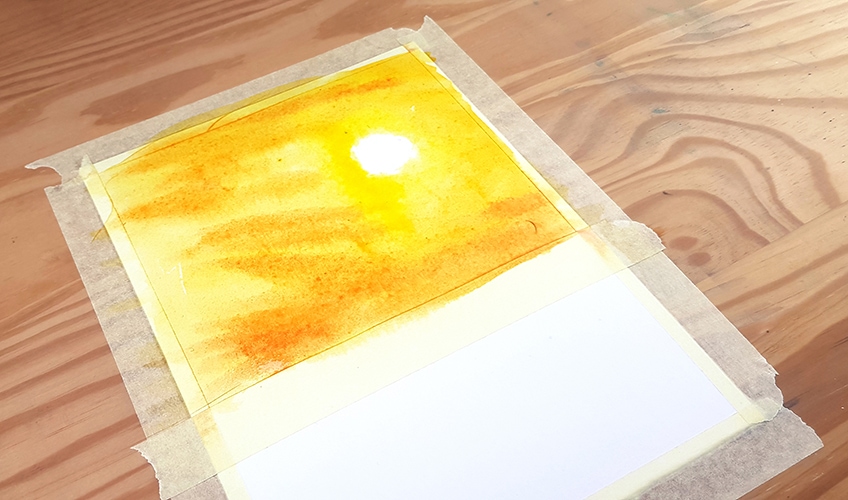
Try to be playful with how you apply these various colors in the sky. think about squiggle motions and linear strokes to imitate different types of cloud structures.
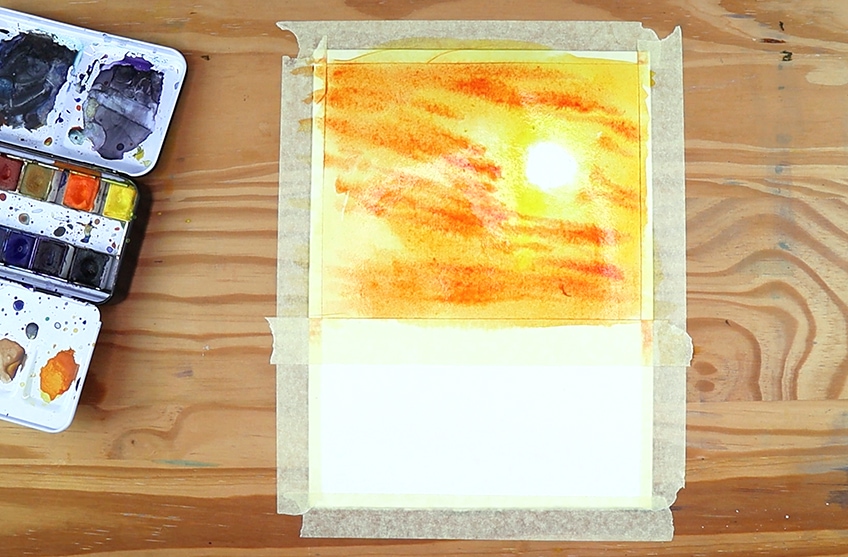
As you learn how to paint a sunset you should always consider that no sunset is ever the same as another. This means there is freedom in the mark-making process associated with how we create clouds and movement in the sky of our sunsets.
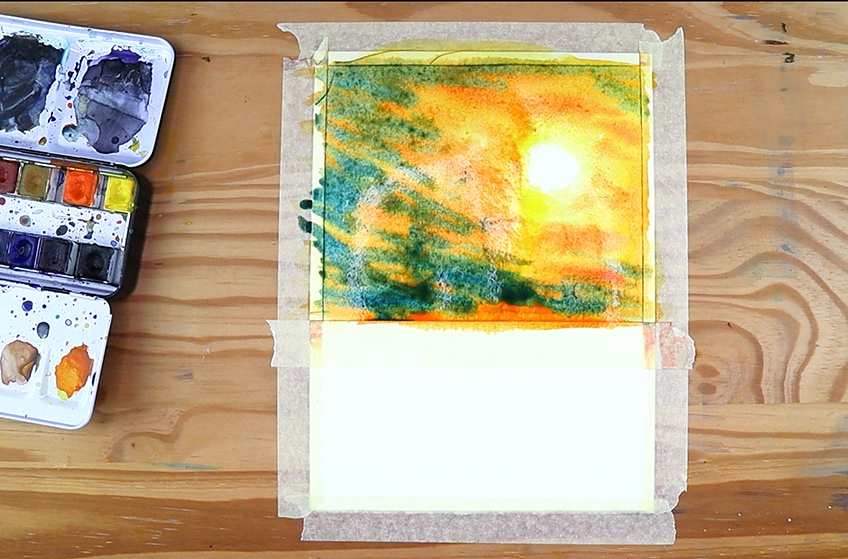
Sunset in watercolor can be really beautiful as the medium water quality allows for a lot of soft gradient shifts. Try to be swift and quote your application of new colors whilst the page is still wet. This will allow for the colors to merge more seamlessly.
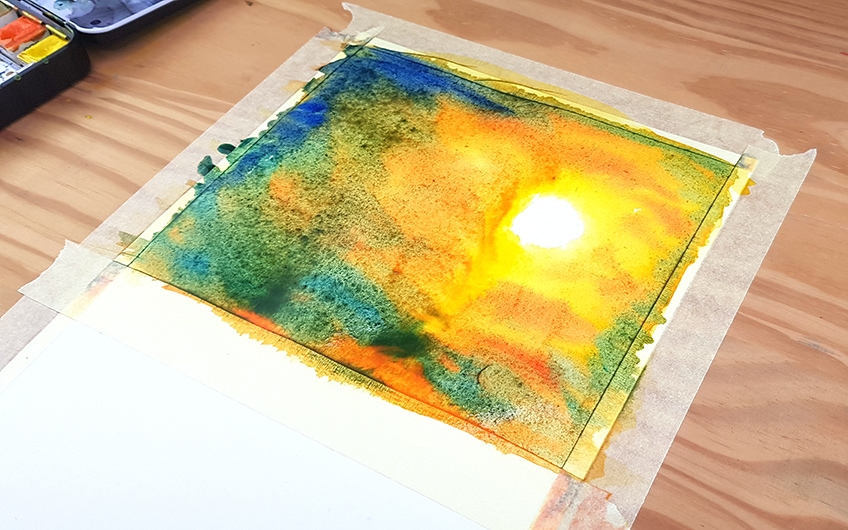
Try to also not dominate the lighter tones with your darker tones in your sunset water painting. A good suggestion of how to do this is by adding the darker tones within the corners of our sky. This allows for good contrast without the lighter colors being completely dominated.
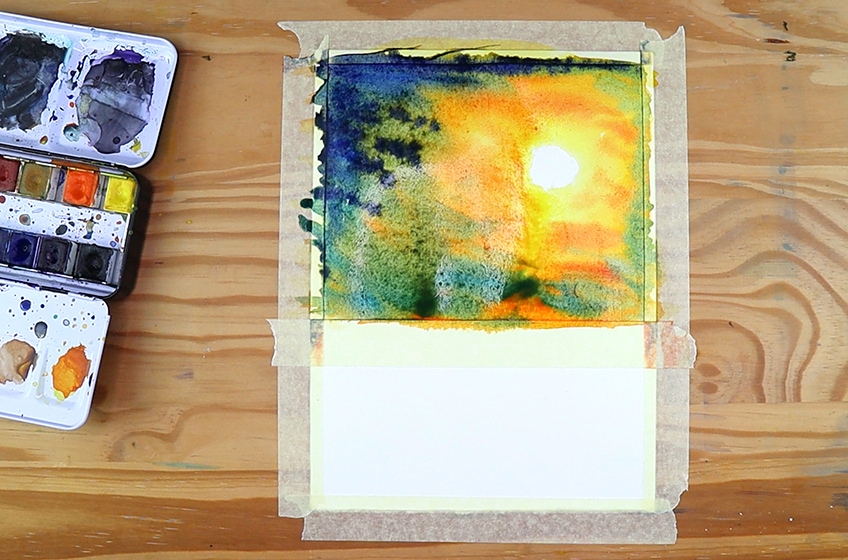
Step 4: Defining the Horizon Line
Once your sky has completely dried, we should be left with an interesting color variation within the sky portion of our painting. What we can do now is slowly and gently lift the masking tape off from the center of our page.
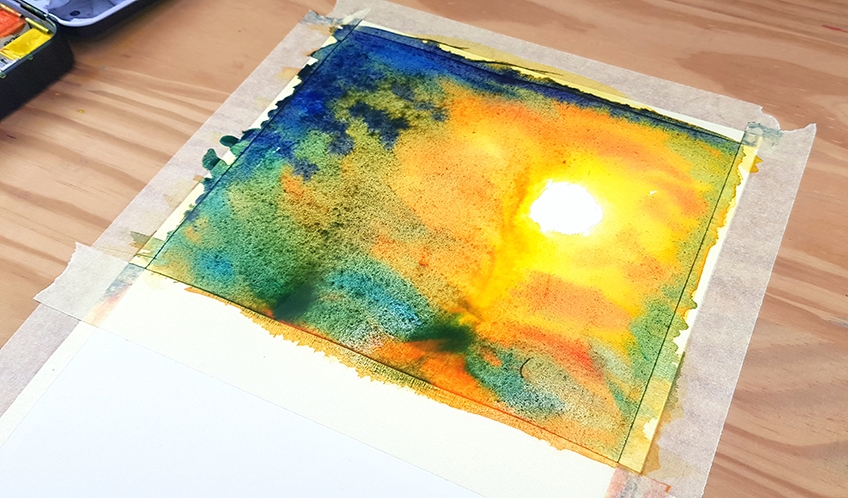
What we will do now is take a new piece of masking tape or scotch tape and begin to place it horizontally onto our page predominantly over the painted half of our page. However, we want a slight overlap of the scotch tape on the empty part of the page.
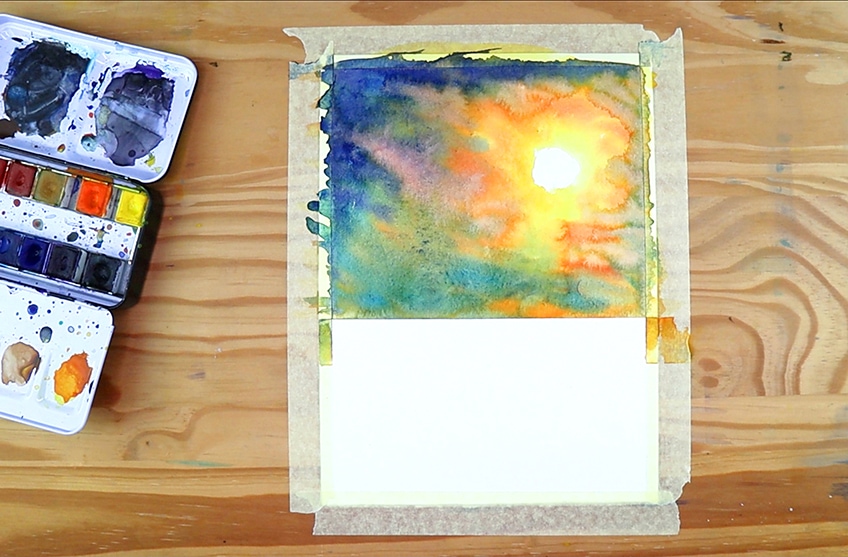
We want there to be a slight overlap of scotch tape placed horizontally onto the page where there would be a horizon line. This little overlap of the scotch tape is going to create a silver lining on the horizon that helps to distinguish the two parts of our painting.
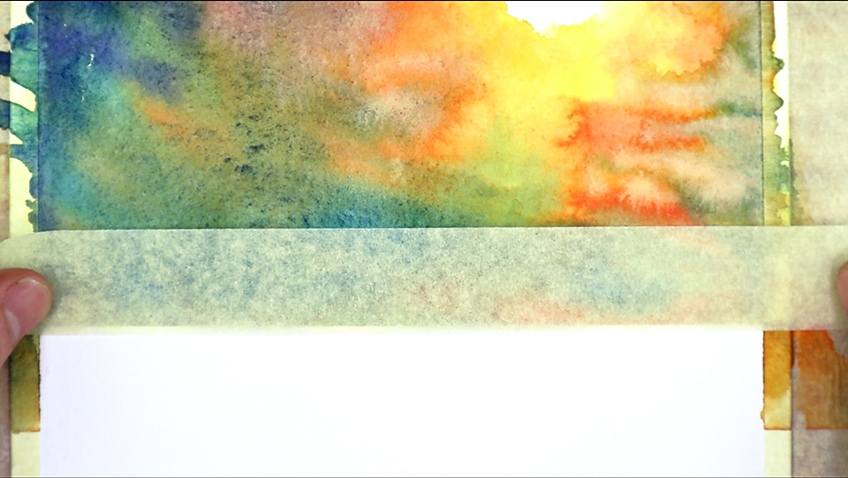
Step 5: Painting the Water Reflection
Once we have our scotch tape placed down horizontally on our page, we should have a slight overlap of the scotch tape placed on the portion of the page where we will paint the water. We can then proceed to take a clean wet brush and prim or page with a bit of water.
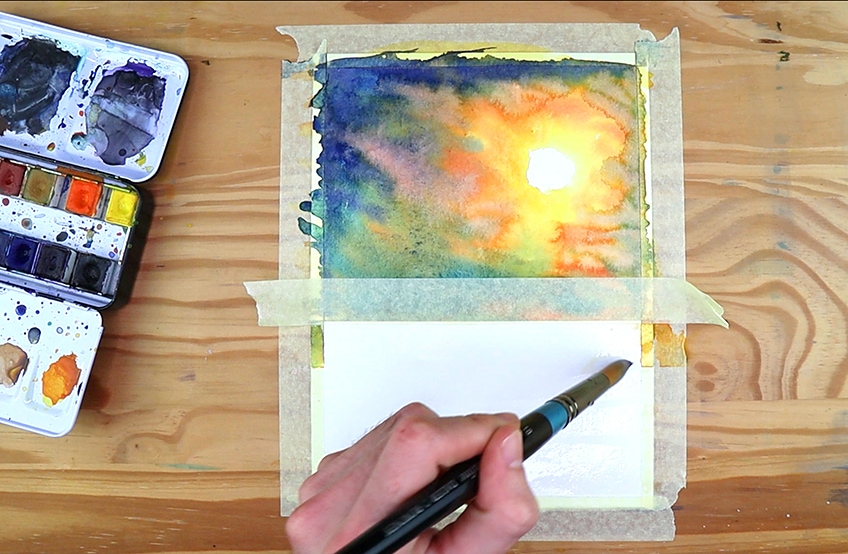
With a small thin brush, we can begin to paint little thin horizontal strokes directly in line with the sun and where its reflections would exist on the water. The reflection of the sun is generally directly underneath it on the surface of the water.
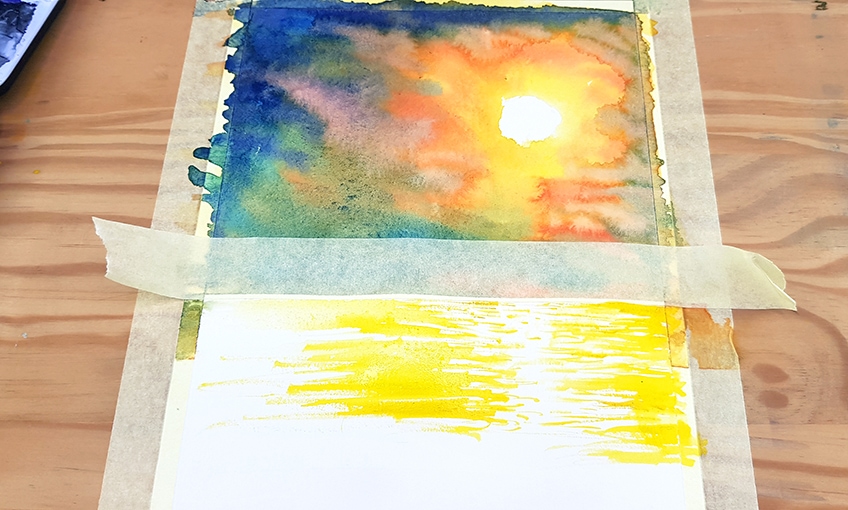
We want to imitate the same color qualities of our sky, this is often a more realistic representation of how reflections in the water work with sunsets. We do this by painting little yellow strokes around a vertical negative space left unpainted that falls directly underneath the sun.
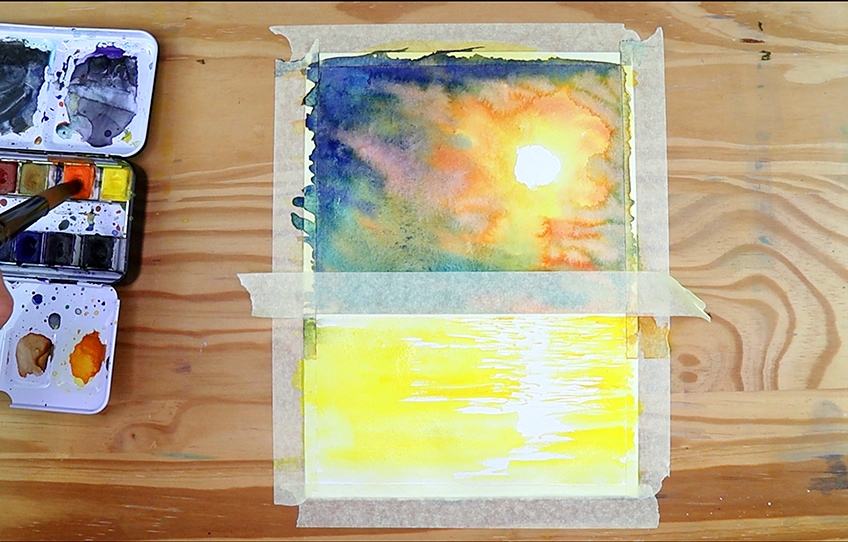
Leave this negative moment of unpainted paper running down the page vertically directly underneath your sun. Proceed to paint yellow strokes slightly overlapping into this negative zone of the page to give the effect of waves. You can also paint the rest of the page yellow around this negative space. We want to just make sure that the brightest reflections are achieved by the white paper itself.
This is why we leave out a strip of unpainted paper directly under the sun. You can, however, have strokes going into that space in moments but not too much.
Step 6: Adding Darker Tones in the Water
While the page is still wet, begin to add some horizontal strokes of orange in the water. Again, we want to imitate the color quality of the sky. We also want to add horizontal strokes because it creates the characteristics of ripples in the water.
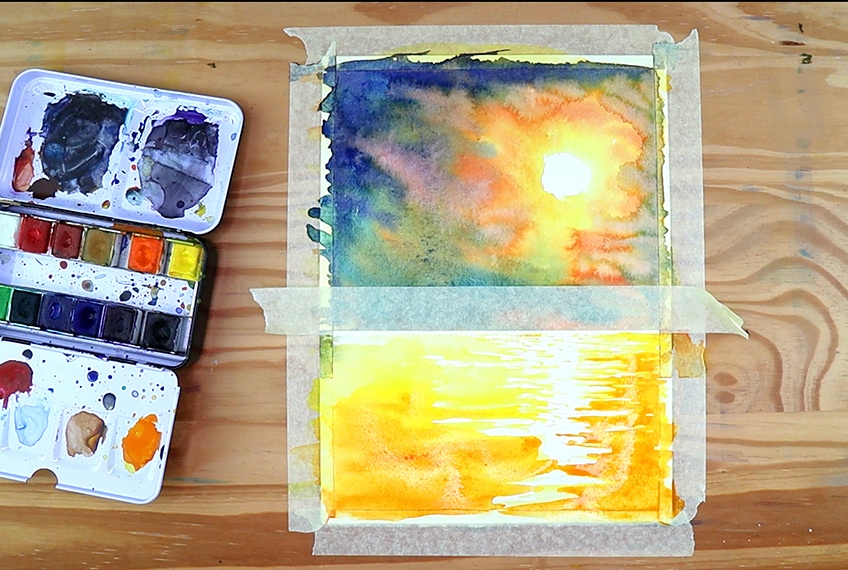
You can also be playful with what color combinations you put in the water. Just remember that we weren’t the water to mimic the sky in color. This is how water generally works when it reflects the sky. However, we want to do this whilst the paper is still wet for a nice seamless fade and gradient shift in the water.
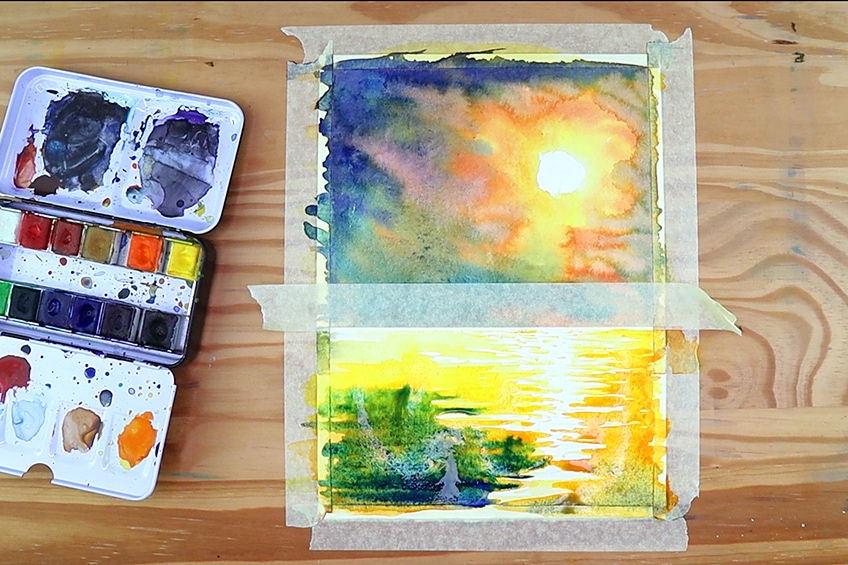
Step 7: Final Details
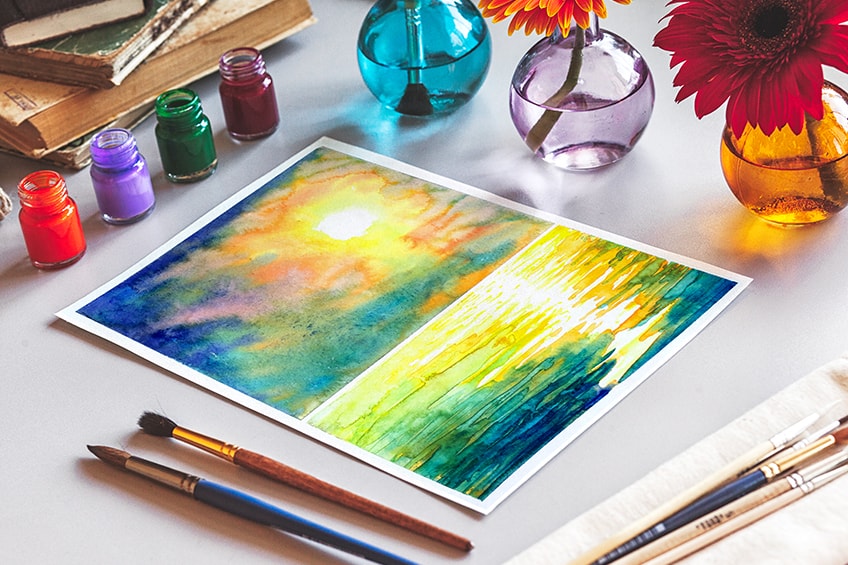
We are done at this point and what we should be left with is an interesting color variation within our sky that is reflected within the water in the bottom section of our painting. Once the painting is dry we can begin to remove the masking tape on our horizon line.
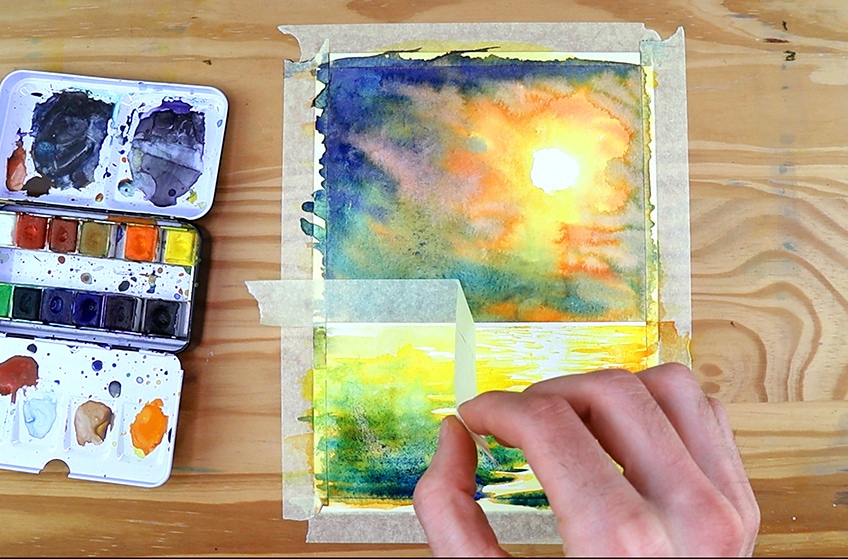
The masking tape or scotch tape should have left a slight lining on the page that defines a horizon line that distinguishes the two halves of the paint, the sky, and the water.
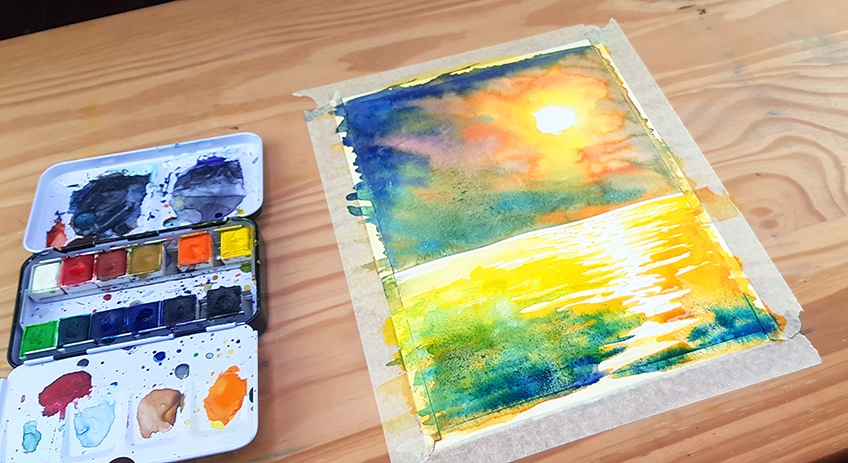
Once our painting is completely dry you are more than welcome to add some little darker strokes here and there on the water to create a bit more of a color variation within the ripples of the water.
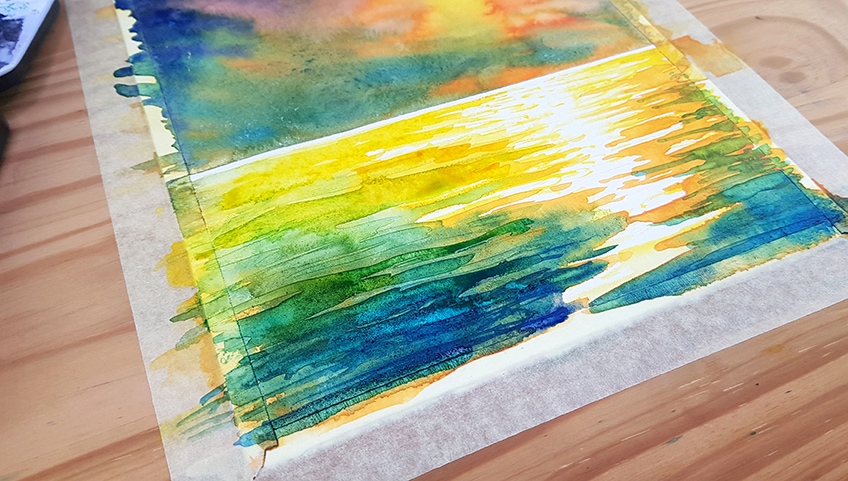
We also learned that we can use other items to aid us in making certain shapes such as a coin for the sun or any circular shape we would want in future paintings. Otherwise, this is a simple way to paint a sunset that you can use in the future when you would like to do so again
Tips to Remember
This guide is a great way for you to also explore other color variations and different application techniques. Watercolor sunsets can be very colorful so try to explore the medium as much as possible when painting a sunset in watercolor.
- Always tape your paper down when painting with watercolor. This way we have our paper firmly placed on our surface for better control.
- Always have two jars of water when doing watercolor. One for an initial rinse after using the paint and the other for a second cleaning of the brush for assurance that it is clean.
- Explore the wet-on-wet technique before application of paint within your final painting . Explore color variations and different strokes.
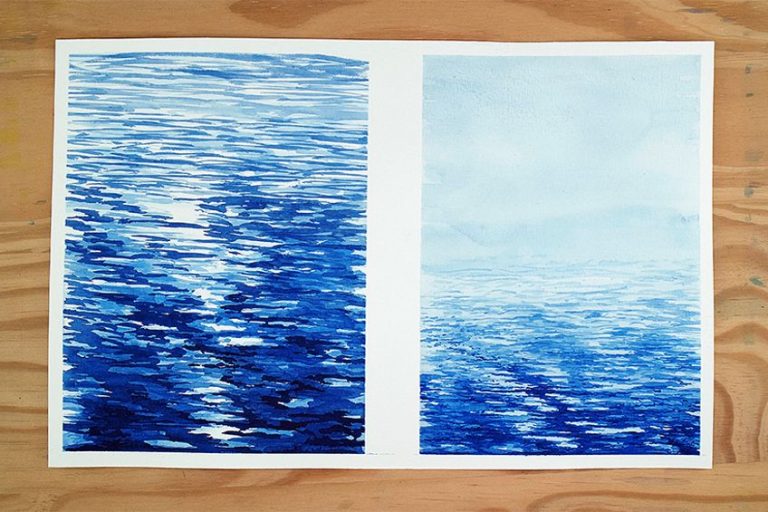
- Remember, creating water is simply just a matter of side-to-side strokes. thicker strokes define proximity and thinner strokes describe ripples in the distance.

There are many ways to paint a sunset using watercolor. Sunset water paintings allow for a lot of movement within the paint because of the water. This means that the water is capable of allowing the paint to move around the paper before drying. You want to grasp this quality of watercolor paint so that you can use it to your advantage when painting watercolor sunsets or any landscape for that matter. However, this tutorial is a really easy and simple way to create sunsets with a few guidelines to work with.
Frequently Asked Questions
How Do You Paint Watercolor Sunsets?
There are many ways to learn how to paint a sunset, however, this tutorial breaks down how to paint a sunset through an easy process. Watercolor sunset paintings are often achieved in a variety of different ways. To paint a sunset in watercolor you always want to have some idea about whether the sunset is over water or in a different type of landscape. Sunset water painting can be really beautiful over a body of water because of the various reflections you can create. This tutorial demonstrates the basic process of sunset reflections in water which is a great trick to learn for beautiful sunset paintings.
How Do You Paint Reflections in the Water?
When learning how to paint a sunset in watercolor a great way to do so is to paint a sunset over a body of water. This is because we can create water reflections quite easily and they can look really beautiful. We achieve these reflections by leaving negative spaces in the water. By leaving the unpainted surface area within the water it will begin to act as the lightest and brightest reflections on the surface of the water. You then want to slowly make strokes working around this negative surface area on the water. Generally, we leave this area of the paper untouched directly under the sun as reflections in a real-life form on the surface of the water. This is a great tip on how to paint reflections in the water.
How Do You Paint Water With Watercolors?
Water is quite simple to paint. With water you need to understand that there are various ways it can be, sometimes settled and sometimes motion. With ripples in the water, it is about creating quick strokes with the wrist generally moving along the plain of your landscape. This means if the plane of your landscape depicts a scene where the water should be moving horizontally then we want to make swift strokes with the wrist from left to right. We use light tones first and then we can and in darker strokes to give a sense of reflection variations. Lastly, you want to keep negative moments or white moments in the water to diversify the shine effect on the surface of the water
Matthew Matthysen is an educated multidisciplinary artist and illustrator. He successfully completed his art degree at the University of Witwatersrand in South Africa, majoring in art history and contemporary drawing. The focus of his thesis was to explore the philosophical implications of the macro and micro-universe on the human experience. Matthew uses diverse media, such as written and hands-on components, to explore various approaches that are on the border between philosophy and science.
Matthew organized various exhibitions before and during his years as a student and is still passionate about doing so today. He currently works as a freelance artist and writer in various fields. He also has a permanent position at a renowned online gallery (ArtGazette) where he produces various works on commission. As a freelance artist, he creates several series and successfully sells them to galleries and collectors. He loves to use his work and skills in various fields of interest.
Matthew has been creating drawing and painting tutorials since the relaunch in 2020. Through his involvement with artincontext.org, he has been able to deepen his knowledge of various painting mediums. For example, watercolor techniques, calligraphy and lately digital drawing, which is becoming more and more popular.
Learn more about Matthew Matthysen and the Art in Context Team.
Cite this Article
Matthew, Matthysen, “How to Paint a Sunset With Watercolors – Guide to Depicting Light.” Art in Context. February 21, 2022. URL: https://artincontext.org/how-to-paint-a-sunset-with-watercolors/
Matthysen, M. (2022, 21 February). How to Paint a Sunset With Watercolors – Guide to Depicting Light. Art in Context. https://artincontext.org/how-to-paint-a-sunset-with-watercolors/
Matthysen, Matthew. “How to Paint a Sunset With Watercolors – Guide to Depicting Light.” Art in Context, February 21, 2022. https://artincontext.org/how-to-paint-a-sunset-with-watercolors/.


