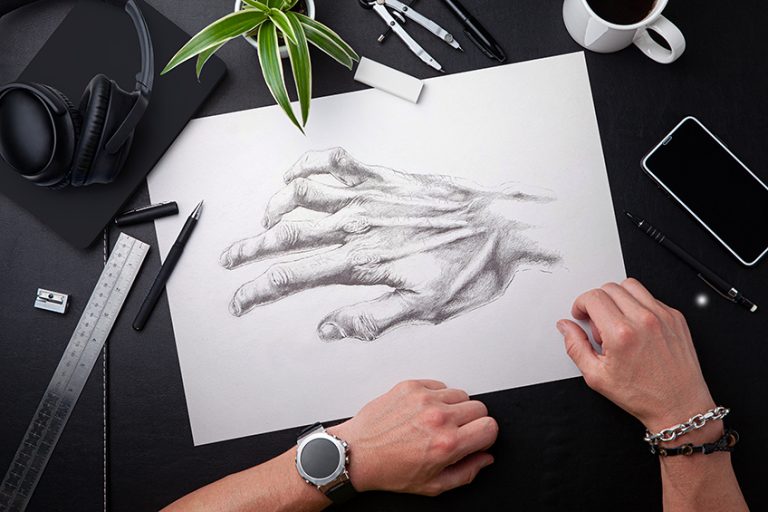
How to Draw Abs – A Step-by-Step Guide to Creating an Abs Drawing
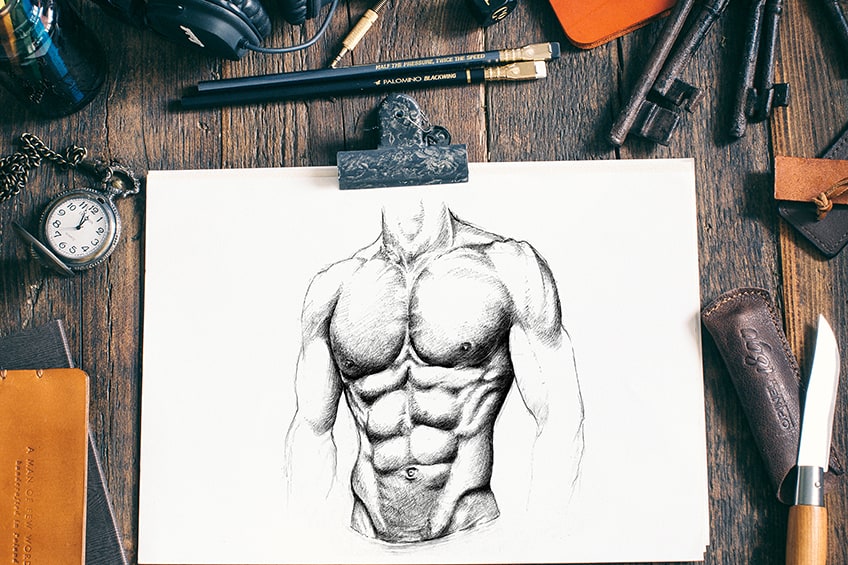
Drawing abs is a great way to learn the male physique. The abdominal muscles constitute a large part of what we describe as core strength. This region of the body is a cluster of smaller muscles that protect the body and help with the mobility of the torso. When we learn how to draw abs we must know that they are never completely symmetrical which means the cluster of muscles can seem strange in their placement on the body. This is an interesting point to note as we dive into the tutorial on how to draw male abs. Lastly, drawing abs is not something to draw in isolation, thus we will be learning how to draw the pecs as a part of the abs drawing tutorial.
Necessary Materials
When learning how to draw abs, we should consider which medium will produce the best results for our abs drawing. In this tutorial, we will be drawing the abs and we will be drawing the pecs as well as general aspects around the core body area.
We will do so by using a series of pens and pencils.
Pen and pencil often work well in tandem with one another as the pencil can create a good layer to draw the finer details on top of with a pen. This is a particularly great medium combination when learning how to draw a six-pack. Here is what we will need:
- A good set of pencils
- A ballpoint pen
- A Micron pen
- A steel ruler
- An eraser
- A sharpener
- Good paper (200 g/m – 250 g/m recommended)
- Source material (could be from your phone or a printed image)
Preparation
We want to make sure we have all these materials as each component will be important through this process of drawing. We will be drawing from the source image within this tutorial, which you can either draw directly from your phone or tablet. Whichever device you want is fine, however, using a tablet or an iPad is generally the better option.
You may also print the image out if you feel that this might be easier. With our materials and source image near and ready for use let us begin.
Before We Draw
Let us take a moment to consider our source image before we begin the tutorial on how to draw abs. When learning how to draw a six-pack specifically, they interact with various other aspects of the body. The abdominal muscles, like any muscle, protrude from the body. This means it defines the body through various shadows produced by the light interacting with the muscles.
These shadows will help guide us in our proportions and placement. When we learn the process of drawing abs, learning how to draw pecs or the pectoral muscles is an important feature to draw as well. With that important concept in the back of your mind let us begin.
Step 1: Grid Marks and General Shape
Let us begin by finding the center of our page and drawing a vertical line down our page. We can find the center of our page by measuring the page both vertically and horizontally. Once we have done this we then divide that measurement into two giving us the center of the page.
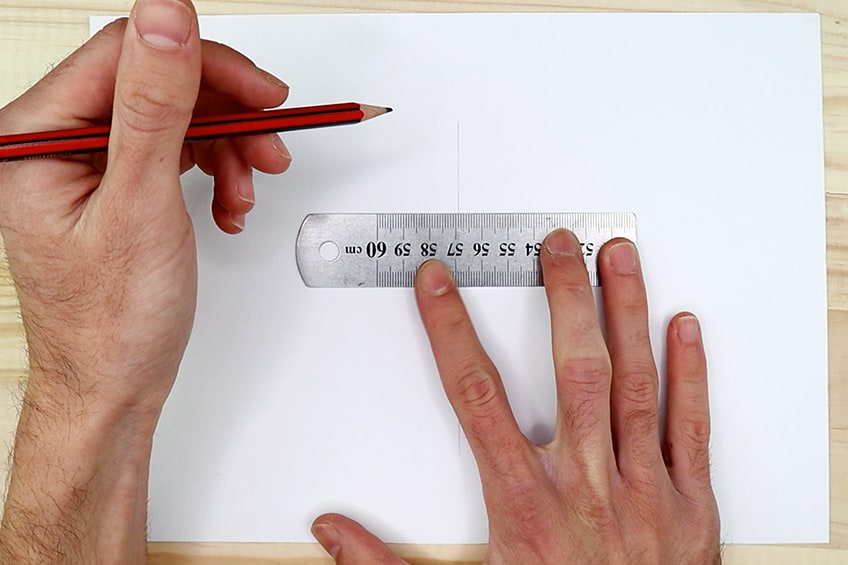
We must know how to draw the pecs for better context.
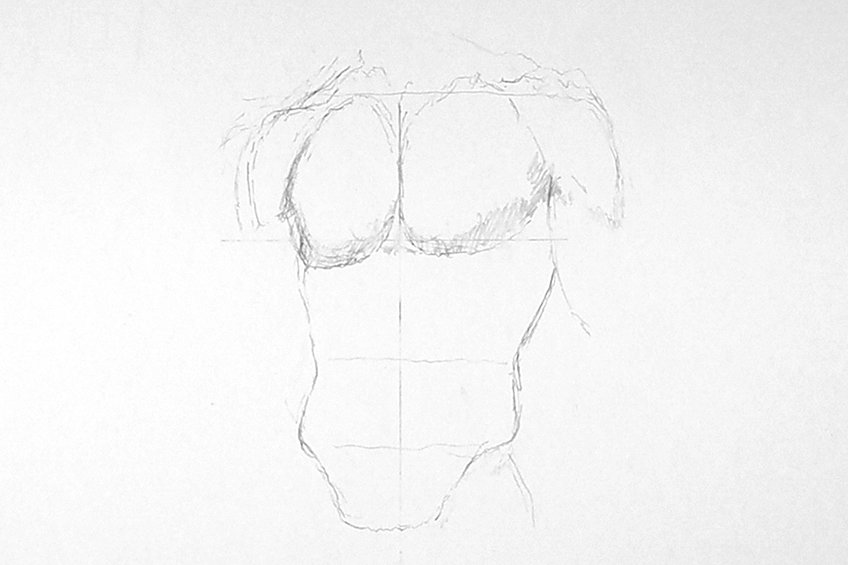
This source image is showing an image of a man from a slight side view so spend time here as it can be tricky to place correctly.
Step 2: Drawing the Abs
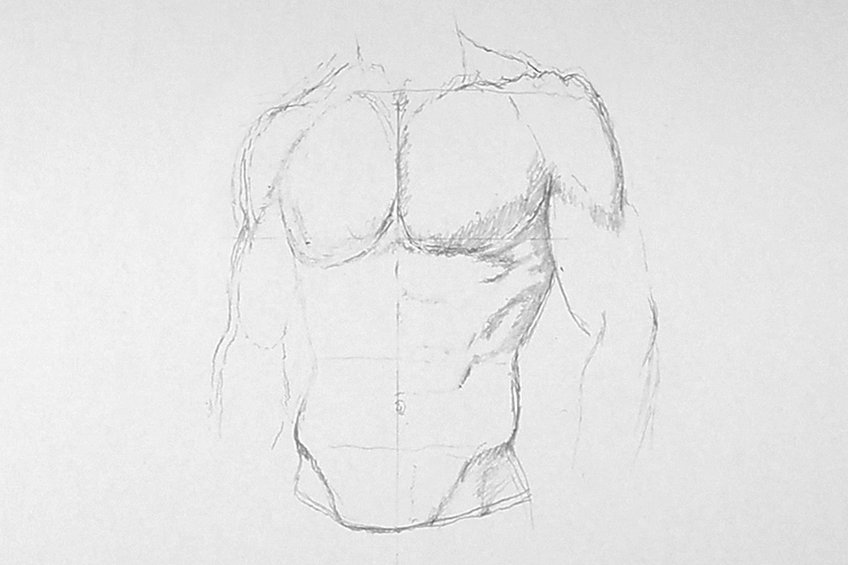
Once we have the general shape of the body and the muscle shapes, we will then start drawing the abs with our H pencil. Try to find how the shadows in the source image describe the placement of each muscle.
We can do this by starting on one side of the body and we will then slowly develop the abs drawing process.
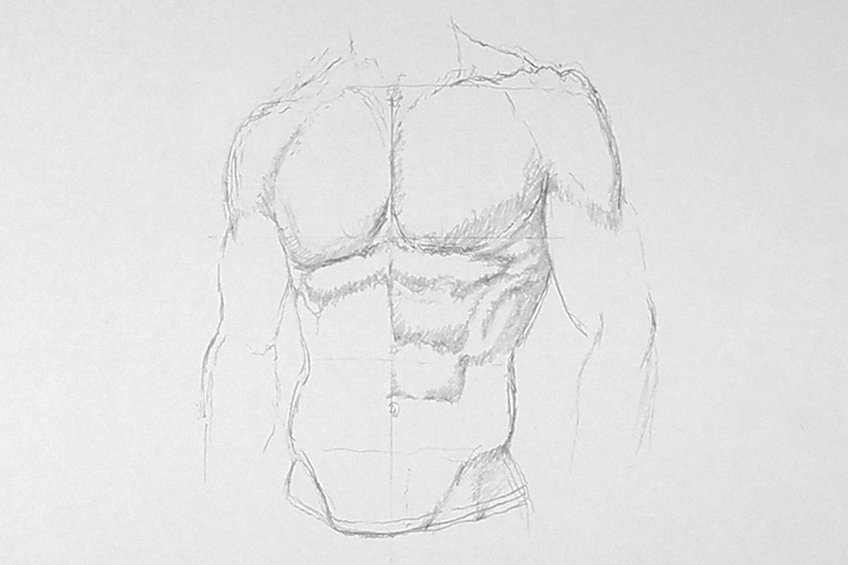
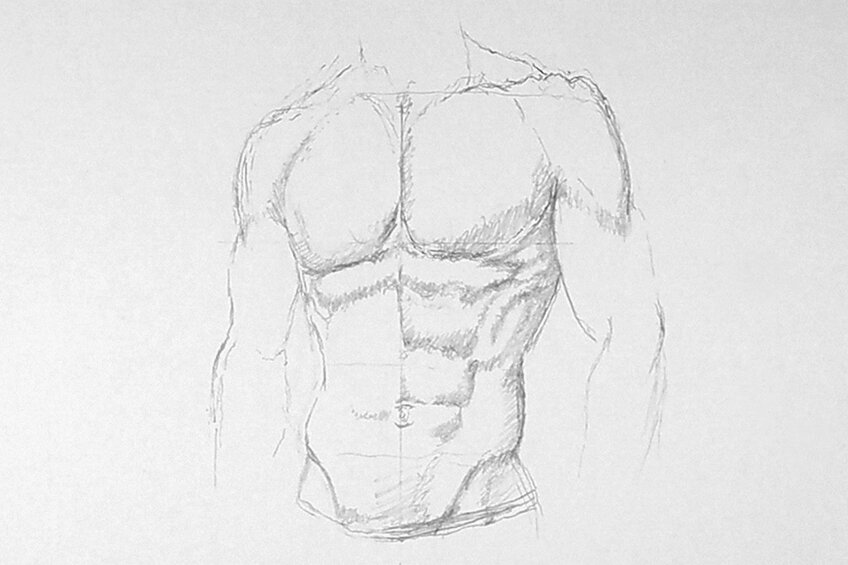
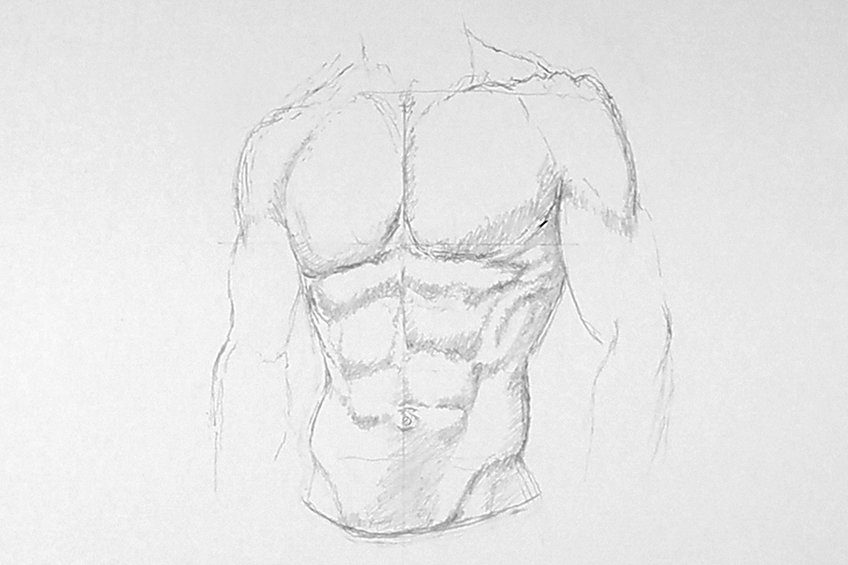
With abs drawing, we want to solidify the marks with a pencil before we begin with a pen.
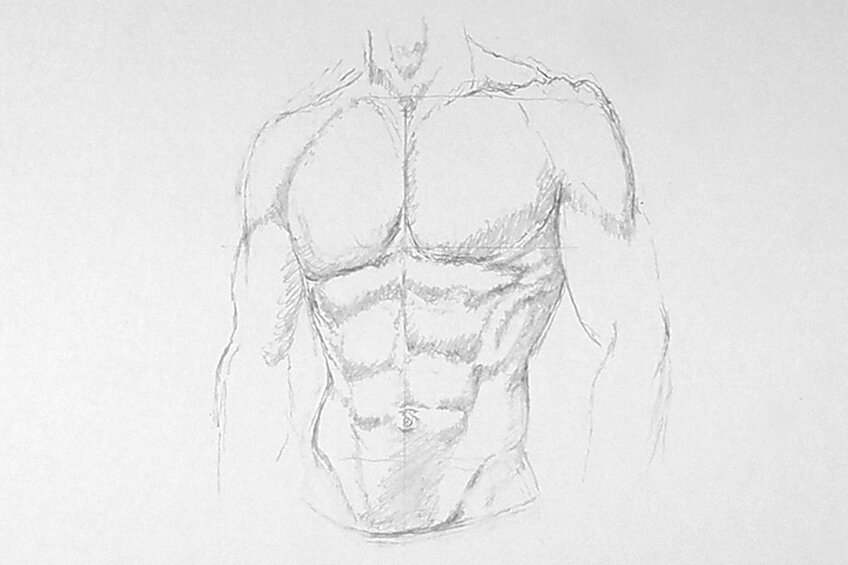
We want to make sure that the placement of these marks is as accurate as can be in relation to our source image.
Step 3: Shading the Abs
When learning how to draw abs, using a medium combination such as pencil and pen is particularly perfect for learning how to draw a six-pack. With a pen, we can get the finer details to come out within the torso. We can now begin the process of drawing with a pen. Similar to the previous step we should begin with one side of the abs drawing and slowly work our way through the whole body.
As we refer to our source image, let us take note of how the body defines the shadows in our source image. We want our pencil marks to resemble the flow of the shadows as we begin our shading with our ballpoint pen.
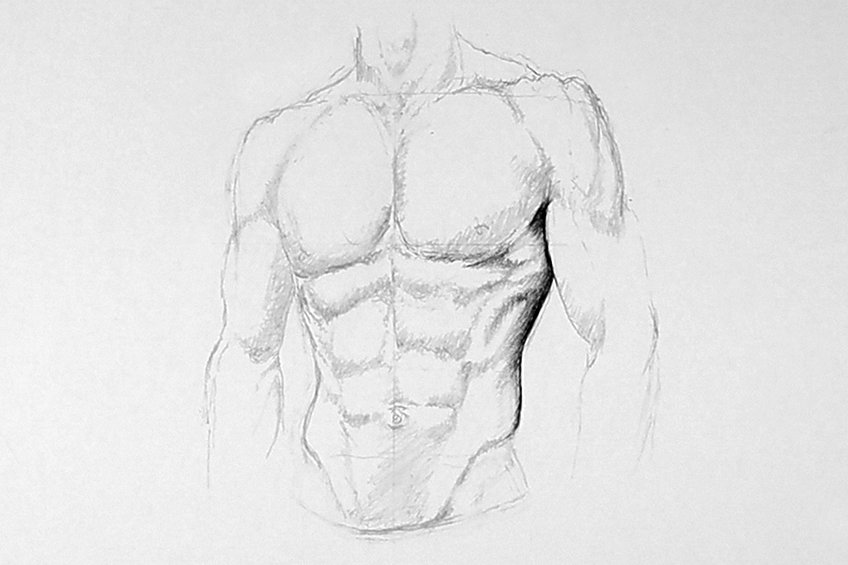
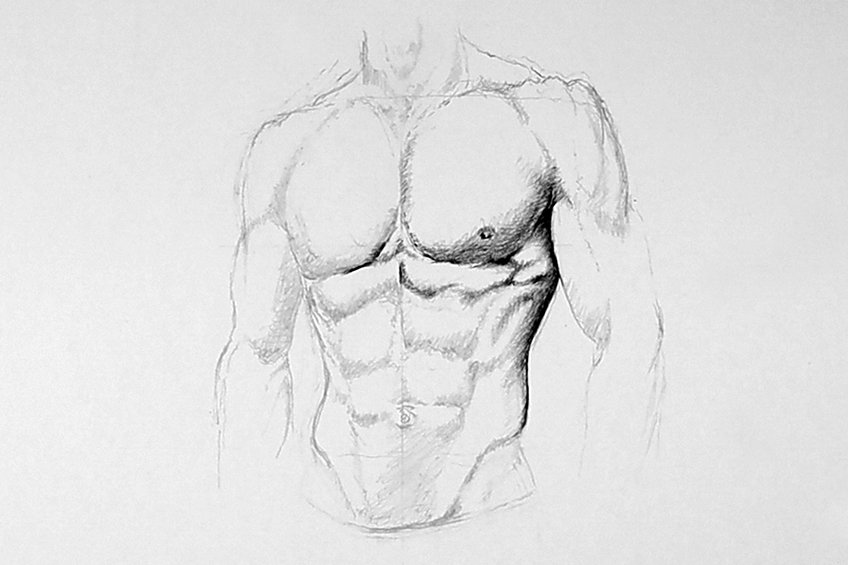
Shade the marks with your ballpoint pen as they move around the pectoral muscles.
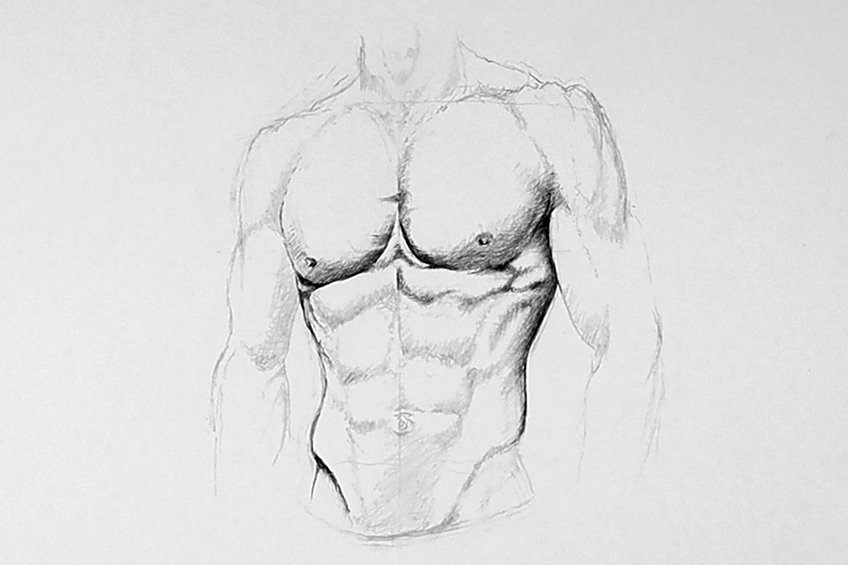
This is where the shadows will tend to be mostly dark for each muscle, including the pectorals.
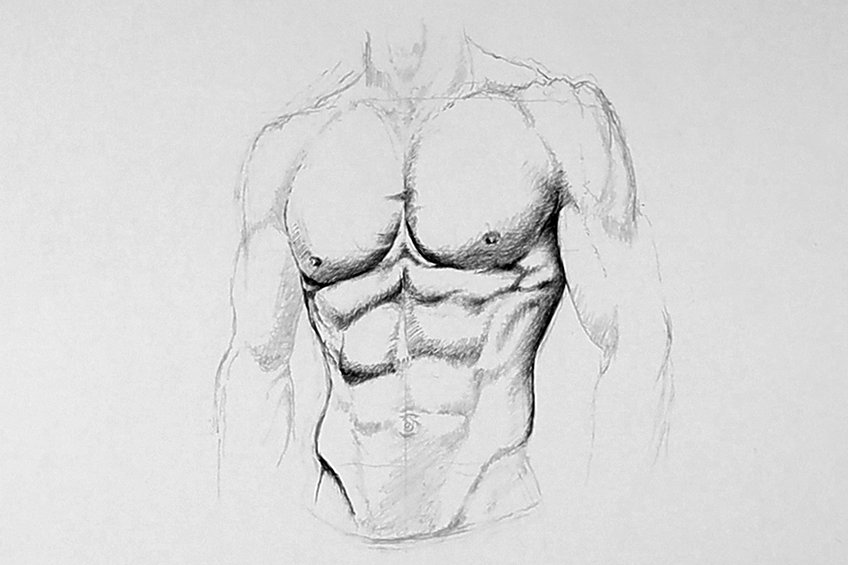
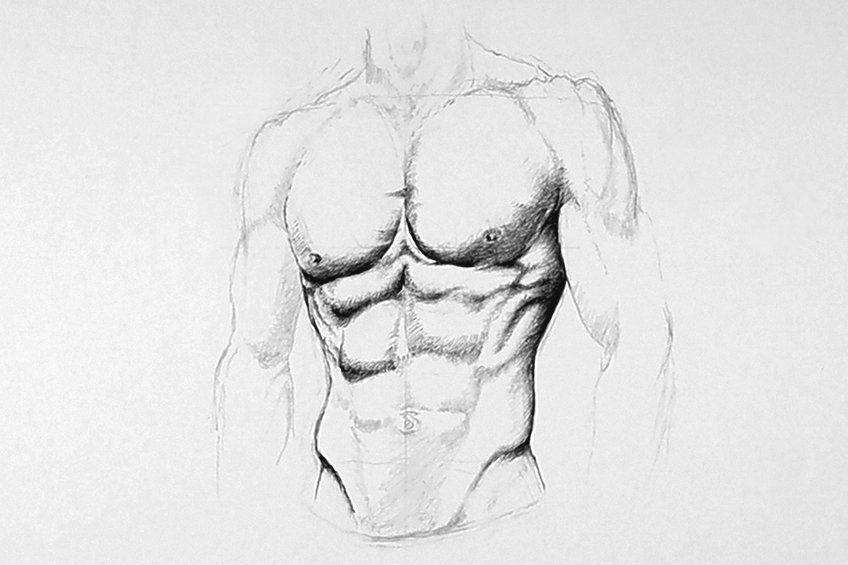
These shadows generally fall under the little bends of skin in and around the belly button.
Step 4: Continue Shading the Abs
As we carry on with shading our abs drawing, let us move toward the lower part of the abdominal area, we can see that there is a shift in the tonal value of the skin. The lower area of the stomach, under the belly button, is slightly darker compared to the upper part.
This is because the muscles that protrude catch the reflection of light.
As we shade the lower area on the body with our pen make sure that your hand is slanted and light as you apply these marks. Take note of the hip area where the indentations near the pelvis cause a dark shadow lining to appear under each protruding hip.
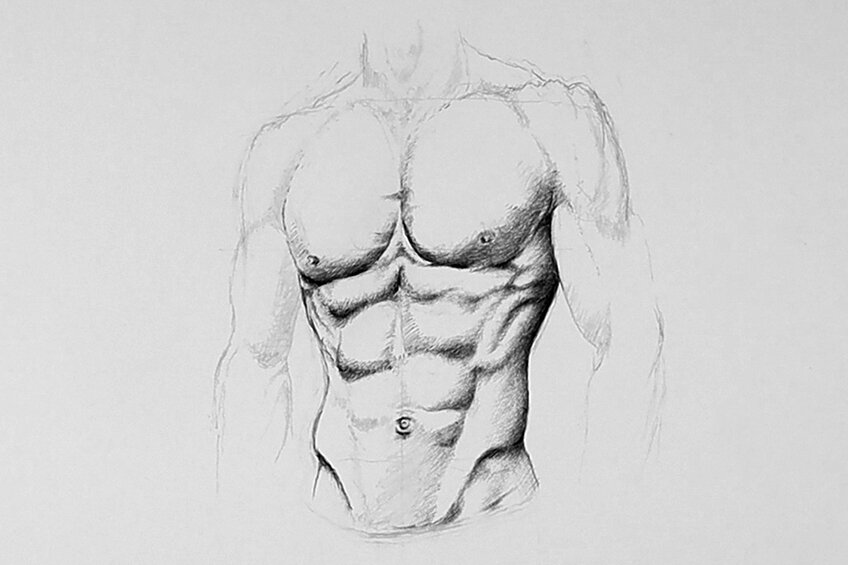
Each hip protrusion is different, as the hip in the foreground seems slightly larger due to the position and angle of the body. This means that the shadowing will be seen much more near the left hip protrusion of the body.
The shadowing will then seem slightly broader than that of the hip shadow in the background.
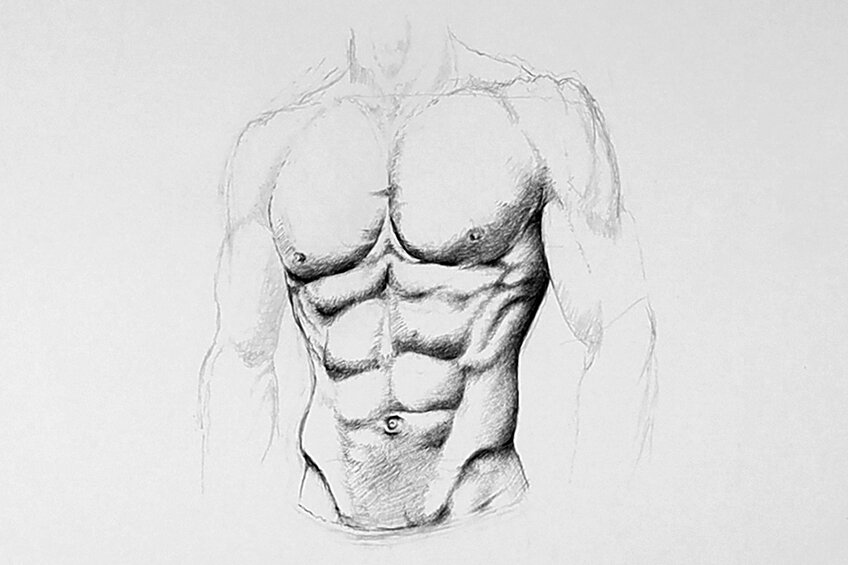
Something to note is that abdominal muscles are not always symmetrical and the same in size. In the source image, we can see that the asymmetrical nature of the abdominal muscles causes the dark shadowing moments to occur in different types of shapes on the body.
Keep this in mind as we begin to shade the darker moments of the muscular body.
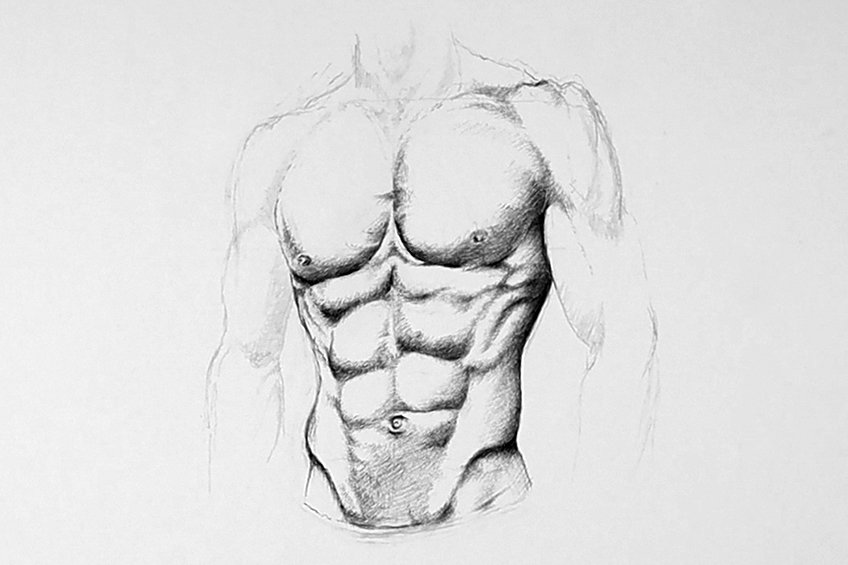
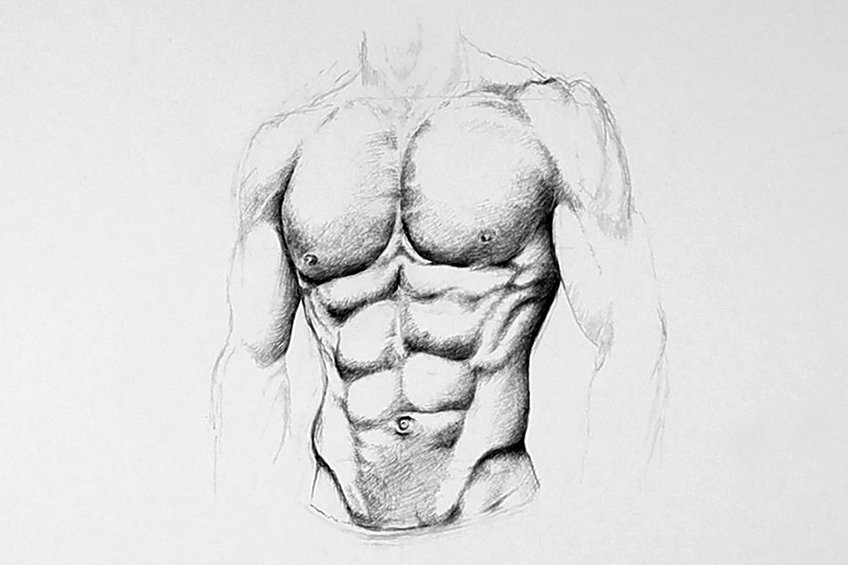
Additionally, do this with the pressure that you apply to your pen.
Step 5: Shading the Arms and Neck Area
This tutorial is about how to draw the abs but the abs are contextualized by the surrounding features, including the arms. You can take your pencil and redraw the general arm shape moving toward the neck and shoulders as a way to contextualize your drawing.
With your ballpoint pen begin to shade from the armpit area, where shadowing is defined.
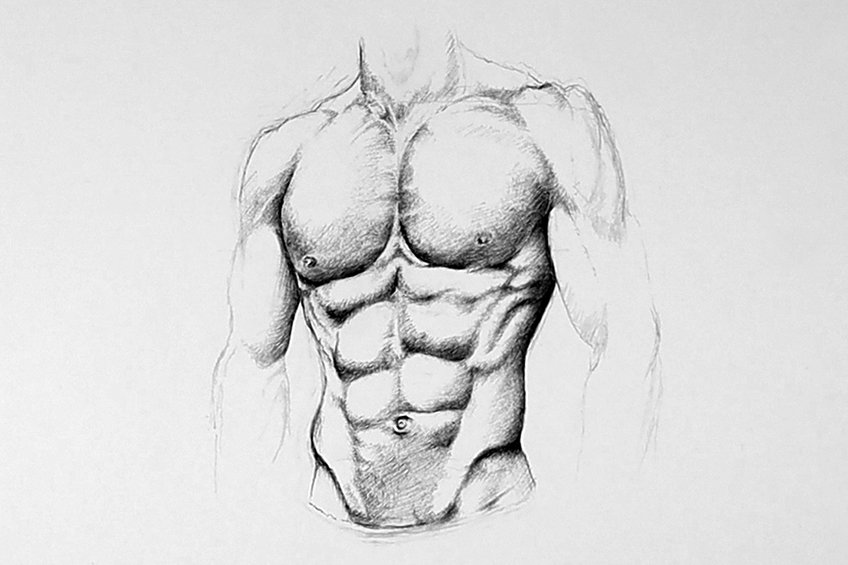
With your ballpoint pen, try to shade these shadows by using your source image as a reference for comparison between the various shadow gradients on the body.
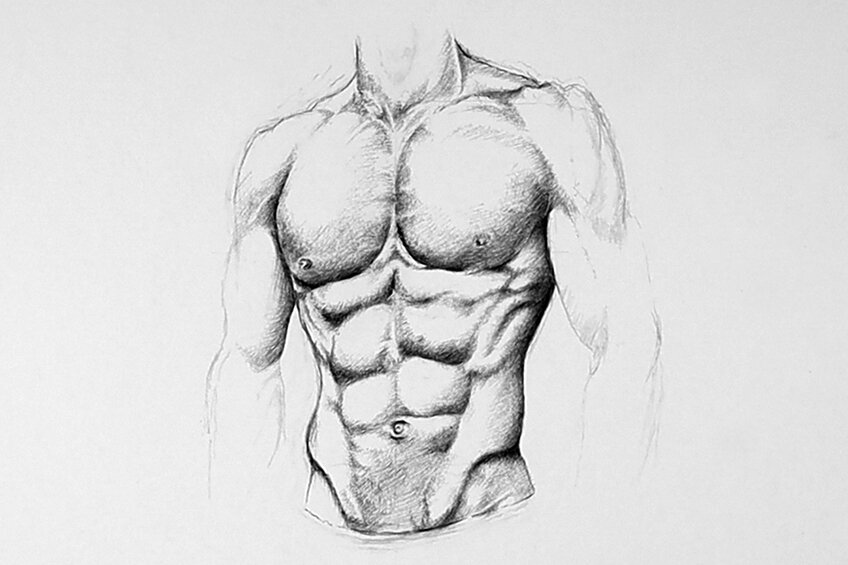
A good suggestion is to draw from the pectoral muscles into the neck and shoulders.
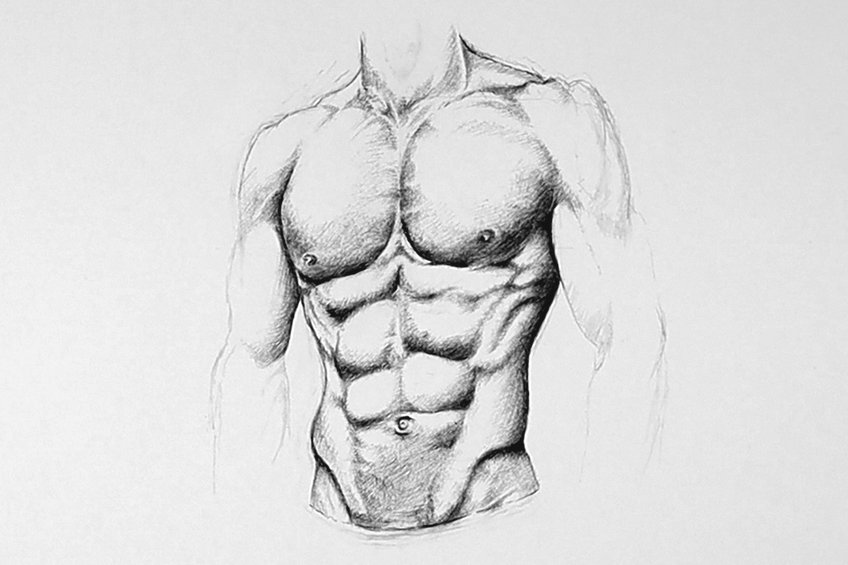
We just want to do the right shading around the armpit area and light shading around the neck area as a way of defining the abs more clearly.
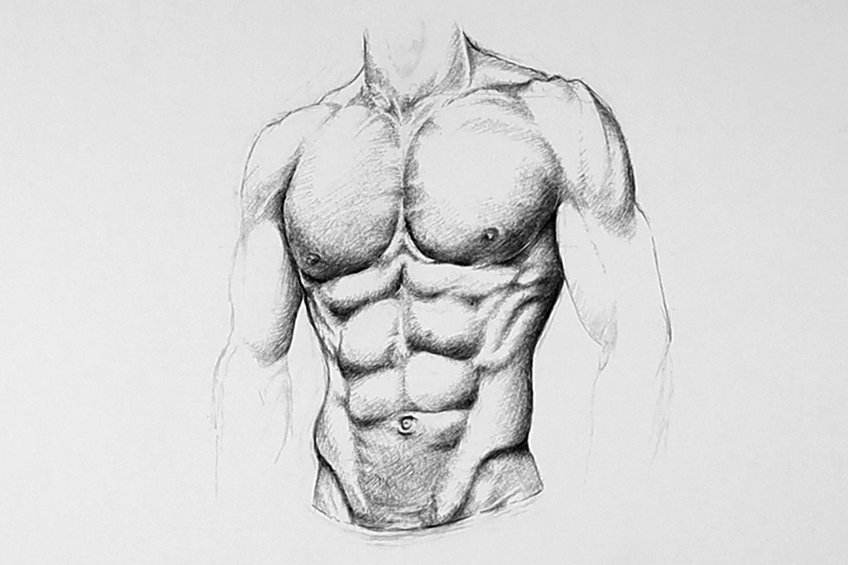
Otherwise, we can keep these shadows fairly light as they are exposed to light.
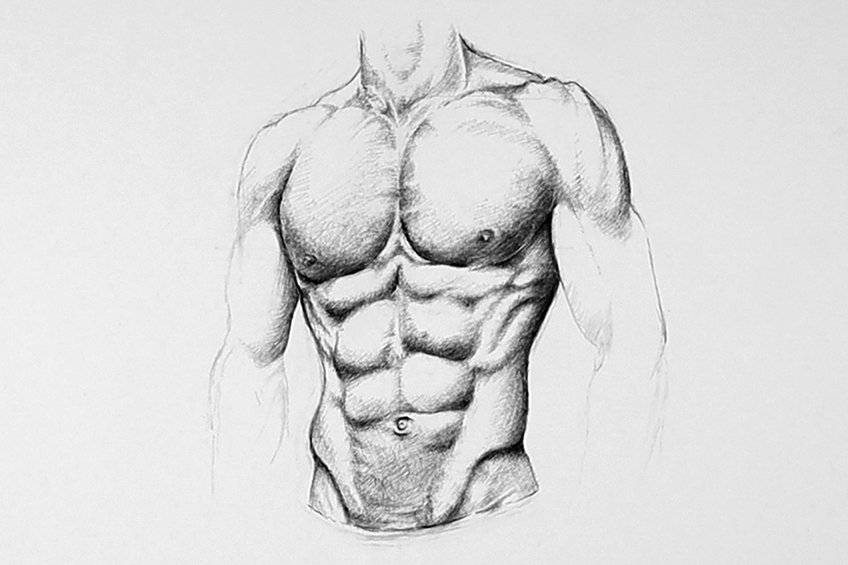
Always work through your drawing one last time with your ballpoint pen, to attend to all the areas that need a little more shading. You don’t need to draw the arms fully, as keeping the arms as a more gestural sketch is a great way to bring emphasis to the abdominal area.
Tips to Remember
- Drawing abdominal muscles should always be contextualized by the surrounding features.
- Shadows are simply lines that move through the body. A good suggestion is to draw these lines with our pencil and then layer pen shading over them.
- Take your time with drawing in pen. Drawing in pen has a higher susceptibility to mistakes, so be patient.
- Drawing in a pen is about lightly and gently adding layer over layer.
- Abdominal muscles are not always symmetrical, this various shaping of the muscles develops different shadowing.
Drawing abdominal muscles is simple when we understand a single fundamental concept. It’s about knowing how the shadows are defined on the body as various lines. These lines should guide your shading process, allowing you to see the direction of your shading in between the various muscles. Then it is all about focusing on little moments in these shadows where they either become lighter or darker, depending on their exposure to light. Drawing something like abs is specifically about shading. We define the shadows with our pencils and spend time perfecting them. This is a simple way of how to draw abs in five simple steps.
Frequently Asked Questions
How Do I Draw Realistic Abs?
Drawing any anatomical structure is about identifying the light source. Once we identify the light source we can begin to place the shadows accurately on the structure. Shadowing is an effect of light interacting with an object therefore we want to make sure that the shadows realistically fall on the structure.
How Do I Shade the Abs?
As we analyze the shadows in our source image we then can use these shadows to guide our shading process. Shadows around muscles are generally like lines that shift between dark and light. Shading is all about layering. A good suggestion is to see where the shadows are in your source image and this is where you will shade in your image. We do this by slowly and softly applying layer over layer until we achieve the tonal variations that we want in our drawing.
How Do I Draw Muscular Abs?
When learning how to draw abs, we define muscles by the way we understand the way the shadows fall on them. Muscles protrude which means that some parts of the protruding muscle are more exposed to light than others. This generally means that there is a slight shift in the gradients of shading. There darker aspects will be where light struggles to penetrate a surface, so always consider the direction from which your light source comes.
Matthew Matthysen is an educated multidisciplinary artist and illustrator. He successfully completed his art degree at the University of Witwatersrand in South Africa, majoring in art history and contemporary drawing. The focus of his thesis was to explore the philosophical implications of the macro and micro-universe on the human experience. Matthew uses diverse media, such as written and hands-on components, to explore various approaches that are on the border between philosophy and science.
Matthew organized various exhibitions before and during his years as a student and is still passionate about doing so today. He currently works as a freelance artist and writer in various fields. He also has a permanent position at a renowned online gallery (ArtGazette) where he produces various works on commission. As a freelance artist, he creates several series and successfully sells them to galleries and collectors. He loves to use his work and skills in various fields of interest.
Matthew has been creating drawing and painting tutorials since the relaunch in 2020. Through his involvement with artincontext.org, he has been able to deepen his knowledge of various painting mediums. For example, watercolor techniques, calligraphy and lately digital drawing, which is becoming more and more popular.
Learn more about Matthew Matthysen and the Art in Context Team.
Cite this Article
Matthew, Matthysen, “How to Draw Abs – A Step-by-Step Guide to Creating an Abs Drawing.” Art in Context. June 21, 2022. URL: https://artincontext.org/how-to-draw-abs/
Matthysen, M. (2022, 21 June). How to Draw Abs – A Step-by-Step Guide to Creating an Abs Drawing. Art in Context. https://artincontext.org/how-to-draw-abs/
Matthysen, Matthew. “How to Draw Abs – A Step-by-Step Guide to Creating an Abs Drawing.” Art in Context, June 21, 2022. https://artincontext.org/how-to-draw-abs/.


