How to Draw a Person – Person Drawing Step by Step
Learning how to draw a human in correct proportions is one of the most essential and fundamental skills every artist should know. At some point, integrating figures into a drawing will inevitably happen, and understanding the basic fundamentals of how to draw a person will go a long way. Understanding how to draw a person in different ways can be much easier once the fundamental building blocks are broken down. The freedom to construct figures within your own artwork will then come a lot easier. Learning how to draw a human is also a versatile skill, as figures can be integrated into so many different art ideas, and in many cases, are the focal point of many artworks. Either way, person sketches also provide an observational skill that can come in handy when drawing from life as well.
A Simple Guide for Drawing People
In this tutorial, we will go through the fundamentals of how to construct both the male figure and female figure with correct proportions. Once we have a good understanding of both proportions and scale, we will then move on to a drawing exercise, where we explore the use of these proportional guidelines to create personal sketches. This is where we can go through a process of how to draw a person step by step, from their foundation to wearing clothing, giving us a better understanding of how to draw humans. Now that we know what to expect, let us go through this tutorial on how to draw a person.
The Fundamentals of Drawing a Person
In order to know how to draw a person correctly, we need to know that the human body is comprised of a certain number of segments. However, it is essential to note that these segments change according to body types and when bodies are in different postures and poses. That being said, these proportions are to be used as guidelines to either follow or deviate from.
Proportions
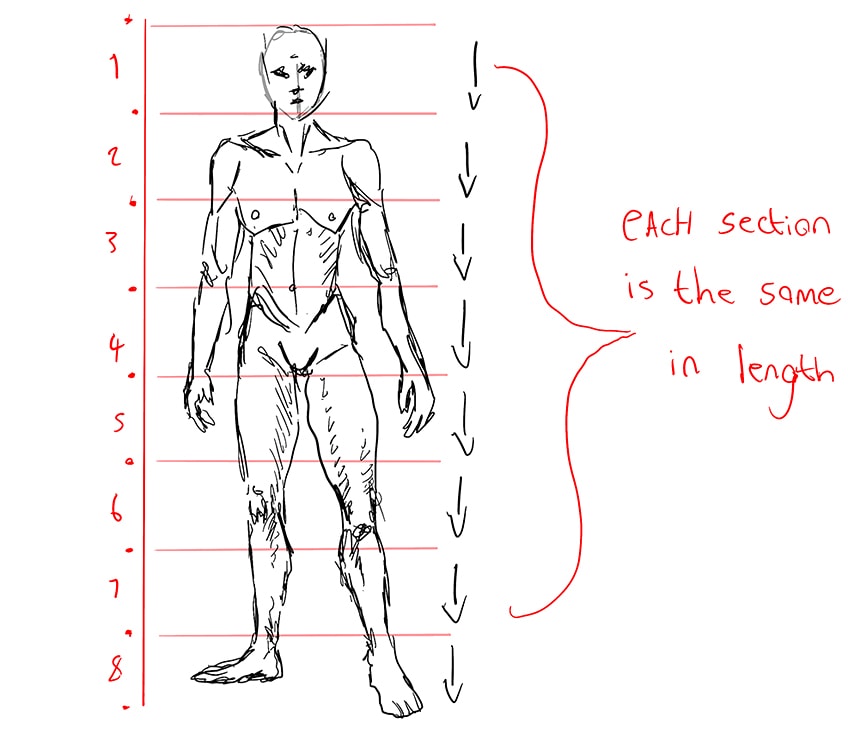
Male proportions are broken up into eight or seven segments that divide the body into equally divided portions. This means that we can use a ruler to draw a vertical line and then create seven equal increments that divide the body into its basic proportional values.
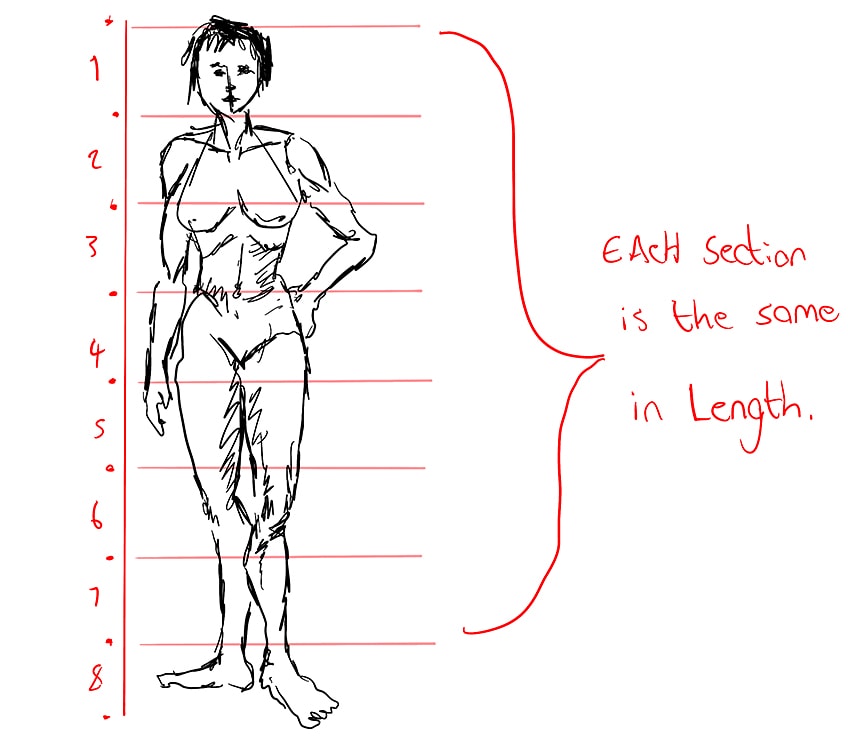
The exact same can be done for the female body, as both the male and female figures utilize the same framework of measurements to place different body parts in their proportionate places.
Scale
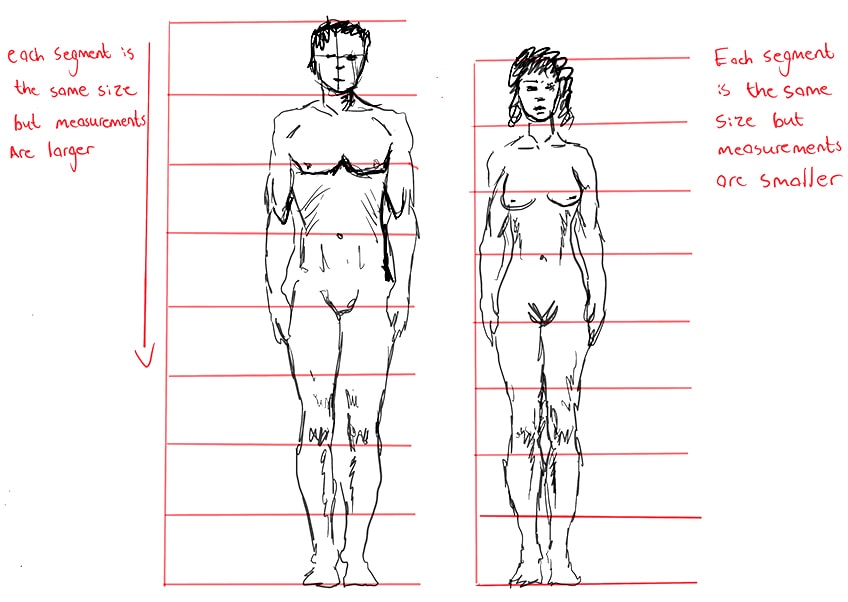
To create differences in scale between the male and female figures, one can simply deduce the length of the segments for one of the figures whilst still keeping them evenly sized. This is applicable to either female or male figures to create differences in height or size.
Manipulating the Measurements for Different Poses
Again, these measurements should not be held as a hard and fast rule to stick to, but rather as a loose guideline to help establish correct sizes in form. Once you understand the basic measurements, you can form figures in different poses.
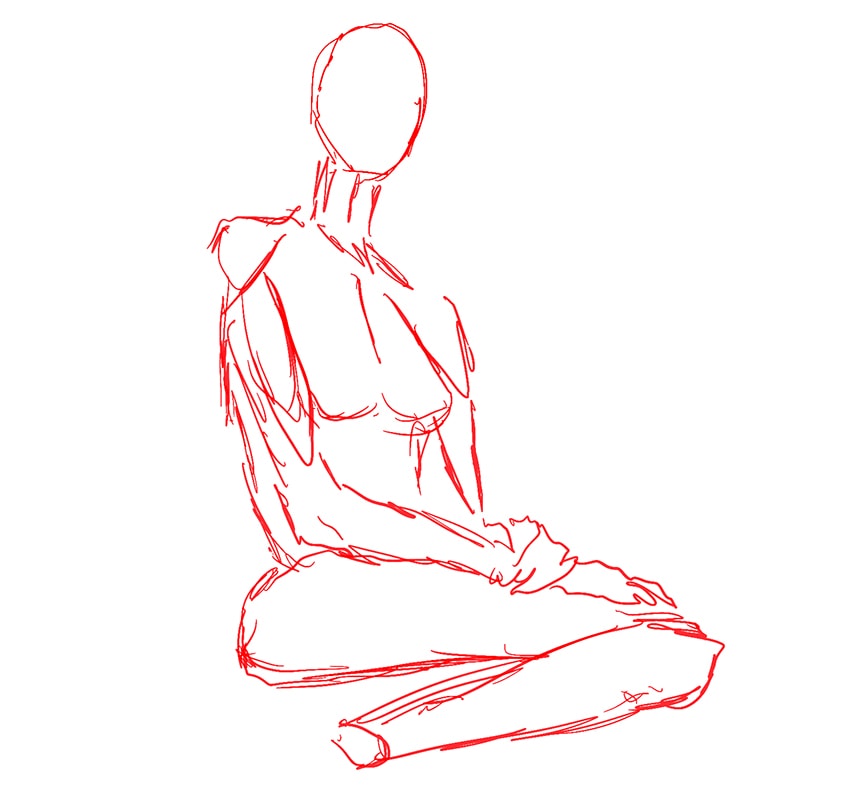
For instance, you can utilize the measurements as a way of comparing the lengths of different body parts. By understanding different lengths of body parts, you can form figures in different poses, manipulating their body parts to be in different positions.
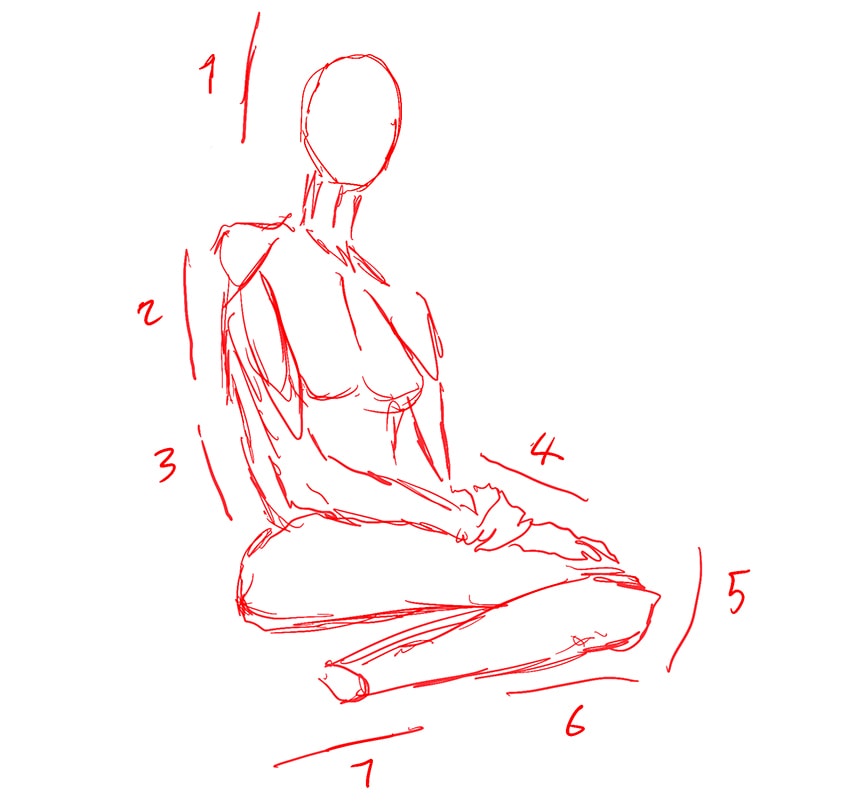
Utilizing the measurements as a guiding principle, you can create base layers for different figures. This can help you establish more complex body positions and angles.
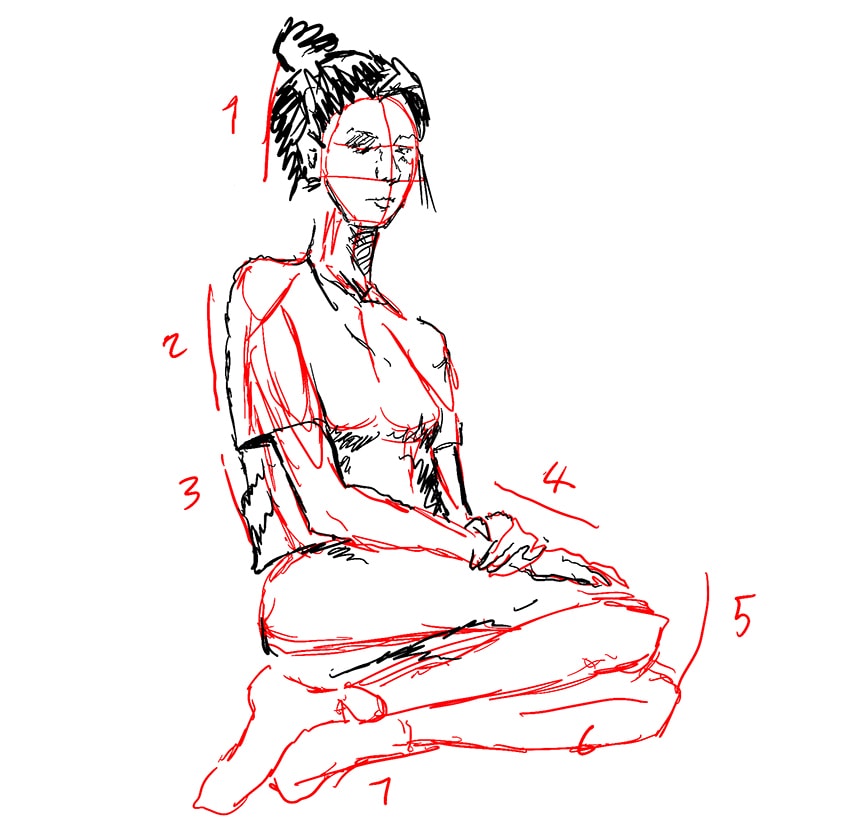
It’s important to remember that body proportions will always change when you are drawing figures from perspectives. The proportional guidelines should be used to set a ghost skeleton figure of lines that simply establish flow and form, which then can be drawn over.
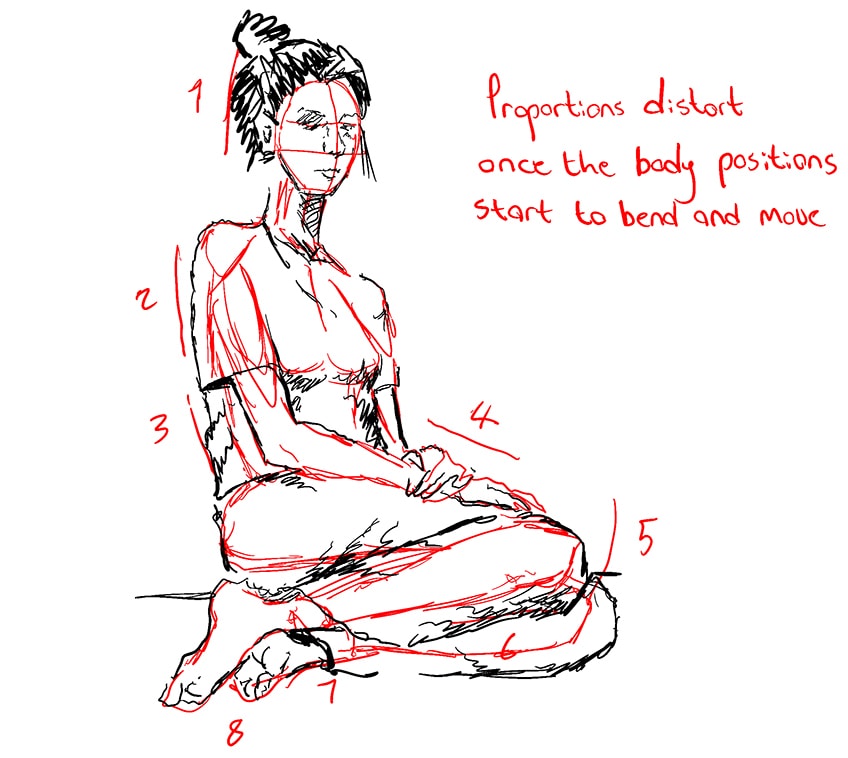
As you get more comfortable with the basic guidelines, you can start using them more loosely, as if you were creating a skeleton to be sketched over. This is really helpful for establishing more realism in the figure movement.
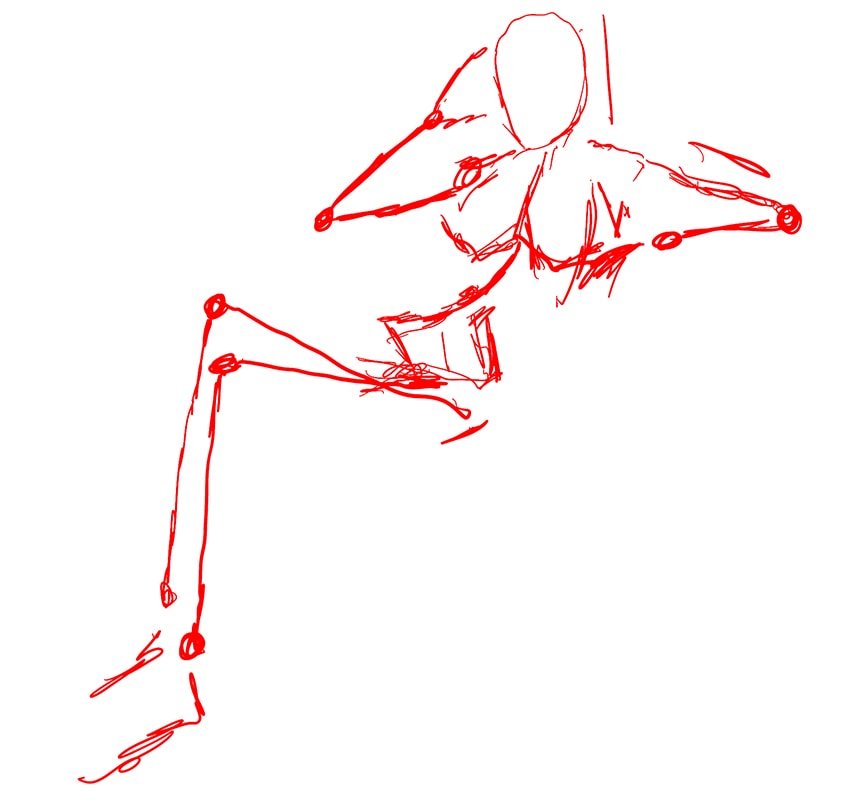
In many ways, a person drawing is also about capturing the unique aspects of a person. This includes not only poses and posture but clothing as well.
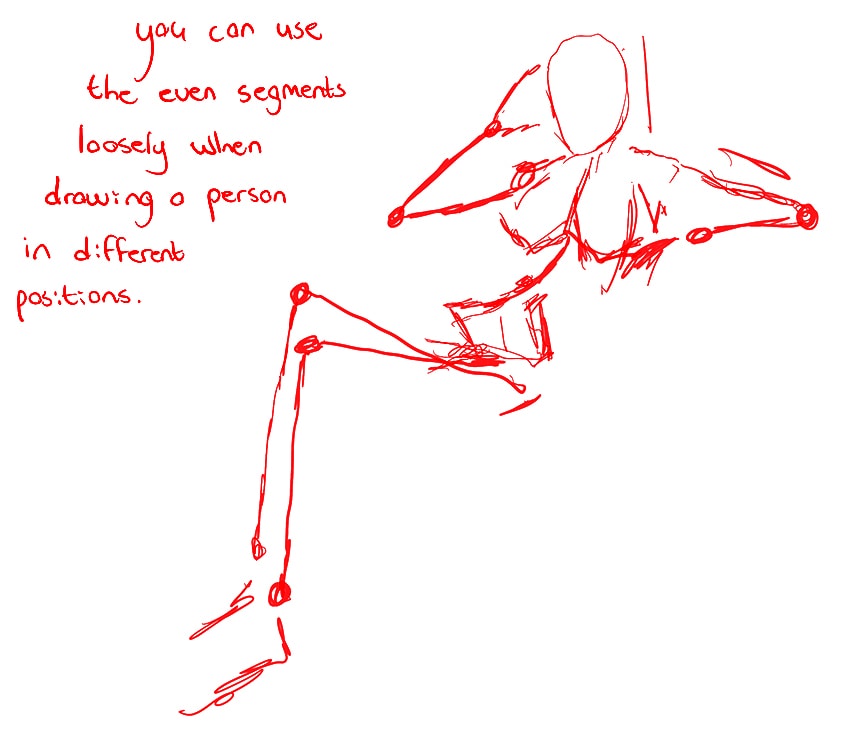
This means that when you want to draw someone from life, you then can build them up from proportional guidelines to body parts and even clothing. Once you have parts of the body, you then can construct them in different environments.
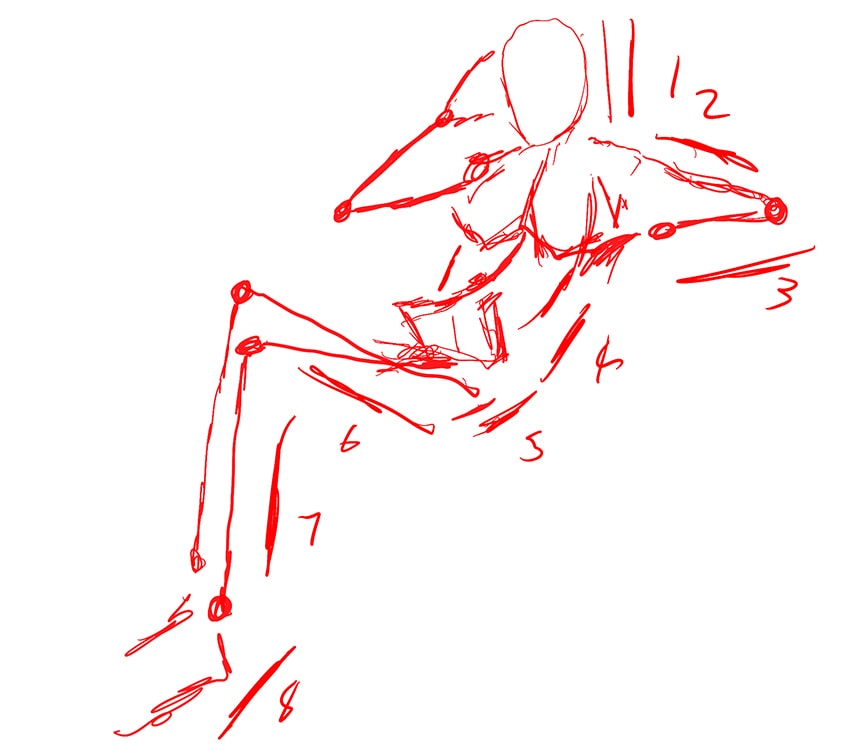
Having the proportional components of a human figure drawn within a specific environment helps to establish how the clothing will form around the body. Figuring out the proportions gives you a lot of freedom to play around with sketching the person in your own way.
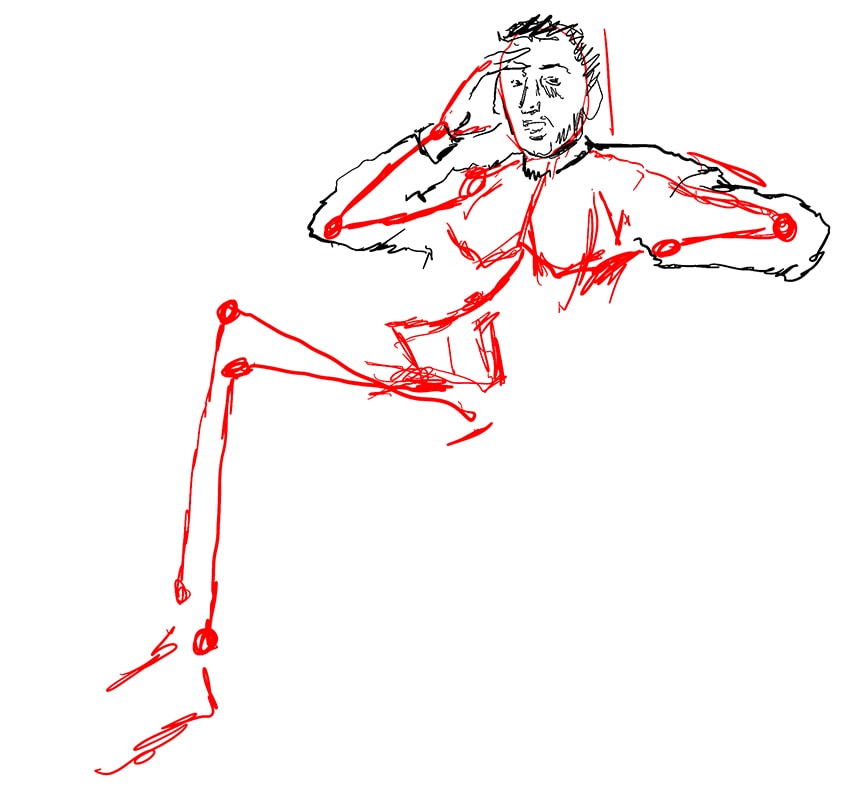
Once you have broken down the proportional values of a figure into its fundamental lines and measurements, you set yourself up for an easier person drawing process.
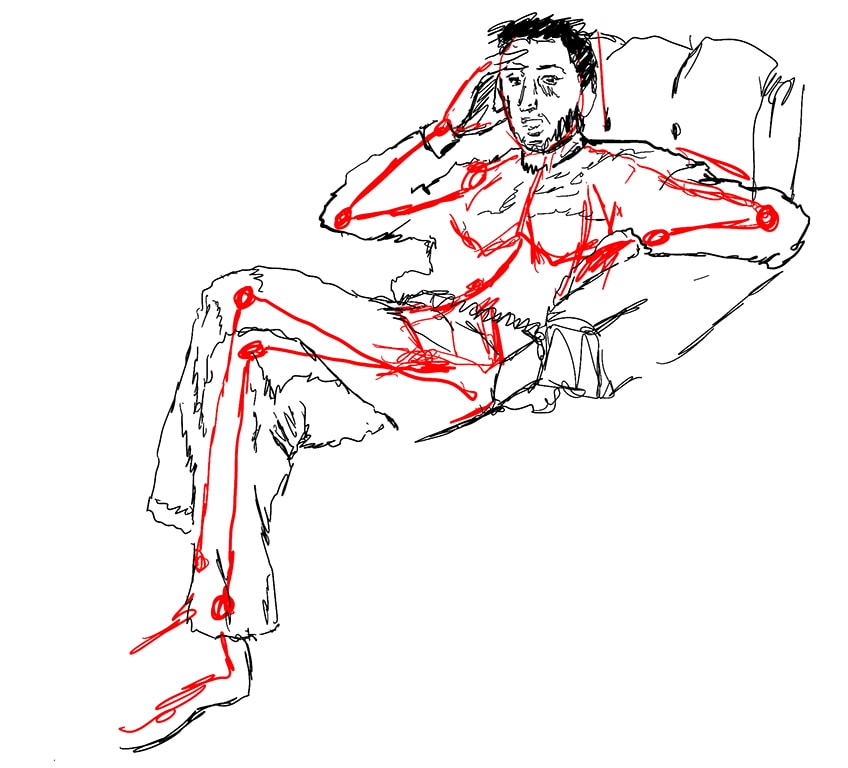
Ultimately, you are essentially starting with an accurately measured figure, which provides you with a better chance of placing the surrounding environment more correctly into your drawing. This includes clothes, chairs, cars, nature, and whatever else a figure is interacting with.
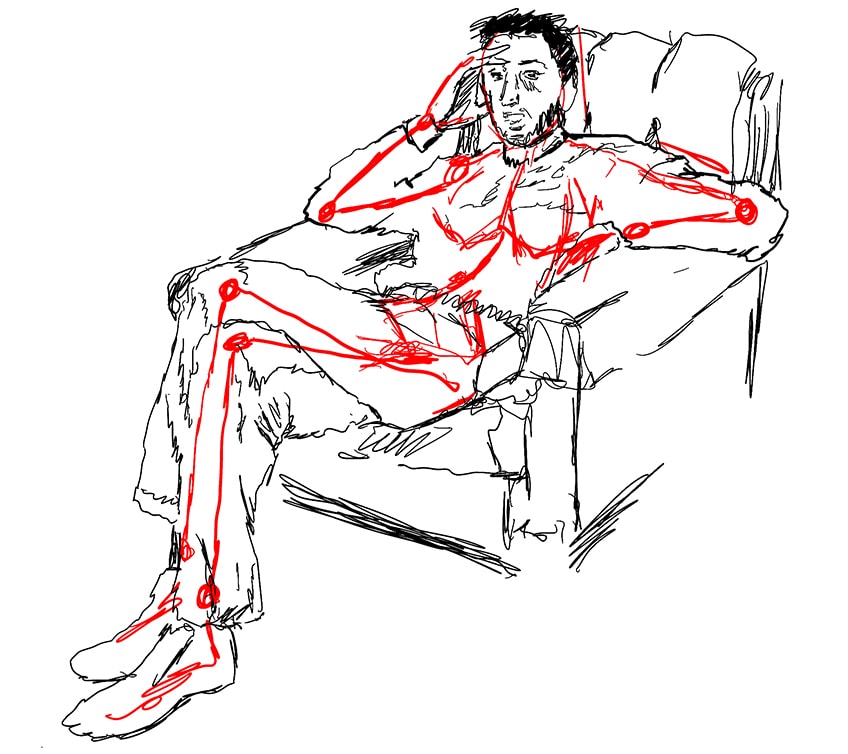
Practicing Loose Figure Drawings
Using these simple guideline skeletons, try to draw figures on the move in real life. These guidelines can then be drawn quickly to be used for drawing figures more correctly in various poses, which is especially helpful when drawing figures from life.
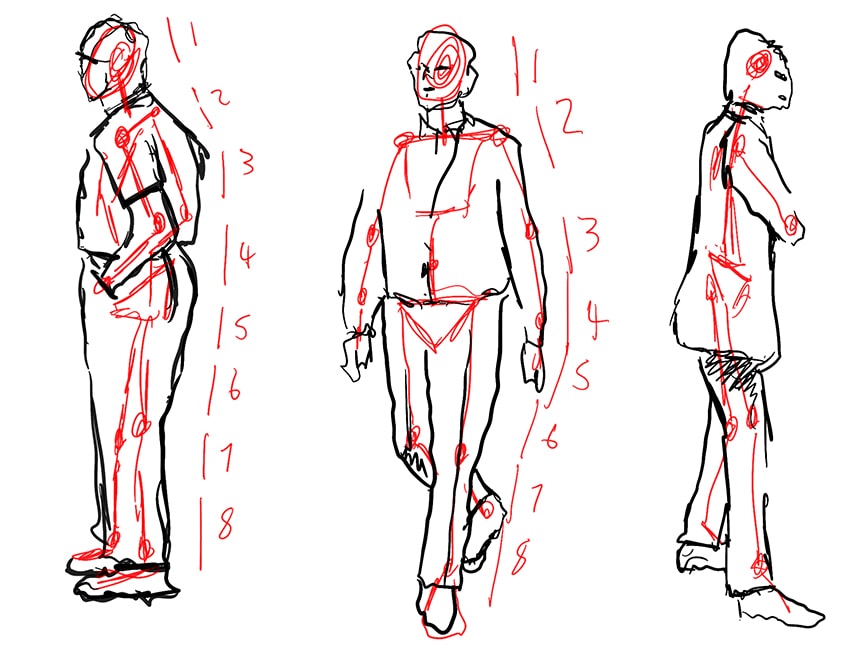
Applying These Concepts: How to Draw a Person Step-by-Step
We now can utilize these basic fundamental concepts in some of our own person sketches, where we can explore different poses and positions. Learning how to sketch a figure from the mind is also great practice and enhances your awareness of actual figure formations in real life. Let us see what the basic drawing process is through the following broken-up steps for three different person sketches.
Sketch One: Walking Male Figure
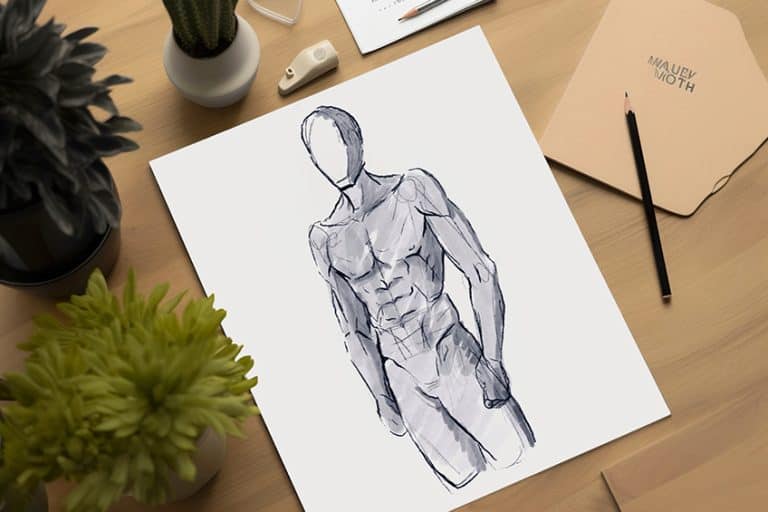
Let’s start with a male figure drawing in a simple walking position. This will provide us with the challenge of distorting the figure’s form a little without being too complicated.
Step 1: Lightly Sketching the Figure
Using a pencil, start by establishing a basic scale along the side of your page, breaking up the figure into eight or seven equal segments. From there, we want to start lightly sketching the figure, placing different features in different positions.
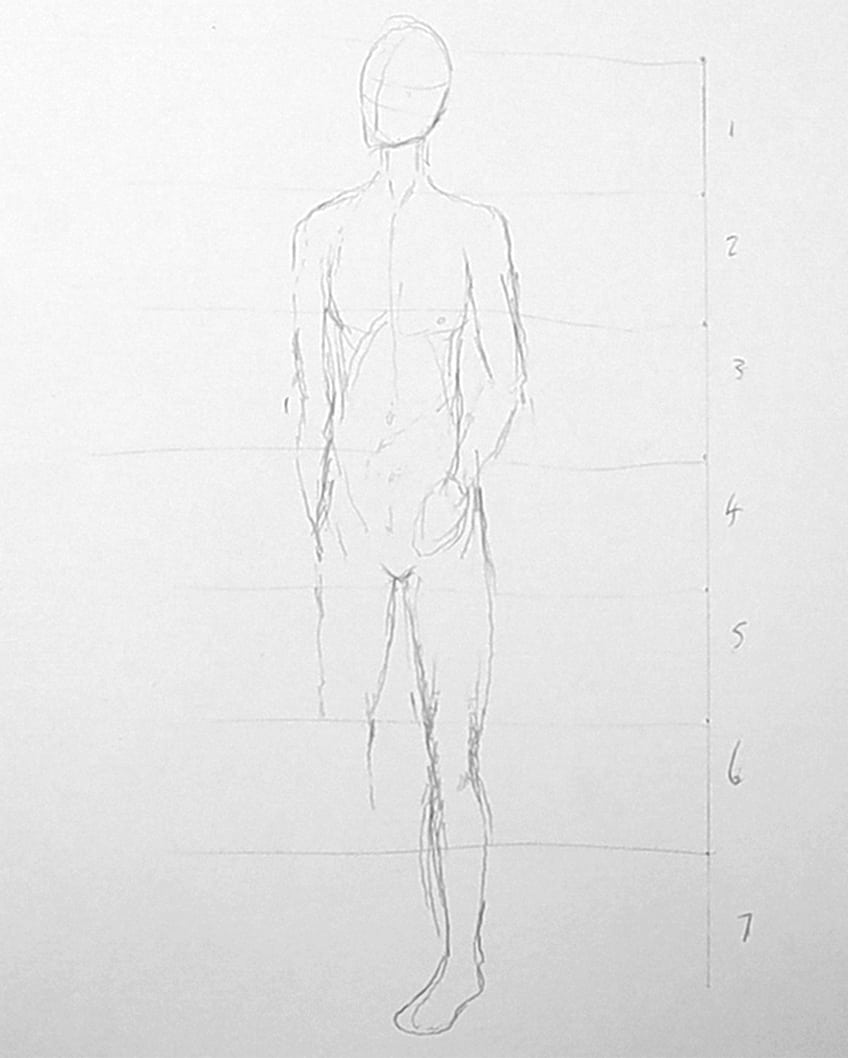
Step 2: Altering the Sketch
Start with something simple like a walking position. This way, you can slightly alter the figure for now. Again, use these measurements lightly and not as a rule. Allow yourself to perhaps draw the figure from a side angle where one side is a little more visible.
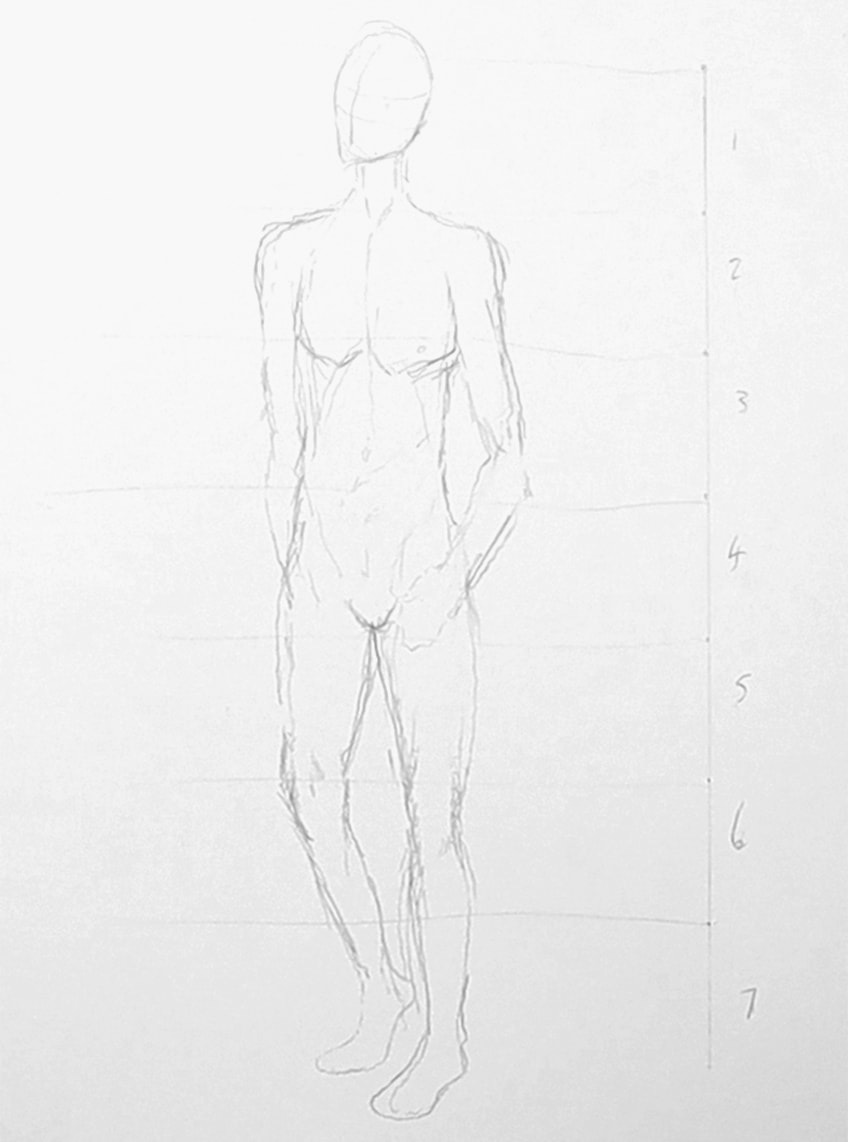
Step 3: Drawing Over the Guidelines
This is the part where you now imagine clothing the figure, carefully considering how the clothing will fall on the body. Learning how to draw clothing on a person is a great way to learn how to capture movement and motion in a person drawing.
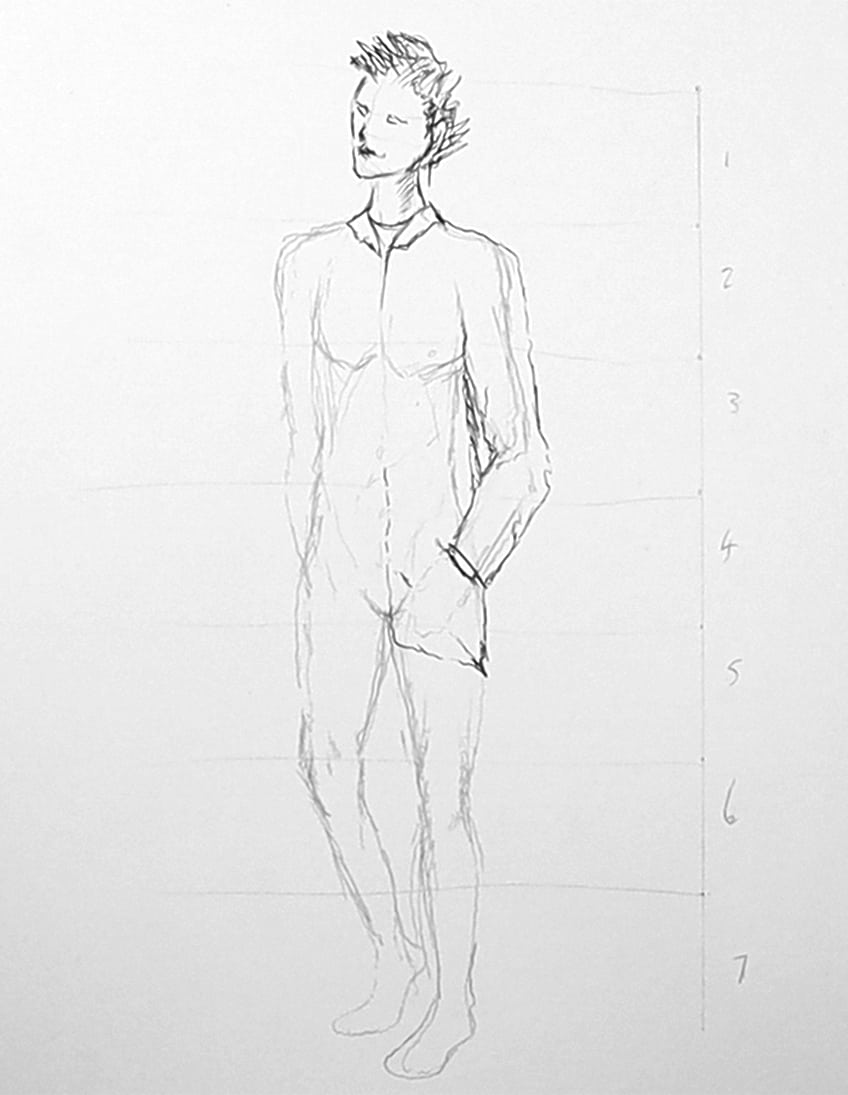
Using the guidelines, carefully start placing features with a pen your person drawing, slowly bringing it to life as you draw over the pencil marks. You should never rush this process but work through it with an awareness of how the figure is positioned and what this does for the drawing.
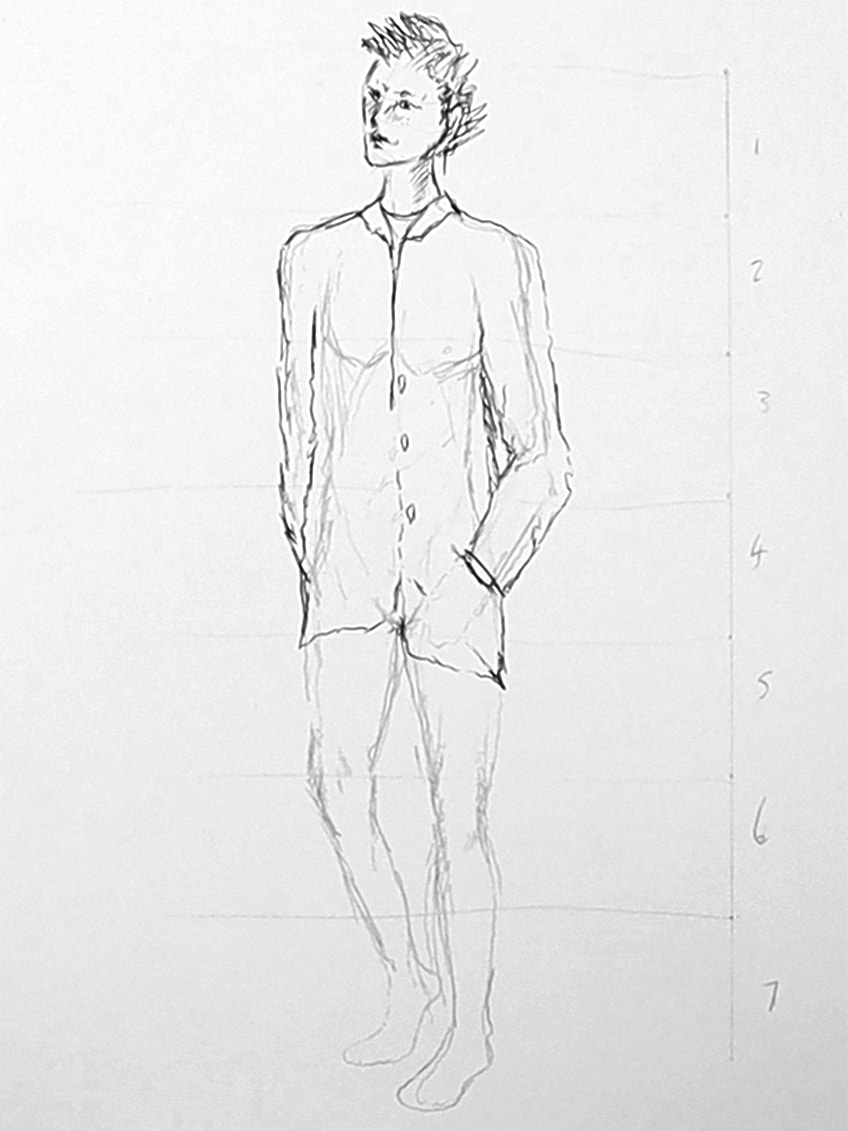
Again, once you have established the fundamental proportions and guidelines in your person drawing, the rest is about creative interpretation. This means their hair, face, clothing, and so on are the result of your creative decision-making.
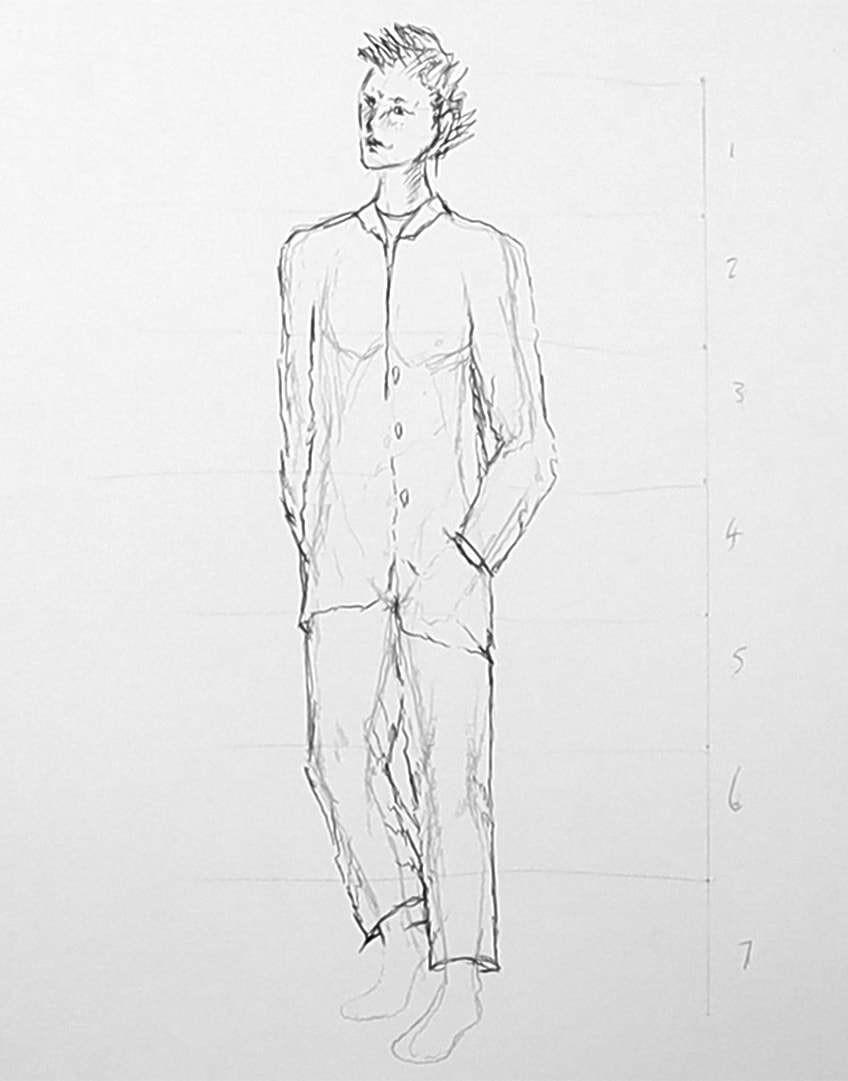
Slowly but surely, you will start to find that the beginning stages of establishing the form and proportions become quicker, allowing you to spend more time on the unique aspects of a person drawing.
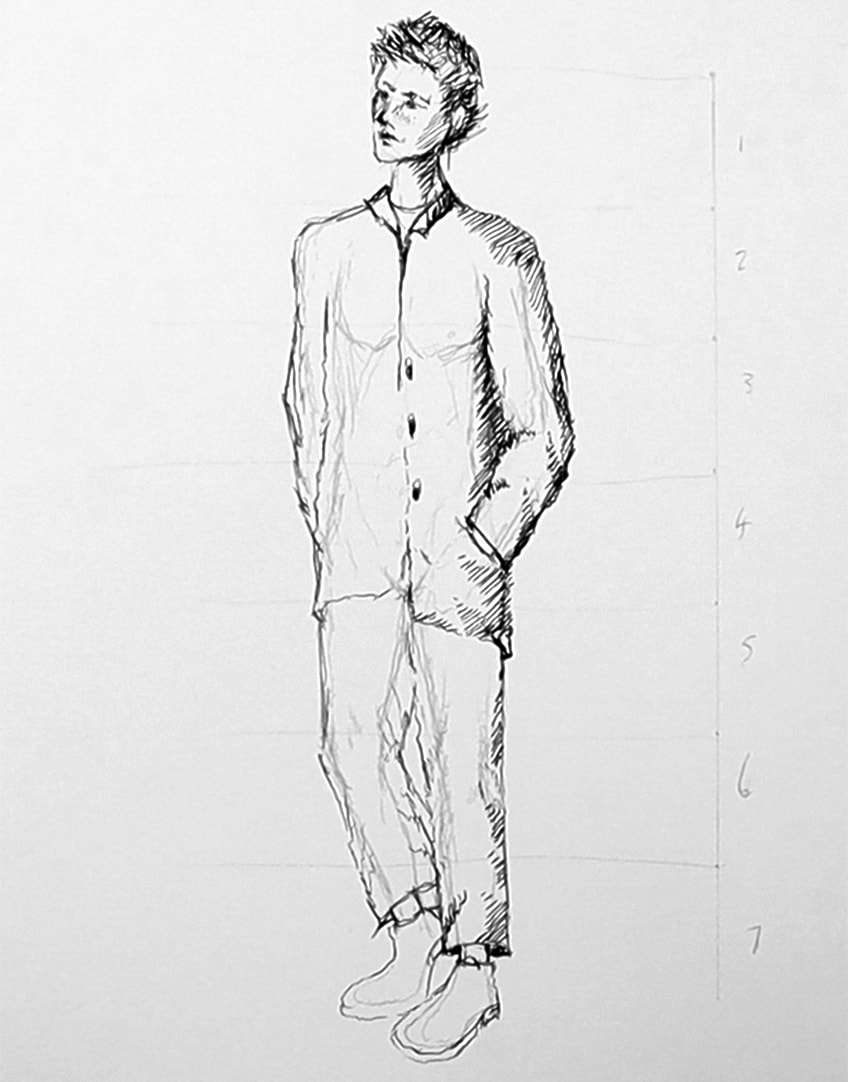
This allows you to play around with shading, clothing choices, and perspective. What makes a person unique is everything you see, all working together in tandem to create a specific image.
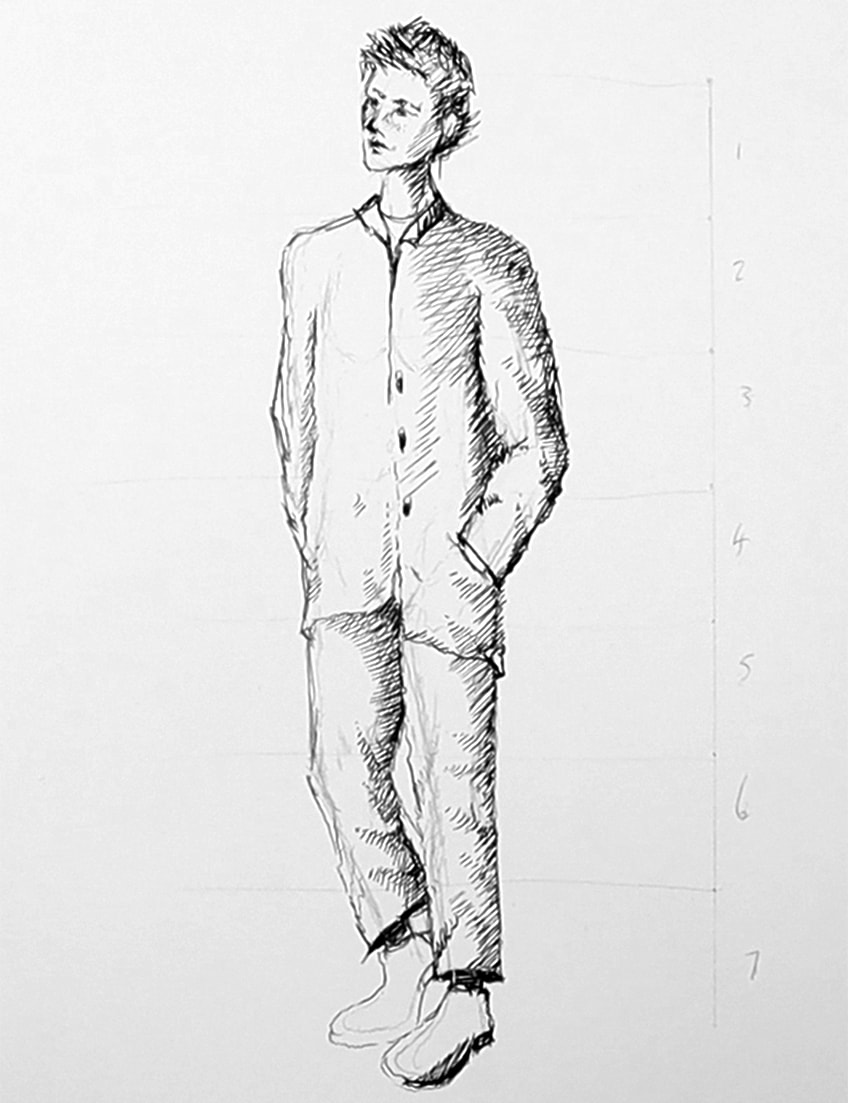
Step 4: Using Shading to Create Structure
This is also where shading becomes an essential tool to establish the structure and form of a figure. We want to remember that a person is a three-dimensional subject, which means that using shading is a great way to emphasize this quality in a person sketch
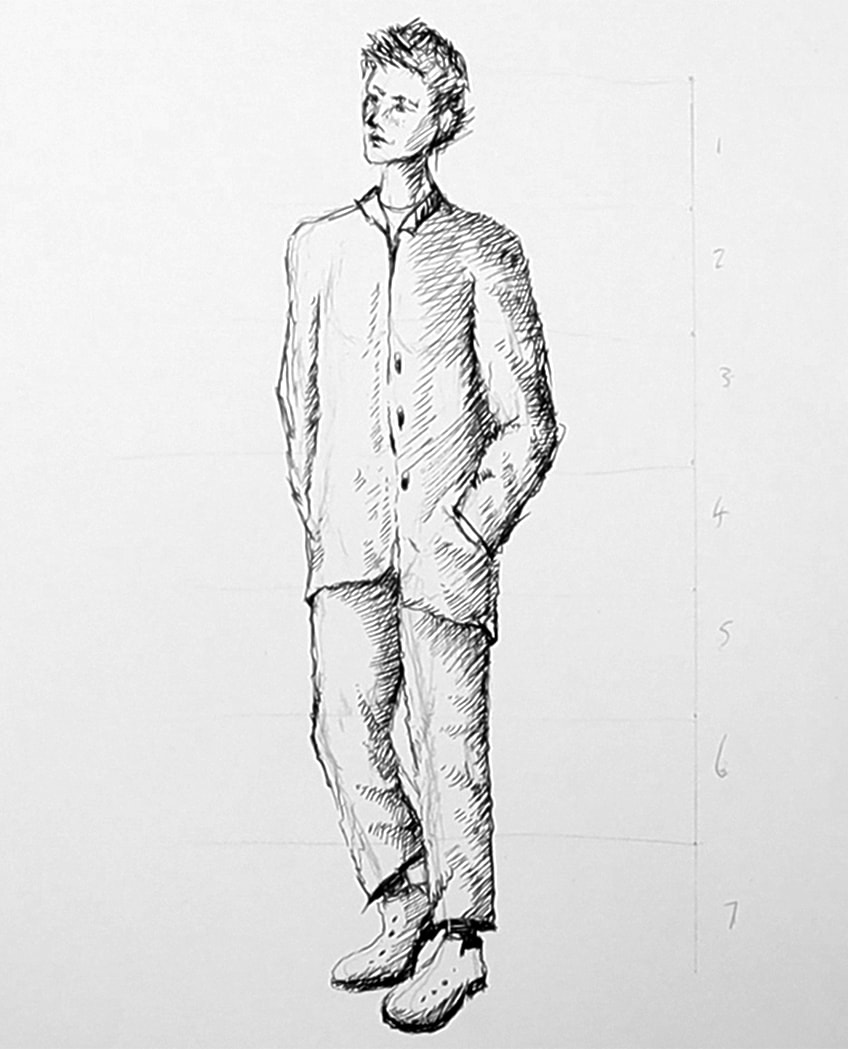
This is also an essential aspect of drawing clothing, as you establish shadows and light in the crease of the material. This makes the figure stand out and not look three-dimensional.
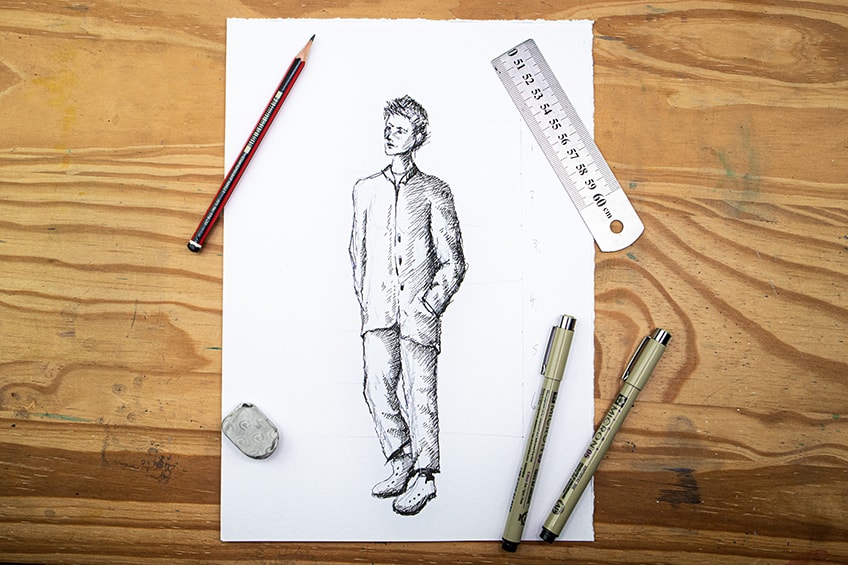
Sketch Two: Female Figure with Lifted Arm in Motion
This time, we will create a female figure drawing, working with the same principles but altering the figure a little more each time.
Step 1: Lightly Sketching the Figure
This time, using the same measurements along the side of your page, let us work on a female figure sketch. This time, let’s try to change the direction of the figure.
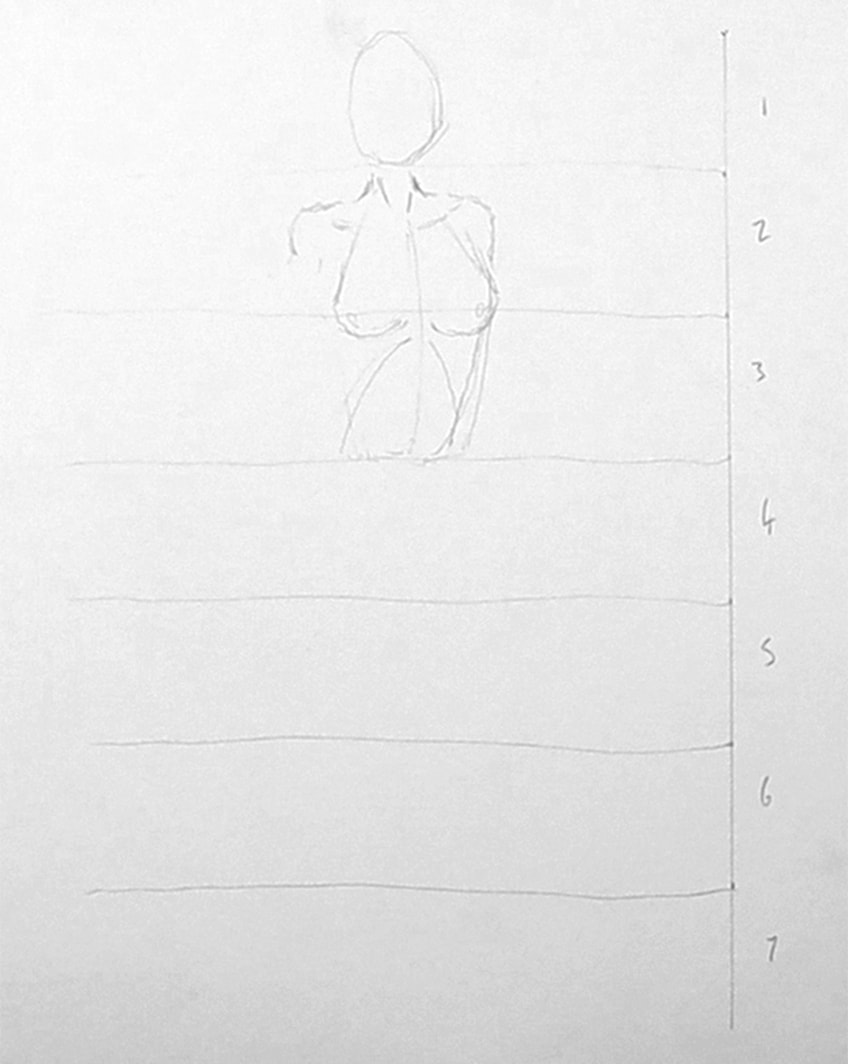
Step 2: Altering the Sketch
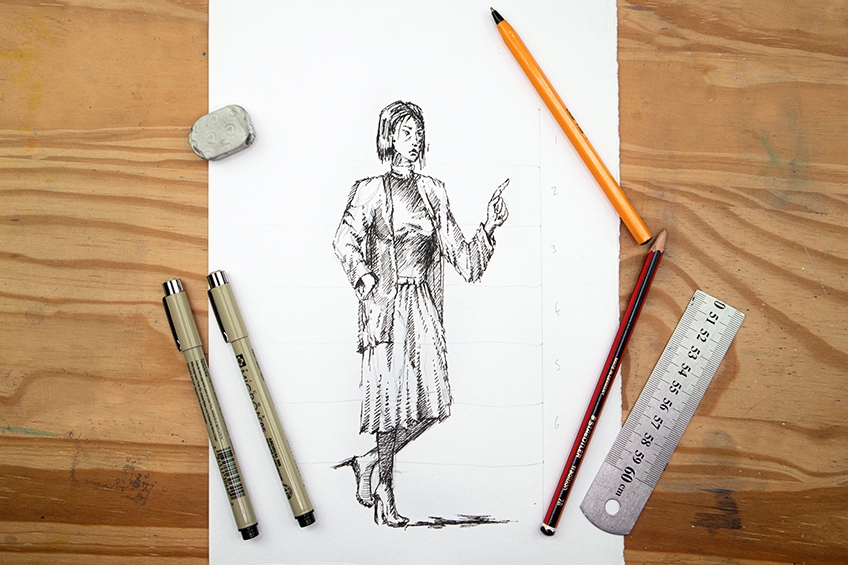
We can also slightly alter details a little more this time- this can be a hand on the hip or a finger in the air as if she was catching a taxi. We really want to explore variation in the body’s motion of the person drawing.
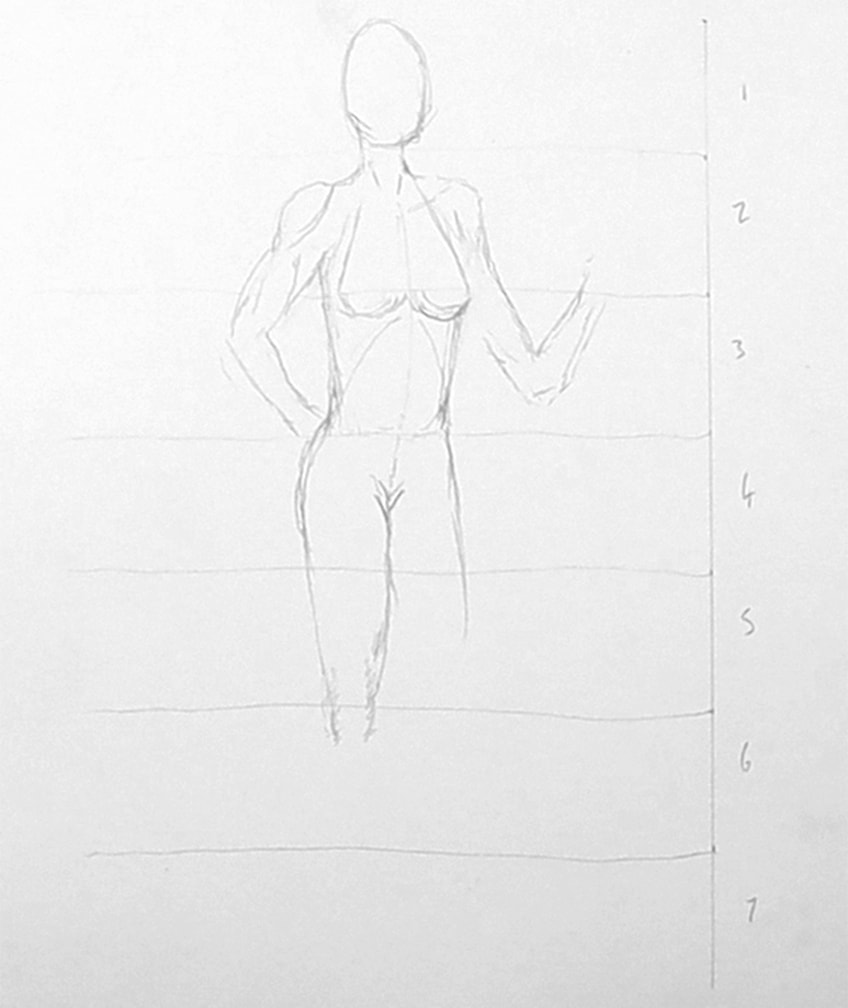
You really want to spend time in the early stages of capturing the dimensions of the body. We also want to bear in mind that a female figure tends to have more curvature in the hips. Think about these small details as you sketch your figure.
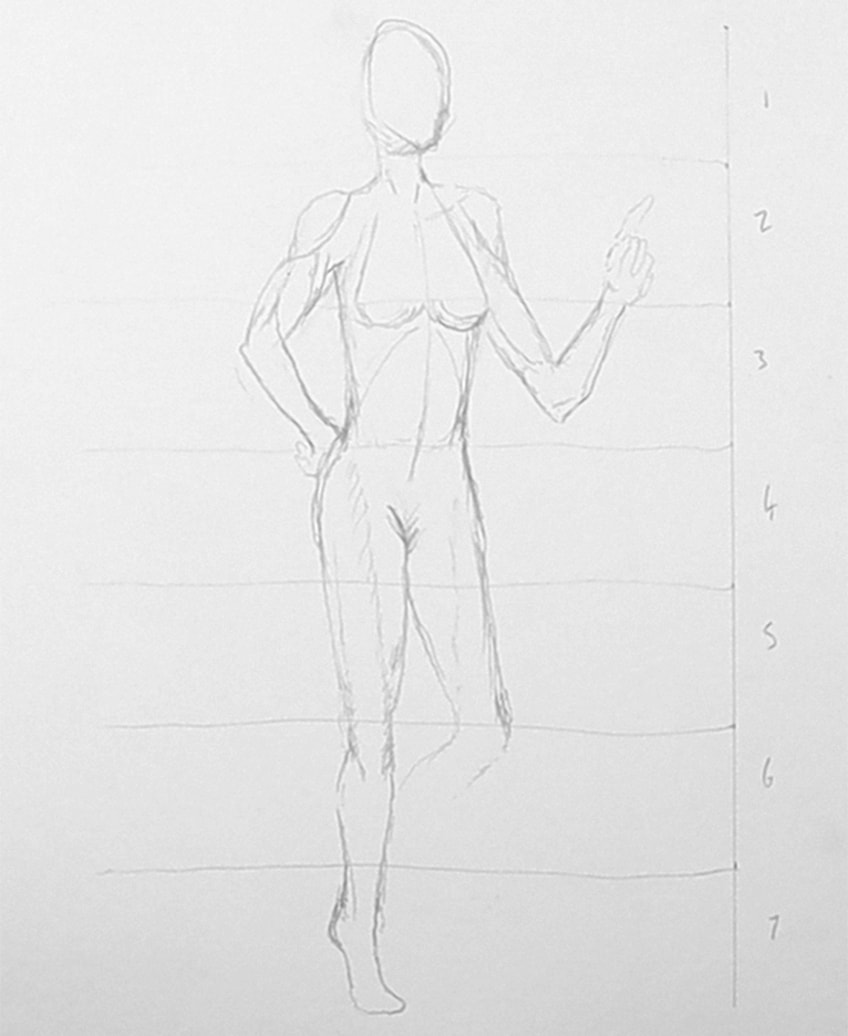
Step 3: Drawing Over the Guidelines
Again, the same process applies once we have established the figure correctly in pencil. We can then move on to drawing over the figure as we choose, using the pencil guidelines as a way of navigating how the clothes form around the body.
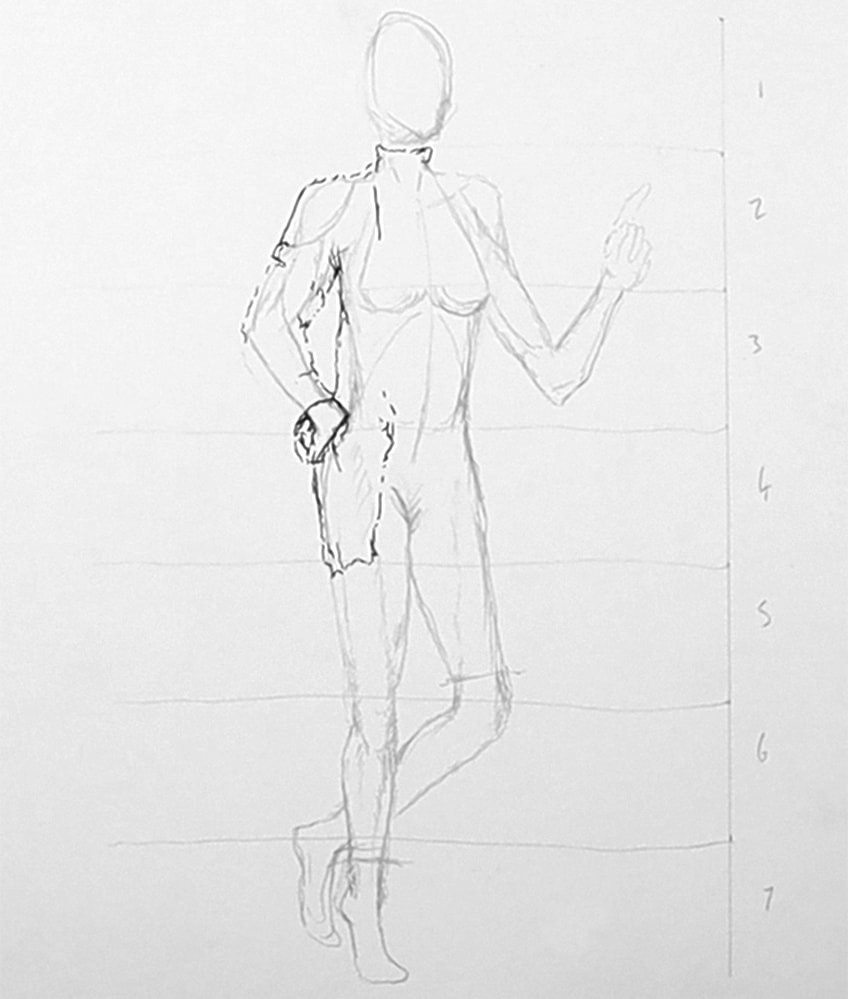
Around the breast area, we want to make sure there is slight shadowing in the clothing under the breast to suggest dimension in the figure. We can also be strategic about creating high- or low-waisted garments around the legs.
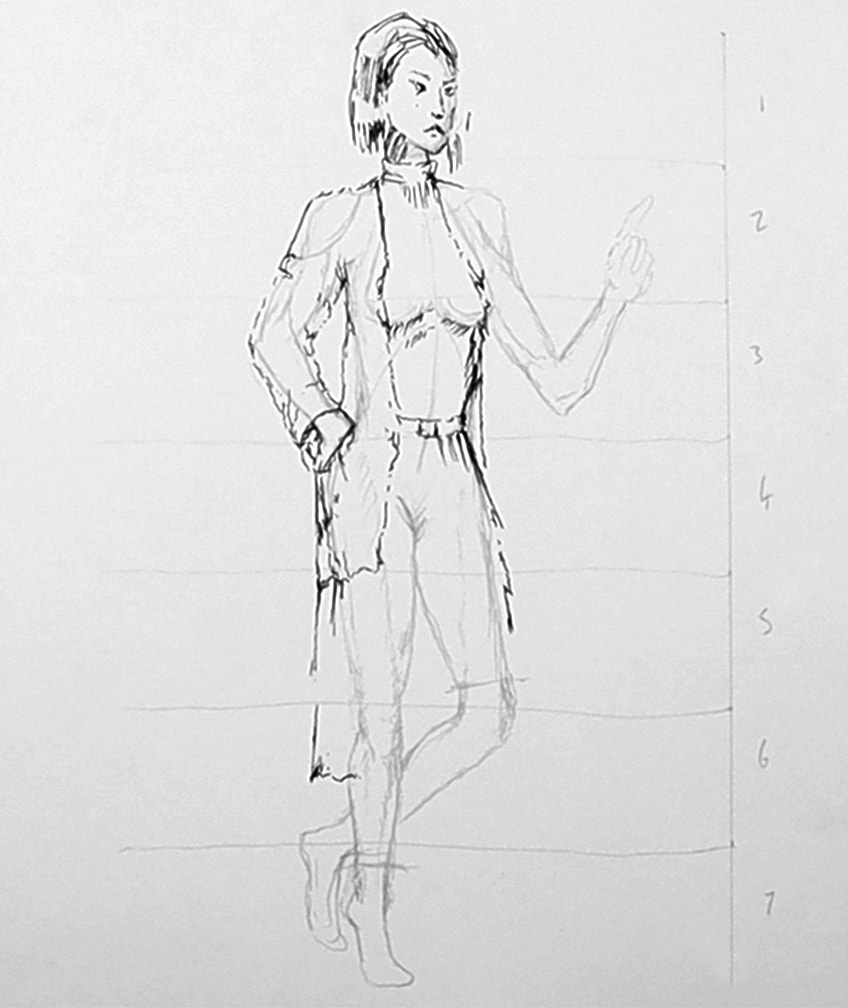
This part of the tutorial is a great exercise for practicing how to draw clothing on a figure and how to represent falling fabric against the body. You can always look at references on the internet to assist you in a more accurate representation of clothing.
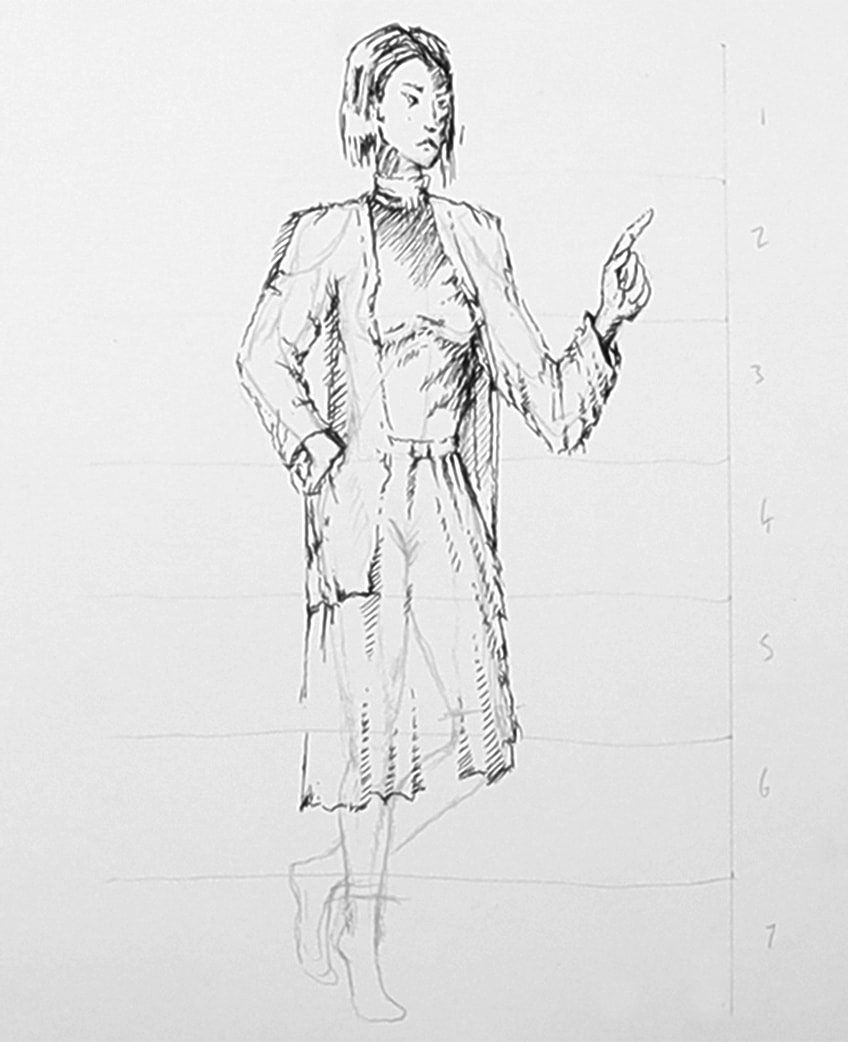
Step 4: Using Shading to Create Structure
Lastly, we really want to utilize shading to create shadow and light within the body of our person sketch. This is an effective method for representing the form more distinctly within clothing. This is especially helpful for capturing moments of curvature in a body structure.
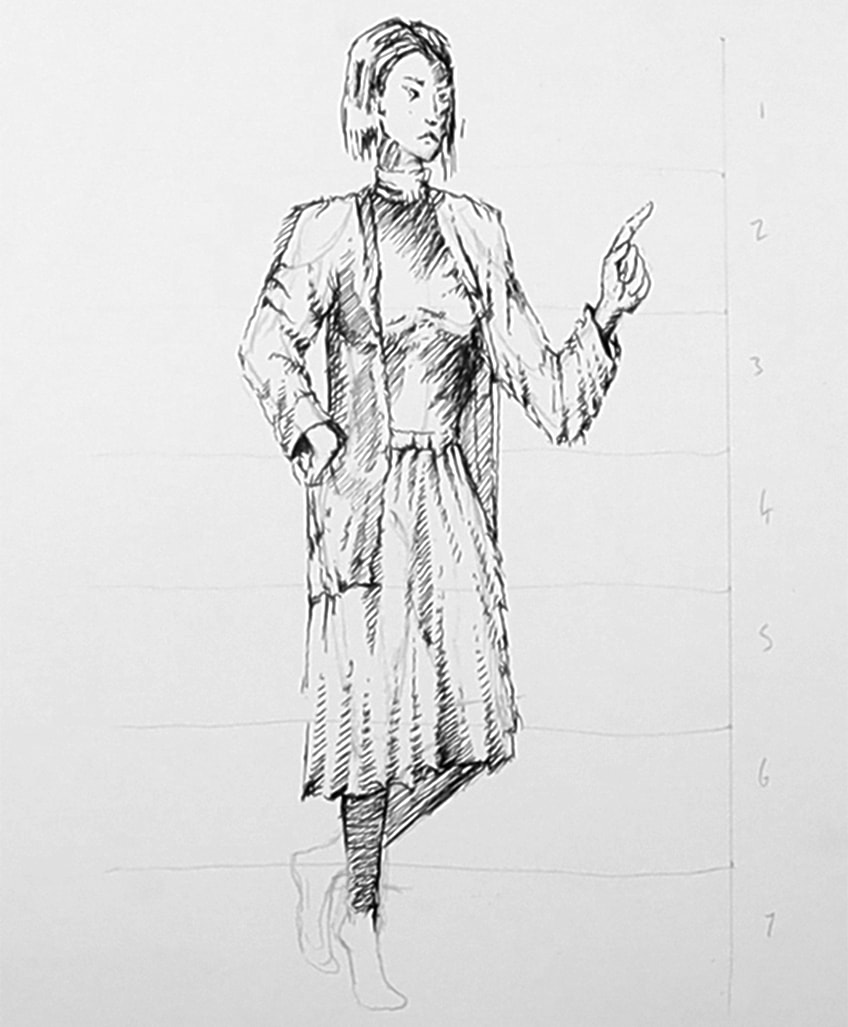
Shading is really what will bring a character to life within a drawing. This is the way in which we emphasize facial features and details in clothing to give the person drawing a three-dimensional quality.
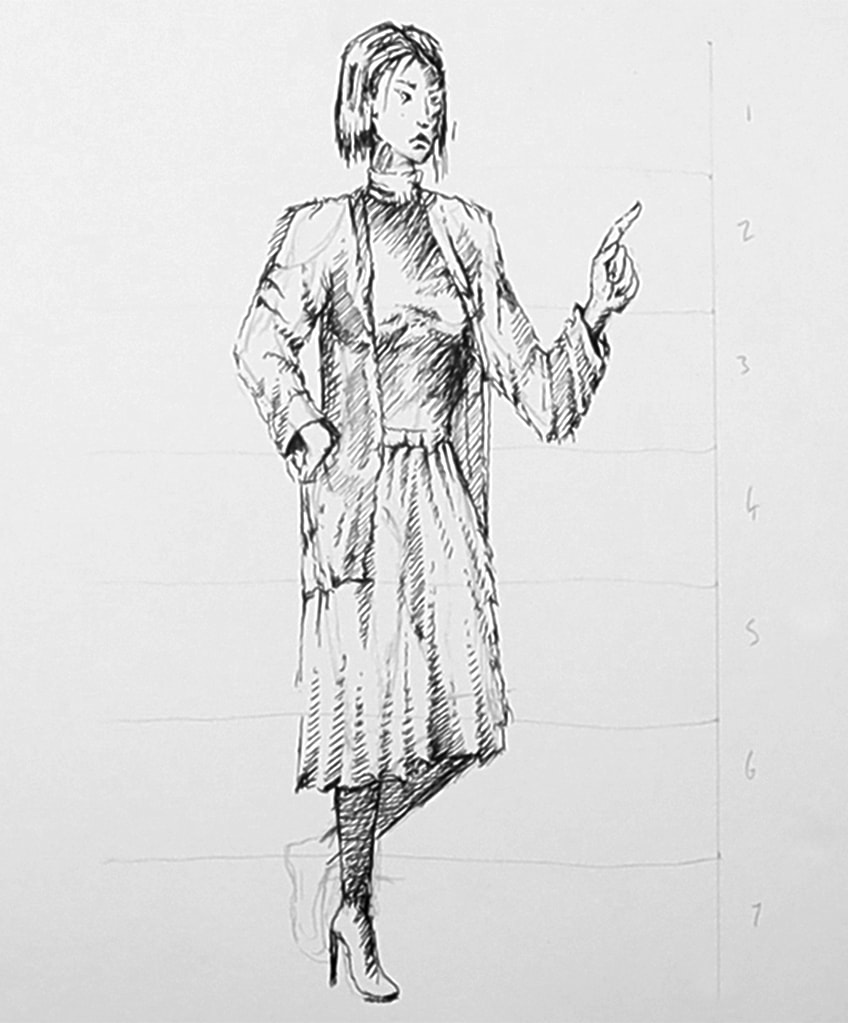
The more time you spend on your shading, the better your chance of creating a realistic and interesting person drawing.
Sketch Three: Seated Female Figure
This time, let us challenge ourselves by drawing a seated figure. This gives you the opportunity to really play around with measurements and place them along a distorted figure in a seated pose.
Step 1: Lightly Sketching the Figure
Again, we can start by lightly sketching the figure, using the measurements as a loose guideline to assist us in forming the figure in a seated position.
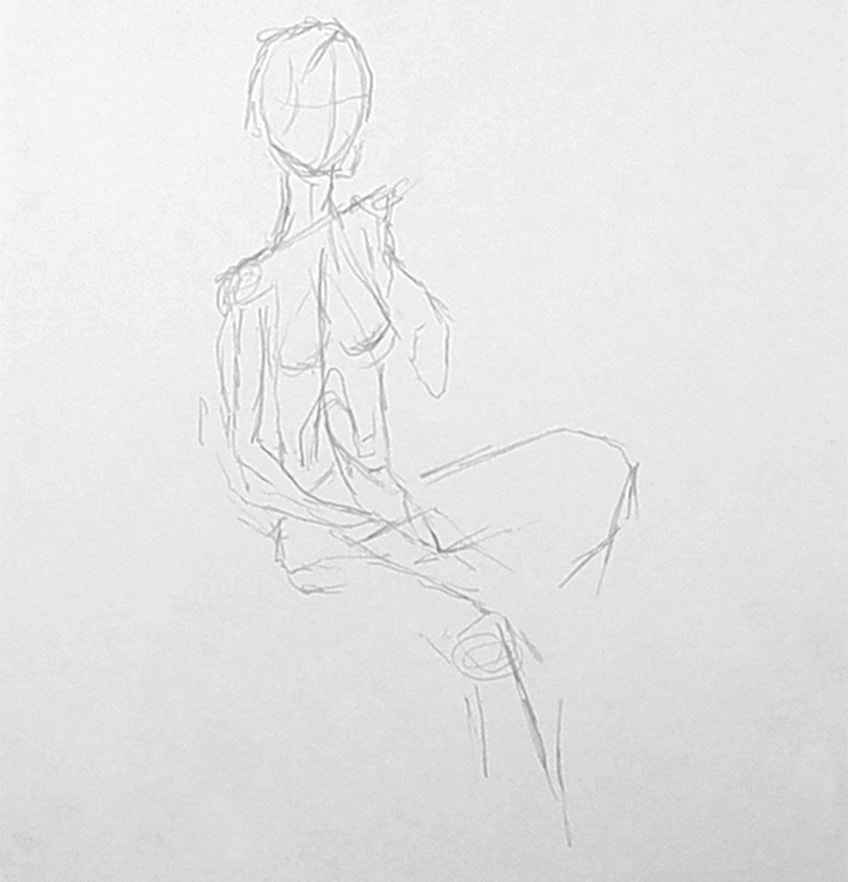
Step 2: Altering the Sketch
This is something we can play around with, whereby we can change the perspective. We can explore one leg up or down, or perhaps draw a hand rested behind the figure suggesting the figure is reclining on an object.
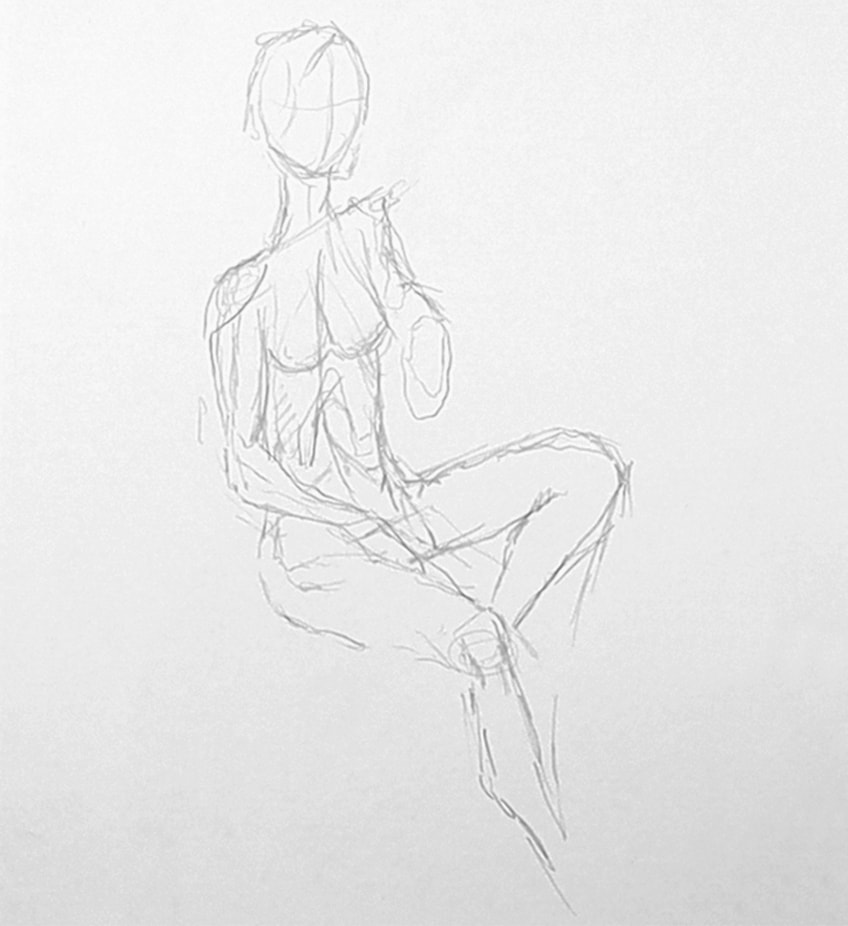
Step 3: Drawing Over the Guidelines
Once we have established the guidelines, we can proceed by drawing over them with our pens, slowly forming the figure. It’s really important that you take your time with adding features on top of the pencil guidelines.
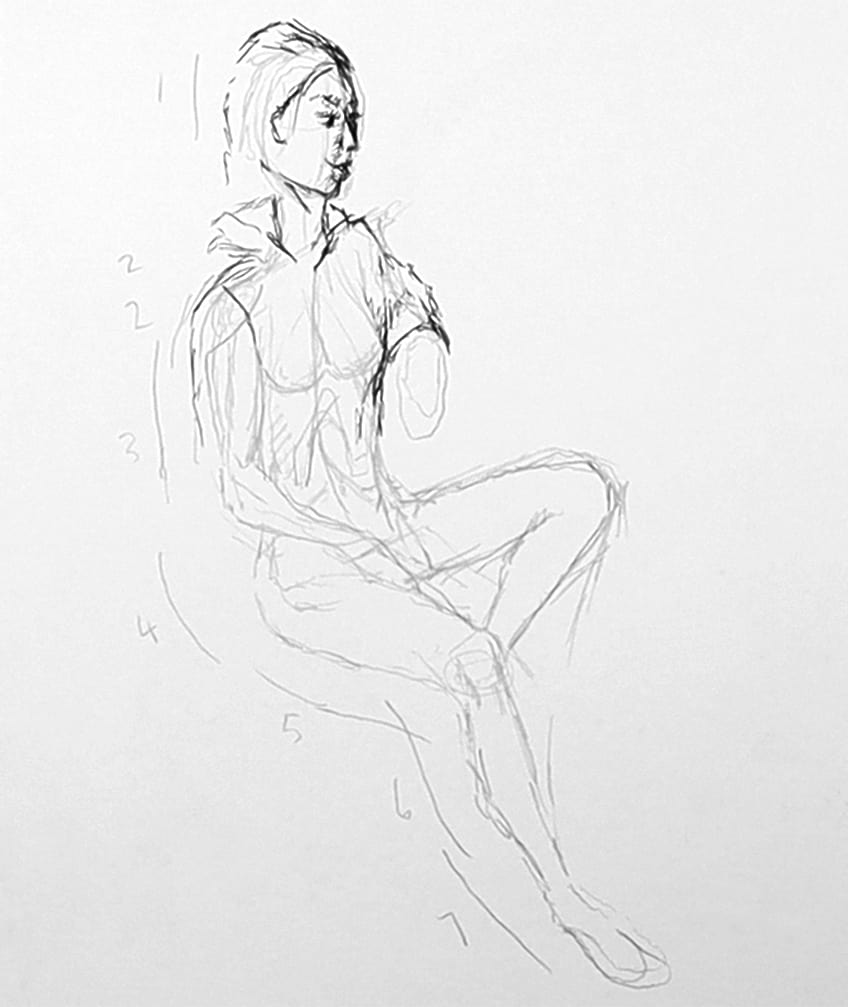
Also try to explore different pieces of attire and how they can be used to suit the vibe of the person drawing. Again, a person is the culmination of all the things that they are, including their clothes, hair, posture, and so on.
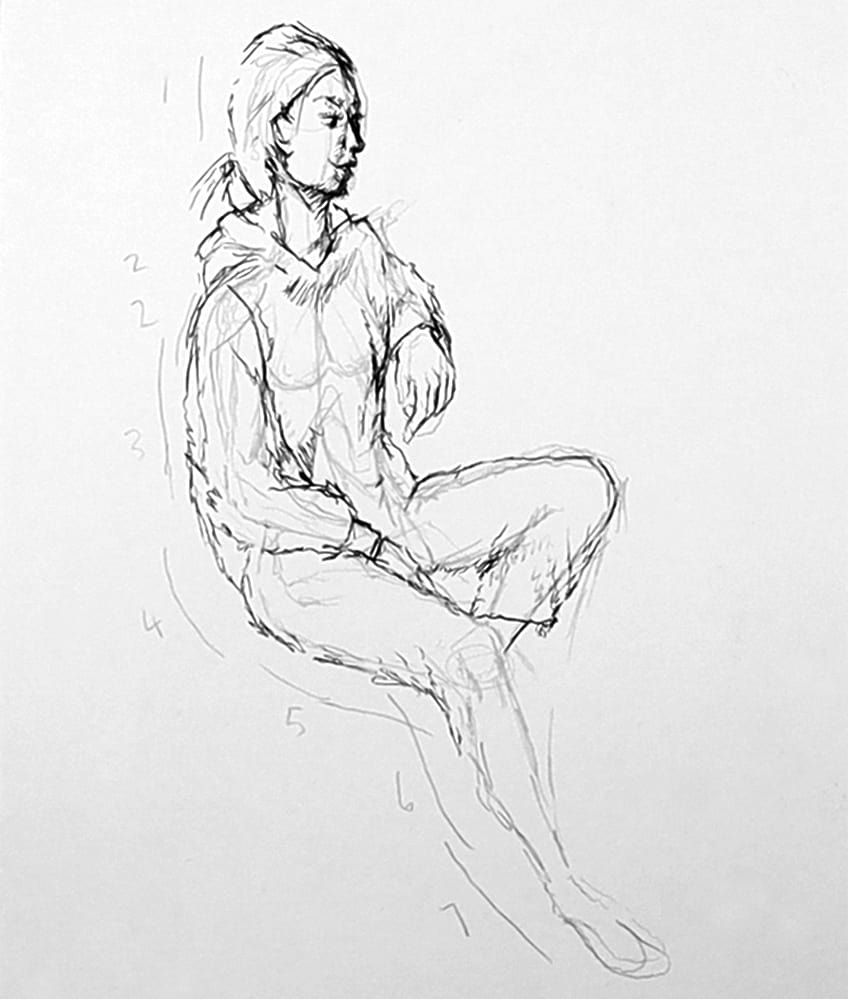
This is the opportunity to figure out what type of character you’re trying to draw and how you are representing them with various features.
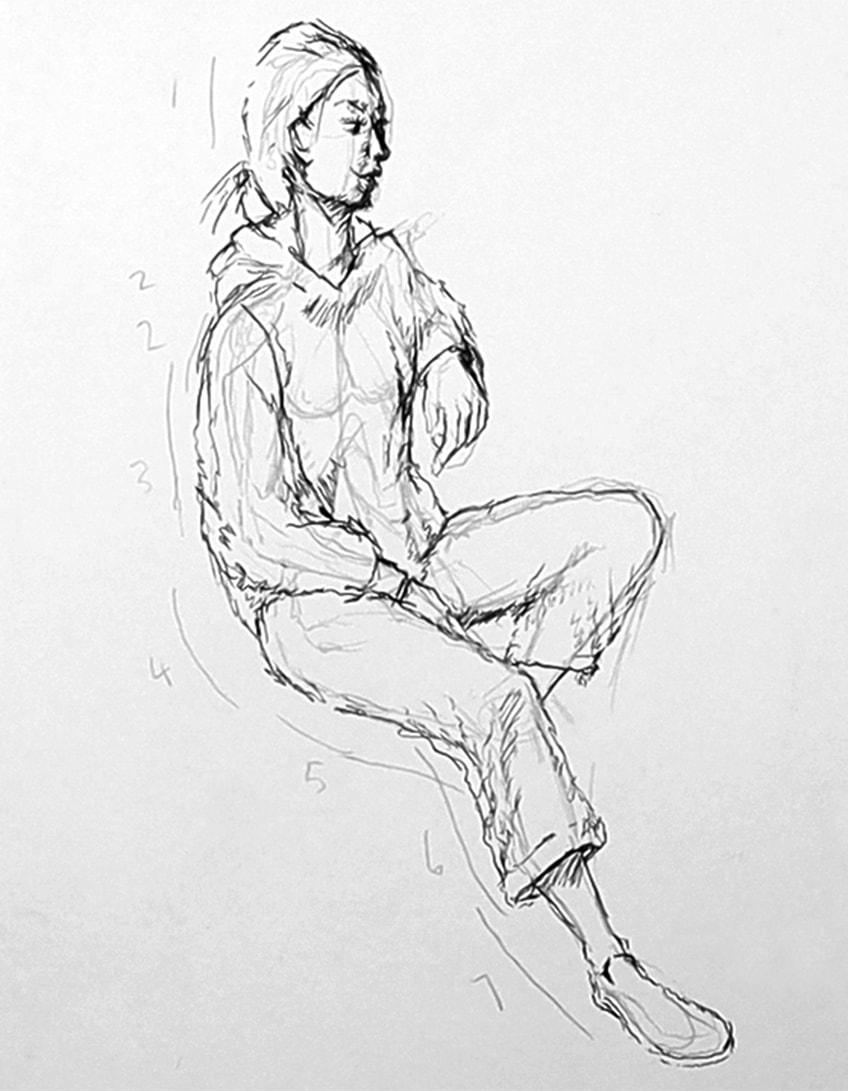
Step 4: Using Shading to Create Structure
Lastly, we can move on to adding shading to the person drawing. A great way to navigate this process is to imagine a light source coming predominantly from one side. This will enable you to keep shadows consistent along a single visible side.
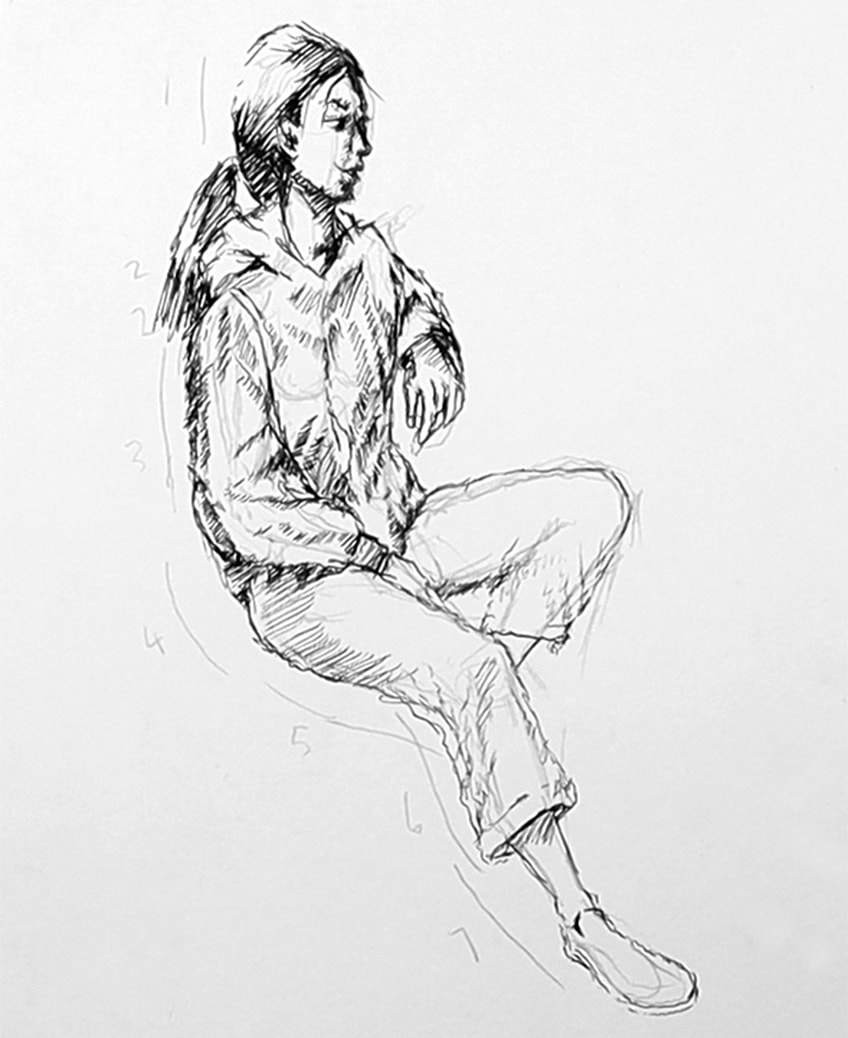
Again, the more time you spend on each of these steps, the better chance you will have of creating a unique and interesting person sketch. That is the basic process of how to draw a person through the use of fundamental shapes and measurements to achieve the nuances of features and shading.
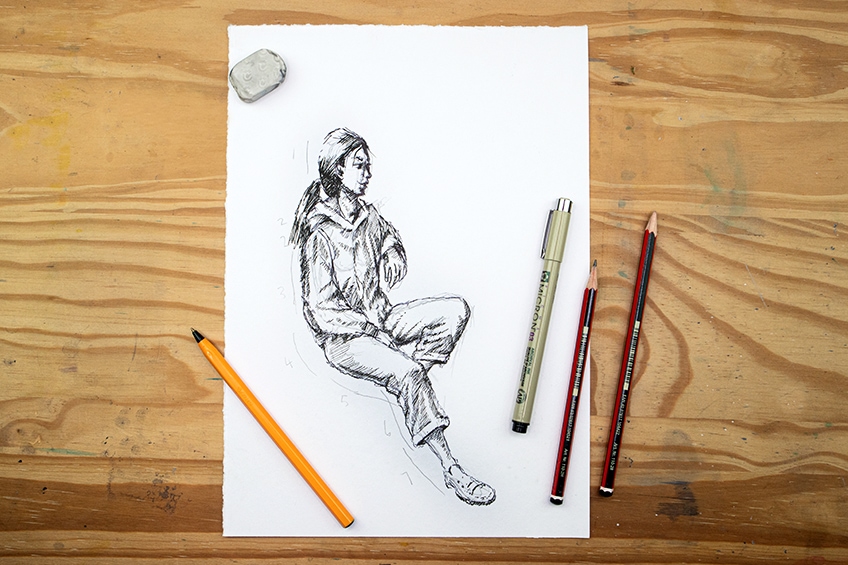
Tips to Remember
- Don’t stick too much to the measurements. The measurements should be used as a general guide that can be deviated from for creating different body types.
- Spend time on each stage. Once you get the first stage correctly drawn, you make the rest of the drawing process easier for yourself.
- Practice from life examples. Once you are comfortable with creating the guidelines, try to draw people in motion as a challenge to better your person drawing skills.
- Always consider the effectiveness of shading. Shading will establish three-dimensionality within the figure, so always consider the light source.
- Use references to build up familiarity. Lastly, using images from the internet will always be a great way to enhance your skills in your spare time.
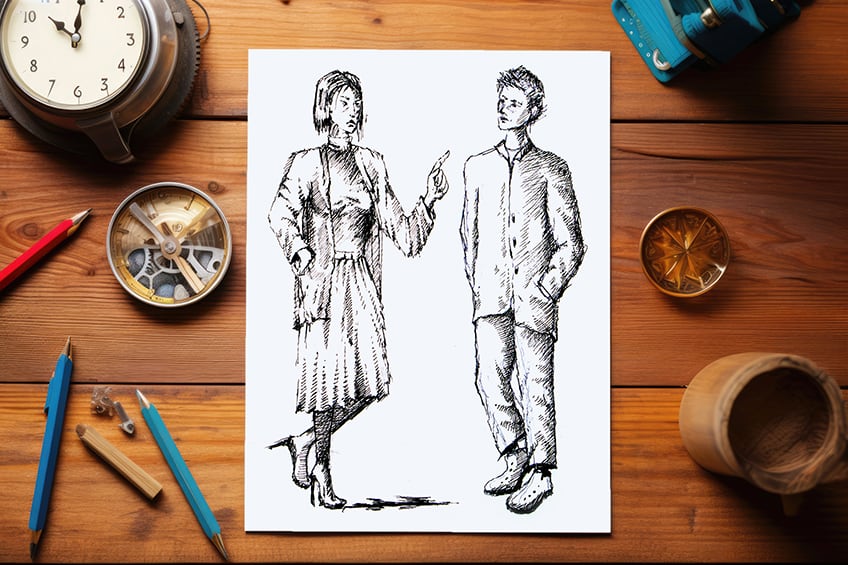
Learning how to draw a person is an essential skill that becomes much easier with practice. Once you understand the fundamental measurements for creating proportions, you can then play around with changing their form for different body poses. This skill is highly valuable and can be used in various ways for your artwork.
Take a look at our person drawing webstory here!
Frequently Asked Questions
How Do You Draw a Person Sitting?
The first important thing to understand is how the body is segmented into equal parts, which establishes the different lengths of different body parts. Once you understand this, you can manipulate these body parts to be positioned in different positions, whilst keeping the proportionally correct. This allows you to sit the torso down whilst raising the legs in a way that establishes a seated figure. From there, it’s a matter of constructing the body parts according to the perspective you are drawing the figure from and how you have set the guidelines to help you do this. Slowly but surely, you can sketch in clothing around the guideline skeleton to eventually establish a seated person sketch.
How Do You Draw Clothes on a Person?
When drawing clothes on a person, it is essential to remember that gravity is pushing clothing in a downward direction. This means that clothing falls on the body, which generally will create creases and ripples in the fabrics in all sorts of ways. So, whether you are drawing a person that is seated or walking, always consider the downward motion as a guiding principle. This will also enable you to better place clothing along different body parts, giving you an indication of whether moments in the attire should be tight or loose. Another factor to consider is what types of material you are representing, such as stiff material, loose material and so on. This can also assist you in drawing clothing a little more accurately.
Matthew Matthysen is an educated multidisciplinary artist and illustrator. He successfully completed his art degree at the University of Witwatersrand in South Africa, majoring in art history and contemporary drawing. The focus of his thesis was to explore the philosophical implications of the macro and micro-universe on the human experience. Matthew uses diverse media, such as written and hands-on components, to explore various approaches that are on the border between philosophy and science.
Matthew organized various exhibitions before and during his years as a student and is still passionate about doing so today. He currently works as a freelance artist and writer in various fields. He also has a permanent position at a renowned online gallery (ArtGazette) where he produces various works on commission. As a freelance artist, he creates several series and successfully sells them to galleries and collectors. He loves to use his work and skills in various fields of interest.
Matthew has been creating drawing and painting tutorials since the relaunch in 2020. Through his involvement with artincontext.org, he has been able to deepen his knowledge of various painting mediums. For example, watercolor techniques, calligraphy and lately digital drawing, which is becoming more and more popular.
Learn more about Matthew Matthysen and the Art in Context Team.
Cite this Article
Matthew, Matthysen, “How to Draw a Person – Person Drawing Step by Step.” Art in Context. February 5, 2023. URL: https://artincontext.org/how-to-draw-a-person/
Matthysen, M. (2023, 5 February). How to Draw a Person – Person Drawing Step by Step. Art in Context. https://artincontext.org/how-to-draw-a-person/
Matthysen, Matthew. “How to Draw a Person – Person Drawing Step by Step.” Art in Context, February 5, 2023. https://artincontext.org/how-to-draw-a-person/.


