How to Draw a Dog – An Easy Dog Drawing Guide
To draw a dog is a rewarding and challenging adventure. This is mostly due to the combination of details such as the proportions, fur, nose, and eyes, each of which requires careful attention to ensure the realism of the dog drawing. This article will teach you how to draw a dog step by step. We will show you the simple procedure of dog drawing, accompanied by some images to aid your understanding. There are some essential pointers to assist you in quickly learning how to draw a dog accurately. So, should you wish to find out how to draw a dog for kids or adults then ensure that you follow this helpful instructional guide.
Dog Drawing Basics
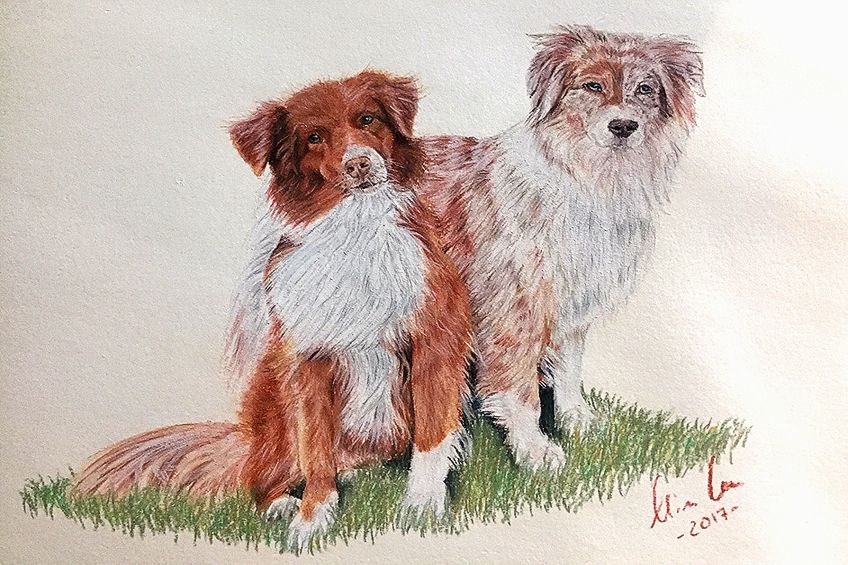
When using colored pencil crayons to draw dogs, what changes must be considered in the process of drawing different breeds? Rather than the color, size, or stature of a particular dog breed, it is the form and characteristics of the coat and fur that need our attention. Easy dog drawing starts with shorter-haired dog breeds. In this particular instance, we apply short, brisk strokes. The direction that the fur grows and the length are generally similar throughout, so this process will soon become second nature to you.
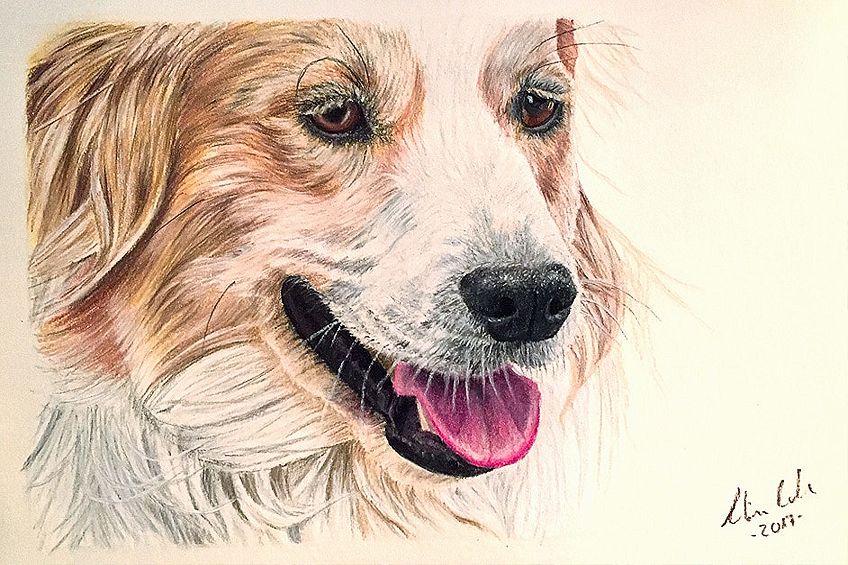
The characteristics of longer-haired breeds, such as a Golden Retriever, however, are slightly more difficult to reproduce. Each hair protrudes in varying directions, overlapping each other and also varying in length. Around the head and face the fur is rather short, but slighter longer on the ears. Hairs may often bend with movement or become elongated in larger parts of the dog’s body. You will need to exercise your concentration here, working in long careful strokes. Break down the drawing process into simple steps, drawing each part separately.
Exercising your patience is the key to becoming more proficient.
Make the process more straightforward by only attempting portrait-style drawings to start with, and using paper of a minimum A4 size if you can. As you reduce the size of a drawing, so the reproduction becomes increasingly complex. Larger sized drawings will allow for more experimentation, where the fine details are more visible and easy to navigate. Once you are comfortable and familiar with some of the guidelines, you can easily produce realistic results.
Materials Need for Dog Drawing
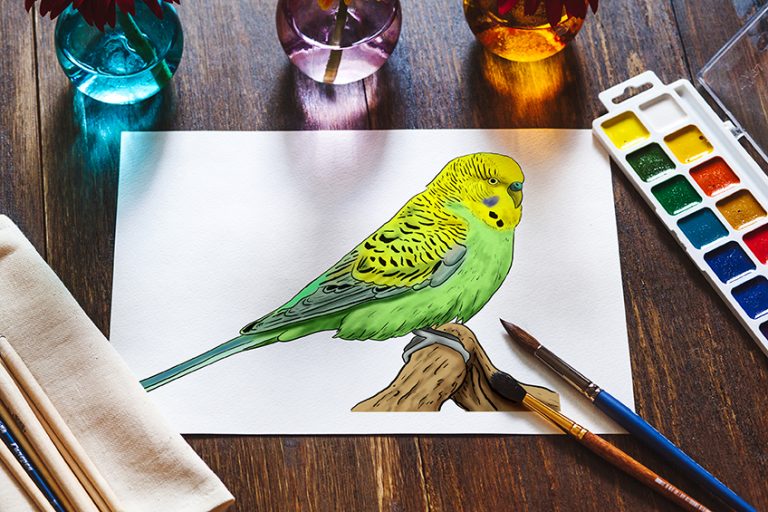
You do not need much for a colored pencil drawing, which is the style we will be doing in this tutorial. This guide covers drawing using colored pencils and requires very little for you to get started. In this case, the drawing began with a single sheet of paper, colored pencils, and a few select pieces of pastel chalk. This is an effective way to create an easy dog drawing. If you would like to learn how to draw a dog, or perhaps another subject, this list of materials will help you get started:
- Archival, natural white, acid-free paper, like this pad from Canson.
- KOH-I-NOOR colored pencils, which are useful for priming large areas.
- KOH-I-NOOR pastel chalk pieces, which allow for drawing in layers and also for creating the structure of the coat.
- A white marker pen, such as this one by Faber-Castell. It is used for adding fine details like reflections and creating tangibly realistic fur.
- A drawing/blending stump to soften and create blended transitions between areas, as well as to define the structure of the coat.
- A putty eraser can be shaped for use in erasing larger areas and tiny details too. Remember that you will not be able to erase darker shades of color.
- A pencil eraser, which is an essential tool. This solid eraser is useful in the creation of bold lines, making small alterations, or slightly lightening specific areas. This will not erase darker colors, however, so keep that in mind.
How to Draw a Dog – The Basics
To create an easy dog drawing, it is crucial to first understand the fundamentals. As you learn how to draw a dog step by step, there are some essential aspects that need to be executed correctly, such as choosing what you are going to draw, where you plan on working, and what materials you would like to use.
Choosing the Dog Picture
Selecting a sharp picture with greater detail makes the drawing process far easier, as this provides you with a high-quality point of reference. Try to keep the drawing as simplified as you can. Pay attention to the dog’s facial expression, the direction the fur is sitting, and the reflectivity of the eyes. When you can gauge these factors by looking at the photograph, you know that you have selected a good picture to work with.
Avoid the mistake of rushing this process and selecting a picture without vivid details or one that is not in focus. You will be compelled to think too much and lose much of the required detail in the process. Fluency is essential when working, so a sharper, more detailed image that captures your interest will stay present in your mind, making the drawing process far easier.
Think in Surfaces and Colors
Categorize your various drawing areas as surfaces. Think of the technique you are using, the colors required, and break down each part to determine your approach and selection of tools, rather than thinking of the dog as a physical form in front of you.
This approach should demystify the process for even the more complex parts of the drawing.
The Workplace
Ensure your workspace is comfortable and that you enjoy spending time there. A single A3-sized drawing can take from 20 to 30 hours to create. A pleasing work environment is conducive to increased productivity per sitting. Ensure that the lighting is sufficient, and create a playlist of your favorite songs or even play a movie in the background.
How to Draw a Dog Step-by-Step Guide
We can now begin to create your dog drawing. Regardless of the complexity of your image, the steps in the process that follows are the same.
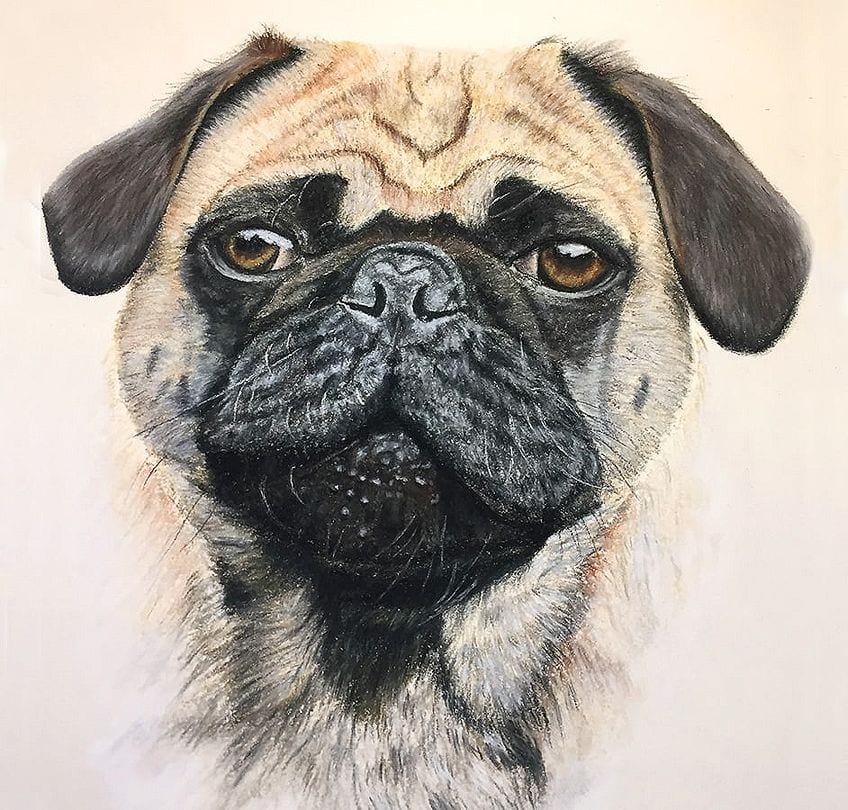
1. From Photo to Drawing
Let us begin by introducing you to a pastel chalk drawing of Bert the Pug. Here, we can take a closer look at the methods used in the drawing process.
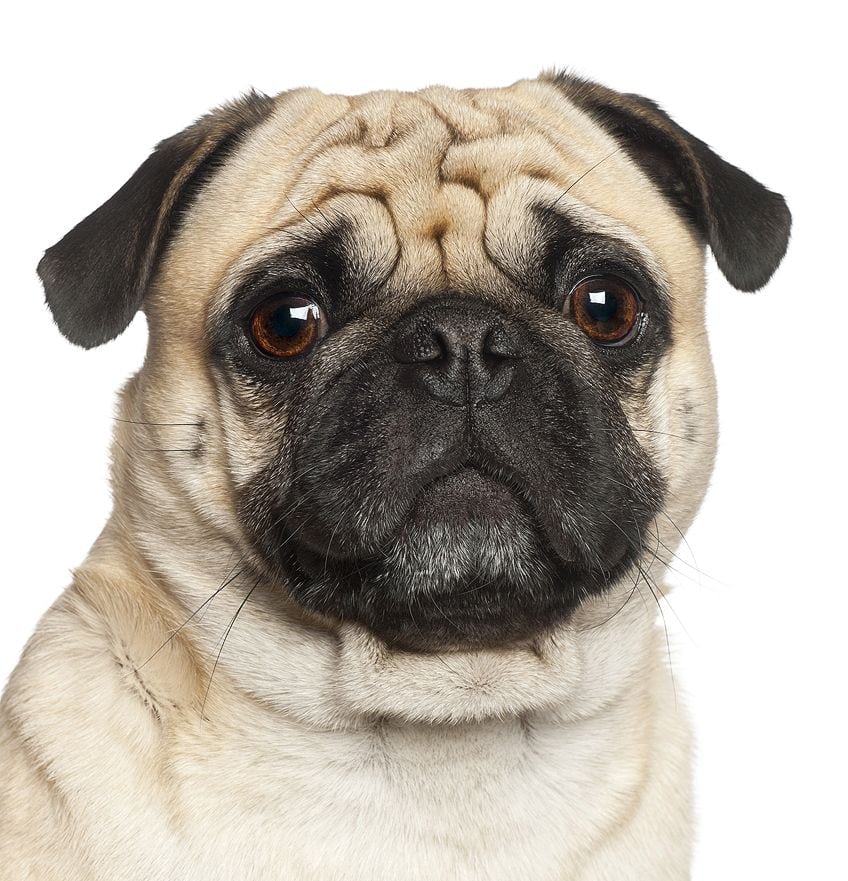
Starting with a pencil, Bert’s lines and shading were lightly sketched. We then work methodically from the top left quadrant to the top right, which prevents the pastel-filled area from being smudged while drawing. Pastel chalk is extremely fragile, so be gentle with your grip and the amount of pressure you apply when working with it. One exception was that both ears were drawn together, as the same drawing methods and colors were applied to each of them.
Tip: If you are right-handed, protect the right ear from being smudged later on while drawing (and vice versa). You can use wax paper or cellophane placed over the area.
Bert’s ears were both pre-hatched using black pastel chalk. We then took to widen the color dynamic with some additional grey tones. As the area we are working with is rather large, you can use your fingertip to blur colors and fill in the white regions, which will also soften the tone.
Ease your finger over the pastel-covered area lightly with deft, rounded wiping motions. After this, you can use a dark brown pastel shade to add more of the fur. Once this is added, continue in the same fashion, getting gradually lighter. The greater the amount of tones you create per shade, the better the result will be. Remember to ensure the hairs lie on top of one another when you draw them. The method of drawing from background to foreground is effective here, as the hairs behind are masked by those at the front.
As soon as the ears are covered with their various shades, make use of a sharped white pencil to create short marks in the direction of the fur’s growth over this entire region. Using this method will also help you achieve excellent reflections. After this, use a dark pencil for drawing in additional bold accentuations. Approach dark regions like Bert’s ears by building them gradually from dark to light. Using pastel chalk makes this a simple task.
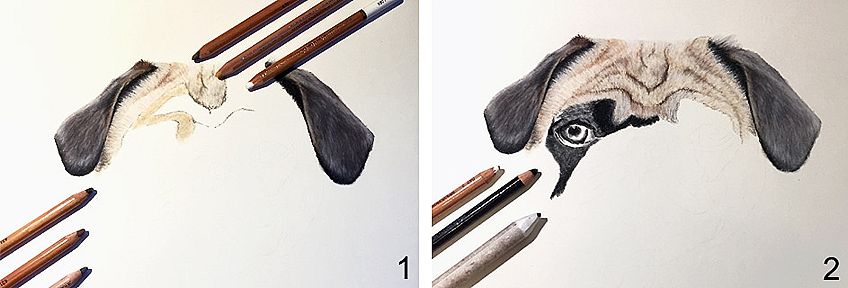
2. The Forehead Area
When continuing with the forehead area, some careful consideration is necessary as you are now drawing from light to dark. Start by priming the region with a sand shade of pastel, working from one brow furrow to another. It will not be necessary to use the blurring method on the sand-colored region, as the hairs are drawn with a white pastel.
Be careful not to smudge this area, because the brighter parts add definition to the face. When you have completed this region, select darker shades as you work in the dark parts. If any line or area is over-darkened, simply use a lighter shade to brighten it with fine strokes.
Note: When working in lighter areas, like Bert’s furrowed brow, draw from lighter to darker shades and remember not to blur or smudge.
3. Drawing Dog Eyes
This region is a critical part of the drawing, as it is the emphatic nature of the eyes that we form an emotional connection with so spontaneously. Bert’s spherical eyes are decidedly dark, so you will need to build the details from dark to light once more. Begin by priming the eye regions with black pastel. Be mindful of the direction of the fur around the eyes.
Cover the area of dark fur surrounding the eyes once more using your fingertips. It is essential that this region is fully covered in deep black pastel. Here, you can use a light grey pastel shade and begin drawing each hair straight away. You can use a black pastel or a blending stump to merge areas that are too bright. This provides a shadow for the fur and also creates more detail simultaneously.
Paying especially close attention to the color composition, draw the eyes once more. Start with black, then add the necessary shades from dark to light brown. Allow the colors to merge slightly by layering the light over the darker brown. The most effective method is using deft, rounded strokes.
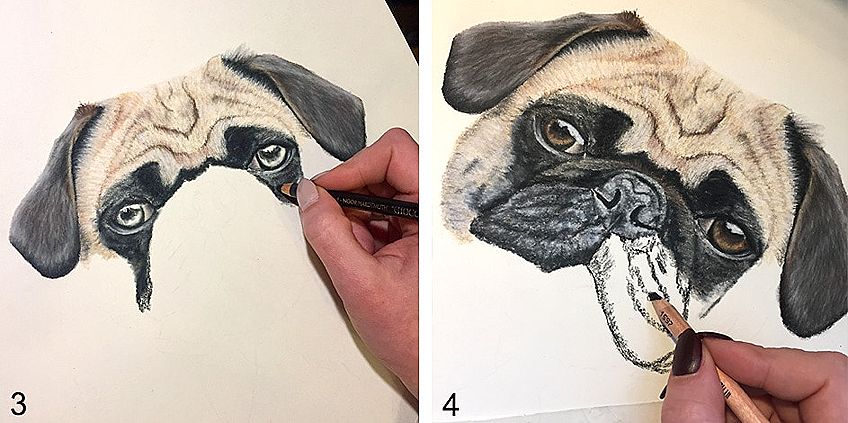
4. Drawing the Mouth and Nose
When approaching the nose and mouth, begin drawing once more from darker to lighter. The method is close to how the eyes were drawn. Use black pastel when drawing the darker regions and indentations. Pay attention once more to the direction of the fur growth, without using straight lines. Once you have completed this area, start drawing in the coat by using shorter strokes with light grey pastel, and use the stump to blend accurately.
Useful tip: Creating lighter accentuations may prove difficult, as the pastel has been applied in multiple layers. White pastel is intensely opaque and also very soft, so it adheres effectively when used over the layers of pastel chalk.
5. The Chin
Bert’s chin was primed using black pastel and the area eased over, using fingertips to cover the blank space between the two regions. Before using the white to complete this area, draw in the fine hairs using dark brown and move to gray to lighten.
It is important to take note of Bert’s whiskers on his chin and mouth regions. White pastel may not be sufficiently accurate to apply here, so a white marker may also prove useful as this can emphasize finer detail. Once you have drawn the whisker in, retracing each line with a sharp-tipped white pastel crayon will soften the overall feel.
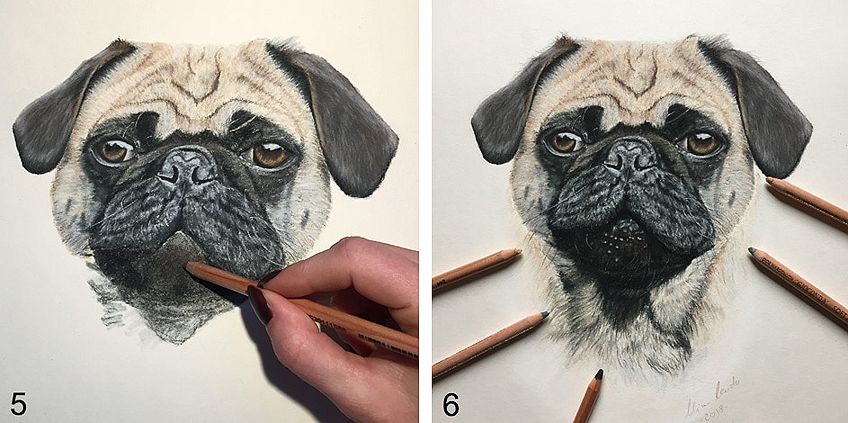
6. The Chest
Bert’s head is now complete, so we can move to his chest where the fur is visibly thicker. Here, we can use a light brown pastel shade to draw in the long, interweaving strokes of hairs. With close inspection, you will notice the fur is made up of various color shades.
So, once the lighter fur is complete, gradually draw in the adjacent hairs using a darker shade as you work. Lighter fur blends easier with white pastel, while the darker areas will require a blending stump. When you have finished, draw over them using white pastel to emphasize the direction of the growth of the fur.
Once you have created a satisfactory amount of surface detail in an area, use a sharp-tipped black pastel crayon to lightly fill in any gaps. This process is correctly drawn by shading each separate hair in the direction of the fur’s growth.
Lastly, use a kneading eraser to clean the dog’s outline with short, rounded movements. Minute-sized pieces of pastel may have fallen onto the page while you were working and may have become stuck. Carefully erase these with the putty rather than using your fingers.
If you would like to master how to draw a dog for kids or adults, ensure that you closely follow these guidelines when working. We hope this has been enlightening and will teach you how to draw a dog properly. Be sure to spend time practicing your techniques and remember to have fun along the way!

Alina Fuchs
Today's guest artist, Alina Fuchs, lives in Dortmund, Germany, and has been working within the Mettmann district for a few years now. She graduated from high school in 2010 and completed her bachelor's degree in social work in 2014. Alina also completed a dual-study program that focused on public administration.
For as long as Alina can remember, both art and animals have been her constant companions. She would always prefer to draw or be outside than being confined to watching TV, even as a child. Alina's role model is her aunt, Silke, who would draw her niece pictures of horses that Alina could then color in or trace. Her parents would often joke that Alina wanted half a zoo within her home.
It was through her love of animals, nurtured by her childhood experience of growing up with dogs and horses, that Alina was able to analyze animals on a whole new level: Subconsciously, she would take note of and memorize her animals' various movements, expressions, proportions, and directions and shades of fur. This is the reason as to why she prefers to draw animals.
Having been drawing with simple pencils and crayons, Alina's father noticed his daughter's talent and got her a box of pastel chalks for Christmas in 2011. It was with this gift that Alina was truly able to explore her talent and develop her passion for art, allowing her to practice various techniques and to build on her stock of oil pastels. Alina's talent has always been natural - she never once attented a drawing class. This artist offers the following advice: "Go ahead and dare to form your own style!"

Matthew Matthysen is an educated multidisciplinary artist and illustrator. He successfully completed his art degree at the University of Witwatersrand in South Africa, majoring in art history and contemporary drawing. The focus of his thesis was to explore the philosophical implications of the macro and micro-universe on the human experience. Matthew uses diverse media, such as written and hands-on components, to explore various approaches that are on the border between philosophy and science.
Matthew organized various exhibitions before and during his years as a student and is still passionate about doing so today. He currently works as a freelance artist and writer in various fields. He also has a permanent position at a renowned online gallery (ArtGazette) where he produces various works on commission. As a freelance artist, he creates several series and successfully sells them to galleries and collectors. He loves to use his work and skills in various fields of interest.
Matthew has been creating drawing and painting tutorials since the relaunch in 2020. Through his involvement with artincontext.org, he has been able to deepen his knowledge of various painting mediums. For example, watercolor techniques, calligraphy and lately digital drawing, which is becoming more and more popular.
Learn more about Matthew Matthysen and the Art in Context Team.
Cite this Article
Matthew, Matthysen, “How to Draw a Dog – An Easy Dog Drawing Guide.” Art in Context. March 8, 2021. URL: https://artincontext.org/how-to-draw-a-dog/
Matthysen, M. (2021, 8 March). How to Draw a Dog – An Easy Dog Drawing Guide. Art in Context. https://artincontext.org/how-to-draw-a-dog/
Matthysen, Matthew. “How to Draw a Dog – An Easy Dog Drawing Guide.” Art in Context, March 8, 2021. https://artincontext.org/how-to-draw-a-dog/.