Bird Drawing – An Easy Guide for How to Draw Realistic Birds
Drawing birds is an interesting exercise because birds are such fascinating creatures with strange features. Learning how to draw birds provides the artist with a unique opportunity to explore the fundamentals of forming a bird. Learning how to develop a simple bird sketch into a more realistic bird drawing is also a very adaptable skill to be utilized for various bird species. In many ways, birds have a similar base structure, which can be drawn in a few simple steps. In this tutorial, we will learn how to draw birds, easy and simple. Birds are also a great subject to have in one’s drawing toolkit, as a bird sketch can easily be integrated into various artworks. As we learn how to draw realistic birds, we will have another skill that can easily be utilized for different artwork ideas.
An Easy Guide to Drawing Birds
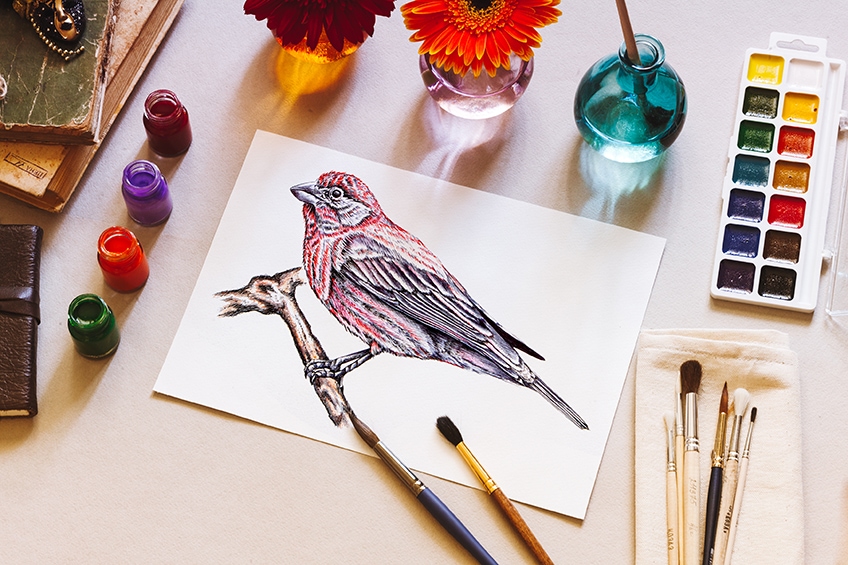
In this bird drawing tutorial, we will be working on the fundamentals of bird drawing. There are many different types of bird species, but the finch is perhaps the most common and foundational shape for many other birds. As we learn how to draw a bird, we will find that the process is quite simple and can easily be followed. Turning a simple bird sketch into a more realistic bird drawing is a matter of breaking up the process into digestible steps. In this tutorial, that’s exactly what we will be doing as we learn how to draw realistic birds by utilizing the compass technique.
Necessary Materials
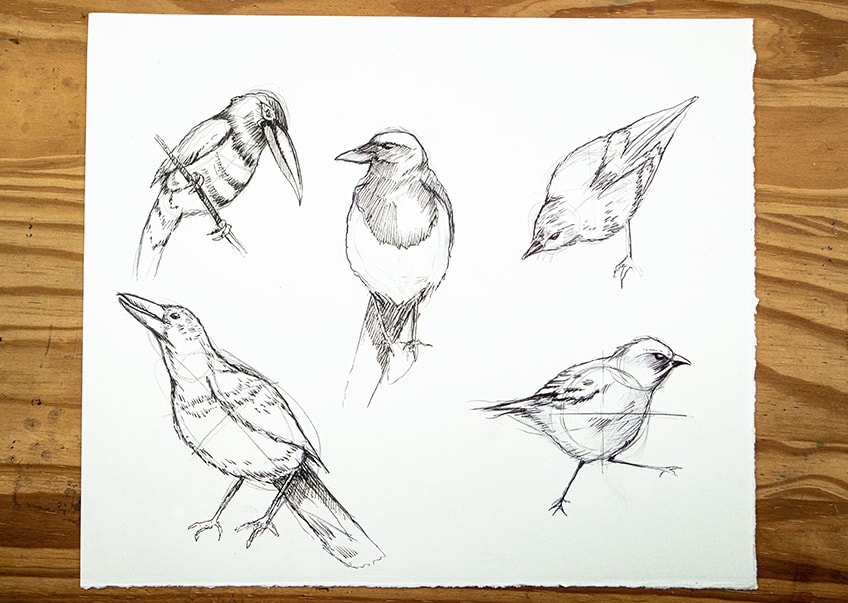
In this bird drawing tutorial, we will be working with a few tools to help us create beautiful and realistic bird drawings. We will want to make sure we have some pencils and pens for our preliminary bird sketches. We will also learn how to utilize color to create a more vibrant and realistic bird drawing, which means we will want colored pencils. Lastly, we will want to make sure that we have an eraser and sharpener to rectify any silly mistakes made along the way. Once you have the necessary materials, make sure you find a space where you can engage with the bird drawing tutorial. All materials can be found through the links below:
- HB pencil
- Ballpoint pen
- Marker pen
- Micron Pens
- Eraser
- Sharpener
- Derwent coloring pencils
- Good paper (200 g/m – 250 g/m recommended)
Step-by-Step Instructions on Bird Drawing
In this bird drawing tutorial, we will break up the process into three main sections. The first section breaks down the basic process of constructing a bird, using the compass method. This is where we will learn how to construct the basic form of a bird. The second stage explores how we can utilize this method to create various bird shapes and forms. Then, lastly, we will look at a few methods for enhancing features within our bird drawing through the use of shading, linework, and color.
Now that we are aware of what we can expect, let us go through the process of learning how to draw birds.
The Fundamentals of Bird Drawing
Birds are such beautiful creatures and, in many ways, we share the same foundational structure. Learning how to construct a bird drawing with the use of the compass method will help us to understand feature placement within a bird drawing. We will go through the basic building blocks of constructing a bird with the use of guiding principles from the compass method.
The Compass Method
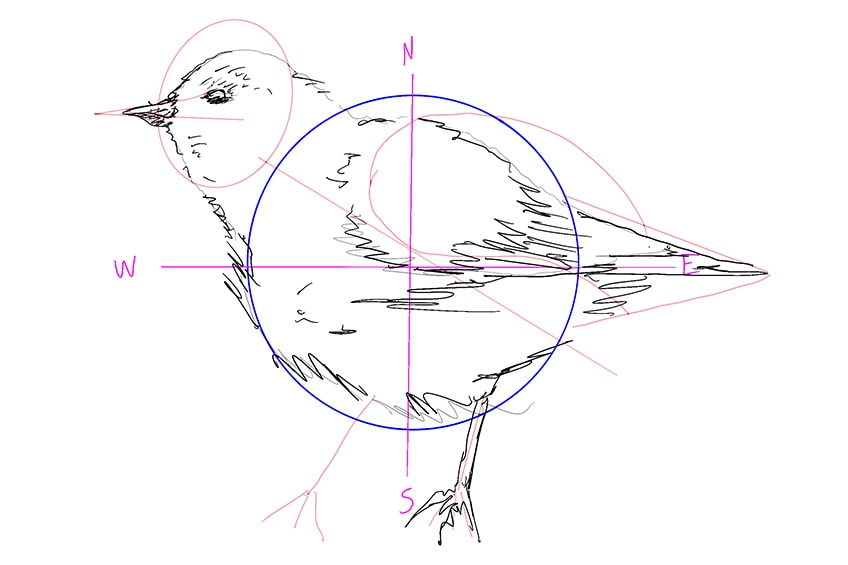
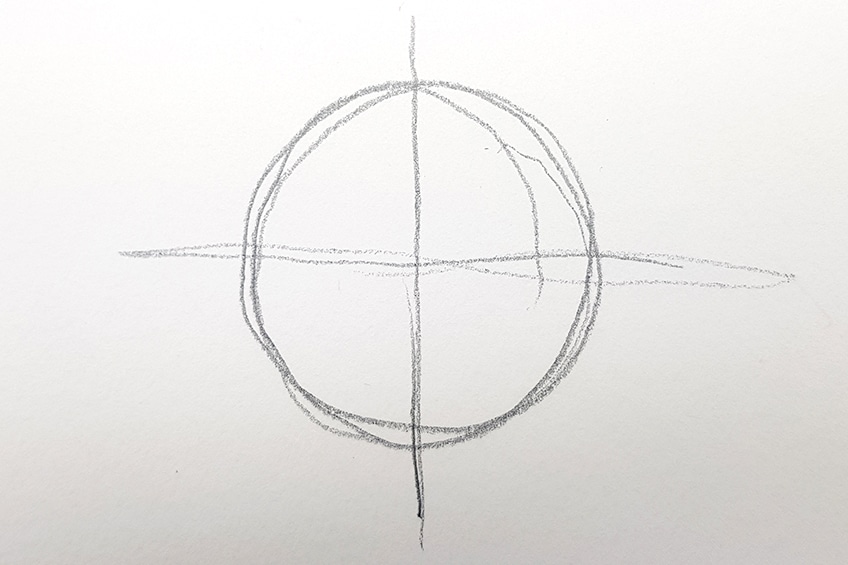
Imagine you are drawing a simplistic circular compass and establishing a north, east, south, and west point along this compass. These points can be used to establish the placement of different features within a bird drawing, which can be a great way to guide you in your bird drawing process.
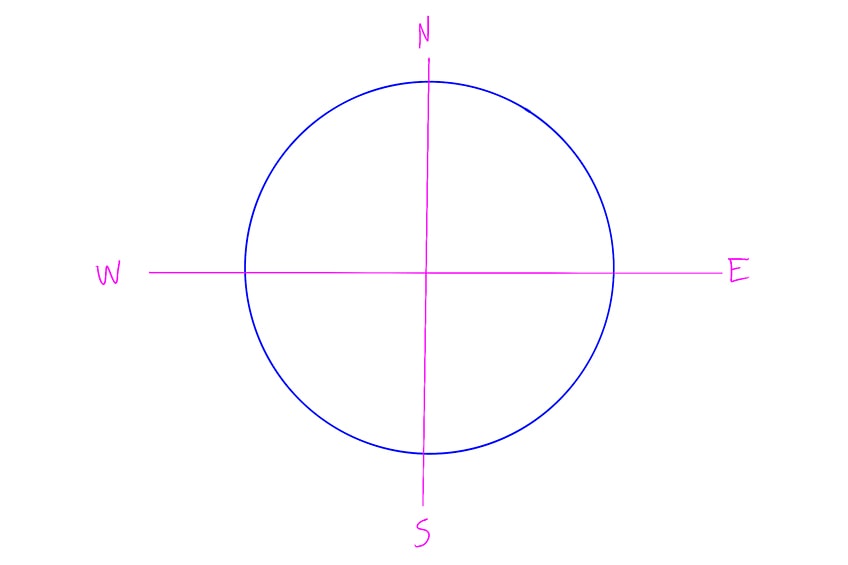
Using the guiding points of the compass, you can then proceed to establish the basic fundamental shapes of a bird. This can be the circular shape for the head, the triangular shape for the wings, and the lines for the legs.
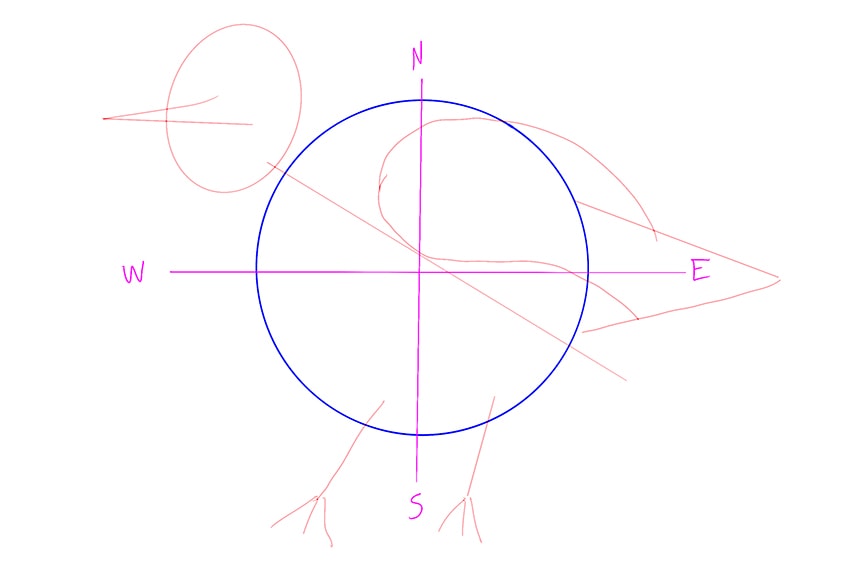
Once we have established the basic blueprint for our bird structure, we can then proceed to sketch out the features of the bird drawing, utilizing the guiding principles of the compass method.
The Compass Method for Drawing Shapes
This process can be easily applied to your pencil drawing process. A good way to practice is to start with a light blue pencil and establish the compass on the page. We can also start to assemble generic shapes along the compass for different features of the bird.
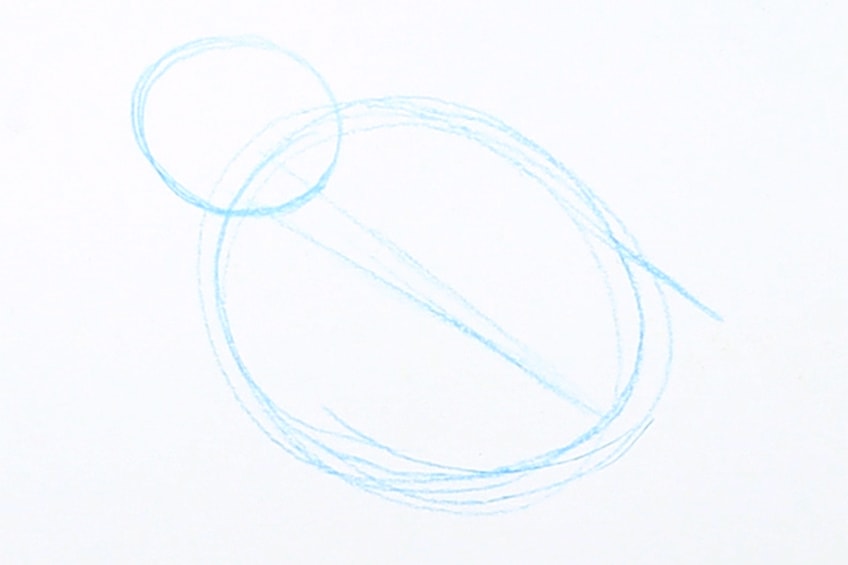
Once you have this method in your head, you can keep the demarcating lines very faint, and in many instances, change their orientation of them. You want to establish the fundamental shapes of the bird structure and organize them along the compass for orientation.
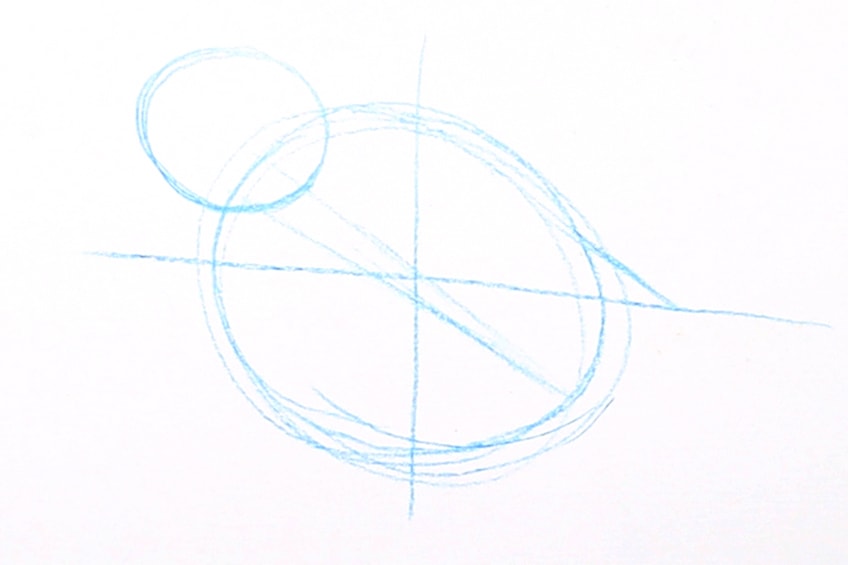
Using your blue pencil, you can now begin drawing the fundamental shapes along the form of the compass shape. This allows you to establish where exactly you would like different features to be placed.

From there, you can utilize some light linework to establish where exactly you will draw in features. This is good for the wings, beak, eyes, and legs.

Drawing Features Along the Compass Guidelines
Using the compass guidelines, you can start to draw in the features of your bird. A good suggestion is to start on one side and work your way through the entire bird sketch.
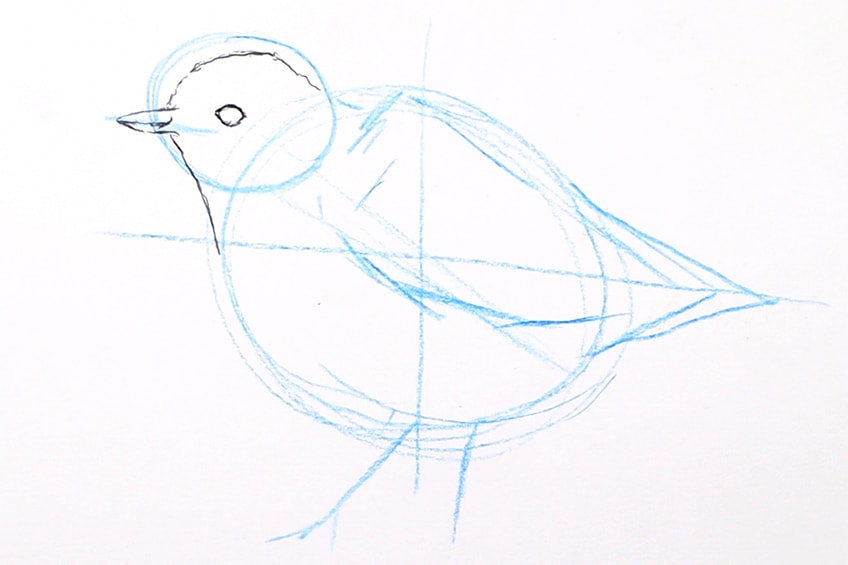
Utilizing the guidelines of the compass method helps you to establish features with correct proportions. In many ways, a bird is constructed with fundamental shapes that then get refined into more realistic features by the use of drawing techniques.
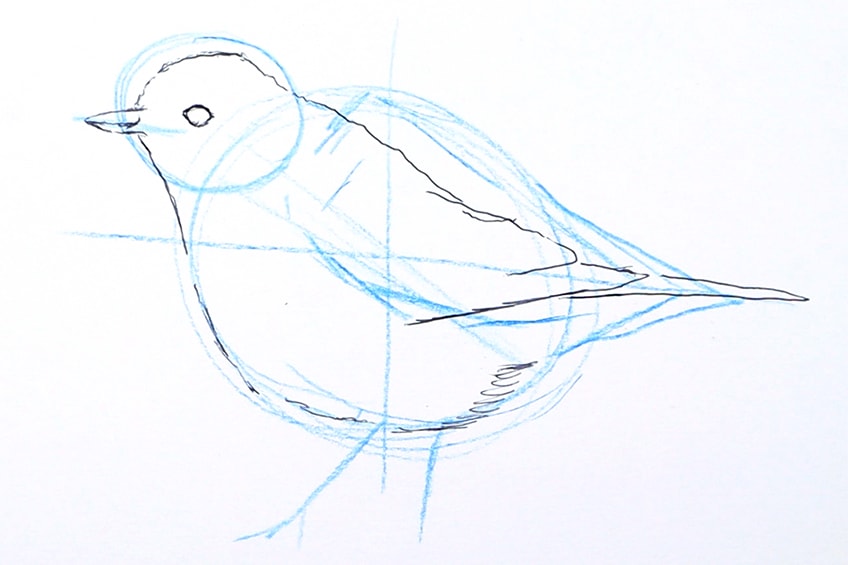
Once you have the basic shapes, adding in additional features is more playful and freeing because you now have guidelines to help you. This also allows you to explore different drawing techniques that enhance the bird drawing.
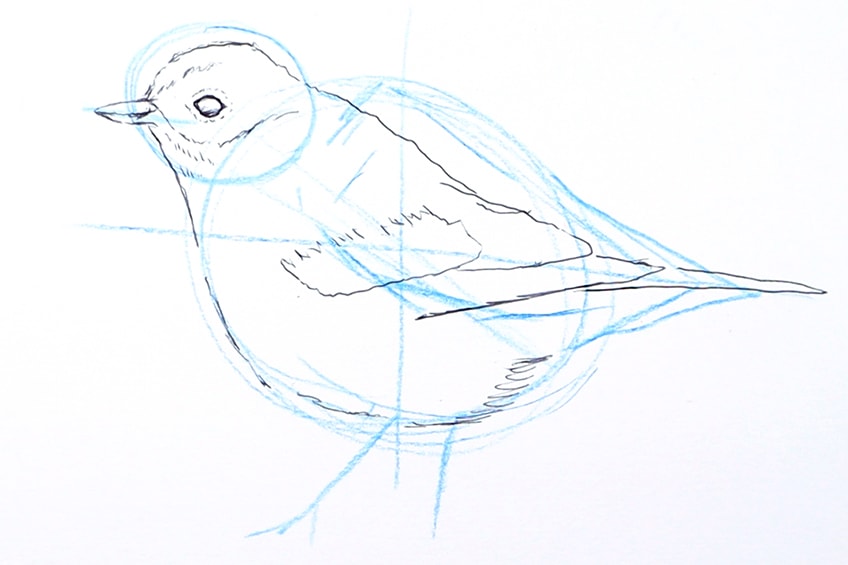
Once you have sketched in the bird’s shape with the help of the compass guidelines and shapes, you then have the freedom to explore adding various features to your bird drawing.
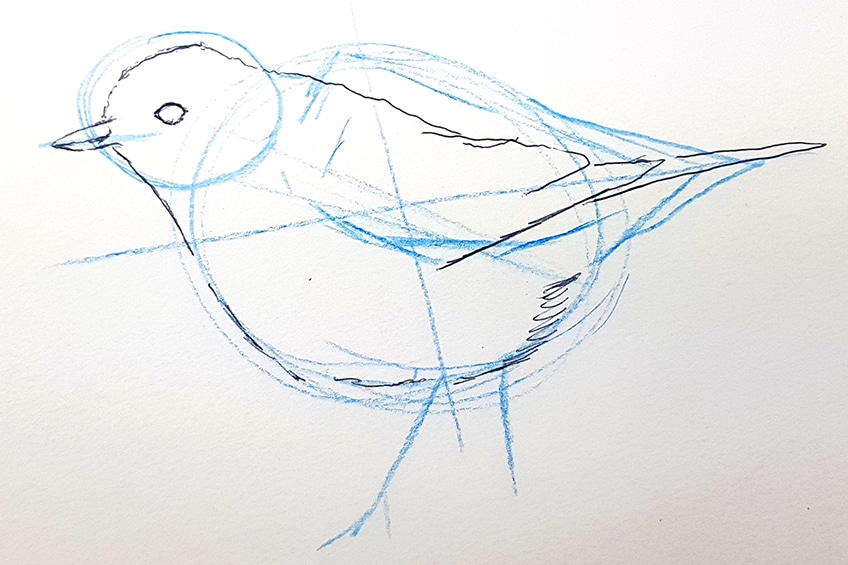
Having the guidelines also helps you to establish the flow of features and how they form along the body of a bird.
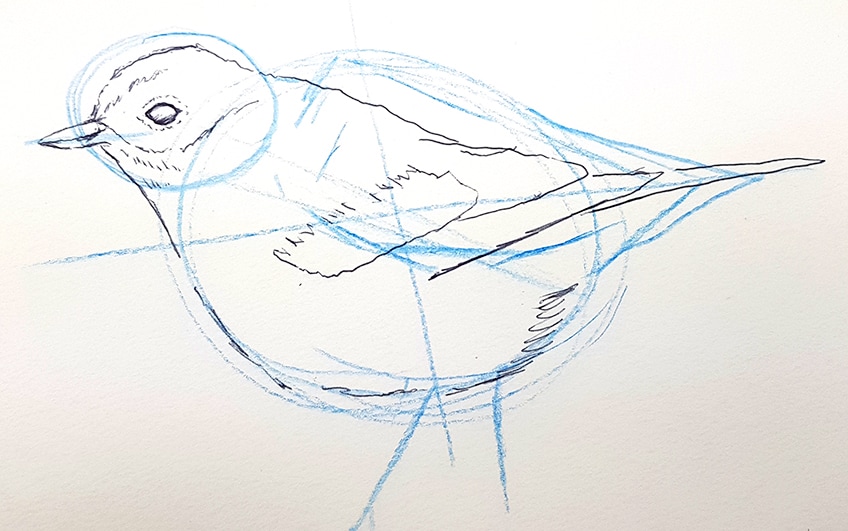
Once you have sketched the bird and have established all the different features, you can then explore shading, Linework, and various other mark-making styles to enhance your drawing.
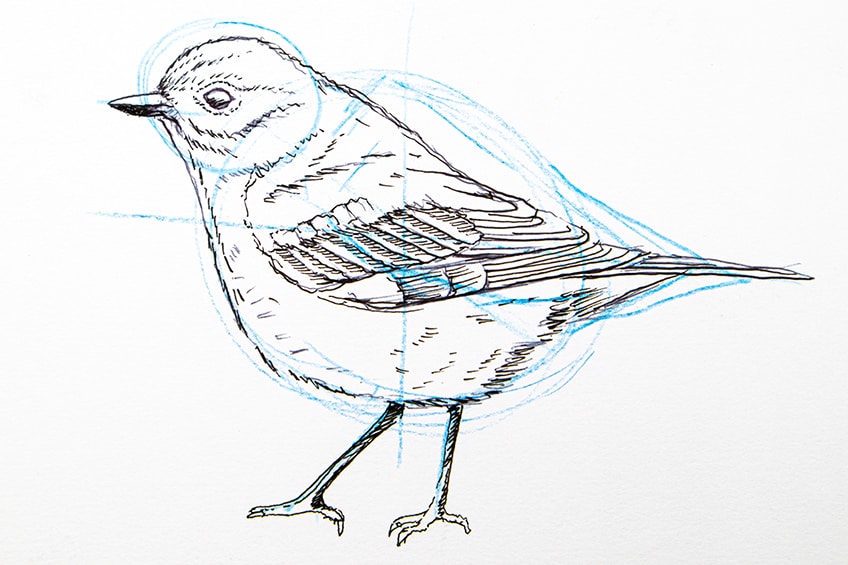
This is the basic process of how to utilize the compass method for both the fundamental shapes of a bird and then the accurate placement of features within the bird drawing.
Using the Compass Method in Different Ways
Once we understand the basic principles of the compass method, a good suggestion is to practice using it to create various bird drawings. Many bird species also have the same fundamental shapes, which can be tweaked in subtle ways. The compass method can be used to create different species of birds by adjusting the compass shape.
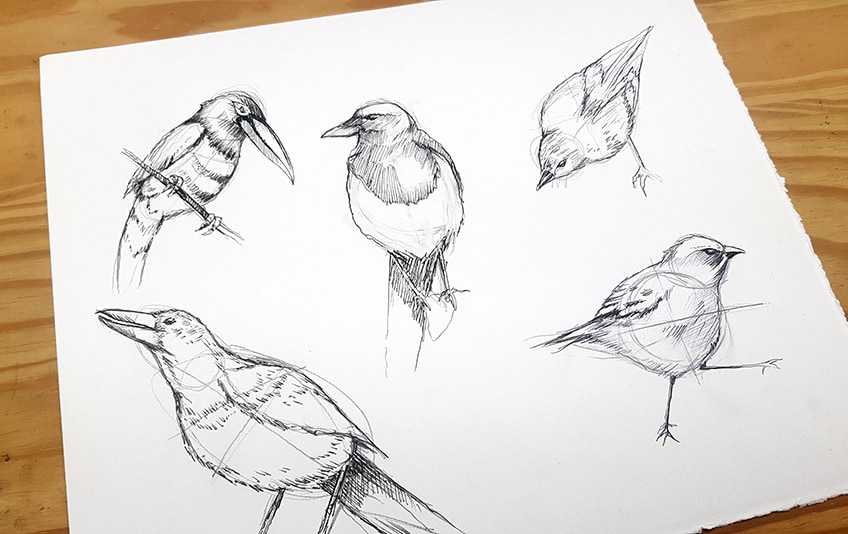
Exploring Different Perspectives With the Compass Method
Once you understand the compass method, start to explore different ways of placing features. This starts by simply drawing the compass and then changing the orientation of the shapes along the compass.

By changing the placement of the shapes, we will be changing the orientation of the bird. This is a great way to exercise how you draw birds from different angles.
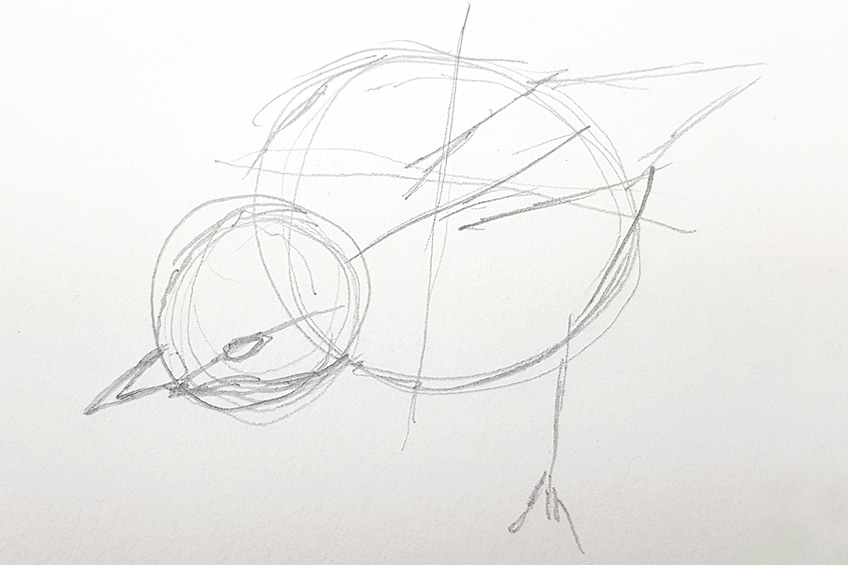
By doing this, you also challenge yourself with the process of drawing features. This means features will distort or change in subtle ways according to how you may have drawn the shapes.
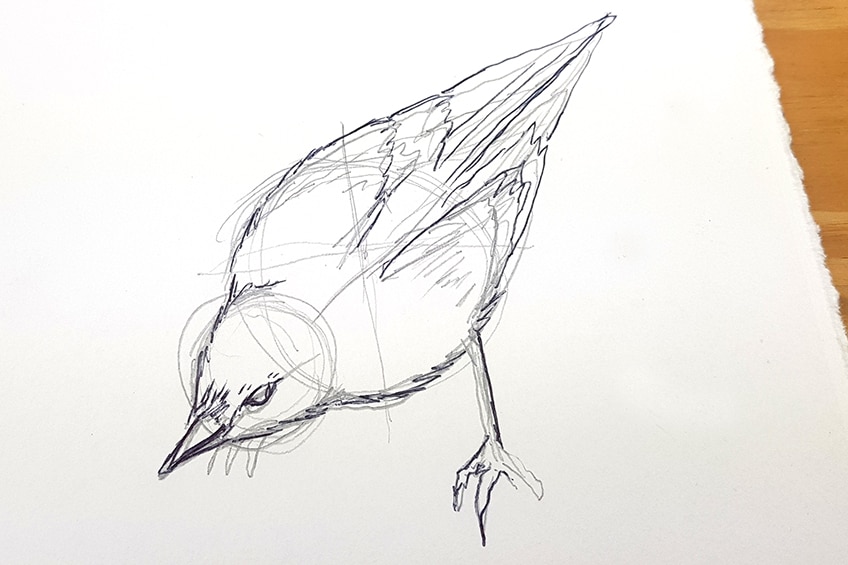
Again, you can start simply by creating a basic circular compass shape with four established points.
From there, you have the freedom to arrange your bird with its fundamental shapes according to how you would like.

This sets the foundations for how you will add in features, which provides you with the challenge of perspective. Learning how to draw realistic birds requires one to learn various orientations and perspectives of how birds are seen.

Once you have the orientation and have lightly sketched in the features, you have the freedom to explore different shading techniques, linework, and various other ways to enhance your sketchings of birds.

Understanding the compass method is a game changer for bird drawing because it is a formula that can be applied to various bird species.
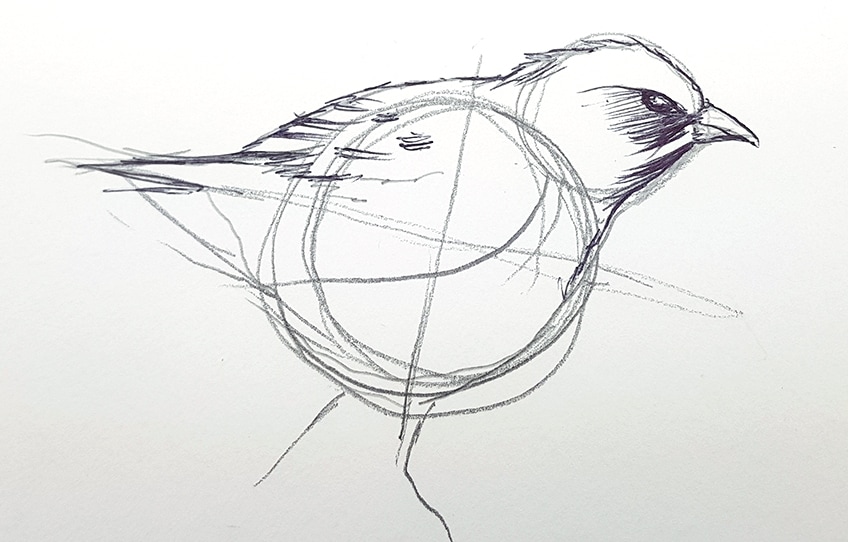
It also gives you the creative freedom to create realistic bird drawings that aren’t necessarily real species, but that look and seem like legitimate birds.
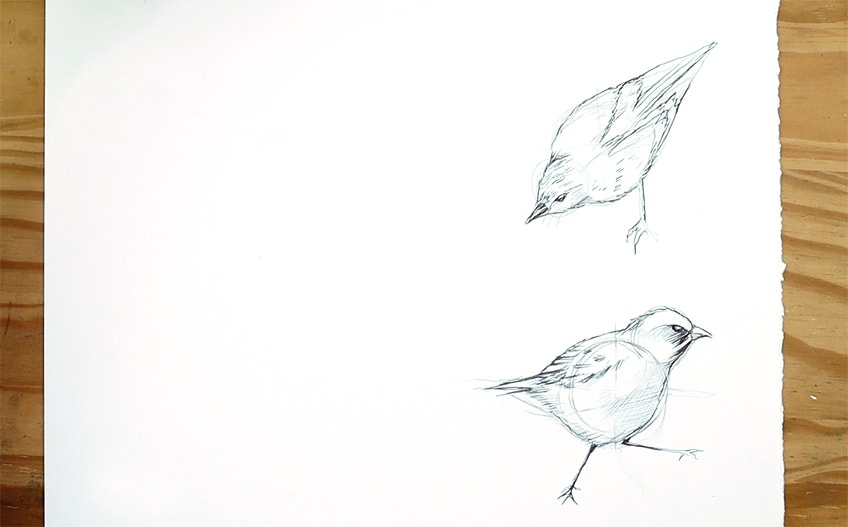
Creating Different Bird Species With the Compass Method
The compass method can also be tweaked to create different species. For instance, it starts with a circular shape, which can be stretched out into an oval shape for birds with a longer torso.
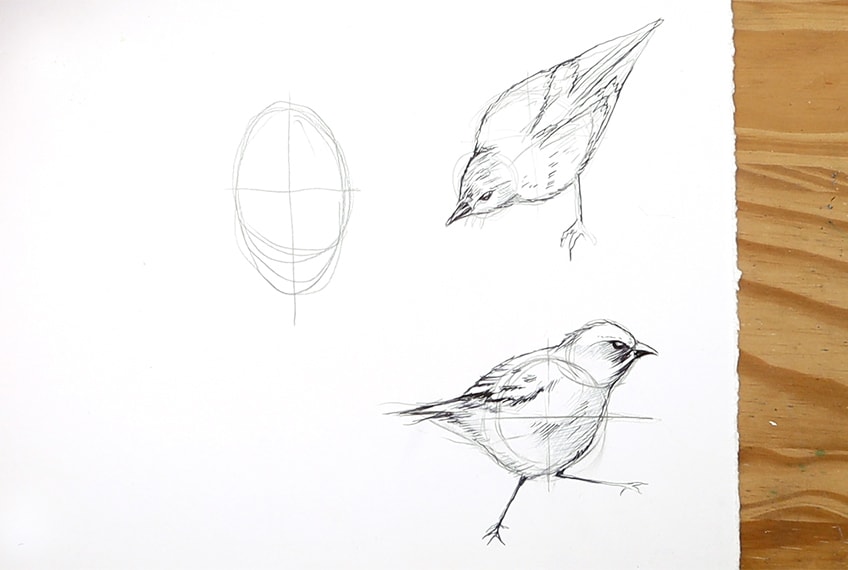
This will then allow you to place features accordingly and can help with the establishment of different orientations and perspectives. You can shape the compass along various planes to suit the various angles at which you are drawing birds.
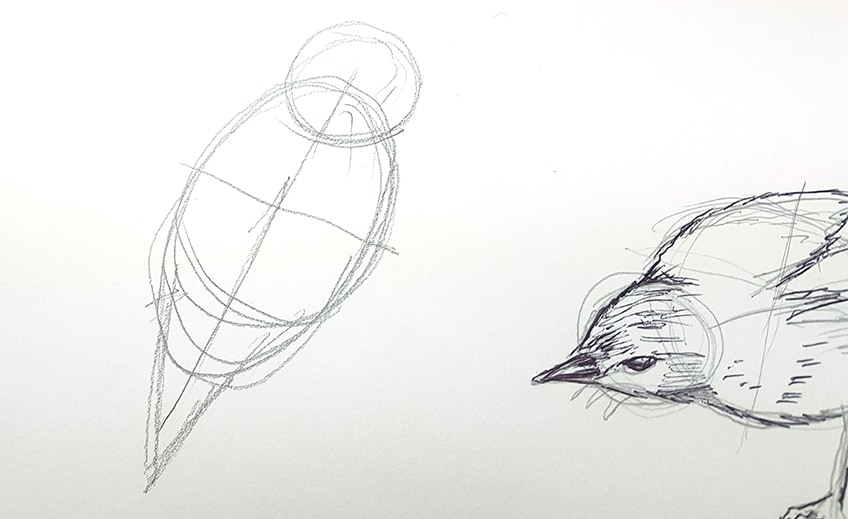
Once you have this way of reshaping the compass dialed in, you can start lightly erasing the compass and drawing in features in a more freeform style. You can change features subtly as well to suit different bird species.
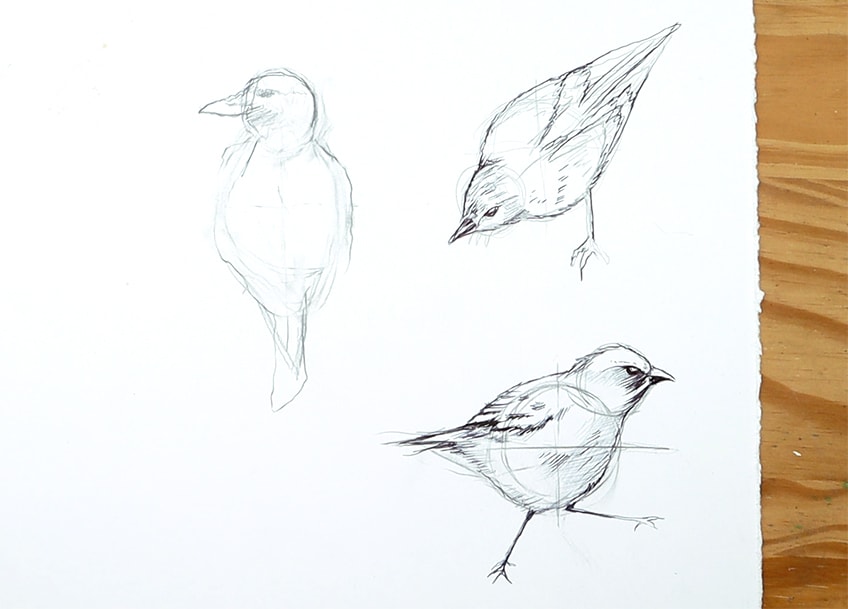
This means you can elongate the beak, widen the body, or even lengthen the tail. This is a great way to think about approaching a drawing with the source material, after which you can apply the compass method by changing its form to suit the shape of various bird species.

It’s all a matter of thinking about what type of bird you would like to create and from what perspective you are drawing the bird. You can then elongate the compass, change the positions of its points, and work along those guidelines.

By rearranging the form of the compass, you can create a variety of different bird species with one simple construction technique.

This means the compass can be drawn diagonally, it can be shortened or elongated, or simply changed accordingly. Think about the basic form of whichever bird you might be drawing.
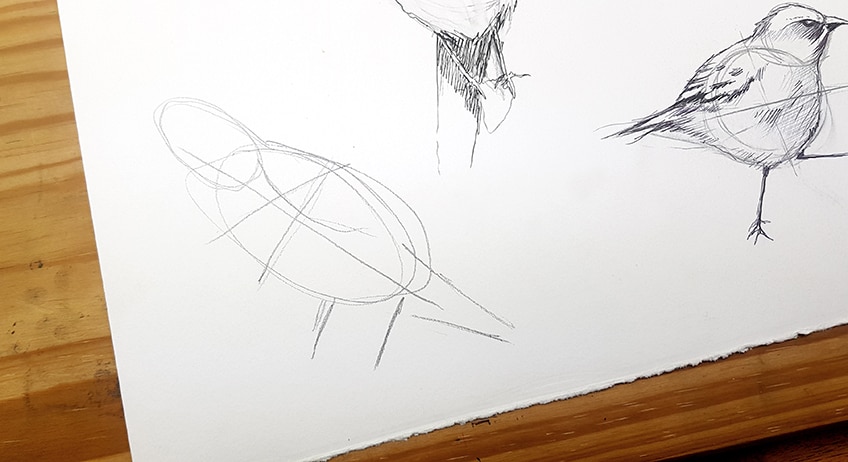
This method for learning how to draw birds, easy and simple, is effective. This is because the foundational shapes and anatomy of birds don’t differ that much.

For anything from finches to crows or even seagulls, you can use this compass method to break down the bird into its fundamental shapes and then slowly construct it by the use of more refined drawing techniques.
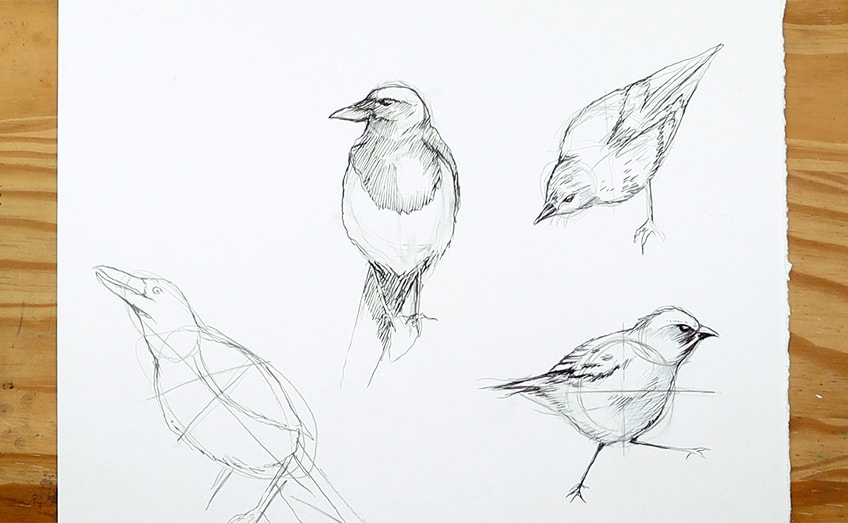
This allows you to have more creative freedom when adding different features to your sketches of birds. This is also a great way to create a more realistic bird drawing.
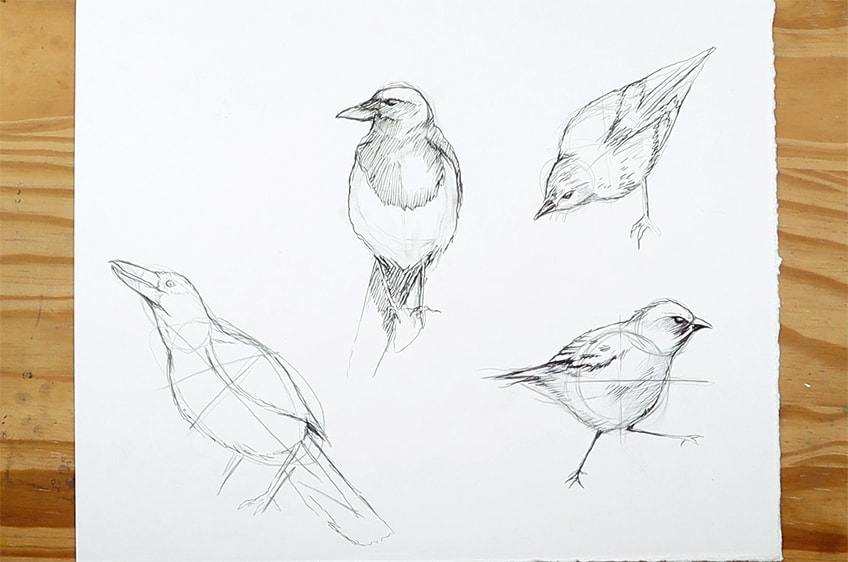
If you want to learn how to create realistic bird drawings, you need to understand the fundamental anatomy of birds. Once you have that dialed, you then can get more technical with how you enhance your bird sketches.
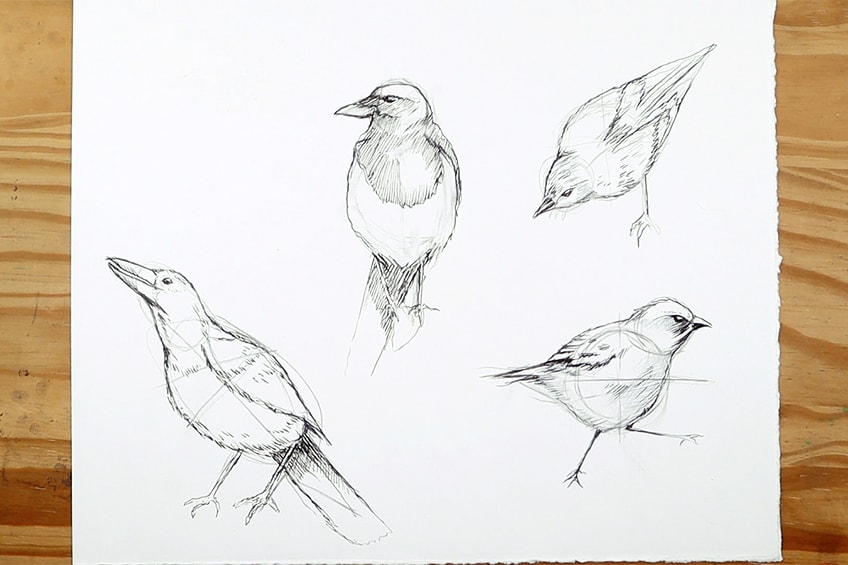
Take your time and explore this method of constructing birds and then see how simple it is to add in features later. The compass method is very versatile for different perspectives because you start with two-dimensional shapes. The placement of these two-dimensional shapes can form any bird from any point of view.
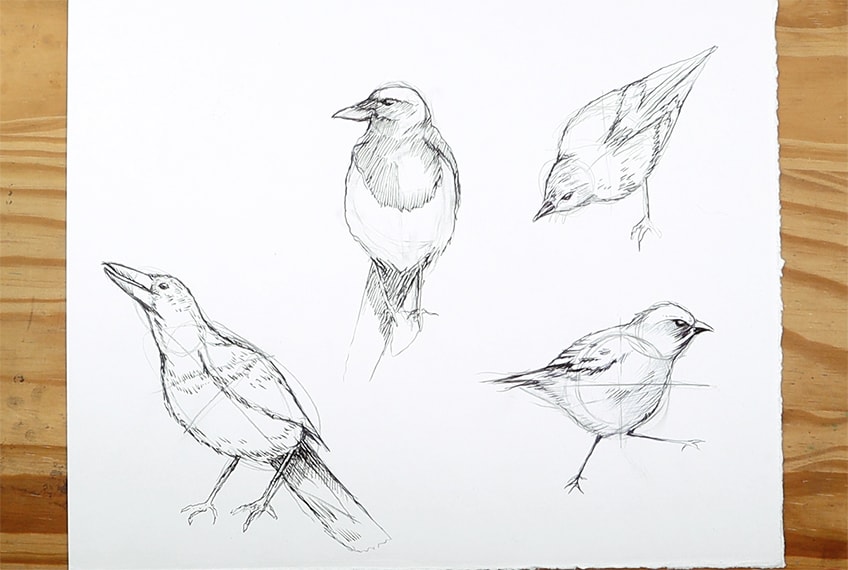
This takes away the anxiety of trying to create not only a specific species but also the angle at which that species of bird is being drawn.
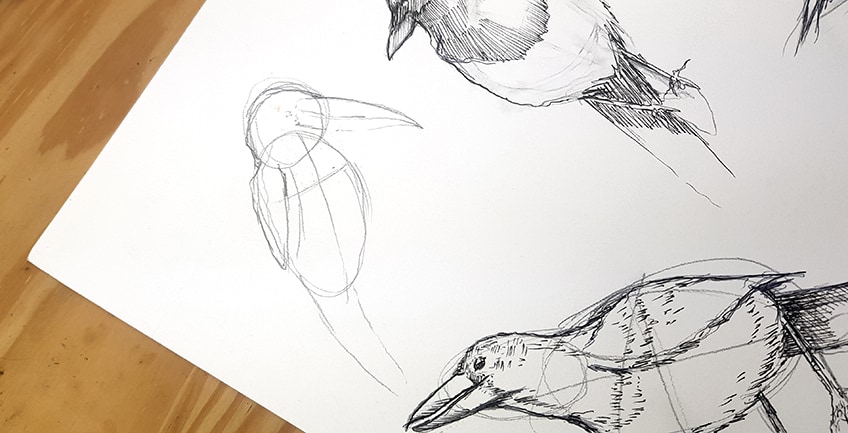
Once you break down the two-dimensional shapes of how the bird is seen from your perspective, you then can add in the features more effectively.

The more you practice creating bird sketches, the more you will start to realize that drawing birds is really easy. Having the foundations in place will allow you to tweak and change details.

This will also give you more confidence with features and how you make them look more realistic in your bird drawings. You will find that there is a domino effect from form, shape, and details to light and shadow. How the bird is positioned gives you a better idea of how to shade and incorporate moments of light and shadow.

The shading and refined details are the trickiest part of making a bird more realistic. But it starts with knowing how to form a bird first.

Once you have explored the full potential of the compass method for both perspectives and different species, you then can start to refine your details with more technical drawing processes.
Enhancing Features
Now that we know the fundamentals of constructing a bird drawing with the use of the compass method’s guiding principles, we can now start to explore different ways of making a realistic bird drawing. Like any other object, a bird is three-dimensional with various textures.
We will learn how to define these three-dimensional qualities in a bird drawing through the use of a few simple skills.
Sketching the Bird
Again, to create a realistic bird drawing, you must start with the basic construction process. This means we can now utilize the compass method more loosely to establish the shape of a bird.
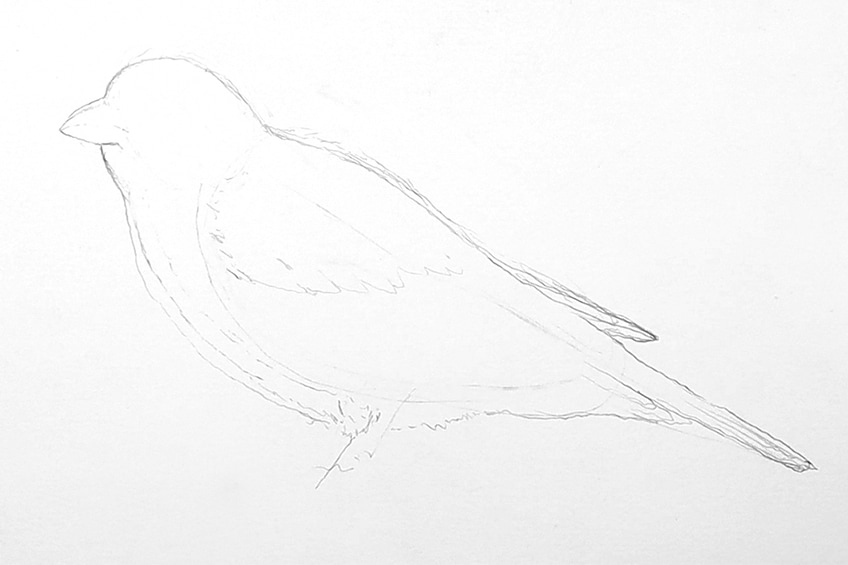
Once we have established the fundamental shapes, we can work with both our eraser and pencils to refine the form of the bird. The intention is to always take your time, never rushing through any step.
Using Linework for Detail
Once we have the shape of the bird accurately drawn, we can then start to add some details to the drawing. The linework is perhaps the most effective way of adding features to a bird drawing because it resembles feathers.
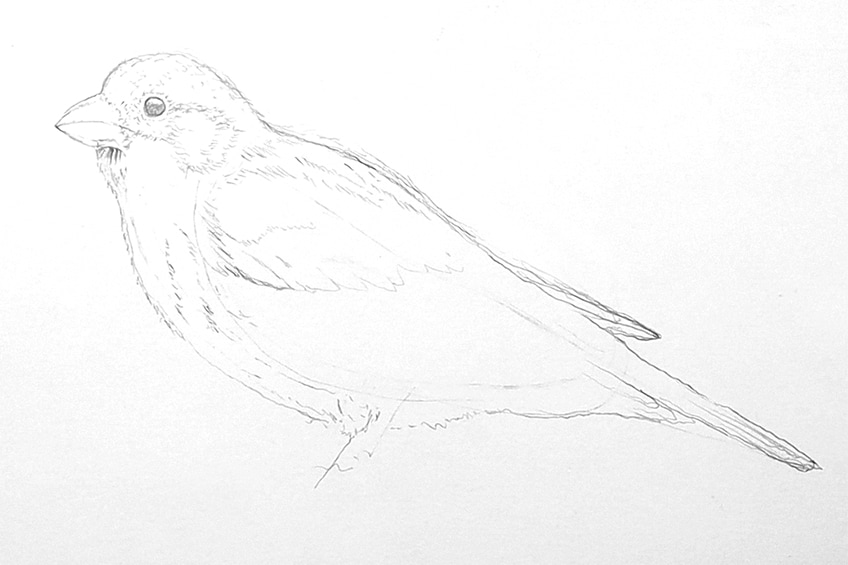
Birds have various feather lengths throughout their bodies, and using short strokes along the head area is an effective way of achieving these shortened feathery features within a bird drawing.
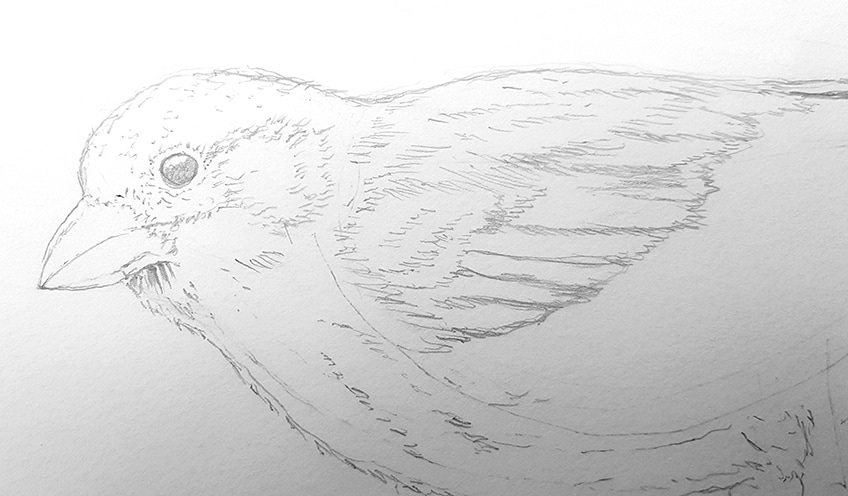
You will also find that using longer strokes can be an effective way to represent the longer wings that are present in birds. It’s important to understand that birds are layered with various feather lengths. Utilizing a combination of different lengths of lines can be an effective way to establish different feather qualities within a bird drawing. This also gives consistency to the overall feathery quality of a bird drawing.
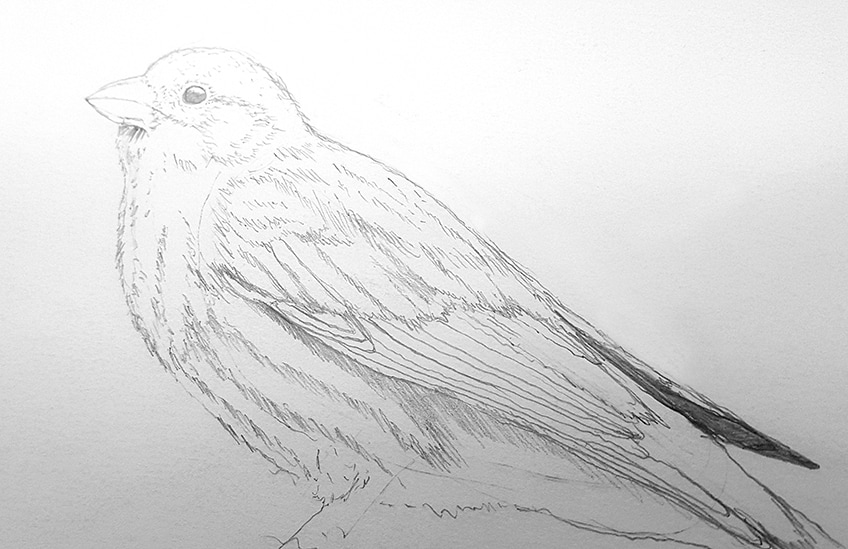
Exploring different line styles is also helpful to provide more textural variety. This means we can explore lines that are diagonal, horizontal, straight, thick, thin, and so on. You want to consider the different features of the bird and how your linework can contribute to those features.
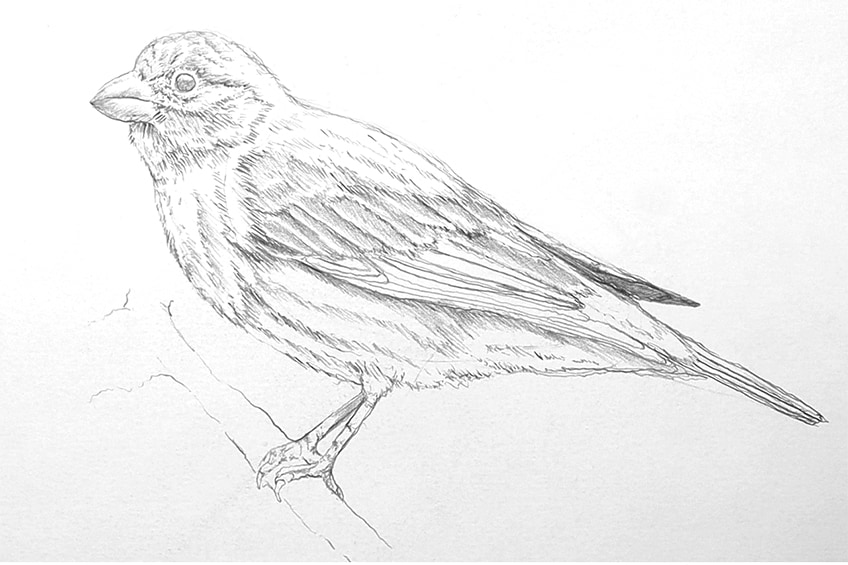
Allow yourself to explore the use of lines as a means of creating texture and detailing within your bird drawing. The combination of finer, detailed drawing techniques paired with shading is what will develop a simple bird sketch into a realistic bird drawing. The more variety of lines you explore, the more detailed and interesting your bird drawings will be.
Using Shading for Dimension
Another major contribution to the realistic effect quality of a bird drawing is the use of darker shading. Once you start to combine both linework and shading into a drawing, you start to enter more realistic territory.

Exploring gradients within shading can start to give a bird drawing a more realistic interaction with light and shadow. Shadow and light often have a seamless transition between one another, so incorporating this into three-dimensional objects is a great skill to have. When you start to have a more acute observation of the object that you are drawing, you start to pay attention to the little shadow formations that are present. We also learn how different surfaces interact with light and shadow.

In the case of a bird drawing, we are aiming to represent these qualities on a feathery surface. This is why linework paired with darker shading is essential because it achieves these smaller shadowy moments in between the feathers.
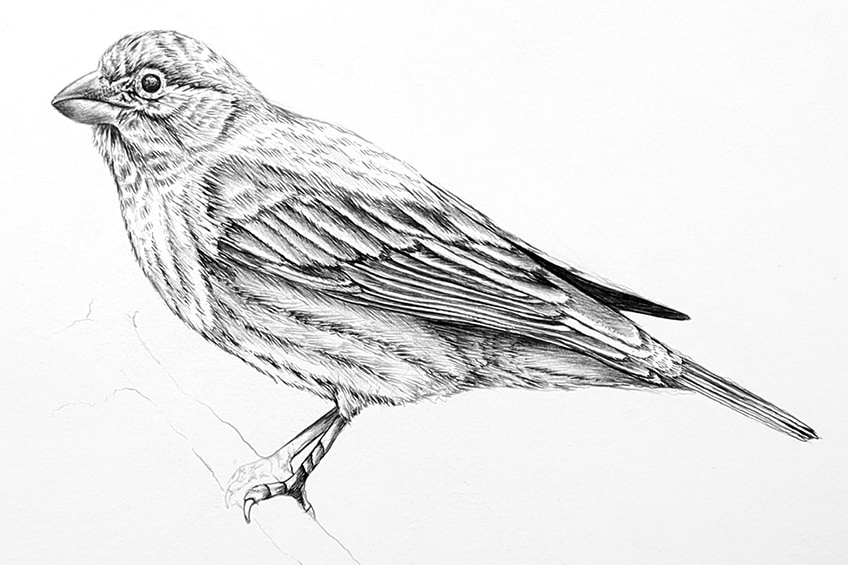
Not only does it correlate well with the feathery qualities of a bird, but the other features as well. This can include smoother textures in a bird, such as the eyes, beak, and legs. The combination of both linework and darker shading is essential for refined and realistic bird sketches.
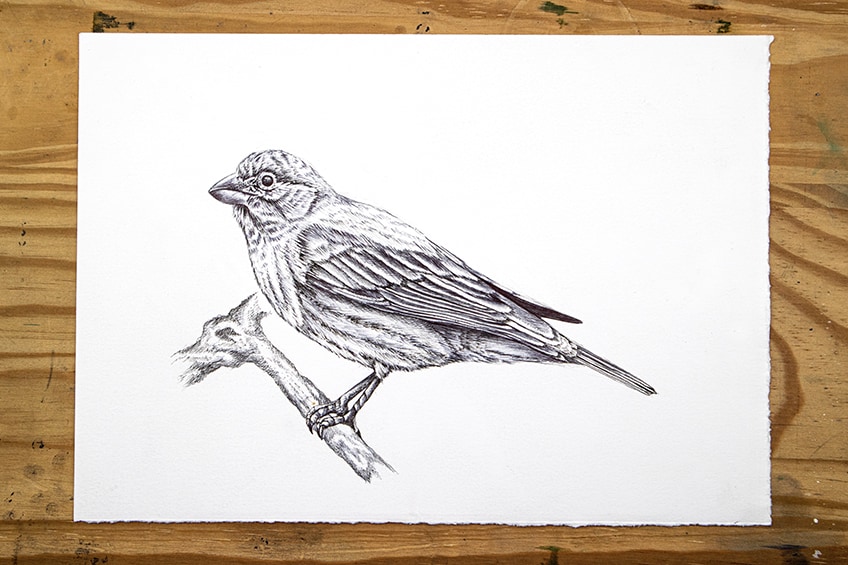
Adding Color to Create Unique Attributes
Lastly is the incorporated element of color, which, oftentimes, is what distinguishes bird species. Once you understand the fundamental integration process of linework and shading, you can apply these processes with colored tools.

Depending on your approach, you can incorporate color before the darker moments of shading, or you can apply color afterward. There are many approaches to adding color, although, utilizing the linework and shading actions with colored tools is a great way to add color to a bird drawing. To give a bird drawing a more enriched colored feature, you can also explore combining differently-colored tools. This means you could use colored pencils for undertones, and then apply pen marks of the same color to give the colored qualities more dimension and texture.
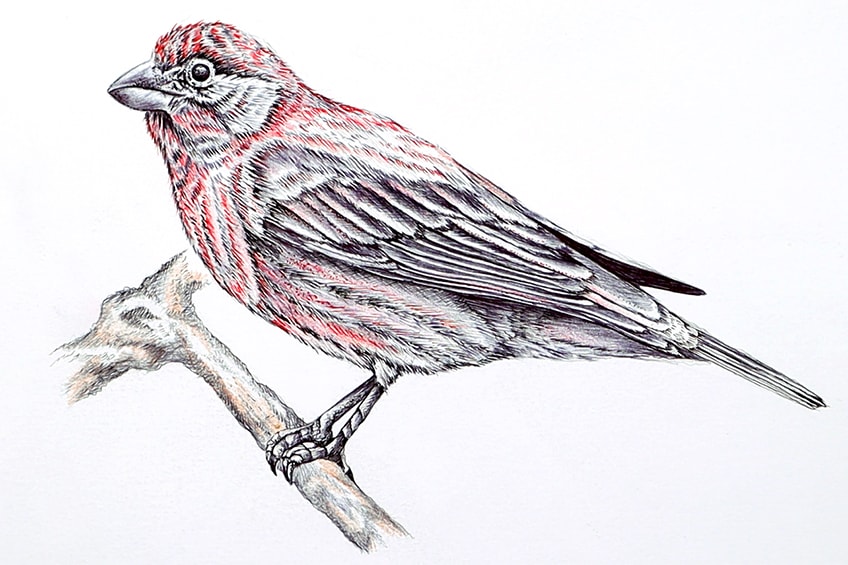
Color is a great third attribute to a layered drawing that incorporates linework and shading. Exploring different tones of color in different parts of a bird is another great way of creating shadow and light with the use of colored tools.
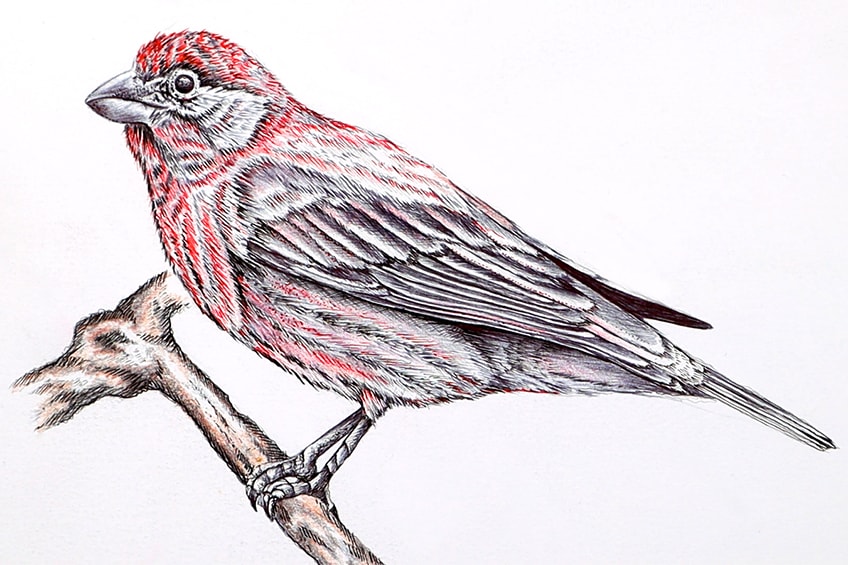
This means we can utilize the same principles of shading with colored tools to develop both lighter and darker areas within a bird drawing. In many ways, you could approach a bird drawing with colored undertones and base layers, following the same process of construction except with the use of colored tools rather than graphite pencil. You can then add in darker features with darker tools later on.

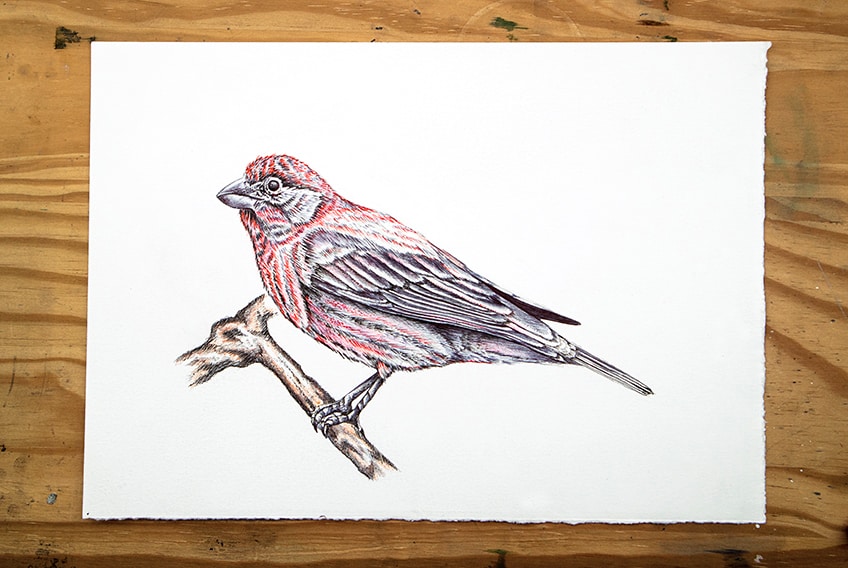
Everything you have learned up until this point is interchangeable with different tools. If you were to create a simplistic, traditional black-and-white sketch, you could do that, but you can also use the same drawing process using only colored tools. Now that you have a fundamental base understanding of creating realistic bird drawings, try to explore different approaches for creating your bird drawings!
Tips to Remember
Birds always seem like complex animals to draw, perhaps because they are so small with very dainty features. With our method, we make learning how to draw birds easy for artists of any level. Here are some of our top tips and tricks for drawing birds.
- Explore the compass method for perspective. Think about how you could use this method for your sketches of birds from different perspectives.
- Utilize the compass method for free drawing. The compass method is also a great way for practicing bird drawings from your mind, which can help you to create your birds.
- Utilize the compass method for live drawing. If you want to get really good at bird drawing, you can try to draw birds from life with the compass method.

- Explore different mark-making styles. Consider how lines, shading, and different drawing techniques can enhance your bird drawings.
- Experiment with the different skills you have learned. Once you feel confident enough, try to incorporate these bird-sketching ideas into your work.
Drawing birds doesn’t have to be a daunting task, and, in this tutorial, there are a variety of helpful tips and tricks that make the process much easier. Creating realistic bird drawings is a matter of understanding their form, refining them, and then enhancing them with detail. This tutorial on how to draw birds equips you with the skillset and knowledge for creating your own beautiful and realistic bird drawings.
Frequently Asked Questions
How Do You Draw Feathers on a Bird?
There are many ways to draw feathers on a bird, but it is important to know how feathers are placed along the body of a bird. In many instances, birds have an assortment of different types of feathers in different areas of the body. For instance, the feathers are generally shorter along the head of the bird but longer within the wings. The most effective way of achieving both varieties in style and texture is by the use of linework and soft shading. Linework is a great shading technique that can be utilized in different lengths to achieve different feather qualities. For instance, short strokes can be used to create short tufts of feathers along the head area, whereas soft shading can be used to create softer and fluffier feather effects in the body. Think about layers, linework, and shading techniques for creating feathers in a realistic bird drawing.
How Do You Draw Closed Wings on a Bird?
Wings are interesting because, in many ways, it’s easier to draw open wings, as they are spread out and therefore details are clearer. On the other hand, wings that are closed and sit on the body of a bird seem more complicated. However, it is quite simple when you understand the anatomy of the wing. Since wings have a variety of both long and short feathers for flight, they then layer on top of one another when they are in a resting position. This means that linework is an essential drawing technique for your bird sketches. Whether a bird is seen from the side or at an angle, we will find that there are layers placed on top of each other in the wings. This means that we want to think about a stacking process when drawing wings in a realistic bird drawing. From there, we can incorporate shading to create a distinction between the different layers, which is the most effective approach to drawing wings.
Matthew Matthysen is an educated multidisciplinary artist and illustrator. He successfully completed his art degree at the University of Witwatersrand in South Africa, majoring in art history and contemporary drawing. The focus of his thesis was to explore the philosophical implications of the macro and micro-universe on the human experience. Matthew uses diverse media, such as written and hands-on components, to explore various approaches that are on the border between philosophy and science.
Matthew organized various exhibitions before and during his years as a student and is still passionate about doing so today. He currently works as a freelance artist and writer in various fields. He also has a permanent position at a renowned online gallery (ArtGazette) where he produces various works on commission. As a freelance artist, he creates several series and successfully sells them to galleries and collectors. He loves to use his work and skills in various fields of interest.
Matthew has been creating drawing and painting tutorials since the relaunch in 2020. Through his involvement with artincontext.org, he has been able to deepen his knowledge of various painting mediums. For example, watercolor techniques, calligraphy and lately digital drawing, which is becoming more and more popular.
Learn more about Matthew Matthysen and the Art in Context Team.
Cite this Article
Matthew, Matthysen, “Bird Drawing – An Easy Guide for How to Draw Realistic Birds.” Art in Context. October 17, 2022. URL: https://artincontext.org/bird-drawing/
Matthysen, M. (2022, 17 October). Bird Drawing – An Easy Guide for How to Draw Realistic Birds. Art in Context. https://artincontext.org/bird-drawing/
Matthysen, Matthew. “Bird Drawing – An Easy Guide for How to Draw Realistic Birds.” Art in Context, October 17, 2022. https://artincontext.org/bird-drawing/.


