


How to Draw a Hedgehog – Create an Adorable Hedgehog Sketch
Hedgehogs may be small in size, but they are big in personality! With their adorable round bodies, prickly spines, and curious snouts, these little creatures are sure to steal your heart. Don’t be fooled by their cute appearance, though – hedgehogs are skilled survivalists, able to defend themselves from predators with their sharp quills and quick reflexes. Plus, they have a surprising talent for climbing, running, and even swimming! Whether you’re looking for a unique pet or just want to admire them from afar, hedgehogs are guaranteed to bring a smile to your face.
A Fun and Easy Hedgehog Drawing Guide
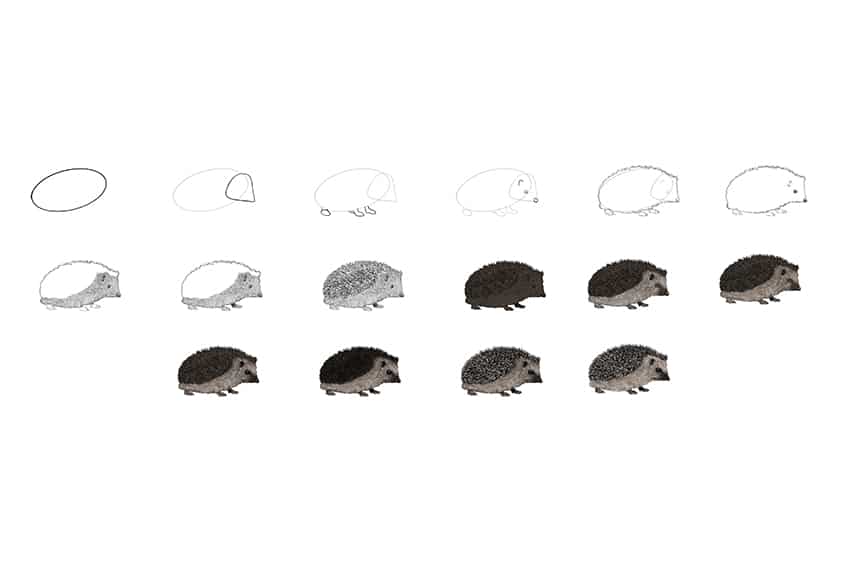
Join us on an exhilarating adventure with our exciting hedgehog drawing guide! We’ll walk you through every step of the process, from outlining to adding intricate details and vibrant colors. This tutorial is designed to suit artists of all levels – whether you’re a beginner or an experienced pro, you’ll find value in our tips and techniques.
Check out the accompanying collage to see each step illustrated in detail, and prepare to create a stunning work of art!
Step 1: Draw the Main Body of Your Hedgehog Drawing
To begin our tutorial on how to draw a hedgehog, start by drawing a tilted oval shape to represent the main body of your hedgehog drawing.

Step 2: Draw the Head
Overlapping the main body, draw a cone-like shape to represent the head of the hedgehog.

Step 3: Add the Feet to Your Headhog Sketch
Underneath the main body, draw three visible feet and the fourth as a partially visible foot. They should all have a curved paw-like finish.

Step 4: Draw the Facial Features
Within the head cone drawn in step two, draw a single ear, the eye’s as an oval shape, and the nostril as a small circle on the tip of the cone.

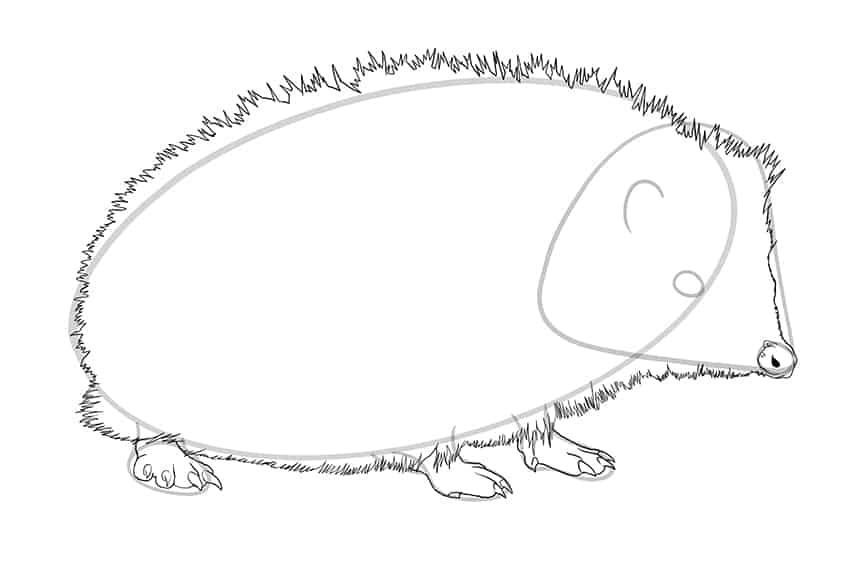
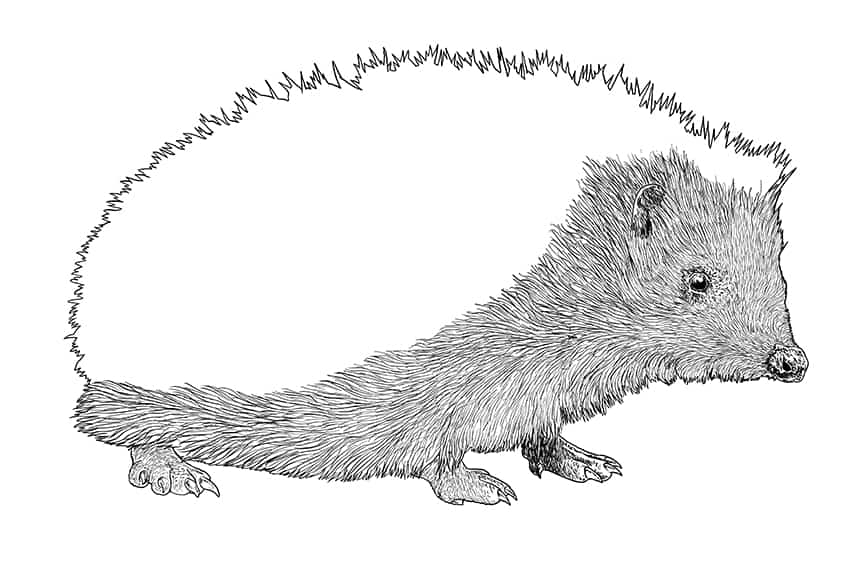
Step 5: Outline Your Headhog Illustration
In this step, you will draw a spiky outline of your hedgehog will be very spiky. To achieve this realistic look, begin on the head and outline the entire hedgehog as a spiky and sharp outline. Continue by drawing the feet and sharp nails on each foot.
Complete the step by finishing the nostrils detail. Once completed you are ready to erase any visible construction lines.
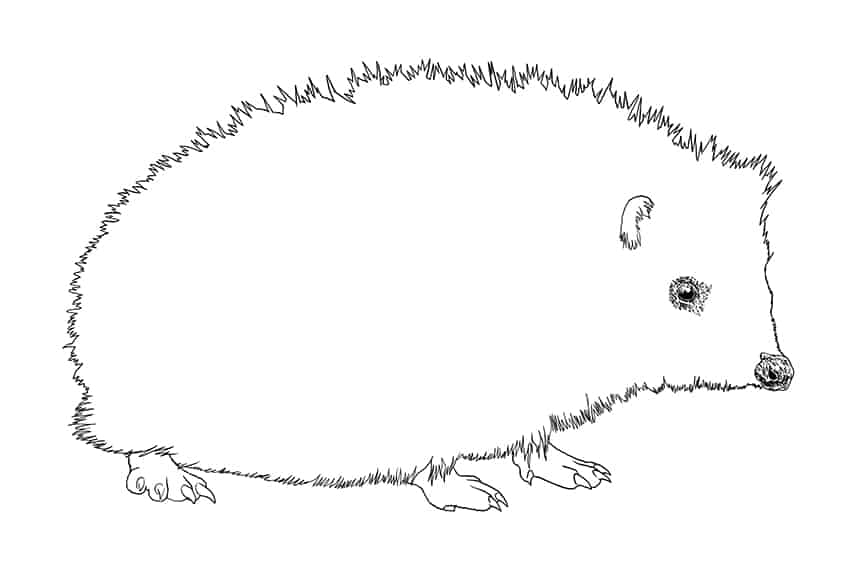
Step 6: Detail the Facial Features of Your Easy Hedgehog Drawing
Draw the eye details by using small texture lines and dots to create a more realistic-looking eye. Repeat the step onto the nose and the ear.
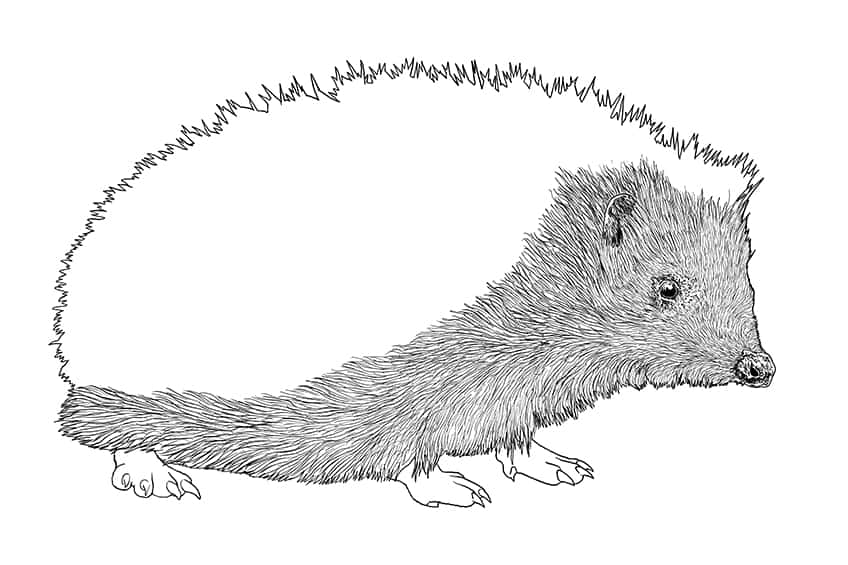
Step 7: Apply Furry Texture
On the bottom half of your hedgehog sketch, draw individual hairlines from the very tip of the nose, spreading to the head and towards the lower body. Each hairline should be drawn individually to achieve a more realistic result.
Step 8: Add Texture to the Feet of Your Easy Hedgehog Drawing
In this step, draw fine texture lines onto each foot. The inner front foot would naturally be darker due to the position, so you will need to increase the intensity of the texturing.
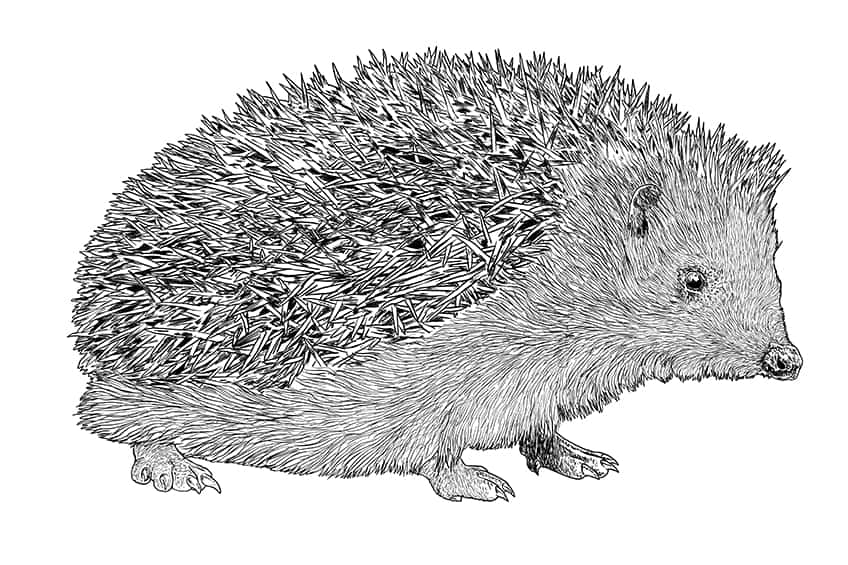
Step 9: Draw the Spikes
To achieve a realistic result, you are going to draw individual sharp spikes, at different angles and overlap one another, to create depth to your hedgehog drawing. Continue this step with a thin brush and black paint, and fill the gaps in between the spikes.
Step 10: Add the First Color Coat
Use a regular brush and dark brown paint, and evenly color the entirety of your hedgehog illustration.

Step 11: Paint Your Hedgehog With a Second Color Coat
Select a soft brush and a shade of cream paint, and lightly apply a second color coat to the bottom half of the hedgehog’s body. Repeat this step on the nose and feet.
Complete the step by using either cream or tan paint, and add a shimmer to the eye.

Step 12: Color Blend Your Hedgehog Sketch
Use the same brush as previously and light brown paint, and lightly apply several faded patches along the bottom half of the hedgehog’s body.

Step 13: Shade the Bottom Half
Apply shading to enhance the facial features of your hedgehog drawing, using a soft brush and black paint. Repeat this step on the nostrils, eye, and ear. Finish this step by lightly applying shading to the bottom half of your hedgehog.

Step 14: Add Shading to the Top Half and Feet
With a small, soft brush and black paint, begin to shade the top half of the hedgehog. Make sure the shading is not too dark as the spikes are still visible. Complete the step by lightly shading the feet.

Step 15: Color the Spikes on Your Easy Hedgehog Drawing
Select a small, fine brush and white or cream paint, and color the tip of each spike.
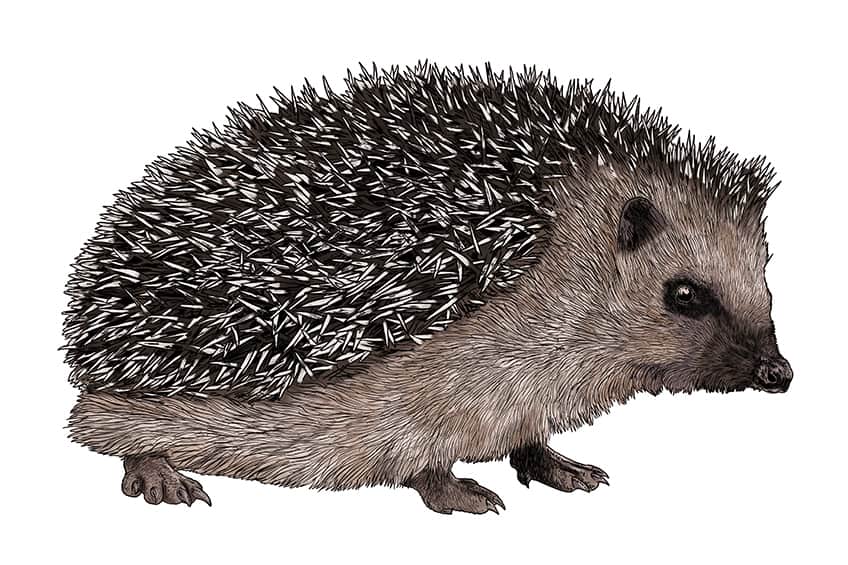
Step 16: Finalize Your Hedgehog Sketch
For your final step, you will select a fine, sharp brush and the corresponding colors to trace the entire outline of your hedgehog illustration. Make sure you use light tan paint to trace the bottom half of your hedgehog and brown paint for the top half.

Step 17: Bonus Step
We have added a bonus step for you! If you want to add a ground shadow to your hedgehog drawing, simply select a soft brush and black paint, and paint a dark spot directly underneath your hedgehog. Switch to a blending brush, and soften the edges of your ground shadow.

Congratulations are in order! You have just completed our tutorial on how to draw a hedgehog. By following our step-by-step instructions, you now have the skills to create charming and adorable hedgehog drawings. We hope that you found our tips and techniques useful and that they will inspire you to create imaginative and unique hedgehog art in the future. Don’t be afraid to experiment with different poses, expressions, and textures to make your drawings stand out. Remember, practice makes perfect, so keep honing your skills and enjoy the drawing process! Be sure to check back soon for more exciting drawing tutorials.
Frequently Asked Questions
How Can I Make My Hedgehog’s Quills Look Realistic?
To make your hedgehog’s quills look realistic, it’s important to pay attention to their placement and texture. Start by sketching the outline of your hedgehog and lightly drawing in the quills. Next, add shading to the base of the quills to create depth and dimension. Use short, quick strokes to create the texture of the quills, making sure that they are pointed and slightly curved. Our tutorial on how to draw a hedgehog will take you through this entire process!
What Are Some Common Mistakes to Avoid When Drawing a Hedgehog?
When drawing a hedgehog, there are a few common mistakes to avoid. One is to make the quills too long or too short, which can throw off the proportions of the drawing. Another is to make the face too round, which can make the hedgehog look more like a generic rodent than a specific animal. Additionally, it’s important to pay attention to the hedgehog’s posture and positioning, as these can greatly affect the overall look and feel of the drawing. If this seems too overwhelming, don’t fret as our drawing tutorial will guide you along the way so you will never feel lost!

Matthew Matthysen is an educated multidisciplinary artist and illustrator. He successfully completed his art degree at the University of Witwatersrand in South Africa, majoring in art history and contemporary drawing. The focus of his thesis was to explore the philosophical implications of the macro and micro-universe on the human experience. Matthew uses diverse media, such as written and hands-on components, to explore various approaches that are on the border between philosophy and science.
Matthew organized various exhibitions before and during his years as a student and is still passionate about doing so today. He currently works as a freelance artist and writer in various fields. He also has a permanent position at a renowned online gallery (ArtGazette) where he produces various works on commission. As a freelance artist, he creates several series and successfully sells them to galleries and collectors. He loves to use his work and skills in various fields of interest.
Matthew has been creating drawing and painting tutorials since the relaunch in 2020. Through his involvement with artincontext.org, he has been able to deepen his knowledge of various painting mediums. For example, watercolor techniques, calligraphy and lately digital drawing, which is becoming more and more popular.
Learn more about Matthew Matthysen and the Art in Context Team.
Cite this Article
Matthew, Matthysen, “How to Draw a Hedgehog – Create an Adorable Hedgehog Sketch.” Art in Context. March 17, 2023. URL: https://artincontext.org/how-to-draw-a-hedgehog/
Matthysen, M. (2023, 17 March). How to Draw a Hedgehog – Create an Adorable Hedgehog Sketch. Art in Context. https://artincontext.org/how-to-draw-a-hedgehog/
Matthysen, Matthew. “How to Draw a Hedgehog – Create an Adorable Hedgehog Sketch.” Art in Context, March 17, 2023. https://artincontext.org/how-to-draw-a-hedgehog/.


