How to Draw a Baby – Learn How to Draw an Adorable Baby
Babies are incredible bundles of joy that fill our lives with wonder and endless laughter. From their tiny fingers to their toothless grins, they possess an enchanting ability to captivate our hearts. Their every gurgle and coo seems like a secret message, unraveling the mysteries of the universe. These miniature explorers embark on a remarkable journey, discovering the world one adorable step at a time. With their boundless curiosity and innocent eyes, they remind us of the purest form of humanity and the beauty of life itself. In their presence, time seems to stand still, as we witness the extraordinary unfolding of new beginnings. Set up your drawing kit and get ready for our exciting tutorial, as we take you go through the entire step-by-step process of drawing a baby!
Learn How to Draw a Baby Step-by-Step
Congratulations on embarking on the wonderful journey of how to draw a baby! Get ready to dive into the enchanting realm of capturing the delicate innocence and charm of these tiny beings on paper. Each stroke of your pencil will unveil the roundness of their cherubic cheeks, the delicacy of their tiny fingers, and the sparkle in their innocent eyes. As you immerse yourself in the process, you’ll discover the mesmerizing details that make each baby unique – the subtle curves of their rosy lips, the wisps of hair on their soft scalps, and the adorably tiny clothes that adorn their miniature frames. Remember, it’s not just about creating an accurate representation, but also about capturing the essence of their captivating spirit. So grab your sketchbook, embrace the challenge, and let your artistic journey begin, bringing these little miracles to life one pencil stroke at a time.
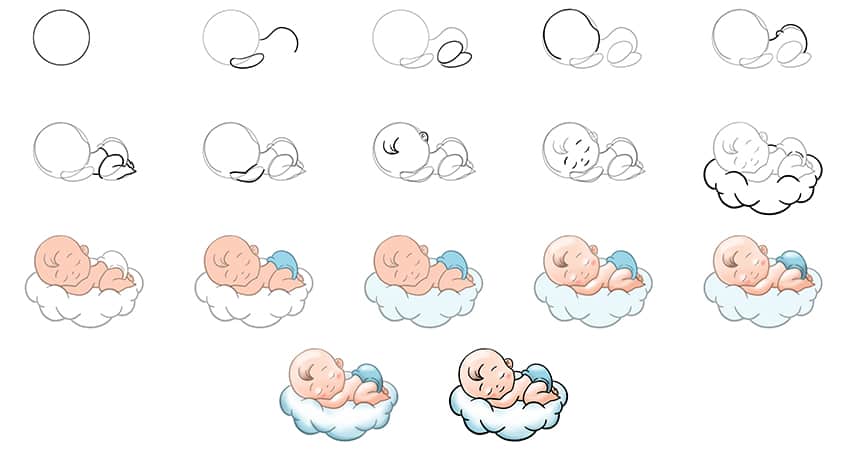
Take a look at the following collage showcasing the sequential steps you’ll follow to draw a baby!
Step 1: Draw the Head
Begin our tutorial on how to draw a baby by drawing a circle slightly to the left. This will represent the head of the baby.

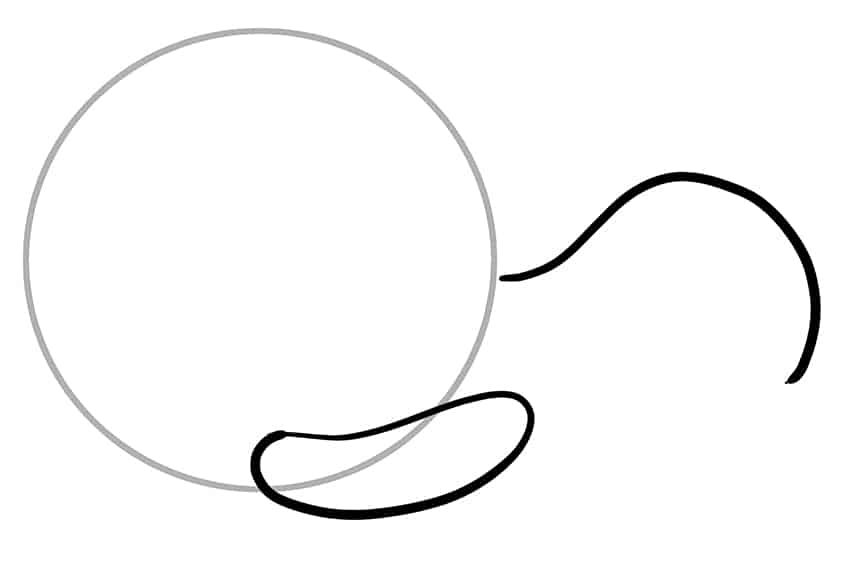
Step 2: Draw the Main Body of Your Baby Drawing
Overlap the head by drawing a small, curved oval shape to represent the arm of the baby. Continue to arch a curving line from the center area of the head and around to represent the main body of the baby.
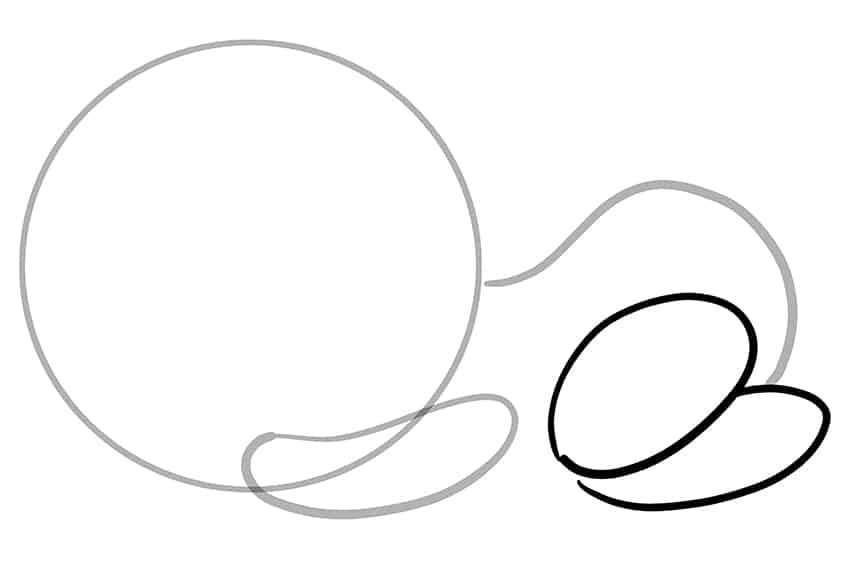
Step 3: Draw the Bent Leg
At the rear of the main body, draw a single tilted oval shape, and a second partially visible oval shape to represent the thigh and leg of the baby.
Step 4: Outline the Head of Your Drawing of a Baby
Utilize the construction lines you drew earlier as a guide to outline the baby’s head in this particular step.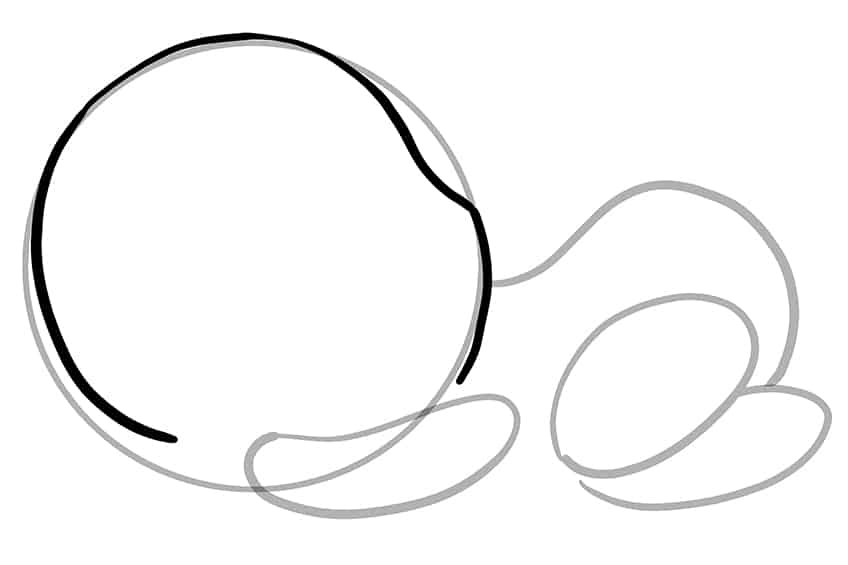
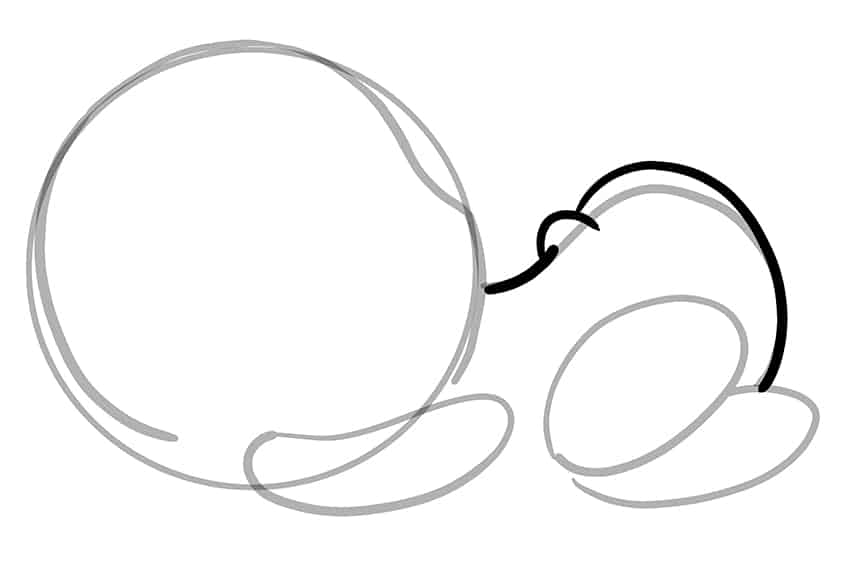
Step 5: Continue the Outline
Continue to outline the main body of your baby drawing. Make use of the construction lines you previously drew to assist you in doing so.
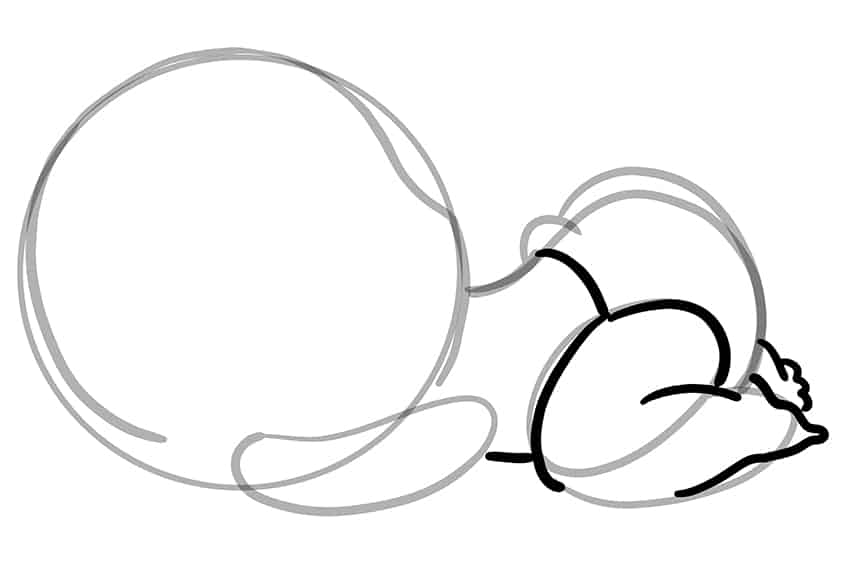
Step 6: Outline the Leg and Feet
In this step, outline the visible leg and feet of your drawing of a baby.
Step 7: Continue to Outline the Arm of Your Baby Drawing
Using the previously drawn construction lines, outline the visible arm on your drawing of a baby.

Step 8: Draw the Hair and Ear
Within the upper center area of the head, draw the curved hair patch of the baby. To the right side of the head, draw the small visible ear.

Step 9: Add the Baby’s Facial Features
To start step nine, begin by drawing two simple eyebrows of the baby. Below this, draw two eyes, a nose, and a curved mouthline. After finishing, remove any remaining visible construction lines by erasing them.

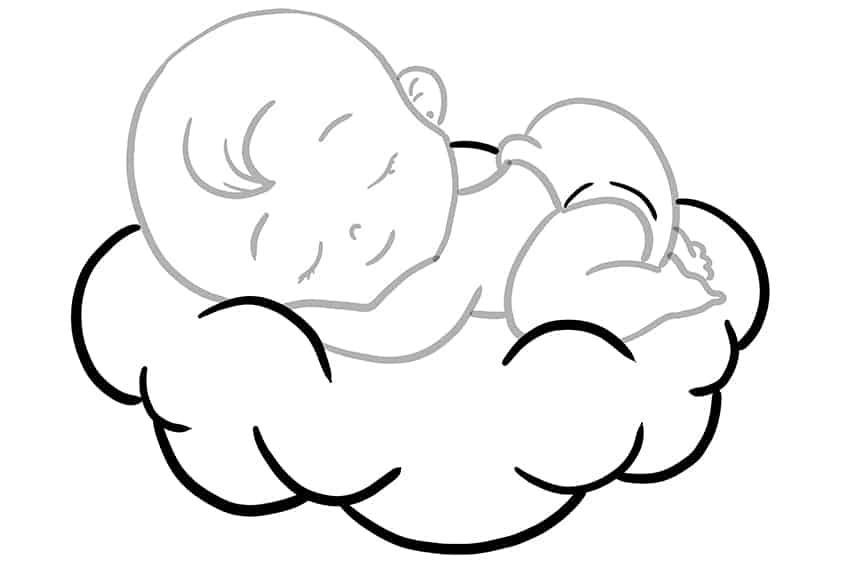
Step 10: Draw the Cloud
Draw several curved lines surrounding the baby to represent the closed cloud-pillow shape that the baby is sleeping on.
Step 11: Apply the First Color Coat
Choose a fine, sharp brush and a shade of tan paint, ensuring a smooth and even application over the baby.

Step 12: Add a Secondary Color Coat
Maintain the use of the same brush as before, but switch to light blue paint. Proceed to evenly apply the paint to cover the baby’s diaper.

Step 13: Color the Cloud on Your Drawing of a Baby
In this step, evenly coat the cloud on your baby drawing using a thin brush and a lighter shade of blue paint.

Step 14: Add Shading and Highlights to the Baby
Start by using a soft brush along with brown paint to incorporate shading into the hair patch. Continue using a darker shade of peach paint, and apply soft shading along the edges and curvatures of the baby. Repeat this step using white paint, and begin to incorporate highlights along the skin tone.
Finish off this step using a soft brush and pink paint, and add a soft blush onto each cheek. Conclude this step by employing a blending brush to gently soften and distribute the layers.

Step 15: Shade and Highlight the Diaper
Utilize a small, soft brush with black paint to delicately apply soft shading along the edges of the diaper. Keep utilizing white paint to introduce highlights to the diaper. Repeat this process using a blending brush to create a gentle, diffused effect. Again, use the blending brush to soften and spread the highlights, ensuring a subtle and realistic appearance.

Step 16: Keep Shading and Highlighting the Cloud
Start this step by employing a soft brush and a darker shade of blue paint to gently apply shading along the edges of the cloud. Continue with a blending brush to gently soften and spread the layers. Once more, use a soft brush and white paint to add a highlight to the center area of the cloud.

Step 17: Finalizing Your Drawing of a Baby
Finalize your baby drawing by selecting a fine brush and black paint to trace the visible outlines and inner texture lines.

Well done on completing our tutorial on how to draw a baby! Drawing a baby teaches you to delve into the captivating realm of capturing the essence of these tiny miracles on paper, and your dedication has paid off. With each stroke of your pencil, you have skillfully brought to life the delicate curves of their chubby cheeks, the adorable features of their button noses, and the innocent twinkle in their eyes. Through your artistic exploration, you have mastered the art of portraying the irresistible charm and tender vulnerability of these little ones. Your drawings now showcase the intricacies of their tiny fingers, the softness of their skin, and the subtle folds of their clothing. You have learned to infuse your artwork with the pure joy and innocence that radiate from the subjects!
Frequently Asked Questions
How to Achieve Realistic Skin Tones and Shading in a Baby Drawing?
Drawing a baby by achieving realistic skin tones requires careful observation and a nuanced approach. Start by studying the various undertones and hues present in a baby’s skin, such as warm pinks, subtle yellows, and delicate peach tones. Layering different shades of these colors can help create depth and a lifelike appearance. Use soft, gradual transitions to blend the colors smoothly and avoid harsh lines. Remember to consider the lighting conditions in your drawing and adjust the shading accordingly, adding darker tones in areas of shadow and lighter tones in areas of highlight. Patience and attention to detail will enable you to capture the natural beauty and realism of a baby’s skin in your artwork.
What Are Some Tips for Capturing the Adorable Facial Expressions of a Baby in a Drawing?
When capturing the adorable facial expressions of a baby in a drawing, it’s essential to observe and study their unique features closely. Pay attention to the curvature of their cheeks, the size and shape of their eyes, and the subtle details of their tiny nose and mouth. Focus on capturing their innocence and curiosity through their expressions, whether it’s a toothless grin, wide-eyed wonder, or a playful pout. Adding light and shadow to emphasize the contours of their face can help bring depth and realism to your drawing. Remember to keep your lines soft and gentle, reflecting the tender nature of a baby’s features.
Matthew Matthysen is an educated multidisciplinary artist and illustrator. He successfully completed his art degree at the University of Witwatersrand in South Africa, majoring in art history and contemporary drawing. The focus of his thesis was to explore the philosophical implications of the macro and micro-universe on the human experience. Matthew uses diverse media, such as written and hands-on components, to explore various approaches that are on the border between philosophy and science.
Matthew organized various exhibitions before and during his years as a student and is still passionate about doing so today. He currently works as a freelance artist and writer in various fields. He also has a permanent position at a renowned online gallery (ArtGazette) where he produces various works on commission. As a freelance artist, he creates several series and successfully sells them to galleries and collectors. He loves to use his work and skills in various fields of interest.
Matthew has been creating drawing and painting tutorials since the relaunch in 2020. Through his involvement with artincontext.org, he has been able to deepen his knowledge of various painting mediums. For example, watercolor techniques, calligraphy and lately digital drawing, which is becoming more and more popular.
Learn more about Matthew Matthysen and the Art in Context Team.


