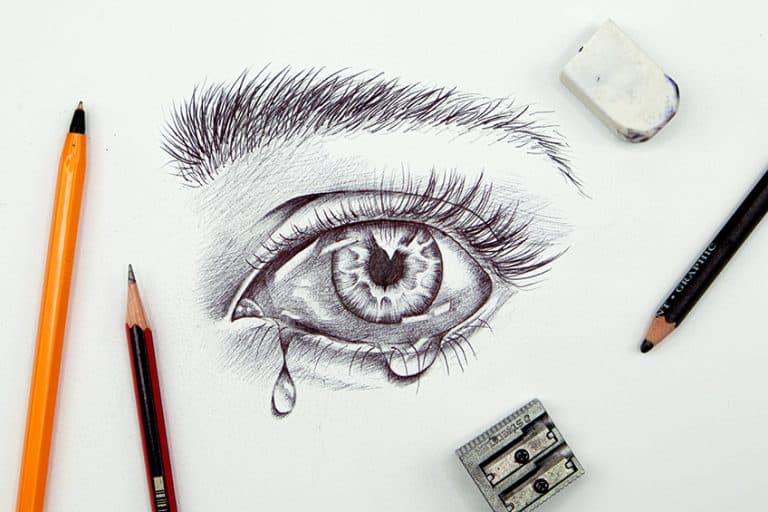
How to Draw Eyes – Learn How to Make Your Own Realistic Eye Drawing
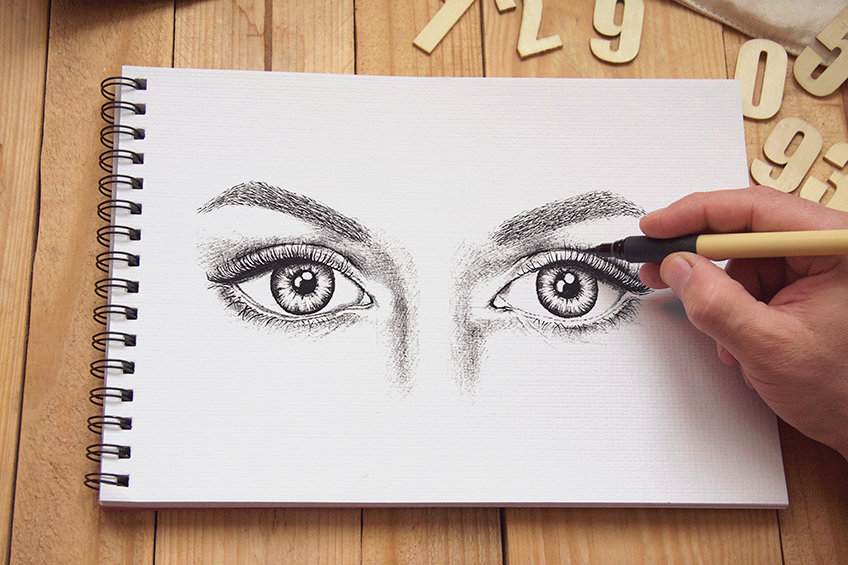
Learning how to draw eyes is very complex, as they are a very unique anatomical structure that can be complicated to draw. Knowing exactly how to describe a particular pair of eyes through a drawing can be even more tricky. However, if we break it down into a series of digestible steps the task becomes much simpler. All the little details that make up a realistic eye drawing are quite simple to do. If we go about it in a way that is patiently and carefully attended to, it will be conducive to getting the best results within this tutorial. In this tutorial, we will be drawing female eyes.
Necessary Materials
We should always consider which medium will produce the best results as we tackle our eye drawing. In this tutorial, we will be drawing female eyes using a series of pens and pencils. Pen and pencil often work well in tandem with one another as the pencil can create a good layer to draw the finer details on top of a pen. So, here is what we will need:
- A good set of pencils (Derwent Graphic pencils recommended)
- A ballpoint pen
- Micron Pen
- Steel ruler
- An eraser
- A sharpener
- Good paper (200 g/m – 250 g/m recommended)
- Source material (could be from your phone or a printed image)
Preparation
When learning how to draw eyes, it is important to know that the most effective way of going about doing so is by a layering process. We first measure, and we then place down our grid and light pencil marks as this will develop the eye sketch. We will then go on to shading as we go through the eyes attending to all aspects that make it up.
We will be drawing from an iPad, or you may use your smartphone. These devices are the most helpful ways to analyze all the little details in your source image. With that being said, let us get going.
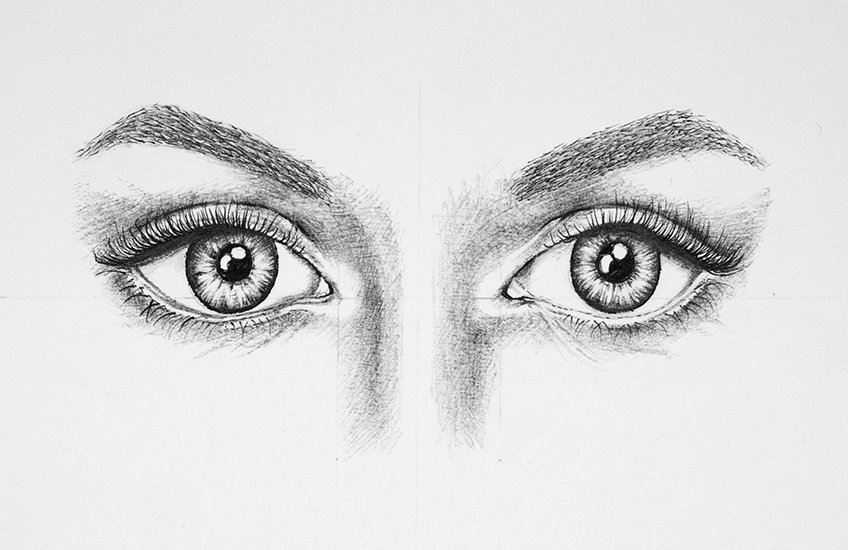
Important Note Before Drawing Eyes
Learning how to draw eyes is a way of building, take a moment to analyze your eyes in the mirror. Consider how different components are placed on top of each other. If one aspect was placed down, try to see how other components are layered on top and so on and so on. In this tutorial, that should be the guiding principle.
We are placing different components on top of each other until the eyes are complete.
Step 1: Measuring and Grid Marks
Let’s begin with finding the center of our page, we can do this by measuring the page both vertically and horizontally. Once we have measured it vertically, divide the measurement in half and do the same with the horizontal measurement.
By doing so, find where they cross over and by doing so we should have the center of our page.
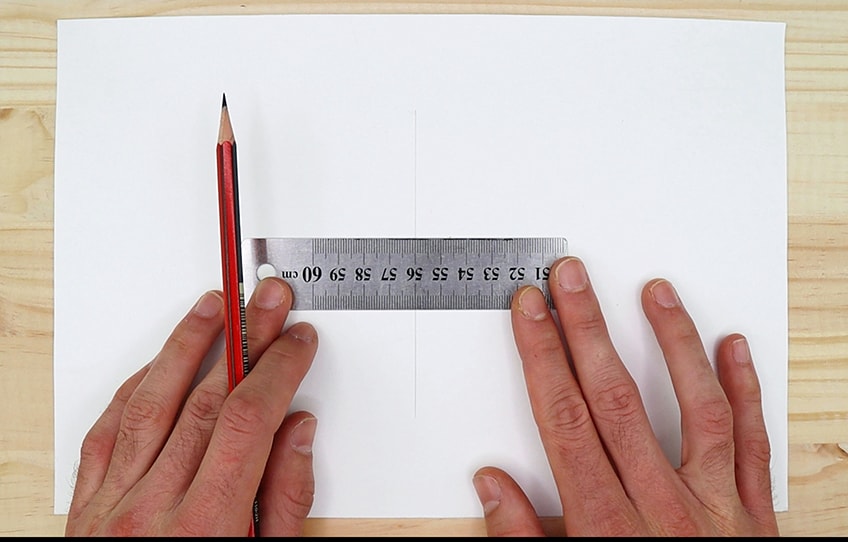
Once you have the center of the page begin to draw a straight vertical line through your page. This line can be any length but for the sake of this tutorial let us work with 15cm. Then we want to measure 5cm from the top of that line and draw a point at that 5cm mark.
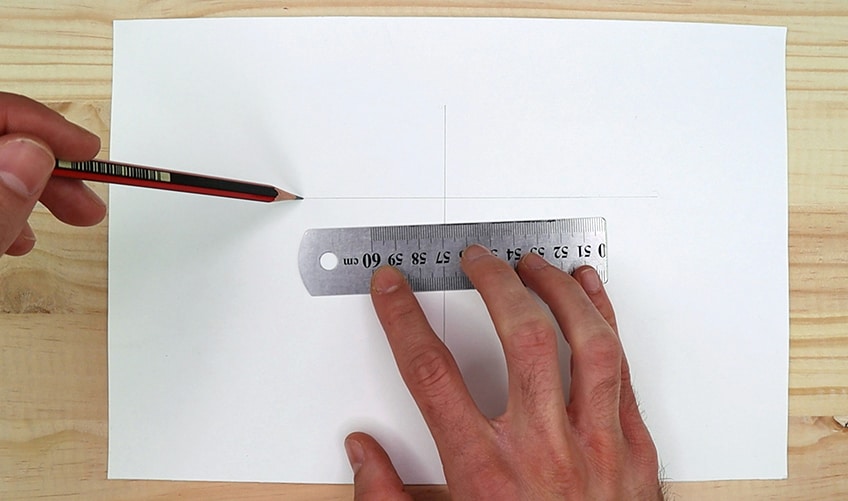
Here is where we will draw a horizontal line through our vertical line, creating two equal 7.5cm lengths on each side. this should be a cross-like shape on our page. The next thing we want to do is draw lines that are parallel to our vertical line, each line being 1.5cm in width on each side of the vertical line. you can draw them down the page it doesn’t matter how long they are.
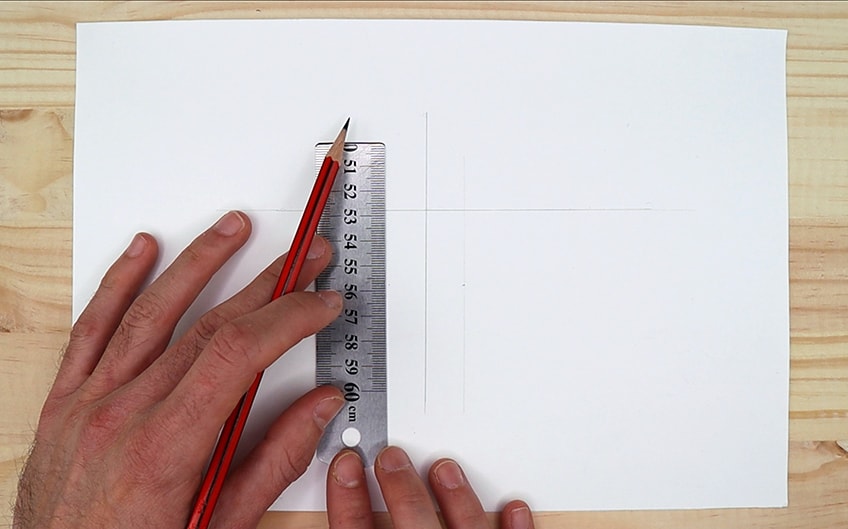
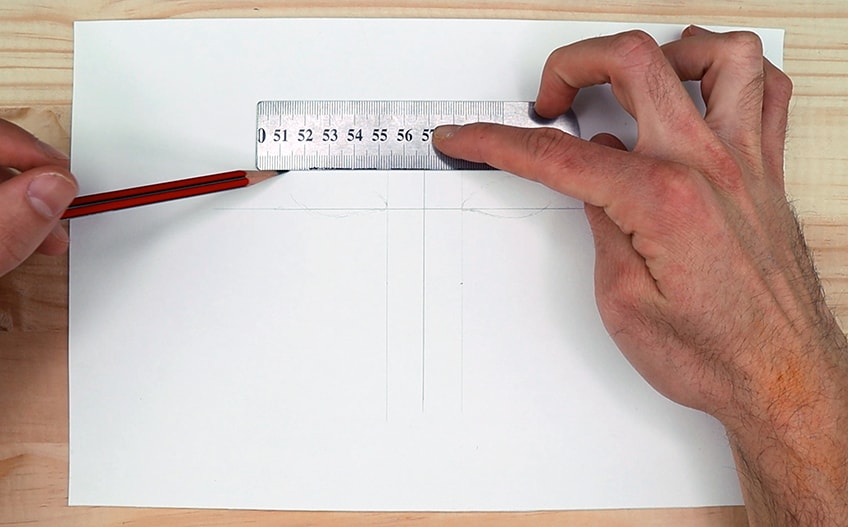
What we want to do now is the same for our horizontal line. Measure a 1.5cm width from your horizontal line and draw a line above it that runs parallel with your horizontal line. When drawing eyes, it does not matter how large you want them to be. If you can configure the measurements correctly they will always be correctly proportioned.
Use this measurement ratio to either make the eye sketch larger or smaller. If you want to follow the measurements in this tutorial that is okay too.
Step 2: Shaping the Eyes
We will now start turning an eye sketch into a realistic representation of an eye. From the corners of where the outer vertical lines interact with the bottom horizontal line is where we will begin to draw, with our H pencils, the structure of the eyes. This is where the inner part of the eye drawing will start to form.
Analyze your source image and see how the shape of the eyes is like two ovals or rather how they resemble a football shape.
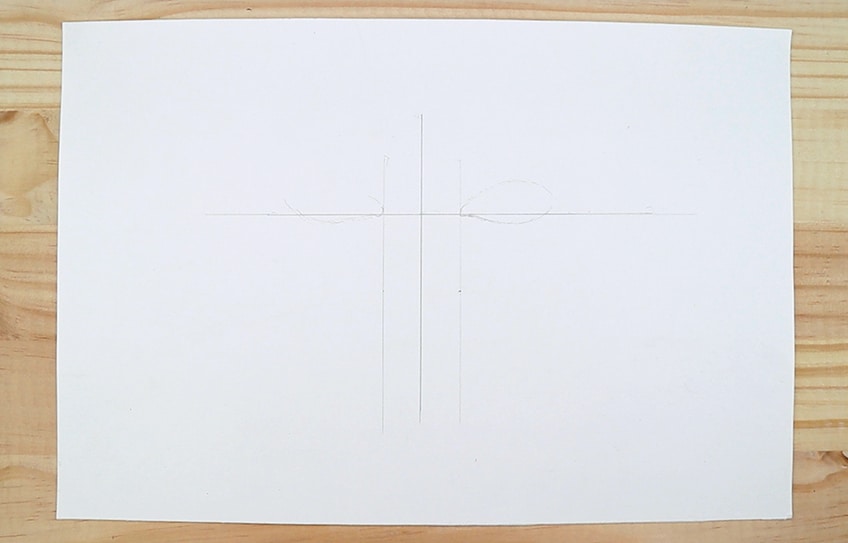
The eye sketch should display a subtle curvature that arches by the inner part. As you can see they deviate under the horizontal line slightly like an upside-down arch. They then move through the horizontal line in a slightly diagonal direction. The outer points of the eye sketch are closer to the bottom horizontal line.
The eyes then do a full curve until the top of the eyes reaches the top horizontal line. As the curve or arch reaches the top horizontal line, it then begins to arch downward again until the line reaches the inner part of the eye again.
Remember, the eye sketch should be more curved on the outside and become more narrow on the inside like a disproportionate football.

Keep using this tutorial and your source image as a way of trial and error until you get it right. It is important to get the shape and proportions right, as it will make the rest of the tutorial much easier for us in the later stages. A good tip to remember is that you can also measure the width of your eyes to make sure they seem the same.
Once we are satisfied with the shape of the drawn eyes, we want to place the iris and pupils.
This is where we want to pay attention as we will be using the iris and pupils as the focal points that we draw around. With your H pencil, begin to draw a circle in your eye that is directly in the middle. You can use a compass or freehand, however freehanding is good practice.
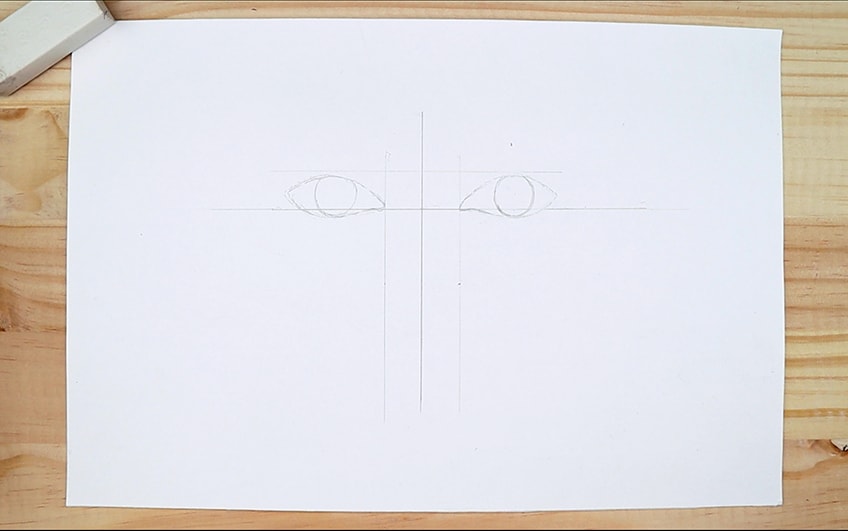
The circle should be slightly under the top of the eye and just touching the bottom of the eye. A good suggestion is to draw a circle that overlaps over the top of the eye and just reaches the bottom of the eye.
Once you have done that, you can erase the portion that goes over the top of the eye. This gives a more accurate depiction of how the eyelid will fall slightly over the iris.
Once we have the iris drawing in the eye as well proportioned as possible we can now draw the pupil within the iris. remember that the pupil is placed directly in the center of the iris and its size can be dependent on its exposure to light. In this tutorial, we can see that the source image shows the pupil to be relatively small. As you analyze your source image begin to draw the pupil
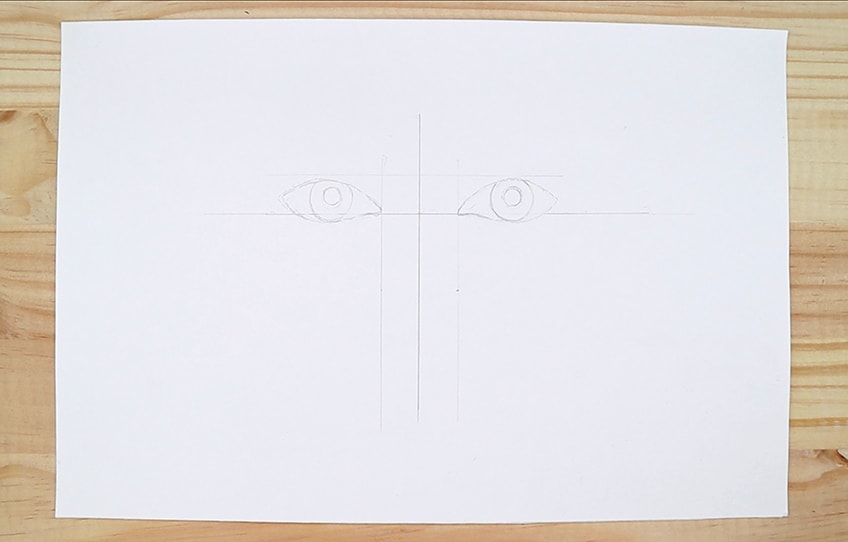
Lastly, if you see the white areas of the eyeball in your source image, try zooming-in the image and see the slight shadows that are cast on the eye from the eyelashes. These little shadows can be drawn very faintly on the eyeball around the iris.
These shadows generally are formed around the edges of the eye.
Step 3: Surrounding Eye Features
What we want to do now is place the indentations on the upper parts of the drawn eye. As you analyze the source image as well as our drawn eyes, look at how the small indentations in the upper eye can be seen through the eyelashes.
As earlier mentioned, we are layering each aspect. We want to draw these marks first.
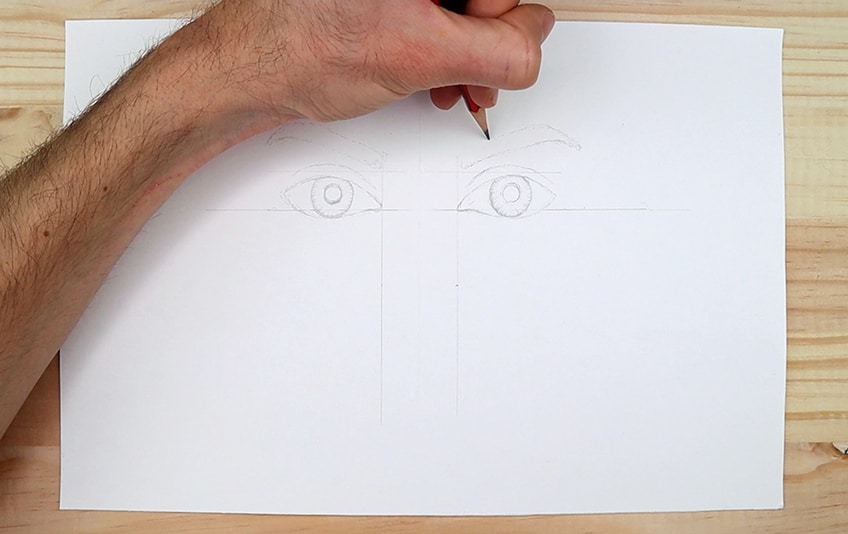
With your H pencil begin to draw the creases above the eye as lightly as possible. During this step, there is no specific measurement for these features. It is a matter of analyzing your source image and drawing as accurately as you can.
However, you can do a general estimation of width and scale as you compare the width of the line to that of the eye.
As you place these creases above the drawn eye see how they move over the top horizontal line. Use your grid marks to help guide you in the process of drawing all these marks. This is why we make a grid so that we can use it to help us scale and correctly place the features of the eyes.
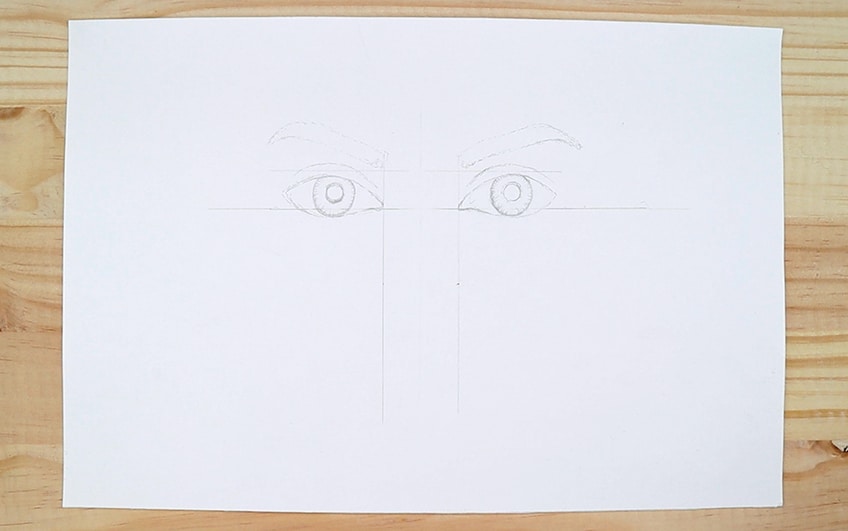
Using your grid begin to place the eyebrows. The eyebrows in the source image are well-manicured which means they are quite linear. The Inner parts of the eyebrows form from the connection point between the outer vertical lines and the top horizontal line. Begin to draw the eyebrows starting from these points
Use your source image to see how large the eyebrows are relative to that of the eye.
The eyebrows are not too thick or too long, so spend some time analyzing their width and length as you draw them. If you need to erase that is ok and remember, we are not doing a perfect replication of our source image. We are just using the source image as a good guide.
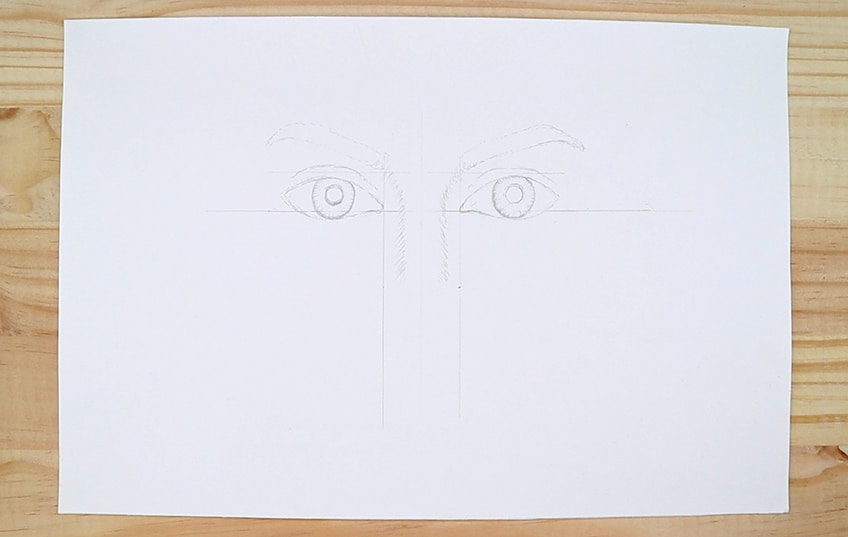
See how the width between the top of the eye, the indentation above the eye, and the eyebrow are all relatively similar. However, their width is only similar near the inner parts of the eye. The width differs as the features move outwardly, this is mostly the case for the eyebrows as they lift upward and outward from the inner section of the eye.
Step 4: Light Shading Around the Eyes
Once we have the indentation of the upper eye area and the eyebrow’s shapes drawn, we can begin to lightly shade the shadows of the nose ridge. A nose casts a slight shadow on either side of its ridge. These shadows fade from its ridge down towards the eyes. They run vertically down the face near the inside section of the eyes and spread around the eye.
Proceed to draw these shadows as lightly as possible with an H pencil.
Try drawing these shadows as straight as you can in a vertical fashion down the face near the inner section of the eyes. These marks generally form from the inner parts of the eyebrows and run down the face.
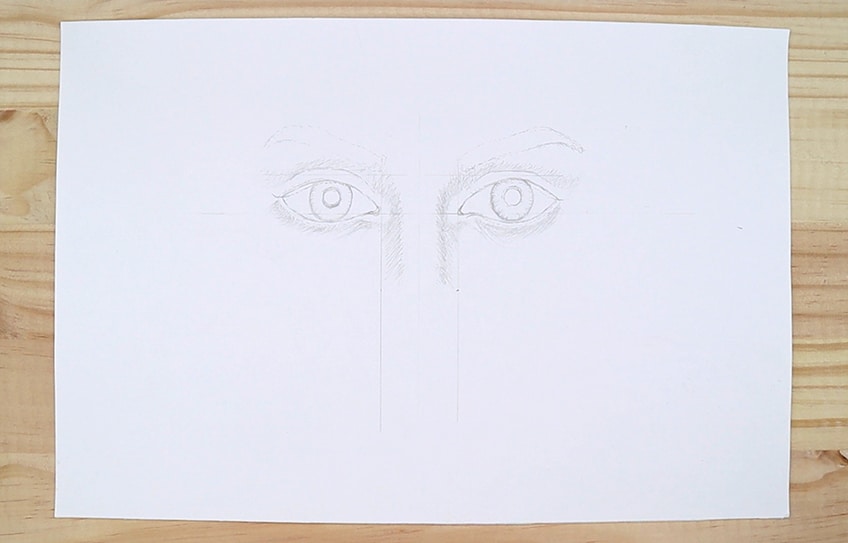
What we then are going to do is start placing the light shadow marks under the eyebrows and above the upper-eye indentations. The shadows next to the ridge of the nose merge with the shadows that form around the upper and lower eye.
However, there are moments when the light in the source image affects the face. This means there are areas around the eyes that are light and stand out from the shadows. As you lightly draw these shadows analyze your source image to correctly place them.
Step 5: Developing the Iris and Pupil
What makes a realistic eye drawing is the pupils and iris. When we start using our pens we need to be as cautious as possible. There are not many ways to fix the marks you make in pen, which means we want to be very careful. Pencil marks from a good underlayer for drawing over with a pen.
This is why we spend a lot of time getting our pencil marks correct.
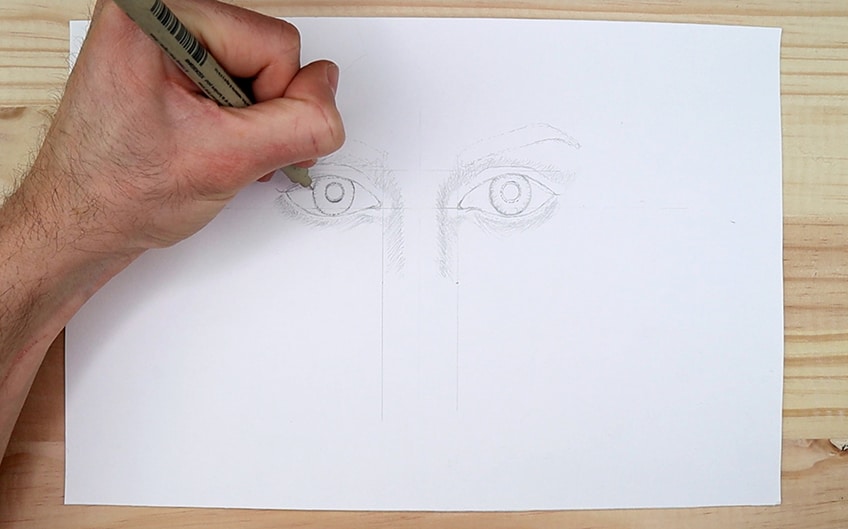
We will start with the iris and pupils as they will be the focal points of the drawing. We want to make sure they are as best as they can be. Take your Micron pen, preferably the 0.2mm, and begin to dot around the pencil marks of the iris.
We want to make these marks gently.
Once you have done this, analyze your source image’s pupils. What you will see is a reflection on the pupils. These reflections can be drawn as two elliptical shapes in the pupil. proceed to draw these with your pencil and once you have drawn them with your pencil go over them with your 005mm Micron Pen.
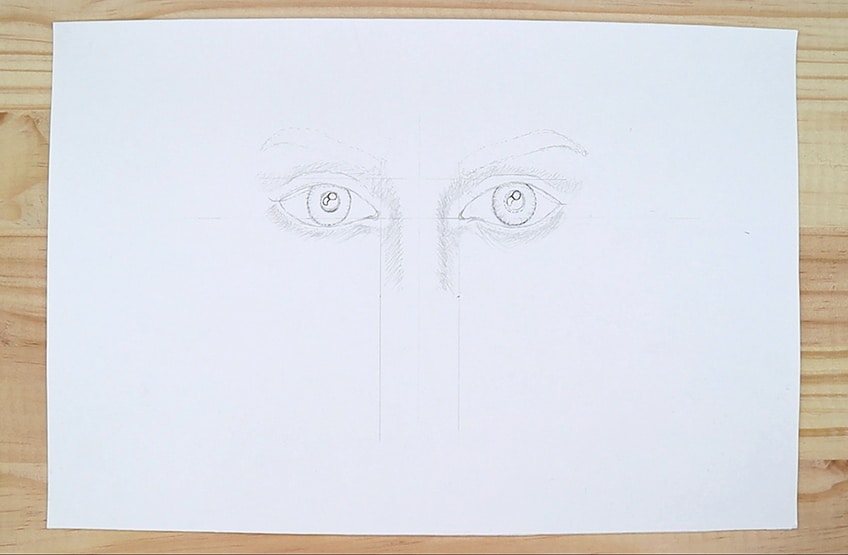
With your 0.2mm Micron pen, you can then proceed to color the pupil completely black, making sure you don’t color in the small reflections in your pupil. Be very careful as you color around the reflections. We will now begin to draw the Iris. Take a moment to analyze the irises of your source image. Essentially, what the iris is displaying is a series of lines that move inward from the rim of the iris toward the pupil. These little lines fade from their origin point.
We can now begin to draw these little lines with an H pencil.

Focus on your source image and spend a good amount of time on the iris and pupils. These are the most difficult aspects of the eyes and require concentration. As we focus on our source image’s eyes and analyze the irises in the image we should allow the image to guide us.
A good suggestion is to start from the bottom of the Iris and move your way around in a clockwise motion.
Once you have done both eyes in pencil, we can now begin to go over it in pen. This is where we use a ballpoint pen. The reason we use a ballpoint pen is that the ink is less intense and the ball-like tip of the pen allows the ink to come out sparingly. This means we have more of a capability to shade with this pen.
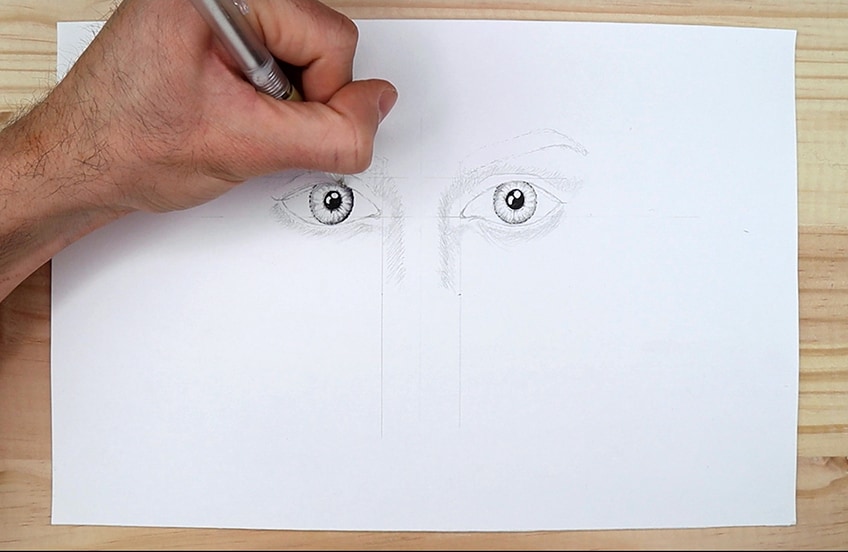
Start with one eye and allow your pencil marks to guide you. remember, that the iris is darkest on its edges, which means, as you apply these marks take note of the pressure you give to the pen. The iris shows dark lines that get more faint as they move toward the pupil. The same is said for the pupils as the lines move outward to the edges of the iris.
As a rule of thumb, your hardest pressure should be applied around the iris for your darkest marks. Then, as you stroke inwardly, your lines fade as you draw each little line inwardly. As you draw the lines from the rim of the iris inward toward the pupil, the motion should be a small hard-to-soft flick of the pen. Of course, you should apply these marks as you feel comfortable, but this is a good idea to keep in the back of your head as you attempt to do so.
What we should have at the end of this step are eyes that show a set of irises and pupils that are hyper-contrasted to the rest of the drawing. We want to make sure that these aspects of the eyes are attended to with a great deal of caution and attention. The drawing will be developed around the Irises and pupils.
Step 6: Light Shading and Filling In Details
Here is where we take our ballpoint pen and begin lightly shading the shadows that we drew earlier with our pencil. A good suggestion is to start with the lower part of the eyes, the area where one would say the bags under the eyes. Pay attention to how these shadows appear in your source image.
What we want to do is, with light pressure and with a tilt of the hand, start shading under the eyes.
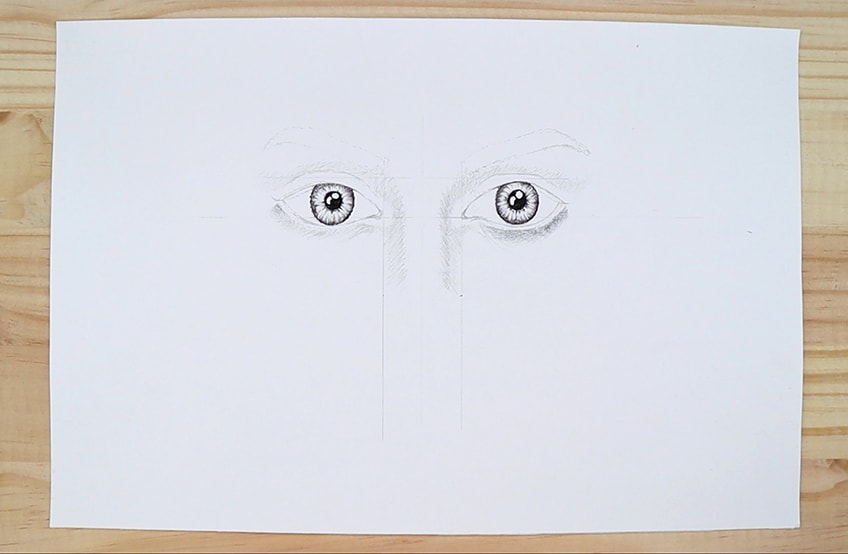
When shading with a ballpoint pen, we can apply the same principles of shading with a pencil. The more pressure you apply the darker the mark. Since we are shading with a pen it is of the utmost importance to keep your hand light and generally tilt.
The ballpoint pen allows for the ink to come out sparingly, which is why we use it. Thus we have a greater ability to control the marks we make.
Consider how the inner part of the eyes has lines that seem to push outward. Use your pen to lightly make strokes in the outward direction under the eye. The bottom part of the eyes has a slight lid. try to run your pen along that lid to demarcate where you should stop shading. We can also put a faint pen line in this lid as it defines the lid more in the drawing. However, these lines should be cautiously applied as you make sense of your source image.
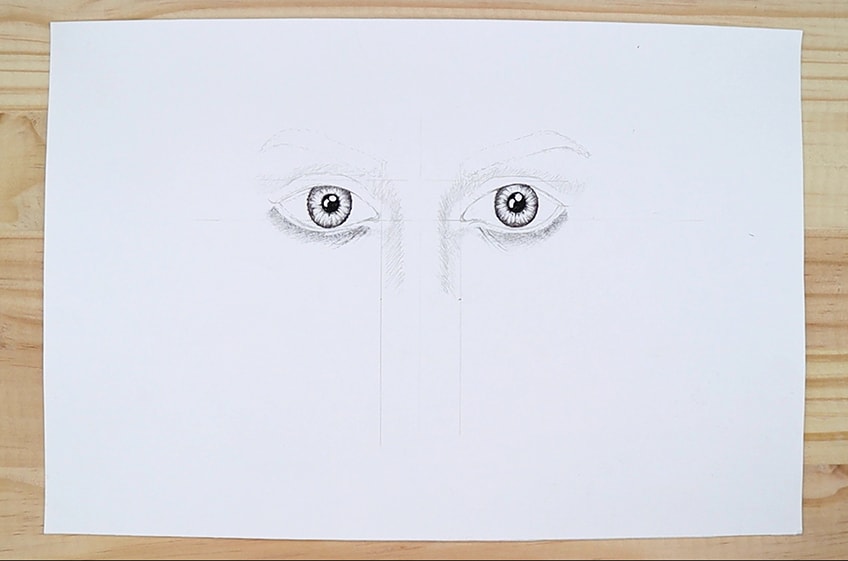
Take your 0.2mm Micron pen and lightly attend to the inside corner of the eye. This area generally has a slight shine due to the plasma on the surface of the eye. We develop this quality by looking at our source image and seeing the little areas of contrast in this space. By doing so, proceed to mimic these details cautiously with your 0.2mm Micron pen.
According to this source image, we could define it with slight outlines and little dark marks on the edges of the corners.
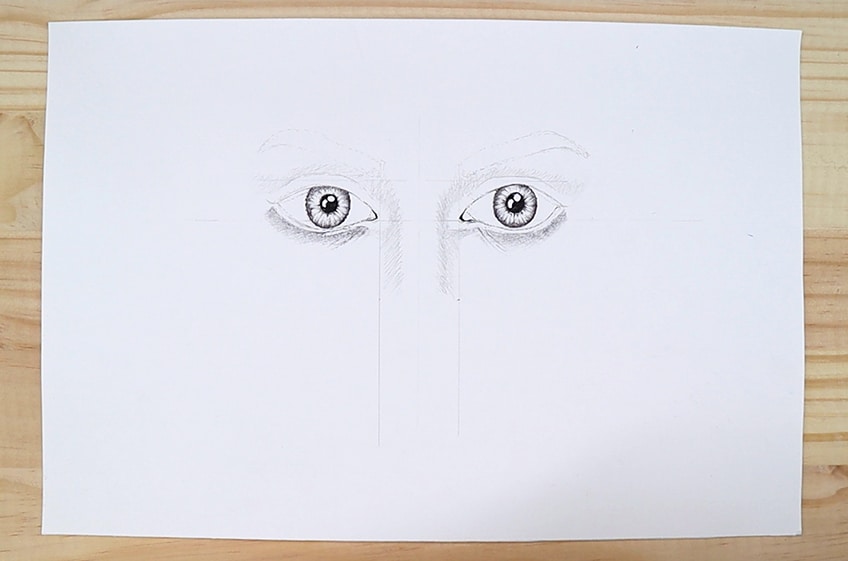
We can work our way around each eye, one at a time preferably, and fill in any pencil marks with our ballpoint pen as lightly as possible. This means the little shadows on the eyeball around the iris, near the eye-lids and at the edges of each eye. be very attentive to each little aspect.
Step 7: Eyelash Marks and Darker Pen Shading
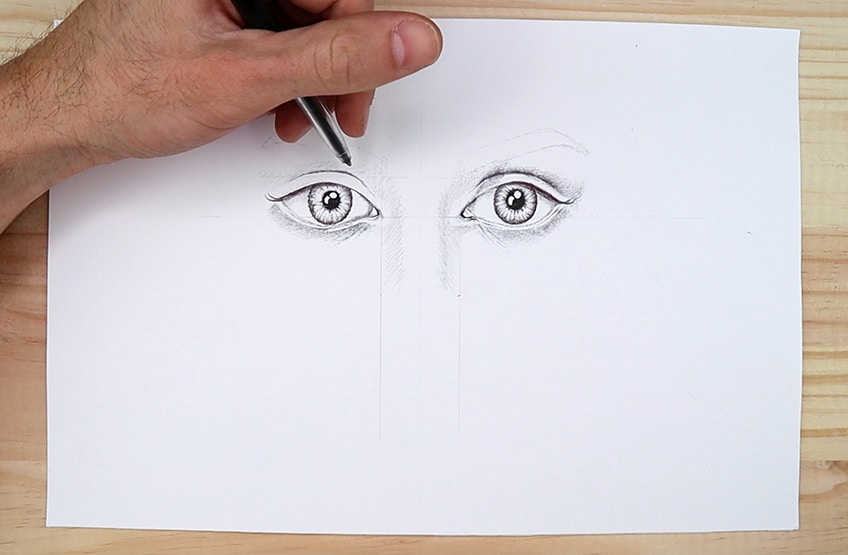
We are going to do the general shadow and marks of the eyelashes but not the little eyelash strokes. Because of the mascara on the eyelashes, the eyelashes seem like a thick black section near the top of the eye. What we want to do is take our ballpoint pen and proceed to draw these dark black marks above the eyes.
These marks should be darkest at the top rim of the eye and fade downward near the iris.
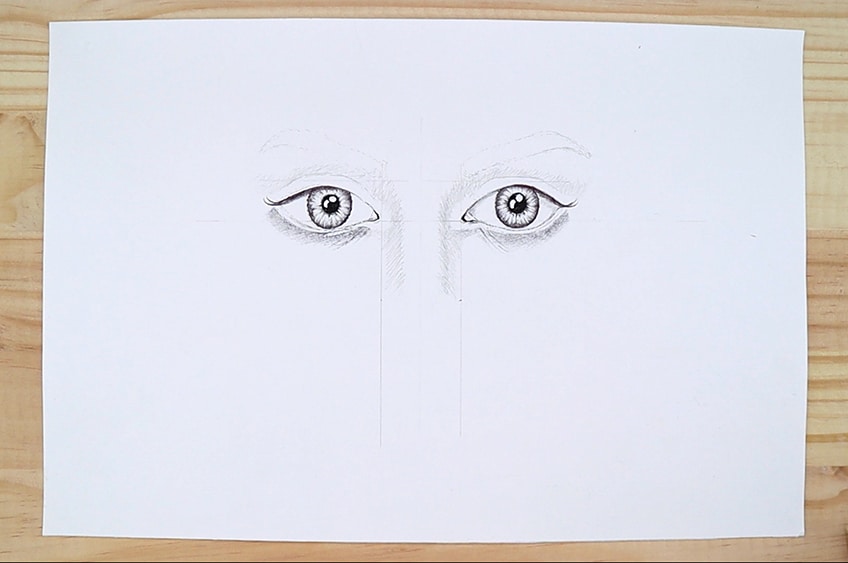
This is a way of drawing these marks that will make it seem realistic and feminine once the drawing is done. Think of how the eyelash would fall over the eye, this is the same with these marks as they slightly fall over the iris at the top of the eye. These marks curve as the top of the eye does as well. They have a slight flick at the outer edges of the eyes to indicate that they are eyelashes.
You can make more than one stroke at the edges of these marks.
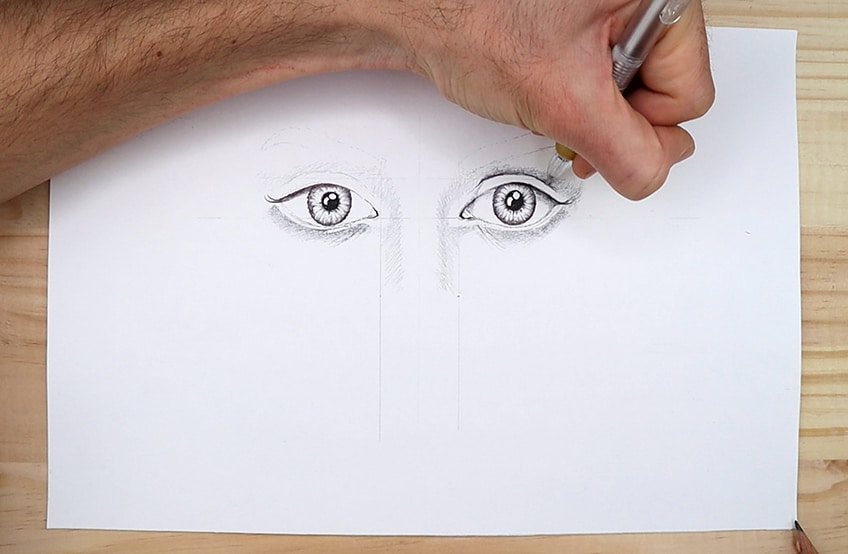
Let us consider the upper eye or the indentations above the eye for a moment. These indentations define the eye. We can begin to take our 0.2mm Micron pen and slightly apply marks along the pencil line as we see where they are dark according to our source image.
Then we can begin to shade in an outward manner from the lines with our ballpoint pen.
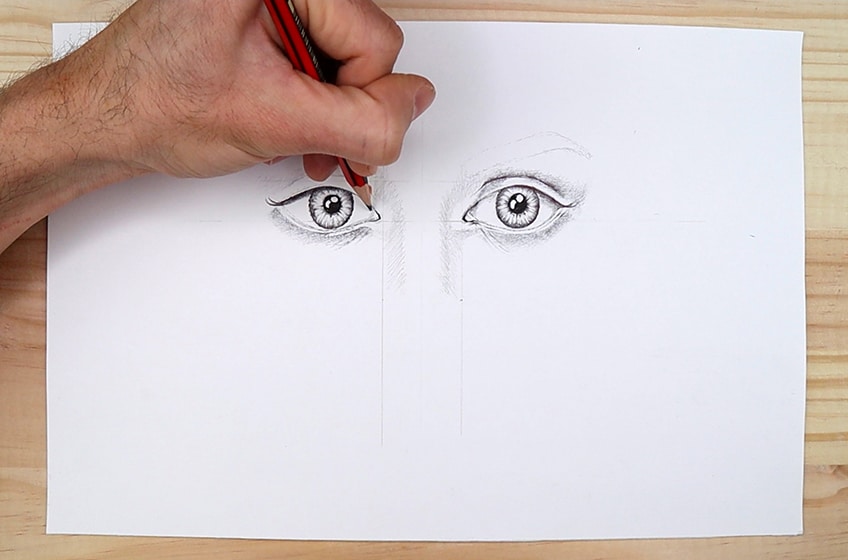
We proceed to do this in an outward direction along the top of each indentation line above both eyes. We can do this in an inward direction along the upper indentation of the eye as well. These two indentations fade from the line outwardly as the darkest moment is inside the crease of the line.
This means we fade these marks toward the eyebrow as the shadow gets lighter.
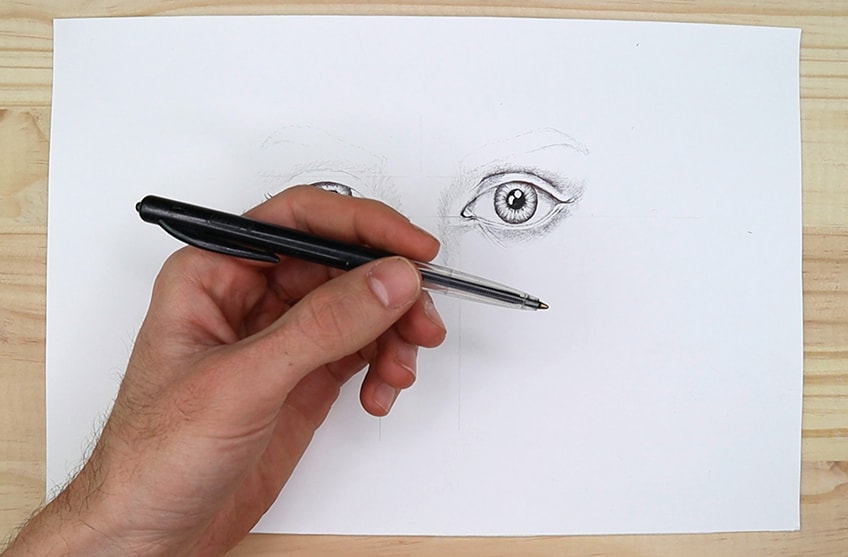
We can proceed to do this for both eyes. If you notice the shadow on the upper parts of the eyes, close underneath the outer parts of the eyebrow, these shadows depict a curve towards the outer edges of each eyebrow. This makes the eyes accentuated and look more feminine. Proceed to make these marks with your ballpoint pen as cautiously and slowly as possible.
Make sure you refer to your source image as a guide as much as possible whilst you draw.
Step 8: Refining Our Shadows
Now we can begin to shade with our pens a little more and more over the eye sketch. It’s about adding pen marks slowly on top of each other until they reach the tonal value necessary. Start with one eye and begin to lightly add in all the various shadows with your ballpoint pen.
Remember to keep a light hand during this process.

Working around our indentations above the eye we can refine these shadows by going over them. Another area to pay close attention to is the top eye-lid. This area has shadows that leave an unshaded area on the rim of the top of the eyelid. This gives them depth and makes them stand out. Shade the top eyelids but leave a slight unshaded line near the edges of the top eyelid.
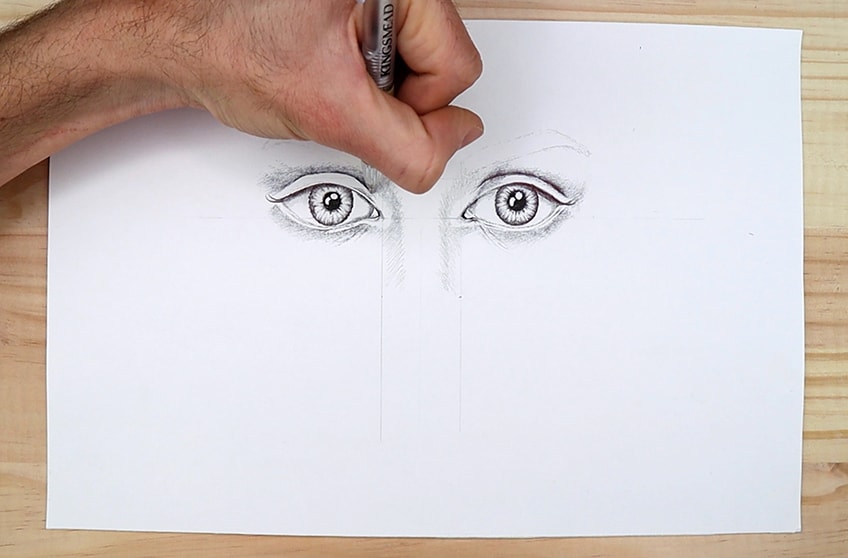
Your eyes should start to seem more realistic the more you attend to all the shadows. As you have previously shaded in pencil and pen, going over these marks and making sure you refine all the gradients our eyes should start to pop. Make note of the bottom eyelids as well.
Similar to the top eyelids, there are moments where you shouldn’t shade, retaining an untouched line helps to make them seem three-dimensional.
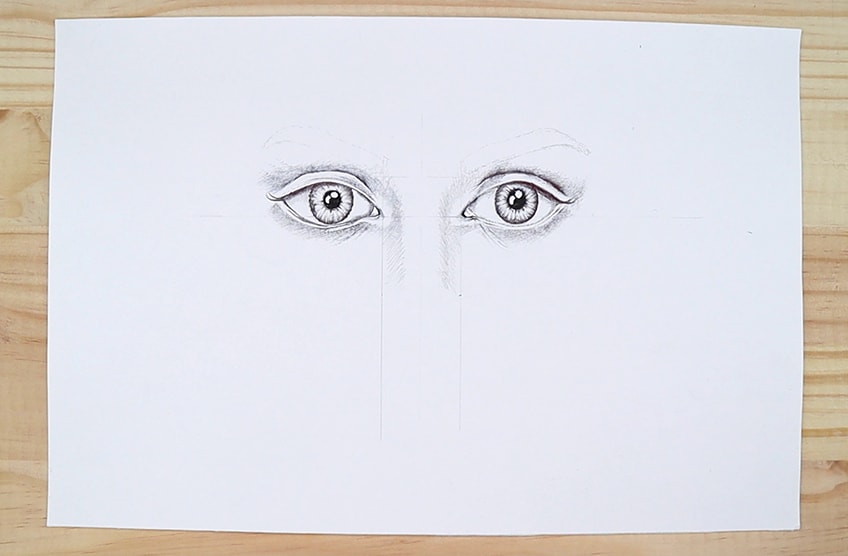
We can also erase any marks or grid lines that don’t need to be there as we should have moved past their necessity by this point. Attend to all the shadows near the top and bottom of the eyes as you refer to our source image. Remember, keep your pressure on the penlight. We can also go over the shadows on each side of the nose ridge.

A good suggestion is to also re-examine your irises. See if you can with great consideration apply lines and strokes with both your 0.2mm Micron pen and ballpoint pen. Sometimes the iris isn’t just lines but little moments of filling in various little shapes with a pen.
But always be very careful as these moments are small and delicate and don’t need to be over-shaded.

Doing this kind of detailing and going over all our shading for a great deal of time makes a great difference. This is what will bring your drawing to life. As we slowly fill in more marks with our ballpoint pens and shade over the areas that need it and slowly produce these gradients, our image should start to look more realistic.

Step 9: Drawing the Eyelashes
A large part of drawing female eyes is the eyelashes. We can now take our 005mm and 003mm Micron pens and begin to make our eyelashes. We use these smaller pens because their width is thin and gives a more accurate depiction of small hairs. Eyelashes have a flick kind of motion, it is most effective to mimic the eyelashes with this kind of motion with your pen.
Try practicing on a blank piece of paper before proceeding.
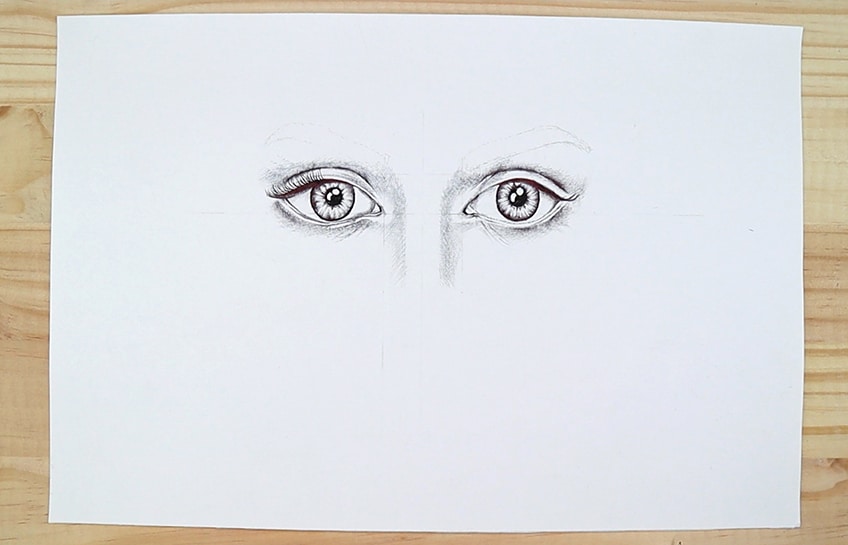
When you feel comfortable making these marks, begin to do so as you constantly refer to your source image. Your source image describes the eyelashes as having various widths, this is why we will use a 005mm and 003mm Micron pen, allowing the pen to control the width whilst we can just focus on the motion of the mark-making.
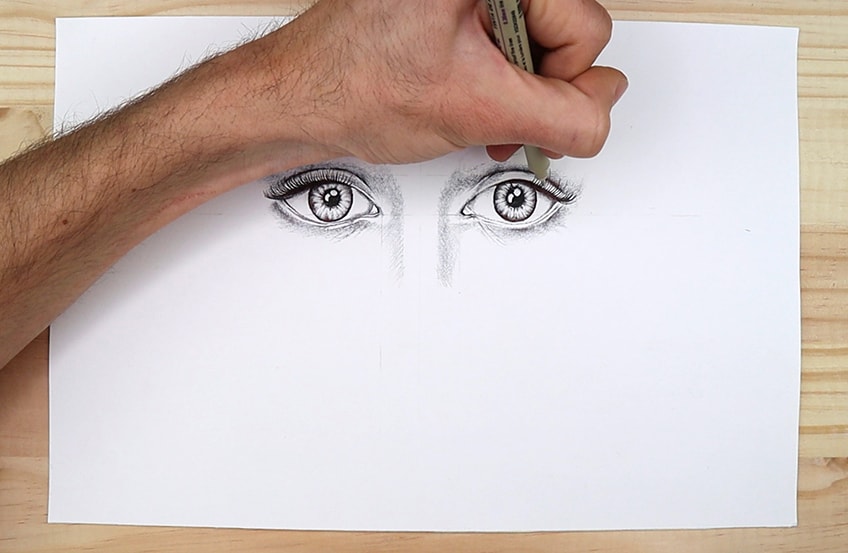
The eyelashes have a seemingly thicker quality toward the outer edges of the eye. This is because they are moving in that direction predominantly. However, there are moments when few of them move in random directions.
Keep this principle in your head as you make these marks.
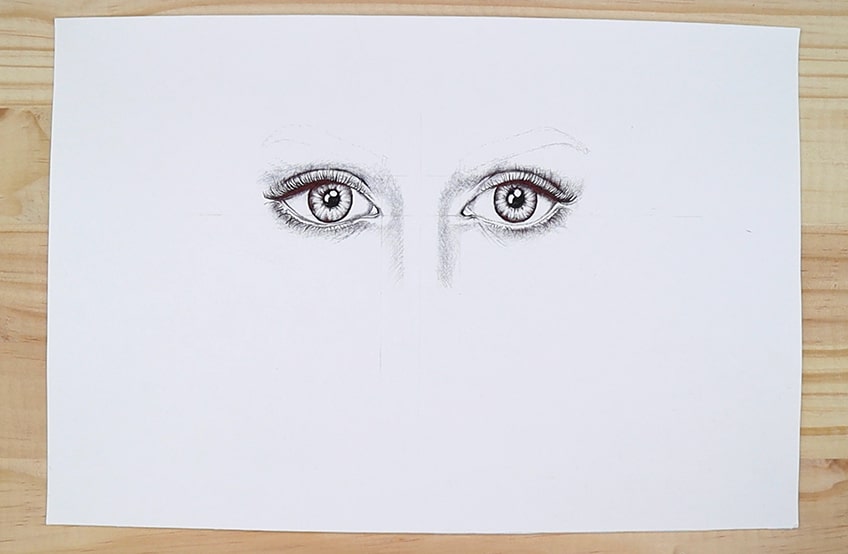
You can also begin to apply the bottom eyelid lashes. These lashes are much smaller and less directional. They are quite sporadic in their movement and should be applied with a quick and short swipe of the hand. Use your 003mm and 005mm Micron pen for these details.
Step 10: Drawing the Eyebrows
The eyebrows are a great way to learn how to draw little hairs. At this stage, we should have the general shape or outline of our eyebrows. With an H pencil begin to do short little strokes from the inside of the eyebrow, moving up and out towards the end of the eyebrow. We do this because these hairs in reality move outward not inward.
To mimic this with the same motion in the drawing will make it seem more accurate.
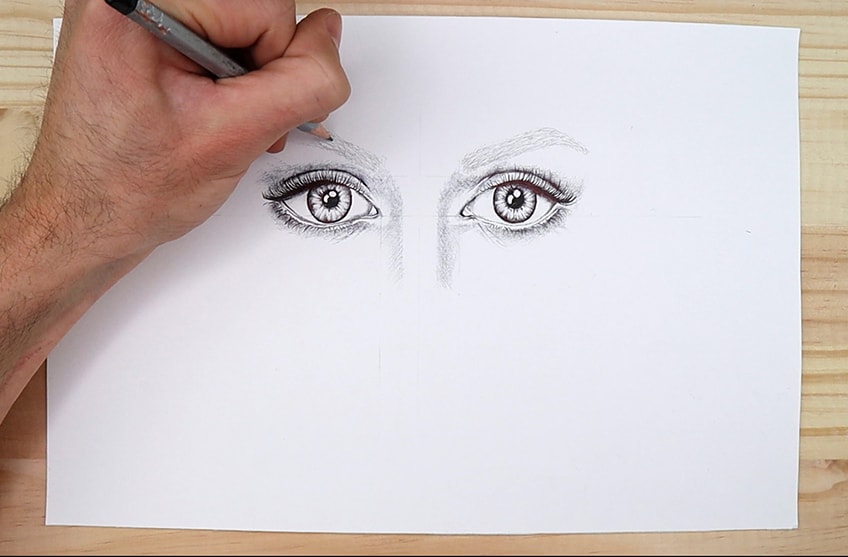
Proceed to do this motion with both eyebrows, until both are filled in with little light pencil lines. Once we have done both the eyebrows take a look and see if you need to fill in any more with a pencil before we move on to the second layer with our Micron pens.
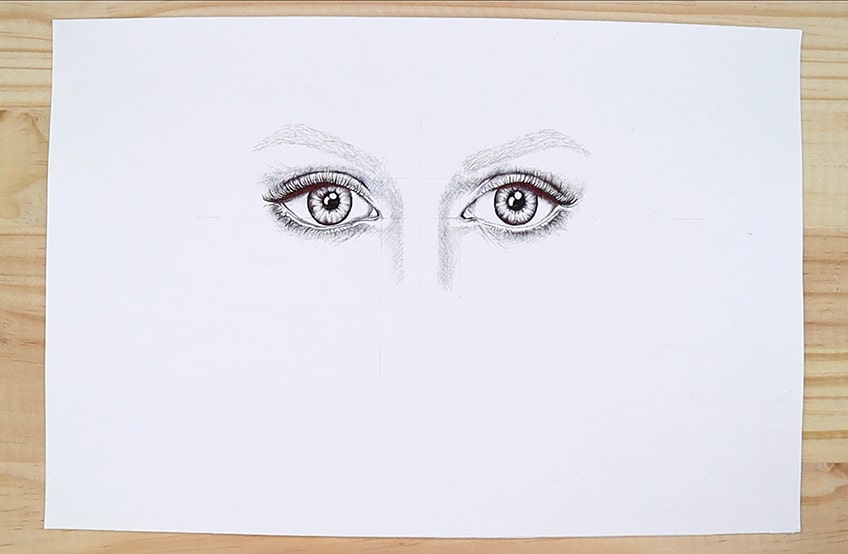
With your 005mm Micron pen, begin to do the same strokes and movement of mark-making over the pencil marks. Do the same as before, where you begin from the inside of the eyebrow and move outwardly towards the outer edges of the eyebrow.
By doing so it will be conducive to the best result.
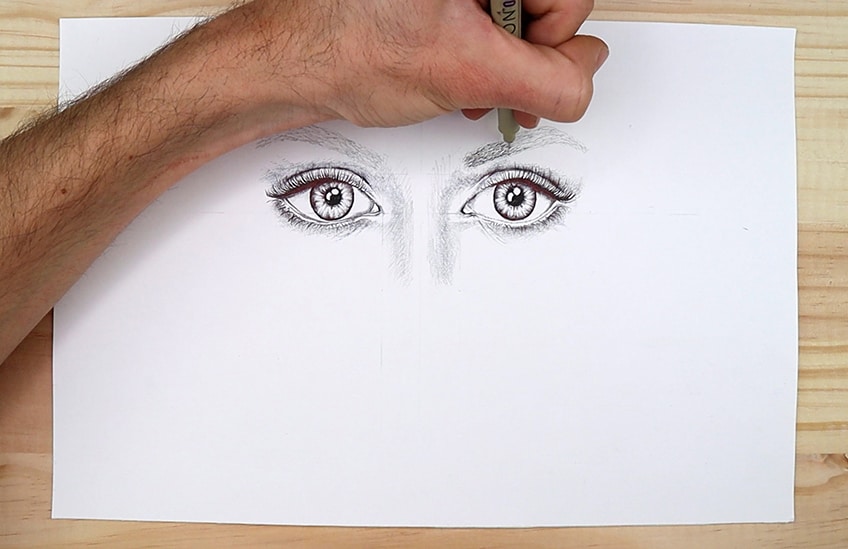
Once both eyebrows are filled in with your 005mm Micron pens take your ballpoint pens and begin to lightly shade over each eyebrow. Remember that the pressure that you apply to your hand will have a direct result on your drawing, what we want to do is keep this pressure relatively light, this way the eyebrows are not extremely dark.
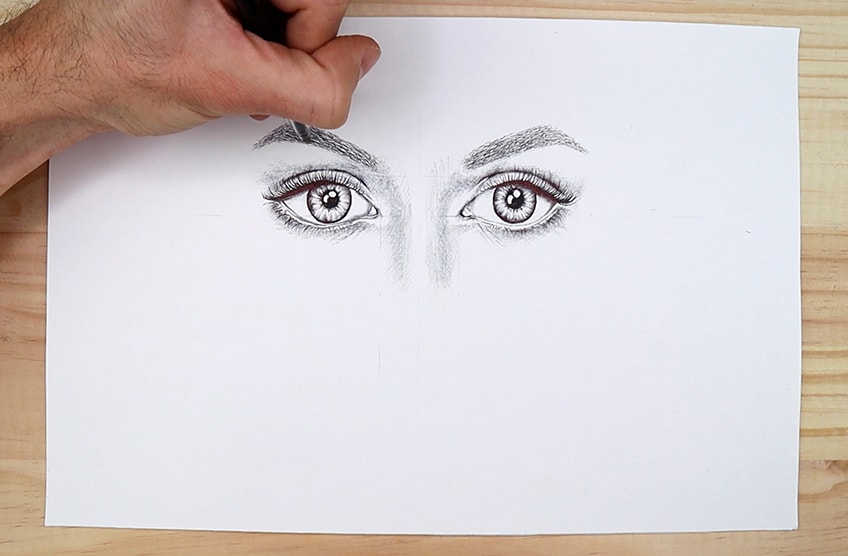
Step 11: Last Layer of Shading with Pen
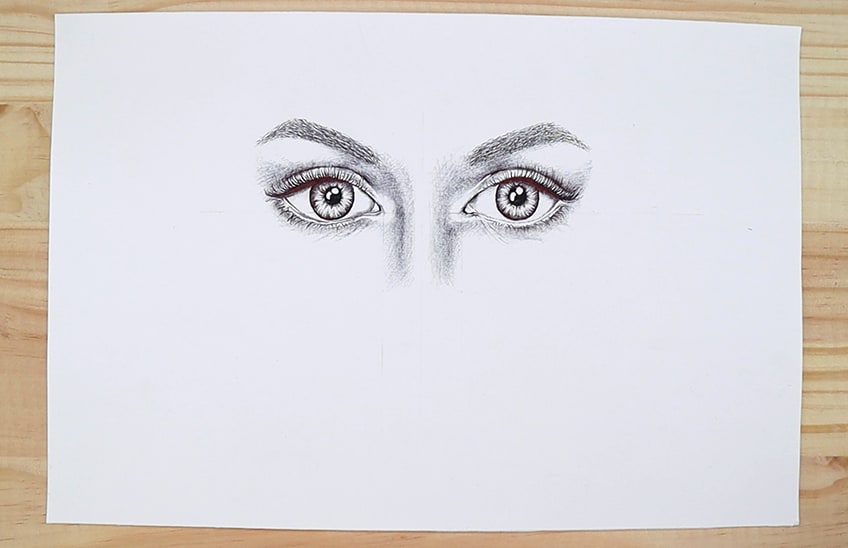
We have come to our last step. We should have a relatively realistic-looking pair of eyes by now. Here is where we can take our ballpoint pen and apply our last moments of shading. By layering our shading we make our drawing seem more and more realistic.
However, keep a light hand as we do not want to overshade, this can often lead to an unwanted result.
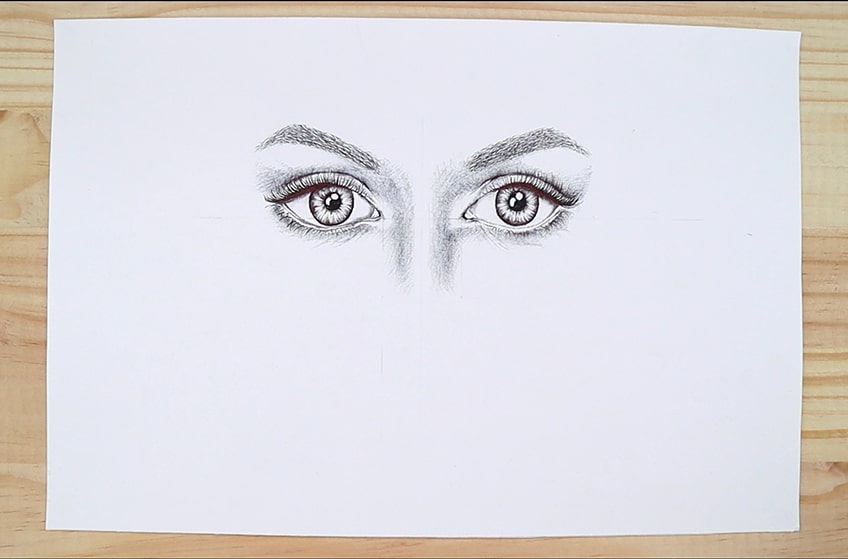
Go through every single aspect of your eyes as you refer to your source image to see where exactly you need to fill in any last layers of shading. A good suggestion is to analyze the inner sections of the eyes as this is where shadows tend to be the darkest. This area also always defines the gradient shifts very specifically due to the nose that casts shadows.
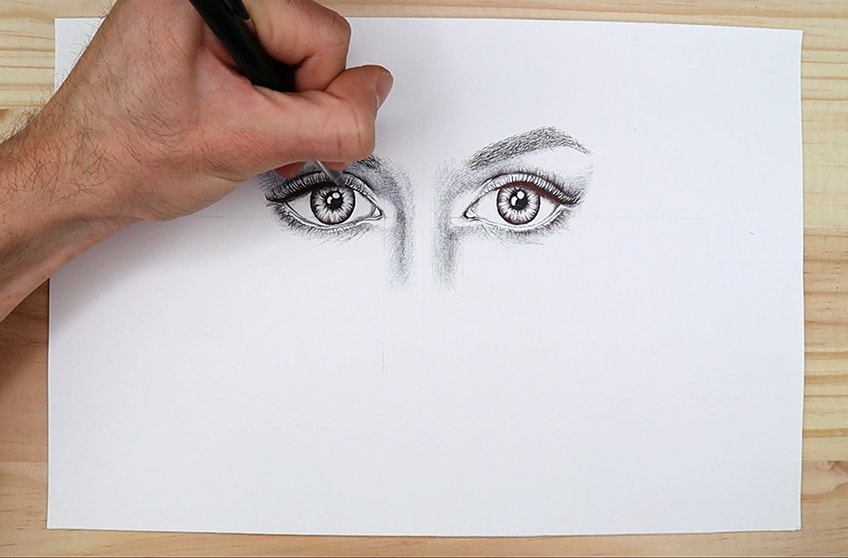
Remember that the inner corner of your eyes slightly protrudes which means the marks can be lighter in these areas. Each side of the ridge of the nose are areas to pay attention to as they shift in their gradients.
As long as you are sure you go through each aspect of your drawing and compare it to your source image then your drawing should turn out great.
Tips to Remember
- Drawing takes time, allow yourself the time to work on your drawing. This is a process of patience, as patience will help you helpfully develop this skill
- Eyes are tricky, it’s not always a linear process of application. Sometimes it requires redoing and returning to a step if and when need be.
- Use your eraser during the beginning steps. The beginning steps are crucial to get right as they will create the template for shading and details.
- When shading in a pen, always lightly apply marks. This way if you do a mark by accident in any way you can still work it into the drawing.
- The iris and pupils are the best tricks, a good recommendation is to spend time getting them right.
The eyes can be the hardest part of the body to draw, as they are generally very complicated and required lots of steps to be drawn correctly. This is due to their unique structure, which can be difficult to capture the first time you attempt it. However, in our tutorial above, we have created an easy step-by-step guide for you to try out drawing eyes for yourself, and see what you come up with!
Frequently Asked Questions
How Do I Draw Realistic Eyes?
Drawing anything is a matter of shading. Always consider how light interacts with the eyes. The way the light interacts with the eye is what causes reflections in the pupils or shadows in and around the eye. So making sure we grasp how the nature of light and its interaction with the structure is the best way to make it seem realistic.
How Do I Shade with Pen?
Shading with a pen is very similar to shading with a pencil. However, this is generally the case with ballpoint pens as the ball-like tip of the pen allows for ink to come out sparingly. So the first thing is to know which type of pen for which effect. The other aspect of shading is about different techniques. Different techniques can help produce different results.
How Do I Draw an Iris?
To make an iris look realistic, you’ll need to apply a series of lines that sprout from the rim of the iris inwardly towards the pupil. The same is said for the pupil, however, these lines are smaller as they sprout from the pupil outwardly toward the rim of the iris. That being said, there are always random moments in the iris that have peculiar deviations in their lines, so these moments can always be added. Lastly, you can always shade inwardly from the rim of the iris, which will be another layer that adds to the eye’s composition.
Matthew Matthysen is an educated multidisciplinary artist and illustrator. He successfully completed his art degree at the University of Witwatersrand in South Africa, majoring in art history and contemporary drawing. The focus of his thesis was to explore the philosophical implications of the macro and micro-universe on the human experience. Matthew uses diverse media, such as written and hands-on components, to explore various approaches that are on the border between philosophy and science.
Matthew organized various exhibitions before and during his years as a student and is still passionate about doing so today. He currently works as a freelance artist and writer in various fields. He also has a permanent position at a renowned online gallery (ArtGazette) where he produces various works on commission. As a freelance artist, he creates several series and successfully sells them to galleries and collectors. He loves to use his work and skills in various fields of interest.
Matthew has been creating drawing and painting tutorials since the relaunch in 2020. Through his involvement with artincontext.org, he has been able to deepen his knowledge of various painting mediums. For example, watercolor techniques, calligraphy and lately digital drawing, which is becoming more and more popular.
Learn more about Matthew Matthysen and the Art in Context Team.
Cite this Article
Matthew, Matthysen, “How to Draw Eyes – Learn How to Make Your Own Realistic Eye Drawing.” Art in Context. June 19, 2022. URL: https://artincontext.org/how-to-draw-eyes/
Matthysen, M. (2022, 19 June). How to Draw Eyes – Learn How to Make Your Own Realistic Eye Drawing. Art in Context. https://artincontext.org/how-to-draw-eyes/
Matthysen, Matthew. “How to Draw Eyes – Learn How to Make Your Own Realistic Eye Drawing.” Art in Context, June 19, 2022. https://artincontext.org/how-to-draw-eyes/.


