How to Draw a Vulture – An Easy Step-by-Step Vulture Drawing Tutorial
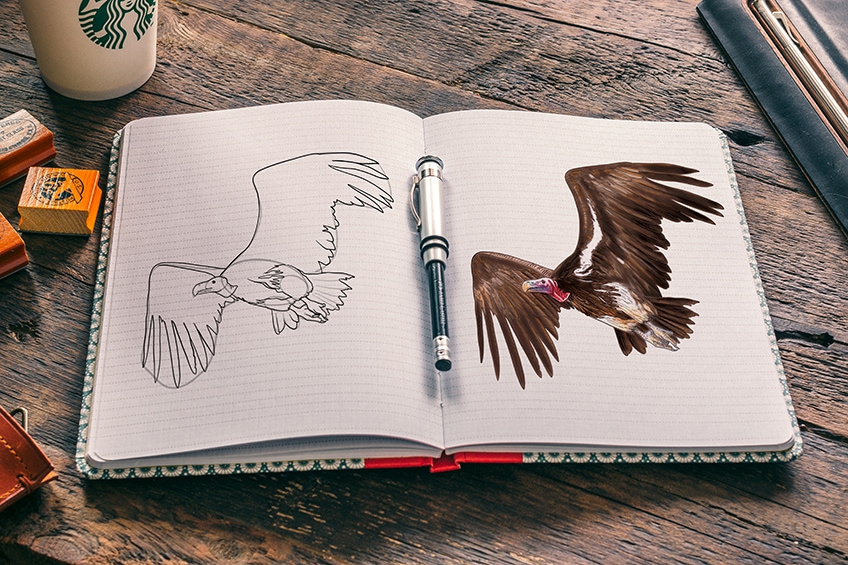
When it comes to birds, vultures have one of the most important ecological roles. In this tutorial, we take you through all the necessary steps to help you draw a vulture in flight. Drawing birds in flight adds a new level of intricacy, but with our easy-to-follow tutorial, we make it easy for artists of all levels to create a beautiful and realistic vulture drawing.
Let us Begin Our Step-by-Step Vulture Drawing Tutorial
When it comes to drawing a bird like a vulture in flight rather than sitting stationary, the proportions can become a little more tricky. Luckily, all of our tutorials begin with a series of steps that help us lay down the basic shape of the animal before adding any details. These initial steps help consist of different shapes and lines that help us get the proportions and final outline spot on.
You can see a quick outline of our vulture drawing tutorial in the image below.
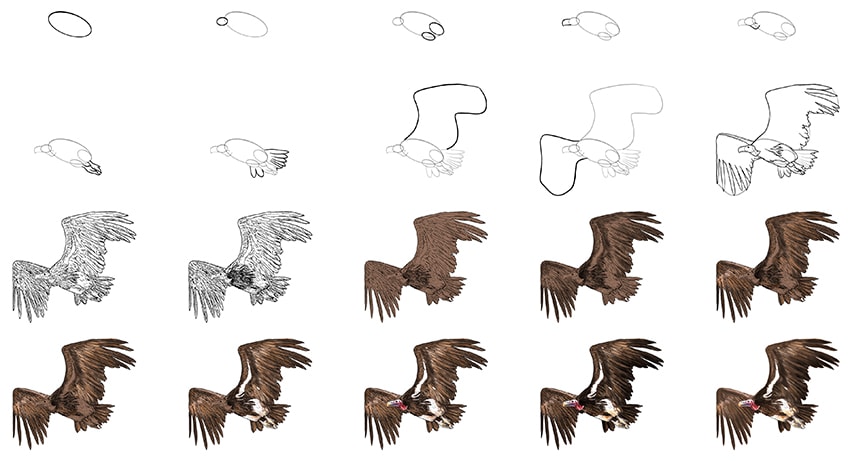
When we get to the final coloring steps, you can use any one of a range of different coloring mediums. The tutorial is written for a painting medium like gauche or acrylic, but you can easily adjust the steps to suit your chosen medium, whether that is a graphic tablet or coloring pencils.
Gather your drawing supplies, including a soft pencil for the construction lines, and let us begin the vulture drawing.
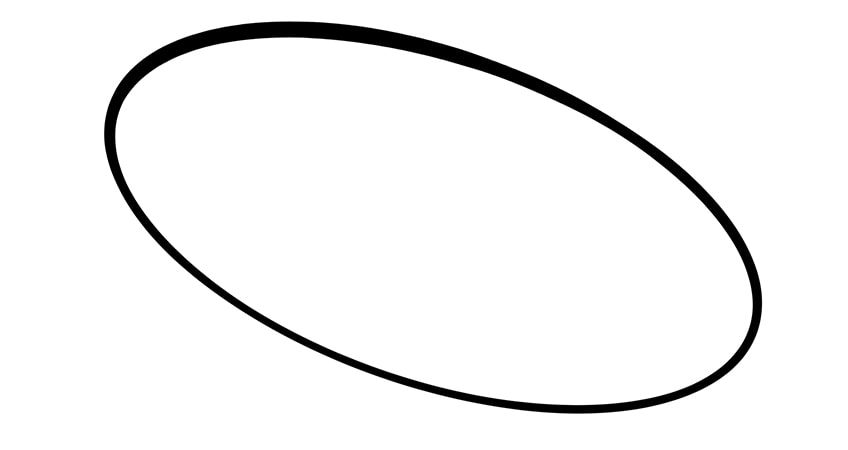
Step 1: Outlining the Main Body Shape
When constructing a drawing of any animal, it is easiest to begin with the largest part of the body, which is usually the torso. As such, in this first step, we are going to use a large, narrow, and tilted oval shape to represent the main body of the vulture drawing. Find the central point of your canvas, and lightly draw this oval with the left side higher than the right.
Make sure that you leave plenty of space on all sides of this first construction shape for the wings, head, and legs.
Step 2: Laying Down the Shape of the Head
Like all birds, the head of a vulture is much smaller than the body. In this step, we are going to use another, much smaller, oval shape to lay down the position and shape of the vulture’s head. On the left side of the main body oval, just below the point, draw a small oval shape that lies horizontally.
This head oval should slightly overlap with the main body oval.

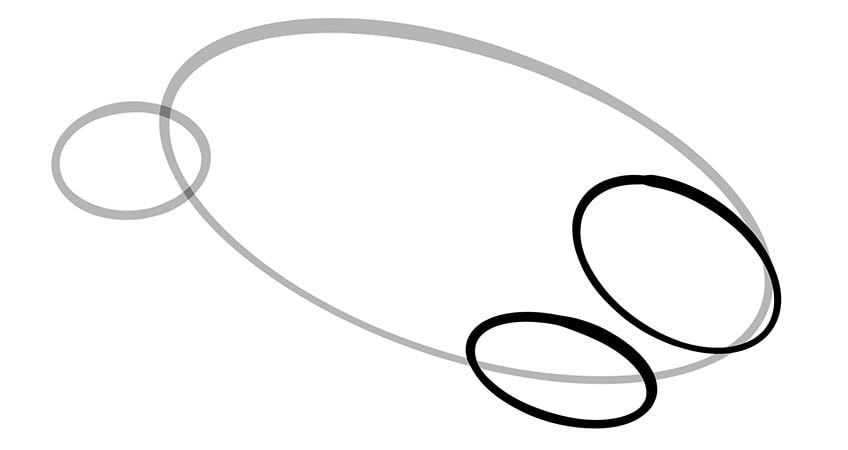
Step 3: Planning the Legs
You may look at this step and think that vultures do not have oval legs, and you are correct! We are not creating the final shape of the legs in this step, instead, we are planning where we are going to draw them from. Within the right point of the main body oval, draw a fairly large oval shape. Below this first leg oval, create a second, smaller one that overlaps with the bottom line of the main body oval.
These shapes will represent the cave area of the legs, and we will use these later to add feathers and the legs.
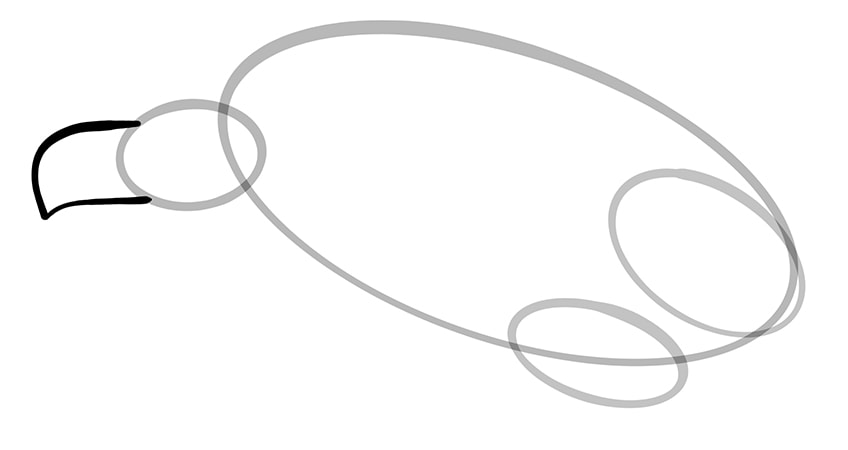
Step 4: Shaping the Beak of Your Vulture Drawing
The large hooked beak of the vulture is one of its most characteristic features. In this step, we are going to create a freehand shape that we will use for the final outline in later steps. You want this beak shape to begin and end at equal distances around the left point of the head oval.
Take the line out from the top, curving it down to create a point, and then bring it back to meet the head oval.
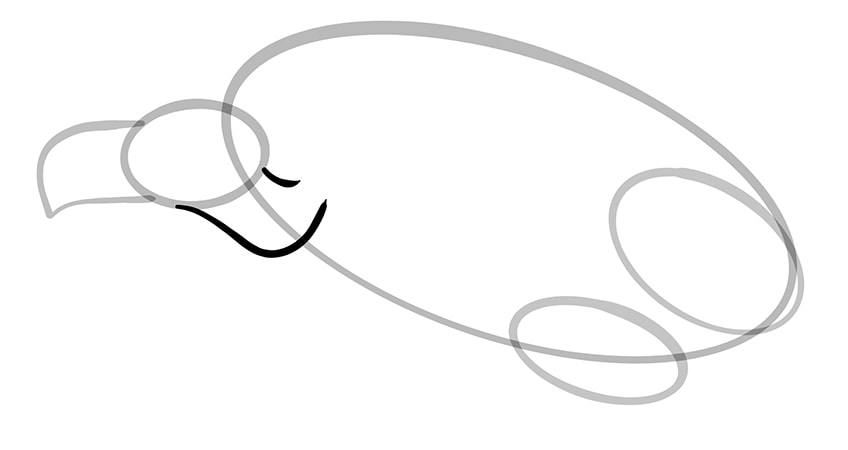
Step 5: Shaping the Vulture’s Neck
We are now going to draw two necklines to join the head oval to the main body oval. Begin with the upper neckline which is very small. From the back of the head oval, draw a small upwards curved line into the main body oval.
For the bottom neckline, take a line that curves down from the bottom of the head oval and then curves back up into the main body oval.
Step 6: Drawing the Legs
This is another freehand drawing step, so do not be afraid to erase and redraw the legs until you are happy with them. From each of the leg ovals, draw two short and curved legs. The legs should be slightly angled towards each other, and each leg should have three toes on the end.
The bottom leg can be slightly hidden behind the upper one, thanks to the perspective we are drawing them from.
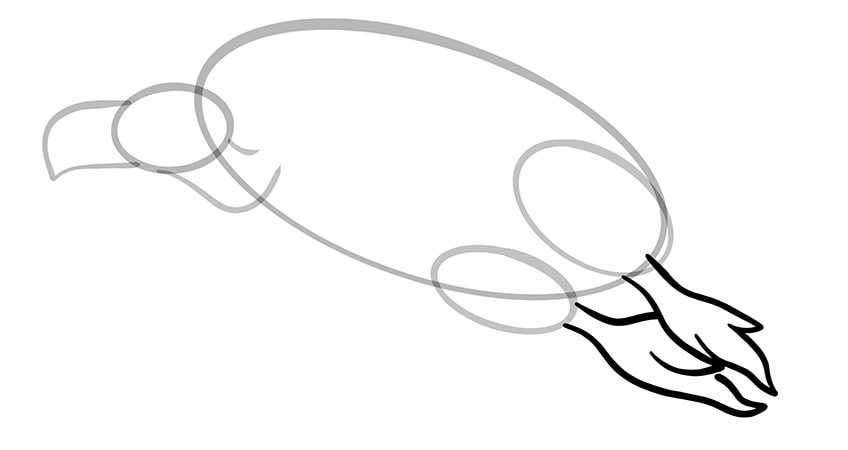
Step 7: Outlining the Tail Feathers of Your Vulture Drawing
We are now going to draw the tail feathers. There are two types of tail feathers that are separated by the legs. Above the legs, draw six long and narrow feathers that end in a slightly curved point. The top one should be long, and they should become shorter as you get closer to the legs.
From the bottom leg oval, draw two long curved feathers.

Step 8: Shaping the Top Wing
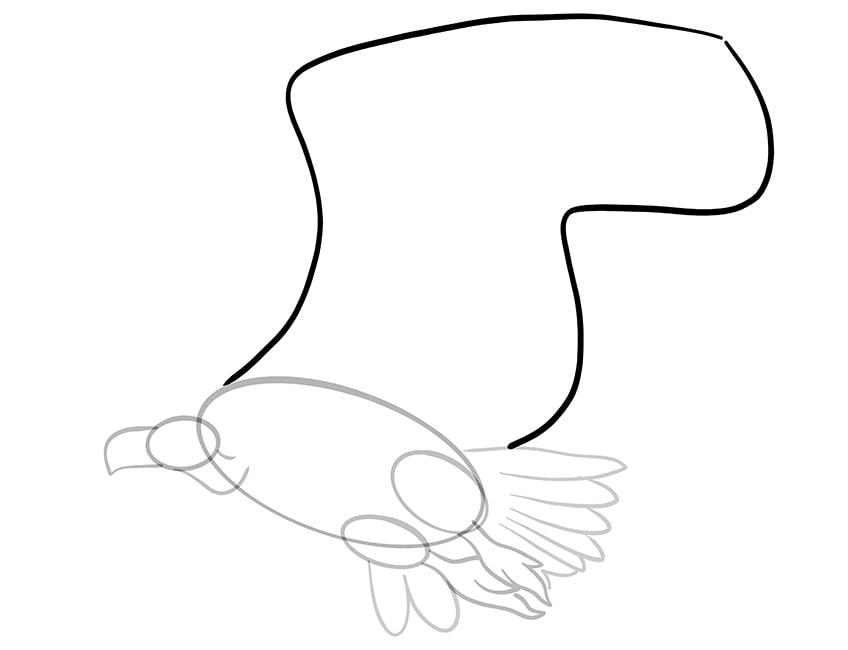
Vultures have very large and imposing wings, and in this step, we are going to create the basic shape of the top wing. Begin at the left side of the main body oval, curving a large line up and back. Take a sharp curve to the right of the canvas. You can then curve the line down and around, before bringing it down to meet the top of the tail feathers.
Overall, this top wing should look a little like an upside-down boot.
Step 9: Outlining the Bottom Wing
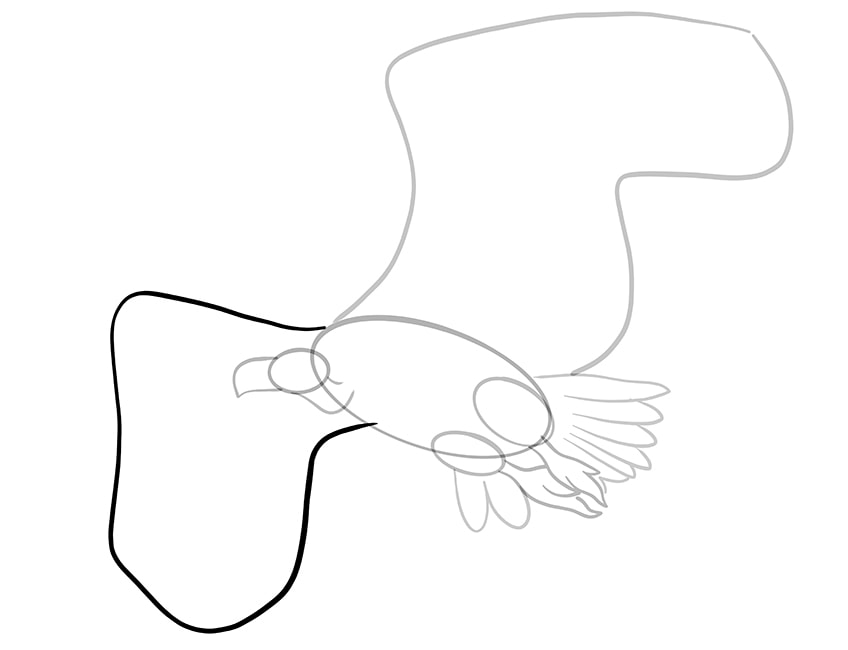
For the second wing, begin at the same point where you began the top wing, Take this line slightly upwards and out to the left, before curving it down.
Finish this step by curving the line back up, slightly back, and join it to the main body oval.
Step 10: Creating the Final Outline of Your Vulture Drawing
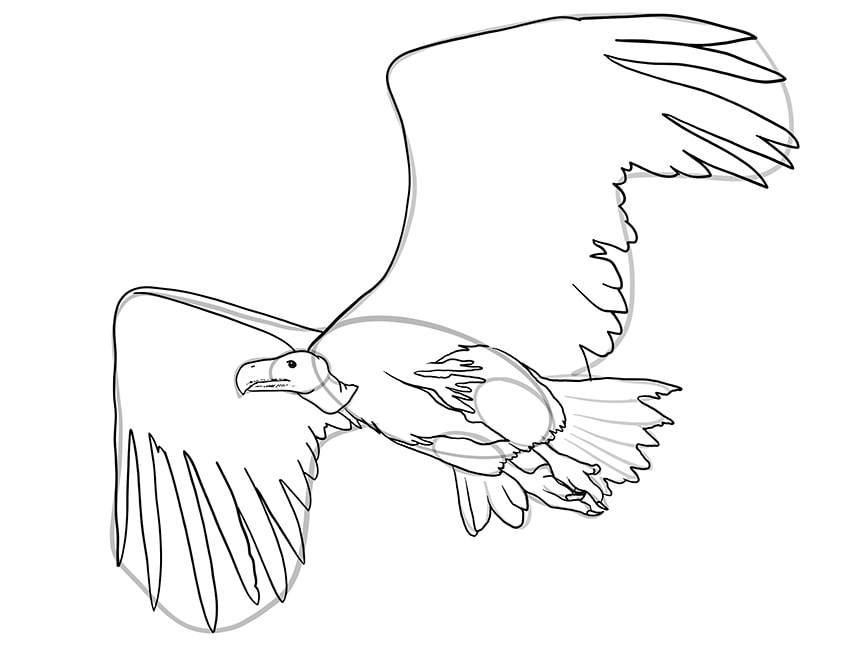
We are now going to use the construction lines from all of the steps so far to help us create the final outline of the vulture drawing. Begin with the vulture’s head, outlining the neck, head, and beak. While you are here, add a separation line to the beak with a few lines of dotted texture. Add a small nostril at the top of the beak, and draw a small eye in the head oval. You can also add a few lines on the neck, and create an end line at the base of the neck where it disappears into the feathers.
Continue to outline the rest of the body, following the top of the wings closely with a smooth line.
When you get to the ends of the wings, you can begin to draw feather shapes into the outline. These feathers should follow the shape and curve of the construction lines. Within the body, create a subtly feathered outline around the bottom of the main body oval. Then, you can outline the legs and feet with more detail, adding a curved and sharp claw to each toe. Finish the step by outlining the feathers of the tail.
You can now erase any of the remaining construction lines, leaving your outline.
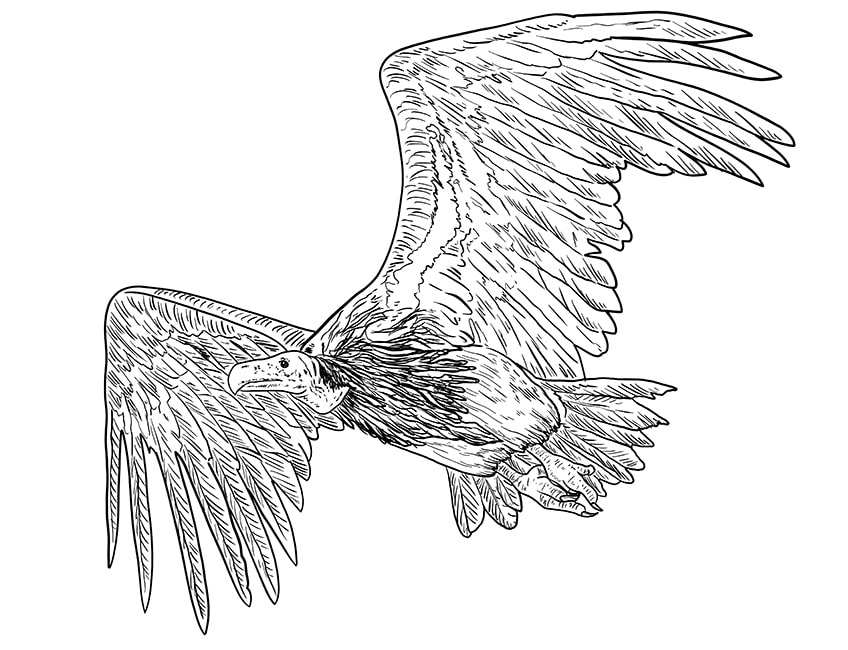
Step 11: Adding Feather Texture
In this step, you are going to fill the entire body of the vulture drawing with detailed and realistic feather textures. Begin with the face of the vulture, adding small dots and streaks to the face, surrounding the head and neck. You can then outline each feather in the wings and tail. Add slightly longer streaks within each of these feathers.
Each feather should be drawn separately, and while this may take some time, the final result will be well worth it.
Within the legs and toes, use short curved lines to add skin creases. On the top part of the main body, you can draw many small curved feather shapes that flow down the body. When you get to the areas where you drew the leg ovals, you can use short and long strokes to create the texture of smaller, more downy feathers.
Step 12: Applying the Base Color Coat
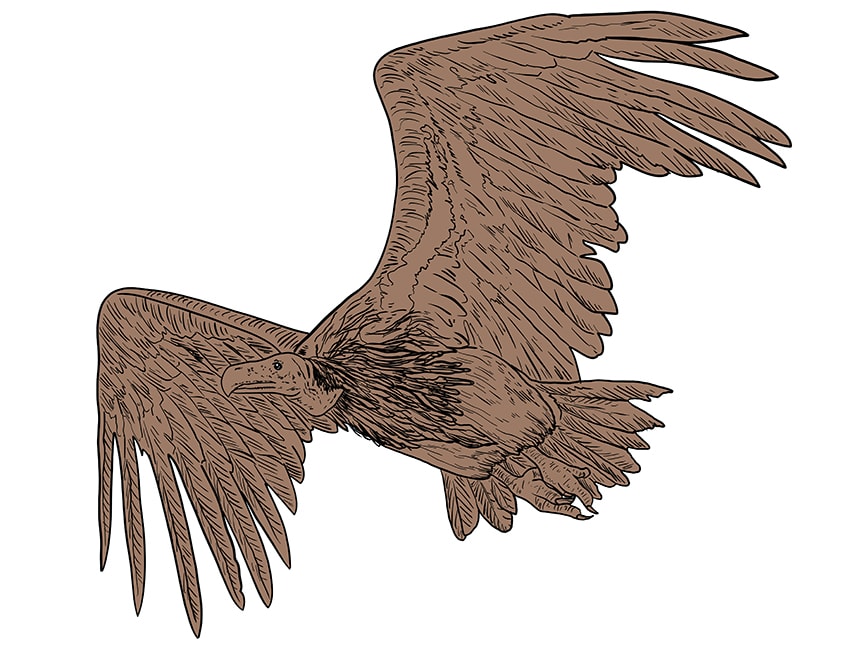
In order to create realistic coloring in your vulture drawing, you need to build it up in a few layers. We begin with a base coat that fills the entire body of the vulture. The best base shade is a light brown. Use a regular paintbrush to fill the entire shape of your vulture drawing with this color.
Regardless of your chosen coloring medium, make sure that this coat is even and not blotchy.
Step 13: The First Shading Layer
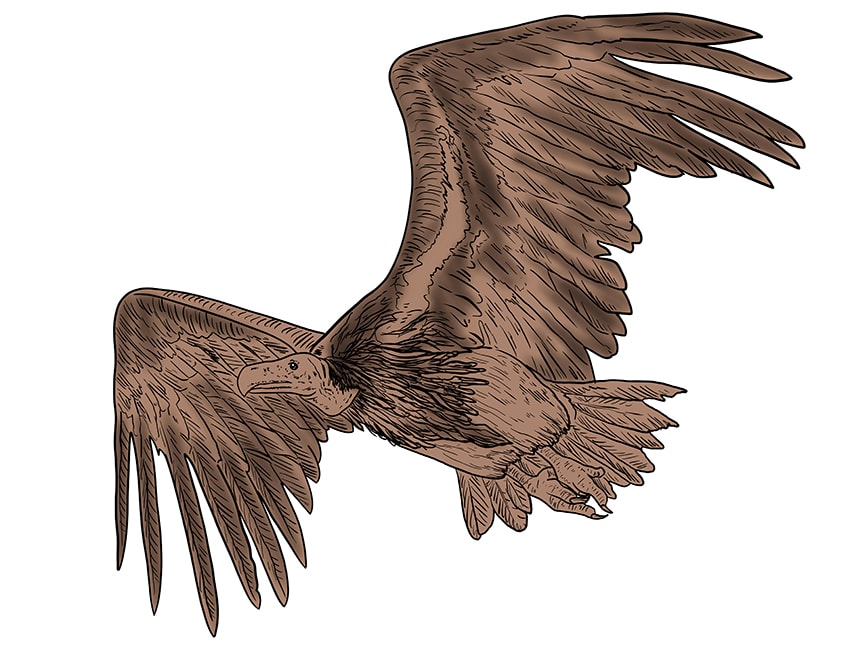
To add a little more dimension, you can now use a touch of black paint to add some shading to the structure of your vulture drawing. Use a soft blending brush, and add this shading to the structural lines of both wings, including the large feathers.
You can finish this first shading step by adding shadows above the neck and down the chest area.
Step 14: Adding a Second Color to the Feathers
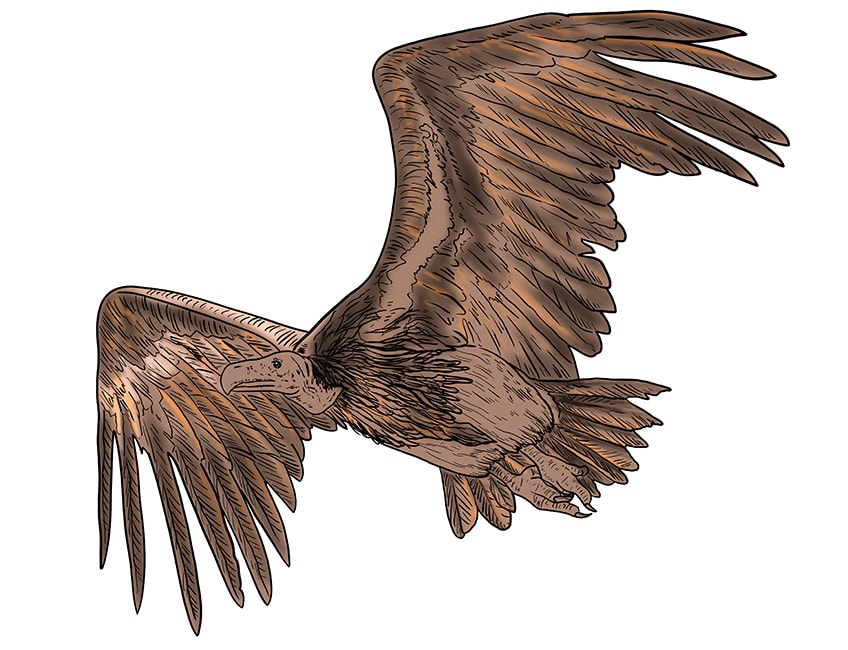
We are now going to add a subtle second color to the feathers. Find a light orange shade, and use a small blending brush to add bright spots along some of the biggest feathers. Add a strip of this lighter shade to each of the largest feathers in the wings and tail.
To finish the step, use the same small blending brush and white paint to add a bright spot on the top of the bottom wing.
Step 15: Painting Highlights
You can now strengthen the highlighted areas where you just painted orange by using a light tan shade. Use a soft brush to lightly add highlighted patches along the base of the feathers on each wing and the tail.
For a realistic texture, you can paint the highlight strokes following the direction of each individual feather.
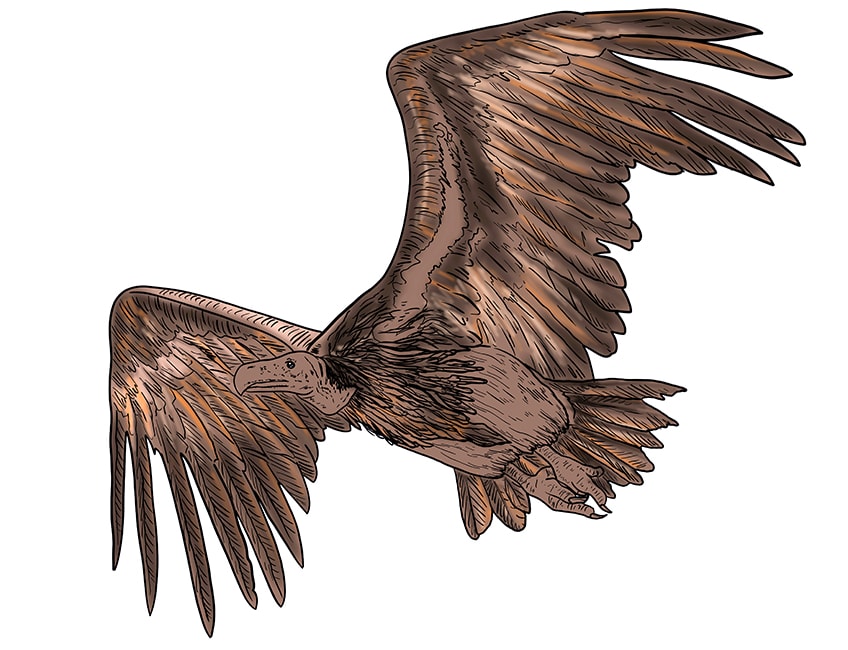
Step 16: Adding a Second Color to the Feathers
You can see in the final vulture drawing that they have patches of white throughout their bodies. In this step, use a soft blending brush and white paint to color along the edge of the fully visible right wing. You can also add a touch of white color to the thigh area and the legs. For a more seamless blend, use a clean and dry blending brush to smooth out the blending.
Next, use a tan shade to add light blending around the bottom of the thigh area and the toes.
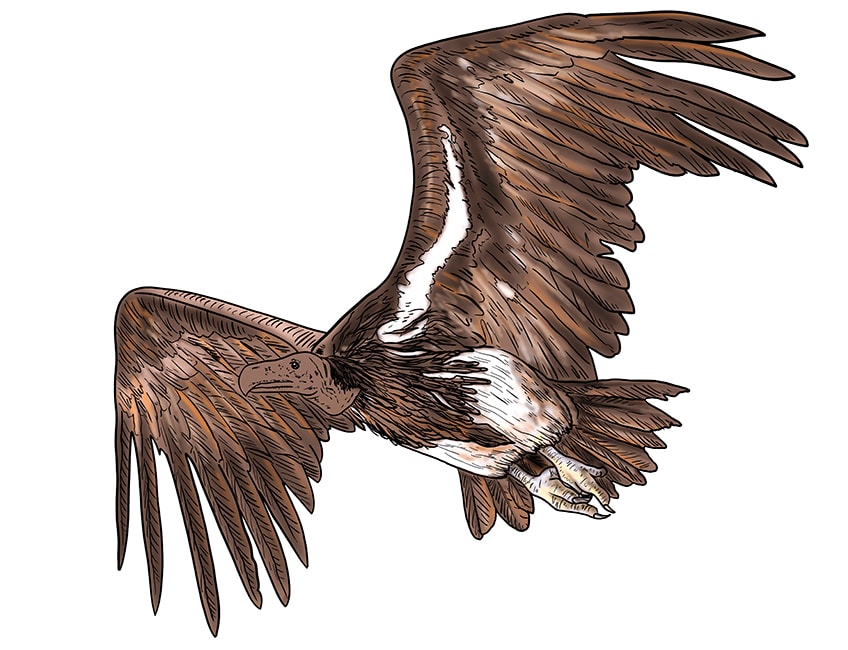
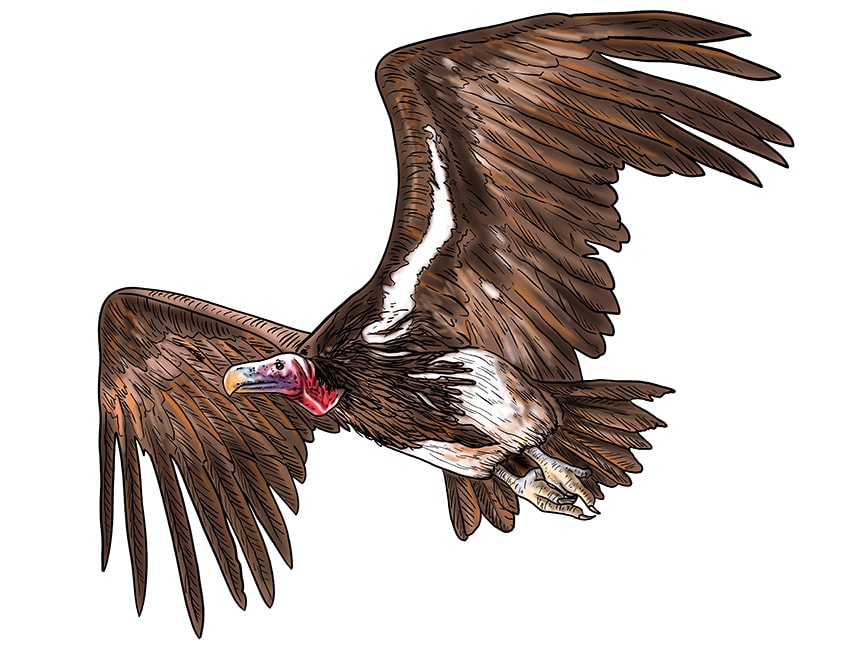
Step 17: Coloring the Vulture’s Head
We are now going to add some interesting coloring to the head of our vulture drawing. Find some bright red paint and use a small detail brush to add a light color to the head and neck of your vulture. Next, with a soft blending brush and a touch of light pink and purple paint, blend this color along the bottom jaw. Follow this by using some tan brown and a light green shade to blend the front of the face down towards the beak. To finish the step, use a small soft brush to add a little white paint to the neck and the top of the head.
For an extra smooth blend in your vulture drawing, you can use a clean blending brush to create a smooth finish.
Step 18: The Final Layer of Shading
In this second last step, you are going to add a final layer of shading to the feathers. Use a soft brush and a touch of black paint to lightly stroke in the direction of each feather and the feather lines. Focus the shading on the ends of feathers on the wings in particular.
As always, be careful when using black as it can quickly become overwhelming.
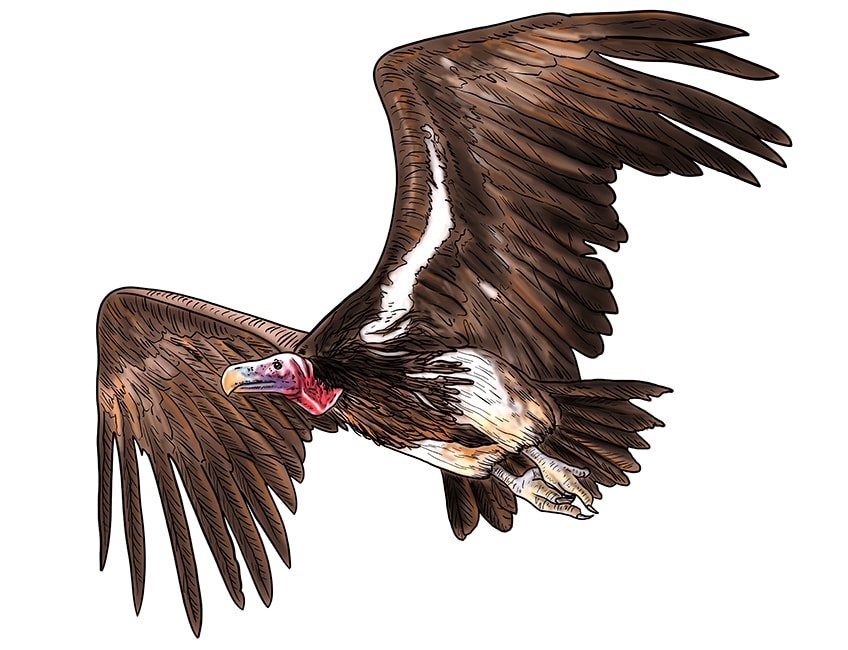
Step 19: Finishing Your Vulture Drawing
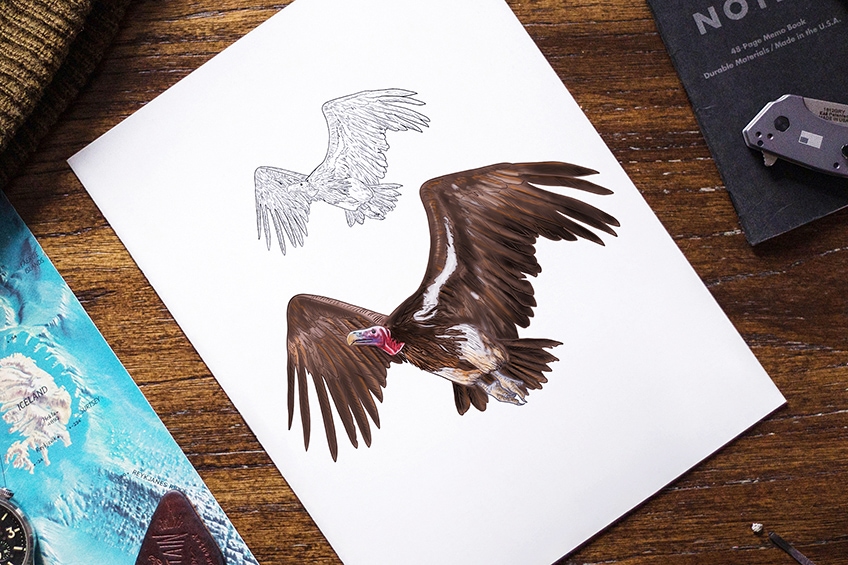
The final step in our vulture drawing tutorial is optional for those who want a more seamless finish. You are simply going to erase the outline of your vulture drawing. If you are working on a graphic tablet, you can simply delete the outline layer. If you are working with a more physical medium, you can trace the outlines with the corresponding color at each point.
For an even more seamless vulture drawing, you can do the same thing for the outlines within the vulture.

Congratulations on finishing your very own realistic vulture drawing. Hopefully, you have enjoyed the tutorial and you feel more confident with how to draw a vulture from scratch. Join us again another time for more realistic animal drawing tutorials!
Frequently Asked Questions
Is It Difficult to Learn How to Draw a Vulture?
Birds are some of the most difficult animals to draw because they have very different proportions to many land mammals. Our vulture drawing tutorial makes learning how to draw a vulture from scratch very easy for artists of any level.
How do You Color a Vulture Drawing Realistically?
Vultures have very unique color patterns that range from brown to red and white. The majority of the vulture’s body is brown, and the head is red. We show you exactly how to build up this realistic color coat in our vulture drawing tutorial.
Matthew Matthysen is an educated multidisciplinary artist and illustrator. He successfully completed his art degree at the University of Witwatersrand in South Africa, majoring in art history and contemporary drawing. The focus of his thesis was to explore the philosophical implications of the macro and micro-universe on the human experience. Matthew uses diverse media, such as written and hands-on components, to explore various approaches that are on the border between philosophy and science.
Matthew organized various exhibitions before and during his years as a student and is still passionate about doing so today. He currently works as a freelance artist and writer in various fields. He also has a permanent position at a renowned online gallery (ArtGazette) where he produces various works on commission. As a freelance artist, he creates several series and successfully sells them to galleries and collectors. He loves to use his work and skills in various fields of interest.
Matthew has been creating drawing and painting tutorials since the relaunch in 2020. Through his involvement with artincontext.org, he has been able to deepen his knowledge of various painting mediums. For example, watercolor techniques, calligraphy and lately digital drawing, which is becoming more and more popular.
Learn more about Matthew Matthysen and the Art in Context Team.


