How to Draw a Grasshopper – Lifelike Insect Illustration Tutorial
Learning how to draw a grasshopper provides one with a new set of skills. They also carry strong symbolism in various contexts, which gives them a powerful visual within the genre of art. However one might use a grasshopper drawing, it is a great subject for refining your drawing skills as well as a great addition to various artworks.
An Easy Guide to Drawing a Grasshopper
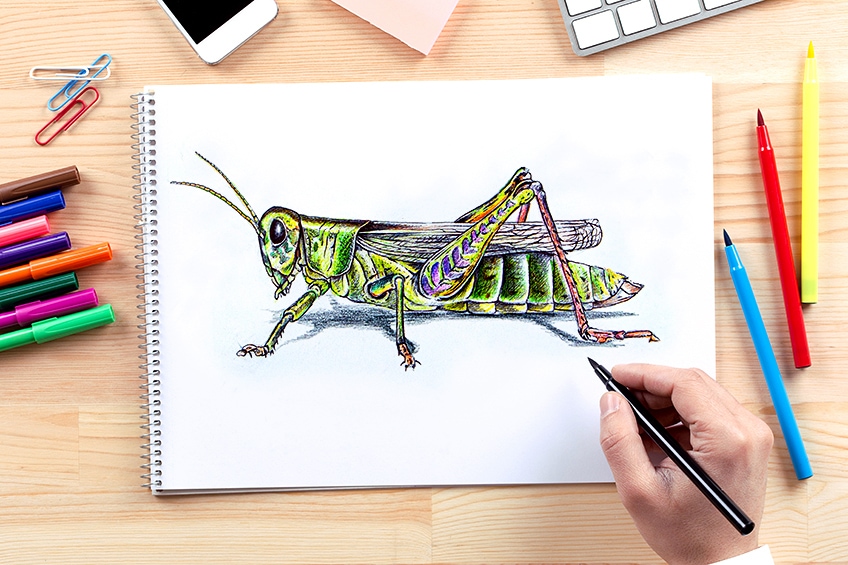
In this tutorial on how to draw a grasshopper, we will break down the process into a few simple steps. We will find that the grasshopper provides an interesting challenge as we learn how to develop a basic grasshopper sketch into a realistic grasshopper drawing.
Grasshoppers are seemingly complicated, but we will find that as we break up the drawing process, it becomes much simpler and more digestible. Learning how to create something realistic through a drawing is a matter of little steps.
The process of drawing a grasshopper requires only a few simple materials, which makes it easy and fun.
Necessary Materials
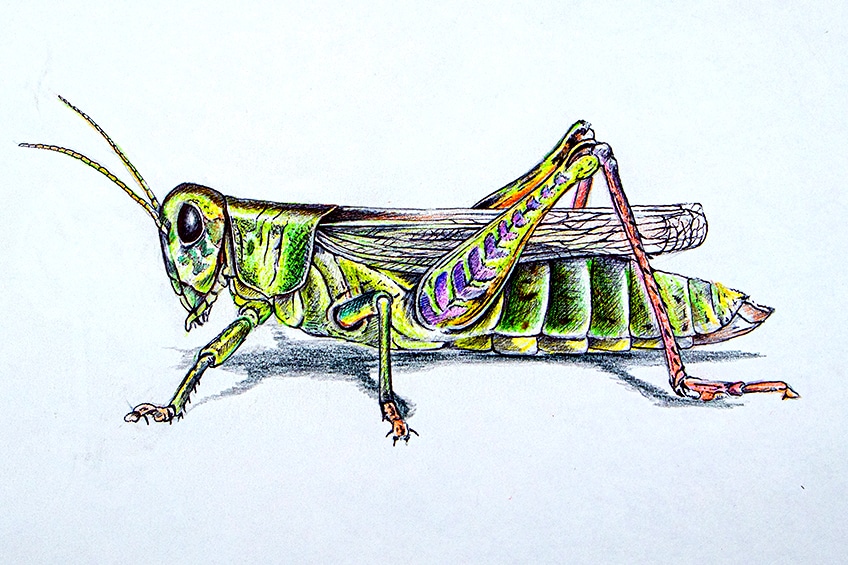
Creating a grasshopper drawing can be done in various ways but in this tutorial, we will be learning how to create a grasshopper drawing using colored pencils and a pen. A grasshopper has beautiful and distinct lines, which work well with a pen. We will first develop the grasshopper sketch in pencil.
This way, we capture the form before moving on to using a pen. In this tutorial, we want to create a variety of colors in our grasshopper, so a good set of pencils will be required. Lastly, an eraser and sharpener will be essential in assisting us in the beginning stages of our grasshopper sketch. All materials can be found through the links below:
- HB pencil
- Ballpoint pen
- Derwent coloring pencils
- Eraser
- Sharpener
- Good paper (200 g/m – 250 g/m recommended)
Step-by-Step Instructions on How to Draw a Grasshopper
In this tutorial on how to draw a grasshopper from a side view, we will begin with a basic grasshopper sketch, where we work out the scale and form of the grasshopper. The grasshopper is divided into three main sections: the head, thorax, and abdomen.
These three main sections govern the placement of the other components such as the legs and wings.
In this grasshopper drawing, we will establish the grasshopper in pencil, which we will then proceed to color in with colored pencils. Lastly, once our grasshopper drawing is fully colored in, we will continue to add pen marks to provide more contrast and vivid detailing in the grasshopper drawing.
Step 1: Drawing the Basic Form of the Grasshopper
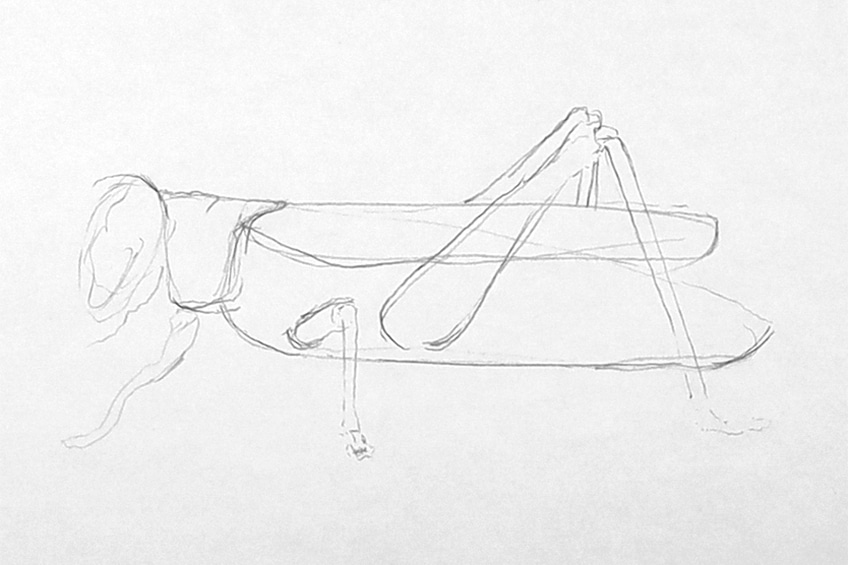
We want to start with a very light grasshopper sketch. We do this by drawing the general shapes of the head, thorax, and abdomen of the grasshopper. We first want to establish the general form and shape of the insect.
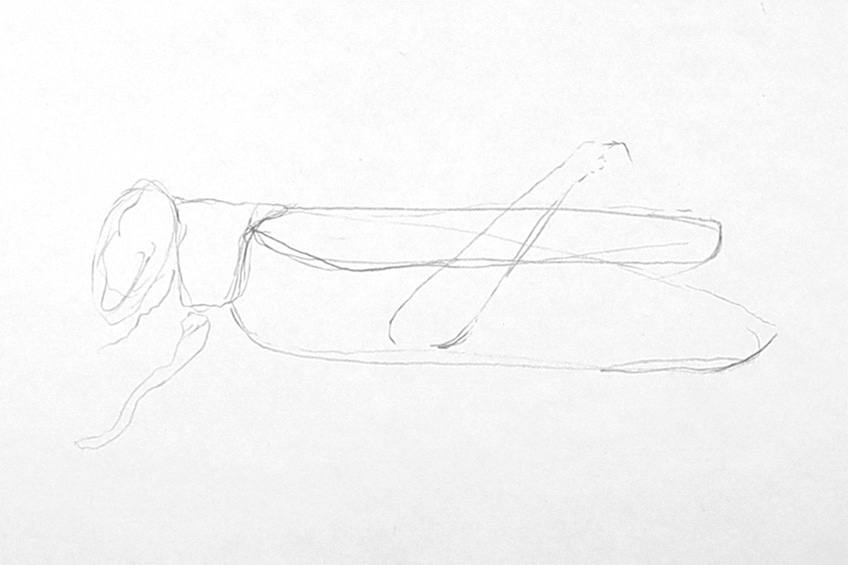
The aim for the beginning is to work with both our pencil and eraser, slowly working out how the placement and scale of the three major aspects of the grasshopper fit together. We will find that the middle thorax section is similar in size to that of the head of the grasshopper.
The abdomen will be the longest section of the grasshopper’s body, which will contextualize how the back legs and the wings are placed onto the grasshopper. The thorax can be quite squarish as it folds over the grasshopper just like armor. The abdomen has a torpedo-like structure, that becomes pointed at the end.
Step 2: Refining Your Grasshopper Sketch
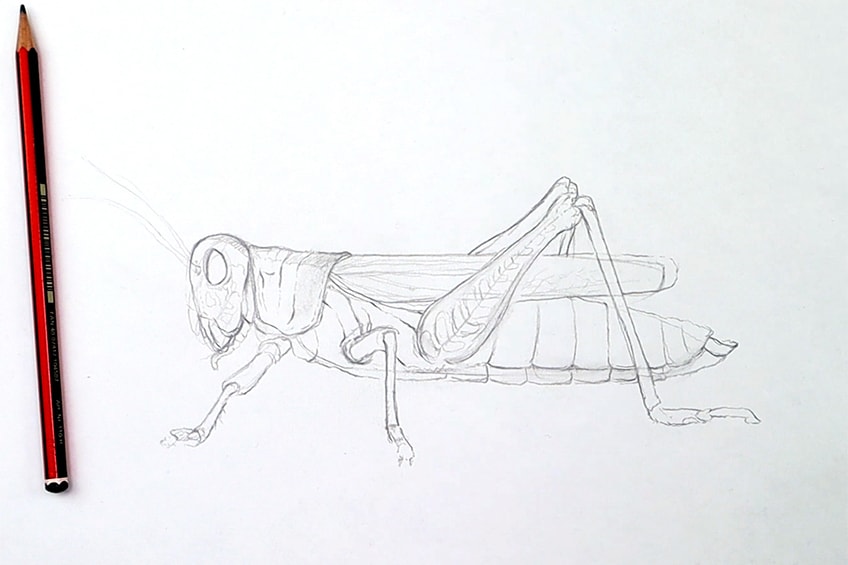
As we continue with our grasshopper drawing, we will carry on using our eraser and pencil, but we will now proceed to tweak and change the drawing by defining the features of the grasshopper. Starting with the head, we want to work our way through the grasshopper, slowly refining the grasshopper sketch and adding in more detail.

A good suggestion is to look at a diagram of a grasshopper, which can be found easily on the internet. This way you can see how the different components of the grasshopper are placed together. We want to make sure that we go through each aspect of the grasshopper, slowly refining the details.
As you go from the head to the back of the abdomen, you want to consider how large the eye is placed in the head, or how many spiracles are in the abdomen. Take your time with each section, slowly working with your eraser and pencil to capture the details as best you can.

For the front two sets of legs, both attach to the thorax and are smaller than the hind femurs of the grasshopper. The hind femurs are placed more within the higher abdomen section and are significantly larger. The front legs also spread out in a lateral fashion, which gives the grasshopper stability. The hind legs move along the abdomen in a parallel fashion, where they arch upwards and then downward.
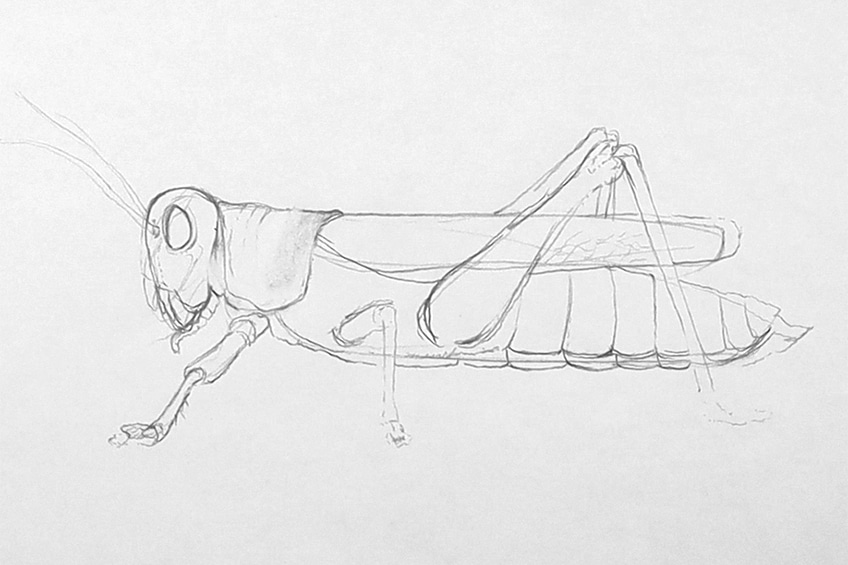
The hind femurs of the grasshopper also have a symmetrical pattern that runs along the leg of the grasshopper. They can be drawn like a zebra-crossing that flows through the femur of the grasshopper. The abdomen of the grasshopper has various spiracles that create a rib-like aesthetic in the grasshopper’s abdomen.
There are two rows of these spiracles one that lies on top of the abdomen, and a set that runs underneath the abdomen.
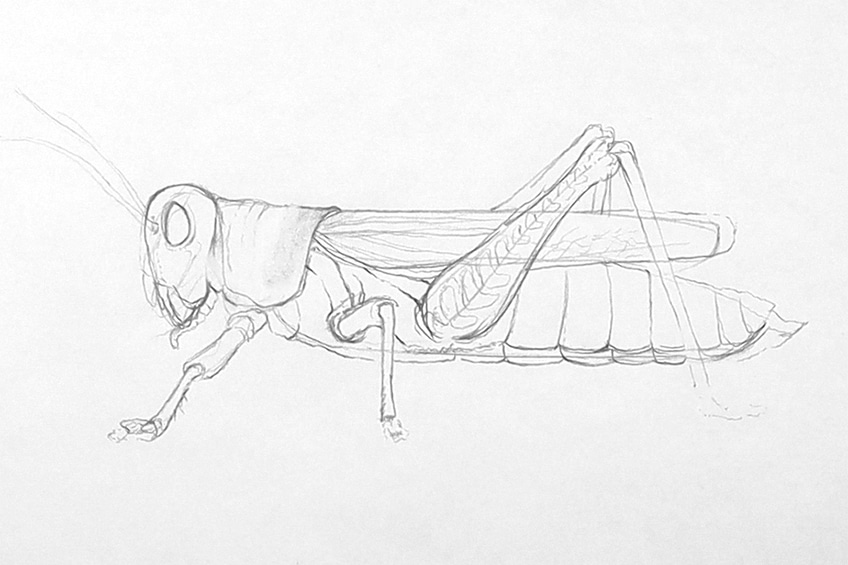
The wings of the grasshopper sprout from the shield-like feature of the grasshopper that forms on top of the grasshopper. This is called the prothorax, and the wings flow from this component of the grasshopper and fall flat on top of the grasshopper’s abdomen.
The wings will have a cracked-glass aesthetic on their surface, which gives them the unique web-like winged look that is associated with insects. This can be drawn by creating cracked lines that run along the flow of the wings, giving it a natural insect look.
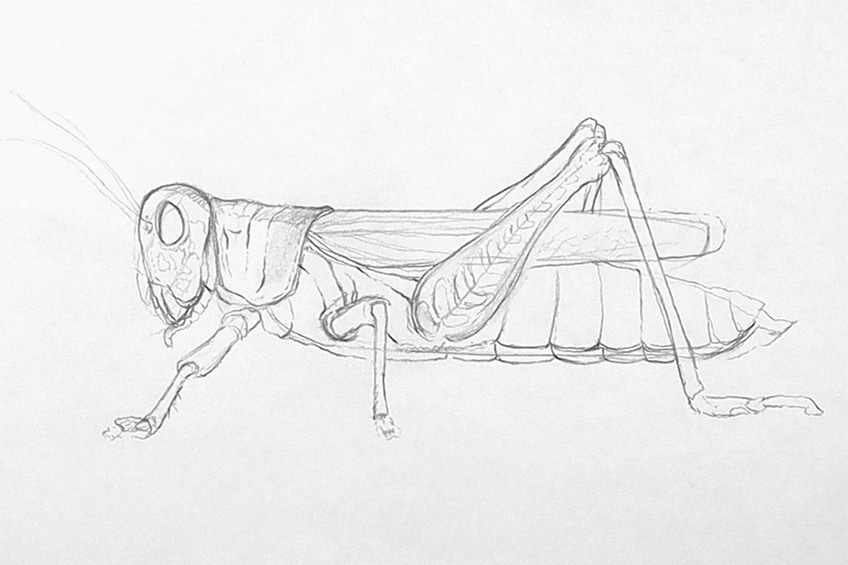
You want to make sure you go through each area of the grasshopper, from head to abdomen, slowly adding in details. Make sure you add in as many details as possible by using a reference guide of a diagrammatical grasshopper to assist you in your drawing process.
The intention is to take your time, slowly working on the grasshopper with your pencil making sure all the details are correctly placed in the drawing. You also want to make sure that all the details make sense in terms of how they are placed alongside one another.
Step 3: Adding Color to Your Grasshopper
Grasshopper drawings can be colored in various ways but they generally have a green hue to them with small amounts of differently colored details. We can begin with the head once our grasshopper sketch is complete, whereby we add light green pencil shading to the head area.

A good suggestion would be to stick with greens, yellows, and browns for the upper section of the grasshopper. We can also add little pattern marks around the face and jaws, giving the grasshopper more unique and naturalistic features.
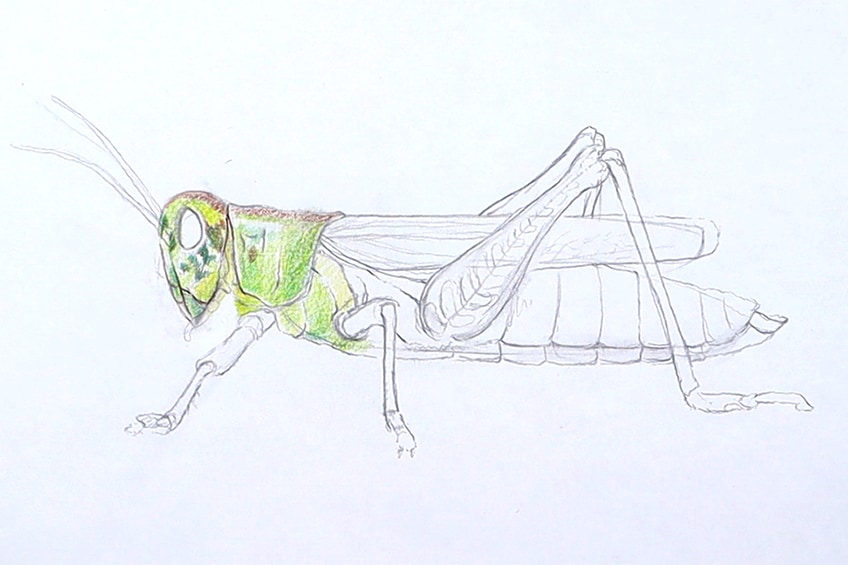
How we make the grasshopper have a realistic color palette is also about how the colors are placed. This means we can mix and blend colors to create gradients within our grasshopper drawing. We want to bear this in mind as we aim to emphasize different features within the grasshopper.

Consider how the grasshopper gains dimension by the use of shading with colored pencils. You want to add in moments of light with your yellows and create transitions to shadow with darker colors such as greens and browns.
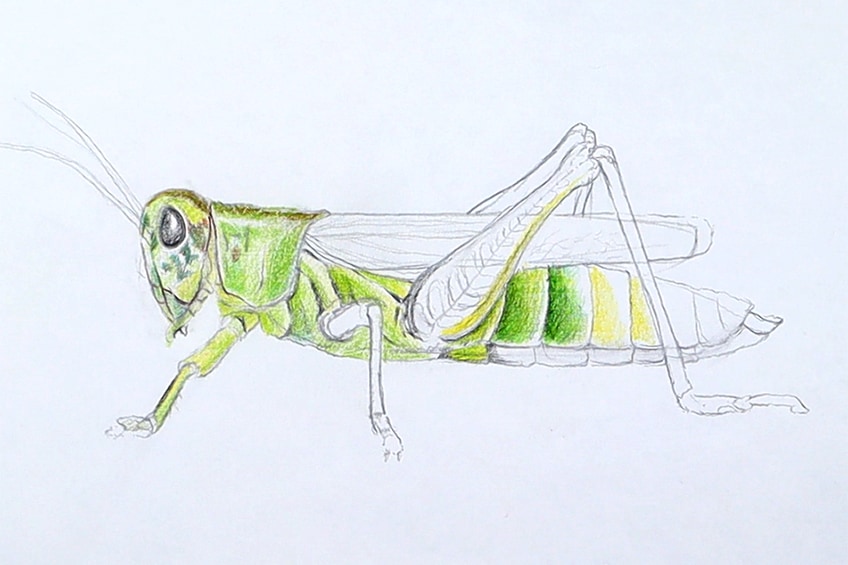
Work with your black and brown pencils to add a shadow around the different features of the grasshopper with connection points and overlapping sections. This can be the case for joints, the prothorax, and other areas where it seems as if pieces of the grasshopper have been joined together.
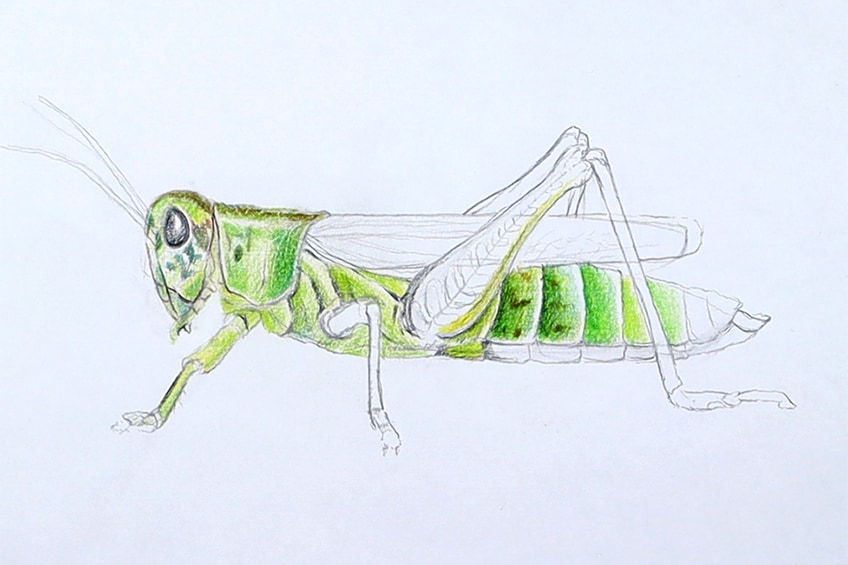
You want to emphasize the different features of the grasshopper with the use of color, which we do by blending colors. Consider the abdomen: We can give the abdomen dimension by creating a dark to light gradient within each spiracle of the abdomen. With the legs of the grasshopper, we can begin to be a little more playful with our color palette.
This is because the femurs of the grasshopper have a pattern that runs through them, and these generally have a little color.
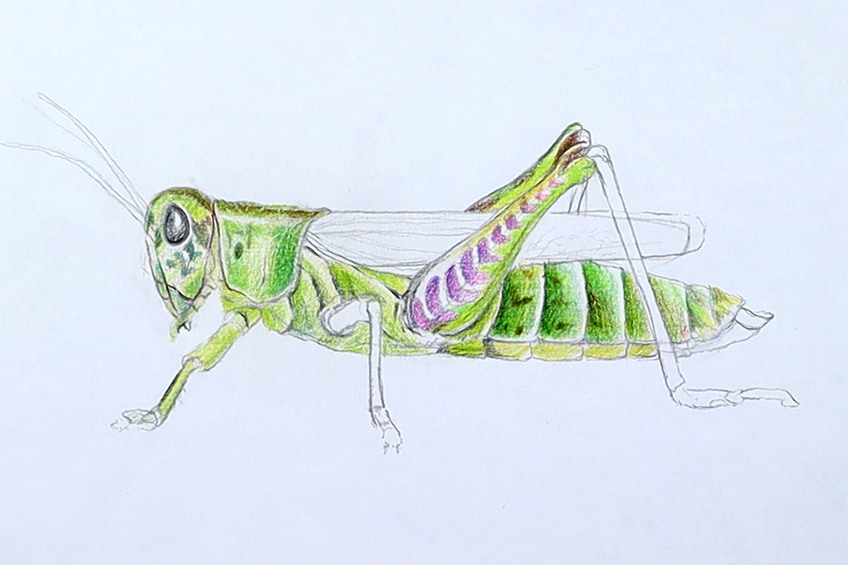
Try to keep a natural and organic look, and make sure the color placement is consistent. This means that you want to keep the color palettes symmetrically placed within the symmetrical pattern within the femurs.
The hind legs are divided into two main sections: the femur and the tibia. The tibia is the long section that goes downward and plants the grasshopper on the ground. This component of the grasshopper can also be colored and is usually an orange or pink color.

As you color in the legs, the femur’s pattern can be colored how you would like, although there should be a yellowish-green color around the pattern. The tibia can be a pink/orange blend in color.

Step 4: Shading the Head and Prothorax With a Pen
As we add in pen marks, we will again start with the head. This should be approached with patience as we go through each section of the grasshopper. We can color the eye completely with our black pen to give contrast. We can also use our pen to outline significant features of the grasshopper.
We can also add in linework as well as stippling marks to give texture to the drawing.
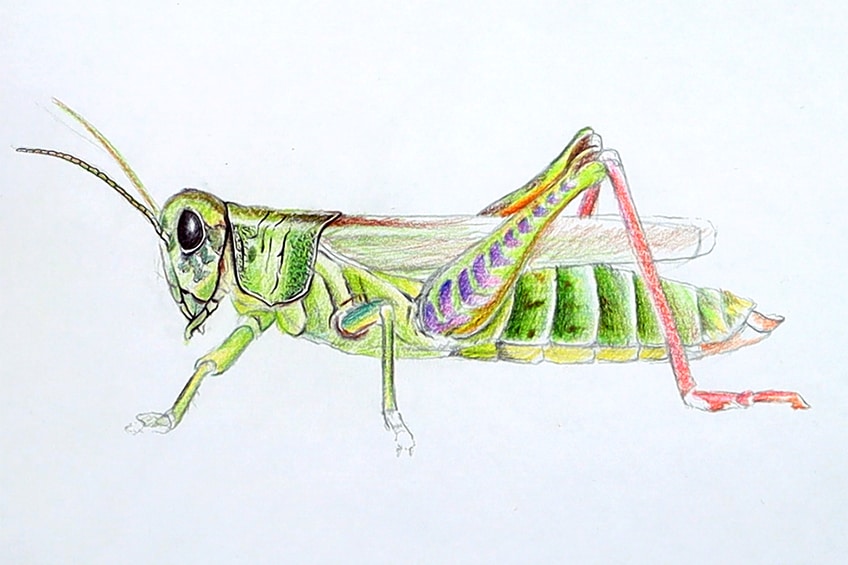
We want to use our pen to add shading to the grasshopper. We want to add shading around the prothorax and head area to create more dimension in the grasshopper drawing.
Step 6: Shading the Legs and Upper Abdomen With a Pen
As we add in line work and shading to the legs, we want to consider the different joints and how the grasshopper connects together with its different features. We want to shade each area of the grasshopper to give it a little more contrast and definition.
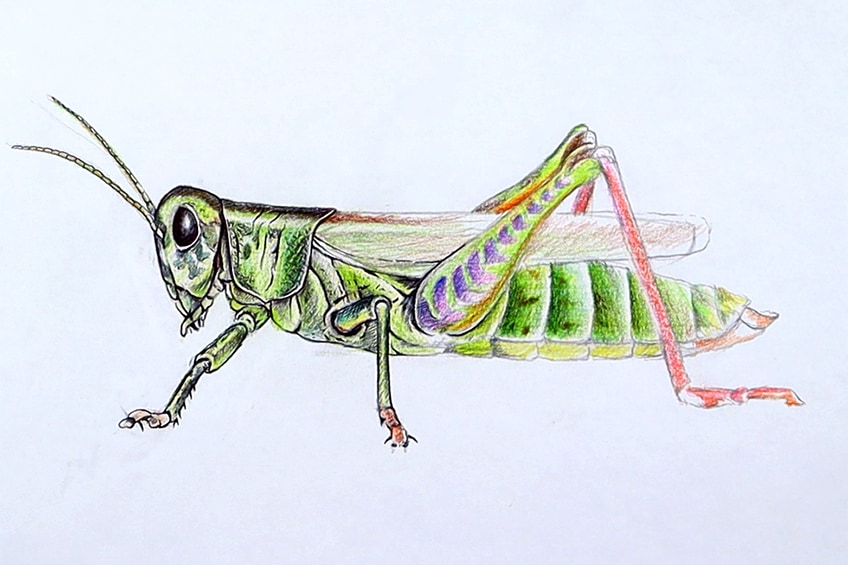
We can do this by going over different sections in pen, or shading with our pen, we can also do this by adding in line-work or stippling marks.
The intention is to use the pen marks in whatever way to emphasize the features a little more.
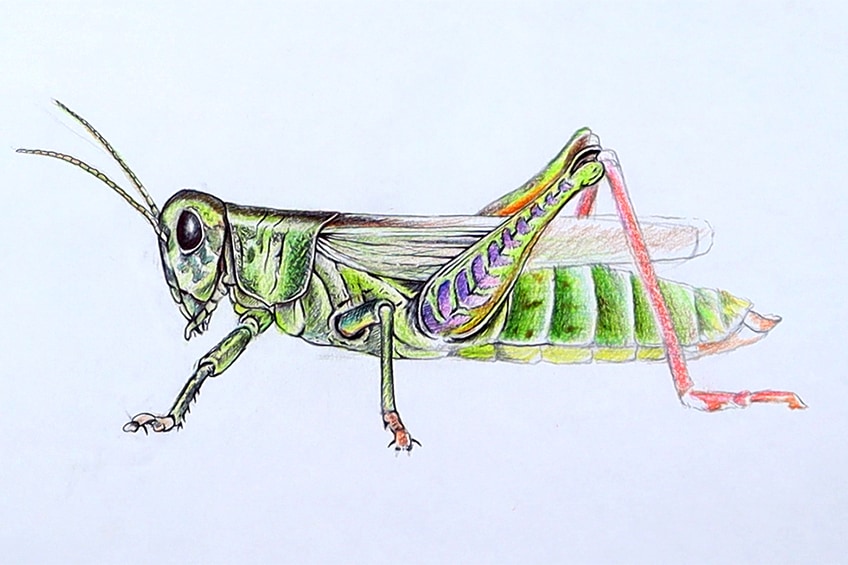
As we add pen marks around the upper abdomen area, we can outline different spiracles and compartmentalized areas in the body. As we go through the body, we can also go over the crack-like lines within the wings with a pen to make the lines more distinct.
Step 7: Shading the Wings, Legs, and Lower Abdomen With a Pen
As we slowly work our way through the grasshopper drawing with our pens, we want to make sure we spend some time on each section. This is especially true for the wings, as we want to be patient and delicate with how we go over the pencil lines with our pens.
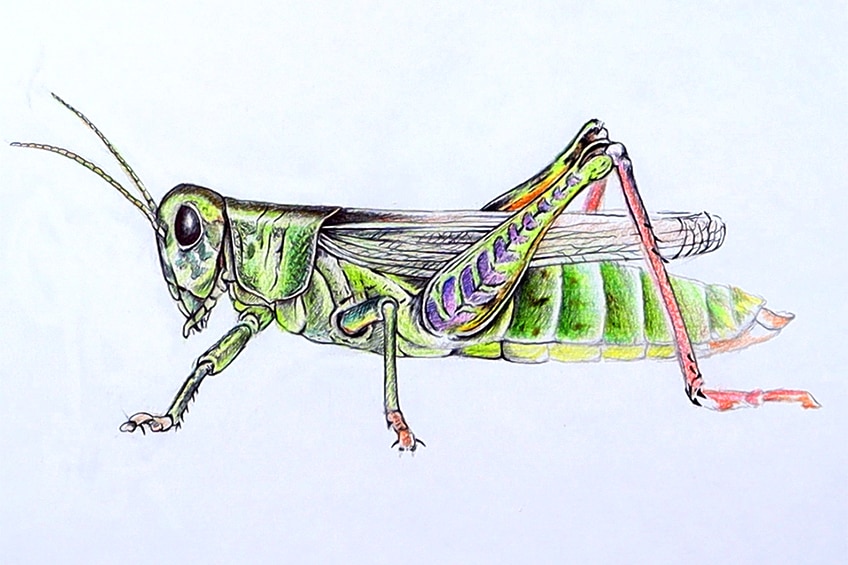
With the abdomen, we want to add a gradient of dark to light within each spiracle. This means that we will create a shadowed area and highlighted area, giving each spiracle a little more dimension. As you add some pen detail to the legs you can add a set of little spikes along the tibia.
This gives the legs a more realistic quality and the legs generally have a set of spikes that run down the tibia.

With the patterns in the femur, we want to use our pen shading very strategically. We mostly want to lightly outline the colored pattern that runs along the femur. By doing so, we emphasize the pattern and color of the legs.

You can also add in little scuffs and spots within the abdomen, which are indicative of a texture and roughness in the grasshopper’s body. This suggests that it has been active and interacted with the environment.
Take your time with your pen shading detailing within the grasshopper. Try to work on it for a while, slowly going through each aspect of the grasshopper. Try to see how you can add in pen marks that help to accentuate different features.

Step 8: Adding a Shadow to the Grasshopper
Lastly, we want to give the grasshopper drawing a shadow to suggest a realistic interaction with the space around it. We do this by using our pencils to draw a shadow underneath the grasshopper along a horizontal plane. You want to make sure the shadow connects to each limb that makes contact with the surface.
Make sure you keep in mind that the shadow is representing the grasshopper above it. This means there will be a distortion in the width of the shadow because of the grasshopper being seen from a side point of view.
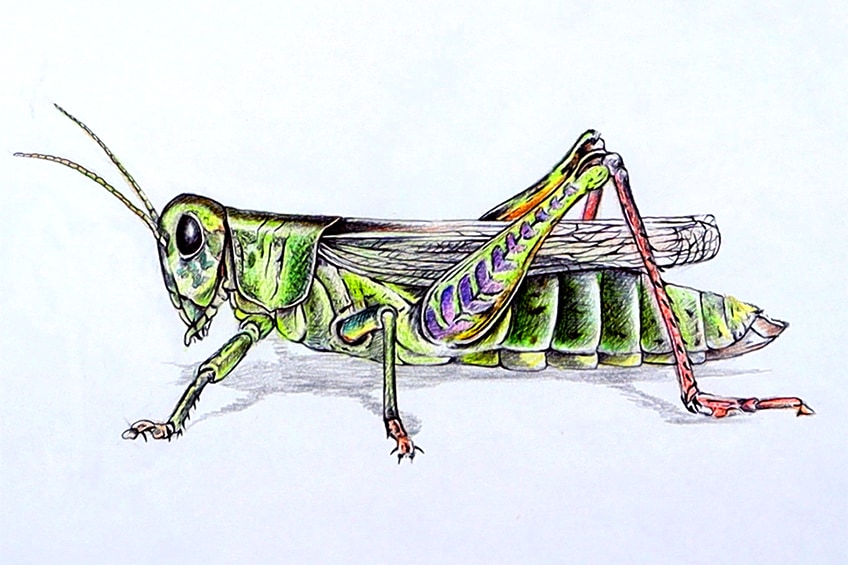
Once you have captured your grasshopper’s shadow in pencil, you can then proceed to lightly shade in the shadow with your pen. And there you have it, a few simple steps on how to draw a grasshopper!

Tips to Remember
- Make sure you spend time on the grasshopper sketch. You want to capture the creature as best you can in pencil before moving on to pen and color.
- Take a break. try taking a moment of rest between steps, giving yourself a moment to refresh before carrying on.
- Play around with color. A grasshopper drawing doesn’t have to be a specific color, and their alien-like aesthetic works well with variety, so play around and experiment.
- Make sure you practice. This is quite a complicated insect to draw and will require some practice, so don’t worry if it is not perfect the first time.
- Apply it to your work. This is a unique tutorial that provides you with knowledge of how to draw strange animals, using the skills you have learned in your artwork.
Learning how to draw insects is always a great drawing exercise because insects have different body and skeletal structures. Drawing reflective surfaces and obscure body structures provides us with a great drawing challenge. Grasshopper drawings in particular give us a chance to explore color variation and refined pen-drawing skills. This creature is also a great visual and makes for a beautiful addition to various artworks.
Frequently Asked Questions
How Do You Color in a Grasshopper?
Grasshoppers have all sorts of color combinations, depending on where they come from. Creating a grasshopper drawing can be a great way to explore color, as the grasshopper can be colored in a variety of ways. Keeping to more traditional color schemes, one could use a variety of greens to create different tonal values of the same color within the grasshopper. However, grasshoppers also often have different colors within their hind femur’s pronotum and tergites. This allows us to utilize various color combinations to amplify different parts of the insect’s body. The less conventional way is to allow yourself to play around with color throughout the whole body of the grasshopper, creating a colorful insect.
How Do You Draw the Legs of a Grasshopper?
The grasshopper belongs to the insect family which means that it has six pairs of legs. The grasshopper is broken up into three main sections, which include: the head, the thorax, and the abdomen. Each pair of legs are attached to each main part of the body, with its hind femurs being the largest of them all. The two front pairs move outwardly in a lateral fashion to give stability to the grasshopper. The hind femur legs go upward and then down in a triangular fashion, which provides spring-like mobility for the grasshopper for leaping. The back legs are also significantly larger whereas the front legs are almost half the size of the back femur legs. Making sure to capture the correct sizes will help to give the grasshopper drawing a more realistic quality.
Matthew Matthysen is an educated multidisciplinary artist and illustrator. He successfully completed his art degree at the University of Witwatersrand in South Africa, majoring in art history and contemporary drawing. The focus of his thesis was to explore the philosophical implications of the macro and micro-universe on the human experience. Matthew uses diverse media, such as written and hands-on components, to explore various approaches that are on the border between philosophy and science.
Matthew organized various exhibitions before and during his years as a student and is still passionate about doing so today. He currently works as a freelance artist and writer in various fields. He also has a permanent position at a renowned online gallery (ArtGazette) where he produces various works on commission. As a freelance artist, he creates several series and successfully sells them to galleries and collectors. He loves to use his work and skills in various fields of interest.
Matthew has been creating drawing and painting tutorials since the relaunch in 2020. Through his involvement with artincontext.org, he has been able to deepen his knowledge of various painting mediums. For example, watercolor techniques, calligraphy and lately digital drawing, which is becoming more and more popular.
Learn more about Matthew Matthysen and the Art in Context Team.
Cite this Article
Matthew, Matthysen, “How to Draw a Grasshopper – Lifelike Insect Illustration Tutorial.” Art in Context. August 16, 2022. URL: https://artincontext.org/how-to-draw-a-grasshopper/
Matthysen, M. (2022, 16 August). How to Draw a Grasshopper – Lifelike Insect Illustration Tutorial. Art in Context. https://artincontext.org/how-to-draw-a-grasshopper/
Matthysen, Matthew. “How to Draw a Grasshopper – Lifelike Insect Illustration Tutorial.” Art in Context, August 16, 2022. https://artincontext.org/how-to-draw-a-grasshopper/.


