How to Draw a Fox – A Guide to Creating Your Own Realistic Fox Drawing
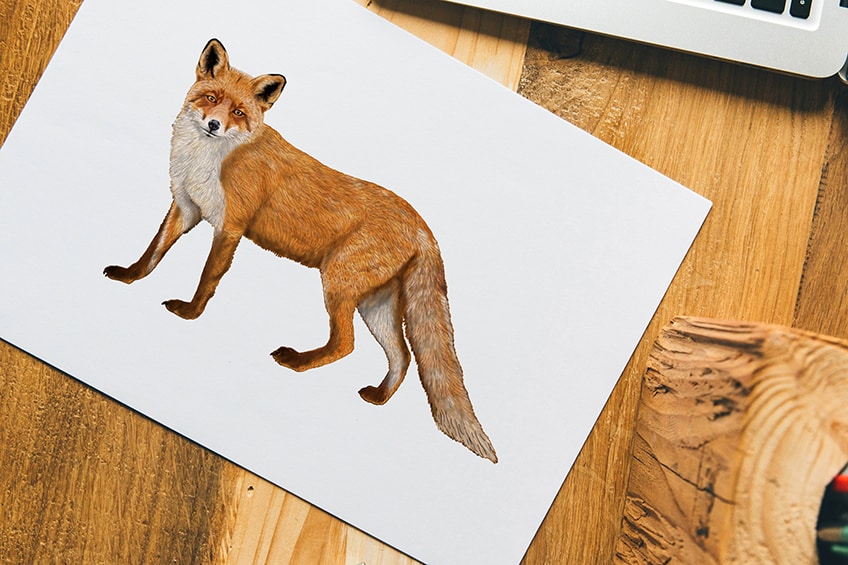
For many people, the first thing they think of when they hear the word “fox” is Roald Dahl’s beloved character, the Fantastic Mr. Fox! In today’s drawing tutorial, follow along and learn how to draw a fox from the very beginning using our easy instructions. Once you are finished, you will be left with a fox illustration as realistic as the tricky and clever Mr. Fox himself. Select the drawing supplies that you will be using and let’s get started!
How to Draw a Fox in 17 Easy Steps
Today we will be drawing a very playful animal, the fox! Follow along and learn how to draw a fox the easy way in this fully detailed guide. In our step-by-step tutorial, we will be covering the basic elements of drawing a fox, including the entire coloring process, the easy way!
Our tutorial is great for beginners and professional artists alike, and can be done on paper or even on a graphics tablet!
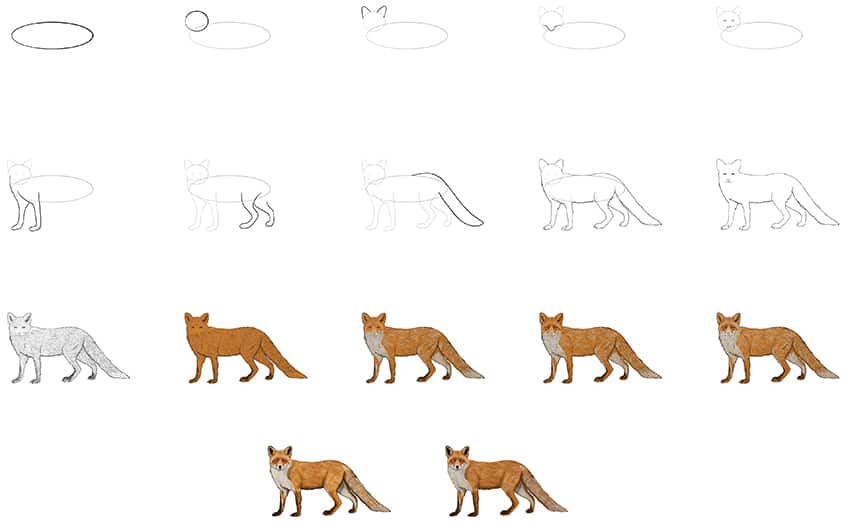
Step 1: Beginning to Construct the Main Body
To start your fox drawing, you will need to draw the outline of the body first. Locate the center of your drawing area, whether it is on a piece of paper or a graphics tablet, and begin to draw a wide and horizontally-lying oval shape.
This oval will represent the main body of your fox sketch.

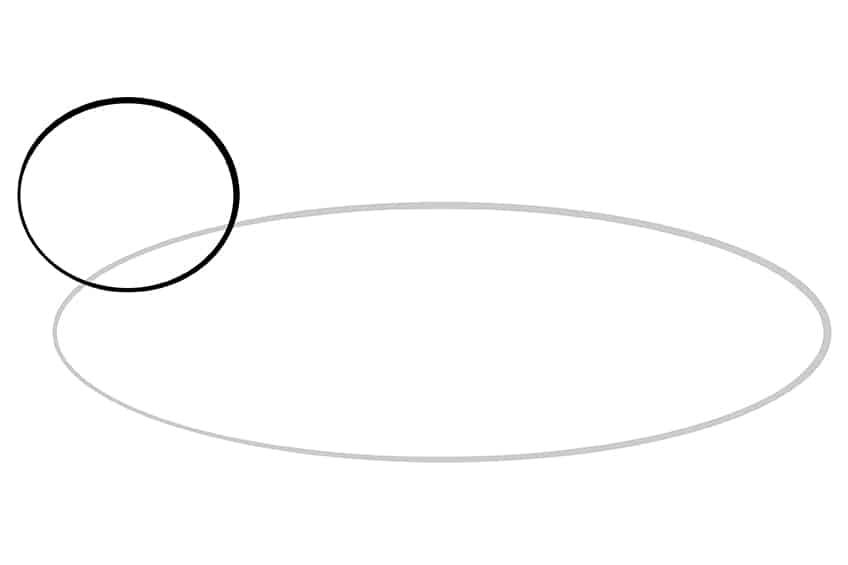
Step 2: Outlining the Head of the Fox
In the second step, you will be attaching the head of the fox to the oval body that was just drawn. On the left-hand side of the oval, draw a small circle, making sure to place it slightly higher up. This will represent the head of the fox.
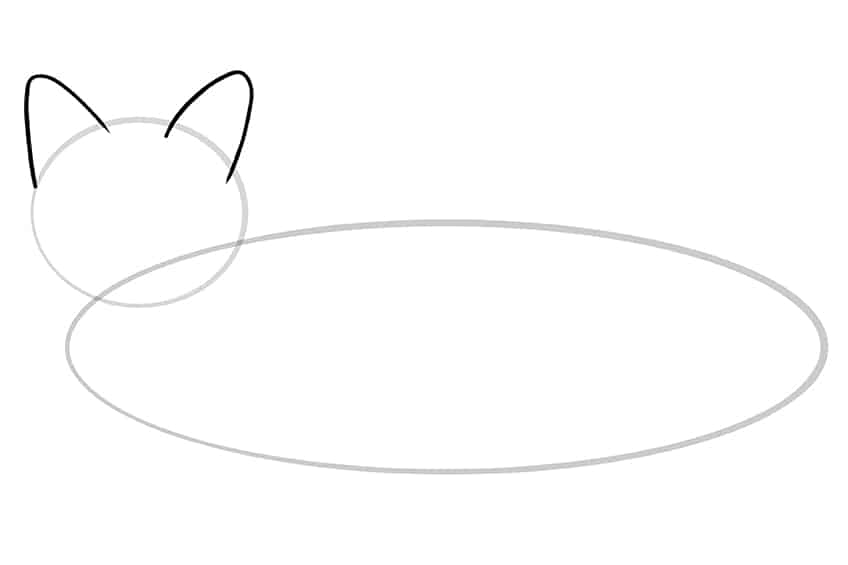
Step 3: Adding the Ears in Your Fox Illustration
Once the outlines for the body and head have been drawn, we can move on to adding some of the basic details to our fox drawing. When creating any kind of fox illustrations, keep in mind that foxes have triangular-shaped ears.
Draw a triangular-shaped ear on either side of your fox’s head.
Step 4: Drawing the Face of the Fox
In this step, we will be continuing to add some of the primary details to our fox sketch. As most foxes have quite a flattened face, we need to make sure that this comes across in our drawing. To do this correctly, you will need to shape the face structure within the head and draw a curving face structure, as seen in the picture below.

Step 5: Adding Some Basic Facial Features
Continuing to add details, we will now need to sketch the eyes and nose of our fox. Within the circle that was drawn in step 2, draw two smaller oval shapes to represent the eyes, and another oval shape within the face structure line to represent the nostrils area.
When drawing the eyes, make sure to space them an equal distance apart so that they look natural.
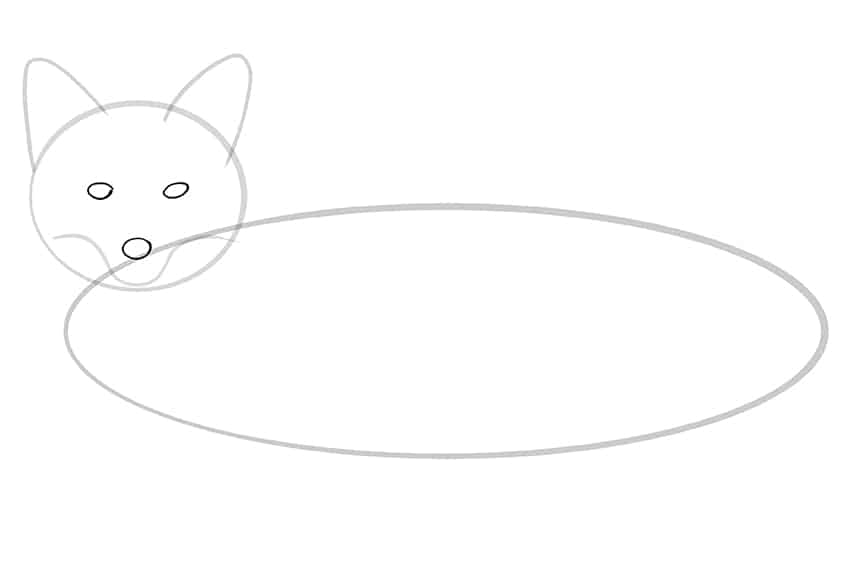
Step 6: Shaping the Two Front Legs of Your Fox Sketch
At this step, we will be moving onto the legs of your fox drawing! Make sure to overlap the main body, as represented by the elongated oval, and draw the front legs of the fox. Once you have finished, add a curving bottom paw shape on each foot.
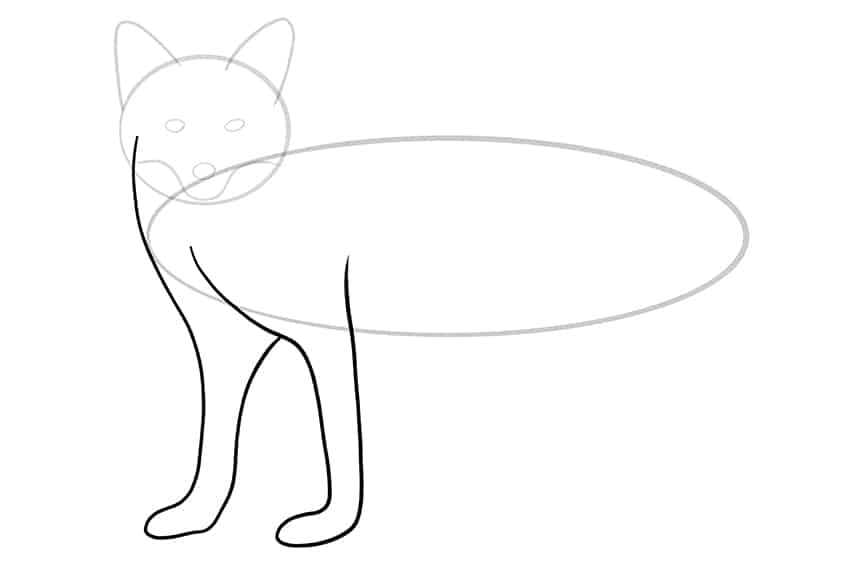
Step 7: Adding in the Rear Legs to Your Fox Drawing
Now that the front two legs and paws have been drawn, we can move on to adding in the rear legs of our fox. On the right-hand side of the body, begin to draw the rear legs in a motion-like posture, making sure to add a curving paw shape on the bottom of each leg.
Just like you did in the previous step, be sure to overlap the rear legs with the main body.

Step 8: Shaping the Tail
As both legs are complete, we can move on to the tail! Starting with a stretching line from the top of the main body, slope this line all the way down before ending the tail against the rear leg thigh line. The endpoint of the tail should be slightly tipped.

Step 9: Outlining the Entire Fox Sketch
We will now be outlining our entire fox drawing. Make use of all the previously drawn construction lines to help you in outlining a more realistic fox shape. Beginning with the ears, which should have a somewhat smooth outline, move on to the rest of the fox’s body, which should have a noticeably rough and furry outline. When you reach the paws, outline small sharp claws where visible.
Once you complete this step, you are ready to erase any visible construction lines that remain, except the facial structure, eyes, and nostrils lines.
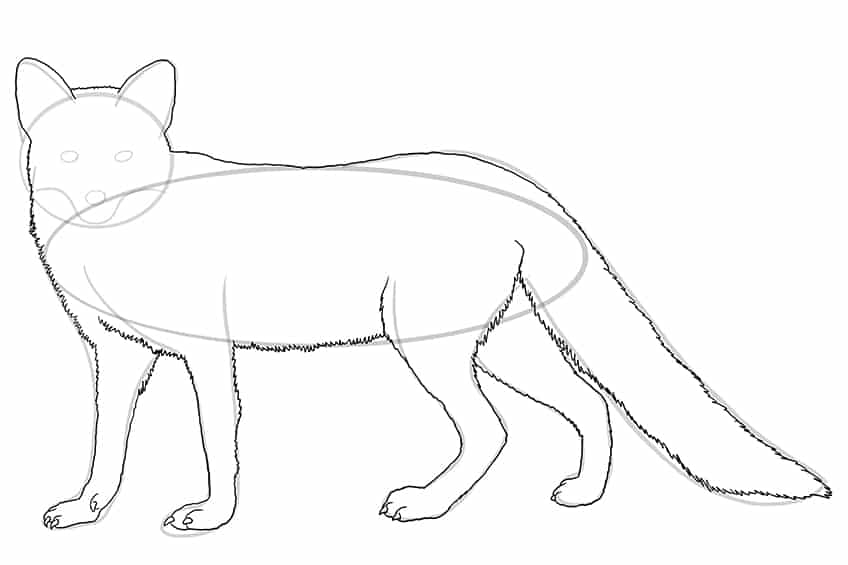
Step 10: Applying Some Detailing to the Illustration
Moving back up to the face of your fox drawing, where your construction lines should still be visible, add more detail to the nostrils, mouth, eyes, and jawline of your fox.
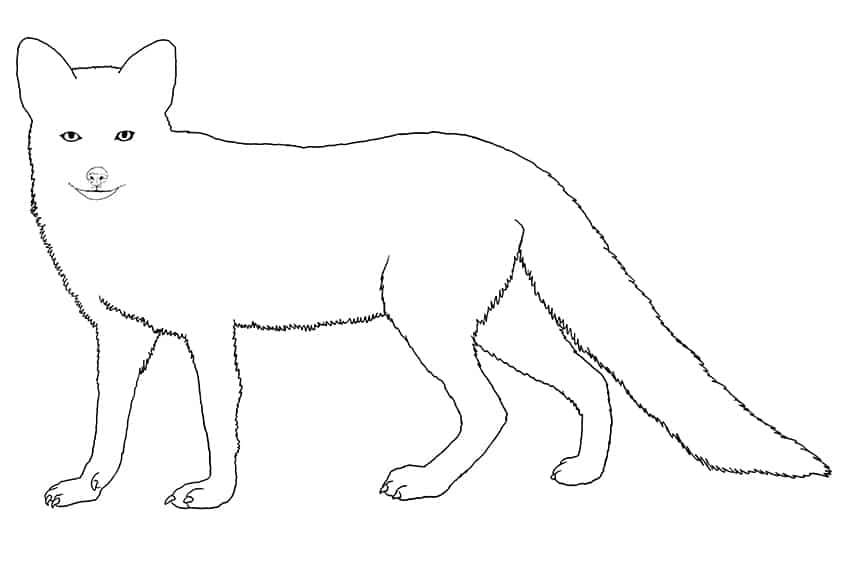
Step 11: Texturing Your Fox Drawing
In this step, we are all going to get quite creative with our playful fox illustrations! Covering the entirety of the fox with a full fur coat, begin to draw short lines closely packed together to resemble hair. Start on the ears, continue down onto the face, and move outwards along the nostrils to create a blooming effect of hair on both sides of the face.
Once you are done, you can add whiskers before continuing the down-flowing pattern of lines from the neck to the legs and tail. Your pattern should be a mixture of short and medium wavy lines and should use the curvature of the body to help you in which direction the flow of fur lines should be going.
Most of the fur lines should not actually overlap. However, to create a darker fur area, overlap the fur lines several times, as we did on the lower parts of the legs and on the paws.
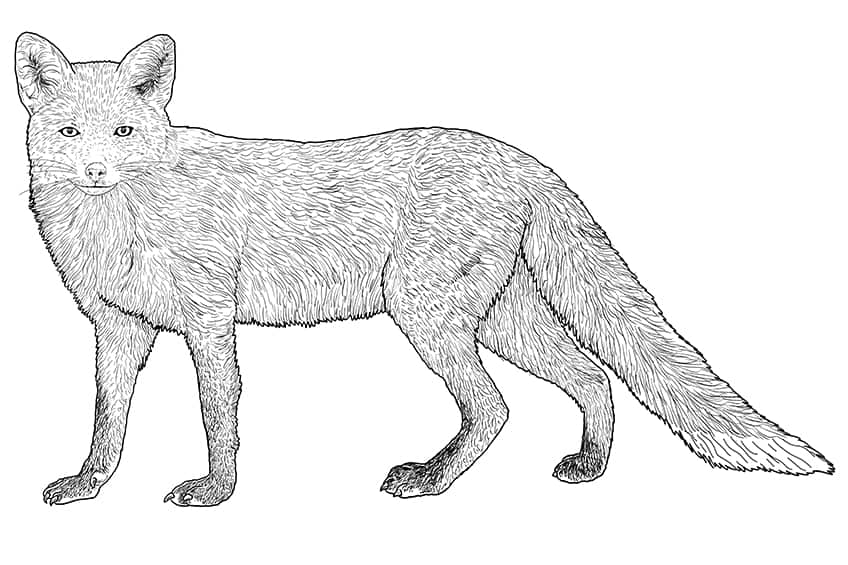
Step 12: Adding the First Coat of Color to Your Fox Sketch
Now that all of the drawing and detailing has been completed, we can move on to adding our first coat of color! With a soft brush and a bright shade of brown or caramel, evenly paint the entirety of the fox with the first color coat. To finish up, brush an eye glare with a soft white brush on each eye.
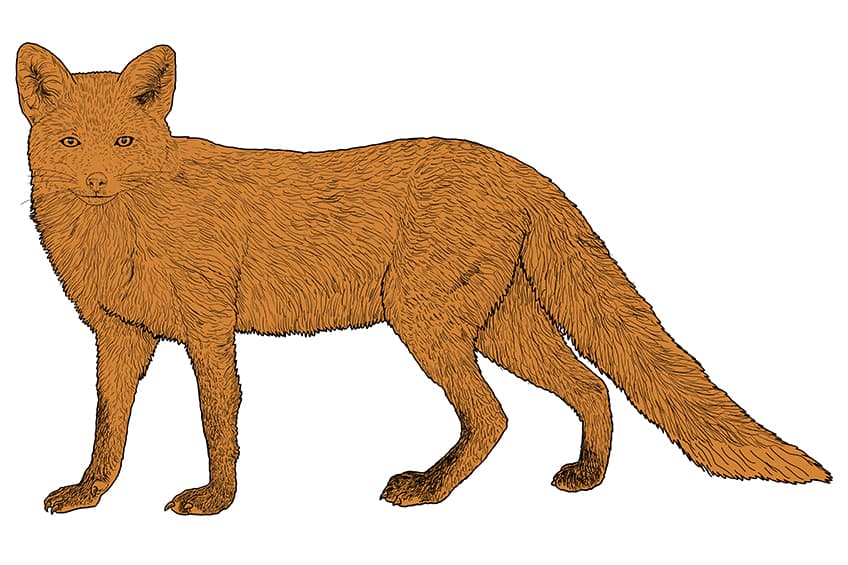
Step 13: Applying the Second Coat of Color
Once the first coat of paint has dried, we will be moving on to the second coat of color! With a small soft brush and some white paint, apply a layer of color inside the ears, around the cheeks and mouth, and down the legs of your fox. Make sure to also place some light patches of color throughout the body and the tail.
Tip: When painting the second coat of color, apply it evenly in the direction of the fur lines.
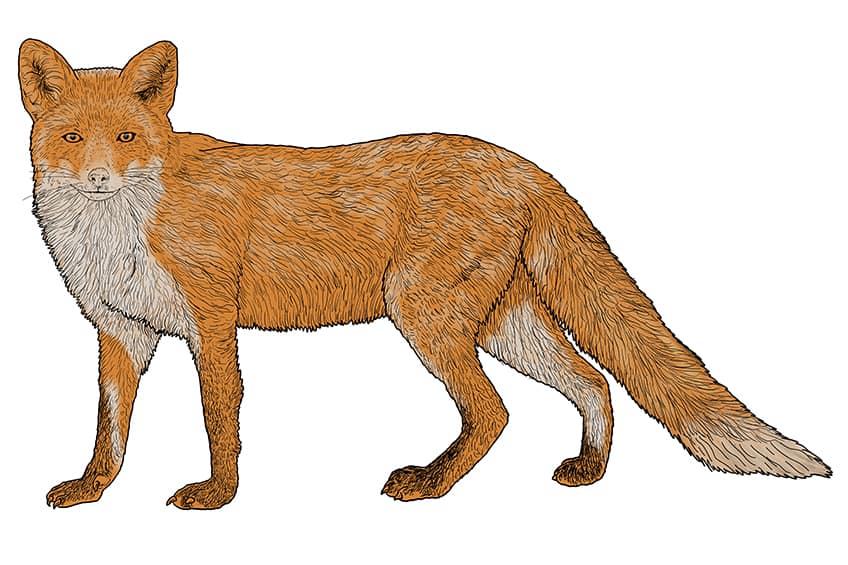
Step 14: Contouring Your Fox Drawing
We can now work on the contouring of our fox sketch in this step. Using a soft brush and a shade of light orange paint, contour the entire facial area of the fox. Lightly frame the structure of the fox, being the legs and tailbone, with the paint.
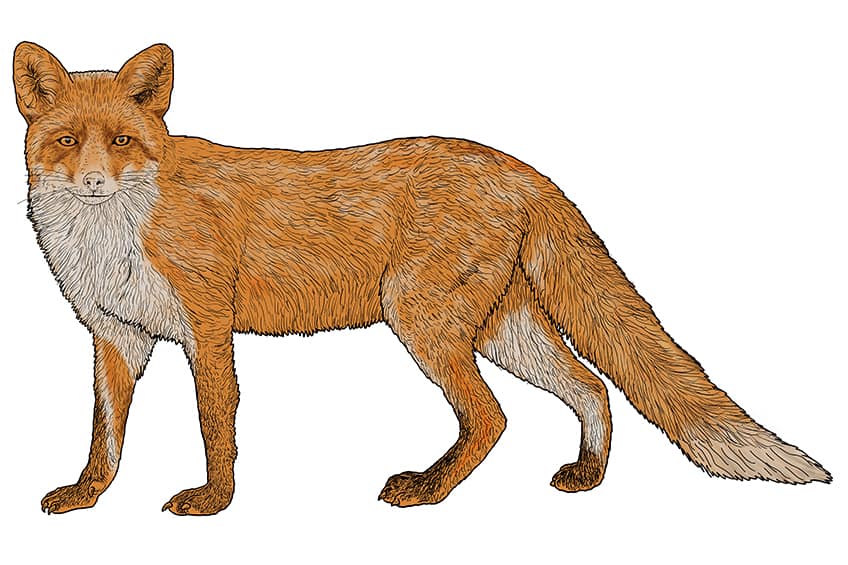
Step 15: Adding Some Highlights to the Fox Sketch
Switch paint colors and select a shade of light tan or yellow. With a small soft paintbrush and your chosen color, gently apply highlights to the entire frame of the fox, including some highlights along the face and some light patches along the side of the body.
To complete the step, make use of a small soft brush and some light yellow paint to apply a highlighted shimmer in each eye.

Step 16: Shading and Blending the Entire Drawing
With a small paintbrush, shade the inner ears with some black paint before moving on to the face of the fox, where you will apply a shading coat along the structure of the face. On the main body and underneath the neck, paint a casted shadow that will have been created by the head and snout.
Tip: When shading the fur strokes, shade in the direction of the strokes to create a more realistic-looking shaded coat.
With a soft paintbrush and the corresponding colors of your fox drawing, blend the color coats smoothly together. Apply a darker shade to the paws and lightly along each leg. To complete this step, add some final shading between the rear thigh and the tail of your fox sketch.
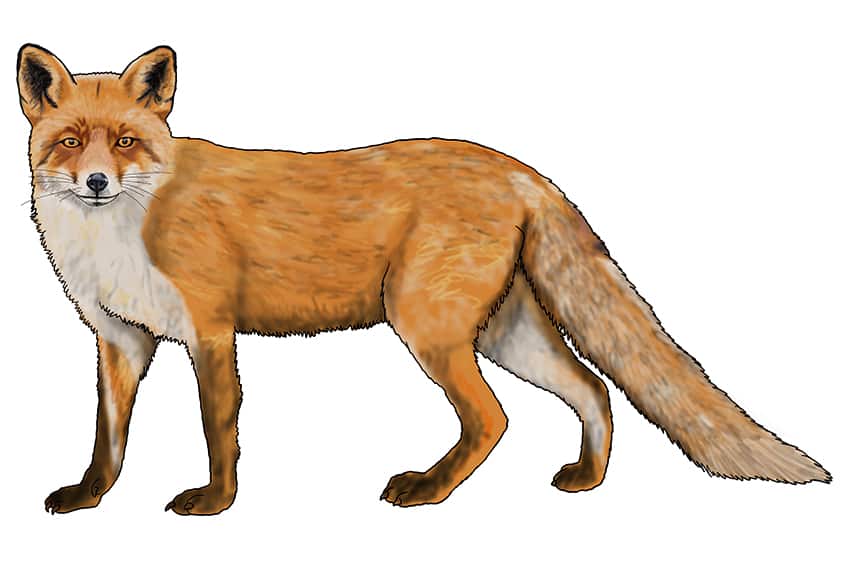
Step 17: Finalizing Your Easy Fox Drawing
In the final step, you will be tracing over your entire fox drawing to give it a seamless effect. With a fine paintbrush and the corresponding colors for each section, trace over the entirety of the drawing. Remember to include the inner texture lines to create a clean and seamless final result. Finally, repaint the fur within the main body to enhance the fur coat and to make it look more realistic.
Once this is finished, you will be left with a beautifully drawn fox sketch that has no visible outlines at all!
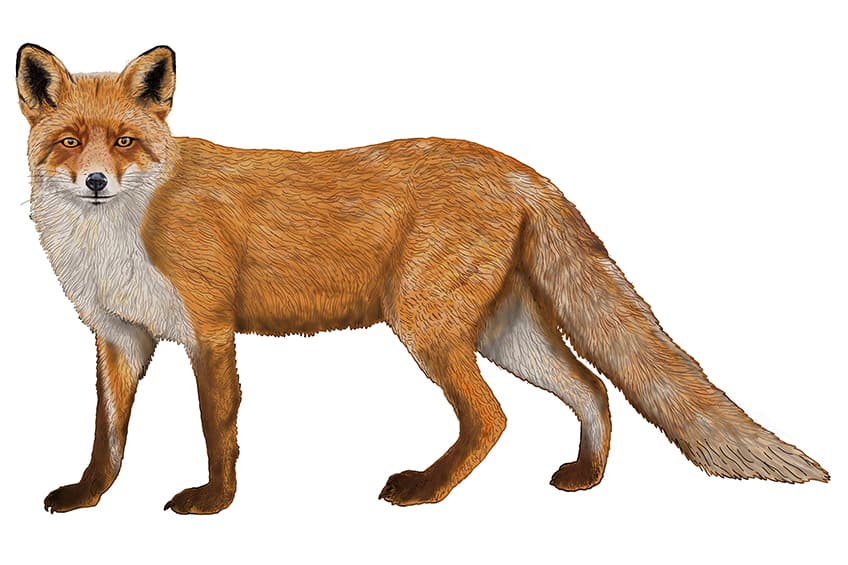
Just like that, you have completed your very own playful and realistic fox drawing! Now that you have mastered all of the steps needed for drawing a fox, you can make as many fox illustrations as you like. We hope that you enjoyed our tutorial on how to draw a fox the easy way, and that you will join us again for more easy and exciting drawing guides!
Frequently Asked Questions
How Do I Draw a Fox the Easy Way?
While it may seem daunting, learning how to draw a fox the easy way is a very straightforward process! Simply follow our easy step-by-step tutorial, where we explain what to do at each stage of the way, and by the time you reach the very last step, you will be left with a beautiful fox sketch.
How Do I Make My Fox Illustration as Realistic as Possible?
In our above guide, we have provided you with the steps that will allow you to create a fox drawing that looks realistic, as opposed to looking more like a cartoon. Through using a range of techniques, such as shading, texturing, highlighting, blending, and adding color, your fox illustration should look incredibly life-like when you are finished!
Matthew Matthysen is an educated multidisciplinary artist and illustrator. He successfully completed his art degree at the University of Witwatersrand in South Africa, majoring in art history and contemporary drawing. The focus of his thesis was to explore the philosophical implications of the macro and micro-universe on the human experience. Matthew uses diverse media, such as written and hands-on components, to explore various approaches that are on the border between philosophy and science.
Matthew organized various exhibitions before and during his years as a student and is still passionate about doing so today. He currently works as a freelance artist and writer in various fields. He also has a permanent position at a renowned online gallery (ArtGazette) where he produces various works on commission. As a freelance artist, he creates several series and successfully sells them to galleries and collectors. He loves to use his work and skills in various fields of interest.
Matthew has been creating drawing and painting tutorials since the relaunch in 2020. Through his involvement with artincontext.org, he has been able to deepen his knowledge of various painting mediums. For example, watercolor techniques, calligraphy and lately digital drawing, which is becoming more and more popular.
Learn more about Matthew Matthysen and the Art in Context Team.


