

Oil Painting Techniques – Complete Introductory Guide
Learning to master oil painting techniques for beginners can feel overwhelming initially, as so many different basic oil painting techniques exist. As with any other skill, learning to paint takes time and patience. Of all the mediums, oil painting exists as a particularly difficult one to learn. However, if the various tips and tricks are followed, your oil painting styles and techniques can increase dramatically and change your painting process.
Choosing the Tools You Will Need to Begin
Oil paint has a long tradition within the history of art and exists as one of the most popular mediums that are still used today. However, before you can begin to learn the basic oil painting techniques, it is important to know what tools will be needed. If you are interested in starting to work with oil paints, it is important to have a selection of basic supplies at your disposal. This simply means that you should have specific tools that are used only for oil-based paints, as they should not mix with other kinds of paint.
Paint Sets and Canvases
In the beginning, a basic set of oil colors should be sufficient to get you going. Additionally, making use of a Masonite or birch wood canvas is preferable for beginners, as linen canvases can be costly. As you progress, you will find it in your best interest to spend money on professional-quality paint sets as opposed to expensive canvases. Basic canvases are ideal for beginners, as they work equally well as long as they are properly primed before painting.
Paint Brushes
When choosing which paintbrushes to use, you should look for brushes that are especially geared towards oil paints. Depending on what you will be painting, it will be beneficial to choose brushes that are different shapes and sizes to play around with, as they are all used for different techniques.
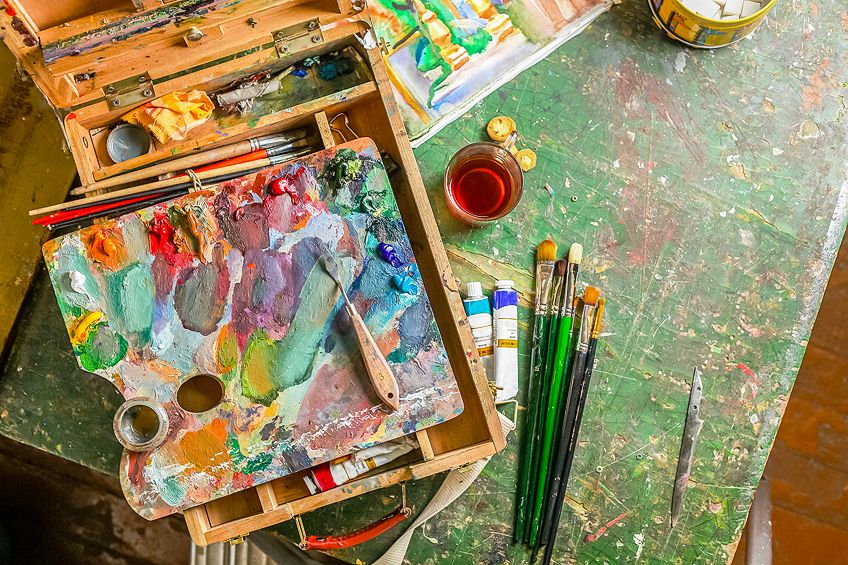
Paint Palette
Typically, plastic or melamine palettes are the most conventional and comfortable to use. However, if you are looking for the iconic curved palette, the wooden boards with the thumb hole are also a viable option. Just be sure to condition the surface by rubbing it with linseed oil to prevent your paint colors from seeping in.
Palette Knife
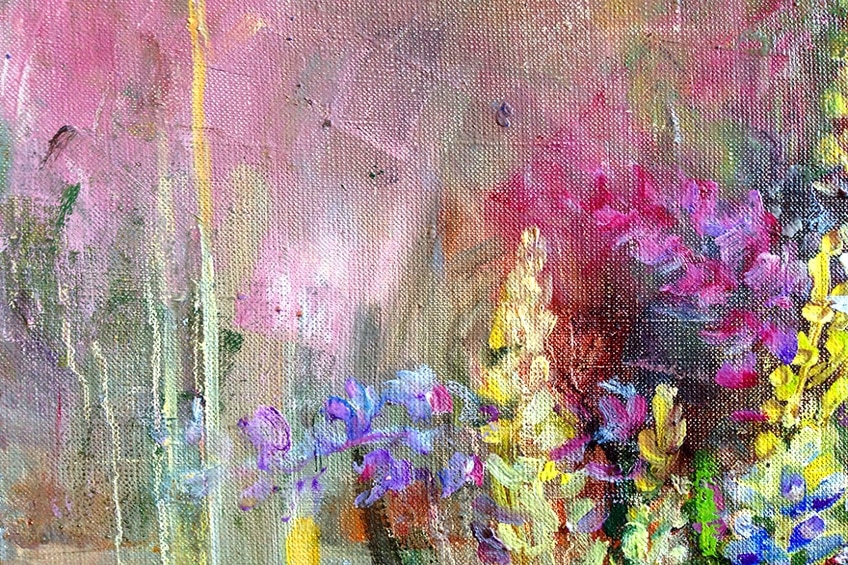
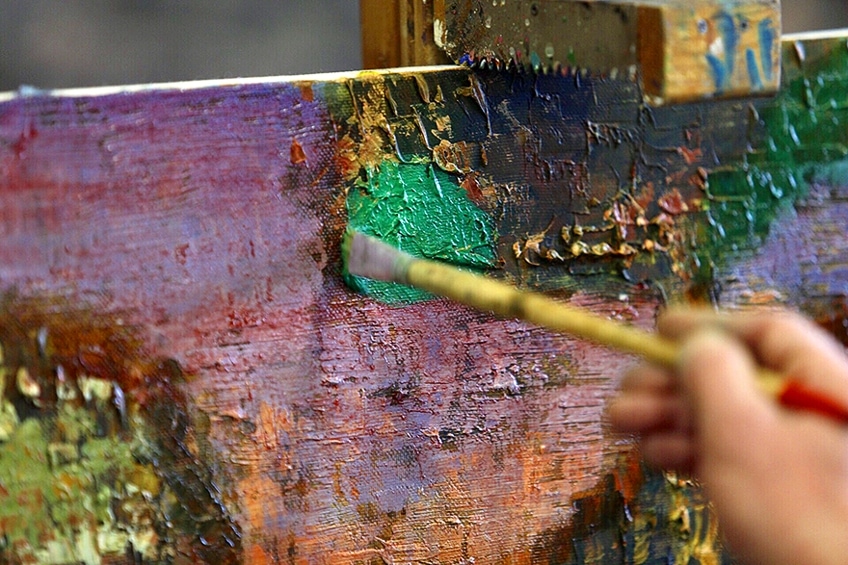
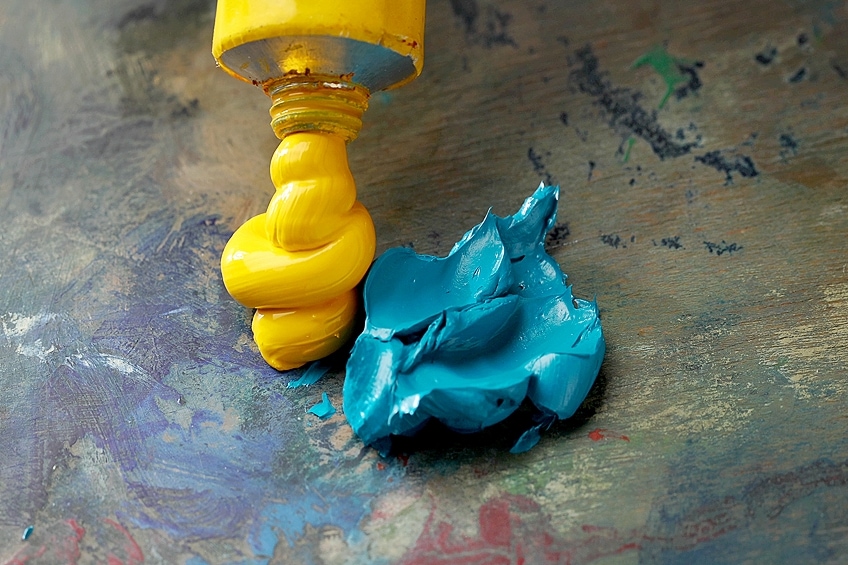
When it comes to mixing colors, it is best to use a palette knife. This tool will enable you to mix colors evenly and prevent you from getting too much pigment onto your brush as you mix. Palette knives can also be used to structurally apply paint, as this tool adds to the oil paint texture that is visible.
Brush Cleaners
Lastly, you will also need a cleaning solution to wash your brushes when you are finished painting. Solvents such as turpentine work wonderfully, as they can also be used to thin pigments while you are painting, but they should be used in a well-ventilated area due to their smell.
Tips and Tricks for Using Your Painting Tools
In addition to knowing which tools to use, it is also important to correctly understand how they should be used. Without knowing this, learning different basic oil painting techniques becomes difficult as the tools may stand in your way of succeeding.
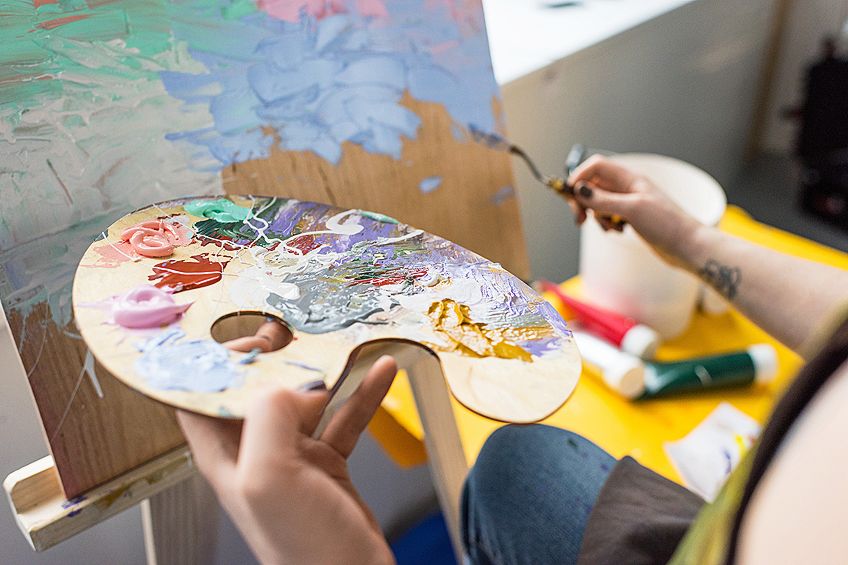
Perfect the Position of Your Brush
While painting, it is important to remember that your brush has two sides, both of which should be used. Learning to orient your brush differently to control the lines you paint will help to improve your speed and adaptability within your oil art, as you will learn which sides are best suited for specific techniques. Additionally, turning your brush on its side will allow you to create finer lines than simply using the flatter part of your brush, which is ideal for wider strokes.
Vary the Pressure Used
The pressure you apply when painting will help determine the final result of your oil art and can make or break the look of an artwork. If you constantly apply heavy pressure, your paint colors could blend as a result and form bumps along the edges of your brushwork. Be sure to familiarize yourself with the differences between using soft, medium, and heavy strokes, as this will help to determine which would be the most suitable for whatever you are painting.
Use Your Thumb to Blend
Your fingers can also be the perfect tool to blend your paint, as the nerve endings can guide you to adjust the amount of pressure you apply. This can help you to smudge your lines as accurately as you want them. However, always be sure to consult the health labels on your paint tubes to see if the oils are harmful to the skin.
Hold the Paintbrush Properly
Knowing how to hold a paintbrush is essential, as this tool can influence how you paint. While there are a variety of grips that you can use when painting, it is suggested that you hold the brush handle as far back as possible when you are a beginner. While this may feel uncomfortable at first, this grip gives you the most control and allows for more sensitive and flexible strokes. Ultimately, gripping the paintbrush correctly allows you to paint with your entire arm as opposed to just your wrist.
Be Cautious of Over-Mixing
When combining colors, it is important to only mix them as much as needed before you can begin to use them. When colors are first blended, small irregularities sometimes appear in the mixture, which tends to add a sense of attraction and vibrancy to your work. If colors are overmixed, these qualities fall away and your color blend will look flatter and boring, which can affect the outcome of your painting.
Avoid Using Paint Sparingly
When deciding on how much paint to use, try not to limit yourself as this may influence the end result of your painting. If you find that you are continuously turning your paintbrush around a thin supply of paint, this is generally the time when you would need to remake the color mixture. However, this will all depend on the type of wash you want for your particular work. Some techniques will require a thinner wash, while others will need a denser wash to create the intended effect.
In essence, you need to make sure that you are using enough paint for the type of stroke you are attempting to create.
Maintain the Purity of Your Colors
Your paintbrushes must be clean when you dip them into different hues, as dirty brushes can spoil the colors you use. If this happens, the purity of your colors can be compromised, and cause you to paint with a shade not of your choosing. To maintain the intensity of the colors when they are used directly from the tube, it is important to make sure your brushes are washed regularly and in-between uses if needed.
Experiment With Two-Color Mixtures
As a beginner, it is suggested that you practice mixing paint using only two chosen colors and white. If you tend to select colors from every tube when mixing, you will create a blend that is bland and has a lower intensity. If you put in the time to improve your knowledge about colors and practice mixing concisely, you will be able to paint more effectively and create work that highlights your skill.
Top 10 Basic Oil Painting Techniques to Know
When it comes to learning basic oil painting techniques for beginners, many different techniques exist. While you do not necessarily need to use all of the oil painting styles mentioned below, it is important to have a basic understanding of them should you wish to incorporate them at a later stage.
Underpainting
Beginners to oil painting may find it daunting to apply color to a blank canvas when starting. Underpainting attempts to solve this by being the first layer of paint that is applied to a canvas before color is added. Underpainting acts as a guide of where you would like to paint the major parts of your composition, which removes the fear when you finally begin to paint.
To employ this technique, you will need to sketch out a rough idea of your composition by painting with a thin layer of paint, and then blocking off where you would like to place certain parts and color tones. This allows you to have a vague idea of where you would like to build your composition and provides you with a map to follow, which can calm you down when you are ready to start.
Blocking In
This technique refers to physically blocking in the different shapes and colors that are going to be used on your canvas before you can fully begin painting. The purpose of this is to create a plan that navigates you through the general composition and color choices and allows you to take care of smaller details, so you do not have to worry about them when painting.
Through using this technique, you can get a real feel for where your painting is headed. Beginners will start by painting a toned-down version of their main colors by using thinned paint and larger brushes. Once this is done, you will be able to increase the intensity of your colors and add additional layers as you go along.
Be careful of blocking with highly saturated colors, as you will spend the majority of your time trying to tone down the painting.
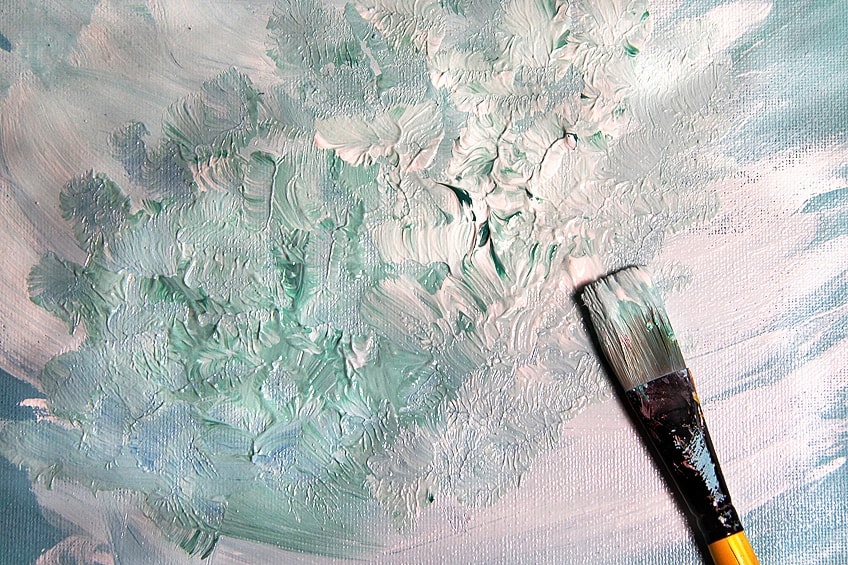
Blending
While this technique is possibly used the most by beginners, it is also one of the simpler methods. Blending describes two different colors that are slightly mixed together when wet, which allows a smoother transition between the hues to be created. However, this technique can only be done when the paints are wet and exists as a popular method within oil painting as the oils stay wet for a longer period.
Blending helps beginners in creating paintings that are smooth and lifelike, but can often be overdone as a result of this. This technique is more effective when used in moderation, as too much blending can create an inauthentic atmosphere in a painting as it takes on an excessively refined look.
Scumbling
Scumbling is a great technique that beginners can use to add more oil paint texture to their paintings. This essentially makes use of a dry and hardened brush and requires you to apply thin layers of paint onto your canvas. This then creates a textured effect as a cracked glaze appears, which is made noticeable by the underpainting that can then be seen through the glaze.
Scumbling differs from other techniques that work towards a smoother effect, as the aim is to leave areas exposed through an irregular application of paint. Thus, scumbling is ideal if you are wanting to create depth in your oil art.
Glazing
Glazing exists as a popular technique within oil painting and is a good one for beginners to learn. This method makes use of painting thin clear layers on top of a dry opaque base layer. As each additional layer of color is applied, it changes the hue of the previous layer and the finish takes on a glossy appearance. This also helps in creating a multidimensional look. Due to the polished finish that glazing provides, it is often added over a thin layer of paint to create a shiny look.
For glazing to be achieved, you will need to first create a monochrome underpainting using opaque colors, and then slowly build the layers of glaze on top. Since you need to wait for each layer of glaze to dry, it can be a very laborious method of painting. Depending on how many layers you intend to use, your oil painting could take an incredibly long time to be finished. Each additional layer should also have more oil than the previous layer so as to avoid cracking at a later stage.
It is suggested that you use oil paints that have a more transparent quality, as the multiple layers work together to visually blend into interesting color combinations. This works especially well for painting portraits.
Alla Prima
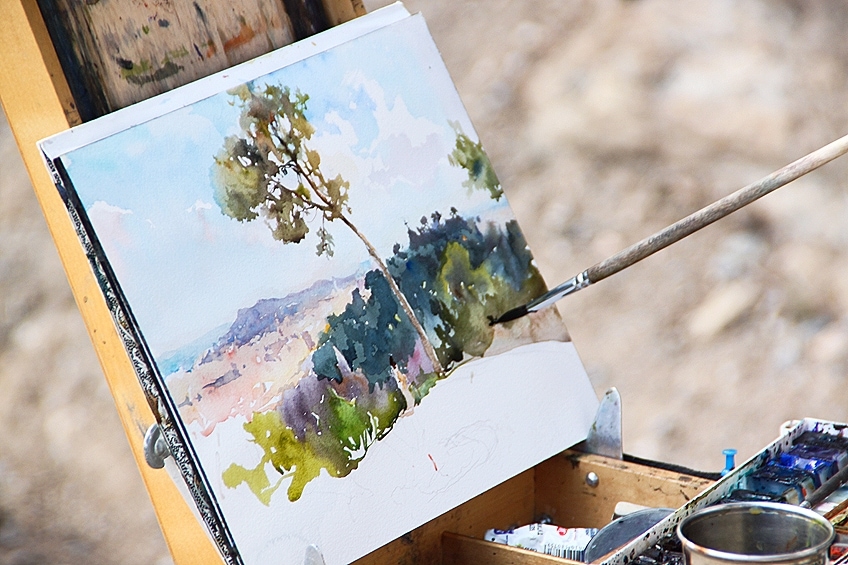
Also known as painting “wet-on-wet”, this method is possibly one of the more challenging ones to be learned when working with oil paints. This technique requires you to directly apply paint to a wet surface without letting any of the earlier layers dry completely. The benefit of using this technique is that paintings can often be completed in a single sitting.
This technique varies from the more traditional methods that allow each layer to dry before more paint is applied. However, given that it can take a few days for oil paint to properly dry, this method is preferable when painting quickly as it also allows you to mix your color layers directly on your canvas. This technique is ideal for painting evasive light as fast as possible, as well as for capturing landscapes at a specific time of day. Some famous artists who made use of this technique were Vincent van Gogh and Claude Monet.
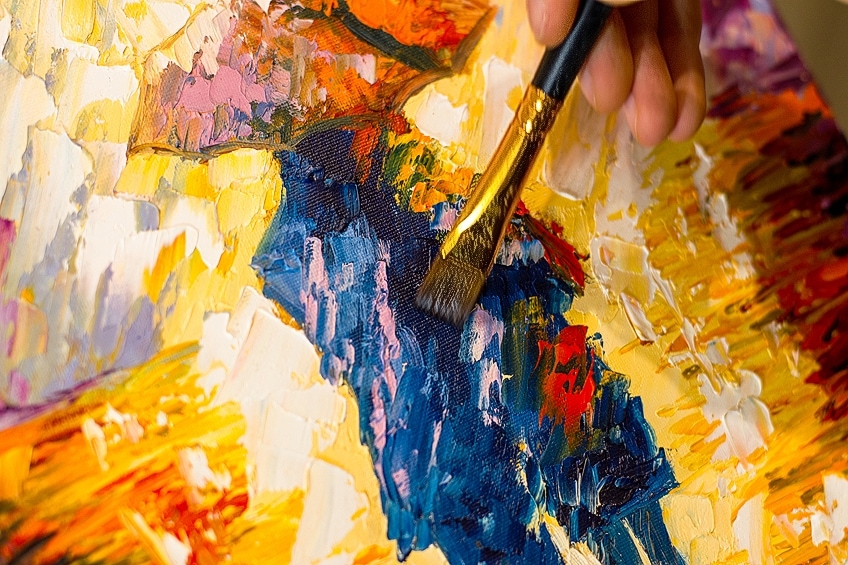
Impasto
While this technique of being able to texturally paint may require additional practice and patience, impasto painting works especially well when you are attempting to add dimension to your artworks. The oil painting style of impasto involves painting strokes of thick paint to your canvas, which each mark being intentionally added. Painting in this style is often described as a bolder technique to employ, as your brushwork remains visible once the painting is complete.
An artist who was famous for using this technique in oil painting was Vincent van Gogh, as his brushwork emulates great activity and movement in his artworks.
A benefit of impasto is that your oil colors can be mixed directly on the canvas, which helps to draw attention to areas that are more striking than others. This thicker painting style can help to enhance the idea of three-dimensionality within your work, as you can change between using a brush or palette knife to create this depth.
The only trick to this is to liberally apply paint to your brushes and then freely spread it over your canvas. Those new to this technique should start by applying thicker paint in the foreground of their paintings, and then gradually thin out the paint as the background lessens. In doing this, impasto helps create the illusion of distance, which you can enhance by adding blobs of paint to close-up areas of the artwork.
Grisaille
Gris, which is the French term for “gray”, describes painting in a monochrome using only varying shades of black, white, and gray to demonstrate different areas of dark and light. However, due to the large assortment of colors that are at our disposal in the modern era, this technique of oil painting is slightly outdated.
Beginners to oil painting may find practicing with duller colors more reassuring before moving on to louder colors, as they can be unpredictable when put on the canvas. If you are wanting to try out this technique, it is ideal for underpainting before a painting is glazed over.
Chiaroscuro
Translated from Italian to mean “light-dark”, chiaroscuro refers to the balance that exists between areas of light and dark in a piece of art. This technique arose during the Renaissance as artists would create a noticeable contrast between light and dark in their work for a more three-dimensional look.
This technique can help to increase the drama present within an artwork, as it pushes the subject to the forefront of the painting. If you are interested in trying out this technique, it is suggested that you start with one light focus initially and work your way out from there.
Oiling Out
Of all the oil painting techniques for beginners, oiling out is not one to be concerned with immediately. This technique is quite advanced, and therefore not necessary to know when first learning about how to paint. However, as you progress, this technique becomes useful when using oils.
Oiling out is used when oils have sunk into the lower layers of the painting, which leaves the top layers looking dull. This can often happen in patches, as the drying time differs between different colors. To fix this, you would simply need to dab a sparse amount of a top-quality oil medium over the areas in question once the painting is dry.
While it may seem that oil painting is quite a technical skill, it is entirely possible to begin to refine and improve your abilities in order to become a better painter. We have listed some of the more basic and slightly easier techniques for you to start out with when you begin to start painting with oils. After practicing these skills, you can always move on to more complex techniques if you would like to expand your oil painting skills.

In 2005, Charlene completed her Wellness Diplomas in Therapeutic Aromatherapy and Reflexology from the International School of Reflexology and Meridian Therapy. She worked for a company offering corporate wellness programs for a couple of years, before opening up her own therapy practice. It was in 2015 that a friend, who was a digital marketer, asked her to join her company as a content creator, and this is where she found her excitement for writing.
Since joining the content writing world, she has gained a lot of experience over the years writing on a diverse selection of topics, from beauty, health, wellness, travel, and more. Due to various circumstances, she had to close her therapy practice and is now a full-time freelance writer. Being a creative person, she could not pass up the opportunity to contribute to the Art in Context team, where is was in her element, writing about a variety of art and craft topics. Contributing articles for over three years now, her knowledge in this area has grown, and she has gotten to explore her creativity and improve her research and writing skills.
Charlene Lewis has been working for artincontext.org since the relaunch in 2020. She is an experienced writer and mainly focuses on the topics of color theory, painting and drawing.
Learn more about Charlene Lewis and the Art in Context Team.


