How to Draw Stairs – Guide to a Realistic Staircase Drawing
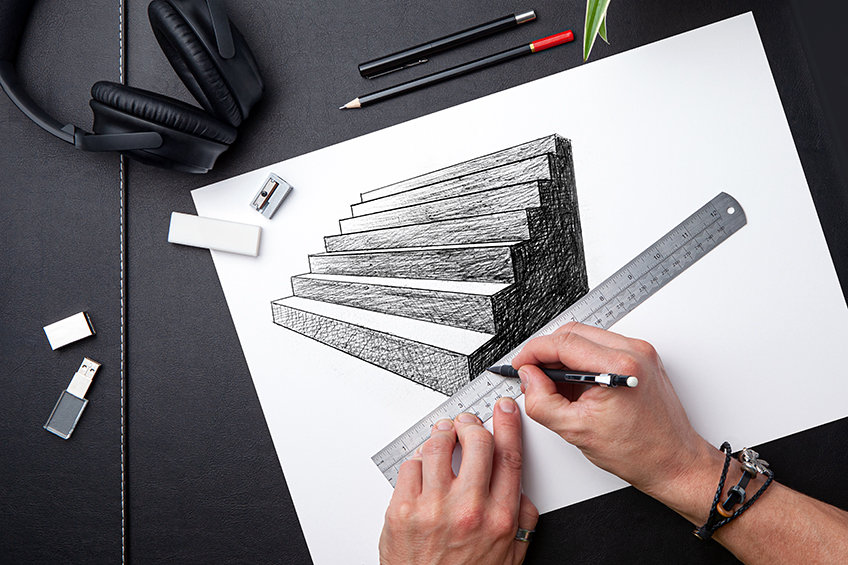
Drawing staircases is a great way to enhance your perspective skills. Staircases are an interesting object as they can be used in various artistic genres to represent many things. A staircase drawing can be a great addition to many different artworks, helping to enrich a landscape or used as a structure upon which a figure could be drawn. Drawing staircases can easily be seen as tricky or difficult, however, a stairs drawing is quite simple when using the correct method. In this tutorial, we will look at how to draw a simple staircase using the two-point perspective method. Other than enhancing your perspective skills, learning how to draw stairs can also help to refine your shading skills. In this tutorial on how to draw stairs, we will go through the simple process of creating interesting and three-dimensional stairs drawing.
An Easy Guide to Drawing Stairs
The process of learning how to draw stairs is so simple and it is really fun once you know the process, as it can be used in so many different ways. This tutorial will focus on the easy process of drawing a two-point perspective staircase, using the rules of two-point perspective to create realistic stairs drawing.
Drawing stairs from a two-point perspective also gives you insight into the depth of the stairs as a structure and can be modified in various ways once you know the drawing method.
We will also see how to give the stairs dimension through the use of shading which will give the stairs a more realistic quality. For this tutorial on how to draw stairs, we will only need simple materials, let’s take a look at what materials we will need.
Necessary Materials
Stairs drawing is a simple and fun task that does not require any fancy materials and can be done with the simplest of tools. In this tutorial, we will work with pencil and pen to give the stairs contrast and make them a little more vivid in detail.
We will want to make sure that we have an HB pencil as well as a 2B pencil for the pencil drawing stages. We will want to make sure we have a ruler for our drawing, this way we capture the straight edge qualities of the steps as best as we can.
We will also want to have an eraser for any little mistakes along the way, as well as a sharpener to keep our lines crisp. We will want to have a good ballpoint pen, preferably black, and lastly, a good piece of paper. All the materials for this tutorial on how to draw stairs can be found through the links below:
- HB pencil
- 2B pencil
- Ballpoint pen
- Ruler
- Eraser
- Sharpener
- Good paper (200 g/m – 250 g/m recommended)
Preparation
Once all our materials are prepared and ready for this tutorial on how to draw stairs, we can begin to place ourselves within an environment that is conducive to concentrating. You want to make sure that you are in a place where you can focus on each step without interruption.
This tutorial is an easy stairs drawing tutorial, however, it does require some concentration and engagement for each step.

Step-by-Step Instructions on How to Draw Stairs
Learning how to draw stairs is simple, although it does require an engagement of each step to have an accurate outcome. The process starts with an establishment of our two-point perspective and horizon line, which we will then move on to creating a set of guidelines that will help to establish the stairs in their correct form.
Once we have accurately drawn the stairs, using the two-point perspective guidelines we will then proceed to add shading to the drawing, giving it a more realistic quality.
From there we will add some shading with our pens, to heighten the contrast a little more, which will make the stairs more detailed and realistic. Now that we know what to expect, let us get into this tutorial on how to draw stairs!
Step 1: Drawing the Horizon Line
We begin by drawing the horizon line. We can do this by taking our ruler and drawing a horizontal line through the middle of the page. From here we can add three dots, one towards the left and right side of the page to indicate the two vanishing points.
We will then add the third dot in the middle of the two vanishing points.

Step 2: Drawing Guidelines Using the Right Vanishing Point
From here we will create a set of guidelines using vanishing points to create our staircase drawing. We can start by drawing a vertical line through the center dot on the horizon line, creating a cross-like shape with our lines that line can then be divided into even increments.
This will indicate how many stairs will be present.
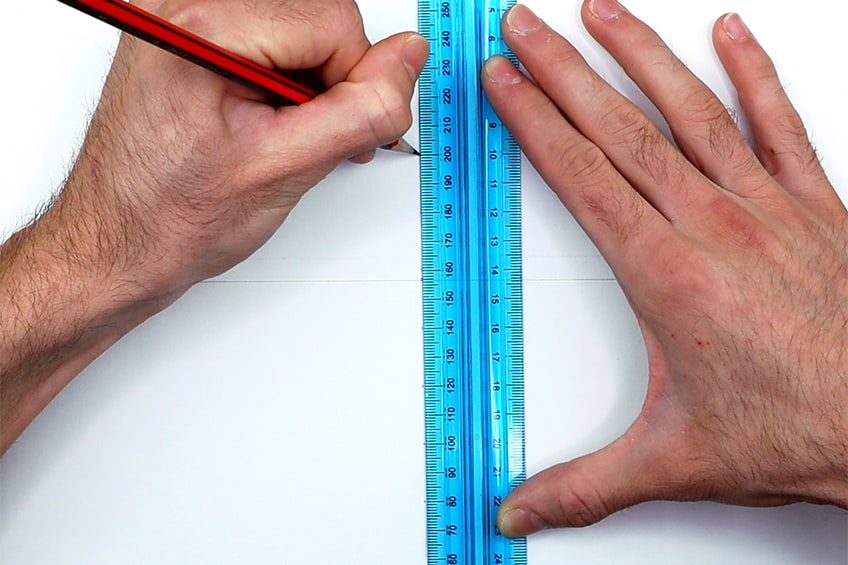
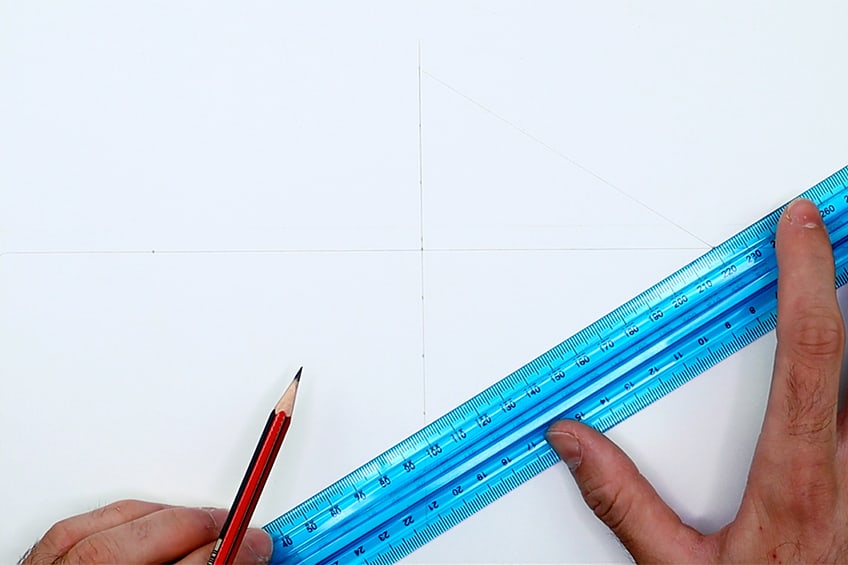
However, this is entirely up to you.
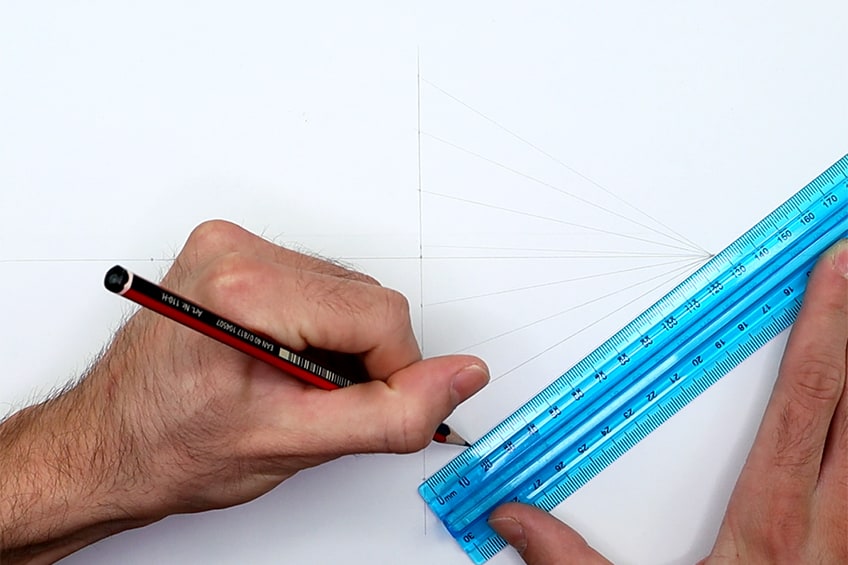

This diagonal line can run all the way through to the top of the diagonal line that runs from the top of the first vertical line to the vanishing point.


Step 3: Defining the Right Side of the Staircase
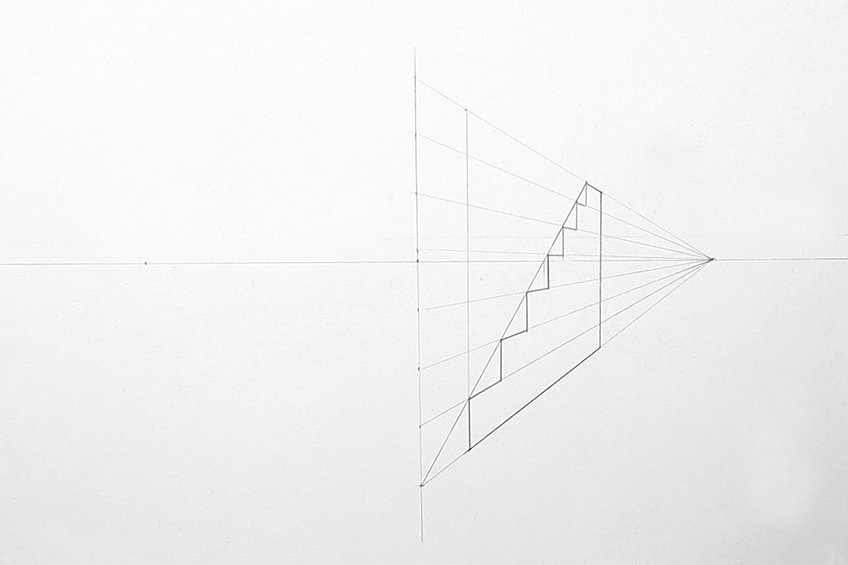
From here, we should have a clear vision of how the steps are present from the right angle. However, we can make them a little more visible by taking a darker pencil and beginning to outline the shape of the staircase.
You can do this by drawing a base however long you would like the staircase to be along the bottom line between the first vertical line and the vanishing point.
Step 4: Drawing Guidelines Using the Left Vanishing Point
We should have one side of the staircase adequately visible at this point. we can now proceed to connect the visible staircase to the left vanishing point. We can start by drawing lines from the bottom three corners of the staircase to the left vanishing point.
This will create the inner and outer edge of the first step.

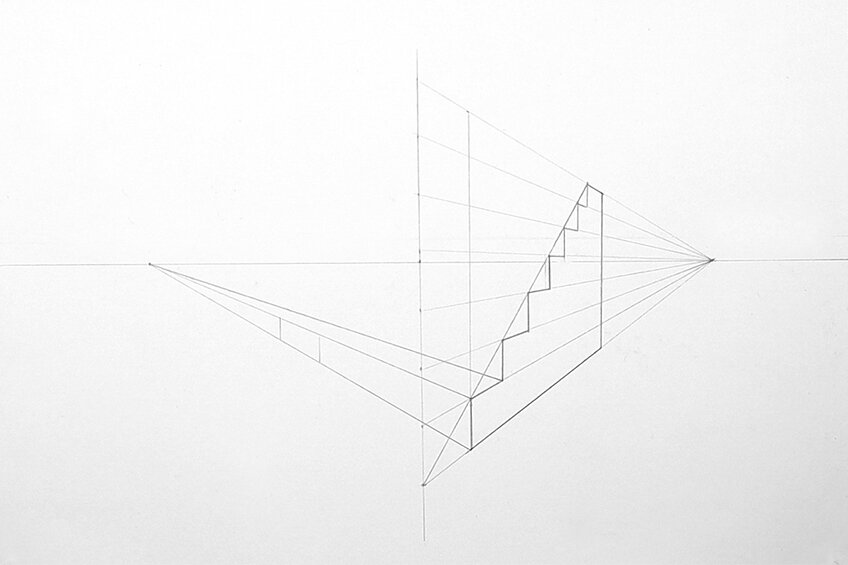
Again, this includes every corner, inner and outer corner of the steps in the staircase.

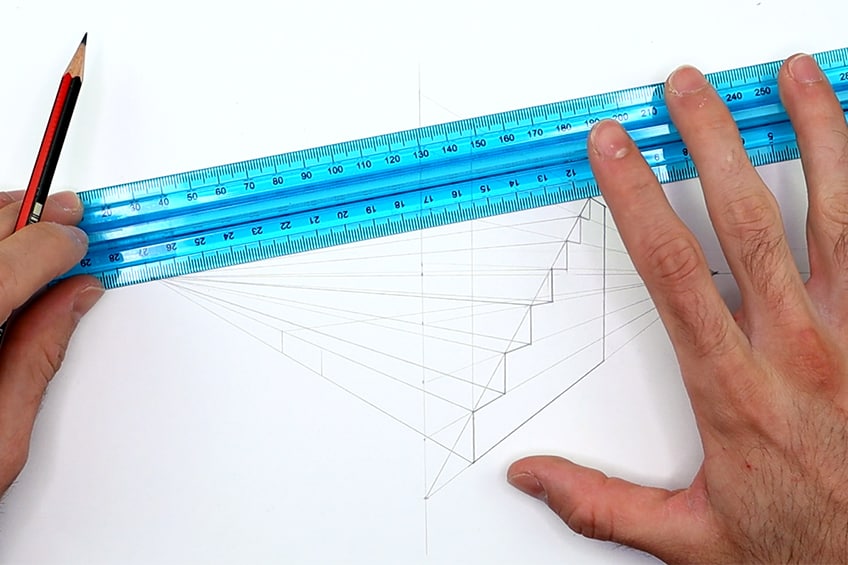
This will guide your mark-making process.
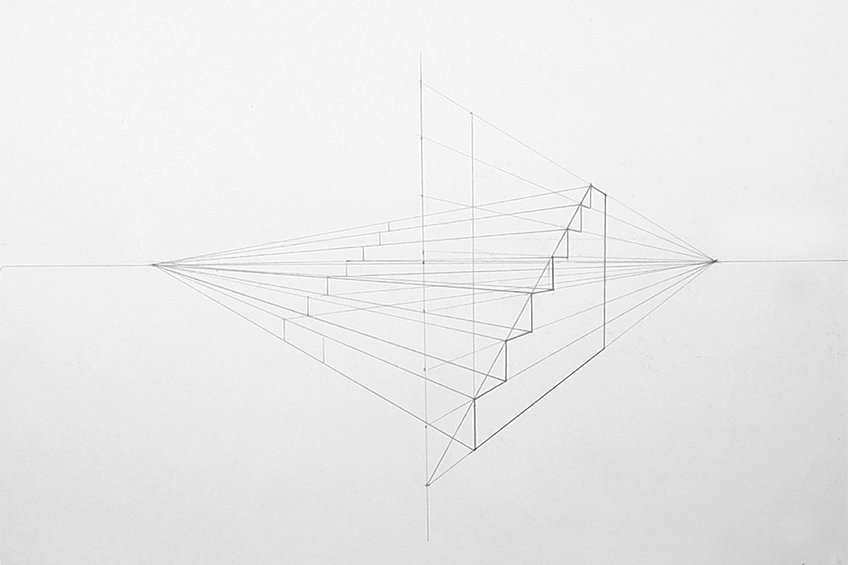
Step 5: Defining the Whole Staircase
We should see that the staircase is visible at this point, as we should have a staircase sketch lightly present by now. We can proceed to outline the shape of the staircase using a darker pencil, to make the staircase drawing a little more visible.
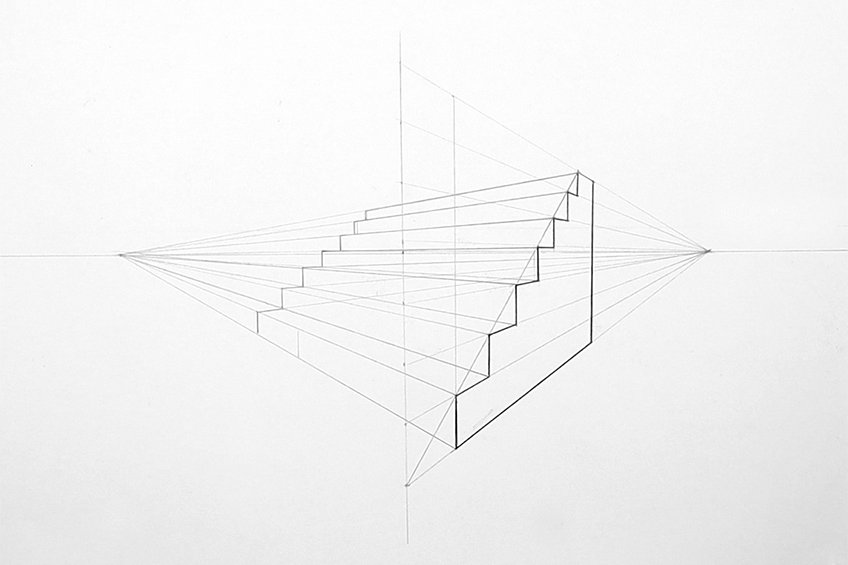
We can achieve this by using our pen and ruler to go over the outline of the staircase drawing.
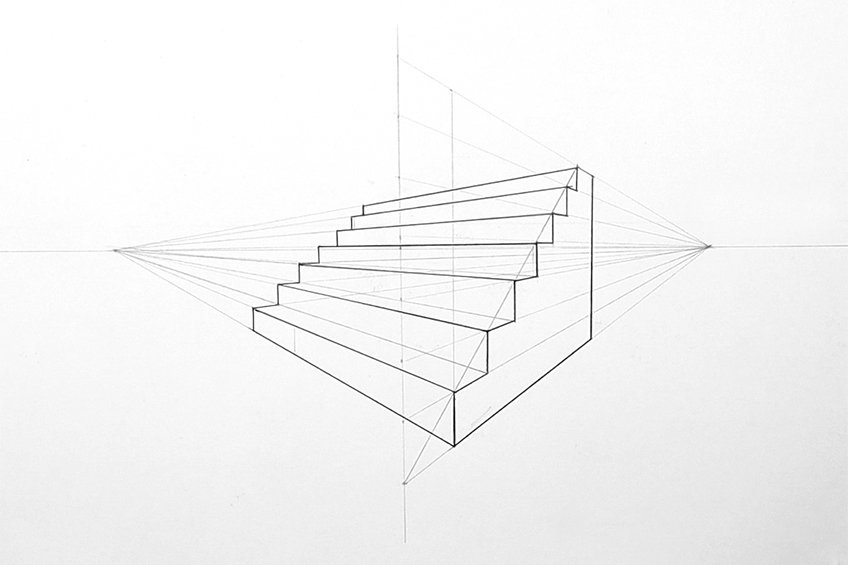
Step 6: Shading in the Staircase Drawing
We should have a realistic staircase drawing by now, to which we can begin to add shading. We can start to shade the structure by taking our 2B pencils and adding some light shading to the different surfaces available.
When shading in a three-dimensional structure we want to distribute three different tonal values to the three different dimensions visible.
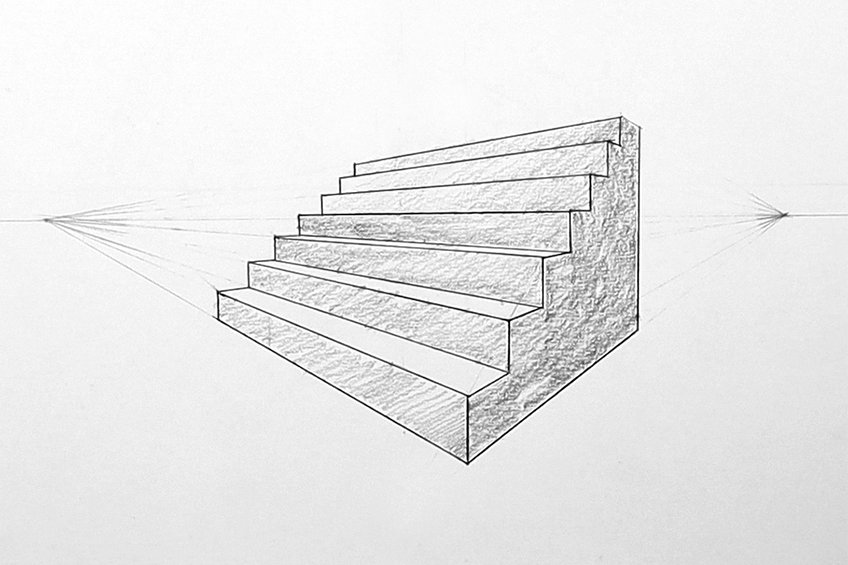
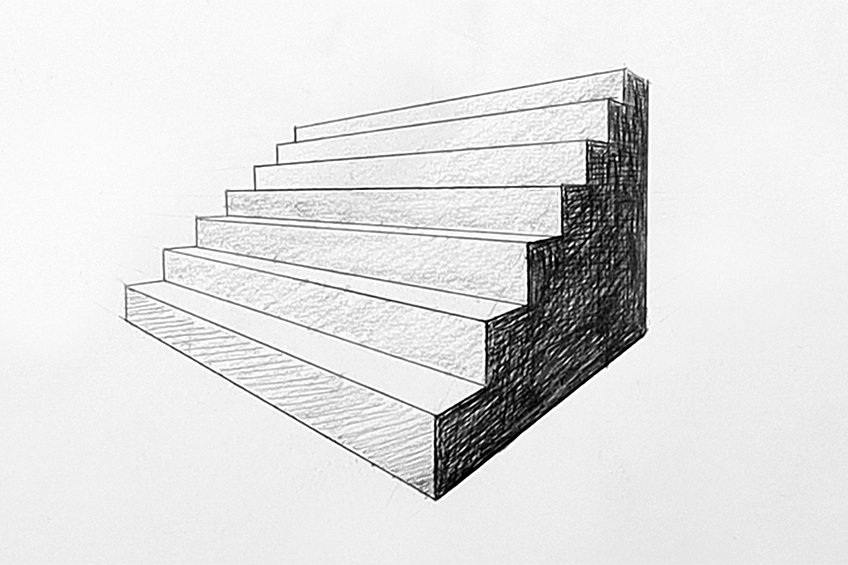
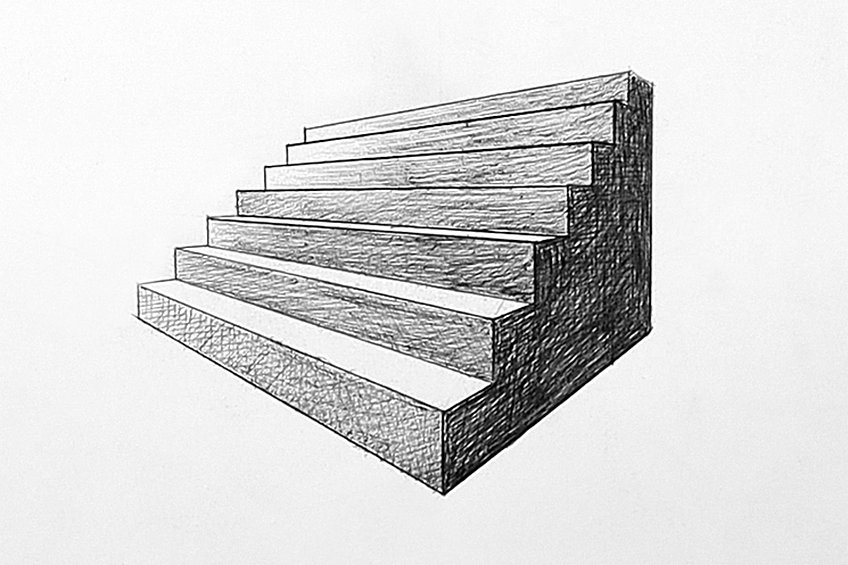
There you have it: a basic staircase drawing tutorial!
Tips to Remember
- Use a ruler. As you develop the stairs sketch into a refined realistic staircase drawing, you want to make sure you are using a ruler to capture the sharp edges.
- Take your time. It’s easy to get mixed up with the process of drawing stairs, so take it slow and concentrate on each step.
- Use the rule of three tonal values. Once you have drawn the structure of your stairs, use the three different tonal values of shading to give the staircase drawing a more realistic quality.
- Engage with each step. Using guidelines with perspective drawings can get a little complicated, so use the images and text to help you as best you can.
- Have fun! Learning perspective is a great skill, and a stairs drawing is a great feature to add to various drawing ideas.
Learning how to draw stairs in a realistic manner, requires some attention to the process. Each step is defining specifically how to use guidelines to create a realistic staircase drawing. Using the guidelines of perspective and shading techniques can really transform a stairs sketch into a more detailed staircase drawing. Remember to practice, drawing staircases does require some practice so be patient and use this tutorial on how to draw stairs as a resource to come back to constantly.
Frequently Asked Questions
How Do You Draw Stairs in a Two-Point Perspective?
Learning how to draw stairs in a two-point perspective is quite simple once you know the two-point perspective drawing method. The method starts by establishing the horizon line upon which the two points will be drawn. You then create a vertical line that will determine the angle at which you are viewing the stairs. From there you begin to create the stairs using the two-point perspectives to guide your line-making process. As you proceed to connect the lines using your ruler, you will find that the crossover of lines between the two points will create a stair-like structure. You will then refine this structure by drawing a set of vertical lines that help to connect the diagonal lines of the two points, which will result in a three-dimensional staircase. What makes the staircase drawing more realistic is the process of adding shading. By doing this we will give the staircase drawing more dimension. This tutorial breaks down the process of how to draw stairs from a two-point perspective in further detail.
How Do You Draw Shade in Stairs?
When drawing stairs that are three-dimensional and can be seen from the two-point perspective, we will have three different surfaces visible. This means we will be able to see the side and top part of each step. We will also be able to see the full side of the stairs, which means we will have three surfaces visible. This means that each of these surfaces will need to be different in tonal value, which gives the effect of the stairs interacting with light in a realistic way. By giving a light medium and darker tonal value distributed between the three surfaces visible, we then get a more realistic depiction of light and shadow interacting with the three-dimensional surface. Using the rule of three different tonal values is a great way to create a realistic shadow effect on a three-dimensional structure seen from a two-point perspective. This will distinguish all three dimensions of the structure and give the stairs drawing more depth.
Matthew Matthysen is an educated multidisciplinary artist and illustrator. He successfully completed his art degree at the University of Witwatersrand in South Africa, majoring in art history and contemporary drawing. The focus of his thesis was to explore the philosophical implications of the macro and micro-universe on the human experience. Matthew uses diverse media, such as written and hands-on components, to explore various approaches that are on the border between philosophy and science.
Matthew organized various exhibitions before and during his years as a student and is still passionate about doing so today. He currently works as a freelance artist and writer in various fields. He also has a permanent position at a renowned online gallery (ArtGazette) where he produces various works on commission. As a freelance artist, he creates several series and successfully sells them to galleries and collectors. He loves to use his work and skills in various fields of interest.
Matthew has been creating drawing and painting tutorials since the relaunch in 2020. Through his involvement with artincontext.org, he has been able to deepen his knowledge of various painting mediums. For example, watercolor techniques, calligraphy and lately digital drawing, which is becoming more and more popular.
Learn more about Matthew Matthysen and the Art in Context Team.


