Perspective Drawing – Methods for Creating Illusions of Depth
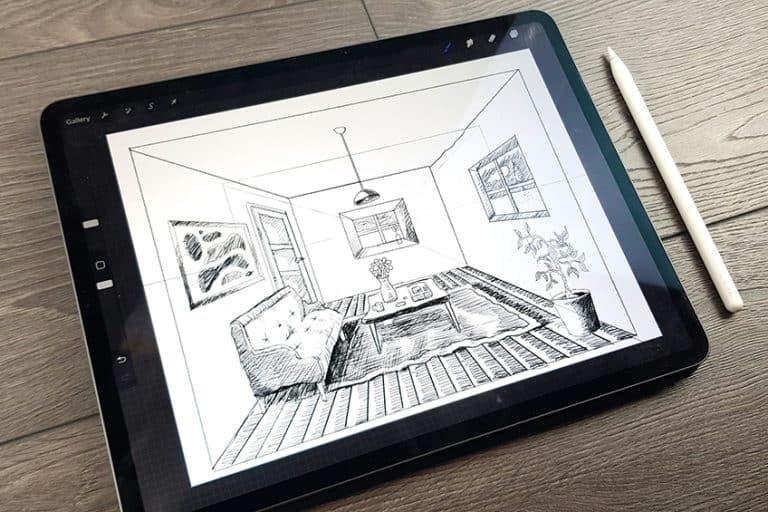
Perspective drawing is a useful skill to learn when we want to understand how to create realistic space in a drawing. Learning how to draw perspective gives us a better understanding of the three-dimensional aspect of objects and how they exist in space. Understanding the different perspective points concerning various perspective lines will be the distinction between one-, two-, and three-point perspective drawing. To draw in perspective, we want to understand the fundamentals of how the horizon line and the vanishing points. As we learn how to construct simple objects using perspective, we will see how objects are constructed in ways that are contextual to their surroundings.
Before We Begin
In this tutorial, we will learn how to place objects in space. Perspective is about understanding the position from which objects are viewed. Different perspective points will define the visual aspects of an object accordingly.
This is because when we look at an object in space from a particular angle, our brain is simultaneously defining the space around the object as well. This peripheral ability allows us to see an object move away into the distance.
Based on which perspective we are looking at the object, this will determine how it moves into the distance. We define this visual quality in a drawing as one-point perspective drawing, two-point perspective drawing, and three-point perspective drawing. Let us see what materials we will need for this tutorial.
Step-by-Step Instructions on How to Draw Perspective
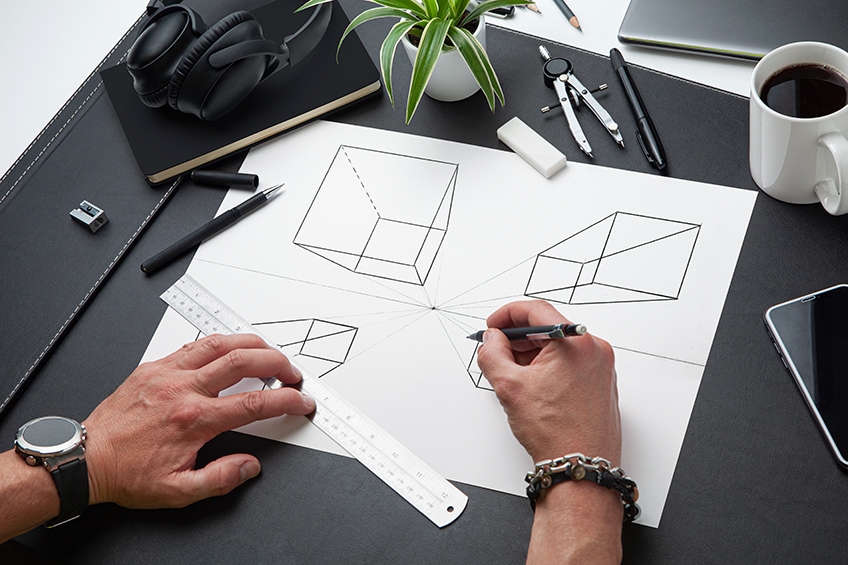
Perspective drawing can be complicated, that’s why we will be breaking down the difference between one-point perspective, two-point perspective, and three-point perspective in this tutorial. We will be going through the basics of each by creating a series of cubes that function according to each perspective. We will see how we construct various perspective lines and how they slowly define each cube by merging into their perspective points.
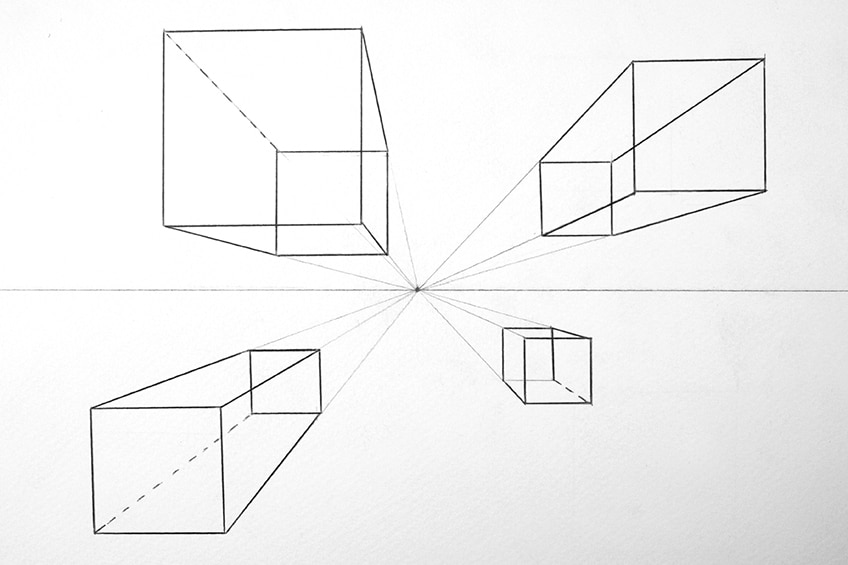
We will learn about the horizon line and the vanishing point, the two key aspects that help us define three-dimensional objects in space.
The various points of perspective are what will govern the formation of each cube and ultimately will contextualize the object within the space that it exists. As we learn how to draw in perspective, we will find that it is not that hard, once we break down each aspect step by step.
One-Point Perspective
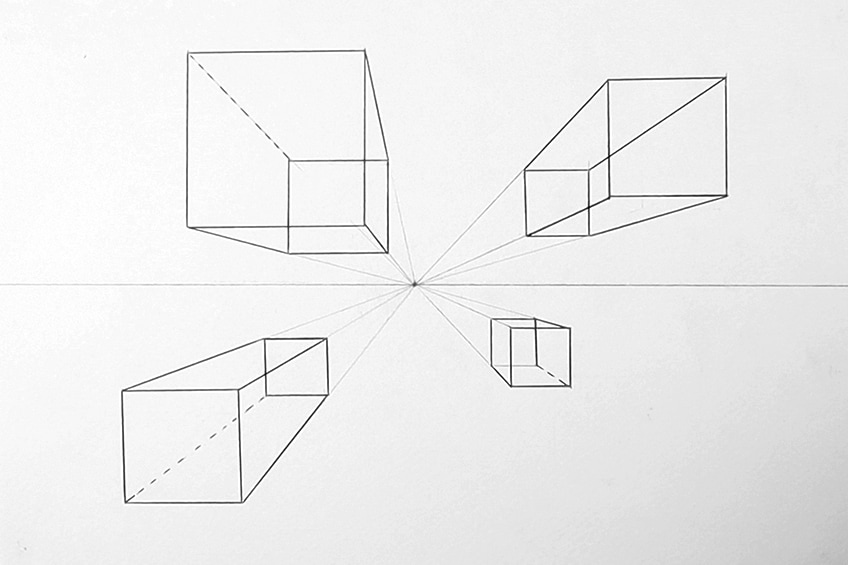
One-point perspective is the simplest way of defining a space using a set of principles to define its proportional accuracy. Again, because this is a single-point perspective, this means we are seeing an object vanish into a single distant point. This makes the edges of the cube lead toward the single vanishing point. Let us see how we construct objects with this one-point perspective rule.
Step 1: Draw the Horizon Line and Vanishing Point
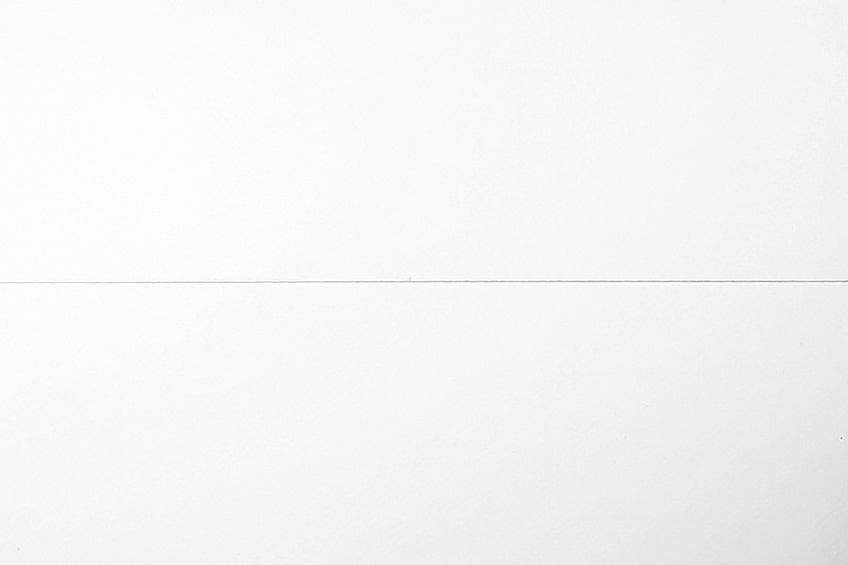
Let us begin by drawing the horizon line. We do this by drawing a single horizontal line through our page. The horizon line defines the landscape and works as the reference for our eye-level view of a space.
This will define the space that cubes will exist in and how we perceive them.
Step 2: Drawing the First Cube
We will now proceed to draw a square under our horizon line. We can draw this square anywhere on the page, however, for collaboration, let us draw this square toward the left of the page. As long as it is under the horizon line, this is fine.
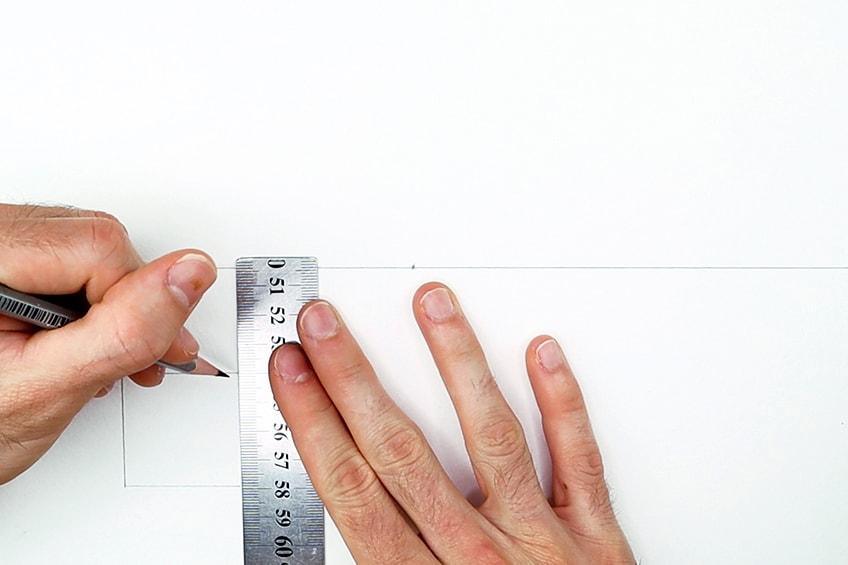
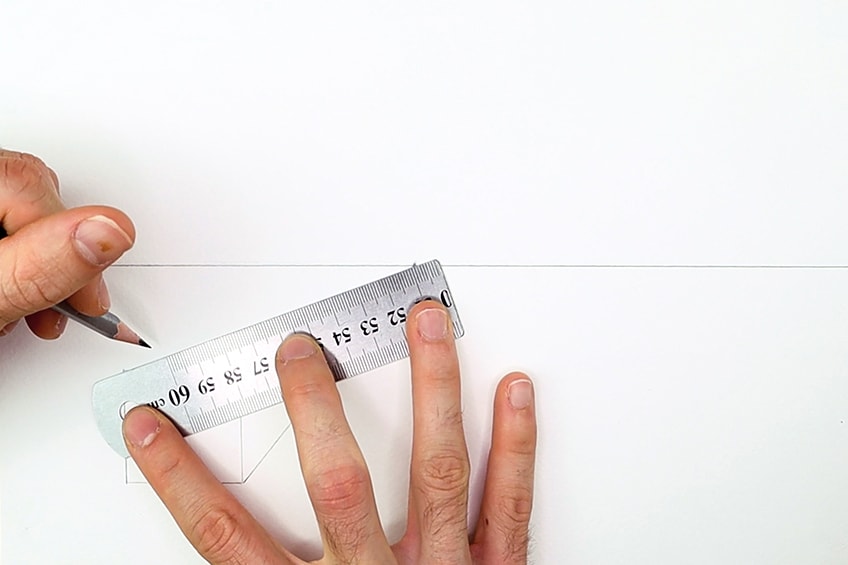
However, we keep these marks within the diagonal lines between our first square and the vanishing point.
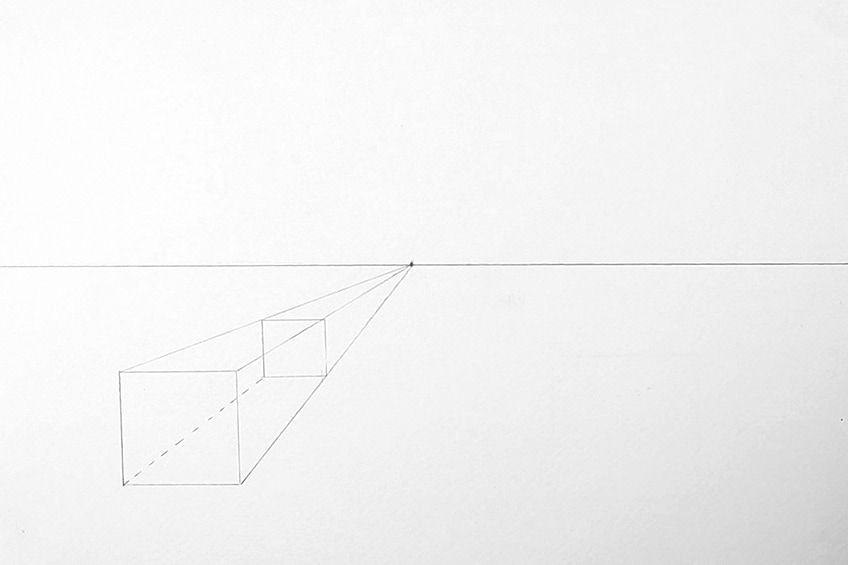
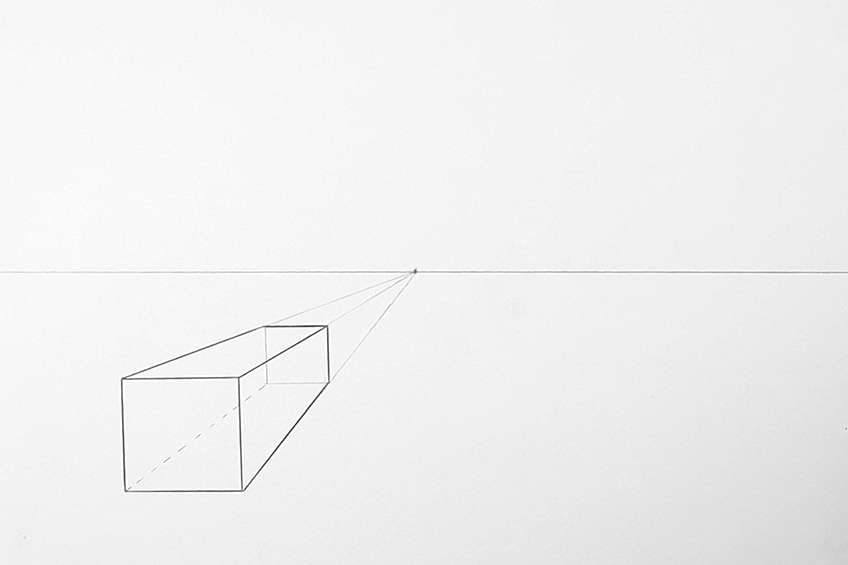
Step 3: Drawing the Second Cube
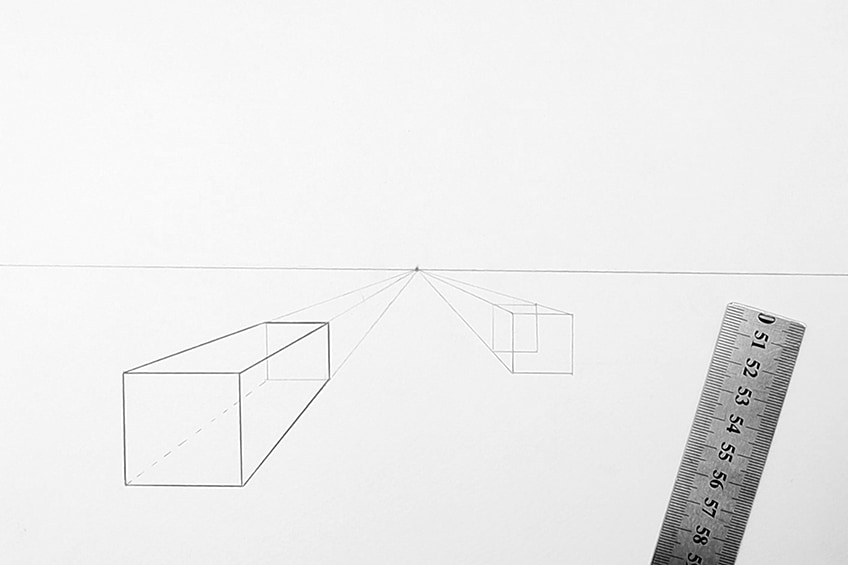
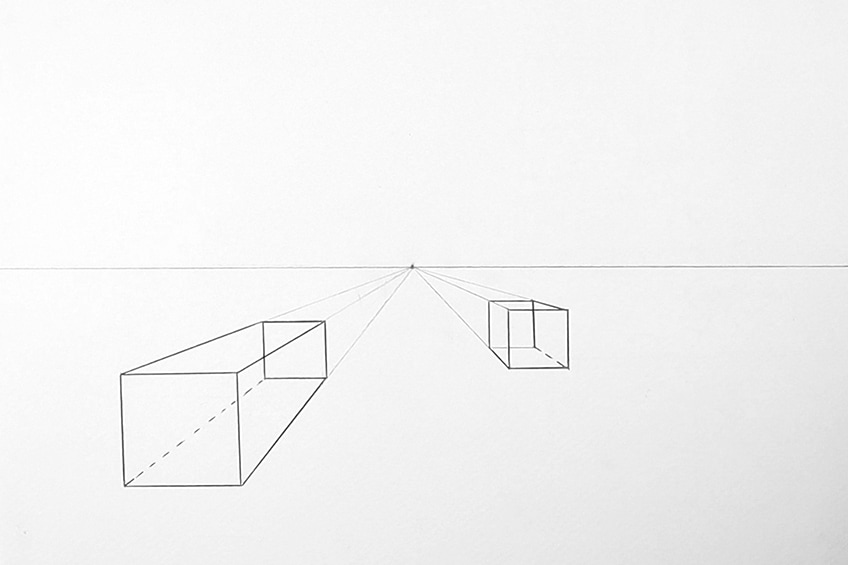
Now that we understand the fundamentals, we can now proceed to make another cube under the horizon line. This time let us make a smaller cube. By doing this we will see how it also defines the depth and distance of different cubes according to the one-point perspective.
As we draw a smaller square, we can connect its edges to the vanishing point with diagonal straight lines.

We then connect these two squares within the diagonal lines to create a cube.
Step 4: Drawing the Third Cube
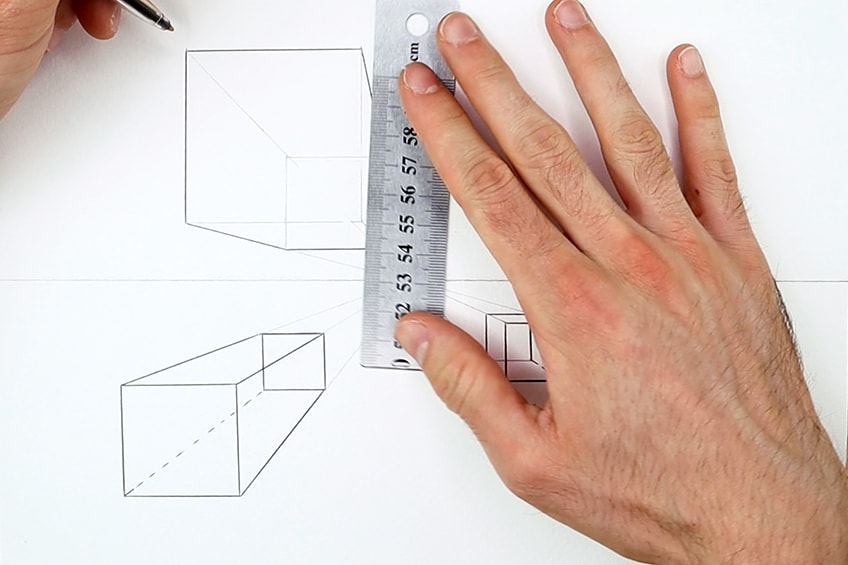
We will now proceed to draw another square, however, this time we will draw the square above the horizon line toward the left of the page. We can draw this square slightly larger this time, just to give ourselves diversity in the scale of our cubes.
This helps create various depths and distances between the various cubes that we draw.
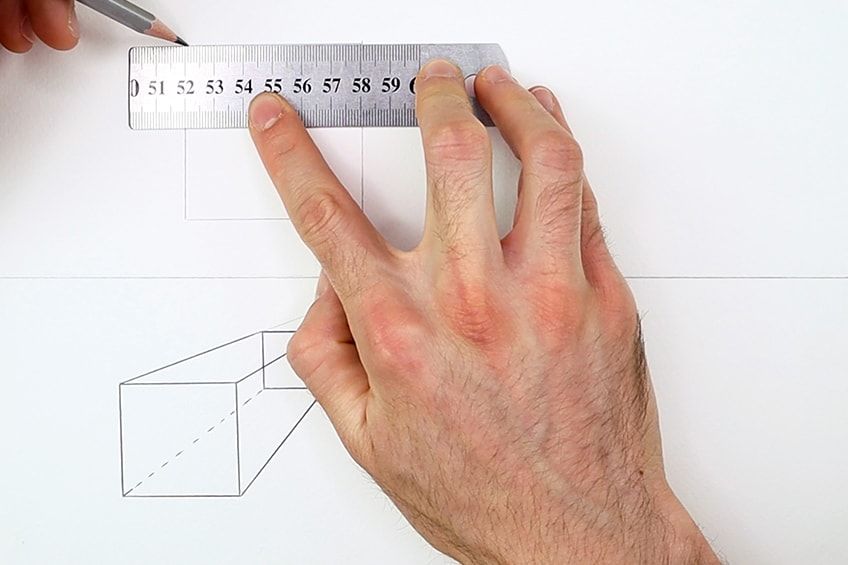
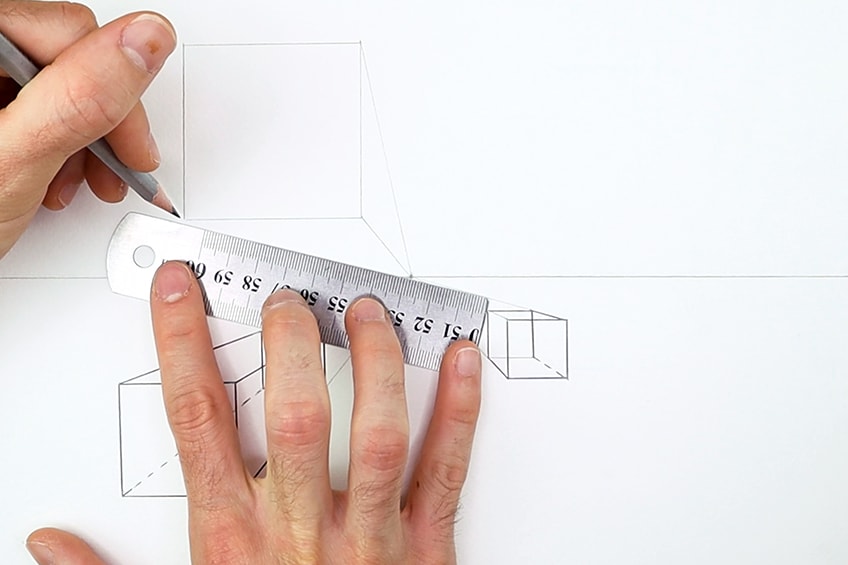
Imagine the horizon line is at eye level, if there are objects above it, it will appear as above eye level and the same goes for if it is below the horizon line.
Step 5: Drawing the Fourth Cube
For this last cube, instead of drawing the square first, begin by drawing two diagonal lines into the right space of the page, above the horizon line. We can then proceed to draw a vertical line through these two diagonal lines.
This will be the length of a new square.
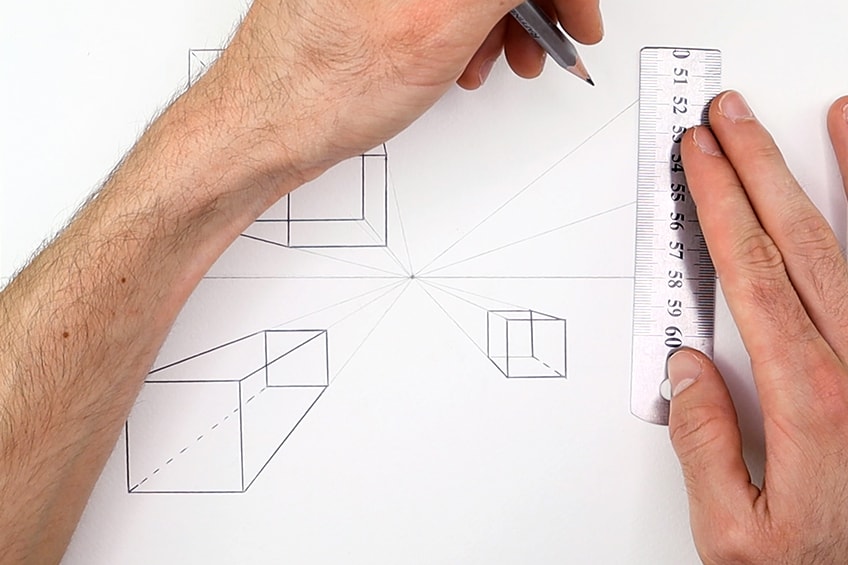
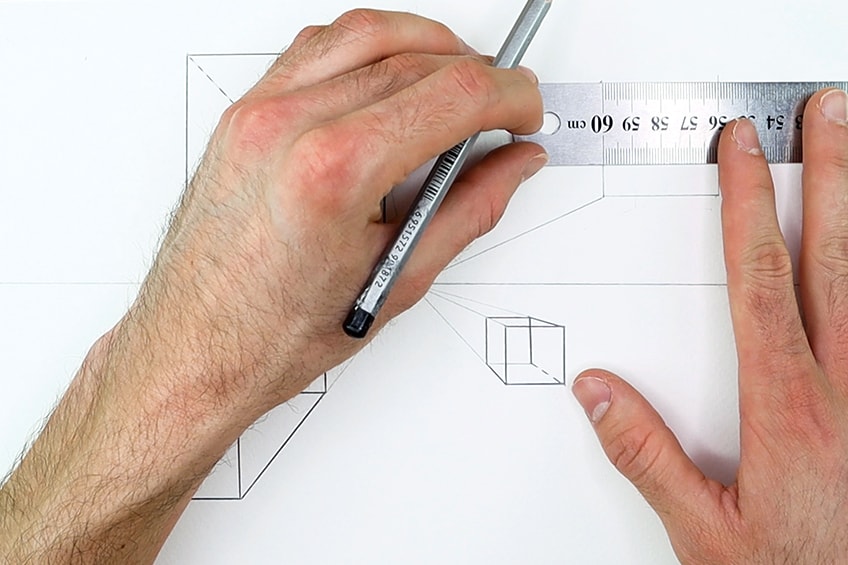
This process is modular, by this I mean that we can construct cubes from the diagonal lines or by creating squares first.
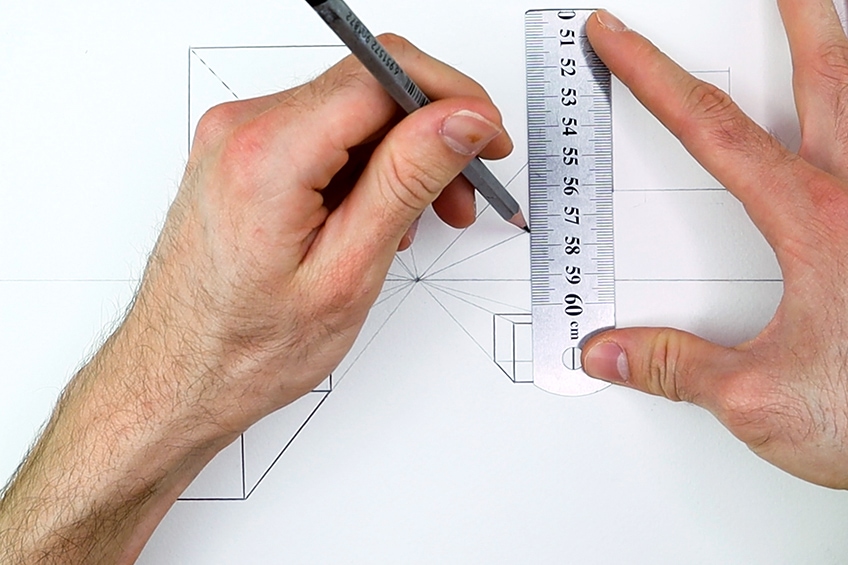
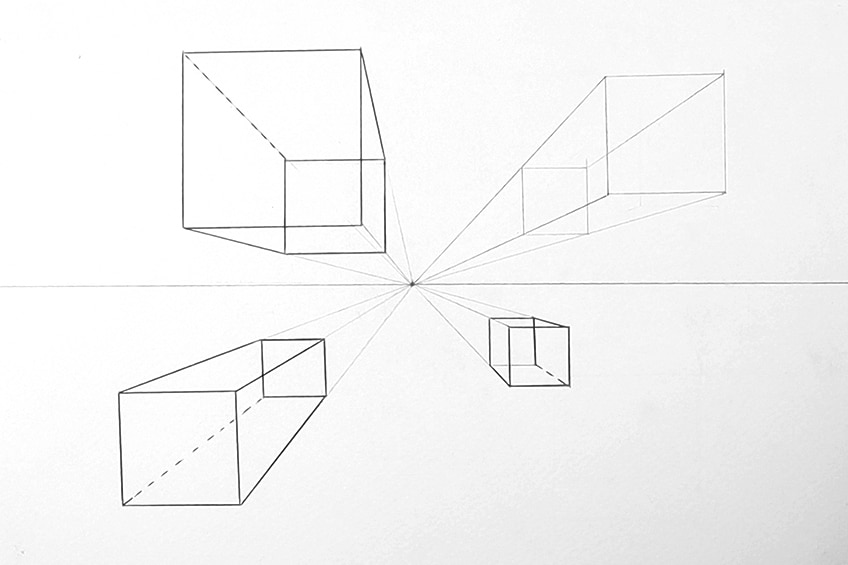
That is a breakdown of how to construct a one-point perspective drawing.
Two-Point Perspective
The two-point perspective is quite similar to that of the one-point perspective, however, if you haven’t guessed yet, this time we are dealing with two vanishing points. Perspective drawing is about understanding various perspectives, in this case, we can imagine looking at the corner of a building, allowing us to see two of its sides. This means we will be able to see it moving in two different directions as if there were two roads we could see on either side of the building. Let us continue to draw cubes and see how we describe this quality from a two-point perspective.
Step 1: Drawing the Horizon Line and Two Vanishing Points
Let us begin by creating a horizon line. Remember, the horizon line is functioning at our eye level, anything above the horizon line is going to be perceived as above eye level and anything below will be perceived as below eye level.
We can then add two points at either end of our horizon line.
Step 2: Drawing the First Cube
We then proceed to make two points below our horizon line vertically parallel to one another. let us do this toward the left side of the page. These two points are going to be the edge of the cube that we look at from a front view. We then can connect two diagonal lines from our left vanishing point to each of these two points that we have drawn below the horizon line.
By doing so, we are creating the left side of the cube.
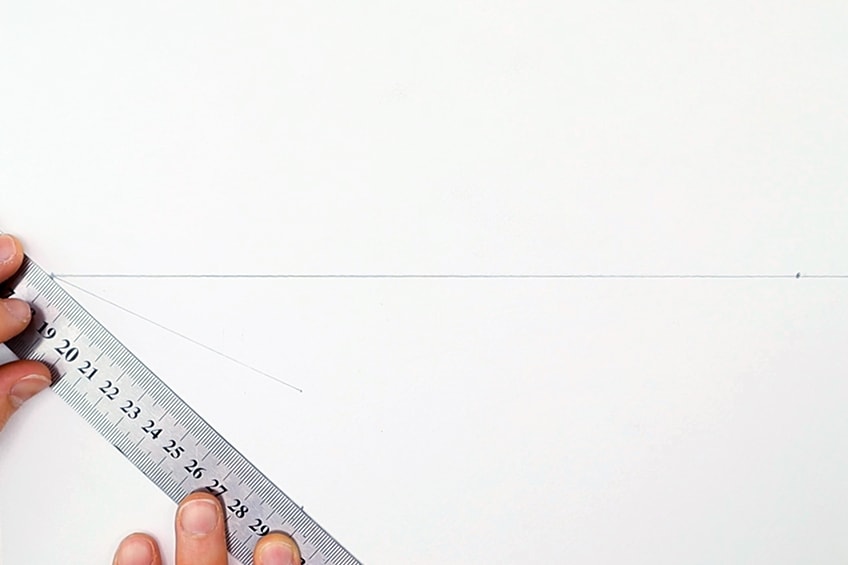
We should be left with a lopsided square within the diagonal lines.
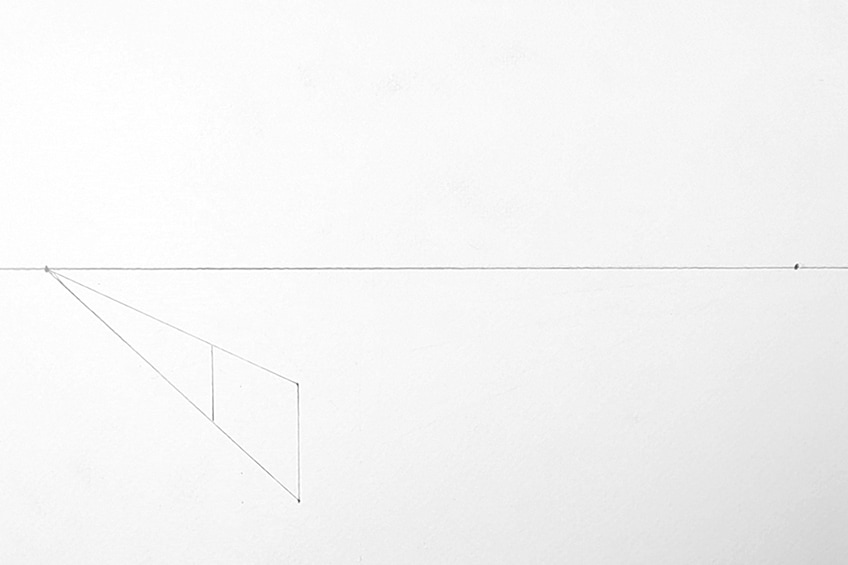
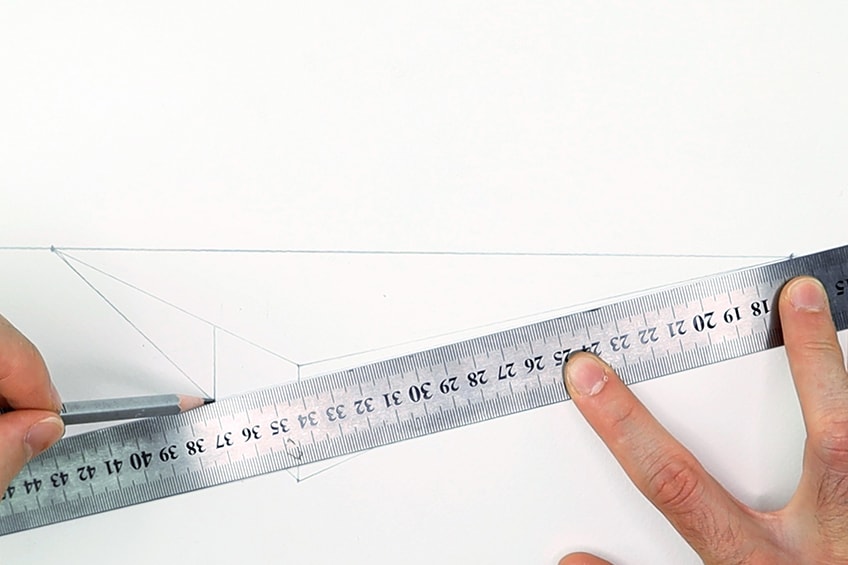
These convergences will create intersection points that will help us to build the cube from a two-point perspective.
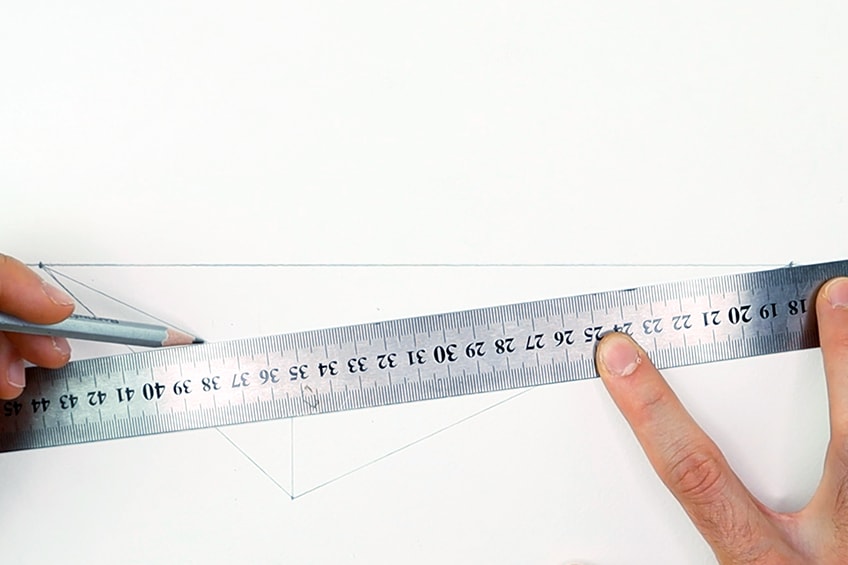
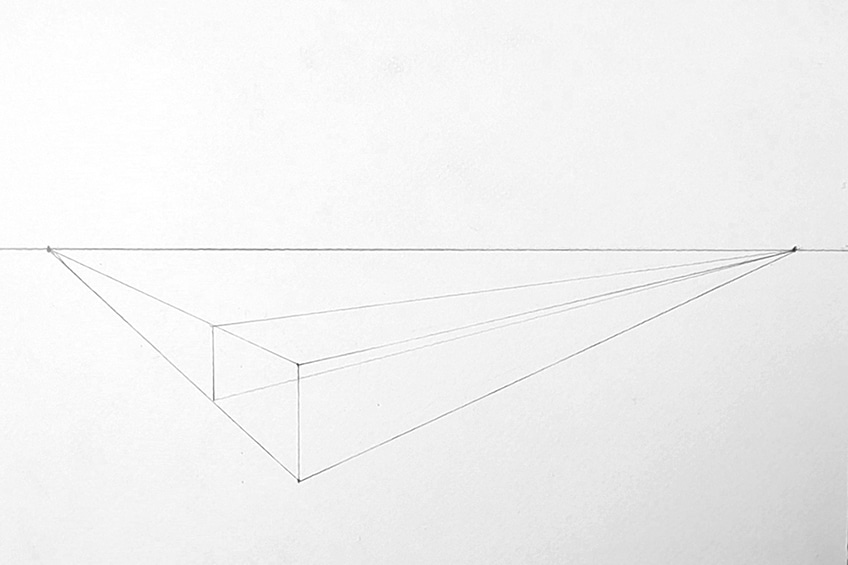
We then want to connect a line from this point to the left vanishing point.

Step 3: Drawing the Second Cube
Again, we will draw two diagonal lines from the left vanishing point, instead, this time we will draw them above the horizon line. We want to draw them out toward the right side of the page above the horizon line.
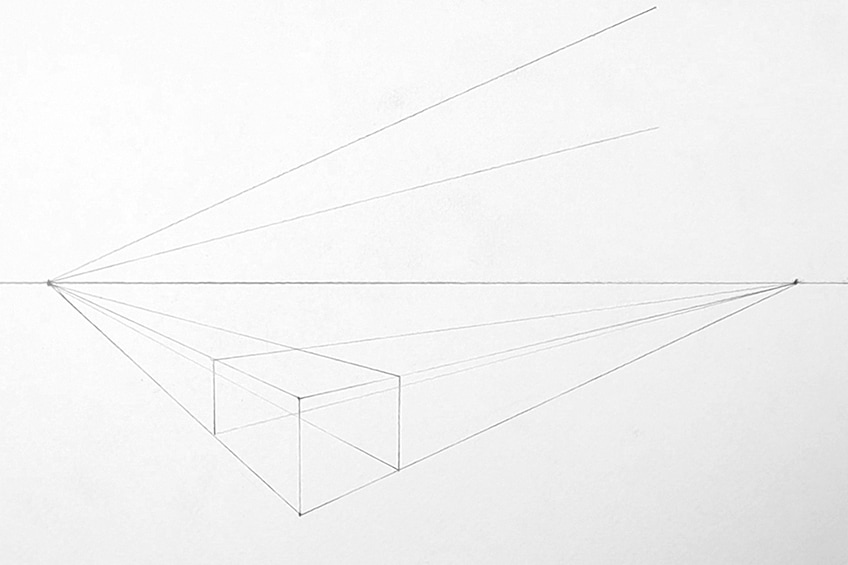
By following the same process as before, we can begin to construct our cube.

We can then connect the edges of the cube with diagonal lines that lead to both vanishing points.
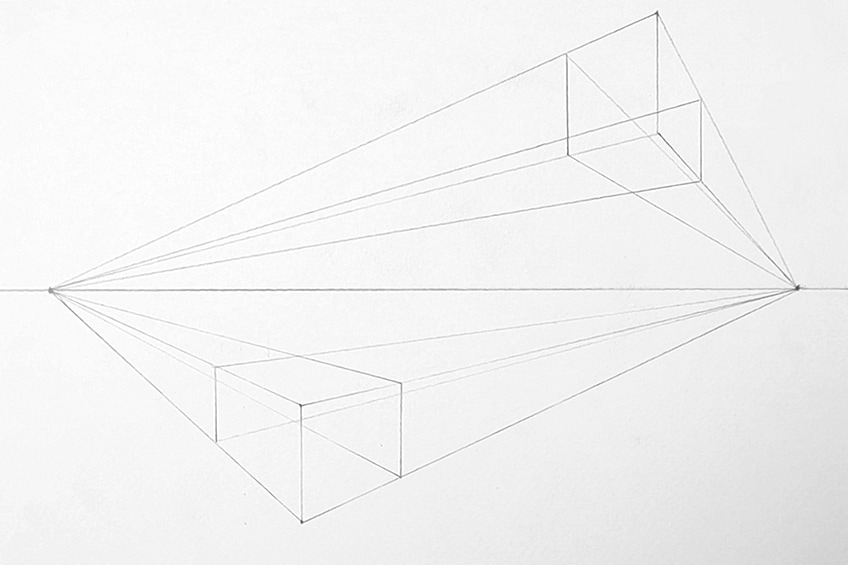
By using the vertical lines, we can also see if the cube is proportional in form.
Once we have both our cubes, which we can see above and below our horizon line we can then proceed to highlight the cube with a pen. Again, drawing perspective is a unique way of understanding the form of objects not only from one, two, or three perspectives but also from understanding how we see them according to our eye level.
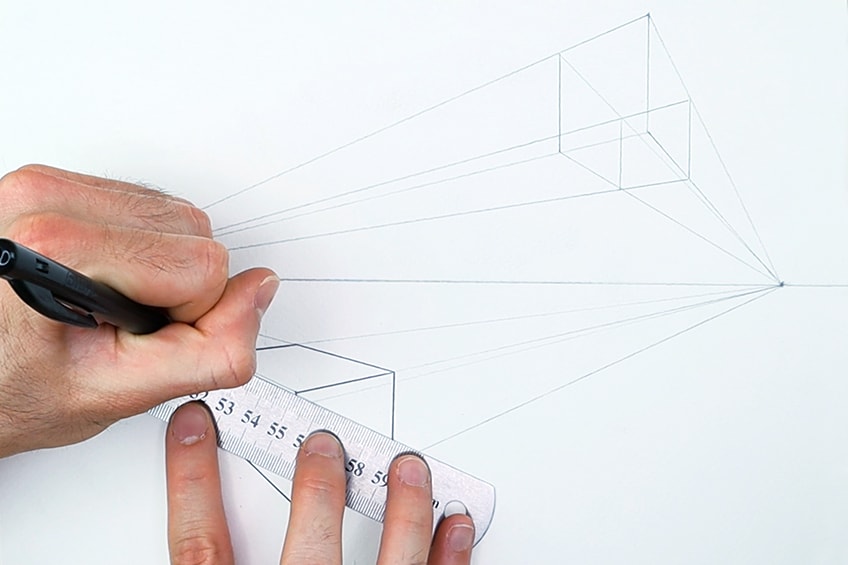
Once we have done that, we highlight our cube with our pen to emphasize their form within the space.
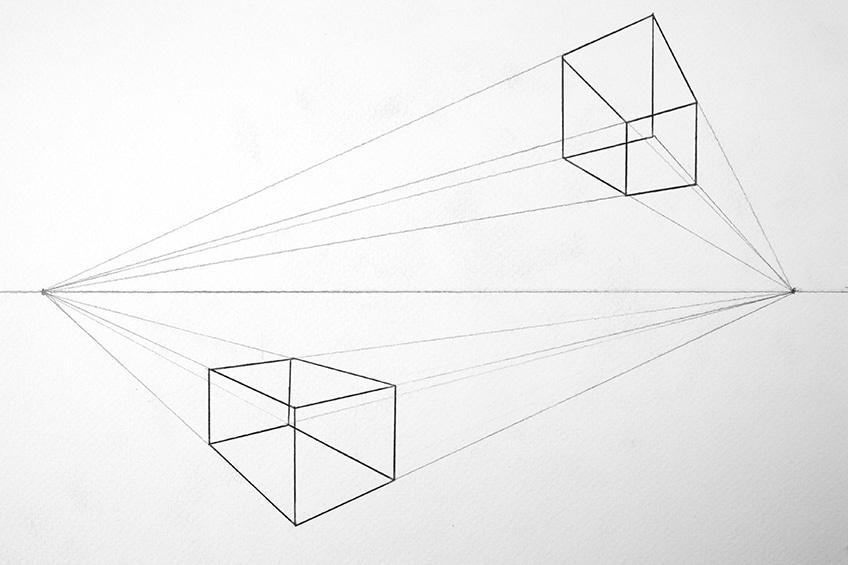
This allows us to use these points of intersection to describe where we’ll draw the vertical lines of our cubes.
Three-Point Perspective
We start with two vanishing points on the horizon line, just as before, but now we are going to place a third vanishing point below the horizon line centrally between the first two vanishing points. This will make an upside-down triangular shape which will govern how the cubes are formed through a set of lines. This will give the cube a more elongated quality as if we are looking down from a high position. With that said, let us go through the various steps from a three-point perspective.
Step 1: Drawing the Horizon Line and Two Vanishing Points
Once again, we begin by drawing a horizon line. The horizon line is the eye-level at which we see the landscape upon which we construct the objects. This helps us understand how the object is viewed, either above or below us.
In this case, we will be constructing objects that are seen below us.
Step 2: Drawing the First Cube
Once we have established two vanishing points on either side of our horizon line, we then will proceed to make a third point. This point is placed significantly below the horizon line, centrally between the other two vanishing points.
This should create an upside-down triangular formation. We then can draw a vertical line directly up the page starting from the third vanishing point.
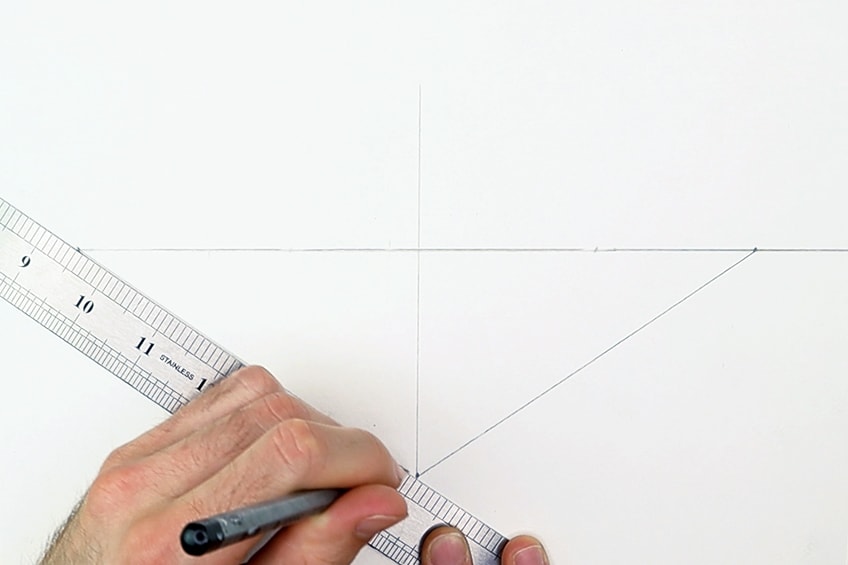
This time allows the lines to connect slightly higher on the vertical line.
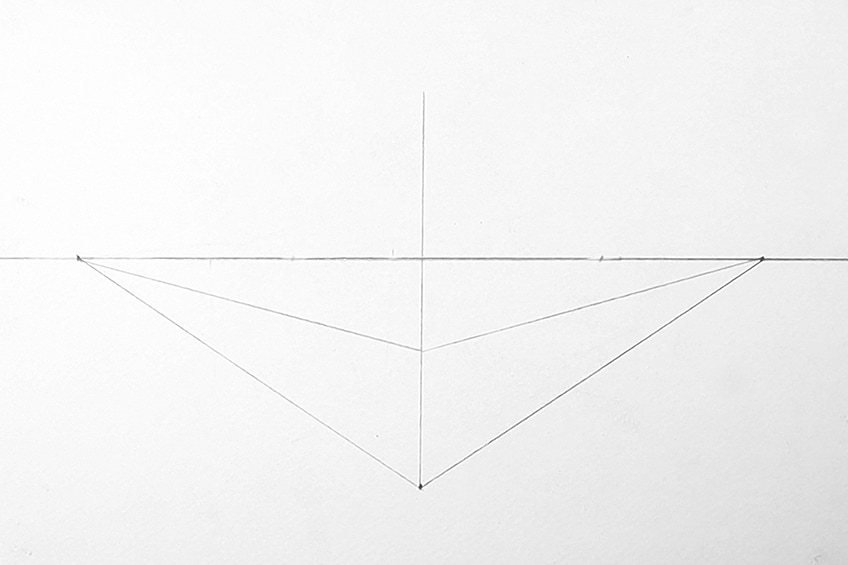
However, make sure that if the line had to continue it would connect through to the right vanishing point on the horizon line.
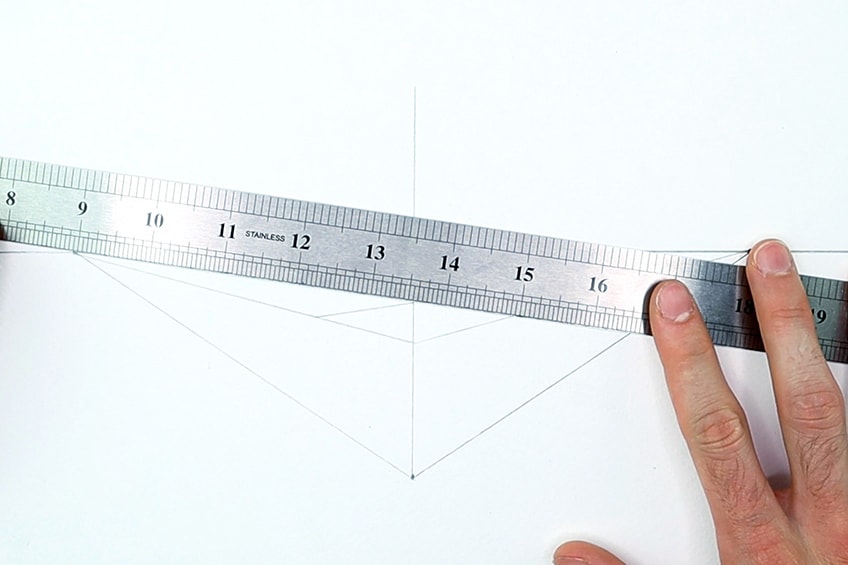
This will create a diamond-like shape that will function as the top of our cube.
We then proceed to connect the top part of the cube to the bottom part of the cube by drawing vertical lines between the top and bottom diagonal lines of the left vanishing point. We connect this vertical line from the left edge of the diamond shape to the bottom diagonal line.
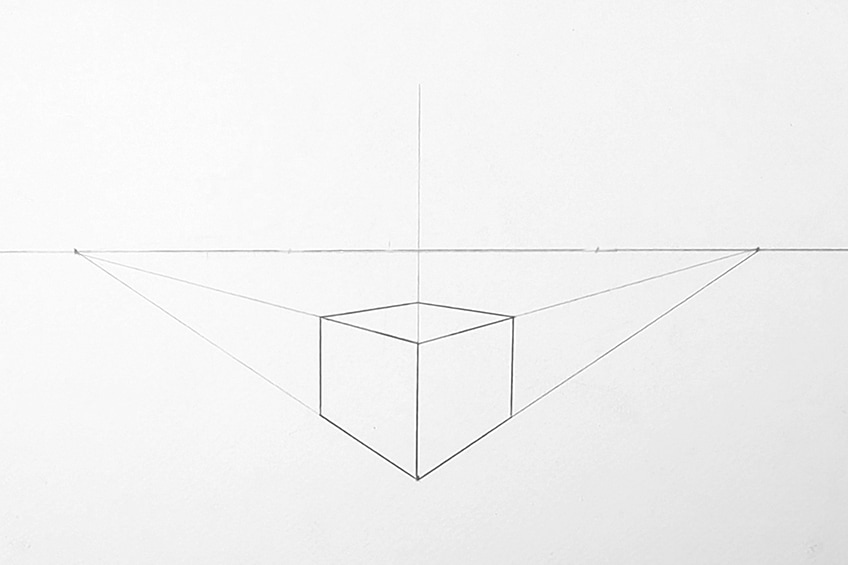
We can then highlight the cube shape with our pens.
Step 3: Drawing the Third Cube
We begin by establishing the same set of three points. Two on either side of the horizon line and a third one placed significantly below the horizon line between the two vanishing points on the horizon line. This should have a triangular-like shape between all three points.
We can draw a vertical line through the page starting at the third point below the horizon line.
This time we will draw two diagonal lines from each vanishing point on the horizon line toward the bottom section of the vertical line. However, we are not connecting these diagonal lines to the third point at the bottom of the vertical line. We want these two diagonal lines to be slightly above the third point on the vertical line.
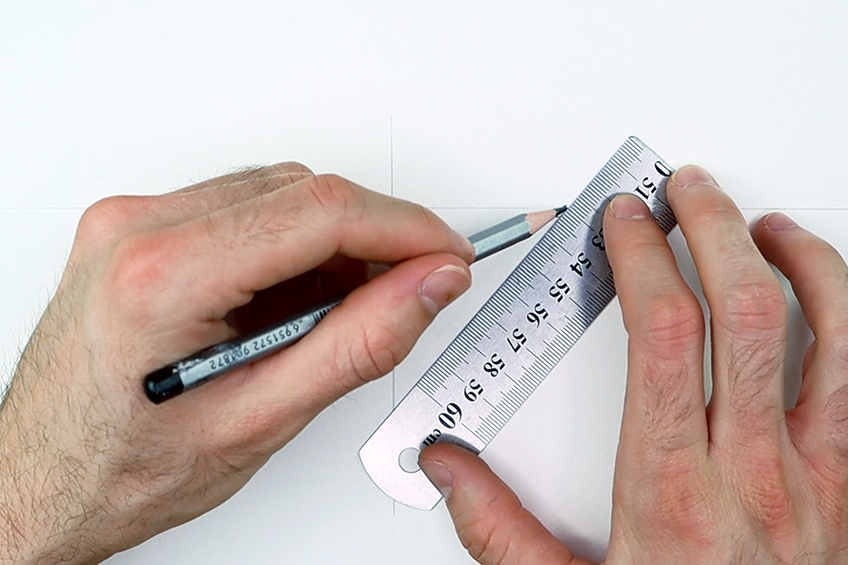
We want them to be quite close to the bottom of the horizon line.
We will now connect our ruler from the right vanishing point to the top-left diagonal line. We will then proceed to make a line along the ruler between the top-left diagonal line stopping at the vertical line. The line should seem as if it is going to connect to the right vanishing point.
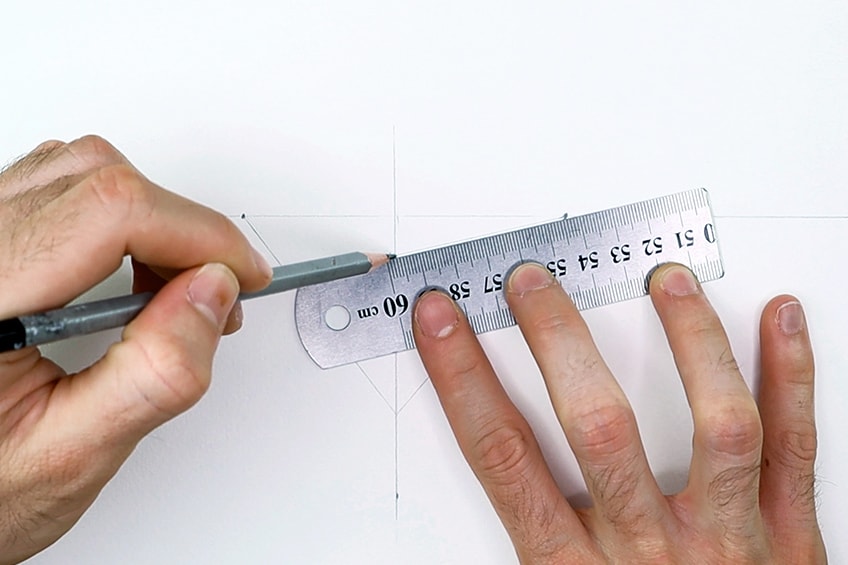
We want this line to connect to the top diagonal line on the left side of the vertical line to create a diamond shape.
At the side points of the diamond shape, we want to connect our ruler between those points and our third vanishing point at the bottom of the page. However, as we draw a line down the page we will stop at the bottom diagonal lines. However, it should connect to the third point if you were to continue to draw the line beyond the bottom diagonal line.
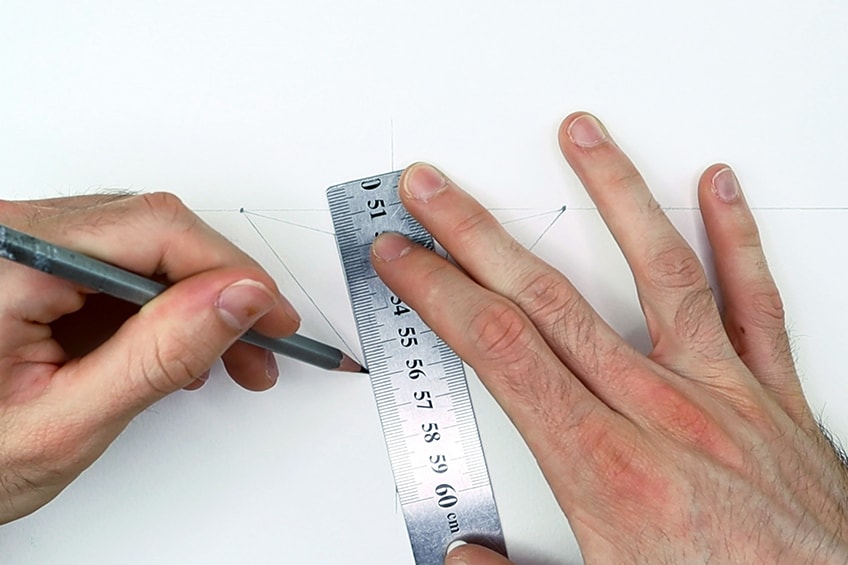
Those two lines should connect to the third vanishing point so that if they were to extend beyond the bottom two diagonal lines, they would meet each other at the third vanishing point.
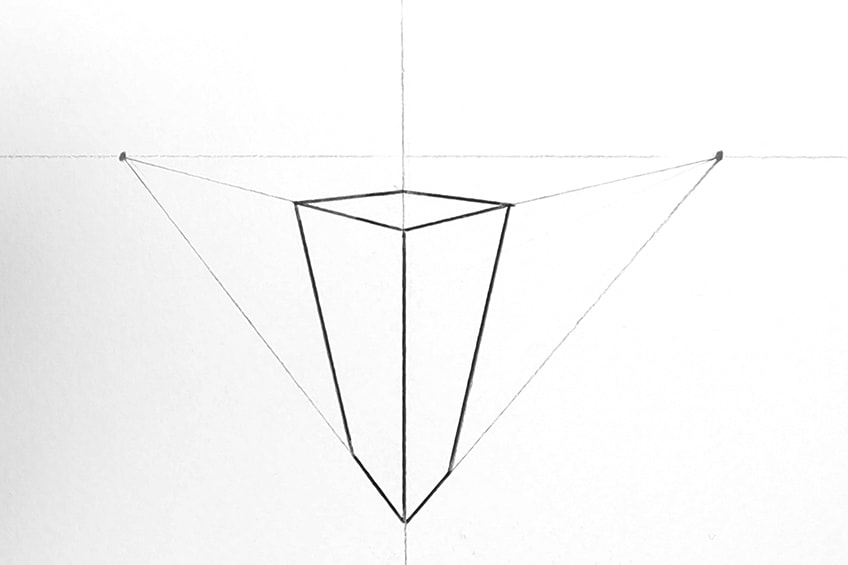
We can then highlight the cube shape with our pens to emphasize its shape.
Finding the Vanishing Point and Horizon Line
This last section within this tutorial is more of a hack that can be used for finished drawings or images that have already established objects without anything vanishing points or a horizon line. Sometimes we need to figure out where exactly the horizon line is and where the vanishing points are so that we can reconfigure a drawing if necessary. Let’s go through the steps on how to do that.
Step 1: Finding the Diagonal Lines
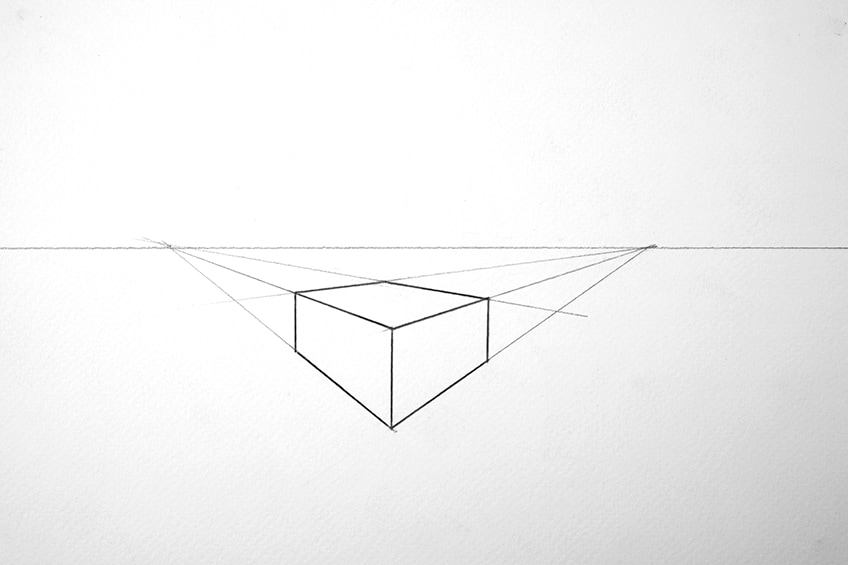
Let us say that we have a cube on the page and we want to find its vanishing points and horizon line. What we do is we want to see how the cube is formed first and foremost, by paying attention to the perspective we have of it.
Seeing that in this image the cube is a two-point perspective, we can see two sides of the cube moving in different directions.
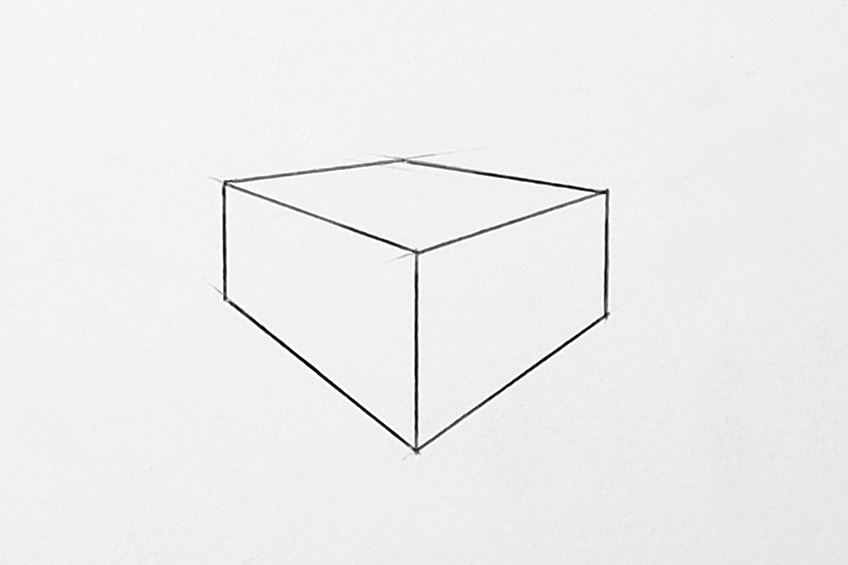
Place our ruler along the bottom right line of the cube and draw a line into the space on the right side of the page until it intersects with the previous line that we drew.

We can do that with the bottom-left edge of the cube until the two lines intersect on the left-hand side of the page.
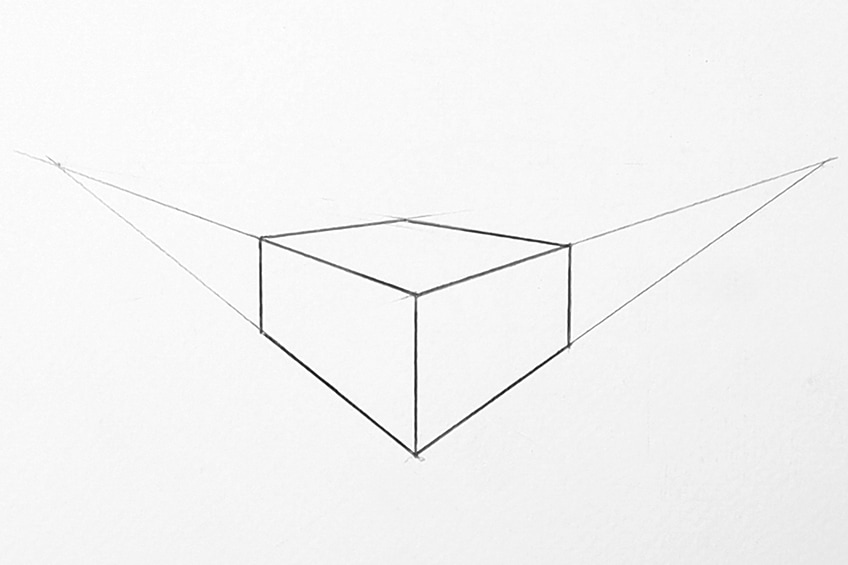
In this case, we have a two-point perspective object.
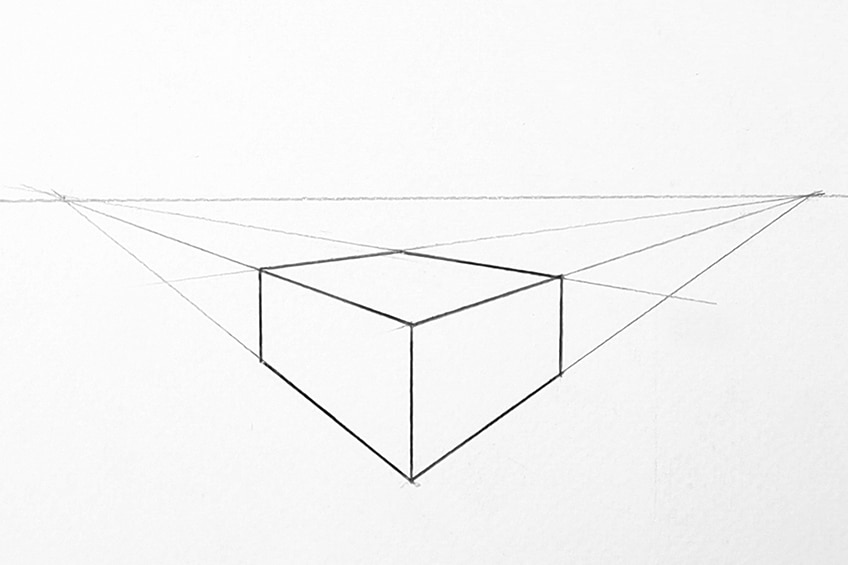
This perspective drawing is about locating the perspective lines by using the cubes form to guide you.
Tips to Remember
- Be patient with this process; if you need to take a break, take one.
- Make sure your pencils are sharp, as this allows for more precise line work.
- Keep your eraser nearby; mistakes are inevitable with this drawing exercise.
- Perspective is modular. This means we can form three-dimensional objects by starting either with a basic shape or the perspective lines from vanishing points.
- Notice where lines intersect. This is normally a clue for where other lines should be drawn from.
There you have it, a tutorial on how to draw perspective in one-, two-, and three-point perspectives. Drawing perspective is a great skill, and once understood can be instinctually helpful to the process of drawing in general. Learning how to draw perspective can enhance other ways of forming objects in a drawing. Even though we focused on simple forms like cubes, the principles apply to all objects and how they begin to move into the distance towards a vanishing point. This tutorial on how to draw perspective gives you a good foundation that you can apply to future drawings and artworks.
Frequently Asked Questions
What Is the Main Purpose for Perspective Drawing?
Perspective drawing has been used a lot in architectural design and can be a really useful skill for defining a space in a drawing. This can often be used for planning home spaces or even conceptualizing a building idea for various architectural reasons. Perspective drawing can also be a great way to enhance your landscape artwork. Understanding how to draw perspective can give you a good understanding of how to create various landscapes that are proportional in scale. One-point perspective, two-point perspective, and three-point perspective can also be utilized as a way of constructing abstract artwork, playing around with objects and shapes and how they exist in space. Although the main purpose of perspective drawing is generally utilized for design-related reasons, one could use the skills of perspective for a variety of artistic reasons.
What Are the Elements of Perspective Drawing?
The main key elements to grasp are the horizon line and the vanishing points. The vanishing points are the main aspects that distinguish between one-point perspective, two-point perspective, and three-point perspective. These points will always be established on the horizon line, so we want to draw the horizon line first and foremost. If we are doing one-point perspective we are working with a single vanishing point. If we are working with two-point perspective we are working with two vanishing points and the same goes for three-point perspective. As we construct objects these points will describe the form of the objects by pulling them toward their vanishing points. This is because we use the vanishing points to draw diagonal lines on our page which we then construct objects from. As we learn how to draw perspective we will see that the horizon line and the number of vanishing points will inevitably change the way we view the objects that are drawn.
How Can You Use Perspective Drawing in Art?
There are so many ways to use perspective for artworks. However, the most common and useful way of using perspective in the artwork is generally utilized in landscape art. This doesn’t necessarily mean that we are creating an outdoor scenario, we can also use perspective as a tool to create indoor scenarios. Perspective drawing can be a really helpful tool for constructing artwork that is proportional and can help to create realistic qualities in a landscape. Another fun way of using perspective drawing is by creating overlapping realities between two-point perspectives, three-point perspectives, and one-point perspectives. This can be a really fun way of creating interesting objects that overlap and interfere with one another. This is a completely fun and free way of using a mathematical tool to construct obscure realities that could be defined within the abstract genre of art. Ultimately, learning perspective drawing will enhance your drawing skills as a whole, giving you a better sense and greater confidence in your drawing.
Matthew Matthysen is an educated multidisciplinary artist and illustrator. He successfully completed his art degree at the University of Witwatersrand in South Africa, majoring in art history and contemporary drawing. The focus of his thesis was to explore the philosophical implications of the macro and micro-universe on the human experience. Matthew uses diverse media, such as written and hands-on components, to explore various approaches that are on the border between philosophy and science.
Matthew organized various exhibitions before and during his years as a student and is still passionate about doing so today. He currently works as a freelance artist and writer in various fields. He also has a permanent position at a renowned online gallery (ArtGazette) where he produces various works on commission. As a freelance artist, he creates several series and successfully sells them to galleries and collectors. He loves to use his work and skills in various fields of interest.
Matthew has been creating drawing and painting tutorials since the relaunch in 2020. Through his involvement with artincontext.org, he has been able to deepen his knowledge of various painting mediums. For example, watercolor techniques, calligraphy and lately digital drawing, which is becoming more and more popular.
Learn more about Matthew Matthysen and the Art in Context Team.
Cite this Article
Matthew, Matthysen, “Perspective Drawing – Methods for Creating Illusions of Depth.” Art in Context. July 13, 2022. URL: https://artincontext.org/perspective-drawing/
Matthysen, M. (2022, 13 July). Perspective Drawing – Methods for Creating Illusions of Depth. Art in Context. https://artincontext.org/perspective-drawing/
Matthysen, Matthew. “Perspective Drawing – Methods for Creating Illusions of Depth.” Art in Context, July 13, 2022. https://artincontext.org/perspective-drawing/.


