Easy Doodles to Draw – A Fun Doodle Draw-Along Guide
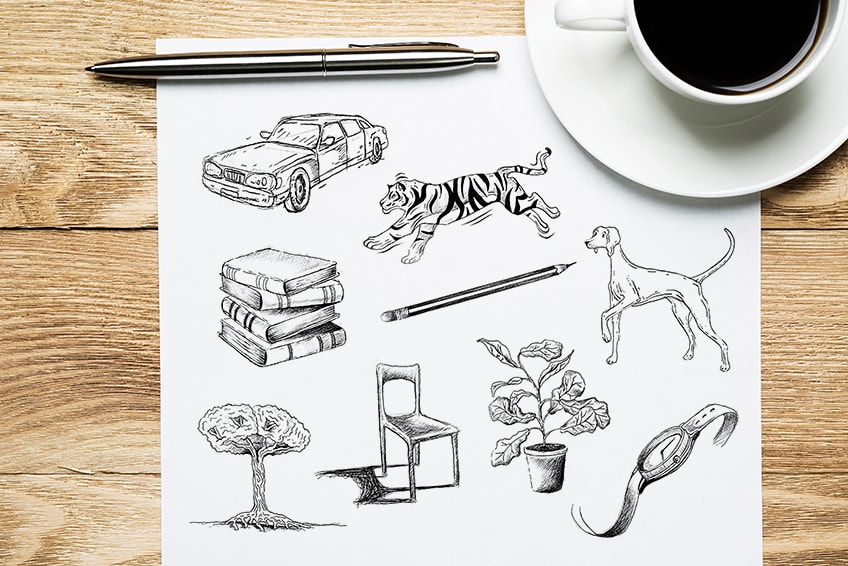
Drawing doodles is probably the most fun way to kill time and occupy boredom. Easy doodles to draw can be a great way to enhance your creativity and problem-solving. Sometimes we don’t have visual references in front of us, but doodle art requires us to reach into our memories and find the visual material that we have stored in our minds. Doodle drawings can be completely anything, which is what makes doodle drawings so fun. We allow ourselves to construct visual representations of things we know in all kinds of weird and distorted ways. There are many things to doodle, however, learning some familiar things to doodle and creating simple doodles out of them is what this tutorial is all about.
Step-by-Step Instructions on a Few Easy Doodles to Draw
Learning how to doodle is such fun because our minds are full of endless possibilities. In this tutorial, we will be going through a series of easy doodles to draw that can be broken up into a few easy steps. This tutorial has some cool doodle ideas that can be incorporated into your doodle art.
Since there are so many things to doodle, this tutorial will be looking at a diverse range of subjects that make for really cute doodles and interesting doodle ideas for cool doodle art.
From plant life to vehicles to inanimate objects like books, we will go through a variety of cool doodle ideas that enhance your drawing skills and help you gain confidence for your doodle drawings. That being said, let us take a look at the few easy doodles to draw, going through each of them step by step.
How to Doodle a Tree
A tree is a great doodle idea that can be incorporated into various doodle artworks. Trees are really simple and are found everywhere in our immediate environments, which makes them a great source of inspiration. Let us go through the various steps on how to doodle a tree.
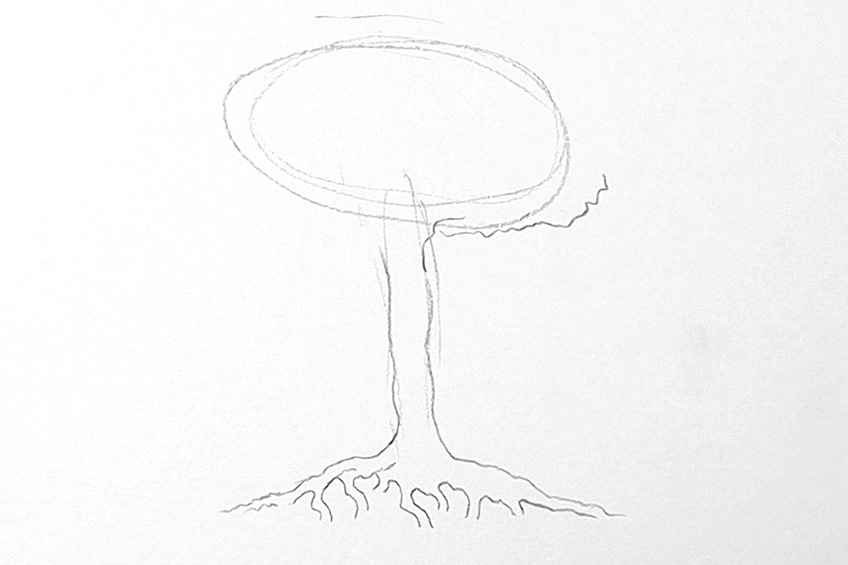
Step 1: Drawing Basic Shapes
We start by identifying how large we want our tree to be. We do this by demarcating a general area with a circle shape in which the tree’s foliage and branches will be drawn. We can do the same for the trunk, by drawing a basic rectangular shape perpendicular to the circular shape.
We can add little branches at the bottom of the trunk.
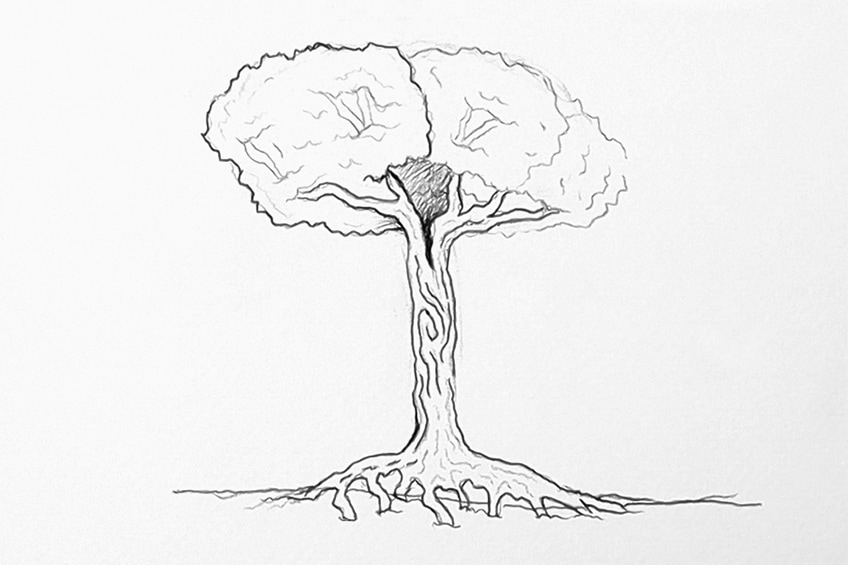
Step 2: Adding Features with Pencil
We can then start to add wavy lines around our circular shape, which we can either keep as one or break into segments. We can also add branches to our foliage, which we can draw as two sections that sprout from the main trunk. We add little branches within the tree’s foliage as well which can be seen as little finger-like shapes.
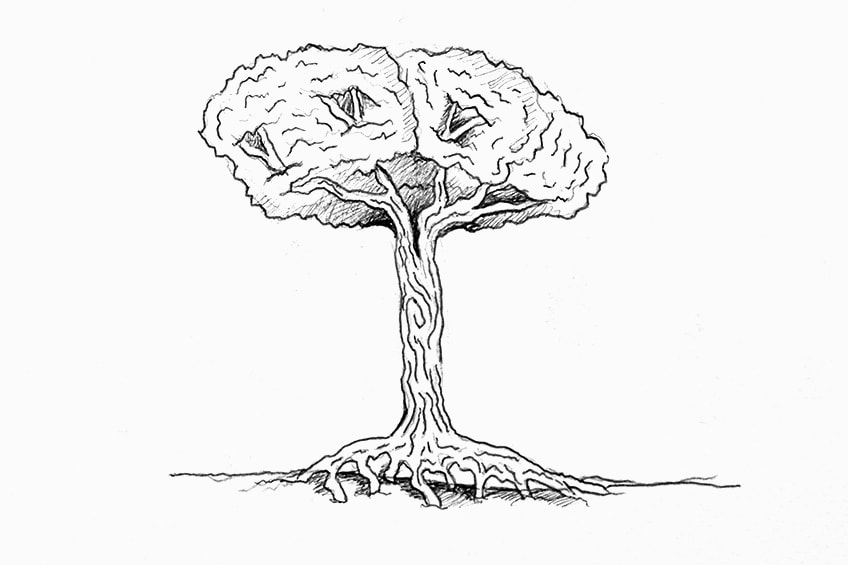
Step 3: Adding Details in Pen
Once we have our little tree sketched out in pencil, we can start going over the work in pen. The process is the same as the pencil step of the tutorial except for this time we are simply going over our pencil marks with a pen.
We can use the pencil lines to guide us.
We can also add little moments of pen shading near the base of the foliage if we want to, giving our tree a little more depth. However, this is completely up to you. You can add whatever kinds of details you feel might be interesting as you go. There you have it! a quick doodle of a tree.
How to Doodle a Tiger
Animals make for great doodle ideas, and there is a variety to choose from. A tiger is a unique and interesting animal that is quite simple to draw. Once we understand how to draw the body shape it is simply a matter of adding stripes.
Let us go through the steps!
Step 1: Figuring Out the Shape
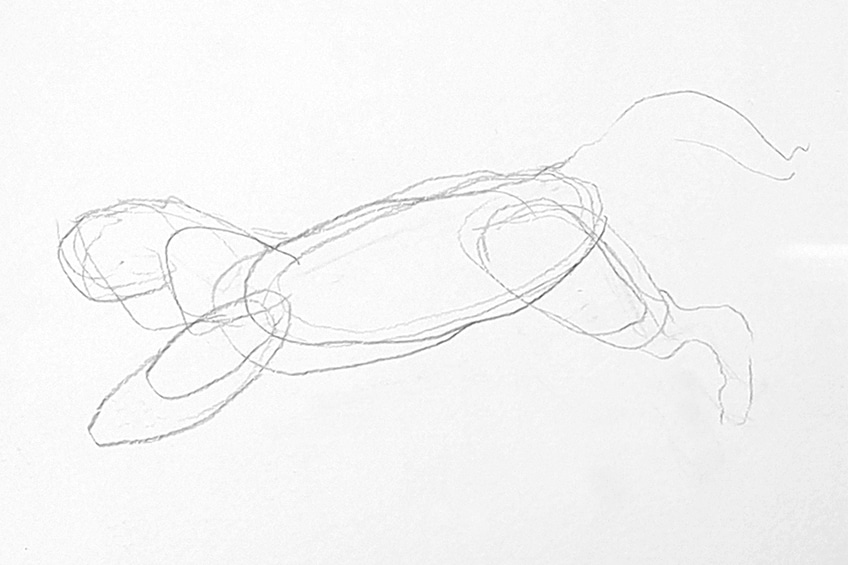
The best way to draw an animal is to break down its simple shapes. We can keep this very loose, again, a doodle is a loose and relaxed way of drawing subject matter. We do not need to get hung up on details. Let us begin by drawing the general shape of the body, head, and legs.
Step 2: Adding Features in Pencil
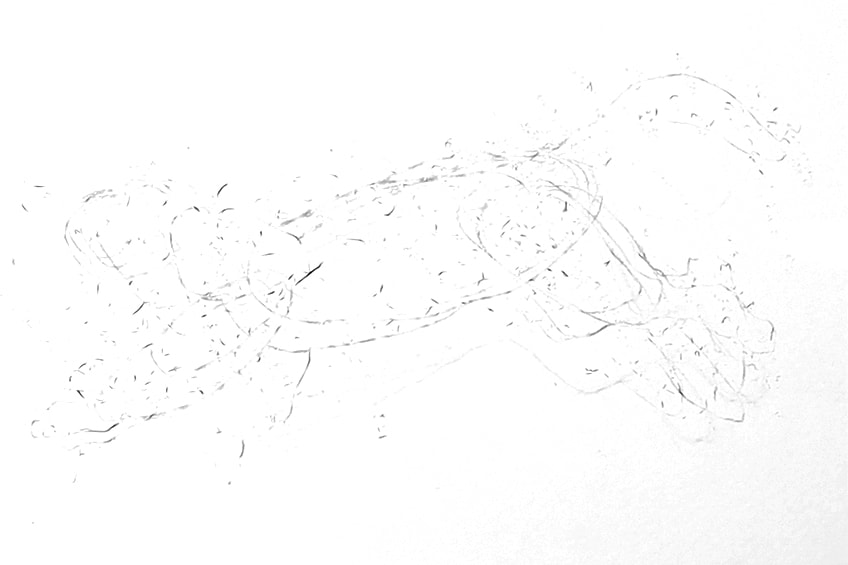
Once we have drawn the general shapes of the body, head, and legs we want to then give it a light erasing with our eraser. This is so we can draw over the lines, giving us a good indication of where the animal’s body parts will be drawn.
Before you erase, make sure the shapes are well proportioned.
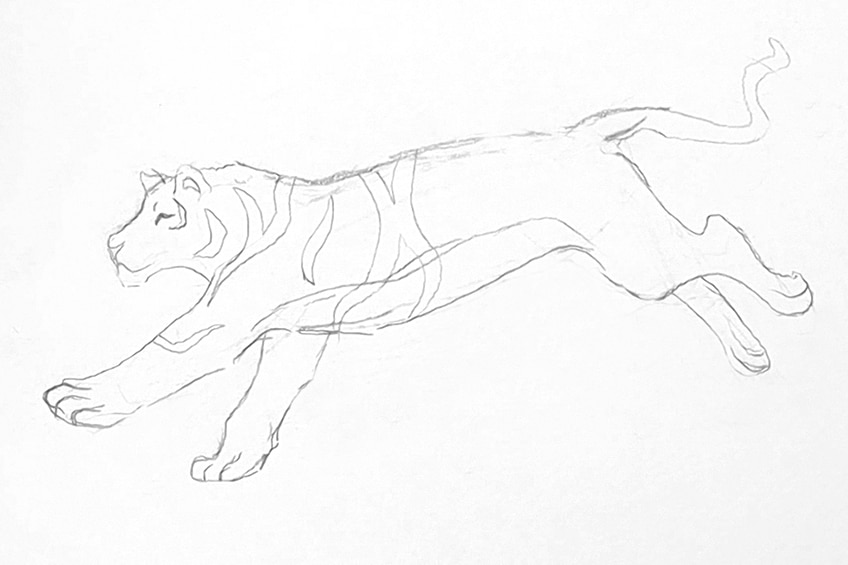
We can now start to sketch out the tiger’s body, using the slightly erased shapes to guide us as we outline the tiger’s body. Again, there is no right way to draw the body, however, the shapes should be used to help you figure out the body and its proportions.
We can start to add little details into the tiger drawing by adding a curved horizontal line to give it a body. We can also give the tiger a series of stripes, these can go in all kinds of directions and can be all kinds of widths.
Step 3: Shading in Pen
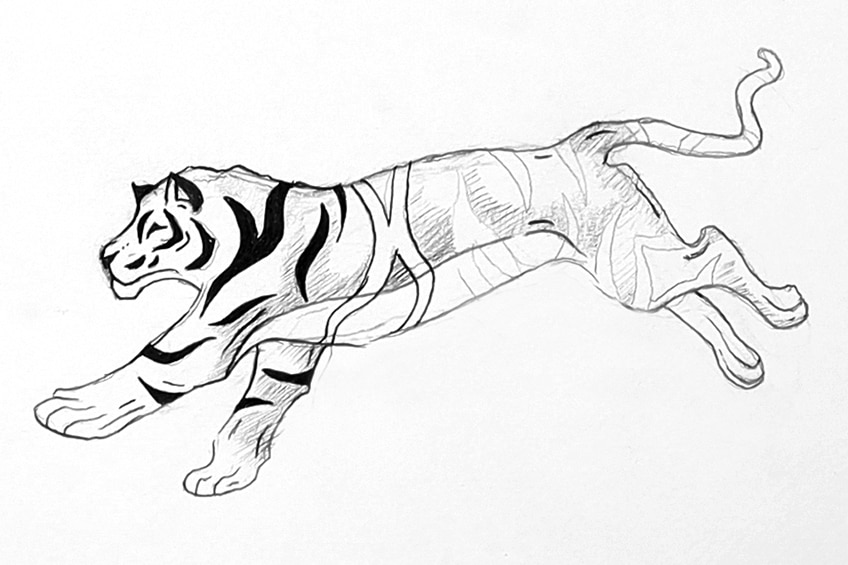
Once we are satisfied with the pencil drawing of our tutorial, we can now use those pencil marks to guide us as we shade over them in pen. We Want to allow ourselves the freedom to play around with our pen marks.
We can go over our pencil marks but we can also add little features as we feel necessary.
Again, this is a guide to give you basic ideas of how to doodle a tiger. Feel free to add little marks and other interesting details as you feel that might add to the drawing. Around the face, you can use little lines and dots for the eyes and mouth.
Lastly, we can color in our stripes, and there you have it, a doodle of a tiger.
How to Doodle a Car
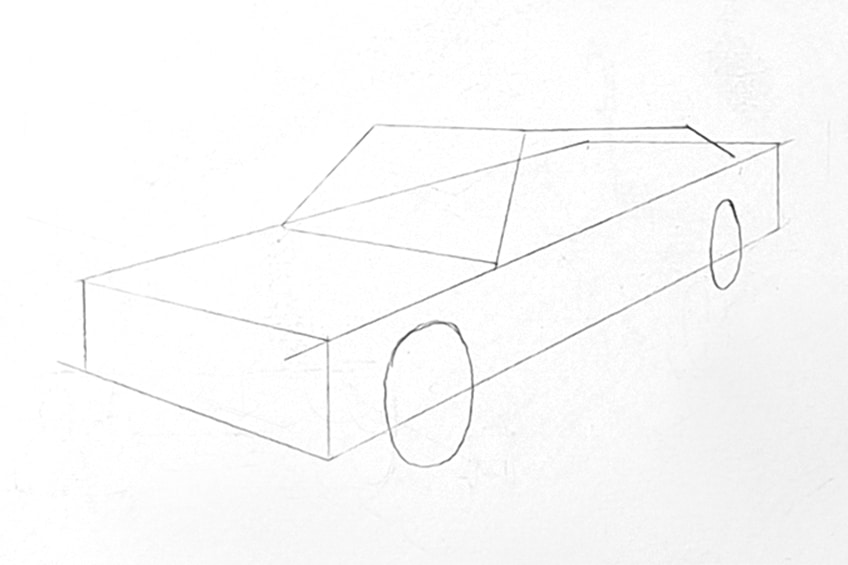
Let us draw something a little more mechanical, like a car. A car is a really fun thing to doodle, however, it can be difficult to figure out how to start a doodle of a car. Let us go through some unique and simple steps to help you figure out how to doodle a car.
Step 1: Drawing a Cube
We are going to draw a rectangular cube first, which is going to form the foundation of how the car is formed. We do this by making a small rectangle and a larger rectangle which we connect at all corners.
Erase any lines that form inside the rectangle, so that we are left with what looks like a solid rectangle.
Step 2: Adding Shapes to the Cube
Once we have that, we can now draw a little trapezium shape on the top of our rectangle. Try to place it a little toward the back of the rectangle. Once we have this structure, we will have a good foundation to be playful with the car’s features. We can also add two little vertical ovals where the wheels would fit onto the vehicle.
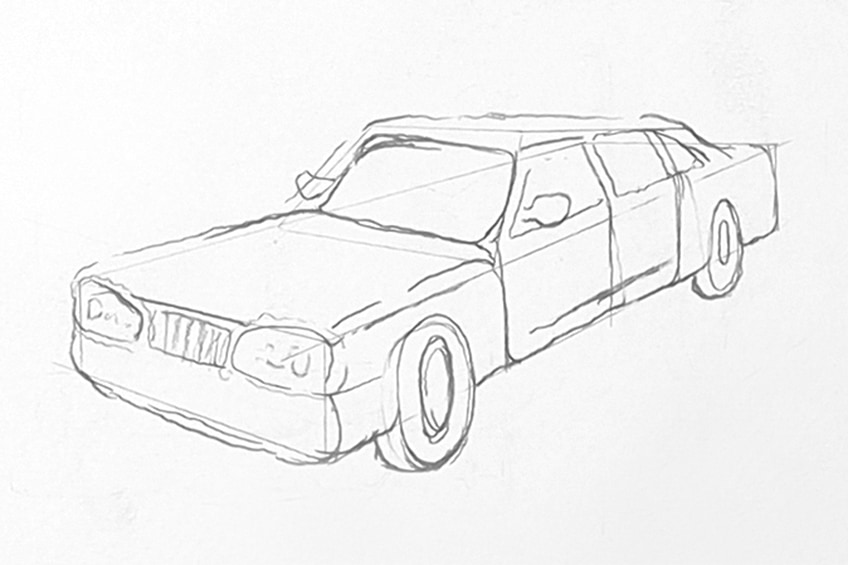
Step 3: Drawing Features
Once we have the general shape of the vehicle, we can start playing around with more detailed features to bring the car to life. Again, there is no right way to doodle, however, these steps provide you with a good basis of how to achieve certain qualities within a doodle.
Try to work out these details with your pencils, such as lights, wheels, and windows. Use the shapes to guide you.
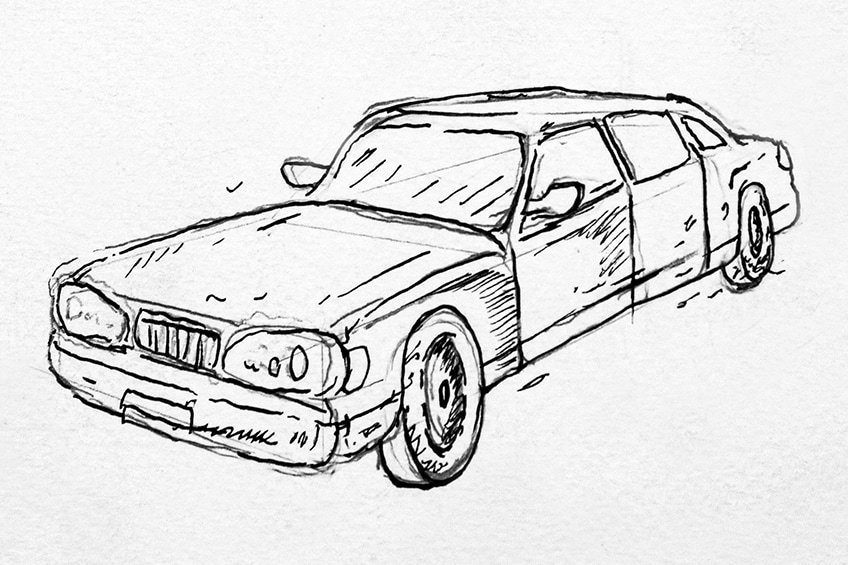
Step 4: Drawing With Pen
We now can go over all our pencil marks with our pens. We can use the pencil lines to guide our pen marks, but we can also be playful with adding new pen marks and moments of shading. Allow yourself the freedom to figure out a few interesting details you would like to add.
And these are the basic steps to doodling a car!
How to Doodle a Watch
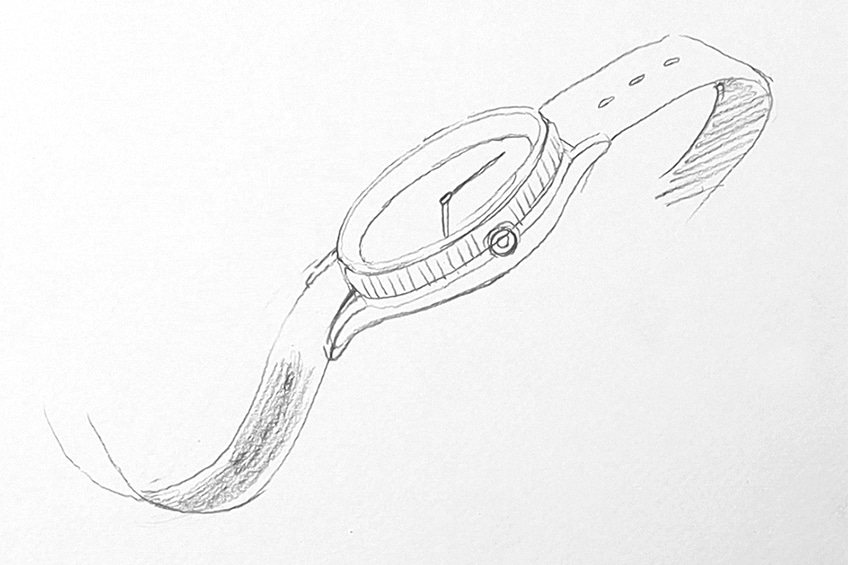
Let us look at another interesting mechanical object that can be found very close to us. It is often strapped onto our wrists and can come in various shapes and forms. However, there is a simple way to doodle a watch, so let us go through a few easy steps.
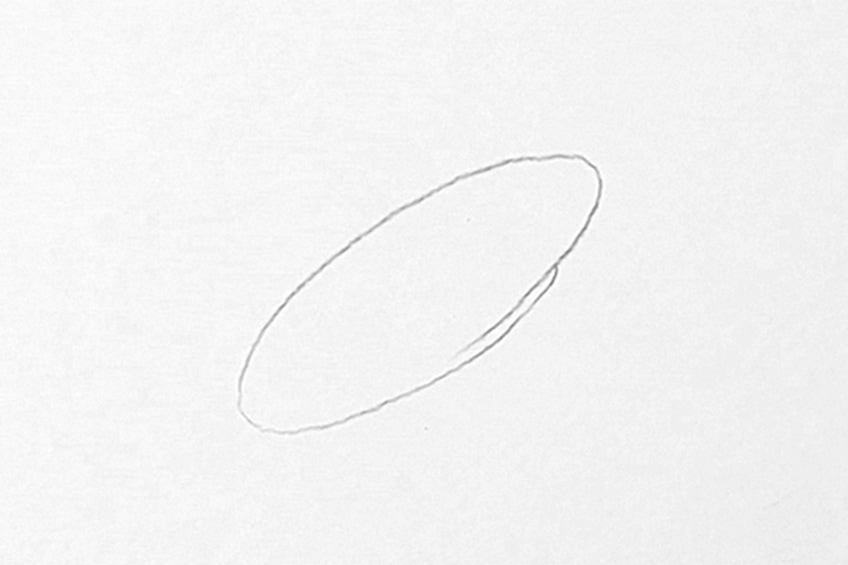
Step 1: Drawing the General Shapes
Let us begin by drawing a slanted oval shape with our pencils. This is going to form the perspective of the watch. We will also begin to develop qualities of the watch around this shape.
Step 2: Drawing Details Around the Shape
We now want to proceed with adding details around the watch, to give it more three-dimensionality. We can do this by adding a parallel line around the bottom of the oval shape. We can also add a curved parallel line inside the oval shape moving along its top section.
We can add more parallel lines as we feel, but adding a little button helps to contextualize the watch.
We can add little vertical lines moving along the outer section of the watch. On each side of the watch, we can also draw a strap, to which we can add little holes. We can add the little hour and minute hand, using the shape of the watch to help guide you in adding details. Don’t worry about perfect details, doodling is not about perfection.
Step 3: Drawing With Pen
Once we are satisfied with our pencil drawing, we can then proceed to add pen marks. We want to use the pencil marks to guide our pen marks, however, we can also begin to add shading in various areas of the watch that we might feel will give it more unique qualities.
This part is completely up to you and how you would like to add details. And there you have it, how to doodle a watch!
How to Doodle a Chair
Probably the most common item we encounter, at least one of them is a chair. However, chairs make for great doodles and can be a staple feature in doodle art. Let us go through the few simple steps on how to doodle a chair.
Step 1: Drawing the Shapes
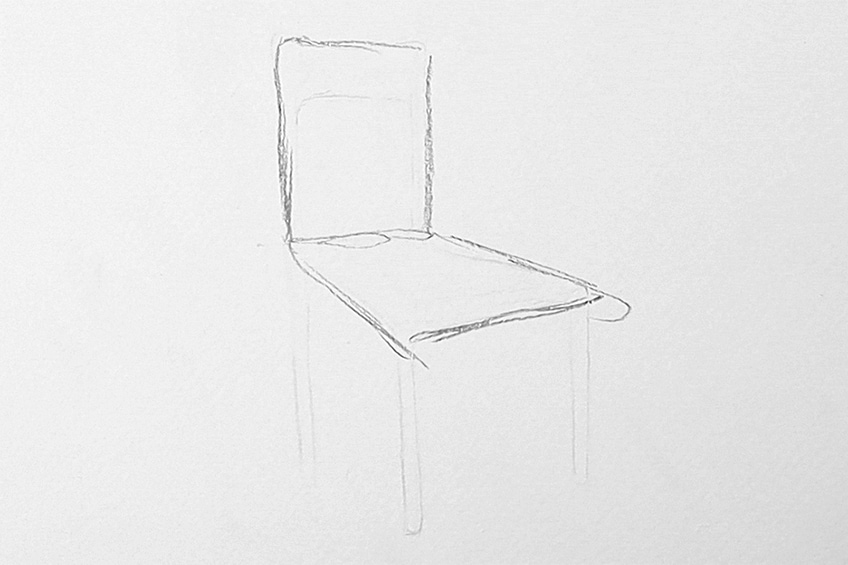
A chair’s shape is really simple, it begins by adding two squares together. This is similar to how you would draw a cube; except we only use the sides and the bottom of the cube. We want to draw these two shapes connected with our pencils. We sketch this out loosely, it’s completely up to you.
Step 2: Adding Features with Pencil
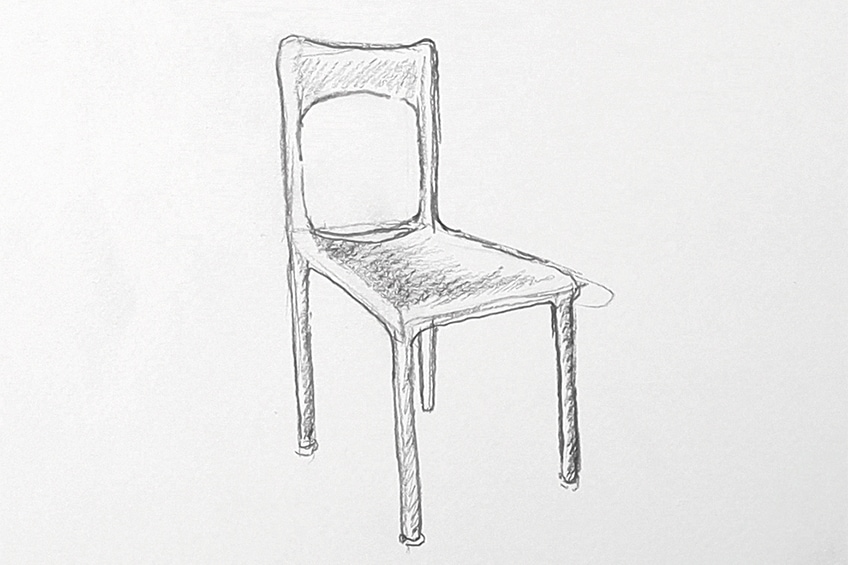
We then want to start forming the chair from these two shapes by features over those two shapes, that form the seat and back of the chair. Play around with how you form the chair from these two shapes. It could be an open back chair or it could be solid.
Once we have the shape of the chair, we can start adding some shadows to our chair, giving it a little more texture and definition. Doodle drawings are really about expressive marks, so allow yourself to be playful as you add in details and shading.
Step 3: Drawing With Pen
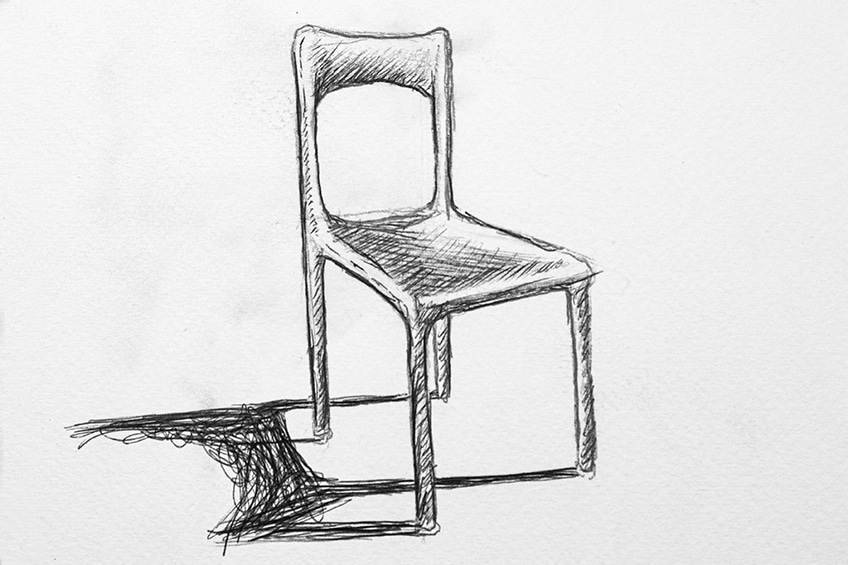
Once we are satisfied with our pencil marks, we can now go over them in pen. We can be playful with how we add the pen to our drawing, whether it is scribbling or slowly adding refined shading. This is something you can play around with and see what works for your drawing.
You can also add a shadow if you would like. Adding a shadow can also be a great way to bring out a doodle drawing. Shadows make for great doodle ideas, which can easily enhance the quality of the image.
There you have it, a simple guide on how to do a doodle of a chair.
How to Doodle a Pot Plant
There are so many pot plants to choose from when it comes to doodle drawings. Pot plants can be cute doodles and can be drawn in so many different ways. This is a subject that makes for great doodle art, so let us go through the different steps on how to doodle a pot plant.
Step 1: Sketching Out the Pot Plant
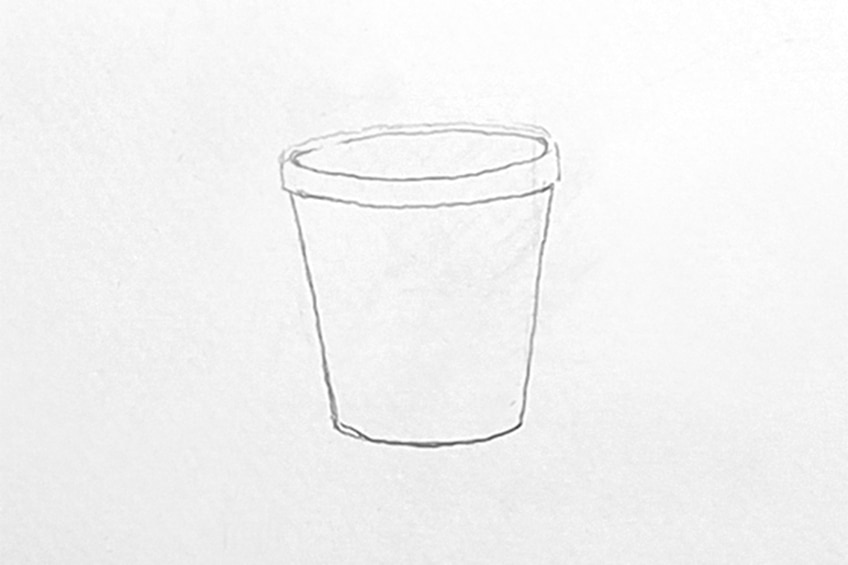
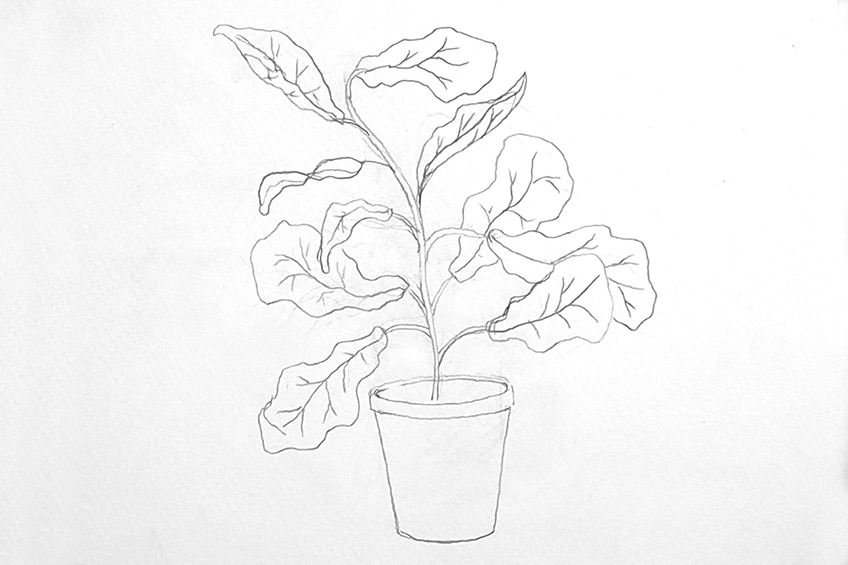
Let us begin by doing a light sketch of the pot plant, beginning with the pot. The pot can be drawn as a cylindrical shape that is wider near the top. From the top, we can sketch out a center branch, with different smaller branches that deviate in different directions.
Step 2: Adding Features with Pencil
Once we have the general shape of the pot plant and we are satisfied, we can move on to adding features in the pot plant. In the leaves, we can add smaller deviating lines to indicate veins. In the pot plant, we can potentially add scribble marks to indicate soil.
How you add these features is up to you, so try having fun by experimenting with different marks.
Step 3: Drawing With Pen
Lastly, we can then go over our pencil marks with our pens. Adding a pen can bring out the features in your doodle drawings. Perhaps explore shading in various areas as well to highlight certain aspects of the leaves. Again, doodles are a fun way to be creative with how we interpret ideas through little drawings.
Perhaps play around with shading the pot plant with your pens. Adding shading marks around the pot and in between different parts of the flower can give it a very interesting quality. Feel free to explore different marks and lines to give your pot plant an interesting look.
That’s it, a few simple steps to a fun doodle artwork!
How to Doodle a Pencil
What is better to doodle other than the tool that enables doodling itself? Let us doodle a pencil, a little wonderful object that is the reason for many beautiful and creative ideas. This item also makes for a beautiful drawing and works well as a feature in doodle art.
Let us go through the few easy steps on how to doodle a pencil.
Step 1: Drawing Two Parallel Lines
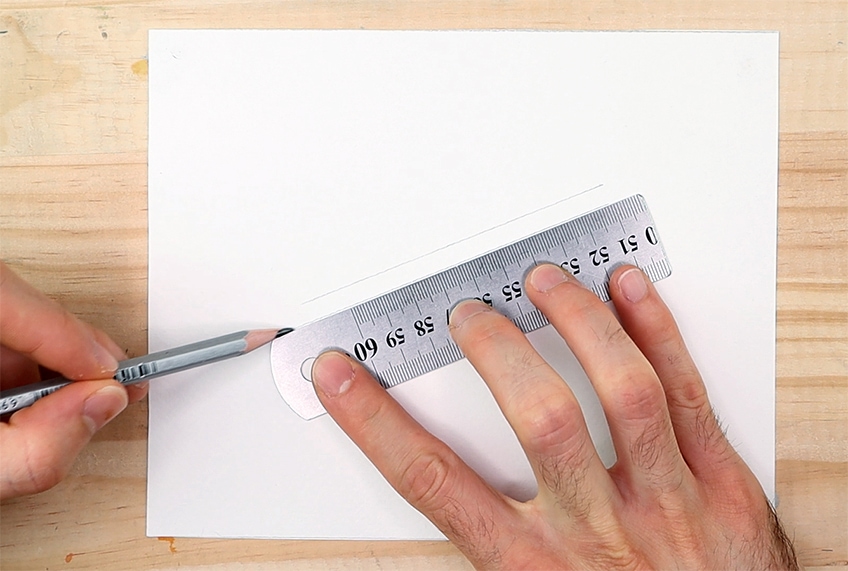
We simply start by making two parallel lines that could be the general width of a pencil. You could make it thicker or thinner, as doodling can be a fun way to play with distorting normal objects. Thus, giving them a unique visual quality that is your own.
Step 2: Adding Features With Pencil
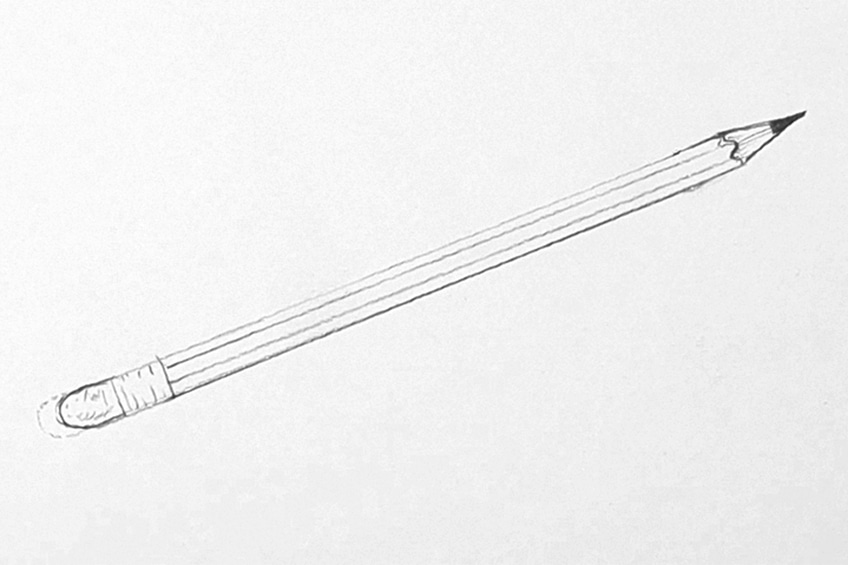
We can now proceed to add little features with our pencils, by perhaps adding a little eraser at the end of the pencil. With doodle art, it is a completely creative interpretation, however, adding two parallel lines in between the first two parallel lines can give the pencil an identifiable look.
We can also add the pointed arrow tip to the other end of our pencil. We can color the end to indicate the graphite tip of the pencil. Lastly, a great feature is to color in the outer sides of the pencil, Leaving the center strip open.
This gives the pencil the iconic pencil look. However, it is up to you to play around with how you add these features.
Step 3: Drawing with Pen
Lastly, we can now add pen marks to our drawing to enhance the details. Adding a pen can just help to bring out the details, as it maximizes the contrast of the drawing. Doodle art is a great way to explore your mark-making skills, so allow yourself to try things as you use these steps simply as a guide.
That’s the easy way to know how you doodle a pencil!
How to Doodle a Dog
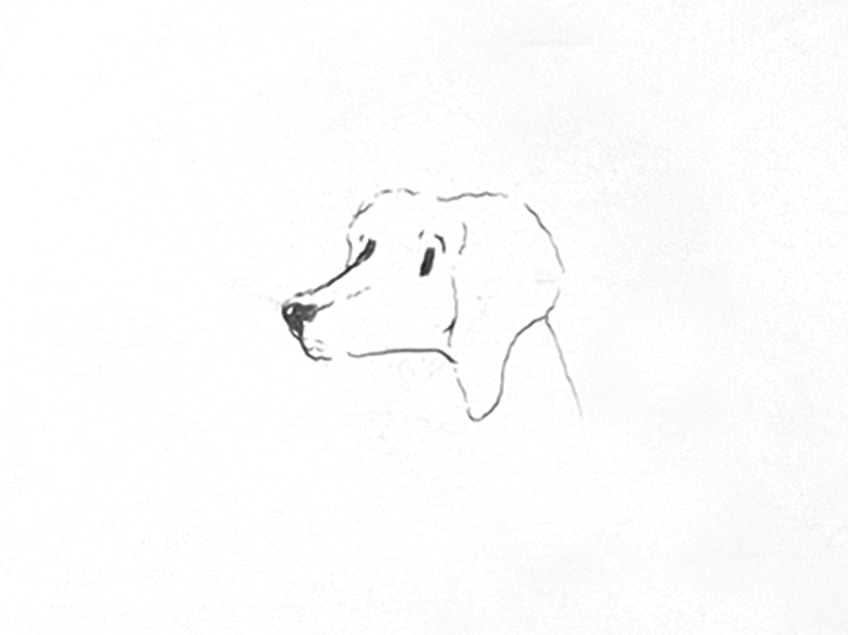
Dogs are a great source of inspiration for doodling as they contain so much character. Drawing a doodle of a dog is fun because you can represent their body in so many different ways. Let us go through a few simple steps on how to doodle a dog.
Step 1: Drawing the Head
Starting with a head can be a great starting point for drawing dogs. The best way to start is by drawing a snout that can be a rectangular shape. We can then add small or droopy ears, both have a triangular shape that is pointing downward or upward.
We can add little dots perhaps for eyes; however, these features can be added according to your interests.
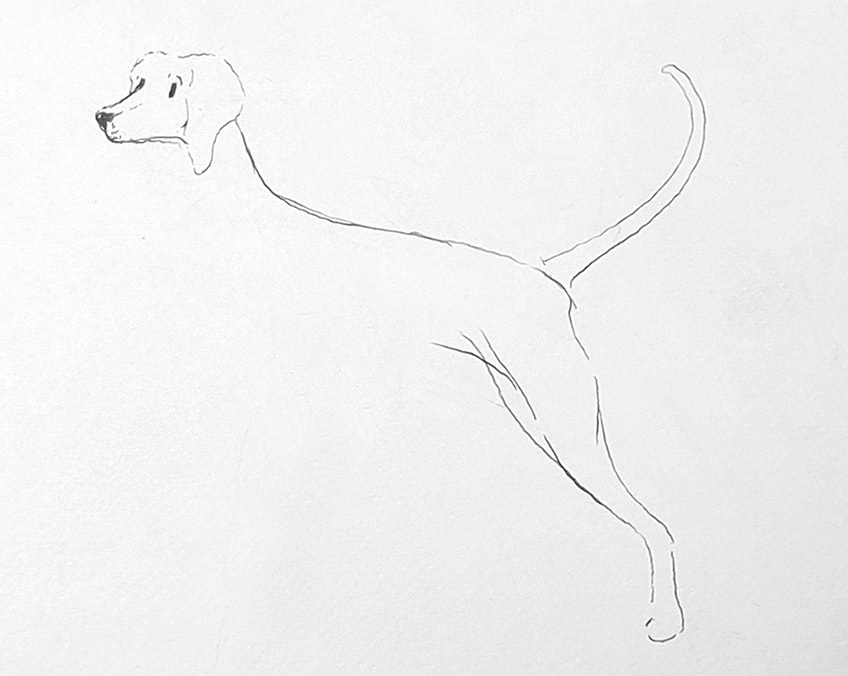
Step 2: Drawing the Body
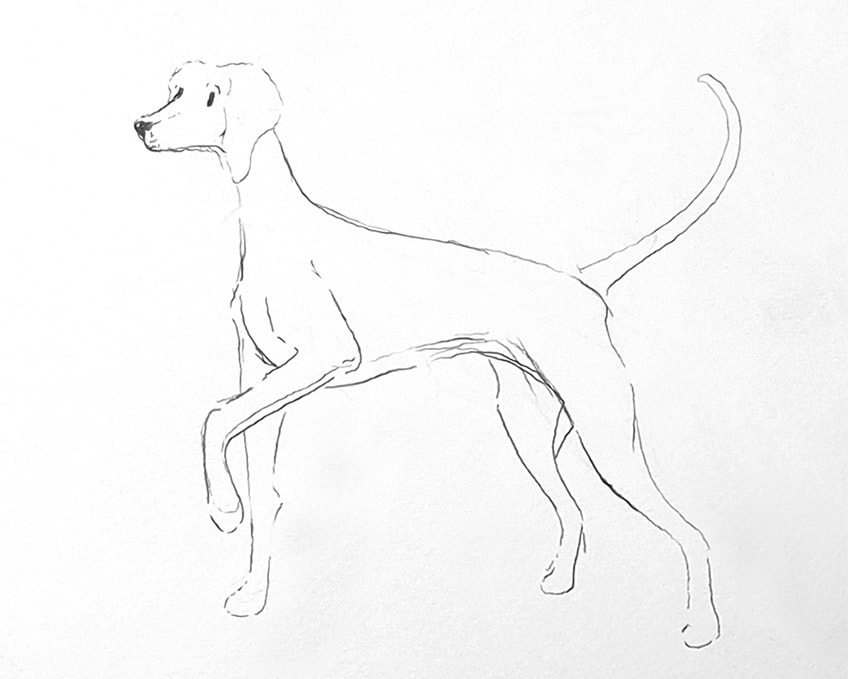
Let us proceed to draw the body of the dog with our pencils. You can refer to the tiger doodle for figuring out shapes, however, feel free to use those skills and apply them to your dog doodle. Play around with how you want the shape to be, this can be an elongated or short body. We can also add a tail moving in any direction.
If you hope to complete craft projects where you need paint that will work well for any number of surfaces, then craft paint is your go-to! The consistency is smooth, creamy, and easy to use.
Step 3: Drawing with Pen
Once again, we can now use our pens to go over our drawing, giving it a pop of contrast. A good suggestion, when it comes to doodles of characters, is to add little gestural lines. These are little lines in and around the characters that indicate motion.
They can be small squiggly lines, long, short and thick. How you figure out the form and movement of your doodle is your choice.
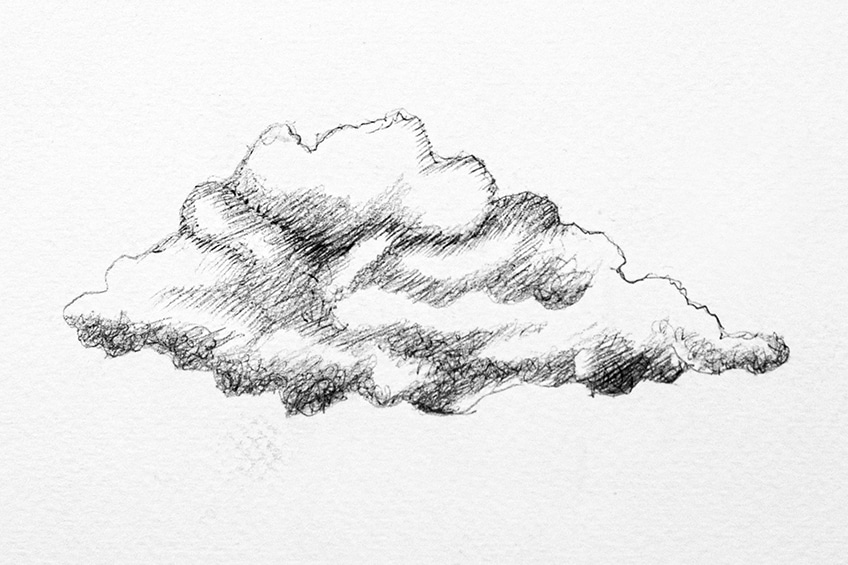
How to Doodle a Cloud
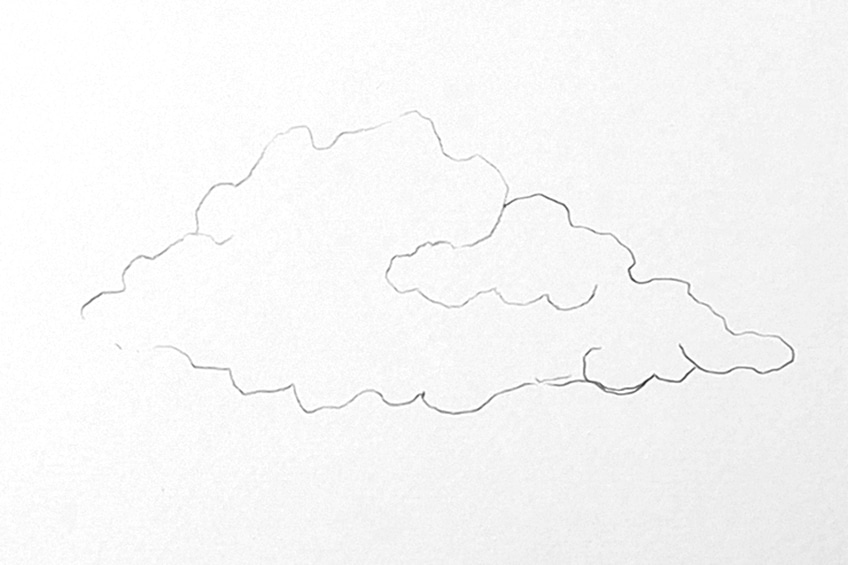
Clouds are such strange objects, which make them great doodle ideas. Clouds give a lot of freedom for doodle artwork as they are abstract, making them very fun to draw. Let us go through a few easy steps on how to doodle a cloud.
Step 1: Drawing a General Cloud Shape
We can begin by making a squiggly triangular shape. We can add various little lines within this shape. No cloud is the same so how you add lines within the general cloud shape is open to your creative interpretation.
This gives us a lot of freedom to play around with how we form the cloud, however, try to keep it bubbly for the cloud effect.
Step 2: Adding Details in the Cloud
Clouds don’t normally have distinct lines, however, when doodling clouds, keeping the bubbly lines retains the cloudy look. A nice way to enhance the cloudy look is by adding moments of scattered shading. Adding darker shading near the bottom of the base of the cloud gives it more volume.
You can play around with the tonal variations.
Adding darker moments of shading in the cloud and creating little gradients from dark to light will give the cloud volume. adding these shadows of shading in the cloud, makes the cloud seem like it has various layers and makes its shape seem more cloud-like.
Step 3: Drawing with Pen
Once we are satisfied with our pencil marks, we can then proceed to lightly shade over these shadows with a ballpoint pen. Creating a doodle of a cloud is a unique drawing as it is also a great way to practice shading and gradients.
Those are the easy few steps on how to doodle a cloud, but remember to play around and explore your marks.
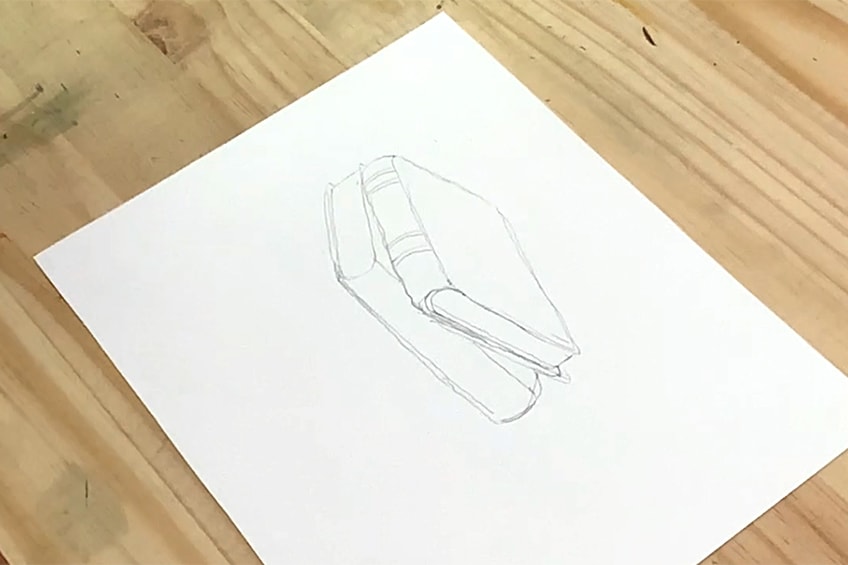
How to Doodle a Pile of Books
Lastly, we will do a doodle of a pile of books. There are so many things to doodle, however, a pile of books makes for an interesting and fun doodle drawing. It can also be a cozy and fun thing to add to your doodle art. Let us look at the few simple steps on how to doodle a pile of books.
Step 1: Sketching the Books
A pile of books is simply a few elongated cubes stacked on top of each other. However, once you establish the first one the rest aren’t completely visible, rather, only their edges poke out. You can be creative with how you stack these books, however, try to keep them thin with one side curved.
One curved side on each book will represent the spine.
You can add as many as you like, to make a large pile or a short pile. You can also add little details along the edges of the book, to indicate their covers. Perhaps observe some books to see their shape to give you some inspiration.
Most importantly, don’t worry about perfect details as doodling is about fun and creative ways of interpreting the things around us.
Step 2: Drawing with Pen
Once we have the general sketch of our books, we can start adding some details with our pens. Adding little lines within the sides of the books can also be a great way to indicate pages. Another cool feature is to add different little lines on the spine as if to suggest the books have names.
Allow yourself to be playful with how you add details to your doodle. You can add various lines and scribbles to indicate various textures and qualities in the book. Try to look around you and consider the visual composition of some books within your home for inspiration.
Most importantly, have fun with it!
Tips to Remember
- Be playful. Although this is a guide to drawing unique doodles, you can also be freer in how you interpret the instructions to make your doodles your own.
- If you make mistakes try using them in the doodles, this can often make the doodles more fun and quirkier
- Keep your eraser on hand if you feel that any mistakes should be removed in your doodle drawings
- As you learn how to create a series of cute doodles, you can add colors if you would like to. This tutorial is aimed at helping you figure out general ideas.
- Most importantly, have fun with it. Make them your own and add to them as you like.
This tutorial shows you a series of easy doodles to draw that can be used in all different kinds of ways in doodle artwork. Doodle art is freeing and can be a great activity, especially when we understand the basic shape and structural forms of different subject matter. This tutorial gives you a good foundation for different things to doodle, some of which are more simple doodles and others a little more unique helping you understand interesting techniques on how to doodle. There is a variety of easy doodles to draw within this tutorial that is great for doodle artwork, giving you a good foundation and confidence for doodle drawing.
Frequently Asked Questions
How Can I Improve My Doodling?
There are so many ways to enhance your doodle drawing skills, that can include reading, drawing from life, but the best way to enhance your doodle skills is to have a sketchbook. Having a sketchbook is a great way to practice your doodle drawings because the most prominent source of inspiration for doodle art is life. Life is rich with interesting objects that we can look to for inspiration for our doodle art. Having a sketchbook on hand is also a great thing to explore the images in your imagination. We think in images, which means it can be a really fun challenge to try and translate those mental pictures into interesting doodle ideas and doodle drawings. Lastly, when we read, we retain a lot of information from our imagination that gets stored up in our minds, a sketchbook can be used as a great outlet to doodle characters, places, and objects that sit in your mind. So, keep a sketchbook and allow yourself to develop a natural doodle ability as you absorb what’s around you.
How Do You Practice Doodle Art?
When we start to doodle, we can easily get too into our heads about what things should look like. The best way to practice doodle drawing is to simply start. Do not worry about perfecting lines and details, often what makes interesting and cute doodles are the little imperfections and squiggly lines that make the doodle feel like a doodle at all. Another good tip is to make observations of the world around you, there are so many interesting things to draw. Keep a sketchbook on hand, but remember, don’t get hung up on perfection. Allow all the strange interpretations of the things you see to be realized in your doodle artwork, which ultimately is how you develop your visual language in your doodle artwork. So just start by making marks, try drawing what’s around you or in your mind, and allow your little imperfections to develop your doodle style.
How Do You Start Doodles?
The best way to start doodling is by identifying basic shapes. Everything we know visually is made up of a series of different shapes. As we start to draw these shapes and turn them into doodle artwork, we are trying to represent them less accurately and more playfully. Secondly, like previously mentioned, doodle art or doodle drawings are a way of playfully representing something within a drawing. So don’t get too hung up on finer details and allow all the little imperfections to form part of the doodle artwork. So, start by making basic shapes that you see in the subject you are trying to draw, then slowly refine with more pencil marks, and finally explore all kinds of mark-making styles to give your doodle artwork interesting and unique visual qualities.
Matthew Matthysen is an educated multidisciplinary artist and illustrator. He successfully completed his art degree at the University of Witwatersrand in South Africa, majoring in art history and contemporary drawing. The focus of his thesis was to explore the philosophical implications of the macro and micro-universe on the human experience. Matthew uses diverse media, such as written and hands-on components, to explore various approaches that are on the border between philosophy and science.
Matthew organized various exhibitions before and during his years as a student and is still passionate about doing so today. He currently works as a freelance artist and writer in various fields. He also has a permanent position at a renowned online gallery (ArtGazette) where he produces various works on commission. As a freelance artist, he creates several series and successfully sells them to galleries and collectors. He loves to use his work and skills in various fields of interest.
Matthew has been creating drawing and painting tutorials since the relaunch in 2020. Through his involvement with artincontext.org, he has been able to deepen his knowledge of various painting mediums. For example, watercolor techniques, calligraphy and lately digital drawing, which is becoming more and more popular.
Learn more about Matthew Matthysen and the Art in Context Team.


