How to Draw the Statue of Liberty – An Easy Step-by-Step Guide
The Statue of Liberty is not just a symbol of freedom and democracy; it is an engineering marvel that stands tall as a testament to human ingenuity. Erected in 1886, this colossal copper statue in New York Harbor has become one of the most iconic landmarks in the world, drawing millions of visitors every year. Standing at a towering height of 305 feet, the statue was designed by French sculptor Frederic Auguste Bartholdi and was a gift from France to the United States to commemorate their centennial of independence. Its striking green patina has been a source of fascination for years, and its torch, which once served as a beacon of hope to millions of immigrants, continues to shine bright as a reminder of the American dream.
A Step-by-Step Guide to Creating a Statue of Liberty Drawing
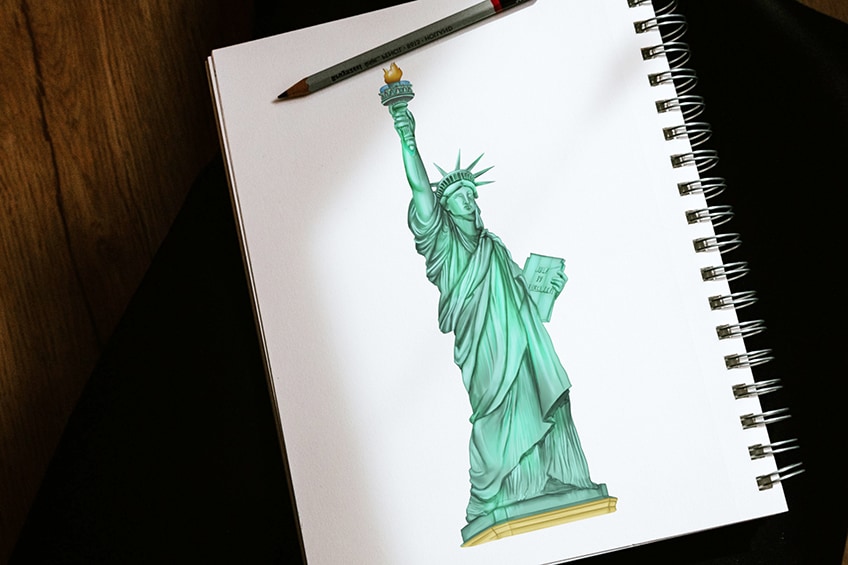
Learning how to draw the Statue of Liberty can be a fun and rewarding experience. Our step-by-step drawing tutorial will guide you through the process, starting with simple shapes and gradually adding details, such as the folds in the robe and the torch until you have a finished drawing! As you progress through the tutorial, you’ll begin to see your drawing take shape, and by the end, you’ll have a beautiful rendition of this iconic monument.
Whether you’re a beginner or an experienced artist, this tutorial is sure to be an enjoyable way to spend some time and improve your drawing skills!
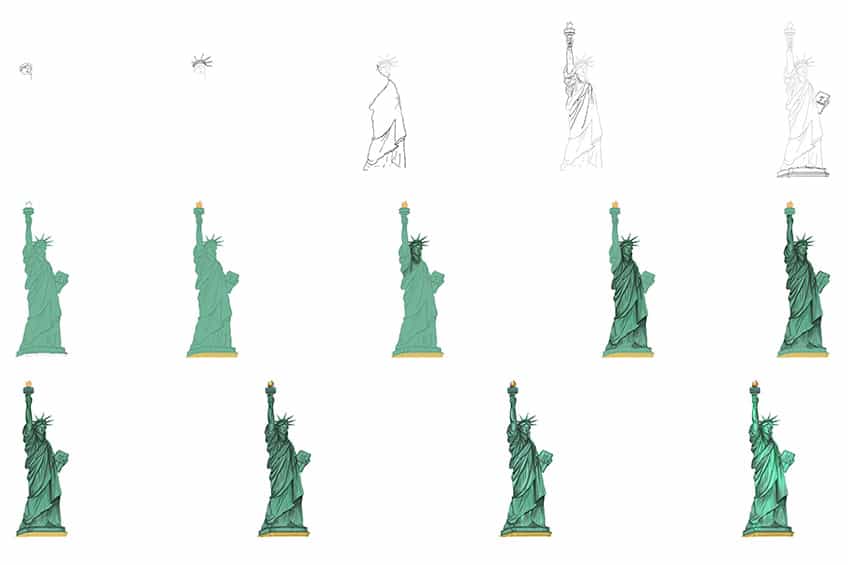
Follow along with the steps shown in the below collage, and you’ll be able to create your realistic drawing and painting of the Statue of Liberty!
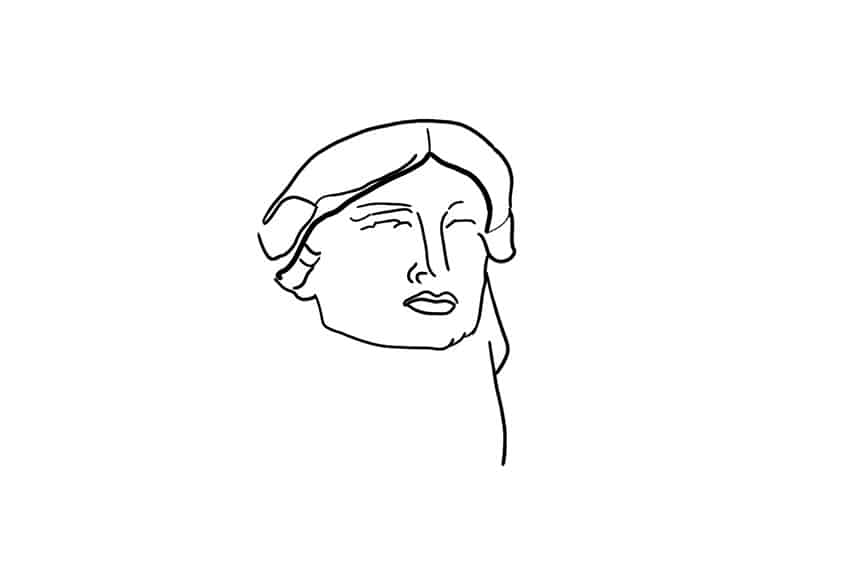
Step 1: Draw the Face of Your Easy Statue of Liberty Drawing
We begin our Statue of Liberty Drawing by drawing the face of this iconic monument. Begin with the basic facial structure, including the nose, eyes, and mouth area. Above the face drawing the surrounding hair.
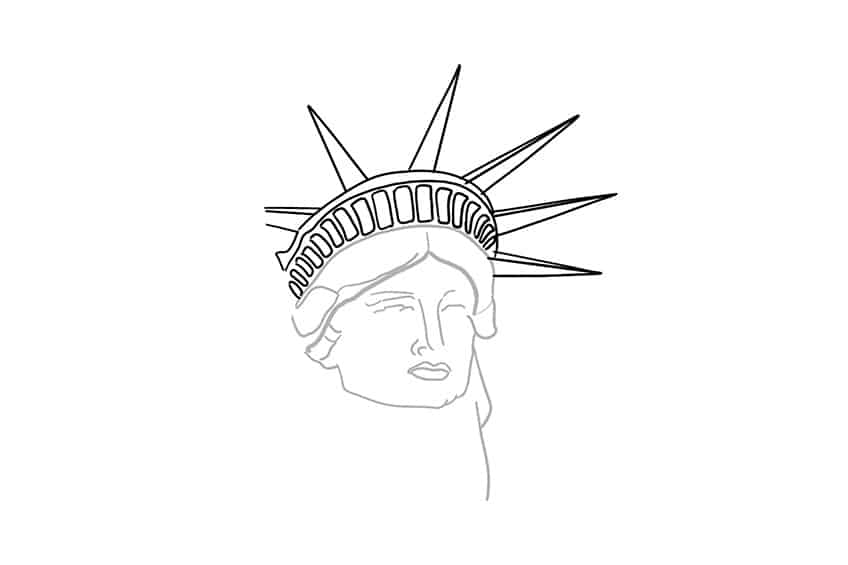
Step 2: Draw the Crown
In this step, you are going to draw the band around the head, with separated pillars leading onto the second band. On top of this, draw the spiky crown top.
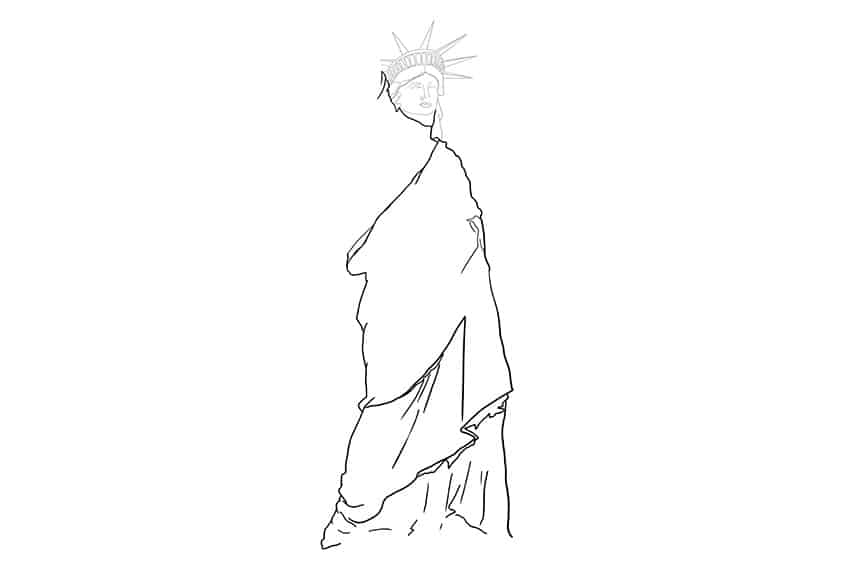
Step 3: Add the Main Body to Your Statue of Liberty Sketch
Begin by drawing the dress-like cloth leading downwards from the neck. Include creases and an edged outline to the main body.
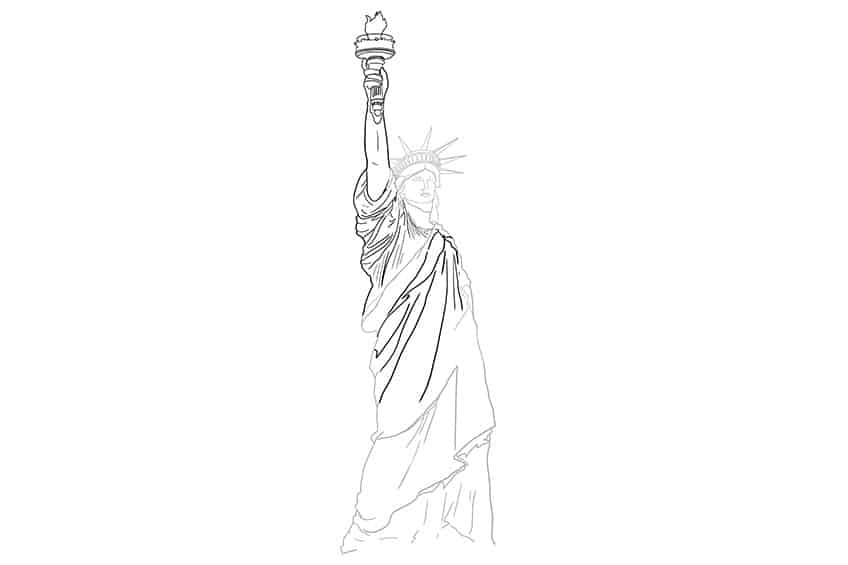
Step 4: Draw the Arm and Torch
Draw the rest of the creased dress-like cloth, and the reaching arm holding the flame of Liberty. The torch should be significantly larger than the actual hand with a large flame above. Use fine hairline strokes to add sharp textured detail to the rim and handle of the torch.
For the final texture add fine, sharp creased lines between the edges and arches of the arm and the rest of the body.
Step 5: Draw the Tabula Ansata to Your Easy Statue of Liberty Drawing
Draw the tablet held to the right of the Statue of Liberty, with the visible fingers gripping the tablet. Draw the official words inscribed onto the tablet, ‘JULY IV MDCCLXXVI‘. Complete the step by drawing the bottom stand.

Step 6: Add the First Color Coat
Select a regular paintbrush and copper green paint, and evenly color the entirety of your Statue of Liberty Drawing.

Step 7: Color the Flame and Base
Use a fine, sharp brush and yellow paint, and evenly coat the base of the Statue of Liberty Sketch. Complete the step, using golden yellow paint, and paint the flames on the torch.

Step 8: Shade the Head of Your Easy Statue of Liberty Drawing
Use a small, soft brush and black paint, and softly add shading along the edges of the face. Switch to a blending brush to smooth out the newly shaded areas.

Step 9: Shade the Main Body
In this step, you will continue using black paint but will switch to a fine, sharp brush. Begin to apply fine hairlines brushstrokes to the edges and creases on the main body. Repeat with a soft brush to add soft shading along the entire dress-like cloth. Finish this step by blending the shading.

Step 10: Add Shading to the Arm of Your Statue of Liberty Sketch
Repeat the process in step nine, using a fine brush and black paint, and apply fine hairline strokes to the edges and creases of the arm. Continue with a blending brush to smooth out the newly shaded areas.
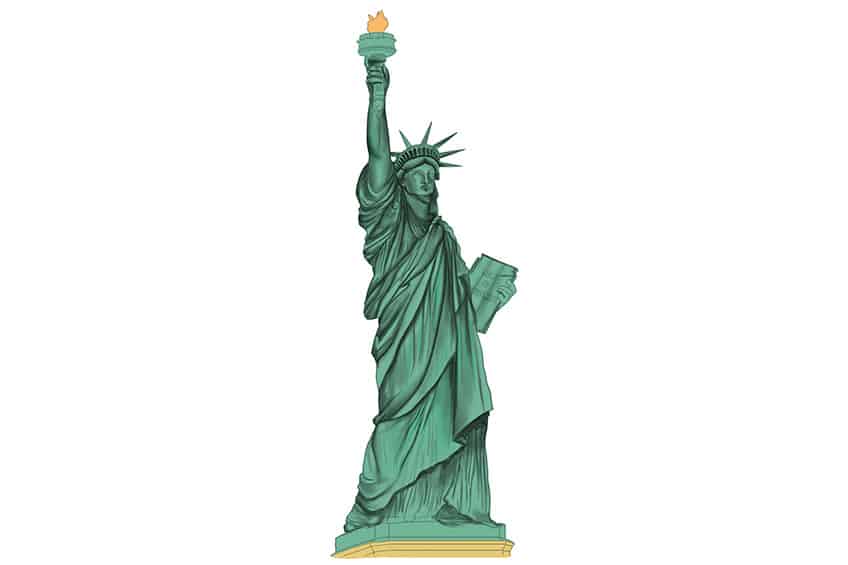
Step 11: Shade the Flame
Repeat the previous process done in step 10, and add shading to the edges of the torch.
Tip! Smooth the shading in the same direction as the rest of the shadow angles of the statue. This will create a realistic look to your Statue of Liberty Drawing.
Continue with a soft brush and blue paint, and apply a soft coat to the glass wall around the frame. Complete this step by adding soft shadows to the rim of the stand, the tablet, and in between the fingers.
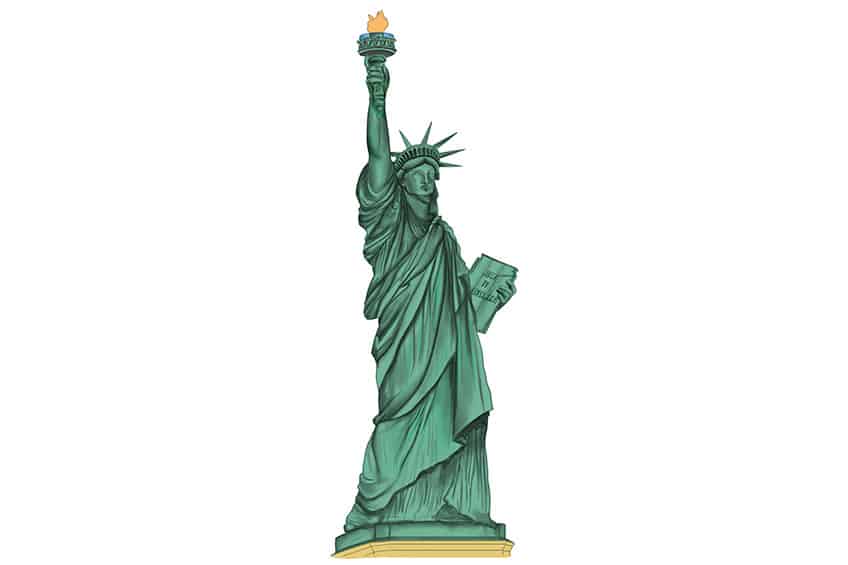
Step 12: Complete the Flame
Use a soft brush and black paint to add light shading around the edges of the flame. The first color coat should still be visible. Make sure to use a clean blending brush to soften this shading. Follow this by using a fine, sharp brush and white paint to add soft highlights to the flame. Complete the step using a small, soft brush and black paint to softly trace the bottom base outlines.

Step 13: Add Highlights to Your Statue of Liberty Sketch
Using a fine, sharp brush and a combination of bright turquoise and white paint, apply fine brushstrokes along the edges and creases of the Statue of Liberty to add a real glow to the statue. Repeat the step using a small, soft brush for larger open areas that have fewer creases/lines. Switch to a blending brush, and soften and smooth out the highlights.

Step 14: Bonus Step for Your Easy Statue of Liberty Drawing
For an added step, select a small, soft brush and a bright lime green, and apply soft brushstrokes along the main body, head, and arm to add a true or accurate color tone to the Statue of Liberty. Complete the step using a blending brush to softly blend and smoothen the areas.

Well done on completing our tutorial on how to draw the Statue of Liberty! You’ve not only created an amazing tribute to this iconic monument, but you’ve also gained new drawing skills that you can build upon in the future. Your hard work and dedication to this drawing have paid off, resulting in a beautiful work of art that you should be proud of. Keep up the great work and continue to explore your creativity through art. With every drawing, you’ll learn something new and develop your skills even further. So, keep on drawing and let your imagination soar!
Frequently Asked Questions
How Do I Draw the Facial Features of the Statue of Liberty?
To draw the facial features of the Statue of Liberty, it is essential to start with the basic shape of the head and facial features, such as the nose, eyes, and mouth. Pay close attention to the statue’s proportions, as they are critical to achieving a lifelike appearance. As you add details, be sure to use light, sketchy lines at first, then gradually build up the darkness and definition. Remember to take your time and practice as much as you need to get the look you want!
What Are Some Common Mistakes to Avoid When Drawing the Statue of Liberty?
Some common mistakes to avoid when drawing the Statue of Liberty include incorrect proportions and not adding enough details to the crown or torch. It is also essential to be patient and take your time, as rushing can result in errors and a less-than-perfect drawing. However, you do not need to worry as our tutorial on how to draw the Statue of Liberty will guide you through the entire process, and you will be left with a beautiful and seamless look!
Matthew Matthysen is an educated multidisciplinary artist and illustrator. He successfully completed his art degree at the University of Witwatersrand in South Africa, majoring in art history and contemporary drawing. The focus of his thesis was to explore the philosophical implications of the macro and micro-universe on the human experience. Matthew uses diverse media, such as written and hands-on components, to explore various approaches that are on the border between philosophy and science.
Matthew organized various exhibitions before and during his years as a student and is still passionate about doing so today. He currently works as a freelance artist and writer in various fields. He also has a permanent position at a renowned online gallery (ArtGazette) where he produces various works on commission. As a freelance artist, he creates several series and successfully sells them to galleries and collectors. He loves to use his work and skills in various fields of interest.
Matthew has been creating drawing and painting tutorials since the relaunch in 2020. Through his involvement with artincontext.org, he has been able to deepen his knowledge of various painting mediums. For example, watercolor techniques, calligraphy and lately digital drawing, which is becoming more and more popular.
Learn more about Matthew Matthysen and the Art in Context Team.


