


How to Draw Graffiti Bubble Letters – Easy Graffiti Lettering Guide
Out of all the different graffiti styles, learning how to draw bubble graffiti letters is a very easy task. The bubble graffiti-style letters are quirky and fun, they’re a great way of creating text. Understanding the process of creating bubble graffiti letters that make that bubble quality is really simple and it looks amazing. It can be a great addition to artworks and can look beautiful on its own as an individual bubble graffiti piece. The skills that you learn throughout the process of creating graffiti writing styles such as bubble graffiti can also be applied to all types of lettering. As we learn how to draw bubble graffiti, we will learn how to construct letters in a specific way that will provide us with the confidence to make our bubble graffiti lettering.
An Easy Guide to Drawing Bubble Graffiti Letters
There are many ways to construct graffiti-style letters and sometimes the result makes it seem as if it is difficult or intricate. However, when you break up the bubble graffiti process into digestible bits you will find that it is really easy to do. This form of graffiti is simple and doesn’t require crazy shapes and forms like wildstyle graffiti. In this tutorial we will break down the process of drawing bubble graffiti letters into a few simple steps, making it much simpler and more digestible for us to follow.
Once you understand the fundamentals of constructing the letters, you will find that you can also apply these principles to other graffiti styles letters.
Bubble graffiti is also easily modifiable, this means we can easily change the text into all different shapes and compositions. As we go through this tutorial on how to draw bubble graffiti letters, we will only need simple tools. That being said, let us take a look at what we will need.
Necessary Materials
In this tutorial, we will go through a basic process of constructing graffiti-style letters using a simple method that transforms a normal letter into bubble graffiti letters. We will only need a few tools for this tutorial such as a pencil for the earlier stages of constructing letters. We will also want three-micron pens and one black.
We will want to have copies that correspond with the Colors of the micron pens.
This way when we make a letter a specific Color, we can use both tools for constructing the letter. It’s also just good to have a sense of Color variety within the bubble graffiti letters. For both the Copic markers and the micron pens, you can buy them in a set. Lastly, we can use whatever paper is available to us. All materials can be found through the links below:
- Copic Markers
- Micron pens
- Pencil
- Paper
Instructions on How to Draw Graffiti Bubble Letters
In this tutorial, we will look at two things. First, we will acquaint ourselves with the letter forming process of bubble graffiti. We will look at how we turn a simple written letter into a bubble graffiti-style letter. It’s really easy to do, which is great because it looks quite complicated in its finished form.
Once you understand the process of drawing bubble graffiti, you will then be able to apply it to any letter.
This brings us to the second activity, which is creating a bubble graffiti alphabet. Once we know how to form a letter, we will use the skills we have learned and apply them to every letter of the alphabet. This will provide you with a practice that will enable you to apply the methodology to your bubble graffiti lettering. Now that we know what to expect let us go through the tutorial on how to draw graffiti bubble letters.
How to Draw a Bubble Graffiti Letter
Learning how to draw graffiti bubble letters starts with understanding the process of constructing a single letter. We will first look at how to construct a single letter in a few steps. The process is easy and once you understand how to draw a single graffiti bubble letter, you can then apply the method to different letters to create your graffiti bubble alphabet.
Step 1: Writing Out a Letter
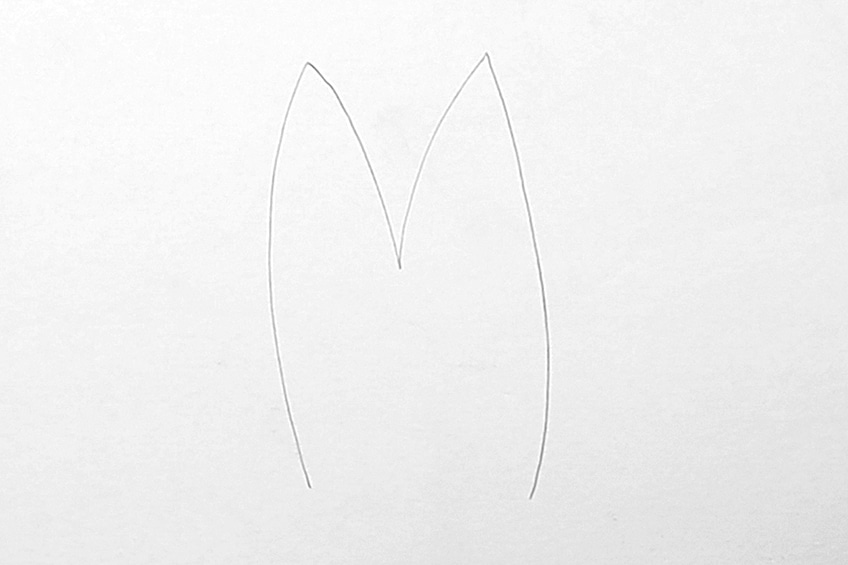
We begin by taking our pencils and writing out a letter. For the sake of the tutorial, let us write out the letter “M”. You don’t have to write this geometrically; you can write out the letter however you’d prefer.
You could write it out normally or you could add slight curvature to your lines or try to keep it simple for the tutorial.
Step 2: Giving the Letter a Rounded-Look
Once our letters are written out, we can then proceed to add body to our letter by drawing around it. As we draw around the lined letter, we want to add curvature to all the different points where the letter changes direction. This means instead of a geometric shape; we curve our letter’s edges to create a rounded more bubble-like quality.
You can draw around your lined letter as wide as you want giving it a very round quality.
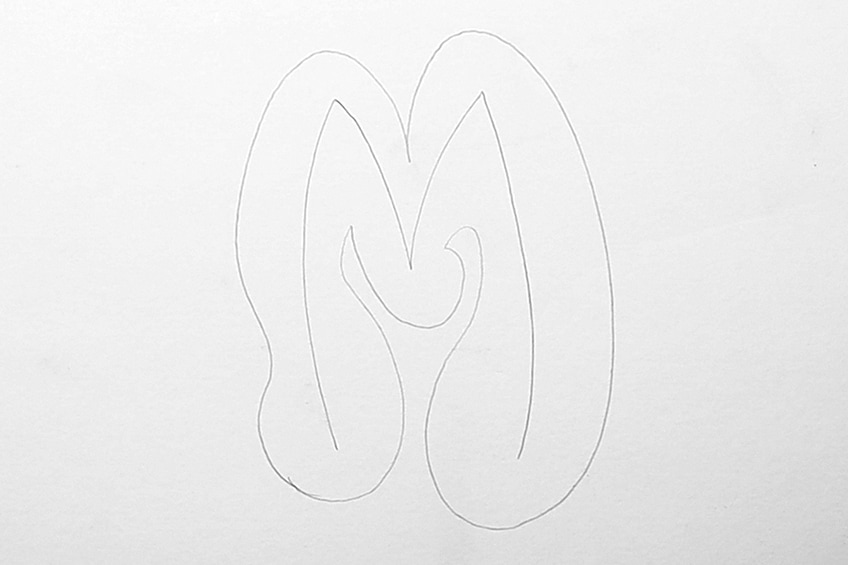
Again, we are drawing a larger body or outline around the lined letter. Whenever there is an edge in a letter, we will create an arch or curved line to form those areas for a letter. This can be applied to any letter with edges.
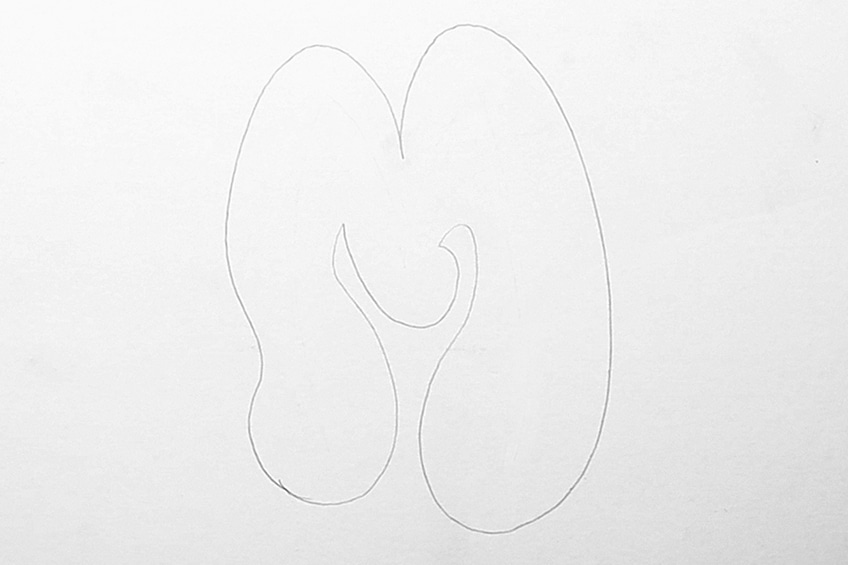
Once you have outlined, you can then erase the lined letter inside of the larger rounded body outline.
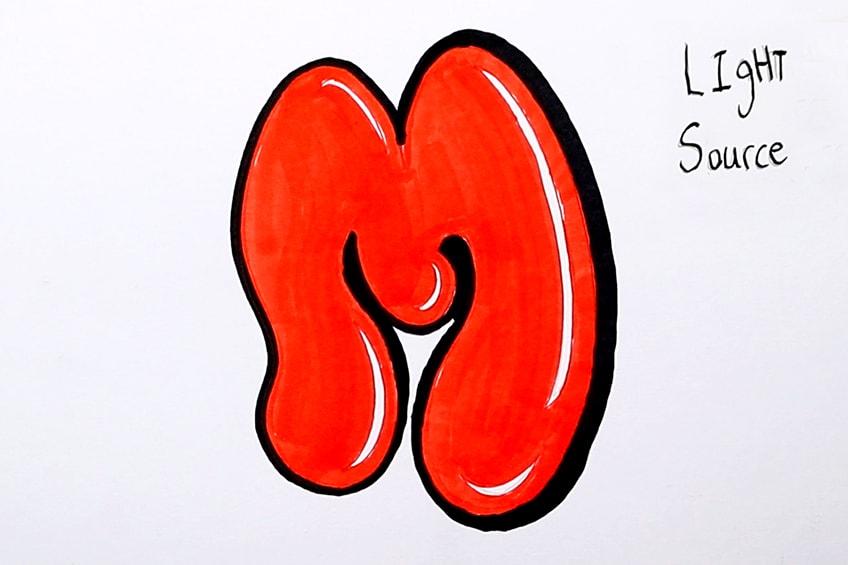
Step 3: Light Source and Highlight Lines
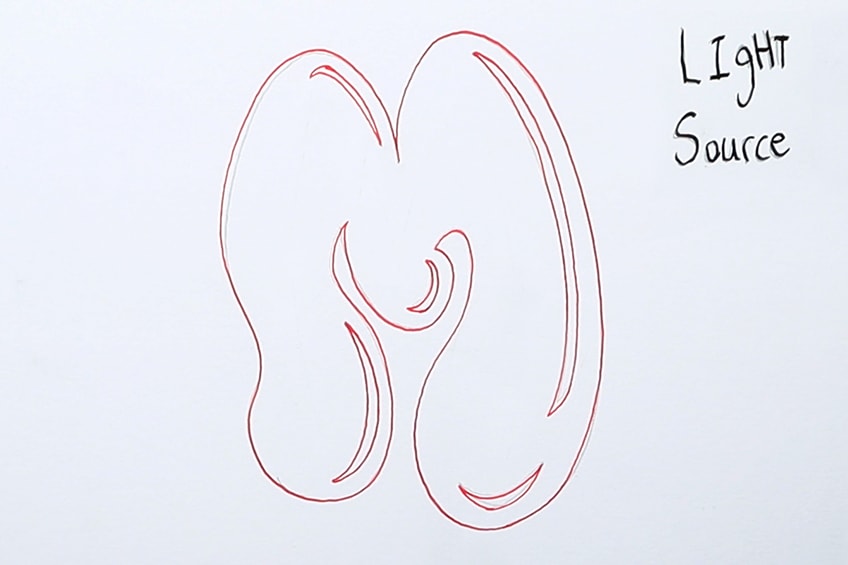
Once we have our letter drawn and we have a thicker rounded version of the letter M, we can then proceed to give the letter highlights. We begin by establishing the direction of the light source. Once we know which side the light source is coming from, we can then know which side to put the highlights on.

We add highlights to the letter by drawing little curved shapes along the curved parts of the letter. However, if the light source is on the right, we then want to add these shapes on the right side of each curved or rounded feature within the letter.
This means that wherever you have drawn a curved rounded shape in the letter you can draw one of these shapes to that round feature.

These little shapes that you draw within the curved-rounded areas within the letter, will be left white. This is because, once we color in the letter, these white curved shapes are going to look like reflections or a shining quality that deflects light off the surface of the letter. Once we have drawn these shapes, we can outline them with a colored micron pen.
Let’s use red for this part of the tutorial.

We can also proceed to outline the whole letter with our red micron pen. Remember, the little shapes that you draw within the letter should have a banana-like shape, that curves parallel to the curvature of the letter.
These features must be added on the sides that would be close to the light source, thus creating consistency in the highlighting quality of the letter.
Step 4: Filling in the Letter
Once we have our letter drawn and have outlined the letter and highlighted shapes with our micron pens, we can then proceed to fill in the letter with our Copic markers. You want to make sure you use the same color Copic marker that corresponds with the color used to outline the letter and highlight shapes within the letter.
Since we have outlined the letter with our red micron pens, let us fill in the letter with a red Copic marker.

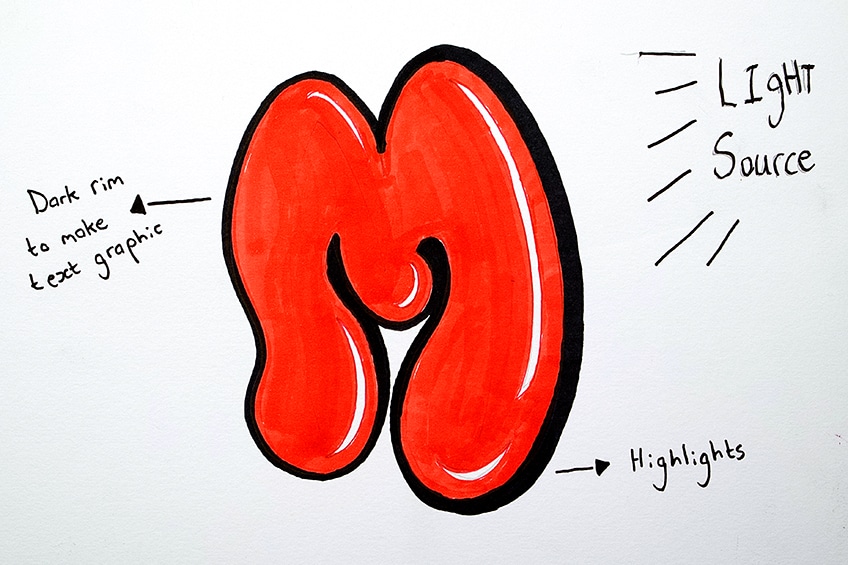
Step 5: Outlining the Letter
A great addition to bubble graffiti letters is to give the letter an outline. By doing so we give the letter a more graphic look. We can do this by taking our black Copic markers, and outlining get e letters. You want to make the outline thick, giving the letter a bold look. Take your time, by doing so you are less likely to make a mistake.
This is the process of making bubble graffiti letters, once you know how to construct a single letter you can apply the methodology to any letter. A few simple steps can transform any letter into a bubble graffiti letter.
Now that we know the process, it’s time to turn other letters into a graffiti bubble letter style by making a graffiti bubble letter alphabet.
How to Draw a Bubble Graffiti Alphabet
Now that we know the methodology of drawing graffiti bubble letters, we can now proceed with a practicing exercise where we can put our skills to the test. A great way to do this is by drawing a bubble graffiti alphabet, where we use the different steps we have learned to create our bubble graffiti letters. Graffiti alphabet styles can change in little ways depending on different letters.
This means you want to make sure you practice your graffiti alphabet styles so that you get comfortable with the different letters. Now, let us go through the different steps of creating a bubble graffiti alphabet.
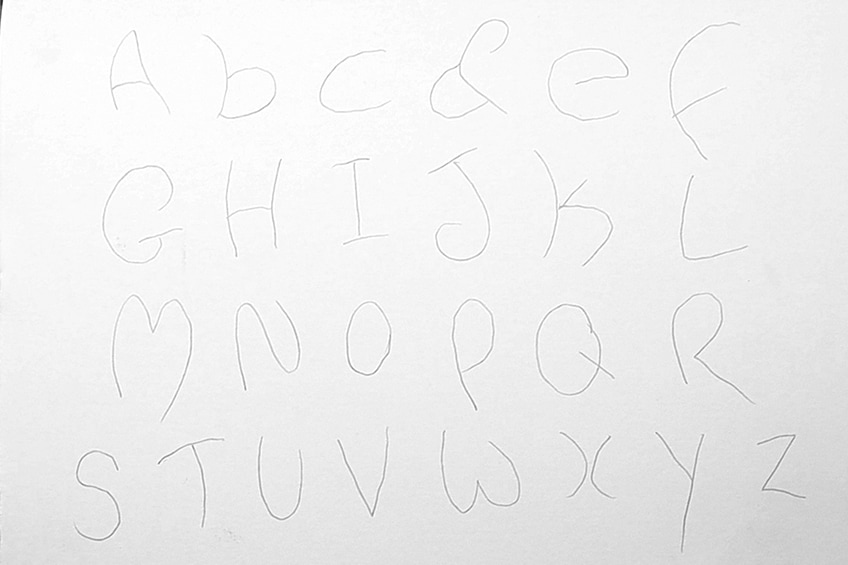
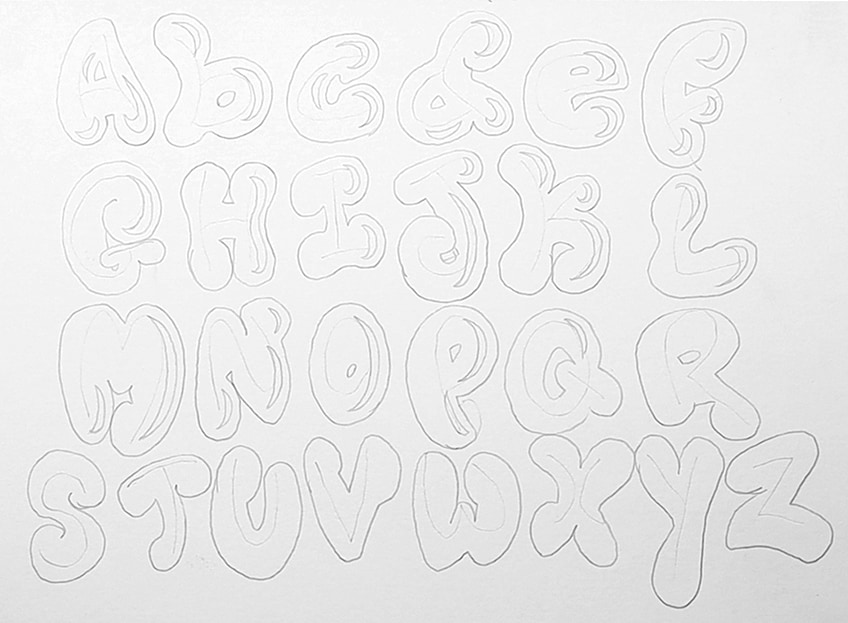
Step 1: Writing Out an Alphabet
We can begin by writing out the alphabet with our pencils. We want to make sure that as you write out each letter on the page, you want them to be spaced out. It’s important to take time writing out your letters making sure that they are placed on the page with some space between each other.
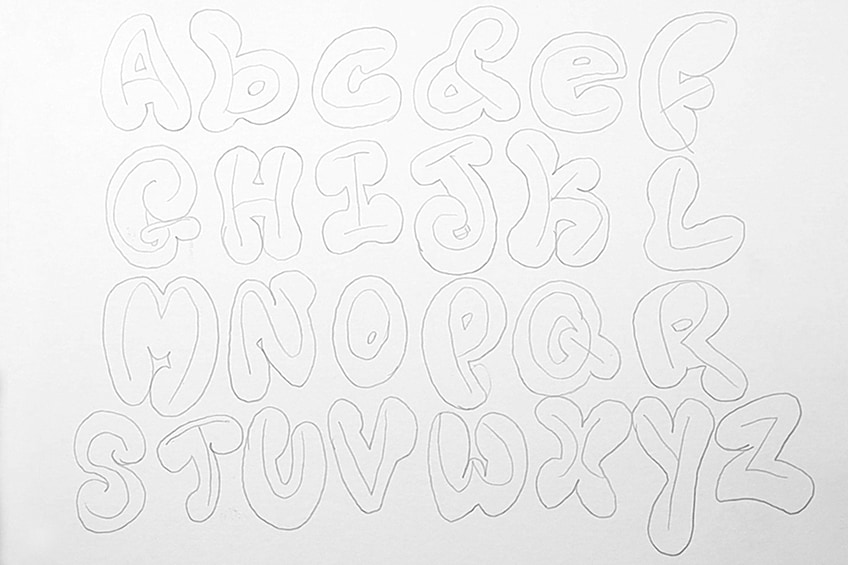
Step 2: Outlining the Letters
Once we have all our letters written on the page, we can proceed with outlining each letter, giving them body and form. This is where we implement the curved and rounded features at every edge of a letter.
You want to keep a gap between your outline and the written letters, this will make the letters thicker and more bubble-like.

Be playful with how you draw the bubble-like outline around each letter, making sure you give each letter a thick bubble-like effect with the rounded body. Keeping the outlines circular and round will make the letters look thicker, which in turn will give the letters a bubble-like quality.
Step 3: Erasing the Lined Letters
Once your letters are outlined and you are satisfied with the rounded and thicker body for each letter, you can then proceed to erase each lined letter within the rounded outline. Once we have erased the lined letters within the outlined body, we will see how the letters start to look fuller and more bubble-like.

Adding the outlines around our letters gives the letters a thick rounded bubble-like quality. As we erase the lines within each letter, we begin to see how the letters start to look more distinct in their graffiti bubble style.
Make sure you erase all the lined letters within each letter.
Step 4: Adding Highlight Lines
We should be left with the outlined letters of a bubble graffiti alphabet. We start with the highlight lines, where we draw lined features within the letters that will indicate the highlights. We do this by drawing banana shapes in the curved areas of each letter. We want to make sure that whichever side we draw within the letter, we keep all these marks on the same side for each letter.
When you draw the lines that will define the highlights within the letters, you want to make sure that you draw these curved banana shapes in the curved areas of each letter. Again, you want to make sure that you keep them all on one side of a letter, this way you create a consistency that describes a light source coming from one direction.
Step 5: Filling in Letters and Adding Graphics Outlines
Since we know how to fill in each letter now and give each letter its graphic outline, a good suggestion is to go through each letter one at a time. Remember that, when you fill in a letter you want to first outline the letter and highlight shapes with your micron. From there you can use the corresponding colored Copic marker to fill in the letter.
Lastly, you can add a black graphic outline to embolden the letter.
As you go through each letter, remember that the process is to outline first. From there you can fill in the letter and then proceed to add the final touch, which is a graphic outline with your black Copic marker. Make sure you pay attention and leave the highlight shape blank or negative to give the letter the shine effect.
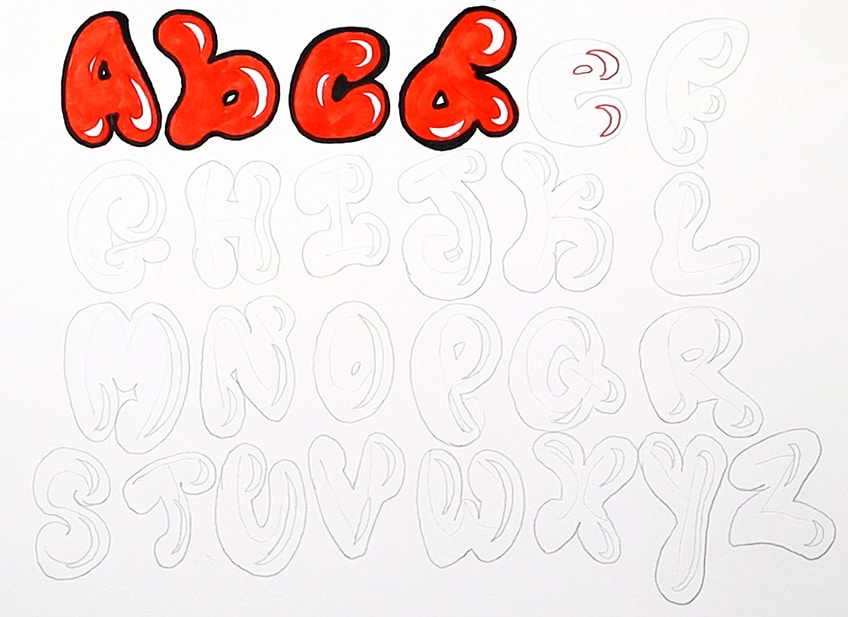
Make sure you outline the highlighted banana shape. The highlight is a key feature of the bubble graffiti lettering style, as it defines a quality of shine which is unique to the bubbly look.
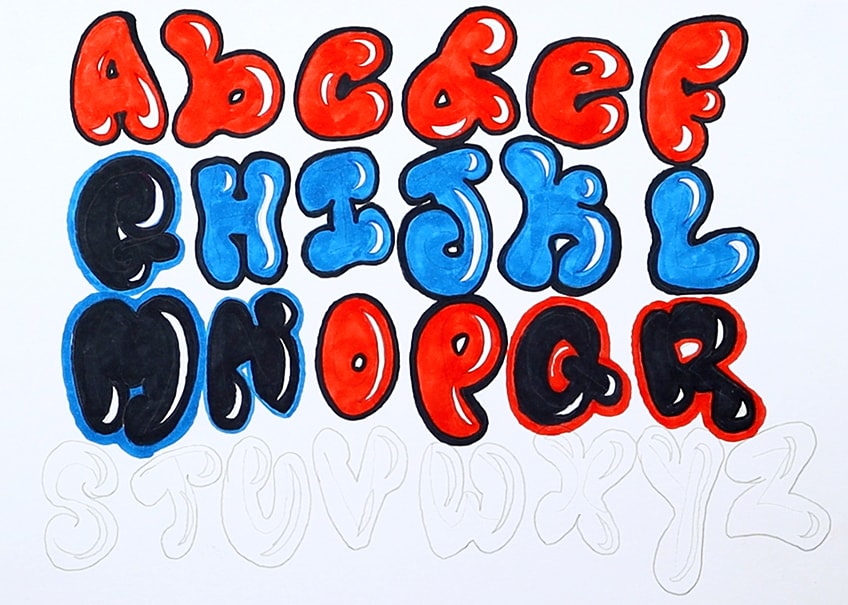
Step 6: Trying Different Color Combinations
Now that you are aware of the process you can now play around with different color combinations. This means that you can follow the same process, except this time you could change the letter color and graphic outline around the letter. Exploring different color combinations will give you an insight into how letters look aesthetically with different color sequences.
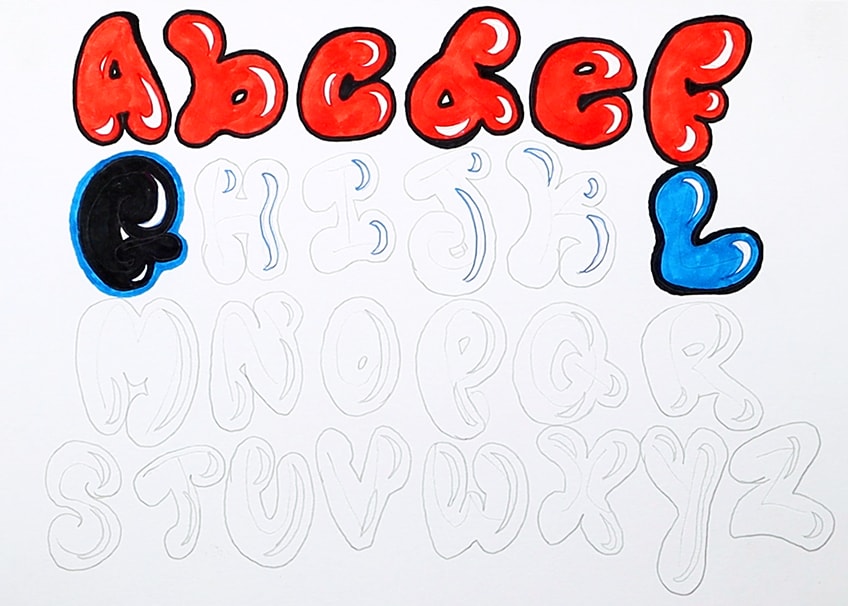
As you try different color combinations you can also see how letters can work together with a contrasted quality that different color sequences provide. As you slowly fill in each letter one by one, you will also see how letters look together in the bubble graffiti style. As you fill in your letters, making sure that the highlight feature remains open and blank is important.
Be careful when filling in your letters around the highlight feature. This will provide the letter with a key feature to give the letter the shining-bubble look.
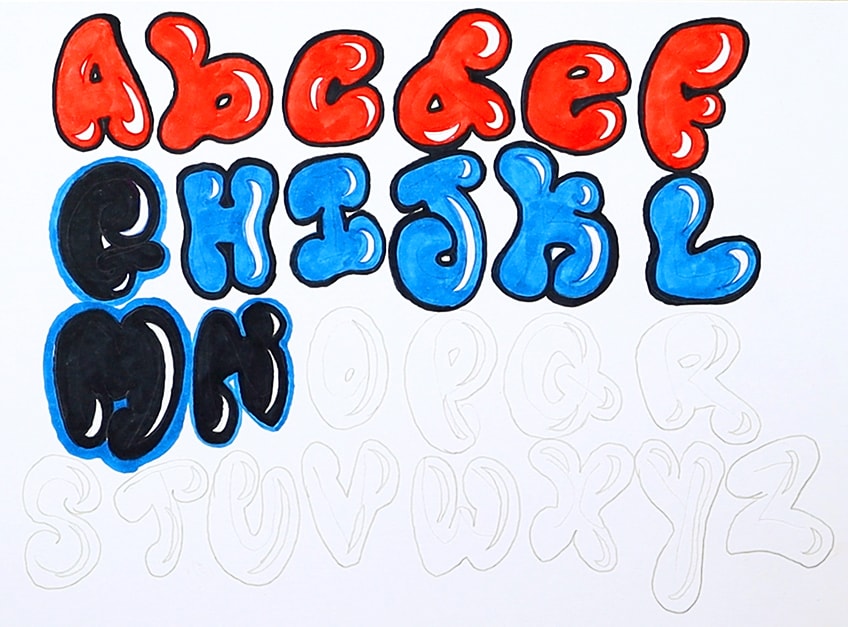
Again, make sure you explore different color combinations. This is why we want to make sure we have three different colors Copic and microns. As you fill in each letter with a different color you are also learning how to pair letters together.
Creating an alphabet provides you with this skill that you can apply to your own bubble graffiti lettering artworks.
As you fill in each letter, you will also see how the bubble graffiti style for lettering becomes more apparent when a group of letters is completed with this method. The look of letters together in groups gives a more holistic and refined quality of a bubble graffiti style.
That’s the process of creating bubble graffiti lettering.
Using this method of constructing letters can be utilized in various contexts. Probably the best way to use this form of lettering is to pair it with other hand-lettering styles. By doing so, you will enrich your hand lettering artwork.

Tips to Remember
- Take your time. Learning a new skill always requires patience taking time to go through the different steps.
- Experiment with different color combinations. Once you understand the process, try using different color combinations for your bubble graffiti.
- Make sure you outline your letters before filling them in. This way you are clear as to where you fill in your letters.
- Make sure you do not fill in the highlight shape. This is a key feature to provide dimension and shine to the letter.
- Most importantly, have fun. Use this style of lettering with other lettering artworks.
Learning how to draw graffiti bubble letters is quite simple. As you come to understand the process of constructing a bubble graffiti letter through the different processes, you can then play around with shape and color variations for your bubble graffiti alphabet. This is also a great addition to other graffiti-style letters and can be used within a combination of other graffiti writing styles. This tutorial is intended to guide you, however, there are no set rules and you should use it as a resource for your bubble graffiti lettering. Remember that as you draw a bubble graffiti alphabet, you want to play around with how you apply the different steps to each letter. Most importantly, have fun and see how you can use this in other hand lettering artworks.
Frequently Asked Questions
How Do You Add Highlights to Bubble Graffiti Letters?
There are many ways to add highlights to graffiti bubble letters, however, the simplest of them all is to leave negative spaces within the letters. We do this by first understanding the position of the light source. Once we know where the light source is we can then place highlights within the letter. We create the highlight by creating a shape within the letter on the side that would be closest to the light source. We then draw a curved shape within the letter, keeping it on one side near the light source. From there, we color in the letter, except for the shapes that we have drawn within the letter, leaving them negative or white. Leaving the little shapes in the letter white will give the letter a shining quality that makes the bubble graffiti lettering look bubblier.
What Is Bubble Graffiti Lettering?
Bubble graffiti lettering is a graffiti tag style or a style of graffiti with rounded lettering, which gives the letters a bubble-like quality. This makes the letters look very playful as the round quality is less geometric and rigid. Bubble graffiti letters stick out from other graffiti-style letters and are a great way to soften a hand lettering artwork. Using this method of graffiti can give fullness to your lettering and contrast well with more geometric-styled lettering styles like wildstyle graffiti. Bubble graffiti can also be a great addition to other artworks or it can be a singular piece of work. You can give your bubble graffiti lettering a variety of details such as different colors and shapes which can change the composition of the bubble graffiti lettering. However, its rounded feature is iconic to its style and is a feature that can be manipulated in a variety of ways that can make the bubble graffiti lettering styles beautiful.
What Do You Use Bubble Graffiti For?
Learning how to draw graffiti bubble letters is a great exercise as it helps you understand how to transform simple line letters into a drawing. The learning curve of bubble graffiti lettering provides you with skills that help you understand letter formation, hand lettering, and simple drawing skills. However, bubble graffiti letters can be used for a variety of reasons such as a feature for other artworks. It can also be a great addition to your hand lettering activities or, it can be used for large-scale mural-styled graffiti artwork. How you use bubble graffiti letters is up to you if you are interested in the genre of hand lettering, building up your repertoire of skills and hand lettering variety is essential. Learning how to draw graffiti bubble letters is a great addition to your range of hand-lettering skills as the bubble quality of bubble graffiti letters contrasts well with many different hand lettering styles.

Matthew Matthysen is an educated multidisciplinary artist and illustrator. He successfully completed his art degree at the University of Witwatersrand in South Africa, majoring in art history and contemporary drawing. The focus of his thesis was to explore the philosophical implications of the macro and micro-universe on the human experience. Matthew uses diverse media, such as written and hands-on components, to explore various approaches that are on the border between philosophy and science.
Matthew organized various exhibitions before and during his years as a student and is still passionate about doing so today. He currently works as a freelance artist and writer in various fields. He also has a permanent position at a renowned online gallery (ArtGazette) where he produces various works on commission. As a freelance artist, he creates several series and successfully sells them to galleries and collectors. He loves to use his work and skills in various fields of interest.
Matthew has been creating drawing and painting tutorials since the relaunch in 2020. Through his involvement with artincontext.org, he has been able to deepen his knowledge of various painting mediums. For example, watercolor techniques, calligraphy and lately digital drawing, which is becoming more and more popular.
Learn more about Matthew Matthysen and the Art in Context Team.
Cite this Article
Matthew, Matthysen, “How to Draw Graffiti Bubble Letters – Easy Graffiti Lettering Guide.” Art in Context. September 23, 2022. URL: https://artincontext.org/how-to-draw-graffiti-bubble-letters/
Matthysen, M. (2022, 23 September). How to Draw Graffiti Bubble Letters – Easy Graffiti Lettering Guide. Art in Context. https://artincontext.org/how-to-draw-graffiti-bubble-letters/
Matthysen, Matthew. “How to Draw Graffiti Bubble Letters – Easy Graffiti Lettering Guide.” Art in Context, September 23, 2022. https://artincontext.org/how-to-draw-graffiti-bubble-letters/.


