How to Draw Texture – A Masterclass in Drawing Techniques
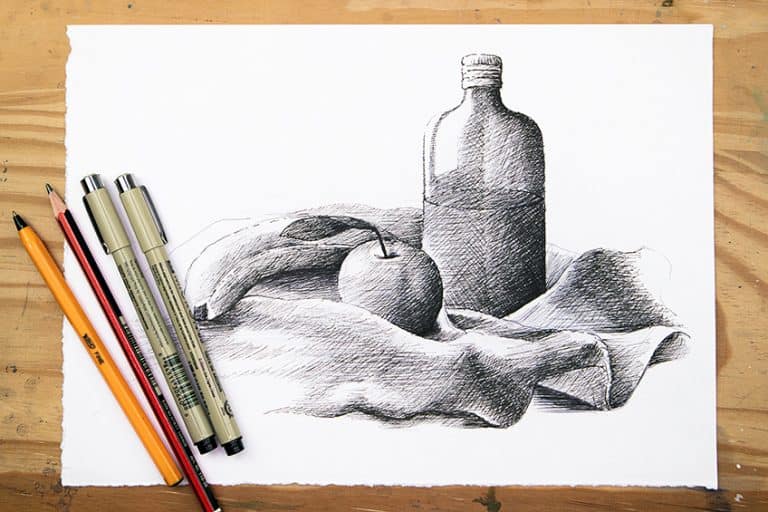
Understanding how to draw textures is a versatile skill that can be used for a diverse range of subject matter. Naturally, there are many different subjects to represent in drawings, however, they all have unique surface areas. Understanding how to utilize line work and shading styles can be helpful when representing unique surface areas that are specifically associated with certain objects. In many ways, we are also learning about the unique relationship between the subject itself and how it responds to its surrounding environment. More specifically, we look at how subjects respond to light and create unique moments of light and shadow to define textures.
Step-by-Step Guide on How to Draw Texture
In this tutorial on how to draw texture, we will look at four examples of how texture is achieved with different drawing techniques. We will look at glossy smooth surfaces, where smooth shading contrast is predominantly utilized to achieve qualities of reflection and refraction. We will then look at how to draw rough textures like tree bark and feathers as two unique visual qualities and how to emulate the textures with a different drawing style and shading technique. Now that we know what to expect, let’s go through this tutorial on how to draw texture.

Drawing Smooth and Glossy Textures
Textures are simply patterns revealed on the surface area of different objects, which can be represented through different drawing techniques. With smooth surfaces, there is a lot of reflection of light off the surface of the object.
Let’s take a look at how to draw two unique objects with these qualities.
How to Draw Reflections on an Eyeball
It is useful for us to understand how to draw surfaces in the context of identifiable objects. For glossy reflective surfaces, eyes are often really good at defining this quality of texture.

We can start by simply drawing an eye, which we can start to form in its basic features, which may include the iris, pupil, and the surrounding eyelids. The iris and pupil often are darker in tonal value due to the upper eyelids casting shadows. Naturally, this will cause a darkened shadow formation over the eye.

As we shape the eye, we can already start to consider unique shapes that can be drawn into the eye to establish the placement of reflections of light.

With a glossy surface, such as an eyeball, light bounces off the surface area and causes a distinct constraint between the shadowed and highlighted areas.

This allows the eyes to work almost as a mirror due to its moist glossy surface area, causing a vivid reflection of the environment. The iris also has a unique coloration, which causes a subtle difference in tonal variation within the middle section of the iris and the outer rim of the iris. With the middle section being predominantly lighter in color, compared to the darkened pupil, we can define this with subtle tonal variations.

As we establish this unique tonal variation, and keep these vividly white reflections in the eye, we start to see how they work together to make the eye seem glossy and smooth. In this case, we are utilizing a combination of smooth shading for darker shadows and distinct linework to define the sharp reflections of light on the surface area of the eye. Naturally, the distinct highlight is going to tell our brains that this reflection is only possible if the surface area is smooth and moist, defining a glossy texture in the eye.

How to Draw Refractions in a Glass of Water
Similarly, we can apply the same concepts of extreme contrast to a drawing of a glass of water. In this case, a glass of water is refracting light, causing abstractions on the surface area of the glass.

Again, texture is simply about noticing patterns, which we then define with the right type of shading and drawing technique. In the case of refractions, we are shading the unique shapes we see. This means we can start to negotiate which shading style will work best to define the patterns we see. For refractions of light, we are seeing the harsh rearrangement of shadows and light in an object.

Naturally, this will cause patterns, which we want to represent as best we can. We can do this by working simultaneously with both smooth shading for soft shadows and line work for distinct shadow formations. In the case of a glass of water, we are trying to draw the shapes that are present, which will then naturally create a quality of texture.

We can then slowly become more strategic with which areas we darken and lighten, according to how light is seen from the perspective we see the glass of water. It’s important to consider what shading style will best define these unique visual qualities that are seen in the object. From there, it is about taking your time to define these unique patterns.

Drawing Rough Textures
Rough textures are also represented through the identification of the patterns that are present, and how to define them with the right shading style. In this case, we will look at tree bark and bird feathers as two examples of rough textures.
We will see how linework can be a great tool to define these surfaces.
How to Draw Tree Bark
Tree bark is interesting because of how it runs along the form of the entire tree, meaning it is very vertical and linear in its pattern.

Tree bark is also very abstract, which gives us a lot of freedom to define its shadows and highlights. Naturally, linework is useful to establish grooves that define the shape of the bark. Bark is quite three-dimensional with a variety of little sections that are slightly lifted from the tree itself. This causes a lot of striations and shadow formations in the bark.

These striations will cause lines to run through the tree vertically. It will also cause these linear patterns to appear, where some lines are thick and some lines are thin. This combination of sporadic thick and thin lines that move vertically will collectively create this quality of bark. Naturally, to enhance the overall quality of the structure, we can then start making one side of the tree darker by adding more shading to one side of the tree.

Again, the intention is to notice the platters and then slowly start to build them op. As they are integrated into the structure of the tree, they are then contextualized by the tree itself and the texture starts to make sense.

This is where we can start adding some moments of horizontal lines in these little sections of bark. Or moments of circular shapes to define a hole in the bark. Most importantly, the most effective drawing technique is linework as it defines the gritty surface area due to the shifting of structures caused by the striations in the bark.

As we take our time, the bark starts to appear more real simply by the number of lines established in the shape of the tree. Linework paired with some shading over the entire tree structure results in this unique aesthetic of bark. It’s about first identifying the pattern that is unique to the object. From there on, you can play around with smaller details and unique features you would like to add to the structure of the tree and consider how it works with the linear texture of the surface area.

How to Draw Feathers
Another texture drawing that is quite rough and defined through a more linear style of drawing is feathers. With feathers, we are doing the same thing, where we identify the pattern in the feathers.

Naturally, feathers are made up of layers, where there are smaller feathers stacked on top of these longer feathers that extend outwardly from beneath the smaller feathers.

This causes these unique shapes that form within the feather structure, creating these linear shapes of different sizes. Linework is another way to not only define these shapes but to simultaneously define the texture within these shapes. This is because feathers are made up of these tiny hair-like strands. How we define the strands is by representing them through a linear style of drawing. In doing so we maintain that line quality of the strands and represent the texture effectively.

As we work our way through the different layers of feathers, we can create these gradients within each set of layers to define depth. We can also integrate lines within these layers to establish the textural quality of the feathers.
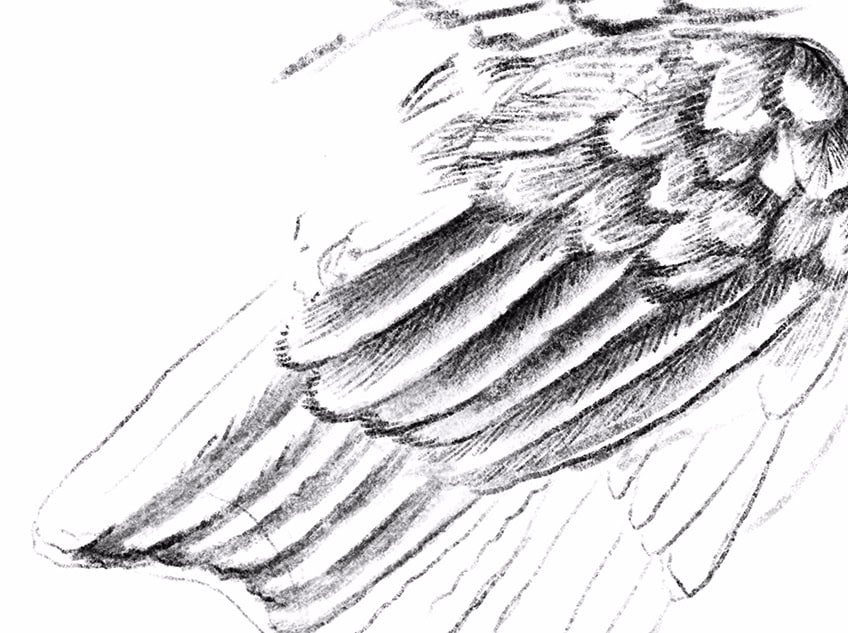
As you build up these line formations within the shapes of each feathery layer, you start to see how it defines shadows whilst maintaining the textural quality of the feathers themself. Again, it always starts with noticing the patterns of the structure and negotiating what drawing style best suits that pattern quality. This is where we ask ourselves if the marks appear soft, harsh, linear, smooth, etc.

There you have it, how to approach drawing texture through a few different ways, looking at four unique structures.

Tips and Tricks to Remember
- Notice the pattern. Start by identifying the pattern caused by light and shadow as a way of deciding how to represent the structure through drawing.
- Consider the right drawing technique. Once you know the pattern, you can then think about different drawing techniques to best represent the patterns.
- Allow the details to work together. Always take your time and allow the details to build up as they come to define the overall texture you are drawing.
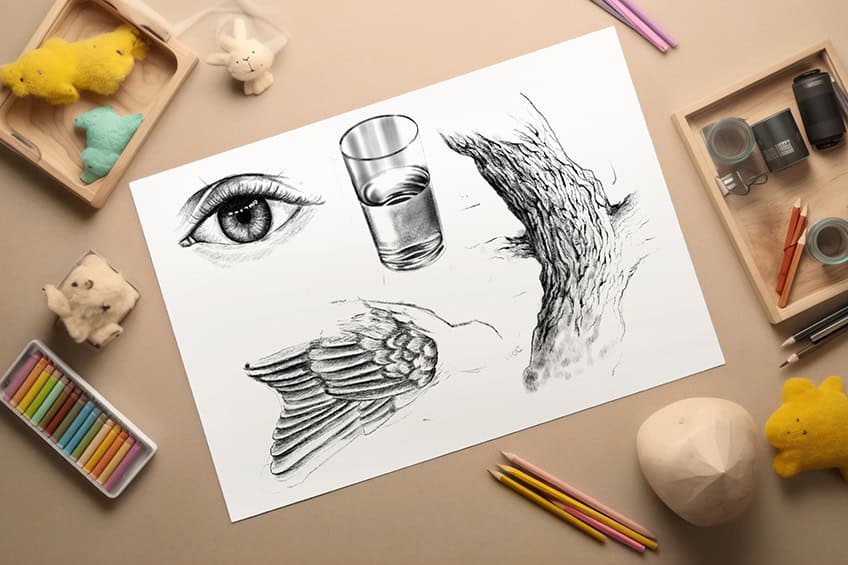
Drawing textures is not that difficult when you approach it with the right toolkit. We want to identify the structure that is seen through a set of different filters, first understanding the patterns and how they are caused by shadow and light. We can then consider the right drawing technique to best define the unique structure and its surface area.
Frequently Asked Questions
How to Use Shading for Textures?
It depends on what you are trying to represent and how it responds to light. Naturally, shading is our way of defining shadows in different objects. We need to know how shadows appear in different textures to integrate shading. In the case of glossy and smooth surfaces, you might deal with a lot of light reflections and highlights, causing moments of extreme contrast. On other surfaces, the light responds less harshly on the surface area, causing more of a subtle gradient in the shadow formations as they shift between moments of light and shadow. We can also have moments where shadows are dispersed due to striations caused by the texture on the surface area of the object. So, it’s important to think about the structure, the patterns of the texture, and how that causes shadow formations, which will inform your shading process.
How to Know Which Drawing Technique Is Useful for Different Textures?
Again, textures are simply patterns that are made from the surface area of the structure and how it responds to light. In some cases, these surfaces can be smooth with very little grit or rough qualities. This means we can consider using a shading style that is conducive to representing those smooth qualities. On the other hand, some textures are rough with many moments of lines and striations. In that case, using something like line work as the dominant tool for defining the structure may be a good idea. The drawing process always starts with identifying the pattern of the surface area, and then considering the drawing approach that suits it best.
Matthew Matthysen is an educated multidisciplinary artist and illustrator. He successfully completed his art degree at the University of Witwatersrand in South Africa, majoring in art history and contemporary drawing. The focus of his thesis was to explore the philosophical implications of the macro and micro-universe on the human experience. Matthew uses diverse media, such as written and hands-on components, to explore various approaches that are on the border between philosophy and science.
Matthew organized various exhibitions before and during his years as a student and is still passionate about doing so today. He currently works as a freelance artist and writer in various fields. He also has a permanent position at a renowned online gallery (ArtGazette) where he produces various works on commission. As a freelance artist, he creates several series and successfully sells them to galleries and collectors. He loves to use his work and skills in various fields of interest.
Matthew has been creating drawing and painting tutorials since the relaunch in 2020. Through his involvement with artincontext.org, he has been able to deepen his knowledge of various painting mediums. For example, watercolor techniques, calligraphy and lately digital drawing, which is becoming more and more popular.
Learn more about Matthew Matthysen and the Art in Context Team.
Cite this Article
Matthew, Matthysen, “How to Draw Texture – A Masterclass in Drawing Techniques.” Art in Context. June 6, 2024. URL: https://artincontext.org/how-to-draw-texture/
Matthysen, M. (2024, 6 June). How to Draw Texture – A Masterclass in Drawing Techniques. Art in Context. https://artincontext.org/how-to-draw-texture/
Matthysen, Matthew. “How to Draw Texture – A Masterclass in Drawing Techniques.” Art in Context, June 6, 2024. https://artincontext.org/how-to-draw-texture/.


