How to Draw a Zombie – A Guide to Drawing the Undead
Discover the art of drawing a zombie in our tutorial. Learn to sketch the eerie details of decayed flesh and haunting eyes, creating a spine-tingling masterpiece from a blank canvas. We guide you in adding gory details and personality to your undead creation, perfect for exploring the darker side of your creativity.
Step-by-Step Tutorial on How to Draw a Zombie
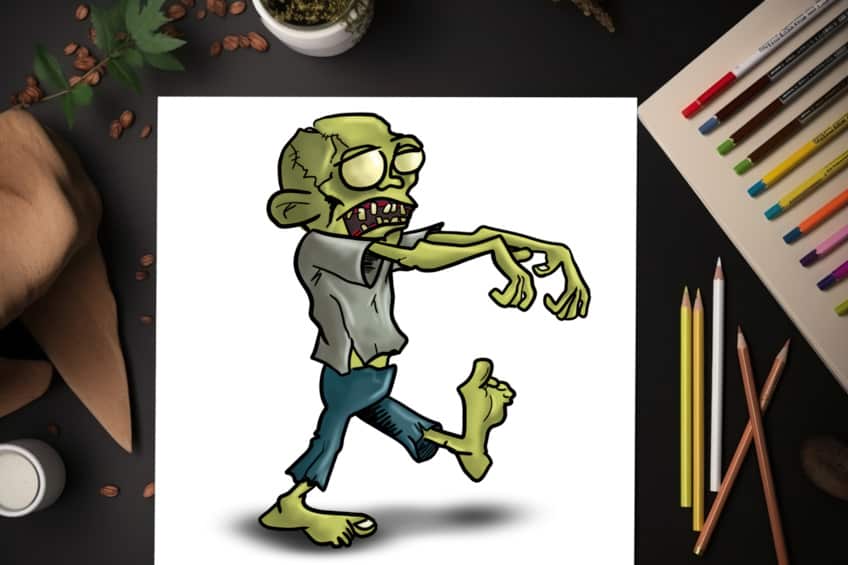
The below collage demonstrates how to draw a zombie in this step-by-step tutorial, breaking down each of the steps to simplicity. Learn how to draw and paint a zombie the easy way!

Step 1: First Step on Your Easy Zombie Drawing
Begin our tutorial on how to draw a zombie, by drawing an oval shape to represent the head of the zombie.

Step 2: Draw the Zombie’s Body
Position the head to overlap with the main body, depicted by a rectangular shape.

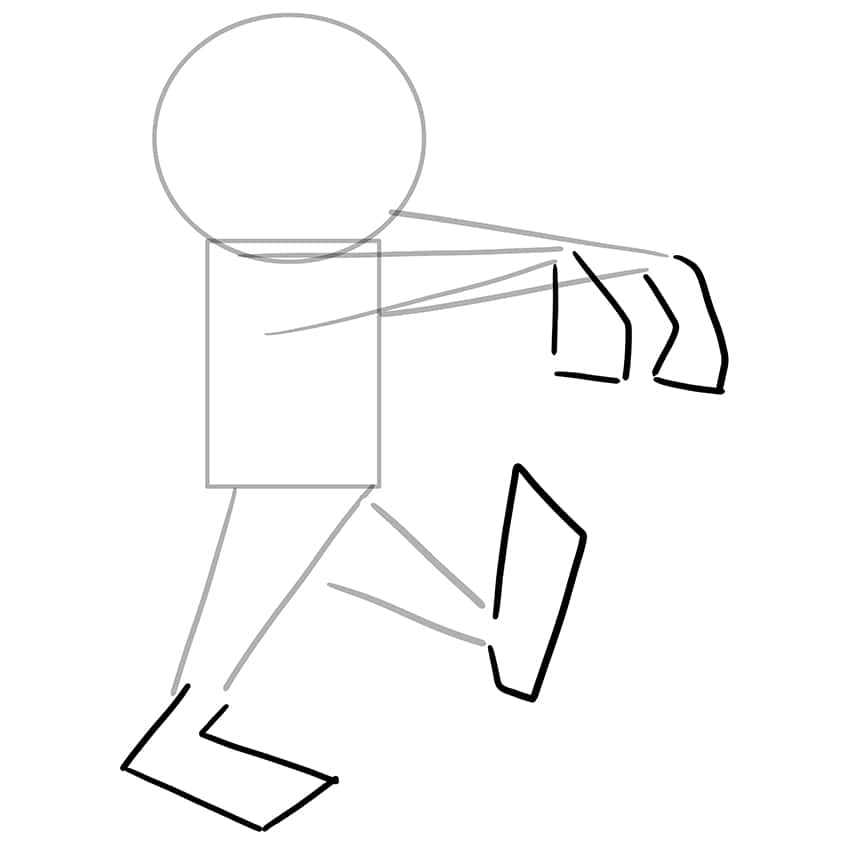
Step 3: Draw the Hands
Draw the stick figure hands overlapping the main body. They should both be leading towards the right side.

Step 4: Add the Legs to Your Zombie Drawing
Underneath the central body, sketch the initial leg with a slanting line to the left, while the second leg should be angled towards the right.

Step 5: Draw the Hands and Feet
Attached to the ends of the previously drawn legs and arms, draw the feet and hands.
Step 6: Add the Facial Features
On each side of the head, draw two ears represented by a half-moon circle. On the face itself, draw four horizontal lines on which you will draw the two eyes, nose, and mouth lines.

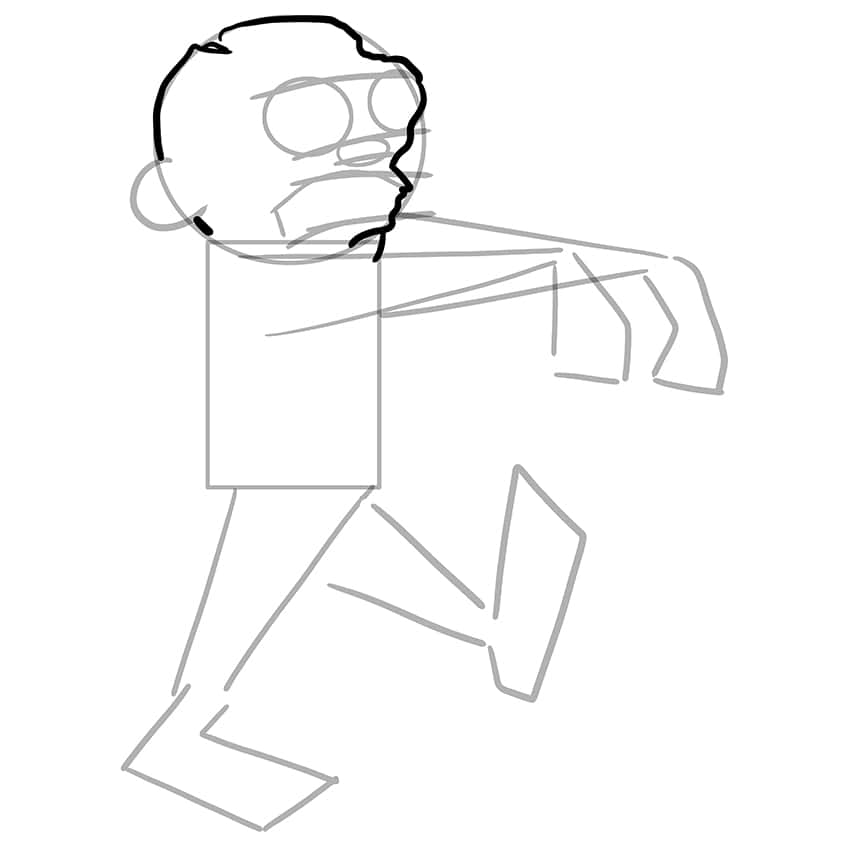
Step 7: Outline the Head on Your Easy Zombie Drawing
Utilize the construction lines you drew earlier as a guide while outlining the zombie’s head. Focus on creating a form that is less smooth and round, opting instead for a more rigid and structured appearance.
Step 8: Continue to Outline Your Zombie Drawing
Continue to outline the shirt above the zombie’s main body.

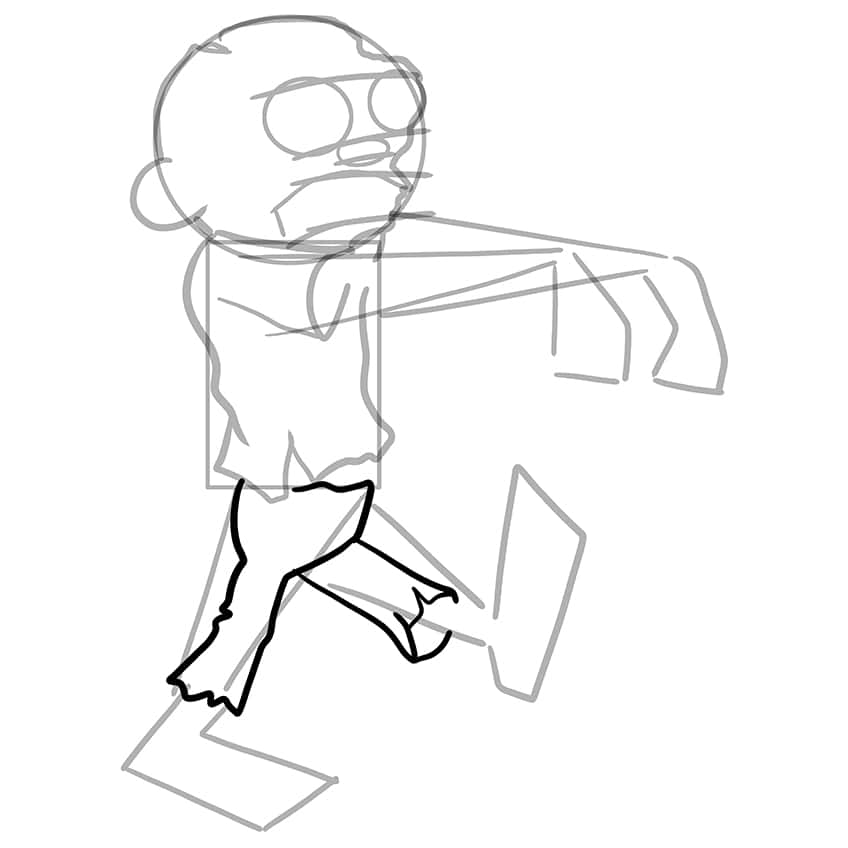
Step 9: Outline the Pants
Utilize the construction lines drawn earlier to help outline the zombie’s pants.
Step 10: Continue to Outline the Arms and Hands
Continue to outline the zombie’s arms and hands. Ensure that the hands align with the bent-down posture indicated by the construction lines. Extend the arms outward from within the shirt sleeves. Conclude this step by drawing the visible thumbnail.

Step 11: Add an Outline to the Feet
In this step, outline the feet of the zombie, and the visible toenail.

Step 12: Outline the Eyes in Your Easy Zombie Drawing
Using the construction lines previously drawn, outline the eyes and nose of the zombie.

Step 13: Outline the Mouth and Ear
Utilize the previously drawn construction lines to outline the ear and mouth. Begin by imparting a curved form to the ear, emphasizing the inner earlobe. Next, outline the mouth, intricately drawing each crooked tooth. Complete the process by erasing any lingering construction lines for a refined finish.
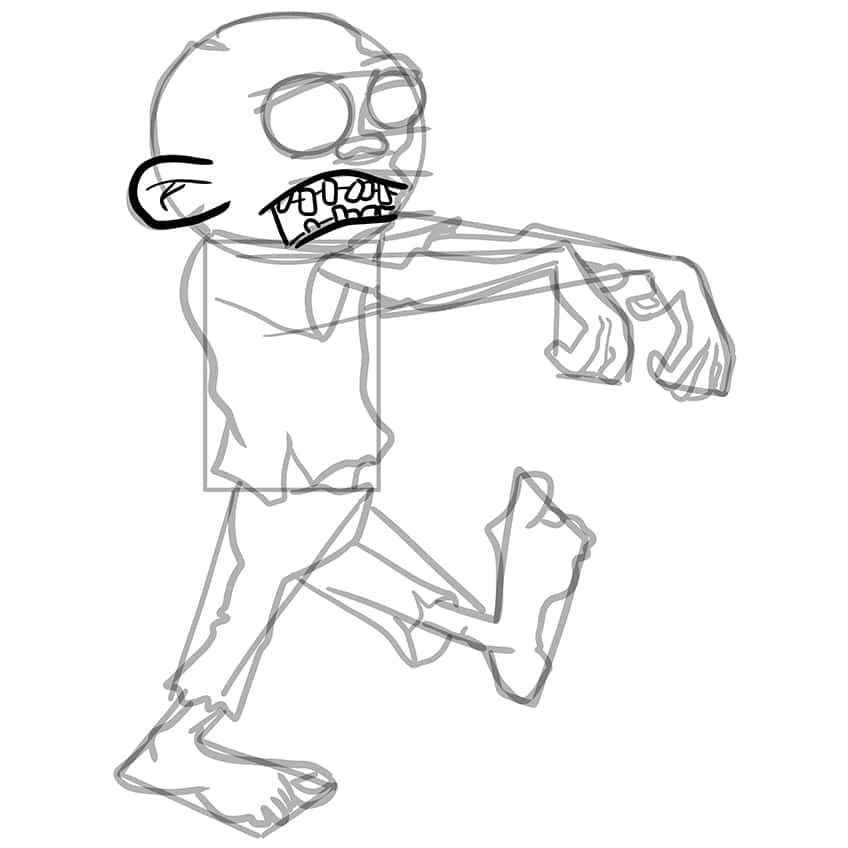
Step 14: Add Texture to Your Zombie Drawing
Begin by adding crack lines and stitches to the head of the zombie. Continue by adding subtle structure and texture lines to the shirt and pants. Within darker areas such as the sleeves, apply shading lines.

Step 15: Begin to Color Your Scary Zombie Drawing
Apply an even layer of yellow-green using a fine, sharp brush to cover the head, arms, feet, and any other exposed skin areas.

Step 16: Color the Shirt
Using the same brush and gray paint, evenly coat the shirt in your zombie drawing.

Step 17: Continue to Add Color
Utilize a precise, fine brush and a Prussian blue shade of paint to uniformly cover the pants.

Step 18: Color the Mouth
Employ a fine, sharp brush and dark brown paint to delineate the mouth outline. Subsequently, use a precise brush to fill the mouth with a dark maroon shade, incorporating red for the gums and white paint for the teeth. For the eyes, employ a fine, sharp brush to fill them with a light yellow paint.

Step 19: Shade and Highlight the Zombie
With a soft brush and black paint, add soft shading along the edges of the head, arms, hands, and feet. Use this to contour and structure the zombie, and repeat once more using white paint to add fine highlights.

Step 20: Continue to Shade and Highlight Your Easy Zombie Drawing
Take a small, soft brush and black paint to introduce shading to both the shirt and pants. Ensure the initial color coat remains partially visible, with the shading evenly dispersed. Repeat this process with a small, soft brush and white paint, adding brush strokes along the edges of the shirt and pants to highlight these areas.
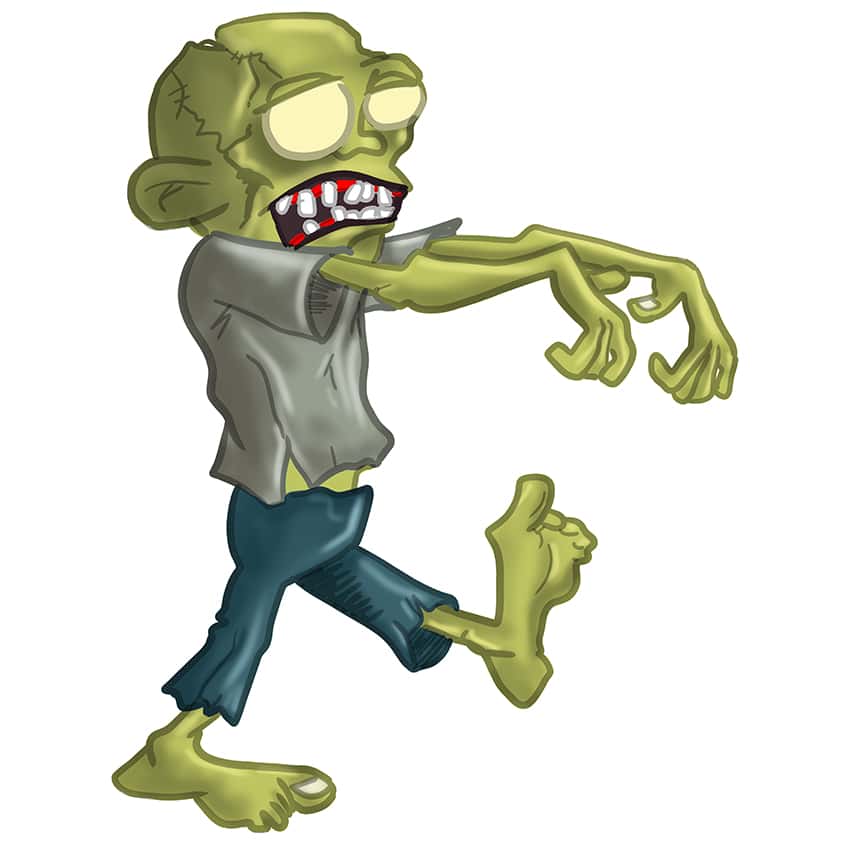
Step 21: Shade and Highlight the Facial Features
Start by employing the same brush as before, along with a darker hue of yellow-green paint, to gently shade each eye and tooth. Repeat this procedure using white paint to introduce a subtle highlight. Conclude by softly applying shading to the gums with black paint.

Step 22: Add a Ground Shadow
Utilize a small, soft brush and black paint to shadow the space beneath the zombie’s feet. Employ a blending brush to diffuse and soften the shading for a seamless effect.

Step 23: Finalize Your Easy Zombie Drawing
Grab a fine, sharp brush and black paint to meticulously outline all contours and inner texture lines, bringing your zombie tutorial to completion. Elevate your finishing touches by emphasizing the importance of refining details and adding personal flair to make the tutorial uniquely yours. Happy drawing!

Congratulations on mastering the art of drawing zombies! Now, let your creativity roam freely and infuse your undead creations with your unique style. Remember, each stroke tells a story, so don’t be afraid to experiment with different expressions and poses. Your artistic journey has just begun, and I can’t wait to see the spine-tingling worlds you’ll conjure on paper.
Frequently Asked Questions
Where Should You Start When Attempting to Draw a Zombie?
When attempting to draw a zombie, start by sketching the basic zombie anatomy, emphasizing distorted features like uneven limbs and a hunched posture. For more detailed guidance, check out our drawing tutorial to get step-by-step assistance in bringing your undead creation to life.
Are There Specific Facial Features or Expressions That Define a Zombie’s Look?
Definitely! You can start by emphasizing sunken eyes, exposed bones, and a slack jaw to capture the characteristic undead appearance. Experiment with different expressions to convey the zombie’s state.
What Materials Work Best for Drawing a Zombie?
Pencils, markers, or digital tools can be used. Consider using muted colors like greens, grays, and browns to create a creepy atmosphere, or add splashes of red for dramatic effects.
Matthew Matthysen is an educated multidisciplinary artist and illustrator. He successfully completed his art degree at the University of Witwatersrand in South Africa, majoring in art history and contemporary drawing. The focus of his thesis was to explore the philosophical implications of the macro and micro-universe on the human experience. Matthew uses diverse media, such as written and hands-on components, to explore various approaches that are on the border between philosophy and science.
Matthew organized various exhibitions before and during his years as a student and is still passionate about doing so today. He currently works as a freelance artist and writer in various fields. He also has a permanent position at a renowned online gallery (ArtGazette) where he produces various works on commission. As a freelance artist, he creates several series and successfully sells them to galleries and collectors. He loves to use his work and skills in various fields of interest.
Matthew has been creating drawing and painting tutorials since the relaunch in 2020. Through his involvement with artincontext.org, he has been able to deepen his knowledge of various painting mediums. For example, watercolor techniques, calligraphy and lately digital drawing, which is becoming more and more popular.
Learn more about Matthew Matthysen and the Art in Context Team.


