How to Draw a Werewolf – Create a Ferocious Werewolf Sketch
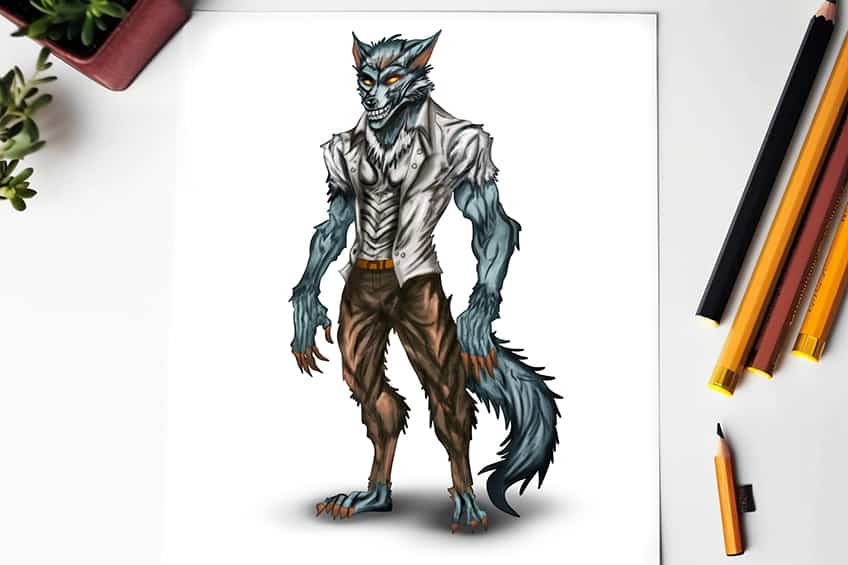
Werewolves have been a captivating part of human folklore for centuries, with tales of half-human, half-wolf creatures prowling through the night under the full moon. The idea of a person transforming into a fearsome beast has fascinated and frightened people for generations, leading to numerous books, movies, and television shows exploring the mythology of werewolves. From the ancient legends of European folklore to modern pop culture depictions, werewolves continue to captivate our imaginations and leave us wondering if there might be some truth to the legend after all. So, grab your drawing kit and get started on our drawing tutorial on how to draw a werewolf step-by-step!
Learn the Art of Drawing a Werewolf
Learning how to draw a werewolf step-by-step can be an exciting and rewarding experience. To begin, start by sketching the basic outline of the werewolf’s body, paying attention to its distinctive features such as its broad chest, muscular arms, and sharp claws. Next, add in the details of the werewolf’s face, emphasizing its ferocious teeth and piercing eyes. It’s important to also capture the texture of the werewolf’s fur, which is typically thick and shaggy. Once you have the basic outline and details sketched out, you can then refine the drawing by adding shading and highlights to create a sense of depth and dimensionality.
Whether you’re an experienced artist or just starting out, drawing a werewolf step-by-step is a fun and creative way to explore the rich mythology and folklore surrounding these fascinating creatures.
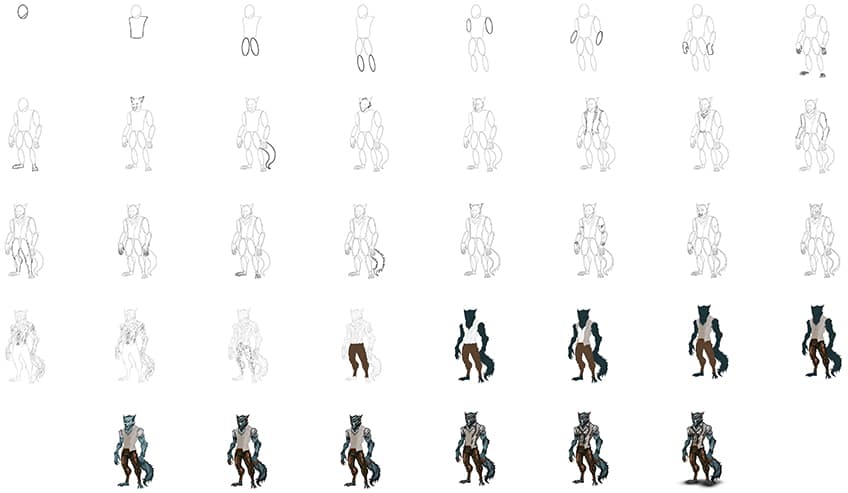
Check out our below collage that demonstrates each step you will take to create a fearsome drawing of a werewolf!
Step 1: Draw the Head of Your Werewolf Sketch
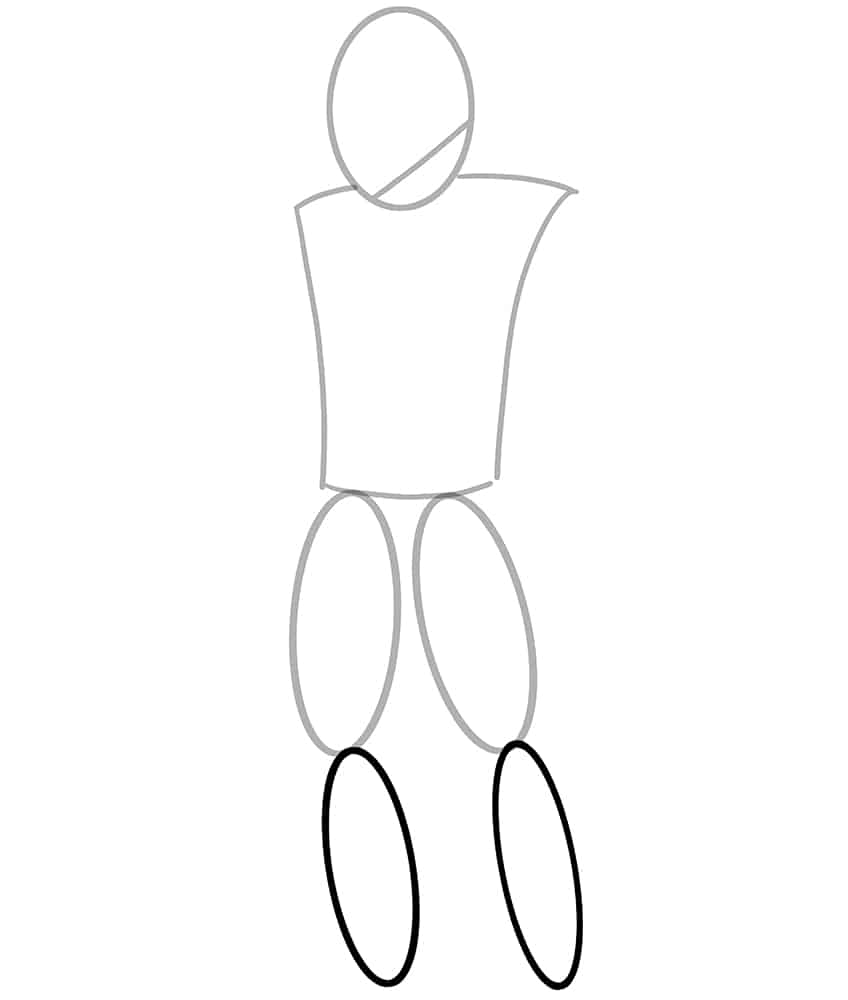
To begin your werewolf sketch, start by drawing an oval shape with a diagonal line to represent the head.

Step 2: Draw the Main Body
Attached to the head, draw the main body of the werewolf.

Step 3: Attach the Legs
Attached to the main body, draw two vertical oval shapes to represent the thighs. Attached to the thighs, draw the second pair of oval shapes to represent the legs.
Step 4: Draw the Arms of Your Werewolf Sketch
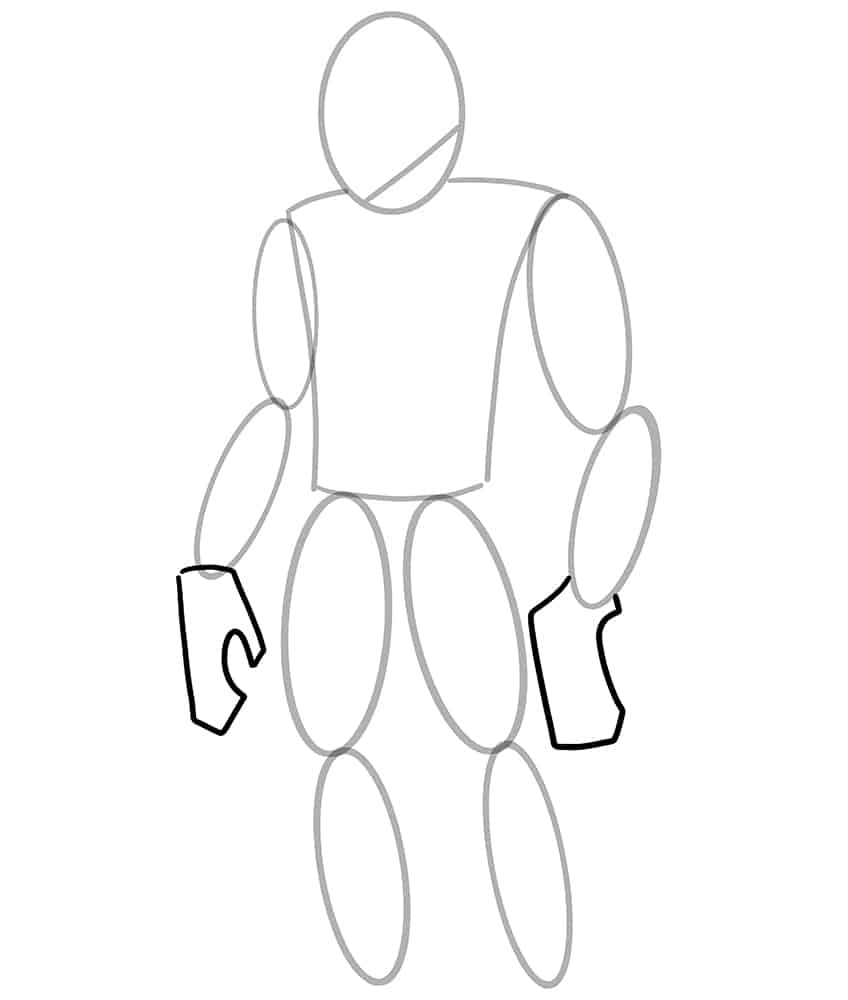
On either side of the main body, draw two oval shapes to represent the shoulders of the werewolf. Make sure that the left oval is smaller that the right. Continue the step by drawing a narrow oval shape, on each shoulder, to represent the arms of your werewolf drawing.

Step 5: Draw the Hand Construction Lines
Attached to each end of the arms, draw the hand construction lines.
Step 6: Attach the Claws to the Hands
On each hand, now draw the sharp claw. Complete this step, by drawing visible claws on the bottom of each leg on your werewolf sketch.

Step 7: Draw the Feet
Outline the feet around the claws previously added.

Step 8: Draw the Facial Features
Draw two narrow ovals within the face to represent the eyes. Below this, draw the nose and the curving mouth line above the stripe drawn in step one. Complete the step drawing the sharp ears above the head.
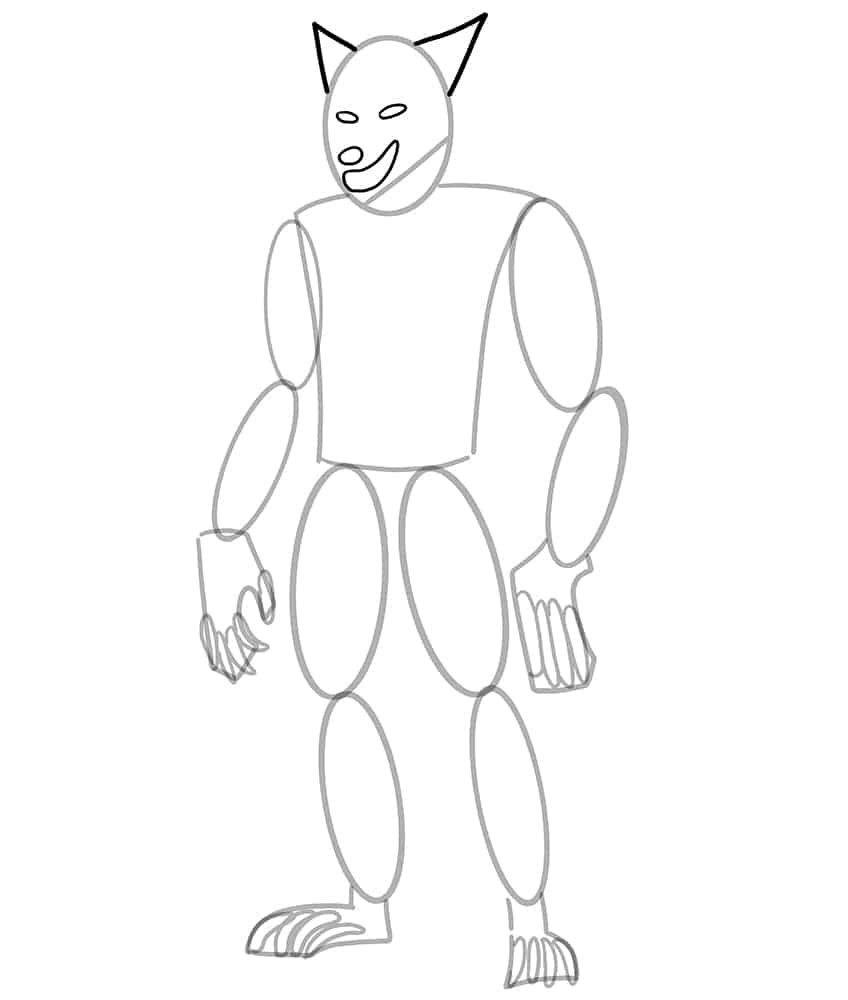
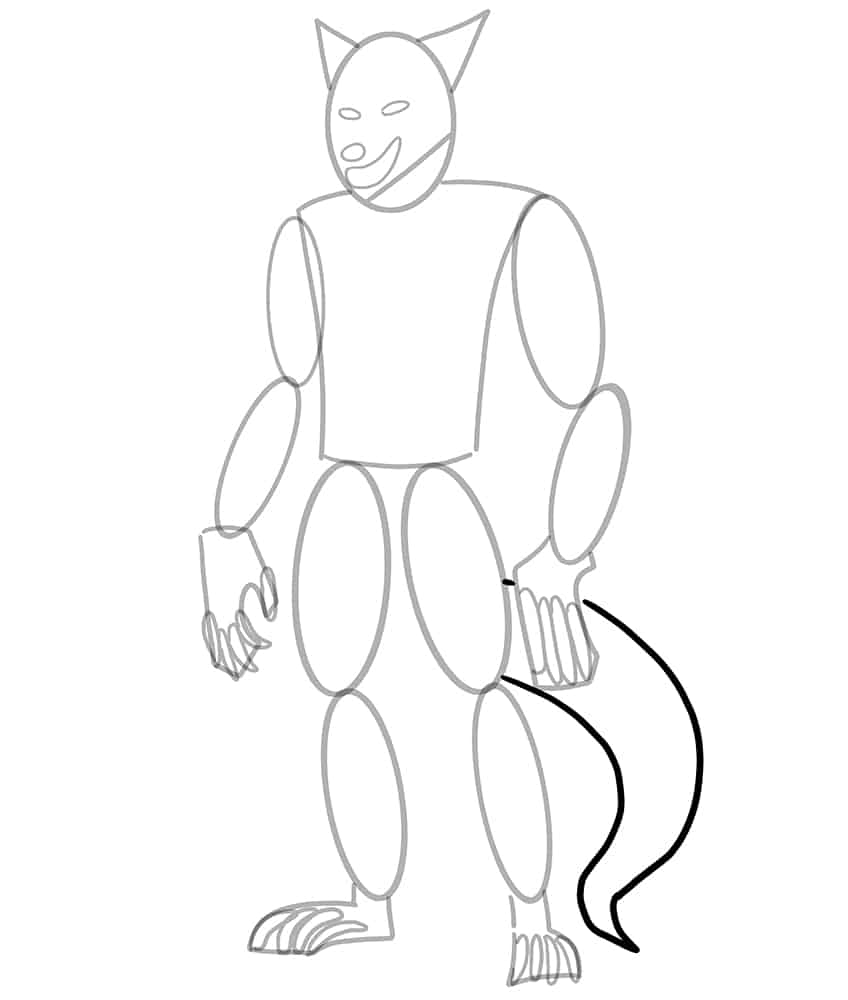
Step 9: Attach the Tail
In this step, draw a wide curving tail ending with a narrow sharp tip on your werewolf drawing.
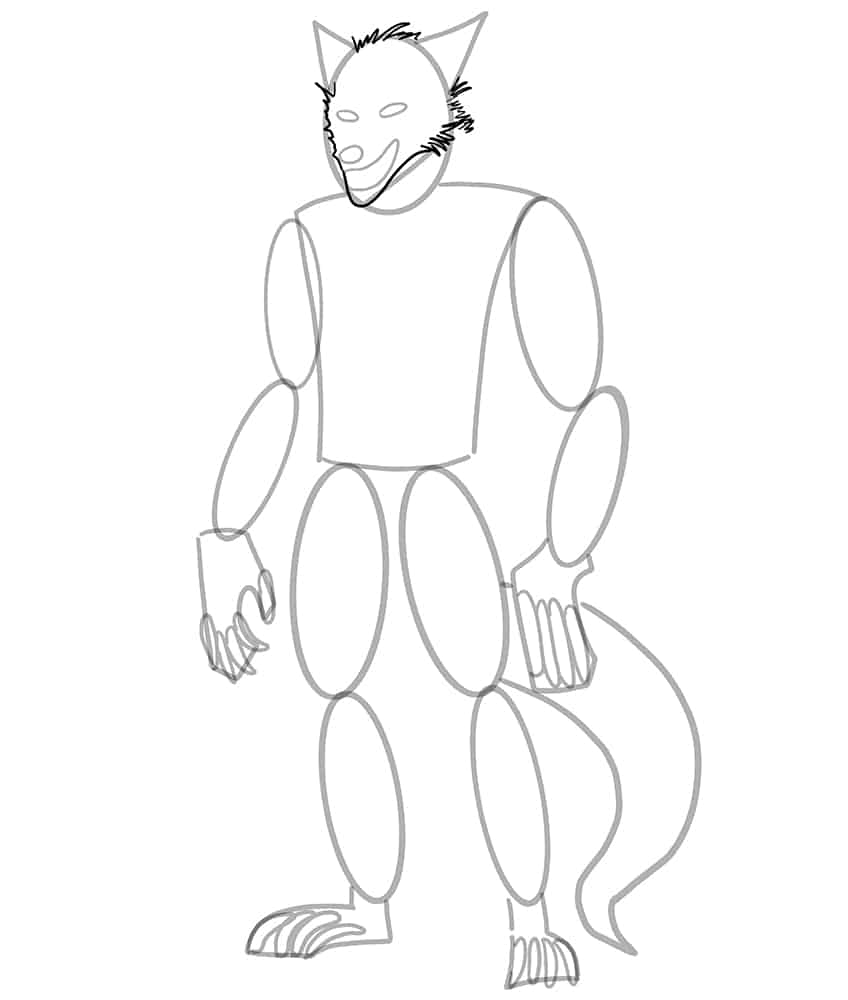
Step 10: Outline the Face
Use the previously drawn construction lines to aid you in outlining the furry face of your werewolf drawing.
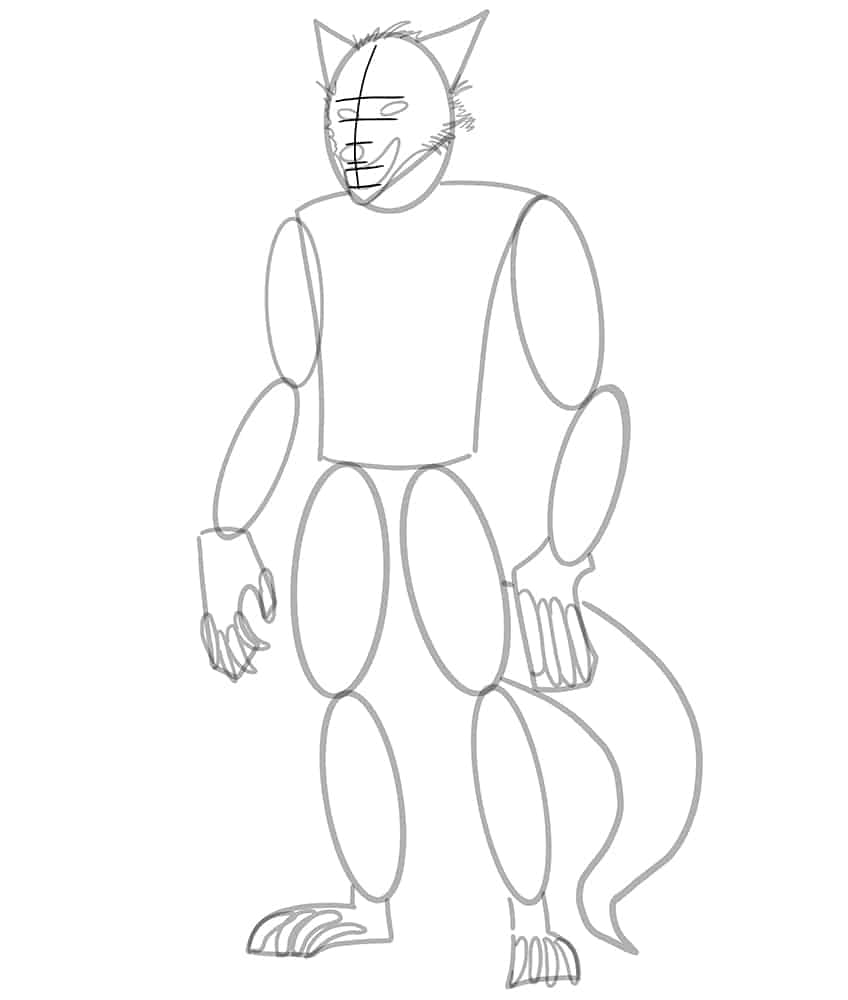
Step 11: Draw Facial Guidelines
Draw a curving, vertical line in the center of the face. Draw five horizontal lines crossing the centerline. These will aid you in the following step where you will outline the facial features in a more symmetrical and realistic perspective.
Step 12: Outline the Shirt
Use the main body’s construction lines to aid you in outlining the shirt. Draw fine buttons and creased outlines along the edges of the shirt.

Step 13: Draw the Neck Fur on Your Werewolf Sketch
Below the face, draw the neck fur leading downwards onto the chest area. Finish this step, by drawing the belt between the shirt openings.
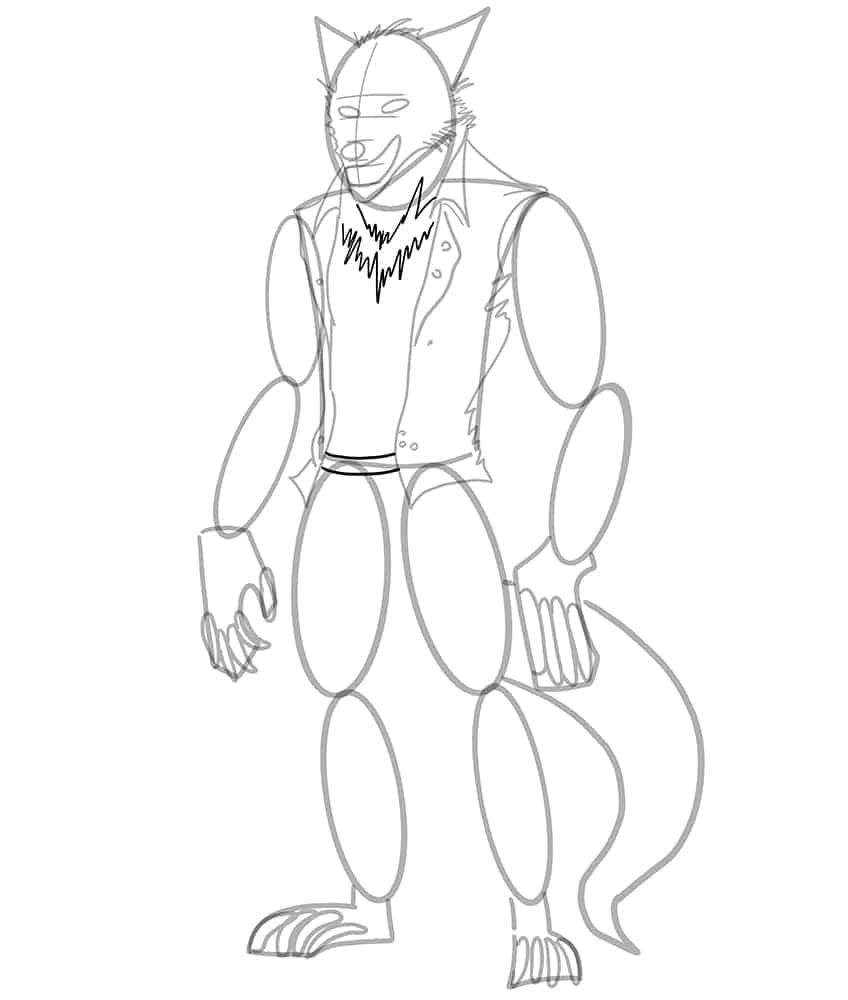
Step 14: Outline the Arms
Using the construction lines to aid you in outlining a more realistic set of shoulders and arms. Make sure that the outline has a spikey and edgy look to it.
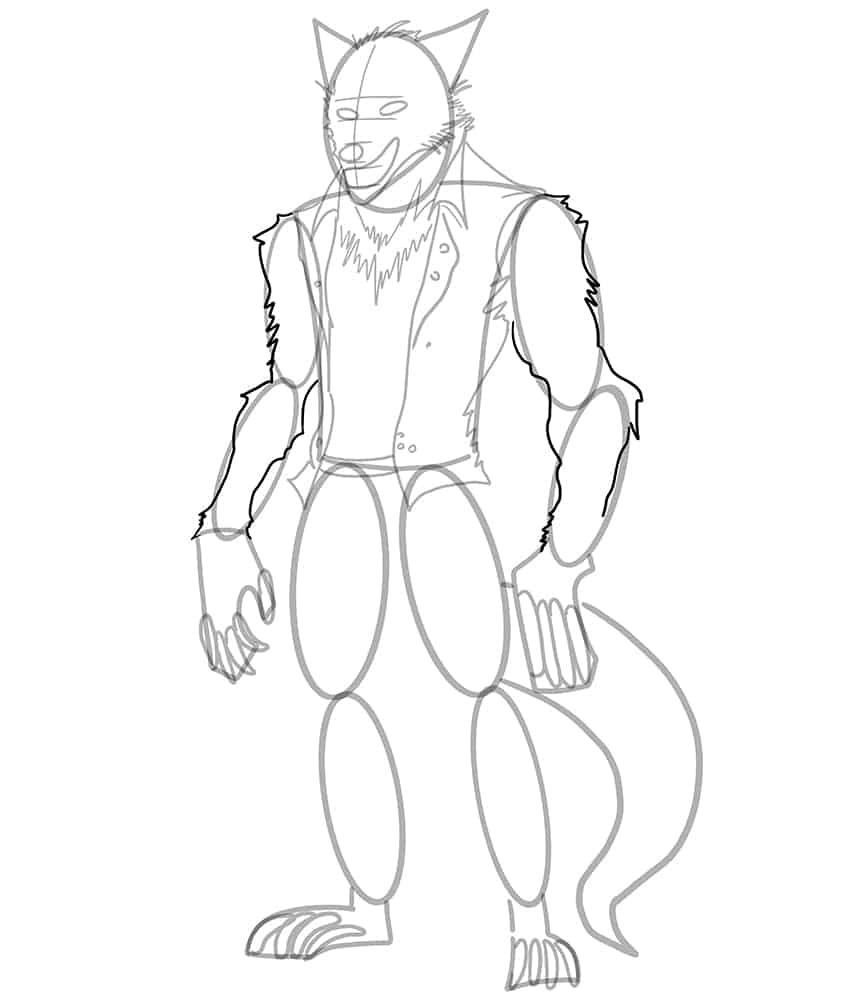
Step 15: Continue to Outline Your Drawing of a Werewolf
In this step, continue to create a furry outline on the legs of your werewolf drawing more realistically.
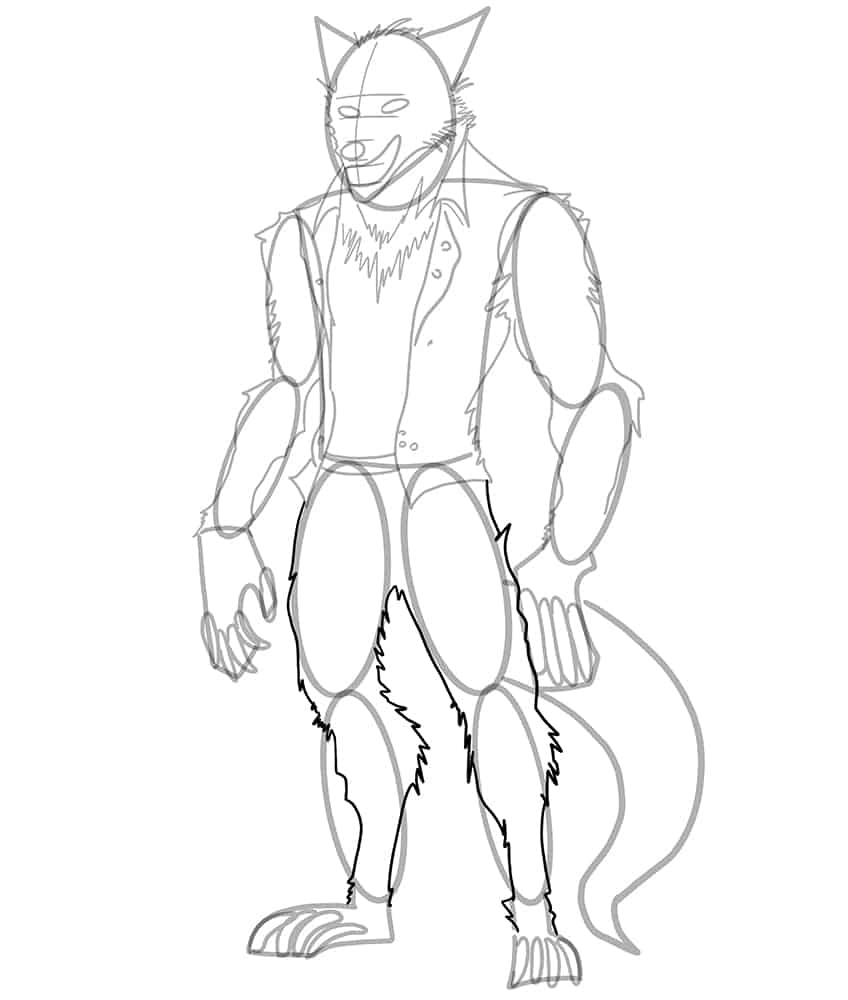
Step 16: Outline the Hands
Use the previous construction lines drawn in step five, to aid you in outlining a more realistic set of hands. Continue to draw the claws with sharp ends.
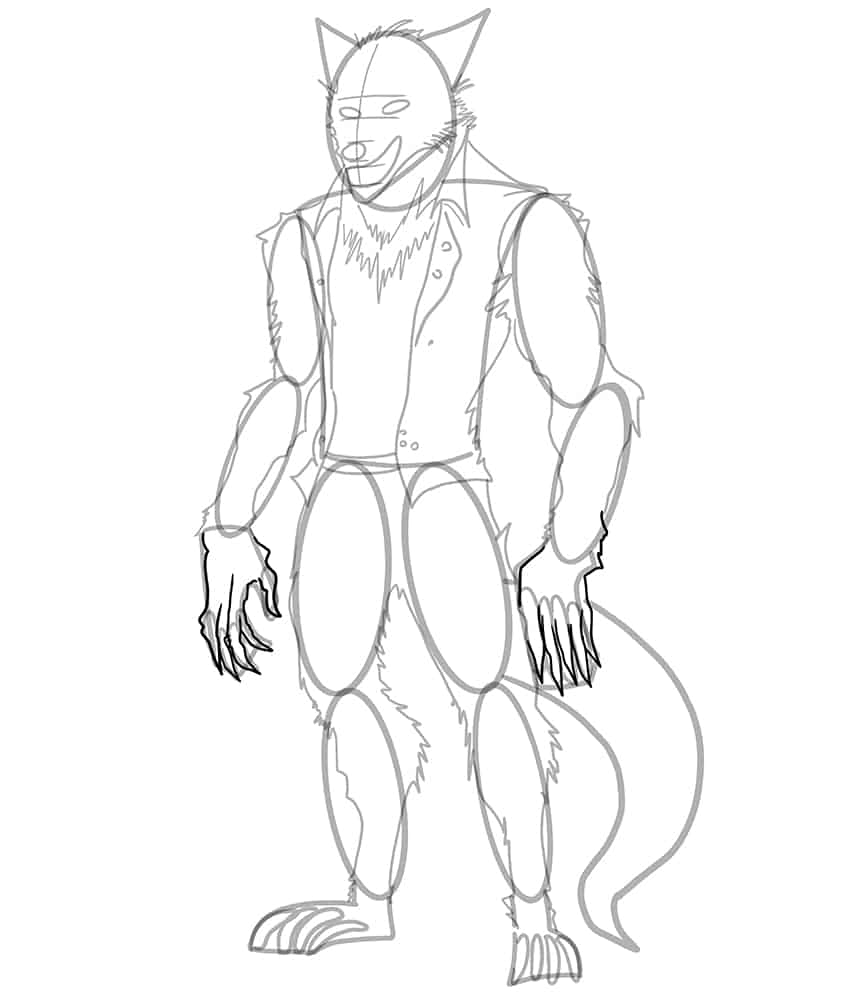
Step 17: Outline the Feet on Your Werewolf Drawing
In this step, outline a more realistic-looking set of feet, with sharp claws, on your werewolf drawing.
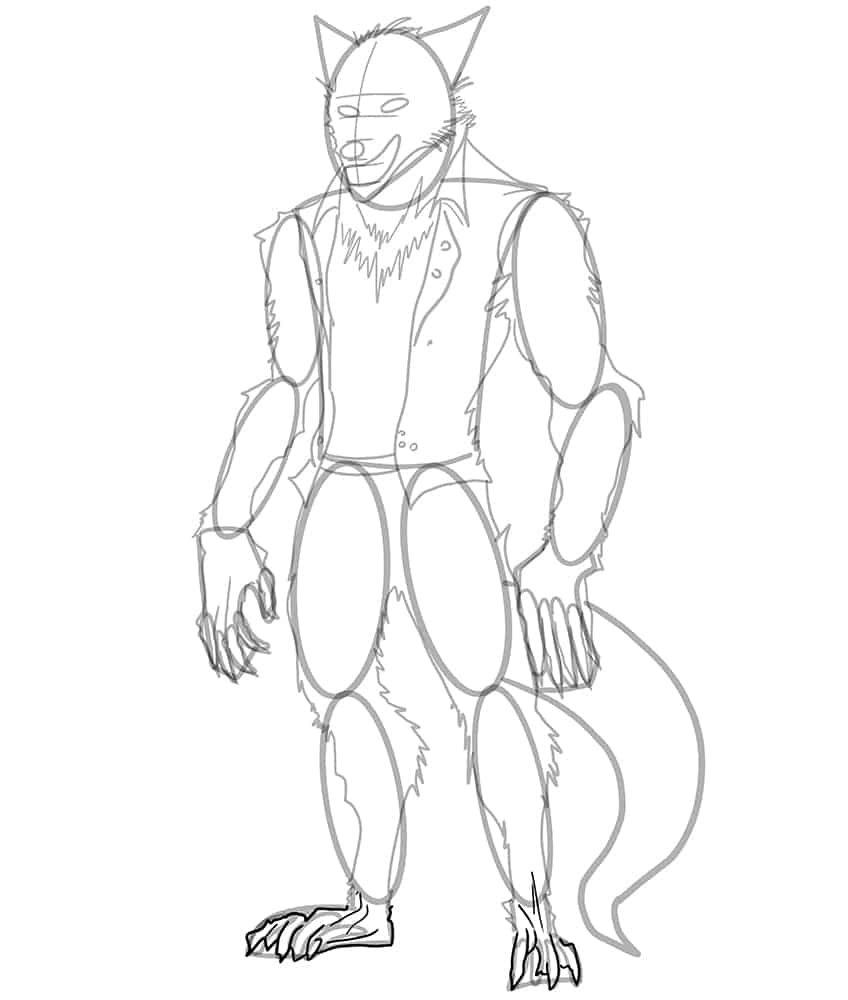
Step 18: Create a Realistic Outline for the Tail
Add fine, sharp spikes to the outlining of the tail. Make sure that the spikes follow the curvature of the tail and end with a sharp point.
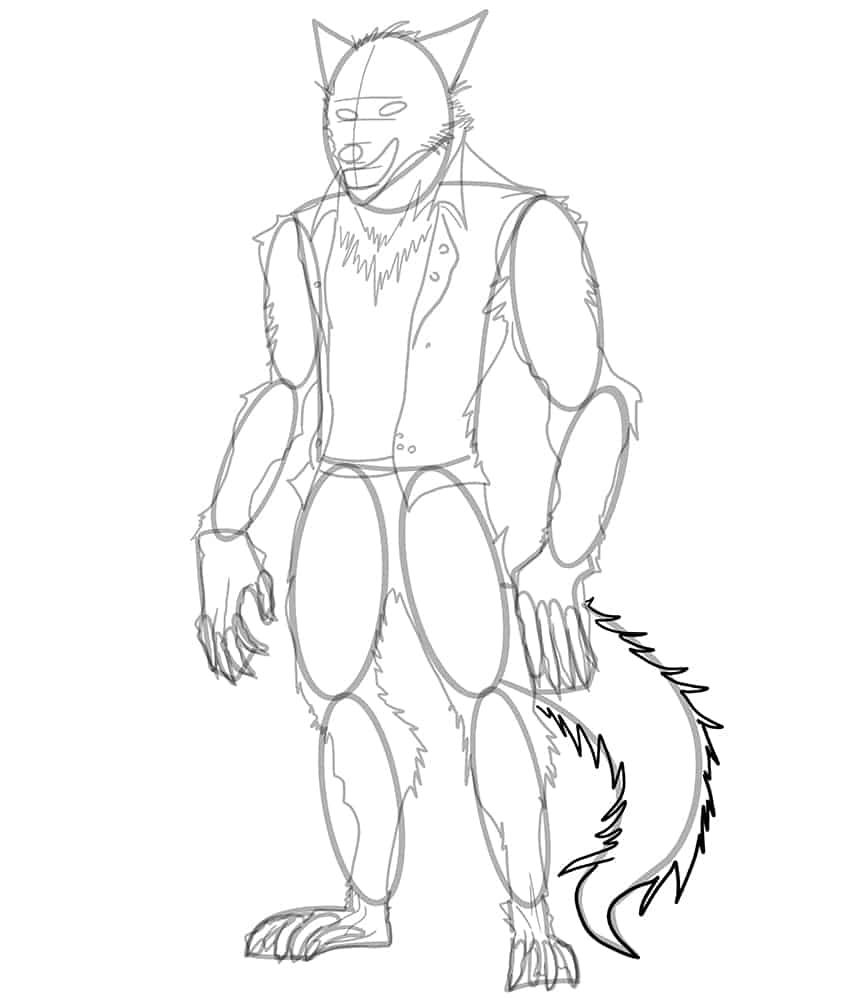
Step 19: Outline the Ears
Make use of the previously drawn construction lines to aid you in outlining a more realistic set of ears. Don’t forget to draw a line in the center of each ear.
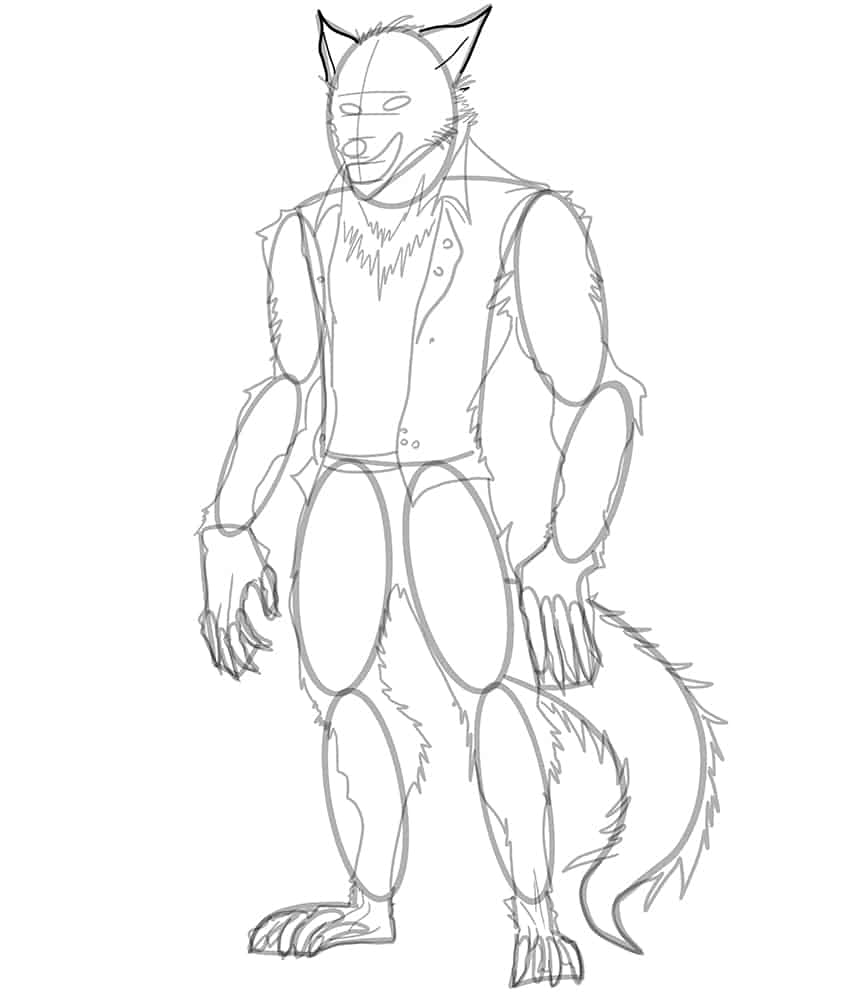
Step 20: Add a Fur Coat to the Arms
Draw several layers of fur as rough pointy outlines within the arms and shoulders.
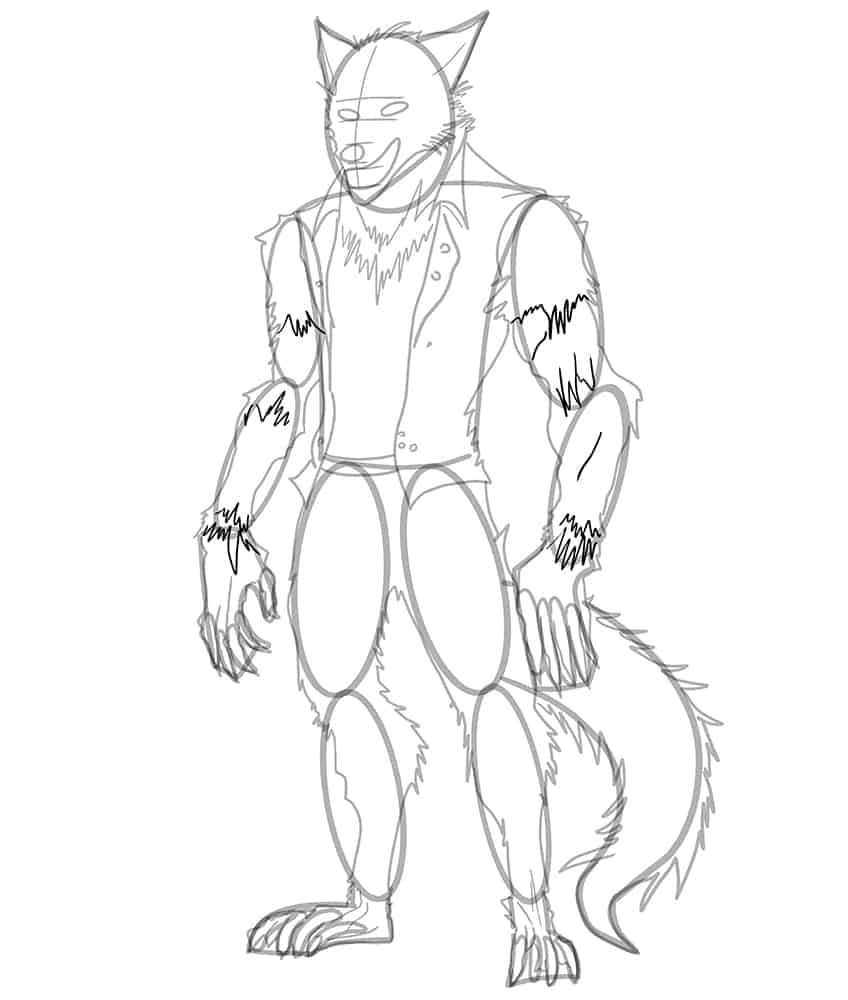
Step 21: Outline the Facial Features
In this step, use the previously drawn construction lines and guidelines to aid you in outlining more realistic eyes, nostrils, and mouth. Draw the eyebrows above each eye and continue by drawing the nostrils. Outline the mouth and draw each tooth above the second layer of teeth.
Complete the step by drawing the final nail lines on each claw.
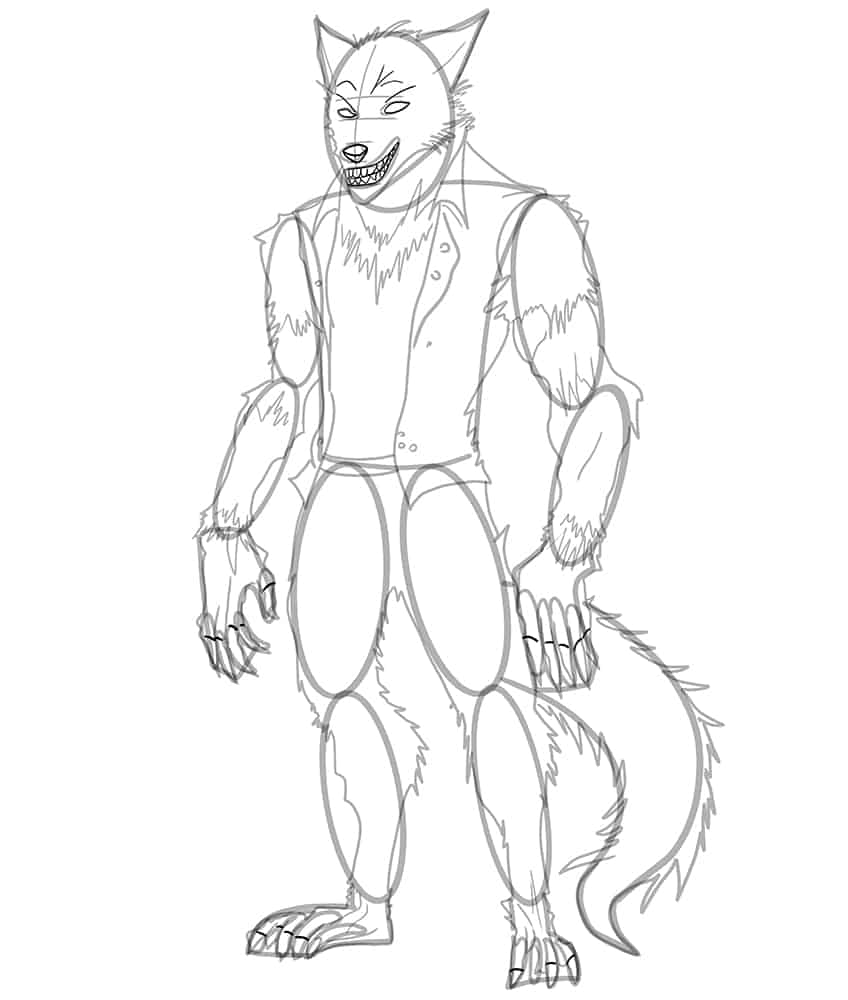
Step 22: Texture the Face of Your Werewolf Sketch
Draw fine, textured lines within the face and around the facial features leading outwards. Once you have completed this, erase any construction lines that are still visible.
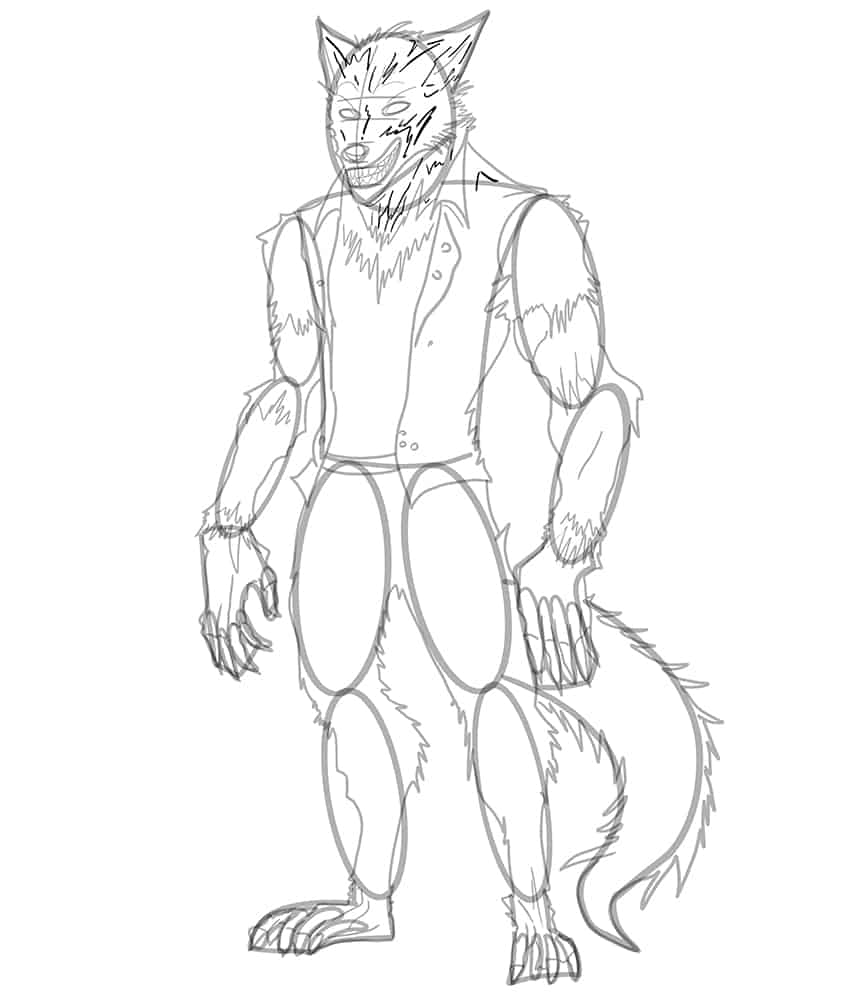
Step 23: Continue to Texture Your Drawing
Draw the chest and ab lines leading toward the belt on your drawing of a werewolf. On the shirt and arms, draw fine, edged lines to enhance the structure and texture of the body stance. Once this is completed, begin to erase the visible guidelines.

Step 24: Texture the Legs
Similar to the previous step, draw fine, edged lines within the legs to enhance the structure and texture of the pants and body stance. The edges should be sharp and lead downwards.
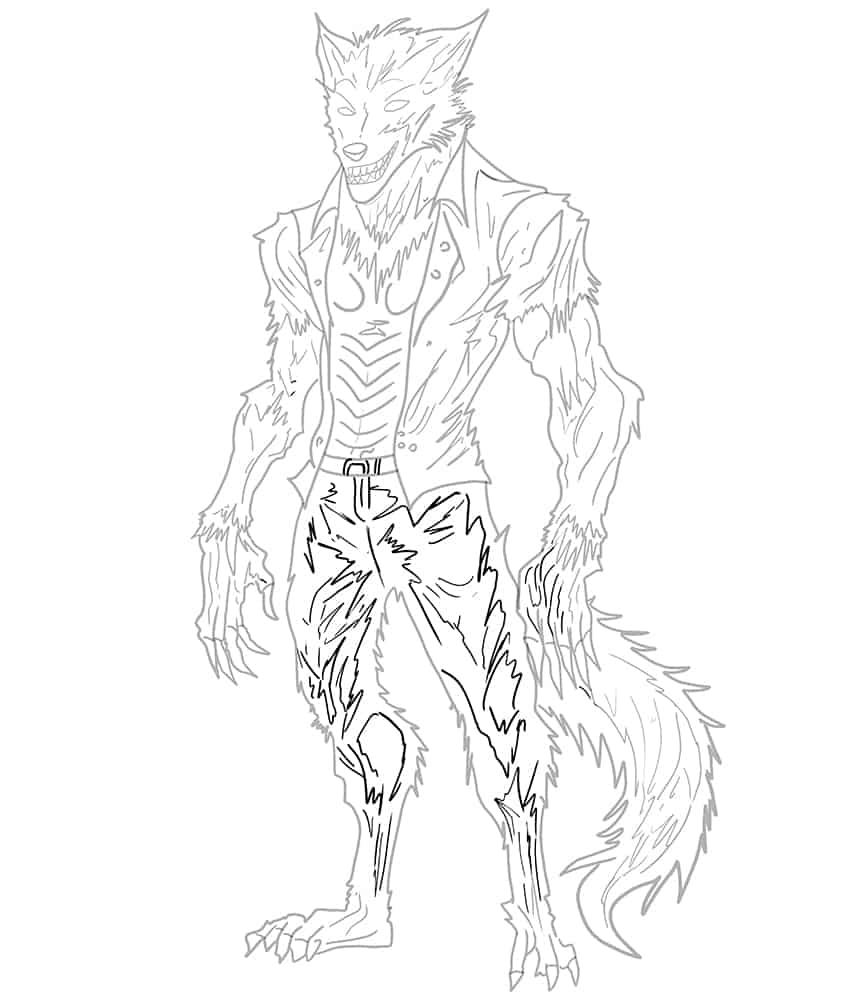
Step 25: Begin to Apply the First Coat of Color
Select a fine, sharp brush and dark brown paint, and evenly color the pants. Continue using a shade of nave blue paint, and paint the feet, tail, arms, hands, and the entirety of the head and neck.
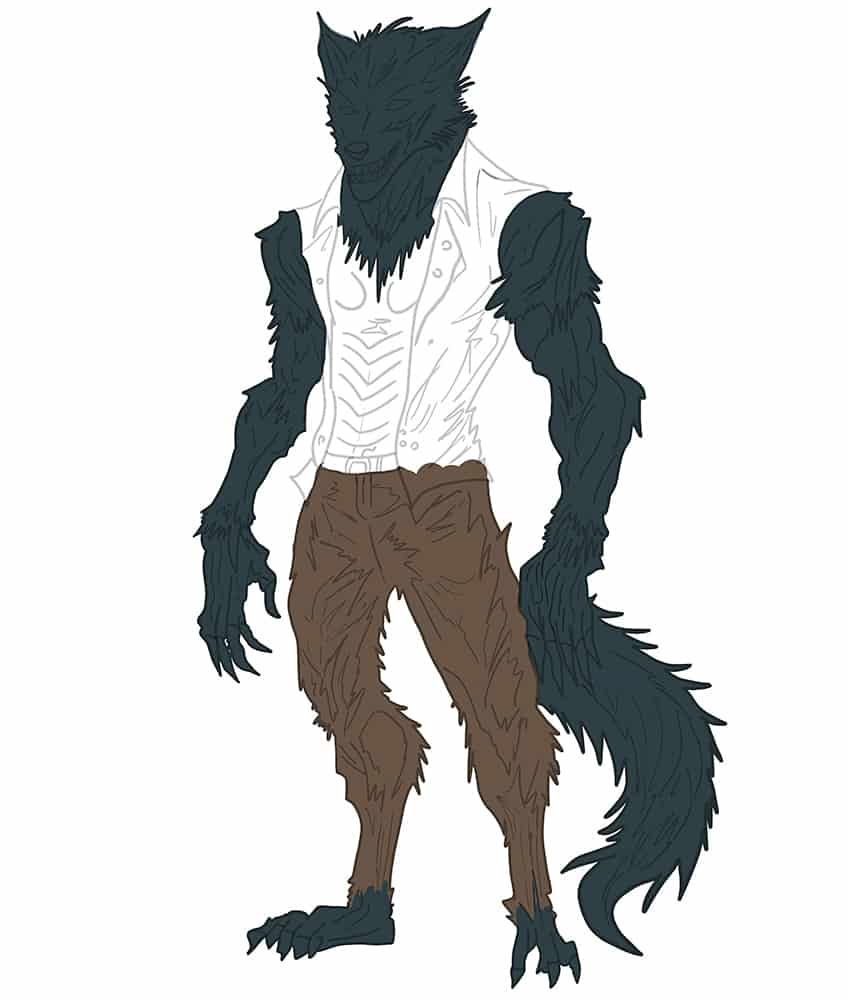
Step 26: Color the Shirt
Use the same brush as previously and switch to light gray paint, and evenly coat the shirt. Switch to a darker shade of gray paint, and color the inner shirt on your werewolf sketch.
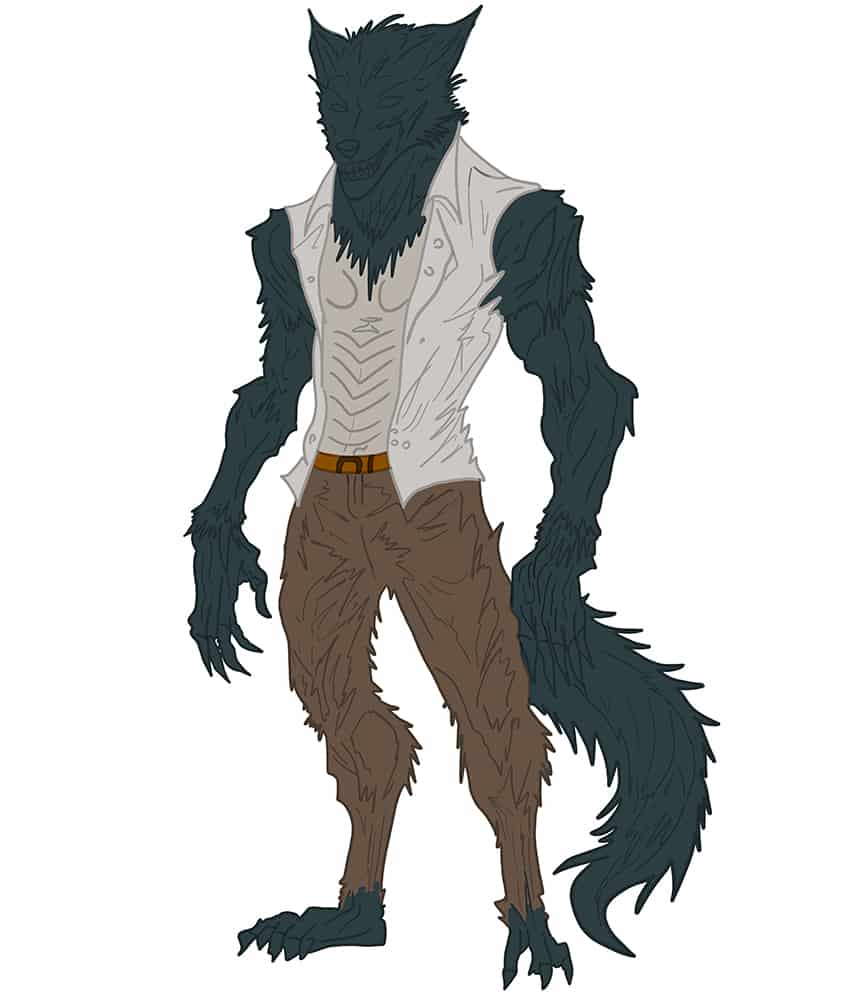
Step 27: Shade and Highlight the Pants
Begin by using a small, soft brush and a bright shade of brown paint, and softly add a color blend to the texture areas previously added to the pants. Continue by using white paint to lightly add a highlight to these spots.
Complete the step using black paint to shade the edges and texture lines. Switch to a blending brush to soften and spread the color coats.

Step 28: Highlight the Fur on Your Werewolf Sketch
In this step, begin applying a highlight within the fur coat area of the feet, tail, shoulders, arms, hands, and face, using a soft brush and a combination of turquoise and white paint. Make sure that the first color coat is still visible, especially on the edges. Complete the step using white paint to softly color the shoulder sleeves.
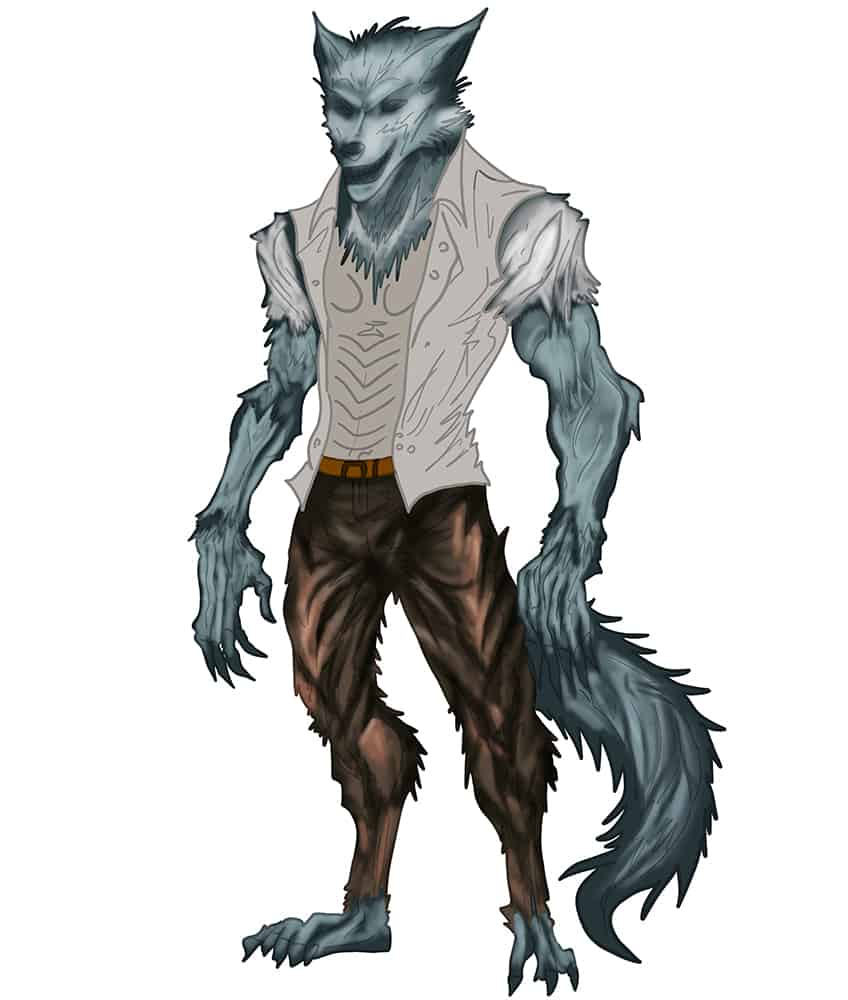
Step 29: Begin to Shade the Fur
With a small, soft brush and black paint, add soft shading along the entire visible fur coat. Switch to white paint, and color the lower patch of the neck fur. Continue by using a fine, sharp brush to trace the texture lines throughout the fur coat and shoulder sleeves. Switch to brown paint, and color the claws on the hands and feet, and the inner areas of the ears and forehead.
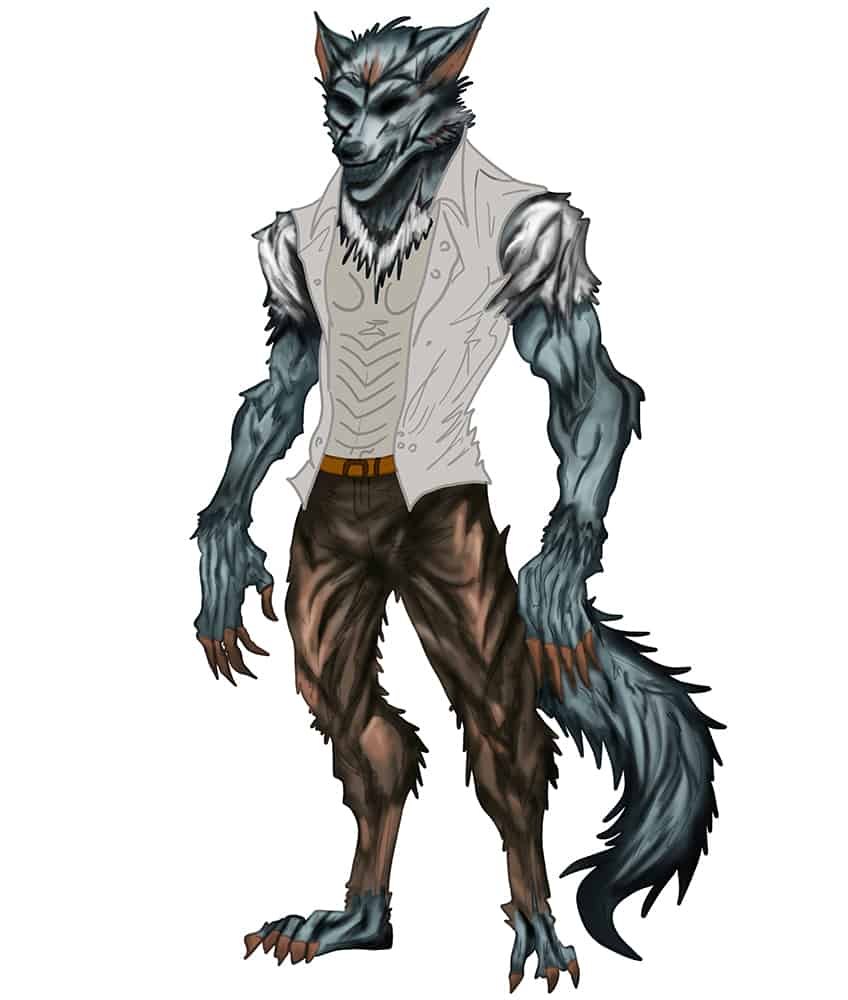
Step 30: Color the Facial Features
Begin by using a fine, sharp brush and a combination of red and yellow paint, and color the eyes. Continue by using white paint for the glow within each eyeball. Switch to a combination of black and white paint, and shape the nose and nostrils of your werewolf drawing.
Continue this step, using a thin brush and white paint, and color each of the teeth. Gray paint can be added for light shading. Complete the step by using white paint to color the side fur patches.
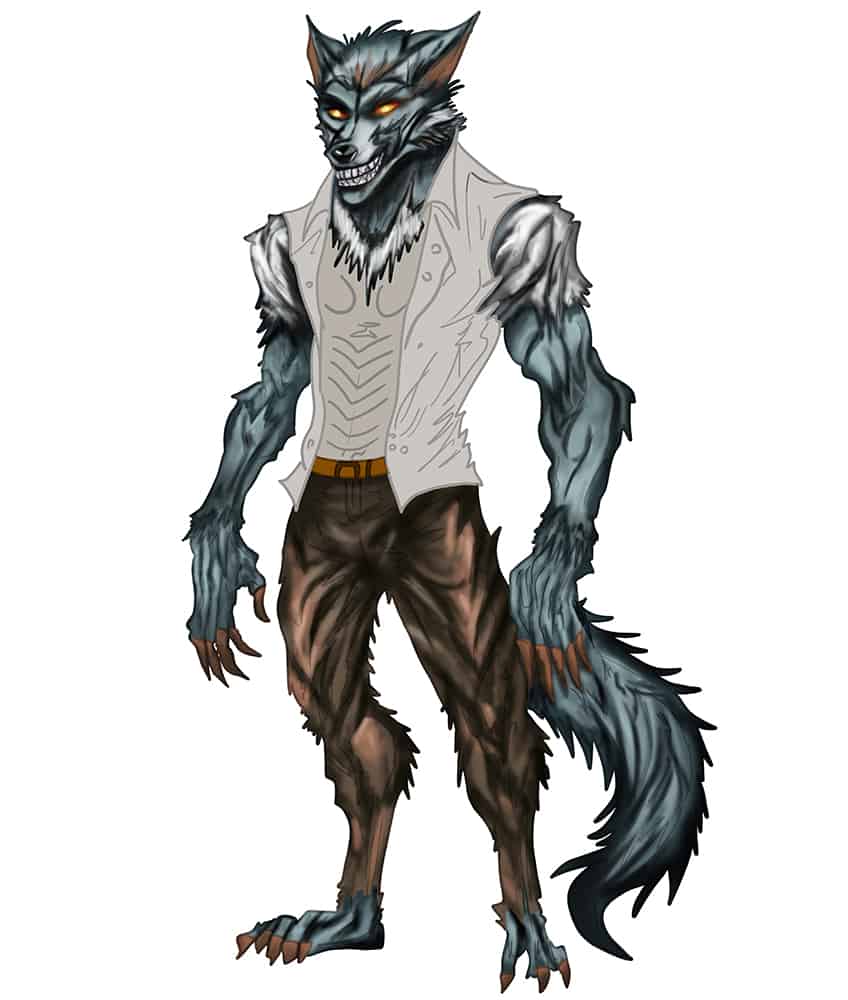
Step 31: Shade Both Shirts
In this step, add shading to the creases within the shirt, using a thin brush and black paint. Continue to add shading to the edges of the inner shirt using a soft brush. Switch to white paint and add subtle highlights to the inner and outer shirts.

Step 32: Add a Ground Shadow
You are one step closer to completing your drawing of a werewolf! To finalize your drawing, select a fine, sharp brush and black paint, and add shading beneath each foot. Follow this with a blending brush to spread and soften the casted ground shadow.
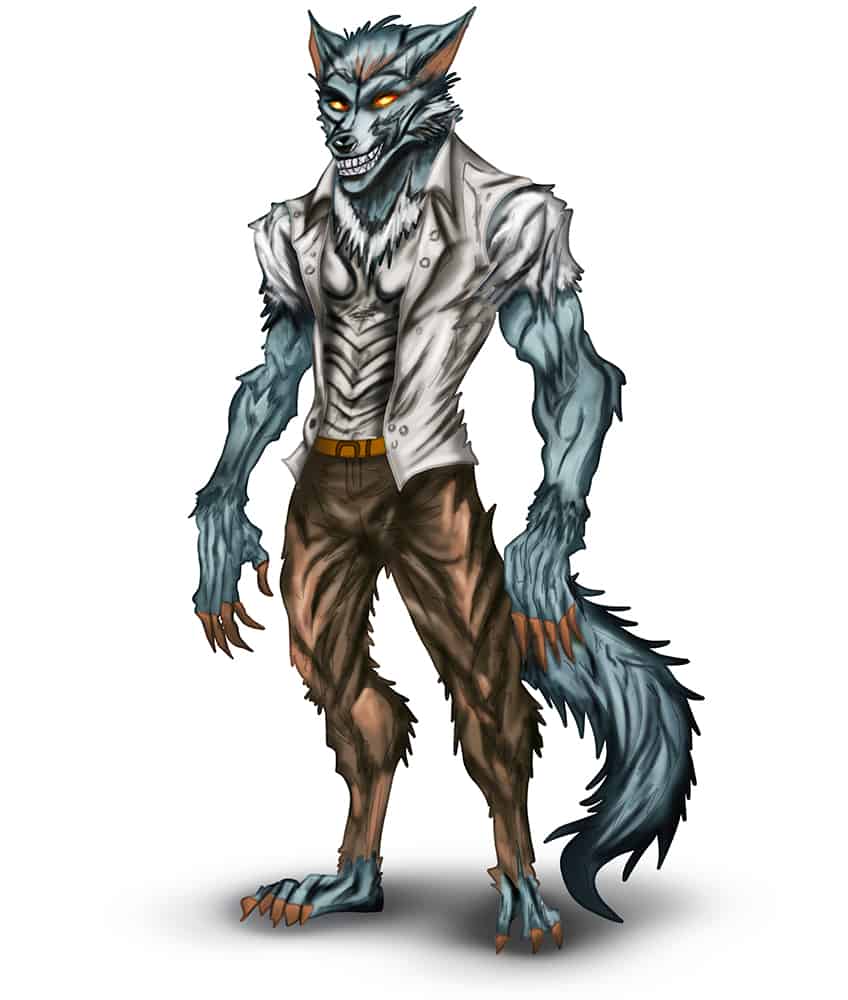
Congratulations on learning how to draw a werewolf! You’ve likely discovered that capturing the essence of this mythical creature requires a keen eye for detail and a willingness to experiment with different techniques. By mastering the various elements of a werewolf’s anatomy, from its broad shoulders to its piercing eyes and razor-sharp claws, you’ve created a powerful and evocative image that reflects the spirit of these fascinating creatures. The thick, shaggy fur and pronounced musculature that define a werewolf’s appearance require careful attention to detail, as well as a willingness to experiment with shading, texture, and other artistic techniques to bring your drawing to life. Whether you’re creating your werewolf drawing for personal enjoyment or as part of a larger artistic project, the skills and techniques you’ve developed in this process are sure to serve you well in your future artistic endeavors!
Frequently Asked Questions
How to Make a Werewolf Drawing Look More Menacing and Intimidating?
One way to make your werewolf drawing look more menacing and intimidating is to emphasize the sharp, pointed features of the creature’s face and body. Pay attention to the angle of the eyes, nose, and mouth, and use bold lines and shading to create a sense of depth and dimensionality. Experiment with different techniques for creating texture, such as cross-hatching or stippling, to add depth to the werewolf’s fur and make it appear more wild and untamed. You can also try experimenting with different color schemes or lighting effects to create a sense of mood or atmosphere that enhances the overall feeling of your drawing. Remember, the key to creating a genuinely menacing and intimidating werewolf drawing is to tap into the primal, animalistic qualities that define these creatures and bring them to life on the page.
What Kind of Materials Should You Use to Draw a Werewolf?
The materials you use to draw a werewolf will depend on your personal preferences and the techniques you plan to use. Some artists prefer to work with traditional media such as pencils, pens, and brushes, while others may opt for digital tools such as tablets and graphic design software. If you’re working with traditional media, you may want to invest in high-quality pencils, brushes, erasers, and paper to ensure that your drawing comes out clean and crisp. For digital drawing, a graphics tablet and software such as Adobe Photoshop or Procreate can provide you with a range of options for creating your werewolf drawing. Ultimately, the materials you choose will depend on your skill level, budget, and artistic goals, so don’t be afraid to experiment with different tools and techniques until you find the ones that work best for you!
Matthew Matthysen is an educated multidisciplinary artist and illustrator. He successfully completed his art degree at the University of Witwatersrand in South Africa, majoring in art history and contemporary drawing. The focus of his thesis was to explore the philosophical implications of the macro and micro-universe on the human experience. Matthew uses diverse media, such as written and hands-on components, to explore various approaches that are on the border between philosophy and science.
Matthew organized various exhibitions before and during his years as a student and is still passionate about doing so today. He currently works as a freelance artist and writer in various fields. He also has a permanent position at a renowned online gallery (ArtGazette) where he produces various works on commission. As a freelance artist, he creates several series and successfully sells them to galleries and collectors. He loves to use his work and skills in various fields of interest.
Matthew has been creating drawing and painting tutorials since the relaunch in 2020. Through his involvement with artincontext.org, he has been able to deepen his knowledge of various painting mediums. For example, watercolor techniques, calligraphy and lately digital drawing, which is becoming more and more popular.
Learn more about Matthew Matthysen and the Art in Context Team.


