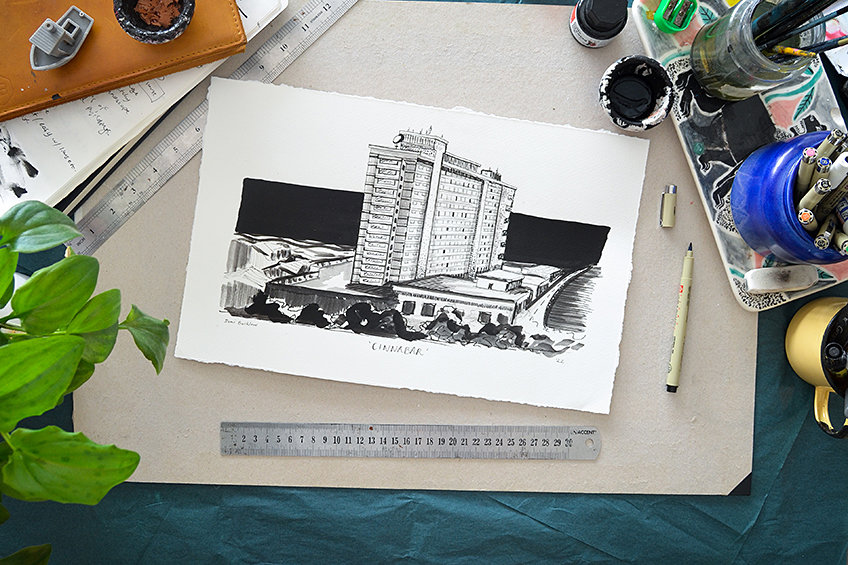
How to Draw a Skyscraper – Step-by-Step Skyscraper Drawing
Skyscrapers are incredibly impressive structures of architecture that tower above our cities. Artists’ interest in studying buildings and practicing architectural drawing has been occurring for centuries. It is no wonder we look in admiration towards these colossal structures of perfection and become inspired to create our own skyscraper drawings. In this tutorial, you will learn how to draw a skyscraper using a few simple techniques. This includes using a vanishing point, observing perspective, and practicing proportions.
Finding Inspiration for Your Skyscraper Drawing
It is always a good idea to find inspiration by experiencing the visual through your own eyes, however, not all of us have immediate access to the cities. The internet is a great place to find inspiring reference images of the incredible structures that exist in our world, but you are also encouraged to add your own touch. Rather focus on the process and practice for your skyscraper sketch.
You could even take it a step further and eventually include details of the surrounding city, such as trees, streets, and other buildings.
Step-by-Step Instructions on How to Draw a Skyscraper
This tutorial will guide you through how to draw a skyscraper by guiding you through a few easy steps. You will first focus on understanding the basic foundations of perspective through a vanishing point. You will then focus on the linework and angles of your skyscraper sketch.
Once you have these first few steps down, you will have everything you need to create a unique skyscraper drawing of your own.
List of Tools and Materials
In this tutorial, you will need just a few tools and materials to create your skyscraper sketch. You can use any medium you choose to work with and are encouraged to add color if you would like to add your own touch. This tutorial will guide you toward creating a black-and-white skyscraper drawing using the following materials.
- Paper of your choice
- Ruler
- Drawing board
- Masking tape
- Ruler
- Variety of pencils
- Sharpener
- Eraser
- Drawing ink (WINSOR & NEWTON Drawing Ink, Black Indian Ink)
- Pens or fine liners
- Paintbrushes
- Water container
- Masking fluid (optional)

Step 1: Prepare Your Tools and Materials
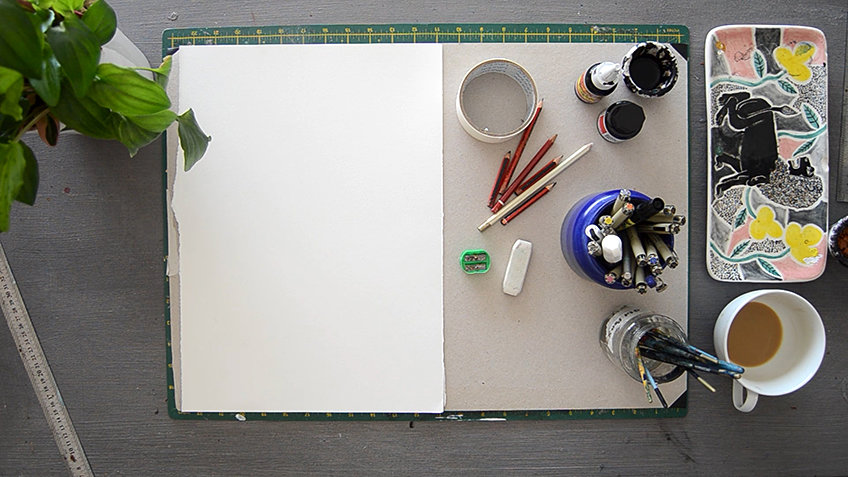
Begin by setting up your workspace by preparing all your tools and materials. You can fix your paper on your drawing board by creating a frame around the edges with masking tape. This will help you keep your paper in place and prevent it from warping in the later stages of your skyscraper drawing.
Step 2: Begin by Drawing the Line of the Horizon
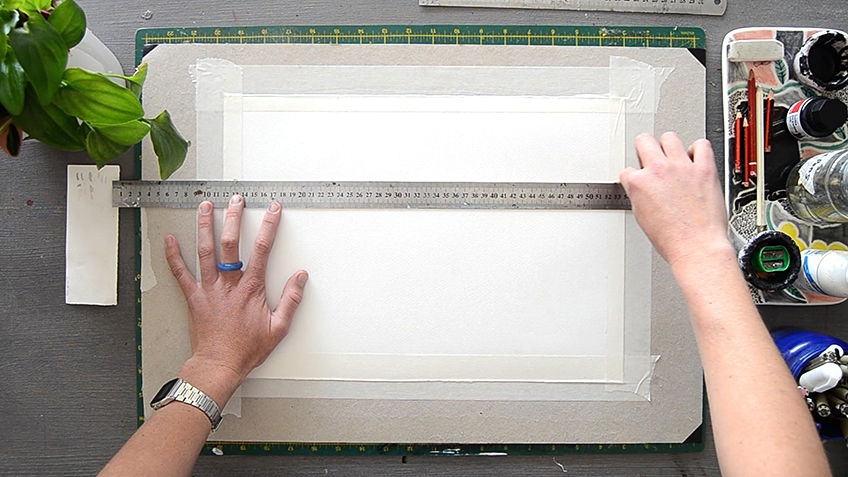
Using a ruler and pencil, draw a horizontal line that runs across the page. This line will feature as the horizon for your skyscraper sketch. Even if your sketch does not feature a horizon, it is recommended to still go ahead and sketch it in anyway.
Doing so will assist with setting up the correct angles for your skyscraper drawing.
Step 3: Mark the Horizon Line on the Far Right With an “X”
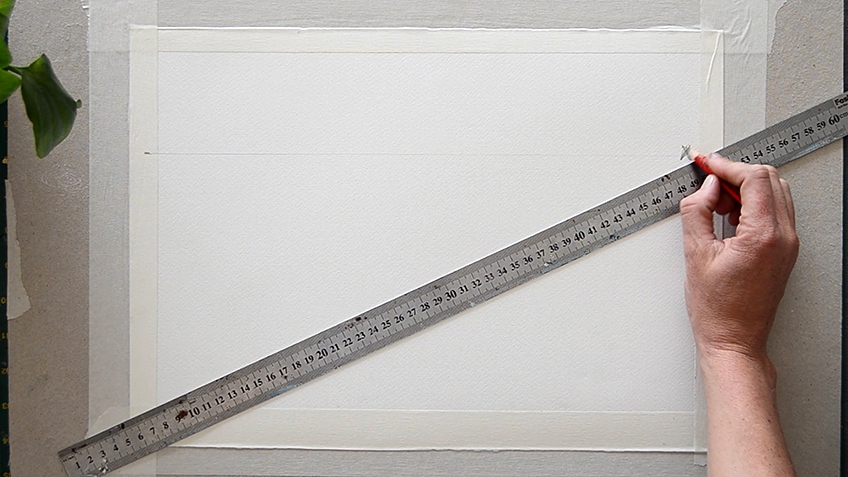
Observe the possible angles from which you could work. Mark the horizon line on the far right with an “X”. This mark will feature as the vanishing point, or point of convergence, for your skyscraper sketch. This is the point at which receding parallel lines diminish or vanish out of sight.
Step 4: Find the Center of the Page and Draw a Point
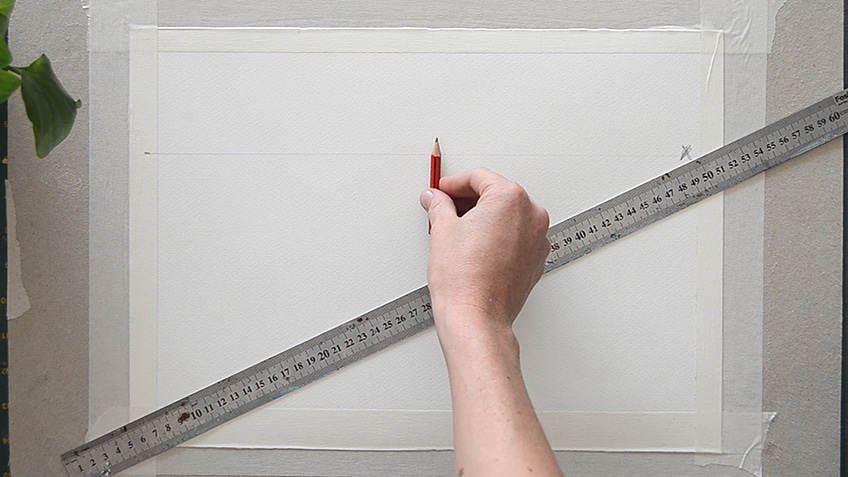
Find the center of the page and draw a point along the horizon line. Here, you can play around a bit with composition.
If you do not want your skyscraper centered, you can place your point anywhere along this horizon line.
Step 5: Divide the Page Into Four Sections With a Vertical Line Through the Middle Point
Divide the page into four sections by drawing a vertical line through the middle point. This line will be the base from which you plan your skyscraper sketch.
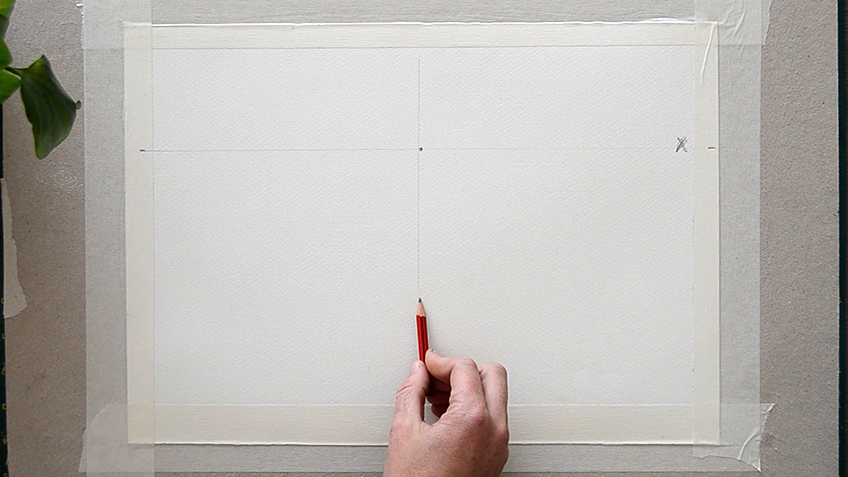
Step 6: Draw a Diagonal Line From “X” Towards the Bottom of the Vertical Line
Using a ruler and pencil, draw a diagonal line that runs from “X” to the bottom of the vertical line (about three or four inches from the bottom of the page).
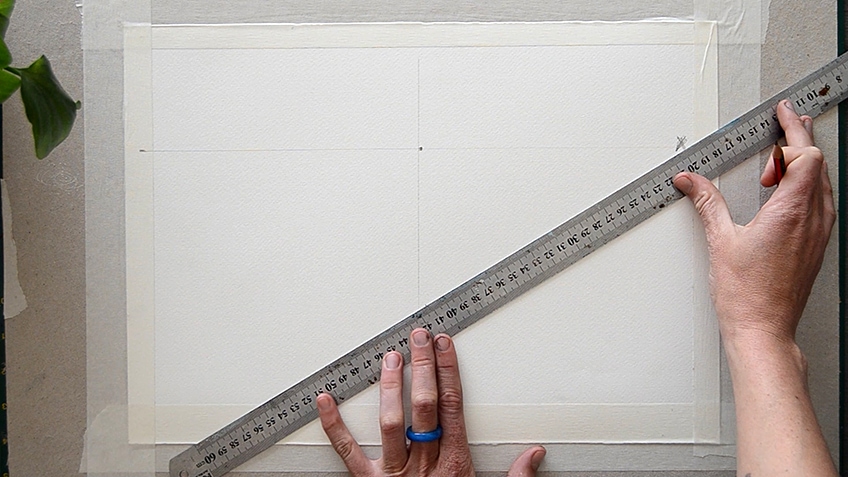
Step 7: Draw Another Diagonal Line From “X” Towards the Top of the Vertical Line
Repeat the step above, but this time, draw a diagonal line that runs from “X” to the top of the vertical line (about two inches from the top of the page).
These parallel lines will guide you toward achieving the right angles for your skyscraper sketch.
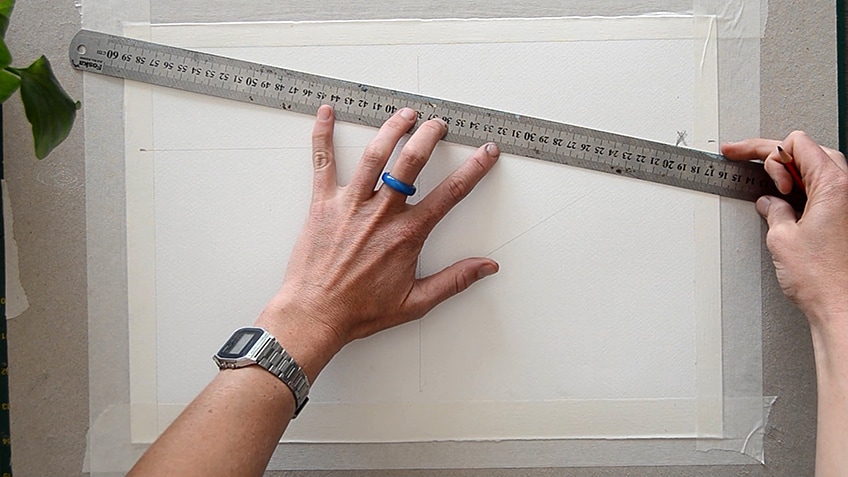
Step 8: Draw a Short Horizontal Line to Create the Base of Your Skyscraper
Next, draw a horizontal line at 90 degrees to the left of the vertical line. This line can be about an inch long and will feature as the base of your skyscraper.
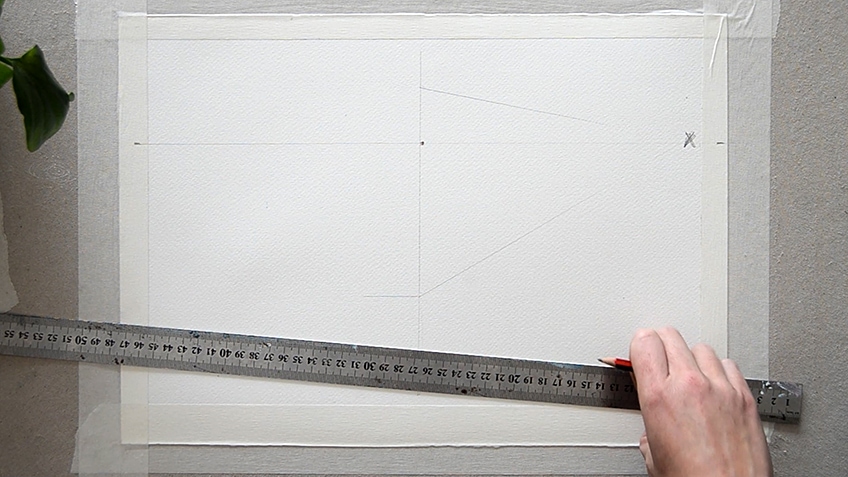
Step 9: Draw a Long Vertical Line to Create the Left Side of Your Skyscraper
Working from the horizontal baseline in step eight, draw a vertical line that runs upwards and parallel to your middle vertical line. This will define the left edge of your skyscraper.
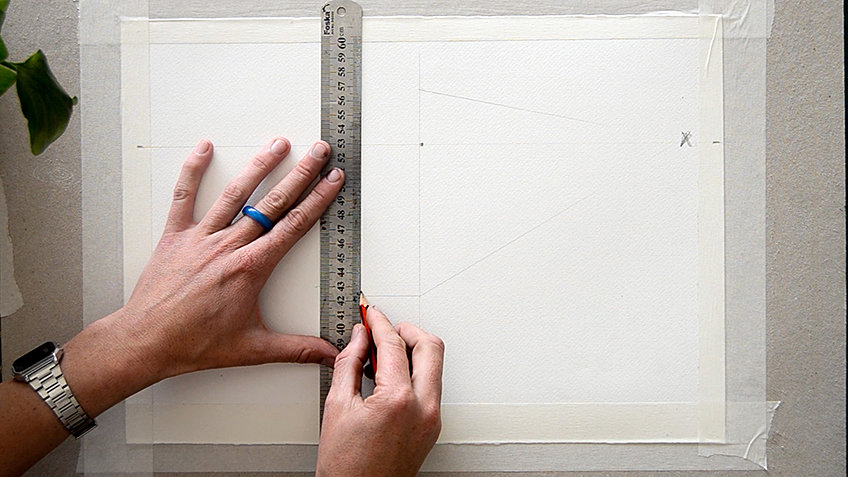
Step 10: Draw Another Short Horizontal Line at the Top of the Rectangle
Draw another short horizontal line that runs towards the middle vertical line, as done in step eight. This line will close the rectangle that is taking shape for the foundations of your skyscraper sketch.
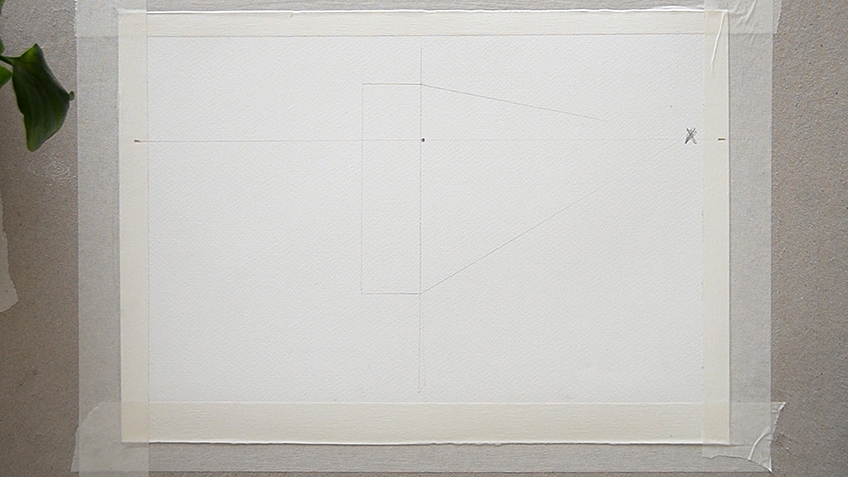
Step 11: Draw the Last Vertical Line on the Right to Close the Box
Draw the last vertical line to connect the diagonal parallel lines that run towards “X”. This will close the lines and you will start to see a box forming. These are the very basic foundational lines you will need to draw a skyscraper.
You can actually create almost any building idea you might have in mind by following these steps up to now!
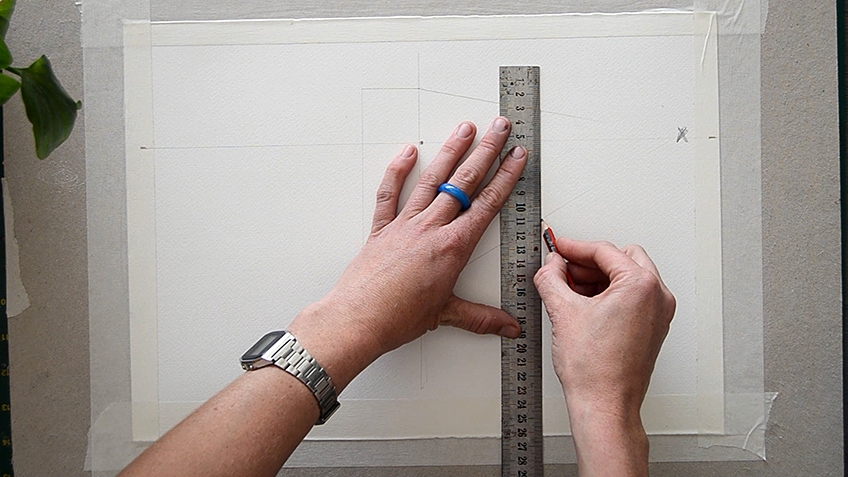
Step 12: Define Your Planning With a Darker Pencil
Now you can start defining your planning with a darker pencil. Begin loosely sketching over the lines you have created for this box until you are happy with the general shape of the building.
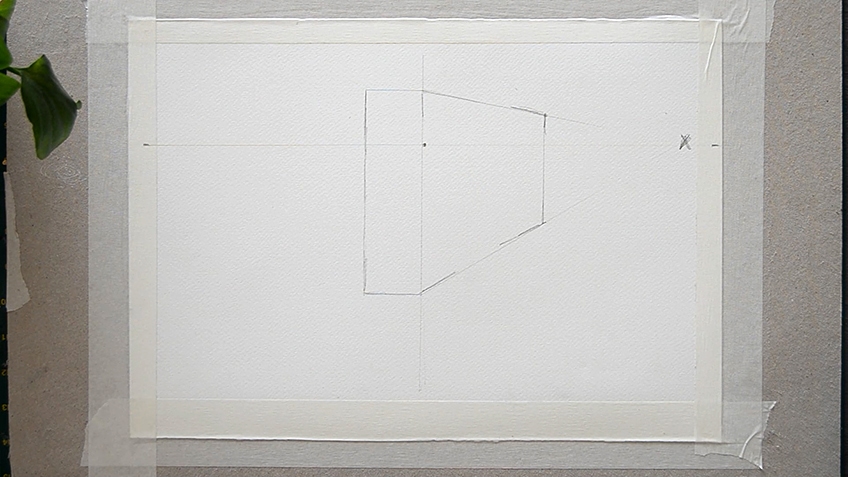
Step 13: Begin Sketching More Details Around the Skyscraper
Begin sketching more details around the base of the skyscraper. This includes a basic sketch of what elements feature below the skyscraper, such as trees, other buildings, parks, and houses.
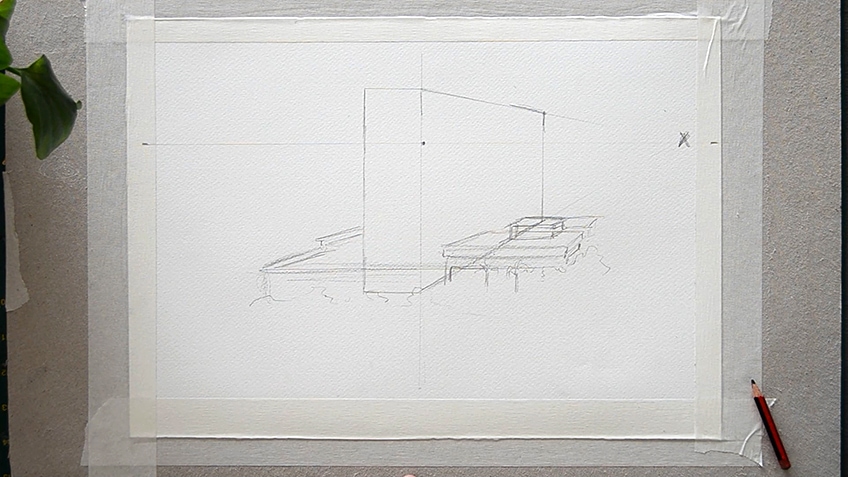
Step 14: Erase Any Unnecessary Pencil Lines
Go ahead and erase any unnecessary pencil lines that you do not need anymore. This includes invisible lines below the skyscraper, as well as the middle vertical line that runs through the page. Be sure to keep your horizon line intact if it is visible in your skyscraper drawing.
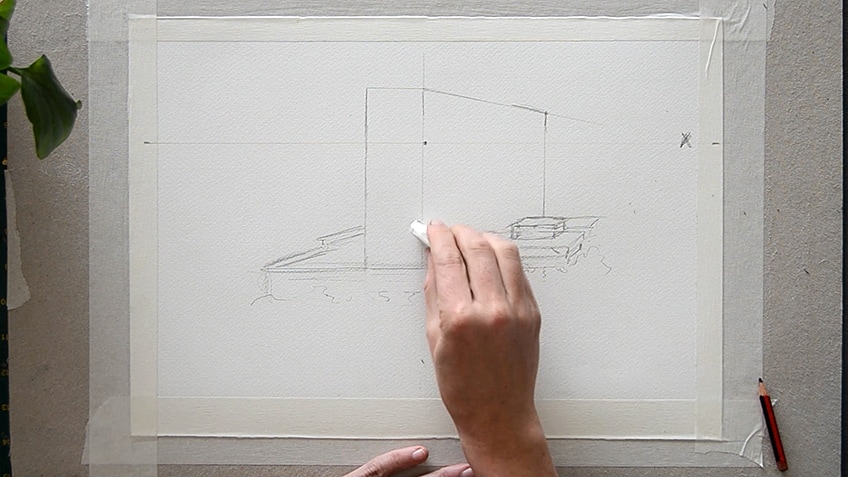
Step 15: Continue Adding Detail to the Skyscraper
Continue adding detail to your sketch with a darker pencil. Focus on defining the edges and include any extra building blocks that are situated on top of the skyscraper.
Keep in mind that you should constantly be glancing at the vanishing point – marked “X” – to ensure that your lines are directed towards this angle.
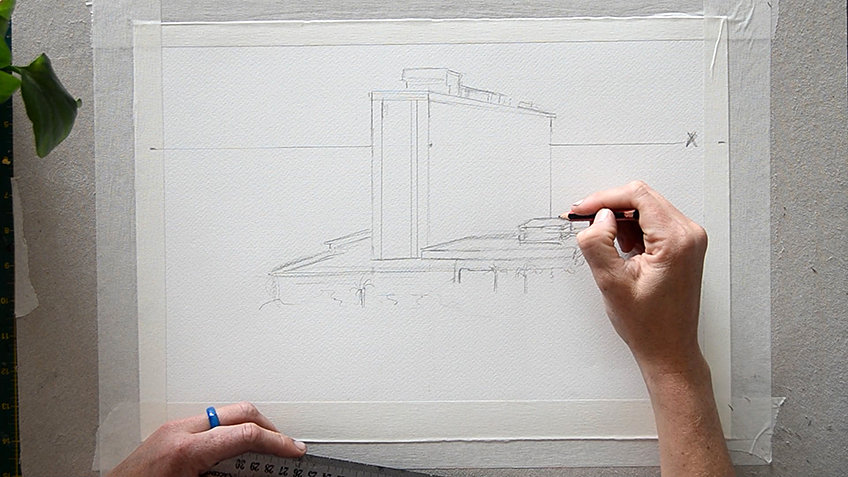
Step 16: Divide and Mark the Skyscraper Into Sections According to the Number of Floors
Using a ruler, divide and mark the skyscraper into sections according to the number of floors that feature in the building. If you are unsure, simply make up an even number and split the floors into these sections by marking them with points.
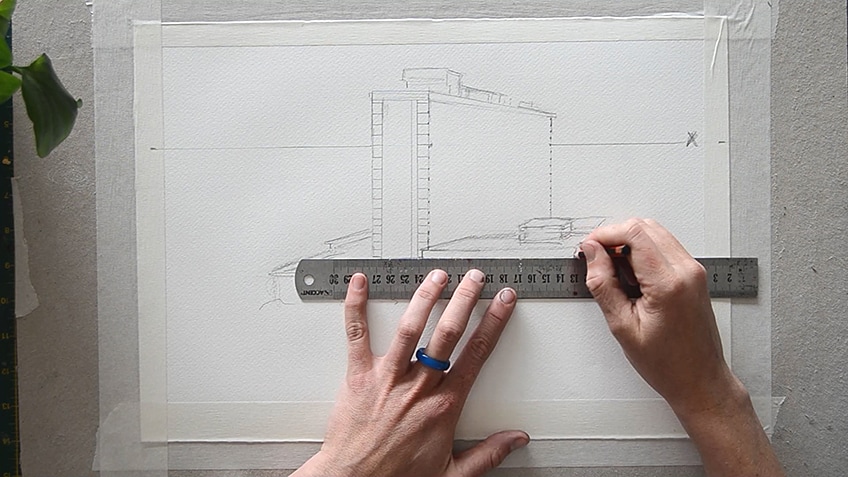
Step 17: Draw Horizontal and Vertical Lines to Define the Floor Levels
Next, draw in the horizontal lines that run through these marked points to define the floor levels. Make sure to draw each diagonal line toward the vanishing point. This is important if you want to create realistic dimensions and proportions.
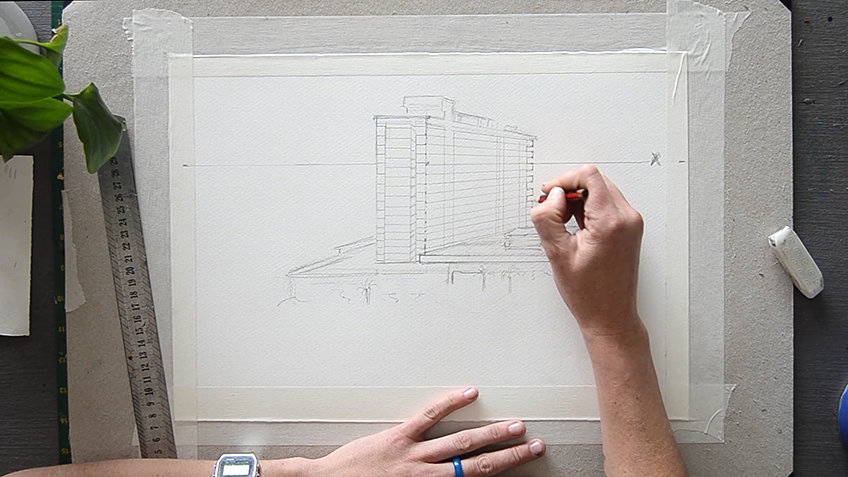
Step 18: Sketch in Any Extra Details and Erase the Vanishing Point
Sketch in more detail. Draw vertical lines where it is necessary to create sub-sections for your skyscraper. Continue adding windows, antennas, roads, and any other details that feature in your skyscraper sketch.
Once the last details have been sketched in, you can erase the vanishing point.
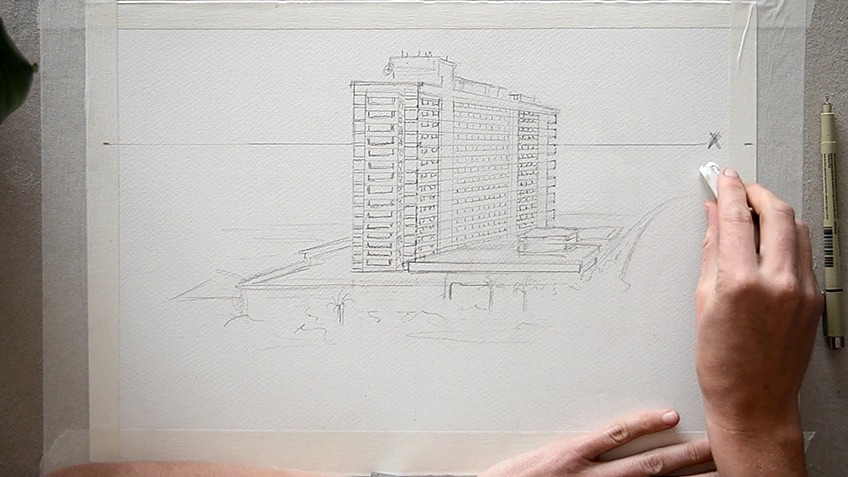
Step 19: Begin Defining the Skyscraper Sketch With a Pen and Erase All Pencil Lines
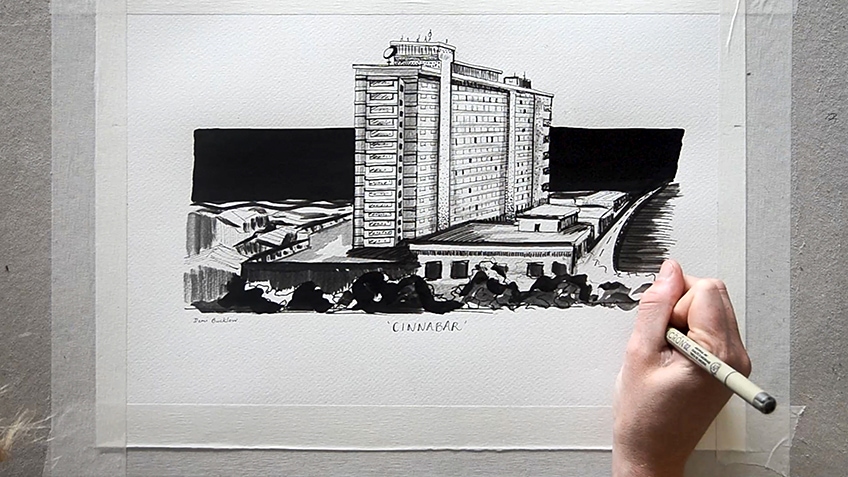
Next, pick up a pen or fine liner and begin defining the skyscraper sketch further. Work across your drawing, perhaps from left to right, and ensure that all the elements and details included have been finalized within your skyscraper drawing. Erase all pencil lines.
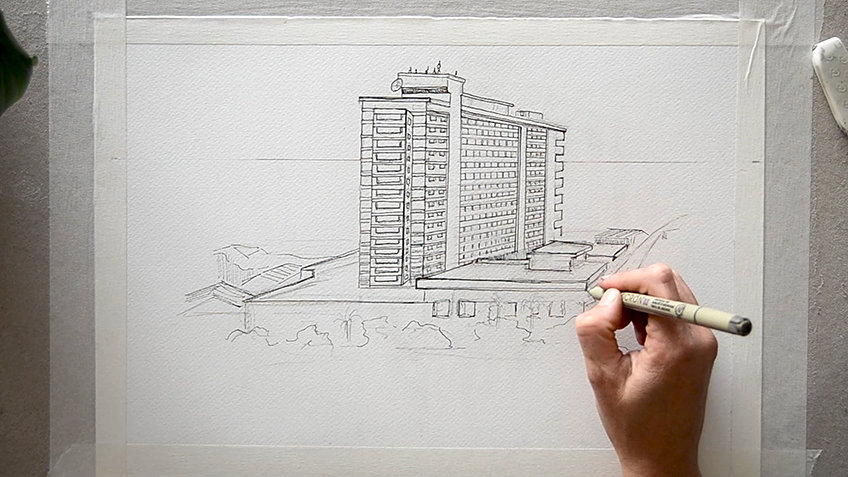
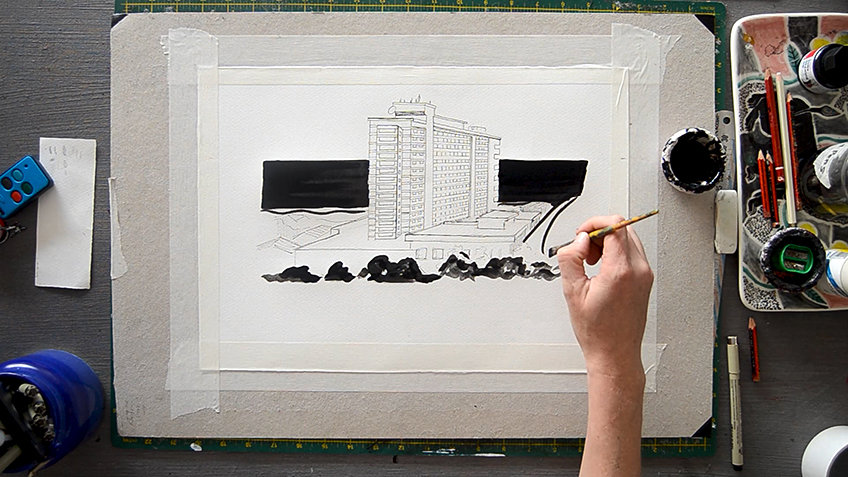
Step 20: Add Dimension and Contrast Using Drawing Ink and a Paintbrush
Using a paintbrush and drawing ink, begin adding further details to your drawing by working into the shadow areas of your sketch. You can dilute the drawing ink with water and apply the ink to the mid-tone areas of your sketch. Be aware of composition and the balance of the range of tonalities created when adding washes of ink.
Skyscrapers are often built using a lot of glass and tend to glisten in the light, so make sure to leave space for more highlights than shadows that are cast onto your skyscraper.
Step 21: Add the Final Details to the Skyscraper Drawing With a Pen
Pick up your pen, or fine liner, again and continue adding more details to the skyscraper drawing. Add the sheen to the windows by drawing streaky, diagonal lines. Add texture to any brickwork.
Use techniques of hatching and pointillism to create subtle shadows in necessary places.
Some windows may be open or closed. Add character to your skyscraper by filling a few windows with ink to show that there are actually people moving about inside.
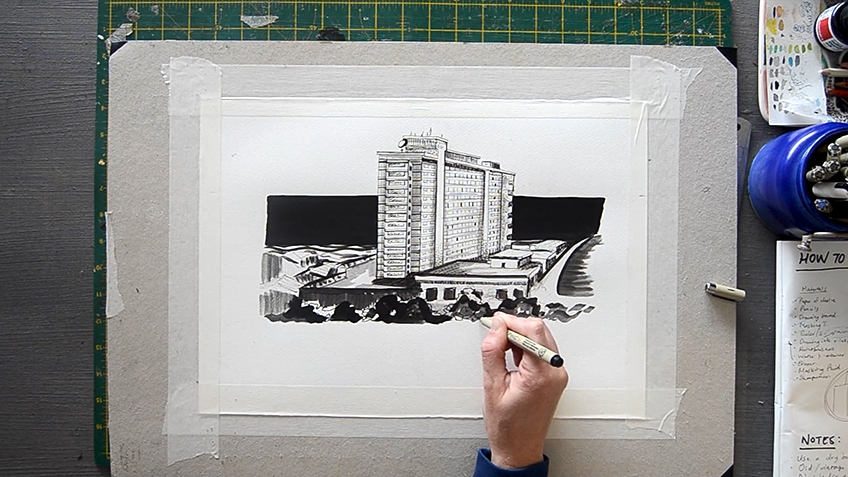
Step 22: Allow to Dry and Sign Your Artwork
Finally, allow your work to dry fully. Sign your creation once it is complete, then sit back and admire your skyscraper drawing.
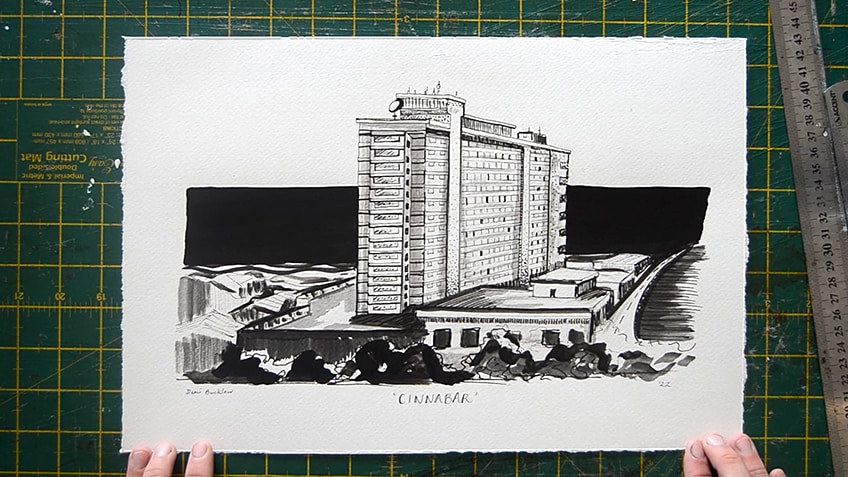
It can be quite fulfilling as an artist when you manage to complete a sketch of something grand and complex like a skyscraper. Although buildings can be rather difficult to draw, you could create truly striking architectural drawings simply by following the right steps. We hope this tutorial feature on how to draw a skyscraper helps guide you towards observing and creating many more sketches of our incredible buildings and architecture.
Take a look at our skyscraper drawing webstory here!
Frequently Asked Questions
What Is a Vanishing Point?
This is the point from which receding parallel lines diminish, or vanish out, of sight. This is how the eye sees every day, but as artists, we have to follow fundamental rules of concept and composition to help us achieve the best possible results.
What Is the Easiest Way to Draw a Skyscraper?
The best and easiest way to draw a building is to use a one-perspective or two-perspective vanishing point. This point helps guide parallel lines towards proportional angles with accurate dimensions. If this is done correctly, this will create a two- or three-dimensional realistic visual.
How Do You Draw a Three-Dimensional Skyscraper?
There are many tools and techniques you can use to create three-dimensional shapes. Drawing a three-dimensional building is easy if you make use of a horizontal line and a vanishing point. Once you have drawn in these two foundational elements, you can sketch your building using these as points of reference. These elements will assist with creating lines of perspective for your three-dimensional drawing of a skyscraper.

Demi Bucklow is an independent artist and photographer living in Cape Town, South Africa. Since graduating from the University of Cape Town in 2018 from Michaelis School of Fine Art with a degree specializing in fine art photography, she currently works as a freelance artist, content creator and writer. Demi’s particular interests explore a range of multimedia illustration, collage art, photography and videography, darkroom processing and stop-motion animation. Her work is an exploration of nature and its phenomenon – somewhere between art and space.
Artistic practice presents the ability to communicate a vision. It is through techniques of pointillism and realism that form, and substance are explored as a metaphor for matter; super-imposing a thousand marks and points until an image is formed before our eyes. From illustrations to surrealist landscapes, Demi translates corporeality – mixing the obtuse and vacuous with the astute and expressive which leads to a mixture of irrevocable pondering over what is and what could be.
Learn more about the Art in Context Team.


