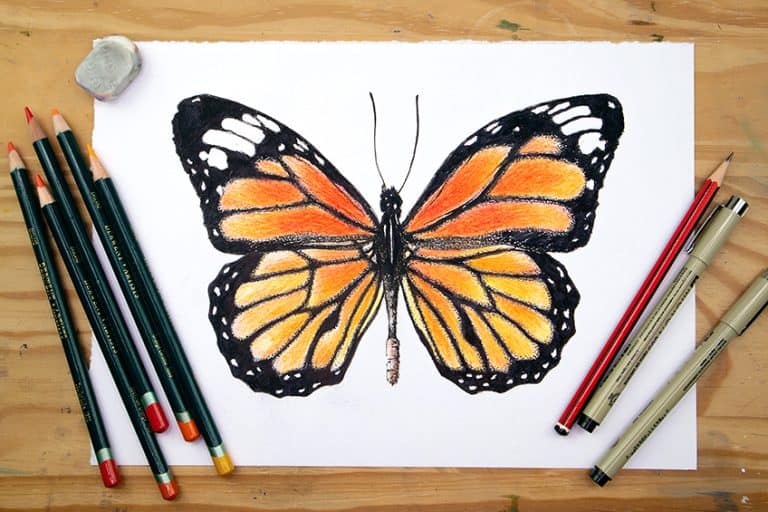
How to Draw a Turtle – Making Turtle Drawing Easy for Beginners
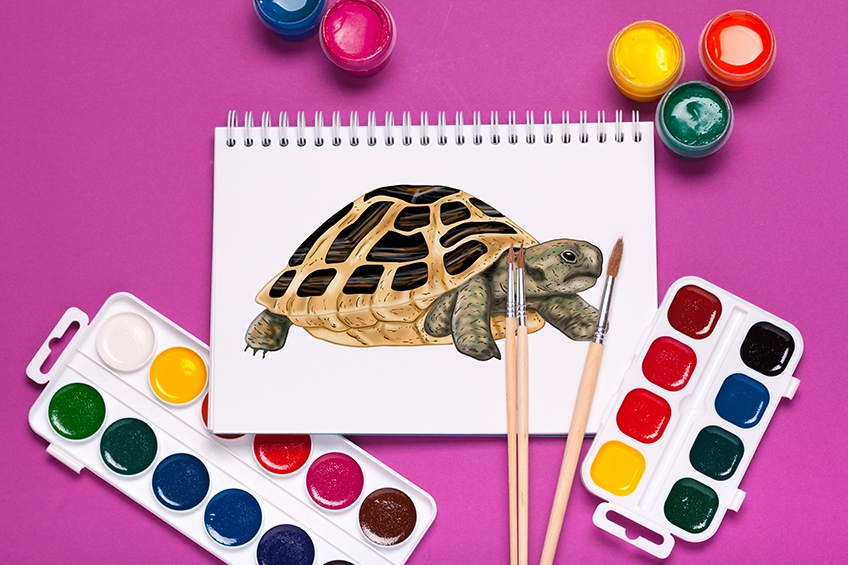
Turtles get a lot of love from people throughout the world. Whether we love them as pets or appreciate the way they glide through the open ocean, turtles are fascinating and beautiful animals. Turtles can range in size from very large to tiny, and they can also take on a range of colors, making them very interesting subjects to draw. In this tutorial, we show you how to draw a turtle step-by-step, and give you our top tips and tricks for creating a realistic turtle drawing.
How to Draw a Turtle Step-by-Step
There are so many different turtle species around the world, with the largest being the leatherback turtle. Turtles are solitary creatures, spending most of their time making their own way through the deep blue. Turtles are perhaps most well known for their shells, which are actually part of their vertebrate column. In this very easy-to-follow turtle drawing tutorial, we guide you through the process of constructing, detailing, and coloring a beautiful turtle. If you are new to drawing and have not completed any of our other animal drawing tutorials, then this tutorial may take some time.
Taking your time is not a bad thing at all because it gives you time to practice and hone your skills.
Step 1: Constructing the Main Body of Your Turtle Sketch
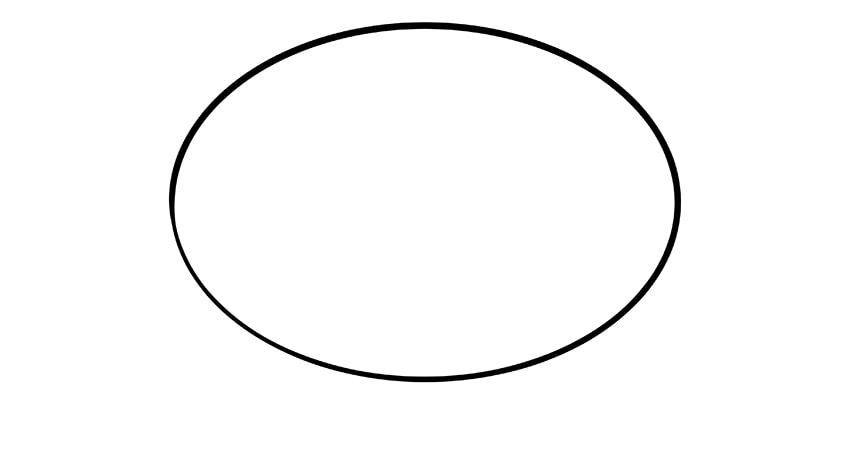
The first step of any of our animal drawing tutorials is to use a construction shape to represent the main part of the animal’s body. The first few steps of this tutorial will also use construction lines and shapes to map out the basic shape of the turtle, and then we will use these shapes to create the final form and add details. For our turtle drawing, we are going to begin by using an egg-shaped oval to represent the main shell of the turtle. You want this oval to lie horizontally in the very center of your canvas.
Whether you are using paper or a graphic tablet, the most important part of this first step is ensuring that your oval is in the very center of your canvas, leaving plenty of space for the turtles other body parts.
Step 2: Constructing the Head
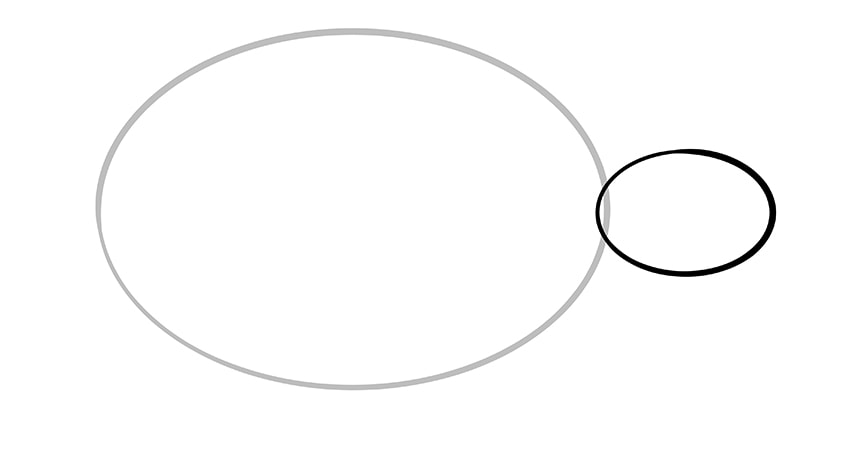
In this second step, you are going to use another, smaller oval shape to lay the foundations for the turtle’s head. The placement of this oval is important to get the right proportions in your final drawing of a turtle. On the very right end of the main body oval, attach the much smaller head oval with a very slight overlap.
To get the proportions spot on, imagine that there was a horizontal line running through the center of the main body oval and the head oval. They should both sit evenly across this line.
Step 3: Constructing the Line of the Turtle Shell
You are going to draw a single curving line for this third step. This line is going to represent the separation of the turtle shell from the rest of the turtle’s body.
Begin drawing this long curved line at the back of the head oval, just after the meeting point between the head and body construction shapes. From this point, curve the line up slightly before taking it down and back towards the bottom of the turtle. This line should then extend past the back of the construction oval, coming to a slight point before climbing back up to end on the upper back of the main body construction oval.
Hopefully, at this stage of our turtle drawing tutorial, you can begin to see the shape of the final turtle peeking through.

Step 4: Constructing the First Front Arm
This fourth step is a very simple one. The first arm that you are going to lay down with construction lines is the front one that is furthest away from us. Being aware of this perspective is essential, and this is where the construction lines come into their own. This arm is protruding out from underneath the head, so you are going to begin your “U” shaped line in the middle of the bottom of the head oval, and end it on the downward curve of the main body oval.
The base of the “U” shape should not extend further forward than the end of the head, and should not be below the bottom of the main body oval.

Step 5: Constructing the Second Front Arm
While the first arm you just constructed began at the back of the turtle, from our perspective, this second front arm begins underneath the shell on the side visible to us. Use another “U” construction shape to form this arm, beginning on the shell construction line and ending below the main body oval.
This second front arm should extend straight down, rather than forwards. You can, however, give the impression of a forward motion by adding a slight forward point at the end of the foot as we have done in the example below.
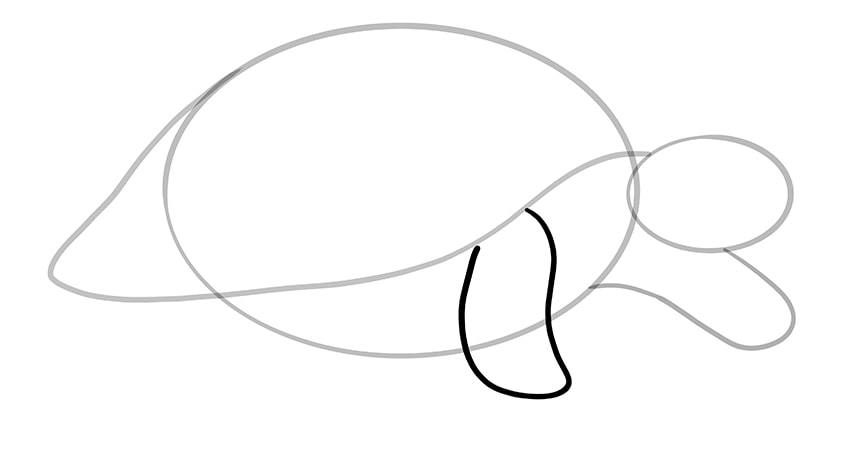
Step 6: Constructing the Back Foot
Due to the perspective in our drawing of a turtle, only the end of one of the back legs is visible to us. You are going to use a similar “U” shaped line to represent this back food, but you want the bottom of the shape to be a little more squared-off than the two previous feet. The two lines of this “U” shape should begin just before the end of the shell construction line.
Hopefully at this point in the tutorial, you can see the broad shape of the turtle in the construction lines alone!

Step 7: Constructing the Bottom of the Turtle Shell
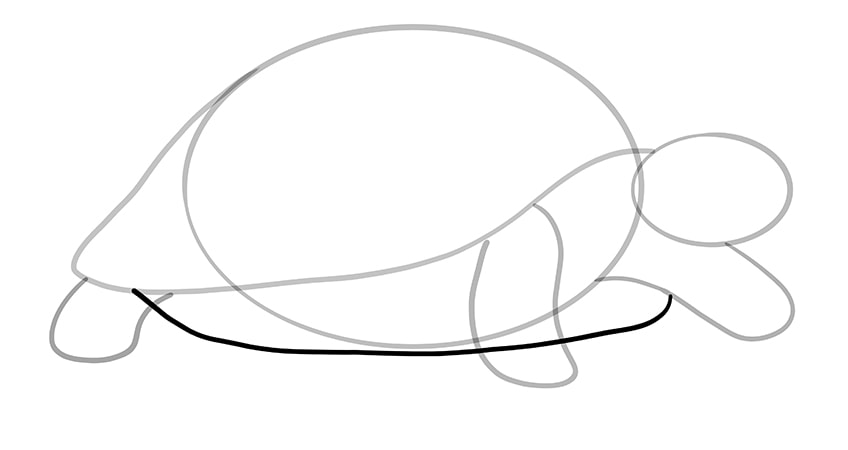
This step is the last one before we start to create the final outline of the turtle’s shape using all of the construction lines that we have drawn so far. In this step, you are going to use a single curved line to outline the bottom of the turtle’s shell. Begin this line just behind the front line of the back foot, and bring it down so that it is in line with the bottom of the main body oval. You can extend this line all the way across the length of the turtle, and join it to the back line of the very front foot.
Take a look at our example below if you need clarity on where exactly this line should start and end.
Step 8: Creating the Final Outline
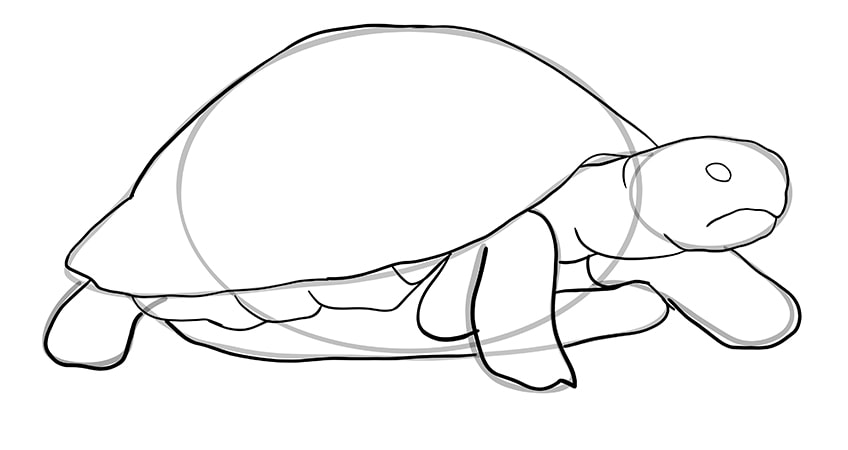
It is finally time to use all the construction lines that you have drawn so far to create the final outline of your turtle drawing. Begin by using the head construction oval to help you draw the final outline of the head and neck. You can stick pretty closely to the construction line, but you can amp up the realism by adding a few lumps and bumps. You can follow the back of the oval slightly with two curved lines to create the impression of skin wrinkles. Then, use the front part of the shell construction line to create the turtle’s neck. Do the same on the bottom, joining the neckline with the front leg.
While you are outlining the head, you can add an almond shaped eye and a downward curving line to represent the mouth.
Now, use the main body oval and the shell line to create the final outline of the turtle’s shell. Add a slight curve to the bottom shell line above the neck, to give the impression that the shell is curving around the neck. You can now trace all of the legs, making the forearm look as if it is extending from underneath the shell.
For the final touches, you can add a few shell details below the main shell line, and then you can erase all remaining construction lines.
Step 9: Adding the Shell Plates
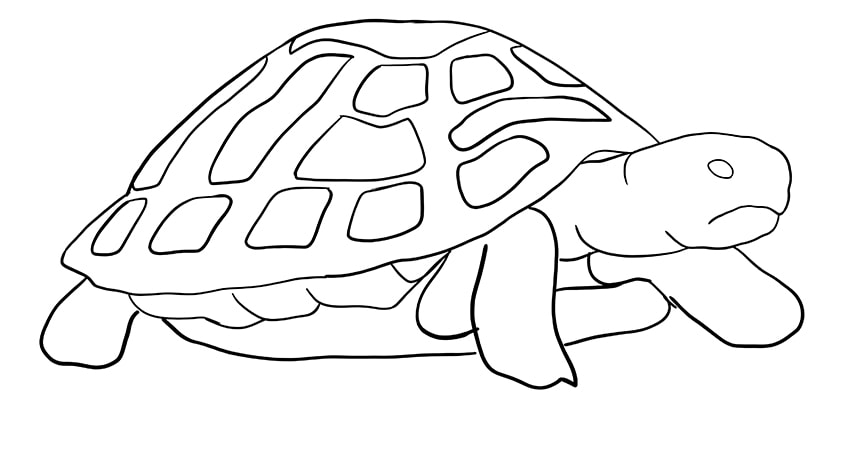
In this step, you are going to add the plate details to the turtle shell drawing. Begin with the lower layer of plates that sit just above the lower curve of the shell. This first line of plates should be fairly square but uneven. These plates should be fairly evenly spaced apart but should follow the curve of the shell. Above this bottom row, you can add larger and differently shaped plates. The very top plate should be drawn horizontally over the upper dome of the shell.
For a touch of added realism, make the plates around the edges of the shell curve slightly.
Step 10: Adding Texture and Detailing
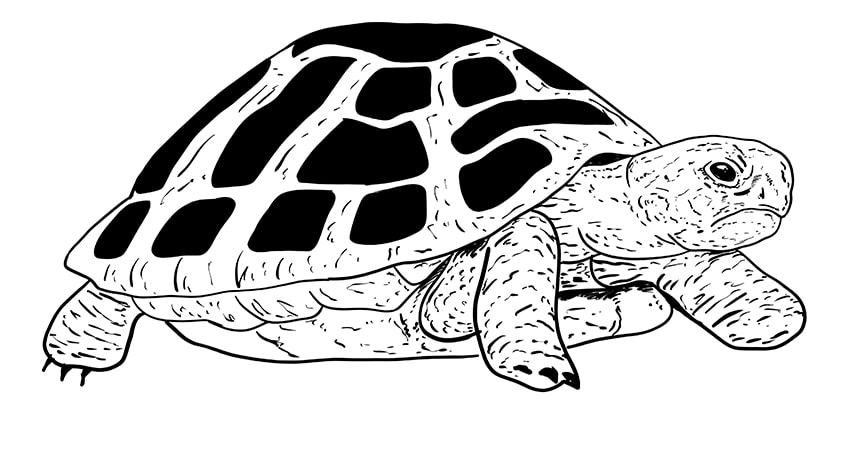
Now that we have most of the larger details drawn, it is time to add a little more texture and more intricate details. Most turtles have rather rough skin and shells, and you can create this appearance using a range of short and long lines. Around the rim of the shell, you can draw thicker and longer lines.
The amount of texture you add is up to you, but you want to make sure that the lines follow the general curve of all the different parts of the turtle. All the lines on the shell should head downwards, and they should wrap around the legs and head.
For the areas that are deeper in the turtle, like the area under the rim of the shell and below the legs, you can add thicker and darker textural lines. You can color in the turtle’s eye, and add several darker lines around the eye to give the impression of wrinkles. Remember to leave a small area of blank space inside the eye to create the reflection of light in the iris.
You can finish this step by adding three dark claws on each of the turtle’s feet.

Step 11: Coloring the Shell Plates of Your Turtle Drawing
For this step, use a dark shade of black to color in all of the plates that you drew in step 9. This is a quick and easy step, and it is the first of the coloring steps.
Step 12: Adding the First Coat of Color
For this coloring step, you need to choose a light shade of brown. This shade should be very light, as you are going to use a darker shade to add shadows in the next few steps. Use a regular brush, or your tool of choice, to add a single even coat of this light brown shade throughout the entire body of the turtle.

Step 13: Adding Highlights to Your Turtle’s Shell
For this step, you need a shade of white to add highlights to the shell of your turtle. Using a small brush, add white highlights to the pathways between the plates all over the shell. You can also add highlights to the plate shapes on the bottom of the shell. Finally, use this highlight shade to line the very edge of the shell to add definition.
Make sure that you are gentle with your highlighting. The highlights should be soft and light, blending seamlessly into the light brown base.
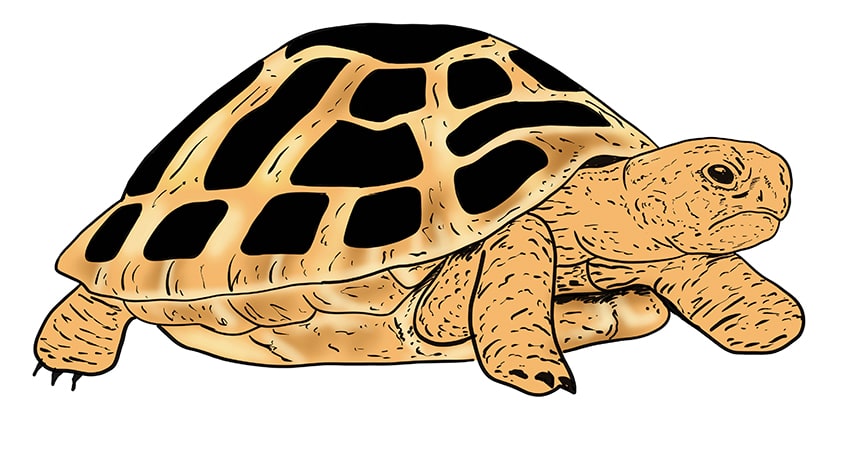
Step 14: Adding Shading to Your Turtle Shell
For this shading step, you need to use a slightly darker brown shade than your base. A coffee brown is a perfect shade because it is not too dark. Like the highlights, you do not want the shading to be too extreme. Use this shading color to emphasize the rugged textures in the shell, using the detail lines to guide you. On the bottom of the shell, use this contour shade to separate the plates.
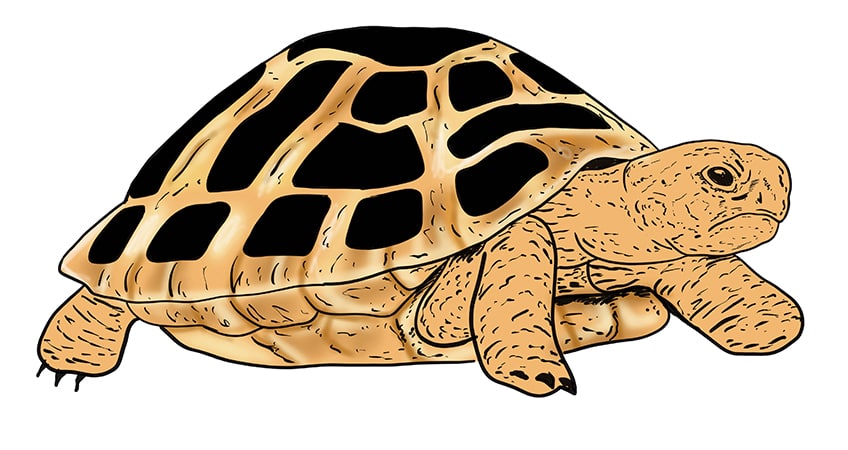
Step 15: Adding the Second Coat of Color
For this step, you are going to use a second color to shade the entirety of the turtle’s body, leaving the shell light brown. The ideal shade for this step is a fairly dark grey. Apply a single, even coat of this color to the turtle’s head and arms.
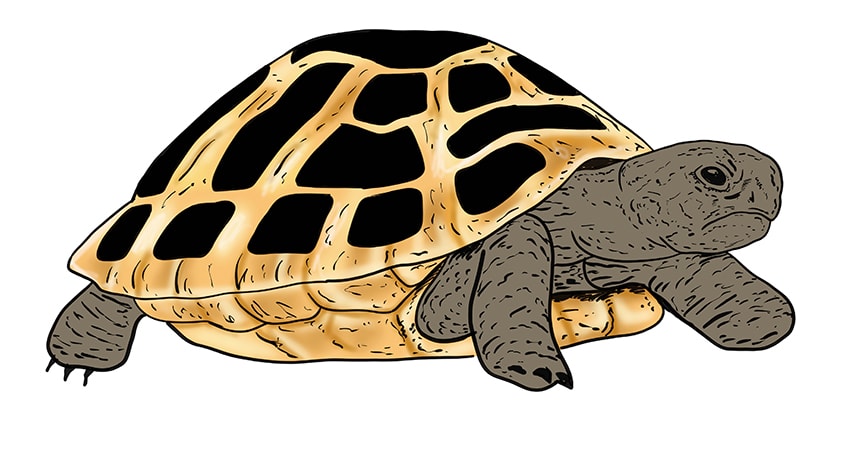
Step 16: Adding the Third Coat of Color
You will see by now that we are gradually building up the final color of the turtle’s body using a variety of different shades. For this step, you can use a light green shade to add depth to the body of your turtle. Use this light green shade as a highlight shade, adding it to the points of the turtle’s body that would naturally catch the light.
You want to make sure that this coat is very light and patchy, you do not want your turtle to be green.
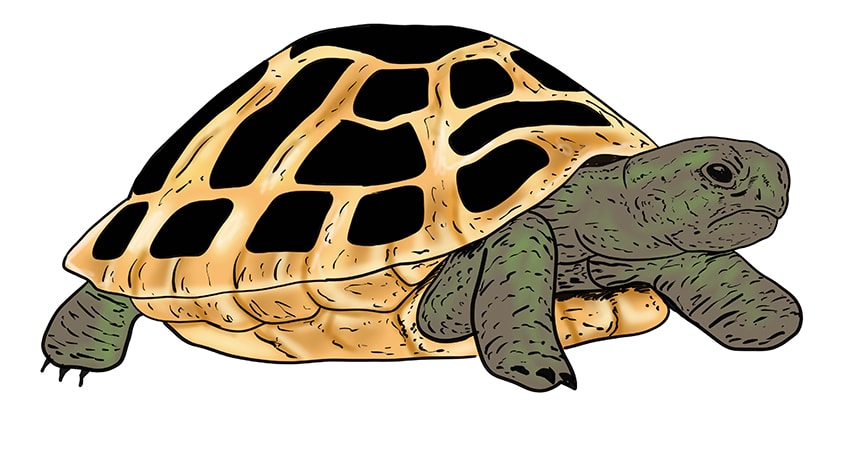
Step 17: Adding the Fourth Coat of Color
For this step, you are going to do exactly the same as you did for the last, but with a different color. Use a shade of light beige to add highlights to the body and head of your turtle. Try to blend the beige with the light green shade for a more natural look.
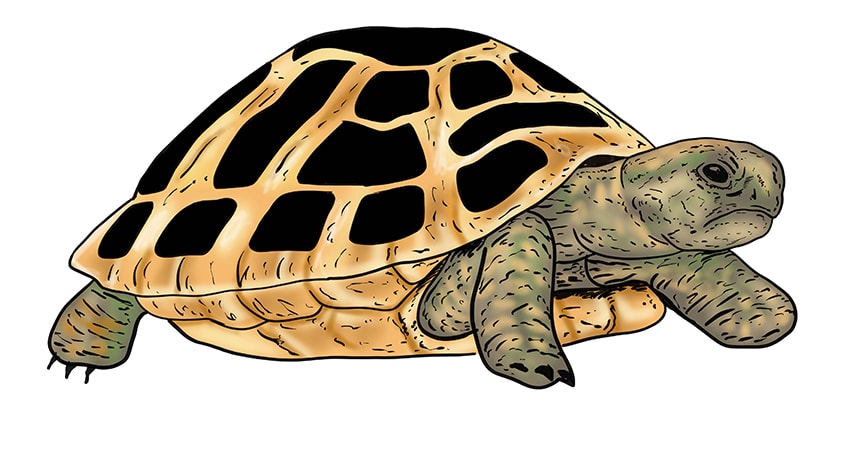
Step 18: Shading Your Turtle Drawing
Begin this step by adding a second coat of black to the eye of your turtle, and add a touch of white paint to make the iris reflection brighter. Use this same shade of black to add shading to the body of your turtle, including the mouth line, below the shell, on the undersides of the legs and neck, around the turtle’s nose, and behind the turtle’s head.
Be careful with the intensity of your shading. Black is a harsh color, and too much can overwhelm your drawing very quickly.
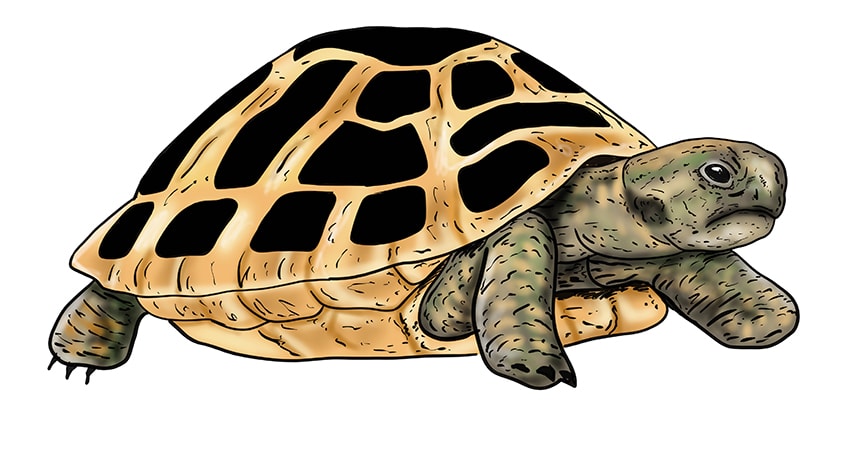
Step 19: Adding Final Texture to the Turtle’s Shell
For this last step, you will need shades of white, light brown, and beige. You are going to use these three colors to add texture to the shell plates. Create this texture using thin strokes of these three colors. These strokes should follow the general shape of the shell but they should all be in the same direction.
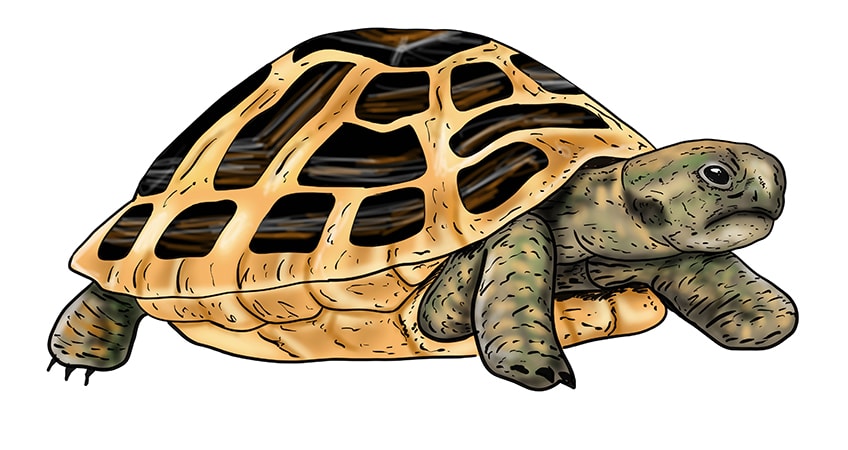
Step 20: Adding the Finishing Touch to Your Turtle Drawing
This final step in our how to draw a turtle tutorial is optional, but it can really help increase the realism in your drawing. Use a very fine brush with shades of light brown and beige to cover the outline of your drawing and create a more seamless look.
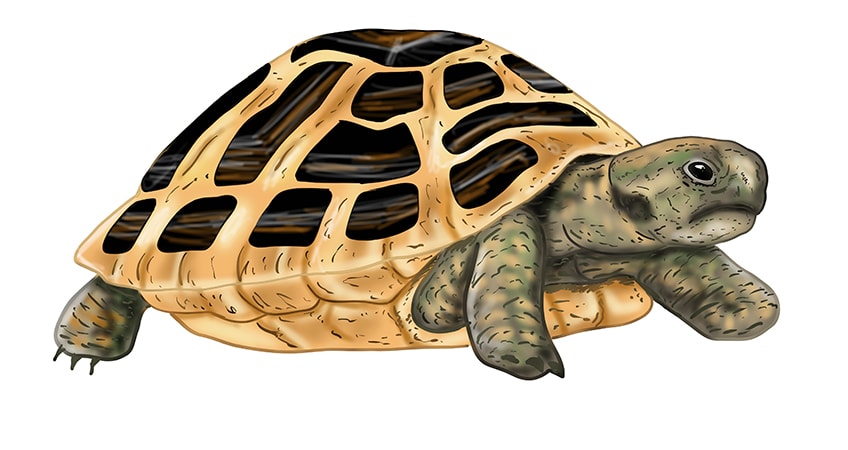
Now that you have finished this tutorial that makes turtle drawing easy, you will be able to draw a turtle in a range of different shapes and colors. We hope you have learned a lot from this tutorial and that you will continue to practice and explore the drawing process!

Frequently Asked Questions
What Is the Hardest Part of this Turtle Drawing Tutorial?
This tutorial is not difficult to follow, but there are some tricky steps that may take some time for you to master. Turtles have an incredible amount of intricate detailing both on their shells and their skin, and this can take some time to get right. With practice and patience, however, you can easily master turtle shell drawings and create a realistic turtle drawing.
Are the Construction Lines Necessary to Draw a Turtle?
Construction lines are not necessarily an essential part of the turtle drawing process, but they do make your life so much easier. We always begin all drawing tutorials with construction lines because it makes the rest of the drawing process simple and stress-free. Construction lines are a great way to ensure that you nail the perspective and proportions of your drawing before you get too caught up in the details.
Matthew Matthysen is an educated multidisciplinary artist and illustrator. He successfully completed his art degree at the University of Witwatersrand in South Africa, majoring in art history and contemporary drawing. The focus of his thesis was to explore the philosophical implications of the macro and micro-universe on the human experience. Matthew uses diverse media, such as written and hands-on components, to explore various approaches that are on the border between philosophy and science.
Matthew organized various exhibitions before and during his years as a student and is still passionate about doing so today. He currently works as a freelance artist and writer in various fields. He also has a permanent position at a renowned online gallery (ArtGazette) where he produces various works on commission. As a freelance artist, he creates several series and successfully sells them to galleries and collectors. He loves to use his work and skills in various fields of interest.
Matthew has been creating drawing and painting tutorials since the relaunch in 2020. Through his involvement with artincontext.org, he has been able to deepen his knowledge of various painting mediums. For example, watercolor techniques, calligraphy and lately digital drawing, which is becoming more and more popular.
Learn more about Matthew Matthysen and the Art in Context Team.


