How to Draw a Rhino – The Best Realistic Rhino Drawing Tutorial
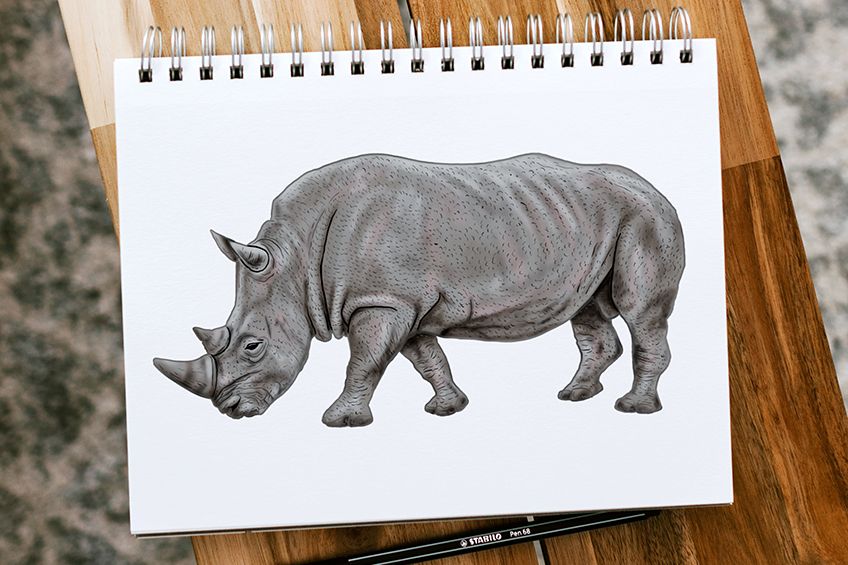
One of the big five animals in South Africa and on the verge of extinction, the rhinoceros is a large and foreboding animal. These beautiful and powerful creatures are one of the more unusual looking animals that roam this green earth, from their large horns and big bodies to their small stubby legs. In this rhinoceros drawing tutorial, we guide you through the process of creating a rhino drawing from scratch. Using construction lines to lay down the shape before drawing, we show you the easiest way to create a realistic rhinoceros sketch.
Table of Contents
- 1 The Step-by-Step Rhinoceros Drawing Tutorial
- 1.1 Step 1: Constructing the Main Body Shape
- 1.2 Step 2: The Head of Your Rhinoceros Drawing
- 1.3 Step 3: Placing the Rhino’s First Horn
- 1.4 Step 4: Drawing the Second Horn
- 1.5 Step 5: Joining the Head and Body of Your Rhinoceros Sketch
- 1.6 Step 6: Shaping the Ears of Your Rhinoceros Drawing
- 1.7 Step 7: Constructing the Front Legs of Your Rhino Drawing
- 1.8 Step 8: Draw the Shape of the Back Legs
- 1.9 Step 9: The Final Outline of Your Rhinoceros Sketch
- 1.10 Step 10: Adding Facial Details to Your Rhinoceros Drawing
- 1.11 Step 11: Adding Textural Detail to Your Rhinoceros Sketch
- 1.12 Step 12: Creating the Base Color
- 1.13 Step 13: Adding Some Light Contouring
- 1.14 Step 14: Adding the Second Color Coat
- 1.15 Step 15: Shading Your Rhinoceros Drawing
- 1.16 Step 16: Creating Highlights in Your Rhino Sketch
- 1.17 Step 16: Finishing Your Rhino Drawing
- 2 Frequently Asked Questions
The Step-by-Step Rhinoceros Drawing Tutorial
Get ready to charge into this one and create your own unique and realistic rhino drawing. If you take a quick look at the collage below, you will see that the first ten steps of our rhinoceros sketch tutorial are purely focused on construction. Using these base shapes before adding any detail can help you nail the proportions and dimensions of your rhino drawing.
We always recommend beginning a drawing with construction lines, as they make your life so much easier!
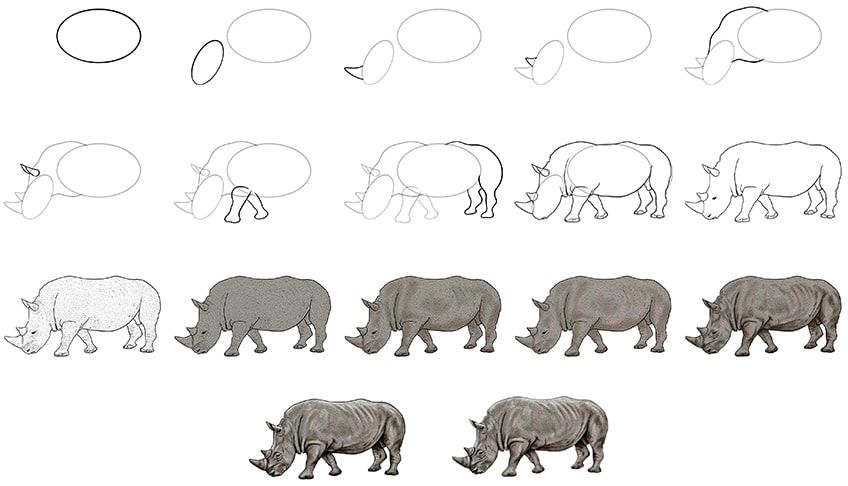
When it comes to choosing a medium for your rhinoceros sketch, the world is your oyster. You can choose to draw your rhino with any medium, whether that is acrylic, watercolor, colored pencils, or a graphic tablet.
You can easily adapt the coloring steps to suit your chosen medium.
Step 1: Constructing the Main Body Shape
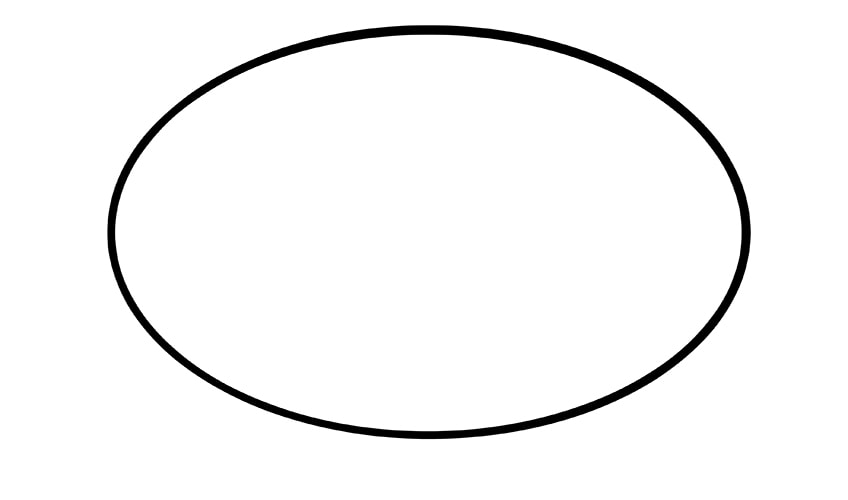
When we are constructing the shape of an animal like a rhino, it is always best to begin with the largest part of the body. In this case, we are going to begin with the main torso body shape. To represent this part of the rhino’s body, you are going to use a large horizontal oval. You want the oval to be quite fat.
Remember that there are many other elements of the rhino’s body that we need to add later, so make sure that the main body oval is placed in the center of the canvas with plenty of space on all sides.
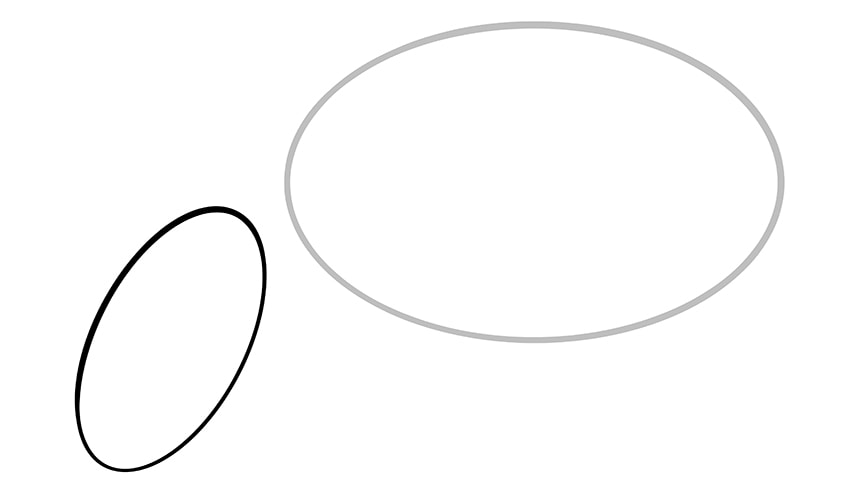
Step 2: The Head of Your Rhinoceros Drawing
For the rhino’s head, you are going to use another smaller oval shape. This head oval shape should be significantly thinner than the main body oval. You want to draw this head oval on the left side of the main body, and it should be quite tilted with the top leaning towards the main body oval.
Make sure that this head oval is not touching the main body oval, and you also want the top point of it to be level with the middle line of the main body.
Step 3: Placing the Rhino’s First Horn
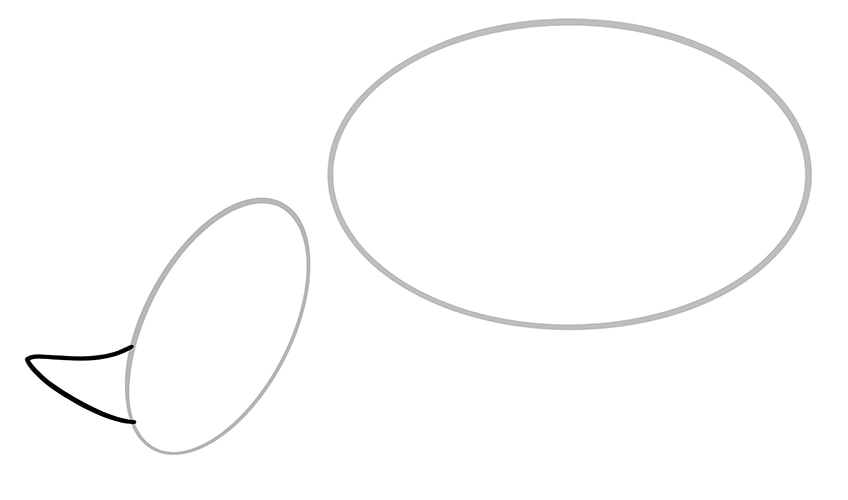
This first horn is the largest and it sits right on the end of the rhino’s nose. To lay down the foundation shape, you want to place the curved cone-like shape on the bottom left side of the head oval.
Step 4: Drawing the Second Horn
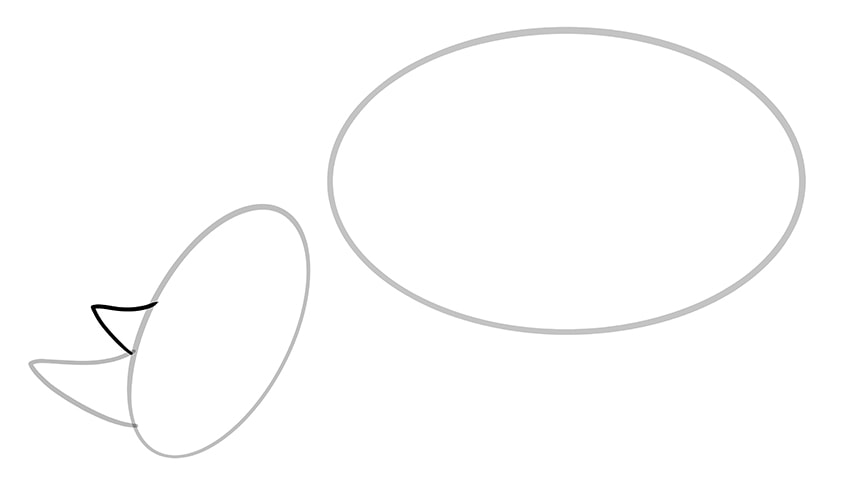
In this step, you are going to repeat the process of the last step but on a smaller scale. This horn should also be slightly less curved and should sit right on top of the first large horn.
At this point, your drawing should resemble our example below.
Step 5: Joining the Head and Body of Your Rhinoceros Sketch
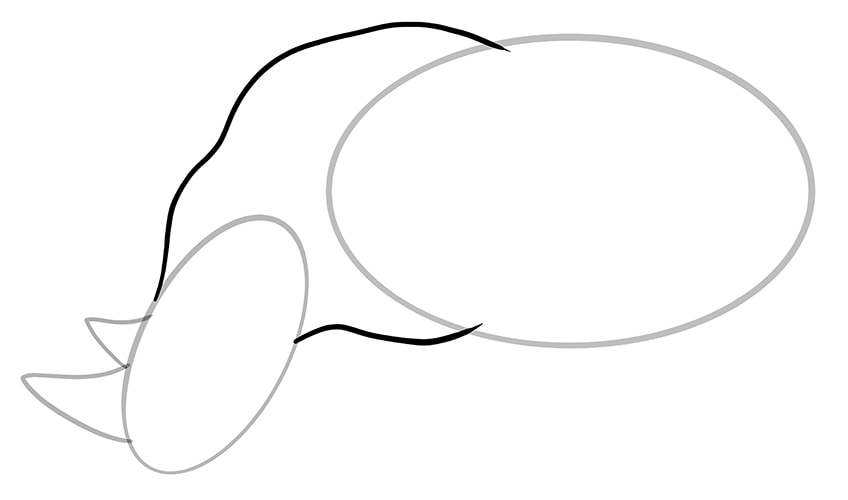
In this step, you are going to draw two necklines to join the head oval and the main body oval. These necklines are not smooth and may look a little silly right now, but it is important to trust the process. Begin with the upper neckline, taking the line from just above the smaller horn and ending it on the top of the main body oval. Add a few lumps and bumps in this upper neckline.
To finish this step, draw a slightly bumpy neckline on the bottom, joining the back of the head oval to the bottom of the main body oval.
Step 6: Shaping the Ears of Your Rhinoceros Drawing
Although we have drawn the head oval as the basis for the head shape, the head actually extends up into the neck shape that you drew in the last step. As such, you are going to place the ear shapes just above the head oval within the neck. Draw two curved cones, similar to the horn shapes. The one ear shape should be a full cone with a bottom curve because it is on the side of the rhino closest to our perspective. The other ear horn should be partially hidden behind this ear to get the right proportions. This is the joy of using construction lines!
The other ear horn should be partially hidden behind this ear to get the right proportions. This is the joy of using construction lines!

Step 7: Constructing the Front Legs of Your Rhino Drawing
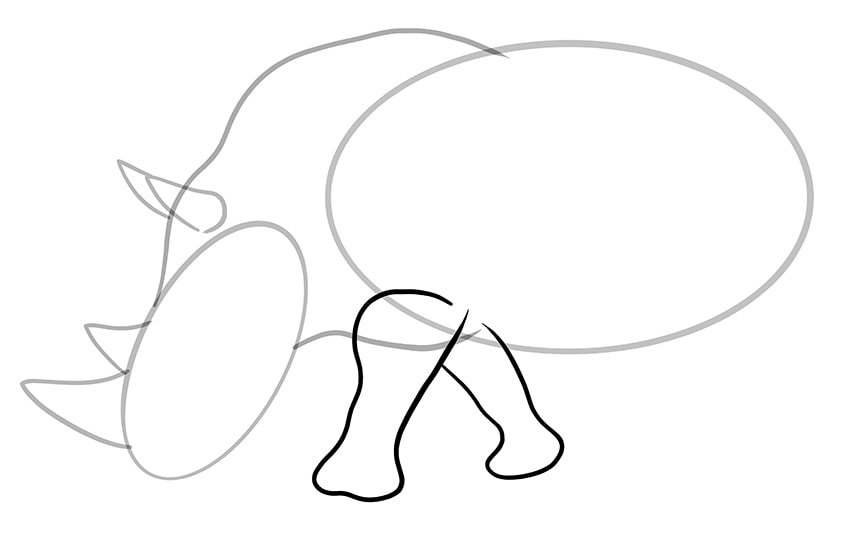
Rhinos have very short and stubby legs in comparison to the size of the rest of their bodies. In fact, the bottom of the legs should be in line with the bottom of the head. Begin by drawing the leg that is closest to us, starting with a curved line that overlaps the bottom neckline and the main body oval. As you go down the leg, make the middle narrower than the top and bottom. This first leg should also be slightly angled forward.
For the second front leg, begin the lines at the top and back of the first leg, and angle this second leg backward. This second leg should also be slightly thinner than the first.
Step 8: Draw the Shape of the Back Legs
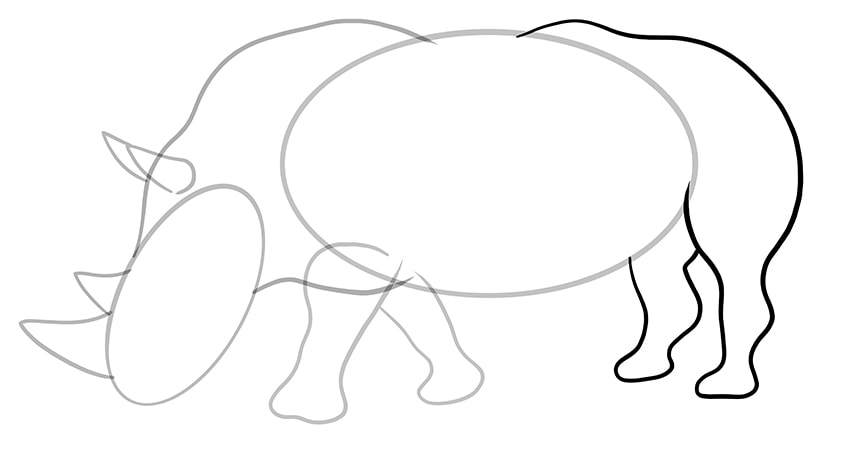
The rhino’s back legs are quite different in shape from the front legs. In this step, you are also going to create the outline of the back rump. Begin with the rump and the leg that is closest to our perspective. Start the line on the top of the main body oval, creating a couple of lumps and bumps and a curved rump shape that extends down behind the main body oval. Just before you reach the line of the bottom of the main oval body, take the leg line in and then out again. The back of the leg should be wiggly, before creating the bottom footpad and taking the leg back up to meet the back of the main body oval.
Repeat the leg steps for the second back leg, just in front of the very back one. This second leg should be slightly shorter and fatter than the first.
Step 9: The Final Outline of Your Rhinoceros Sketch
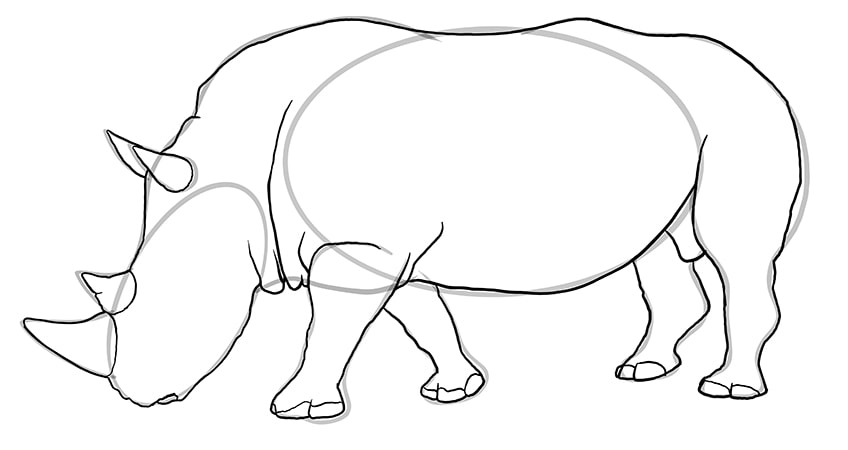
Now that you have laid down all of the construction lines, it has come time to put them to use in drawing your final outline. For the most part, you can follow the construction lines pretty closely for your outline, but you are going to add some additional details. Begin at the front of the head, creating a slightly bumpy outline of the head oval and neck. Outline the horns, adding a little chink in the smaller one. You can also outline the ears while you are here.
At the bottom of the neck, you are going to add a few deep grooves to give the impression of skin folds. You can take one of these lines right up into the neck of your rhinoceros drawing.
You can proceed to outline the rest of the body, following the construction lines closely. For the feet of the rhino, create small toe separations with half oval shapes. Finish your outline by outlining the belly and adding a few crinkles to the outline for additional realism.
Once you are happy with your final outline, you can erase any remaining visible construction lines.
Step 10: Adding Facial Details to Your Rhinoceros Drawing
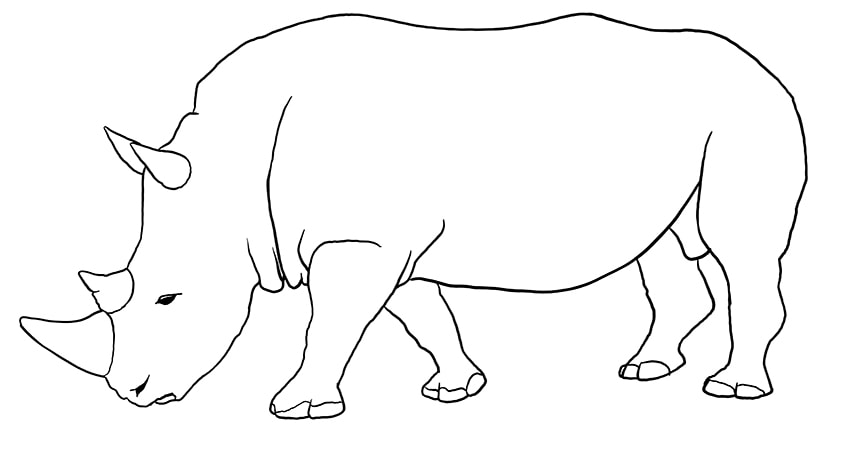
This is the first of our detail steps, and we are focusing on the face of your rhino drawing. Begin by drawing the nostril at the very bottom of the nose using two inverted curved lines. You can finish this step by drawing a sloped eye just behind the smaller horn.
This eye should be an almond shape and you can fill the bottom of it with black.
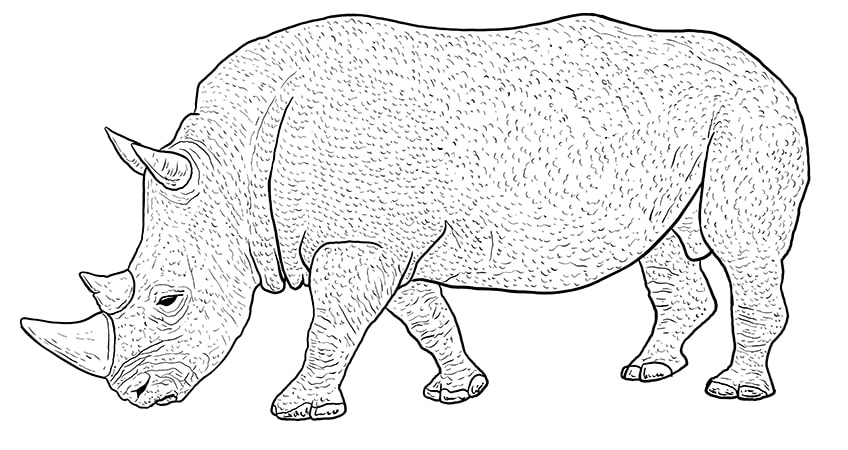
Step 11: Adding Textural Detail to Your Rhinoceros Sketch
This step is one of the more time-consuming, but the effort pays off so it is worth having patience. Rhinos have very textured skin, and you are going to emulate this by using a lot of small markings. Begin at the head, using long curved lines around the nose area to create the impression of wrinkly skin. You can do the same thing around the eye, horns, and ears.
Then, use smaller lines to create texture throughout the rest of the head, including the ears and horns.
You can continue to add these small texture lines throughout the rest of the body. When you get to the legs, create the texture of knee knuckles by creating oval-like shapes with long curved lines. For the toes, add little scribbles along the bottom of each.
Step 12: Creating the Base Color
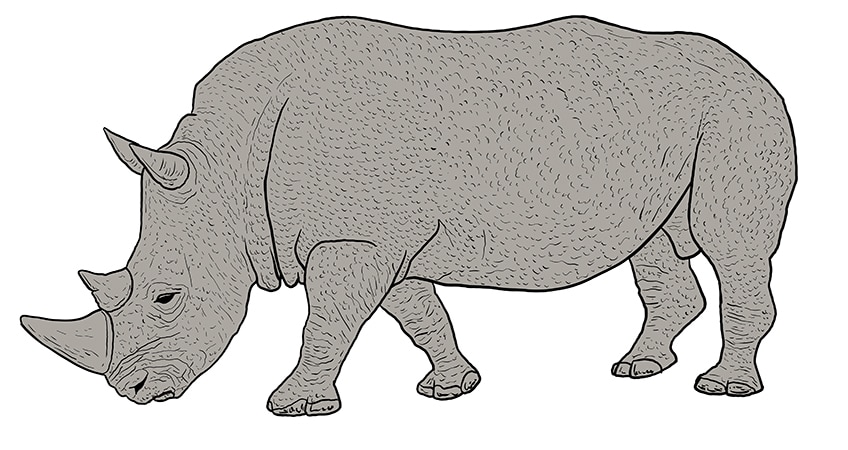
We want our rhinoceros drawing to be as realistic as possible, and coloring is a very important part of it. To build up realistic color, you need to layer the shades, beginning with a base shade. For your rhino drawing, you want to use a gray shade as the base. Use a regular brush to fill the entire body of your rhino with this gray shade.
Whichever medium you choose to use, you want to ensure that the coat is even and not blotchy.
Step 13: Adding Some Light Contouring
Contouring is one of the best methods for creating realism in any drawing. It adds shape and dimension to your drawing. For this first light contouring step, you are going to use either a dark green shade or a mouse gray color. Apply this shade very lightly with a soft blending brush to the parts of the rhino’s body that are naturally less prominent.
Contour around the edge of the outline, in the skin fold details, around the face and horns, and between the legs.

Step 14: Adding the Second Color Coat
The second color coat may seem strange but it creates a warm effect. Use a light pink or peach color to add light shading throughout the body of your rhinoceros sketch.
Focus this second coat of color around the edges of the contouring from the last step.
Step 15: Shading Your Rhinoceros Drawing
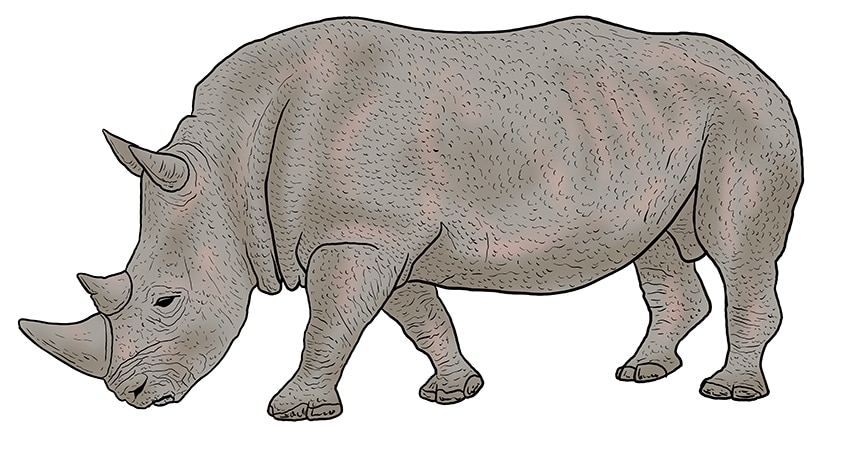
Shading is another great way to emphasize your contouring and create a realistic appearance in any drawing. For the shading of your rhinoceros sketch, you want to use a black shade. Use a small soft brush and gently paint around the edges of the second color coat you painted in the last step. You also want to add shading to the line texture areas that you drew earlier, particularly the folds and creases of the skin. You can also add patches of shading within the horns, ears, and neck.
You do not want this shading to be too dark. When working with black, it is always a good idea to take it slow. You can blend your color realistically by using a clean soft brush to blend the paint after application.
Step 16: Creating Highlights in Your Rhino Sketch
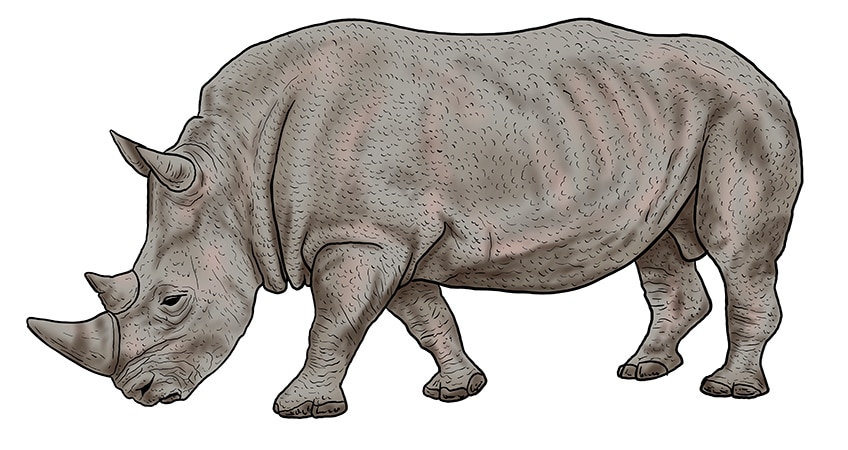
Highlights go hand in hand with shading, so it is time for us to add the finishing touches to our rhino drawing. You are going to need white paint and a small blending brush for this step. Gently use this to paint highlights along the edges of the rhino, including the head, ears, horns, and body.
You can create additional realism by using this white to highlight parts of the facial structure that would naturally stand out, like the top lip, the top of the ears, and the brow bone above the eye.
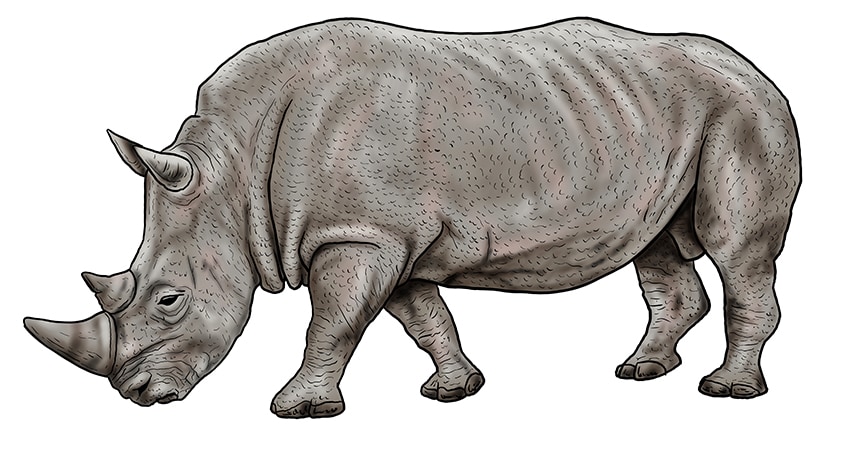
Step 16: Finishing Your Rhino Drawing
If you are happy with your rhinoceros drawing, you are welcome to leave it here. If, however, you want a more seamless drawing, you can now erase all of the outlines. You can do this in one of two ways, depending on the medium that you are using. If you are using a graphic tablet, you can simply delete the outline layer.
If you are using a physical medium, you can simply use the corresponding color at each point of the outline to trace over it.

Just like that, you have created your very own realistic rhinoceros sketch! Hopefully you are happy with the final outcome, and you feel more confident in your drawing skills. We hope to see you soon for more animal drawing tutorials.
Frequently Asked Questions
Is It Difficult to Create a Realistic Rhinoceros Sketch?
Whether you are a beginner or a veteran artist, animal drawings always carry a certain level of difficulty. In all of our drawing tutorials, we begin by using construction lines to help you get the correct proportions before you begin adding intricate details and colors.
Can You Learn How to Draw a Rhino Easily?
Absolutely! We have designed the most in-depth drawing tutorial to help you create a rhinoceros drawing with significant ease. Once you have completed this tutorial, you will be able to use the same skills to draw rhinos in a range of different positions.
Matthew Matthysen is an educated multidisciplinary artist and illustrator. He successfully completed his art degree at the University of Witwatersrand in South Africa, majoring in art history and contemporary drawing. The focus of his thesis was to explore the philosophical implications of the macro and micro-universe on the human experience. Matthew uses diverse media, such as written and hands-on components, to explore various approaches that are on the border between philosophy and science.
Matthew organized various exhibitions before and during his years as a student and is still passionate about doing so today. He currently works as a freelance artist and writer in various fields. He also has a permanent position at a renowned online gallery (ArtGazette) where he produces various works on commission. As a freelance artist, he creates several series and successfully sells them to galleries and collectors. He loves to use his work and skills in various fields of interest.
Matthew has been creating drawing and painting tutorials since the relaunch in 2020. Through his involvement with artincontext.org, he has been able to deepen his knowledge of various painting mediums. For example, watercolor techniques, calligraphy and lately digital drawing, which is becoming more and more popular.
Learn more about Matthew Matthysen and the Art in Context Team.
Cite this Article
Matthew, Matthysen, “How to Draw a Rhino – The Best Realistic Rhino Drawing Tutorial.” Art in Context. October 5, 2021. URL: https://artincontext.org/how-to-draw-a-rhino/
Matthysen, M. (2021, 5 October). How to Draw a Rhino – The Best Realistic Rhino Drawing Tutorial. Art in Context. https://artincontext.org/how-to-draw-a-rhino/
Matthysen, Matthew. “How to Draw a Rhino – The Best Realistic Rhino Drawing Tutorial.” Art in Context, October 5, 2021. https://artincontext.org/how-to-draw-a-rhino/.


