


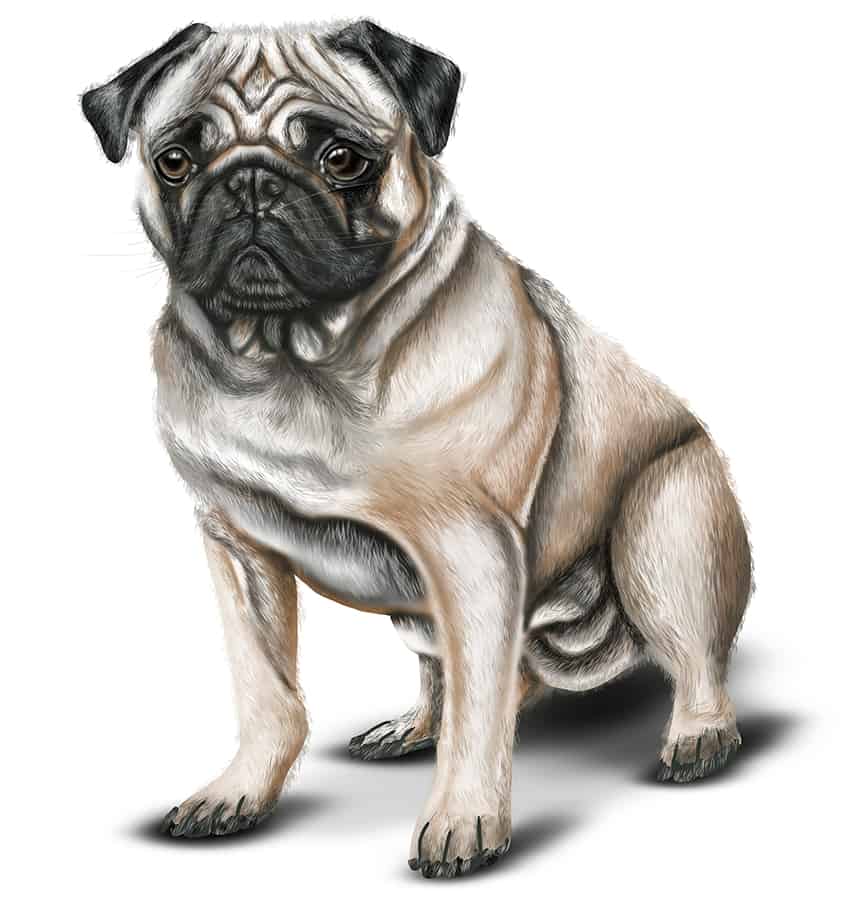
How to Draw a Pug – Create an Adorable and Easy Dog Drawing
Dogs are more than just pets; they are our loyal companions, protectors, and sometimes even therapists. Their wagging tails and wet noses have a way of melting our hearts and easing our stress. From tiny chihuahuas to massive great danes, these furry friends come in all shapes and sizes, each with their unique personalities and quirks. Whether you’re looking for a running buddy, a cuddle buddy, or just someone to greet you with enthusiastic barks every time you come home, there’s a dog out there for everyone. So, follow today’s easy tutorial where we show you how to draw a realistic dog step-by-step!
Learn How to Draw a Dog for Kids
Learning how to draw a dog step-by-step can be an exciting and rewarding experience, especially if you’re a dog lover. First, you’ll want to start by studying the proportions of dogs, which will help you to create a more realistic and accurate depiction of them. Focus on the shape of the head, the position of the ears, the length of the legs, and the overall body structure. Once you have a basic understanding of these details, you can start sketching out the dog’s basic form and add more specific details, like the shape and size of the eyes, nose, and mouth. Be patient with yourself, as even a simple dog drawing takes practice and dedication, but with each attempt, you’ll start to see your skills improve.
Remember, there’s no right or wrong way to draw a dog, so let your creativity flow and have fun! Follow the steps illustrated in the below collage, and soon you will be able to draw a realistic pug.

Step 1: Draw the Body of Your Dog Drawing
Begin your easy dog drawing by drawing a tilted oval shape to represent the main body of the dog.

Step 2: Draw the Head
Attached to the main body, draw a circle to represent the head of the pug.

Step 3: Add the Ears
Attached to either side of the head, draw the overlapping oval shapes to represent the ears. Within the center of the head, draw a narrow oval shape to represent the nostrils.

Step 4: Draw the Legs of Your Easy Dog Drawing
Again, overlapping the body, draw two narrow vertical oval shapes to represent the front legs. Continue to draw a larger oval shape to represent the rear leg of your dog drawing.

Step 5: Add the Paws
Beneath the previously drawn leg shapes, draw the construction lines of the paws underneath each leg. These can be represented by small ovals.

Step 6: Draw the Facial Guidelines
Draw a curving line down the middle of the dog’s face. Continue to draw two horizontal lines across the center line and an additional two shorter horizontal lines at the bottom of the center line.
Between the two horizontal center guidelines, draw a circle on each end to represent the eyes of the pug.

Step 7: Outline the Body of Your Simple Dog Drawing
In this step, you will mainly focus on the top half of the body. Use the previously drawn construction lines to aid you in outlining the top and bottom neckline of the pug leading onto the oval shape of the body.

Step 8: Continue to Outline the Face
Continue to use the previously drawn circles in step two to aid you in outlining the pug’s face.

Step 9: Outline the Legs of Your Dog Drawing
Outline the dog’s leg and lower body area using the oval shapes previously drawn in steps four and five.

Step 10: Outline the Paws of Your Easy Dog Drawing
Begin to outline a more realistic paw shape for each leg, using the previously drawn ovals in step five.

Step 11: Continue to Outline Your Simple Dog Drawing
In this step, you are going to outline more realistic-looking dog ears in your simple dog drawing. Continue the step by drawing the connecting line between both ears which represents the top of the head. Finish this step by drawing the final bottom neckline.

Step 12: Outline the Eyes
Use the previously drawn circles to aid you in outlining more curved and realistically shaped eyes. Within each eye, draw a half-moon shape to represent the iris. Once you have completed this step, you can erase any construction lines that are still visible.

Step 13: Draw the Mouth and Nostrils
Within the face, draw the triangular-shaped mouth on the bottom area of the center guideline. Finish the step by drawing the curving nostril shape on the center axis.

Step 14: Structure the Face
Make use of the center face guidelines and draw the structure of the pug’s face with layered lines leading from the top of the head leading downwards. Make sure these lines curve around the eyes, nostrils, and mouth.
Once you have completed this step, you may now erase the visible guidelines.

Step 15: Apply the First Color Coat
Select a regular brush and light brown paint, and evenly coat the pug, however, leave the ears blank.

Step 16: Continue to Color Your Simple Dog Drawing
With a fine, sharp brush and dark gray paint, paint the ears, eyes, and the bottom area of each paw.

Step 17: Highlight the Body
Begin by lightening the first color coat throughout the body and face area of the pug, using a soft brush and white paint. Repeat using a fine, sharp brush for finer and sharper highlight lines. Switch to a blending brush to spread and fade the white paint over the first color coat.

Step 18: Contour Your Dog Drawing
With a soft brush and dark bronze paint, begin to enhance the first color coat. To do this, simply follow or trace the guidelines added in step 14. Switch to a blending brush to soften and fade the contouring.

Step 19: Shade Your Easy Dog Drawing
In this step, add shading around the facial and body contouring lines with a soft brush and black paint. Use a blending brush to soften and spread the shading between the existing color coats. Complete the step with a fine, sharp brush and black paint, and add fine brushstrokes along the bottom neckline area.

Step 20: Texture Your Simple Dog Drawing
Select a fine, sharp brush and a combination of black, white, and bronze paint, and add fine brushstrokes creating a furry texture along the body of your pug. Continue to create a furry texture to each of the pug’s legs leading onto the paws.
Step 21: Continue to Texture Your Drawing
Continue onto the nostril and mouth area, using a thin brush and a combination of black and white paint, and create a furry texture. Surround the eye patches with fine brushstrokes. Follow this by tracing the structure lines on the face and head with fine brushstrokes and black paint. Finish this off using white paint to enhance the fur coat.
Continue onto the ears, and add fine brushstrokes using a thin brush and black paint. Repeat once more using white paint to add a fine highlighted coat within each ear.
Step 22: Color the Eyes
With a fine, sharp brush and black paint, fill in both eyes. Continue onto the iris and outline it using brown paint. Finish off using white paint, and add fine brushstrokes within each paw.

Step 23: Highlight the Eyes
Continue with the eyes by adding a subtle highlight within each iris using a thin brush and white paint. Complete the step using white paint to add fine whiskers to your dog drawing.
Step 24: Add a Furry Outline
In this step, extend the fur coat beyond the solid outline of your dog drawing, using a fine, sharp brush and the corresponding colors. This will create a realistic result and less of a ‘cut out’ look to your simple dog drawing.

Step 25: Apply a Ground Shadow
Add shading underneath each of the paws with a small, soft brush and black paint. Switch to a blending brush to spread and soften the ground shadow.
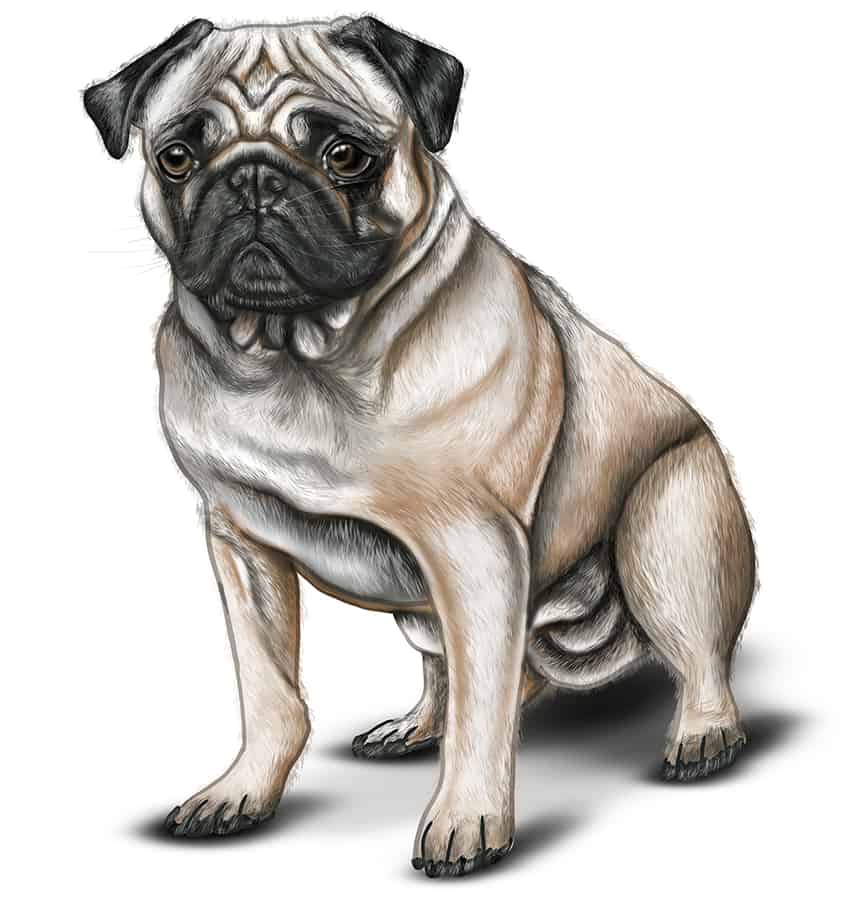
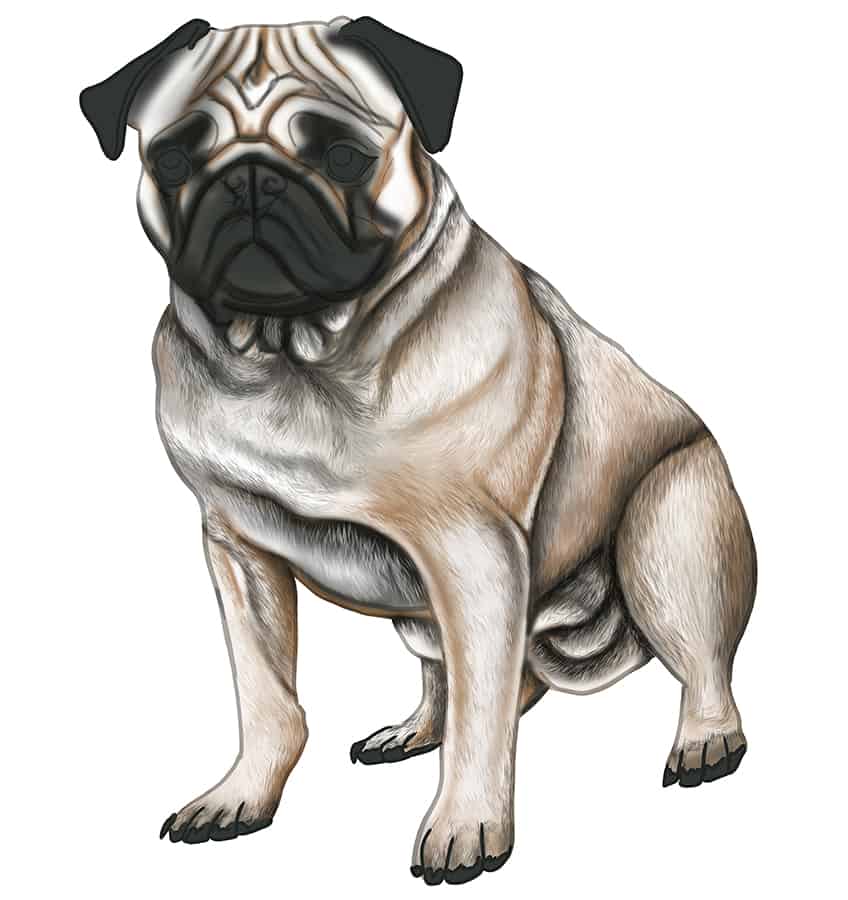
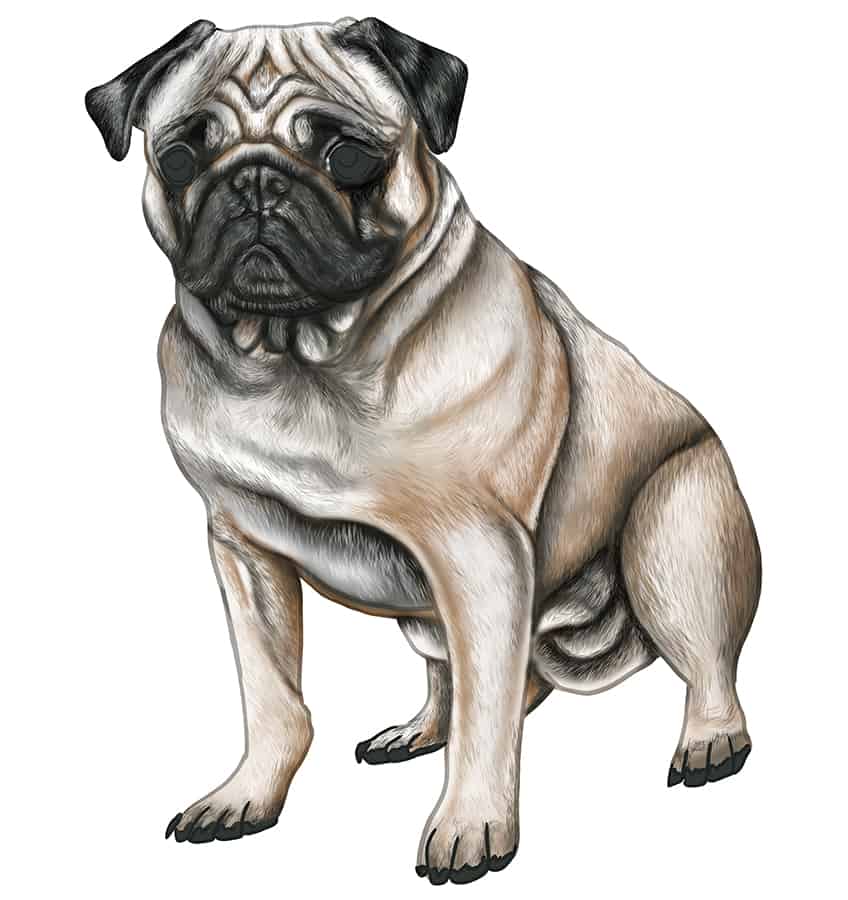
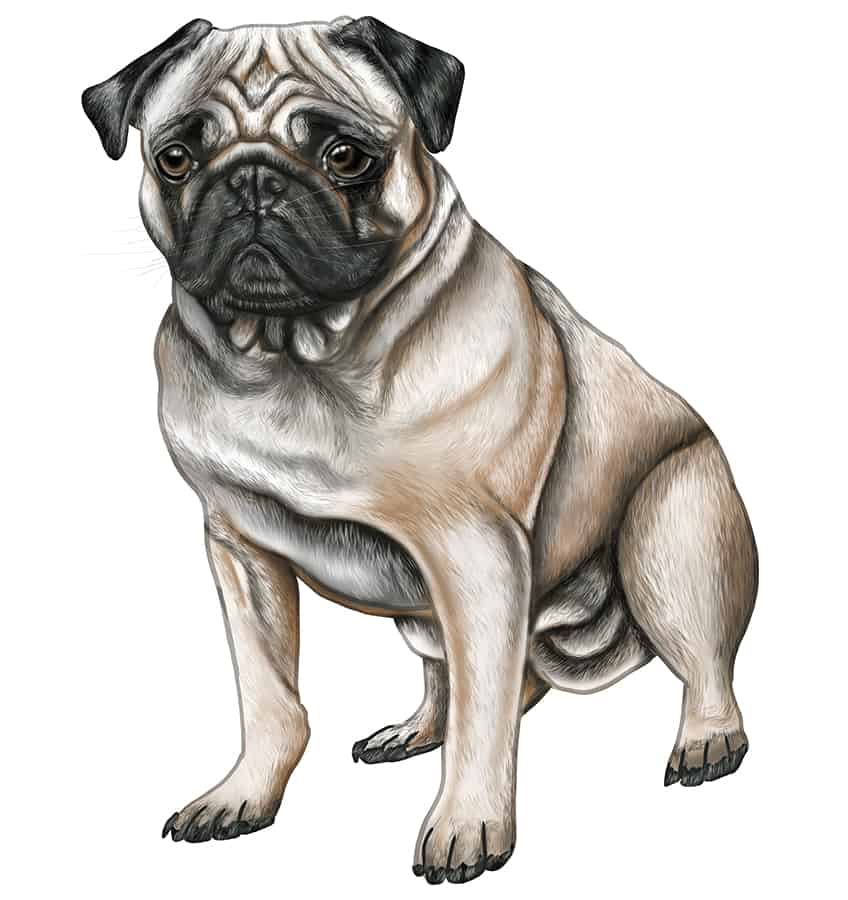
Step 26: Finalize Our How to Draw a Dog Tutorial
To achieve a realistic final result of a pug drawing, select a fine, sharp brush and matching colors and trace any harsh outlines.
Congratulations on learning how to draw a dog step-by-step! Now that you’ve mastered the basics, you can experiment with different breeds and styles. Try drawing dogs in action, like running or jumping, to bring your drawings to life. Experiment with different textures and shading techniques to give your drawings depth and dimension. Don’t be afraid to make mistakes or take creative liberties with your drawings. Remember, each artist has their unique style, and your dog drawings are a reflection of your creativity and imagination. Keep practicing and challenging yourself, and you’ll continue to improve your skills and create even more impressive drawings.
Frequently Asked Questions
How Do You Draw a Dog in Motion?
To draw a dog in motion, start by sketching the basic shape of the dog in the desired pose. Next, add details like the position of the legs and the direction of movement. Pay attention to the dog’s body language, as this will help convey a sense of motion and energy. Finally, add shading and texture to create depth and dimension.
How to Make a Dog Drawing Look More Realistic?
To make your dog drawing look more realistic, pay attention to the details. Study the proportion of a dog and incorporate these into your drawing. Add shading and texture to create depth and dimension, paying attention to the highlights and shadows. Use a range of values to create contrast and make your drawing pop. Finally, pay attention to the small details, like the texture of the dog’s fur or the shape of its eyes, to make your drawing as realistic as possible. Our tutorial is easy enough it can be used to teach kids how to draw a dog!

Matthew Matthysen is an educated multidisciplinary artist and illustrator. He successfully completed his art degree at the University of Witwatersrand in South Africa, majoring in art history and contemporary drawing. The focus of his thesis was to explore the philosophical implications of the macro and micro-universe on the human experience. Matthew uses diverse media, such as written and hands-on components, to explore various approaches that are on the border between philosophy and science.
Matthew organized various exhibitions before and during his years as a student and is still passionate about doing so today. He currently works as a freelance artist and writer in various fields. He also has a permanent position at a renowned online gallery (ArtGazette) where he produces various works on commission. As a freelance artist, he creates several series and successfully sells them to galleries and collectors. He loves to use his work and skills in various fields of interest.
Matthew has been creating drawing and painting tutorials since the relaunch in 2020. Through his involvement with artincontext.org, he has been able to deepen his knowledge of various painting mediums. For example, watercolor techniques, calligraphy and lately digital drawing, which is becoming more and more popular.
Learn more about Matthew Matthysen and the Art in Context Team.
Cite this Article
Matthew, Matthysen, “How to Draw a Pug – Create an Adorable and Easy Dog Drawing.” Art in Context. April 19, 2023. URL: https://artincontext.org/how-to-draw-a-pug/
Matthysen, M. (2023, 19 April). How to Draw a Pug – Create an Adorable and Easy Dog Drawing. Art in Context. https://artincontext.org/how-to-draw-a-pug/
Matthysen, Matthew. “How to Draw a Pug – Create an Adorable and Easy Dog Drawing.” Art in Context, April 19, 2023. https://artincontext.org/how-to-draw-a-pug/.


