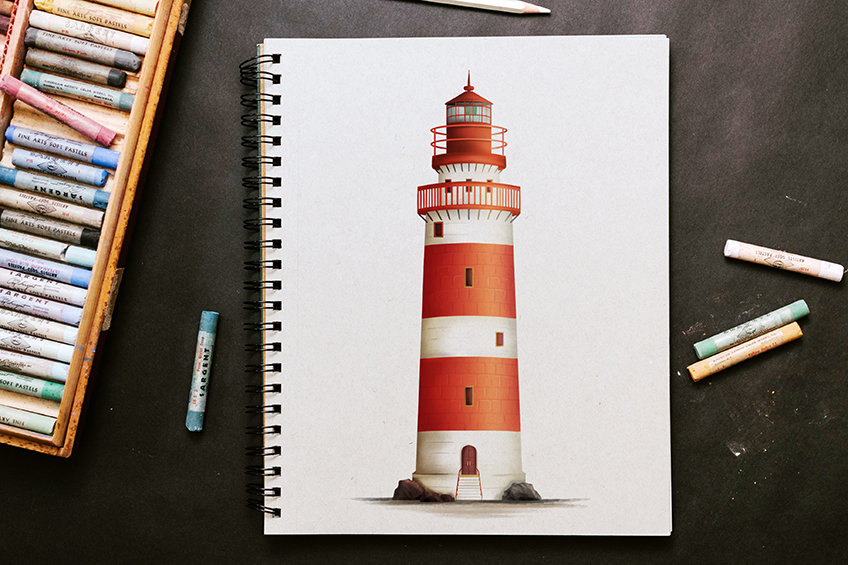
How to Draw a Lighthouse – An Easy Lighthouse Drawing
Standing tall and proud against the crashing waves, a lighthouse is a beacon of safety and hope for sailors at sea. Its majestic tower reaches towards the sky, guiding ships to safety with its powerful light. With each flicker of its beam, the lighthouse reminds us of the incredible power of human ingenuity and the importance of navigation in the vast and unpredictable ocean. For centuries, these towering structures have stood as symbols of strength and resilience, weathering the storms of time and guiding generations of sailors to their destinations. The lighthouse is a true testament to the power of human determination, and the unrelenting force of nature.
A Step-by-Step Guide to Creating a Lighthouse Drawing
Embark on a journey of artistic discovery and learn how to draw a lighthouse with us today! Whether you’re a beginner or an experienced artist, our comprehensive tutorial covers the essential elements of creating a striking lighthouse sketch. Discover new techniques for adding texture, shadows, and highlights to your artwork, and achieve mastery over the details that bring your lighthouse drawing to life. Don’t miss this opportunity to explore the captivating world of lighthouse drawing and take your art skills to the next level!
The below lighthouse sketch collage demonstrates each step you will take to achieve an easy lighthouse drawing!
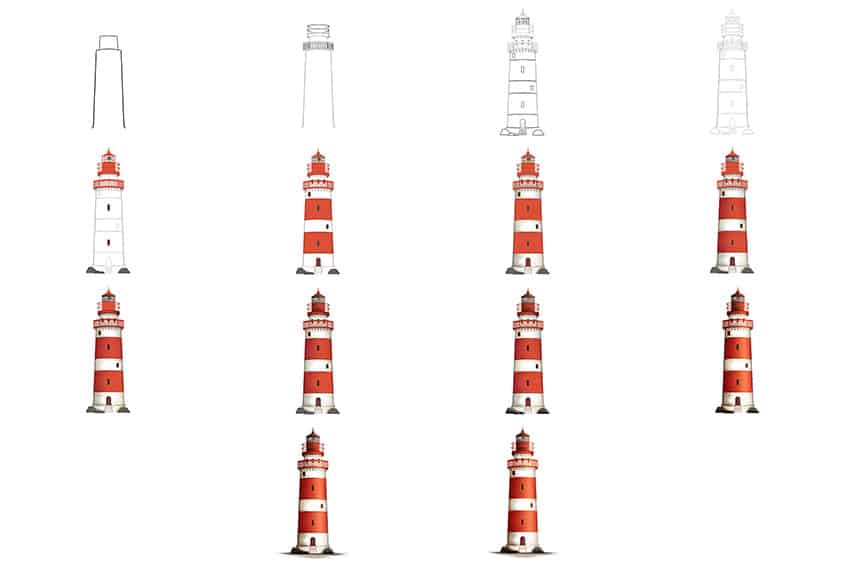
Step 1: Draw the Main Frame of Your Lighthouse Drawing
To begin our tutorial on how to draw a lighthouse, you will start by drawing the main frame of your lighthouse in the center of your drawing page. Include the top mount to the main frame of your lighthouse drawing.

Step 2: Outline the Top Deck
Draw the surrounding top deck rails on your lighthouse drawing. Continue by drawing oval shapes surrounding the structure of the top mount.

Step 3: Add the Details to Your Lighthouse Sketch
At the main frame of the lighthouse draw the center door with steps. Add separation lines within the main frame, and draw a window between each of these separation lines. At the top of the lighthouse, draw supporting beams for the rails on the first and second top floors. Add several rocks at the bottom of the lighthouse.
Complete this step, by drawing the main hatch on the top of the lighthouse with a sloping roof.

Step 4: Erase the Overlapping Lines
In this step, you are finalizing your outline for your easy lighthouse drawing. Erase any visible overlapping or construction lines.

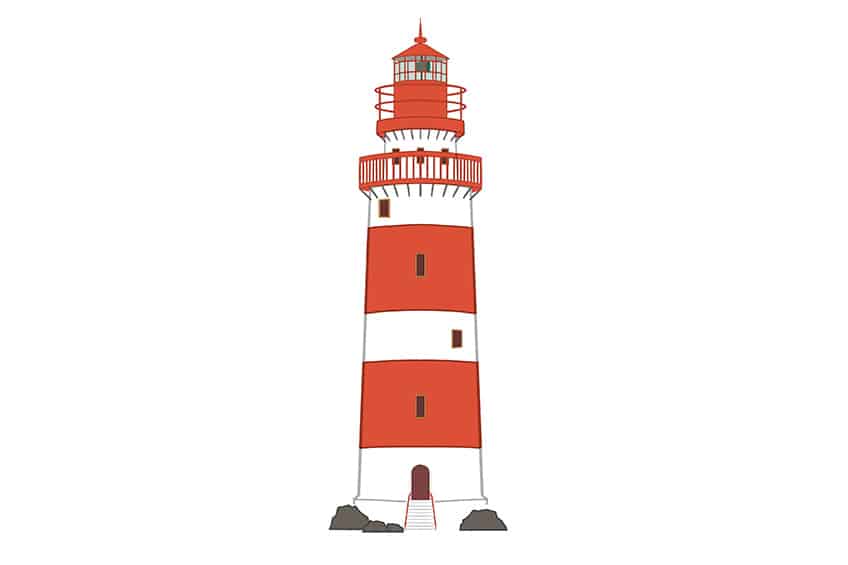
Step 5: Add the First Coat of Color
Select a fine, sharp brush and a pale shade of red paint, and evenly color the top hatch and rails in your lighthouse sketch. Continue by painting two of the window frames with soft gold paint, and brown paint for the inside of the windows. Complete this step with gray paint, and paint the supporting beams and surrounding rocks. Switch to green paint and fill in the lamp on the top hatch.

Step 6: Add the Second Color Coat
Use the same brush as previously and switch to the pale shade of red paint, color two stripes on the lighthouse leaving a white color base between the strips. Switch to maroon paint, and paint the center door. Color the rails of the steps in bright orange paint. Fill in the remaining windows as you did in the previous step.
Using a soft brush and light green paint, softly fill in the glass portion of the top hatch.
Step 7: Texture Your Lighthouse Drawing
Select a soft brush and black paint, and add soft shading to the edges of the lighthouse. Switch to a blending brush and apply smooth brushstrokes that lead inwards. With a thin, sharp brush, apply fine brick patterns along the lighthouse.

Step 8: Enhance the Texture
Continue to add a more detailed brick texture along the lighthouse, focusing mainly on the red strips, with a thin brush. Apply fine structure lines to the center door with black paint. Repeat using gold paint for the handles on the door. Complete this step, by adding shading within the top hatch ceiling.

Step 9: Shade Your Easy Lighthouse Drawing
Make use of a small, soft brush and black paint, and add soft shading along the edge of the railing and top floor including the glass portions. Repeat within the windows.
Note! The first color coat should still be somewhat visible.

Step 10: Shade the Top Hatch
Use the same brush as previously and black paint, and apply a realistic shadow in the top hatch. Switch to a blending brush and smooth out the areas. Complete shading with white paint, and softly add a highlighted spot on the lamp itself.

Step 11: Texture the Rocks to Your Lighthouse Sketch
Select a rough, textured brush and tan paint, and apply patches of rough patterns within each rock. Repeat using black paint and enhance the structure and shading on each rock.

Step 12: Add Highlights to the Lighthouse
Before we begin to add some highlights, apply structure lines, using a small, soft brush and black paint, to enhance the shading on the edges of the lighthouse building including the rocks. Follow this with white paint, and add a soft highlight along the center of the lighthouse.

Step 13: Add a Ground to Your Lighthouse Drawing
Use the same paintbrush as previously and a combination of black, brown, and tan paint, and apply a realistic ground base to the bottom of the lighthouse and surrounding rocks.

Step 14: Finalize Your Easy Lighthouse Drawing
For a more realistic look, use a fine, sharp brush and matching colors and delicately trace the entire outline and any inner texture lines of the lighthouse. This will result in a seamless final product without any harsh or visible edges!

Congratulations on finishing your stunning lighthouse sketch! We hope that following our simple 14-step guide on how to draw a lighthouse was a pleasurable experience for you. If you’re interested in exploring your creative side further, we invite you to check out our other fantastic drawing tutorials!
Frequently Asked Questions
How Do I Add Texture to the Bricks on My Lighthouse Drawing?
To add texture to the bricks on your lighthouse sketch, you can use a technique called hatching or stippling. Both techniques will help you to create a more detailed and textured appearance for the bricks on your lighthouse drawing. Follow along with our tutorial on how to draw a lighthouse and we will guide you through the entire texturing process. Also, experiment with both techniques to find the one that works best for your drawing style!
How to Draw the Windows and Doors of the Lighthouse?
When drawing the windows and doors of the lighthouse, it’s important to pay attention to their placement and size. Use a ruler to ensure that they are evenly spaced and aligned. You can also add depth to the windows and doors by shading the areas around them to create the illusion of shadow. Finally, consider using a finer pen or pencil to add detail to the panes of glass and door handles.
Matthew Matthysen is an educated multidisciplinary artist and illustrator. He successfully completed his art degree at the University of Witwatersrand in South Africa, majoring in art history and contemporary drawing. The focus of his thesis was to explore the philosophical implications of the macro and micro-universe on the human experience. Matthew uses diverse media, such as written and hands-on components, to explore various approaches that are on the border between philosophy and science.
Matthew organized various exhibitions before and during his years as a student and is still passionate about doing so today. He currently works as a freelance artist and writer in various fields. He also has a permanent position at a renowned online gallery (ArtGazette) where he produces various works on commission. As a freelance artist, he creates several series and successfully sells them to galleries and collectors. He loves to use his work and skills in various fields of interest.
Matthew has been creating drawing and painting tutorials since the relaunch in 2020. Through his involvement with artincontext.org, he has been able to deepen his knowledge of various painting mediums. For example, watercolor techniques, calligraphy and lately digital drawing, which is becoming more and more popular.
Learn more about Matthew Matthysen and the Art in Context Team.


