How to Draw a Water Buffalo – The Best Water Buffalo Sketch Tutorial
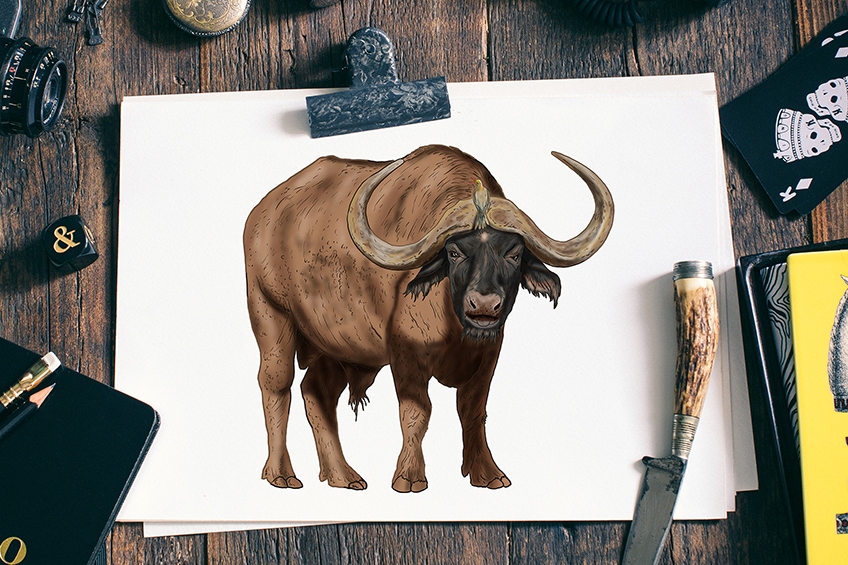
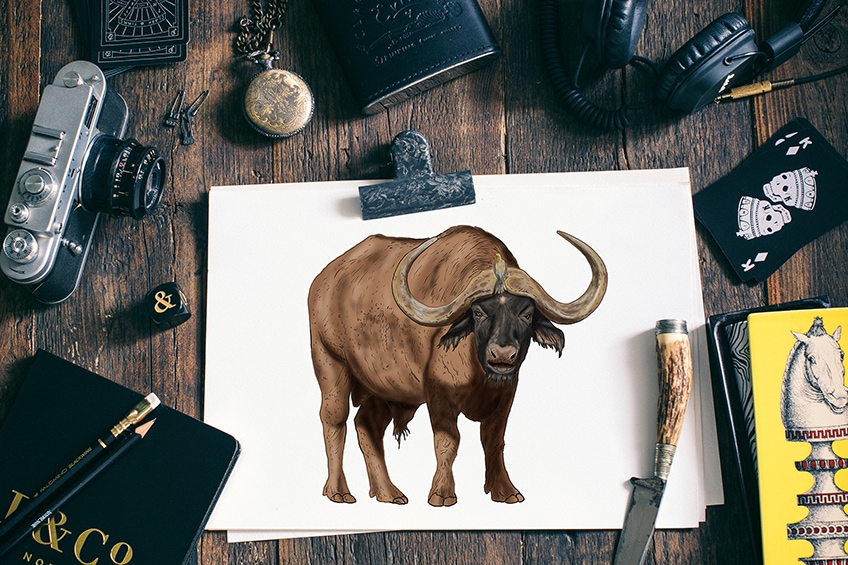
Water buffalos are fairly intimidating and unusual-looking animals. Their large horns and powerful bodies make them fantastic drawing subjects, particularly when you want to focus on improving your eye for proportion. In this easy-to-follow drawing tutorial, we take you through all the necessary steps to create your own realistic water buffalo sketch.
How to Draw a Water Buffalo Step-by-Step
Not only do water buffalos have a unique appearance that can challenge even the most proportion-oriented artists, but we have laid down an additional challenge by the perspective we have chosen for our water buffalo drawings. We are creating a water buffalo sketch that is slightly off-front facing. This way, we get to see the whole of the buffalo’s face and the majority of their body too. If this unique and tricky proportion seems intimidating, do not worry!
We use construction lines to help us lay down the basic shapes and proportions before getting into any intricate details.
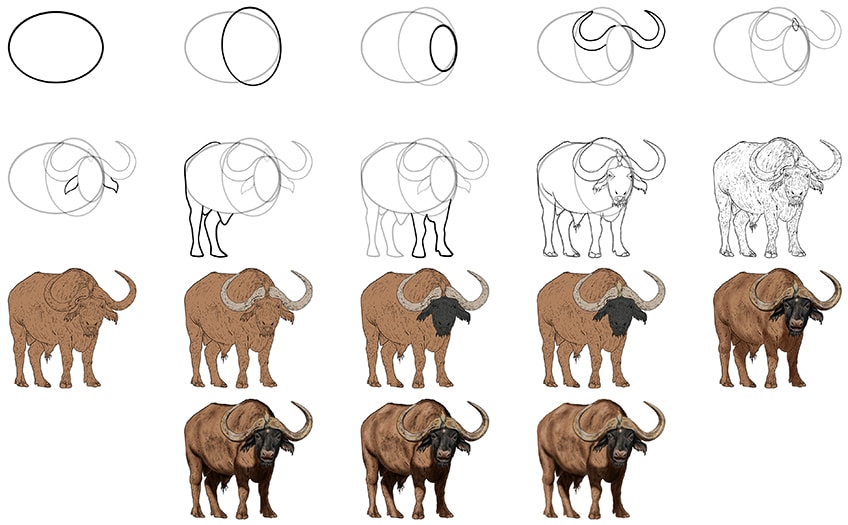
For the coloring steps, which you can see in the collage above, you have the freedom to choose whichever medium you like the most. We use acrylic paint, but you can easily adapt the coloring instructions to suit a range of materials from graphic tablets to coloring pencils.
Whichever medium you have chosen, gather your drawing supplies, and let us begin our water buffalo sketch tutorial.
Step 1: Outlining the Shape of the Main Body
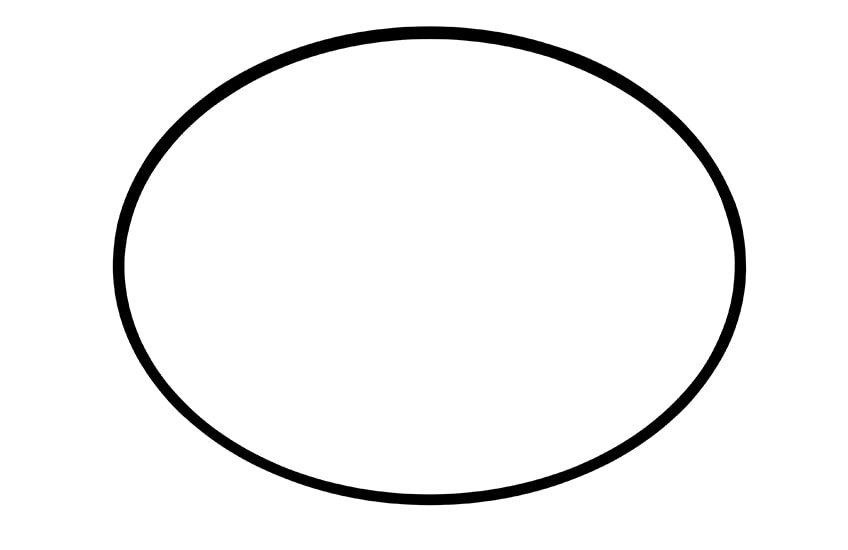
We always begin our animal drawings by using a construction shape to lay down the foundation of the largest part of the body. As a result of the perspective we are taking in this drawing, the main body shape is quite squat and round. As such, we are going to use a large, quite round oval shape to represent the main body of our water buffalo drawings.
When beginning your water buffalo sketch, it is important to make sure that this first construction step sits in the very center of your canvas with plenty of space on all sides to accommodate the other parts of the body.
Step 2: Creating the Separation Between the Body and Head
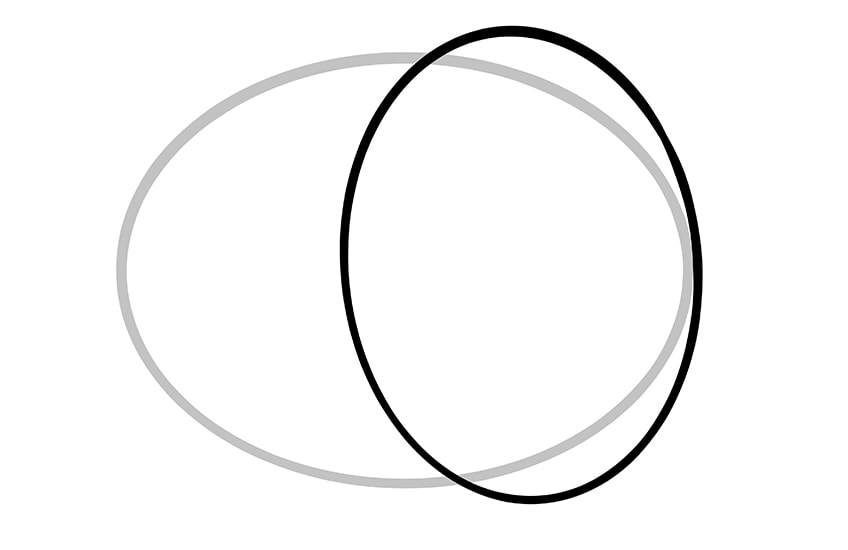
In this step, we are going to draw a shape that will represent the area between the body, neck, and head. In other words, this shape is going to help us create the hump of our water buffalo sketch. To create this shape, you are going to use a slightly more narrow vertical oval shape that sits on the right side of the main body.
You want the right side of this vertical oval to sit on the right point of the main body oval.
Step 3: Outlining the Shape of the Water Buffalo’s Head
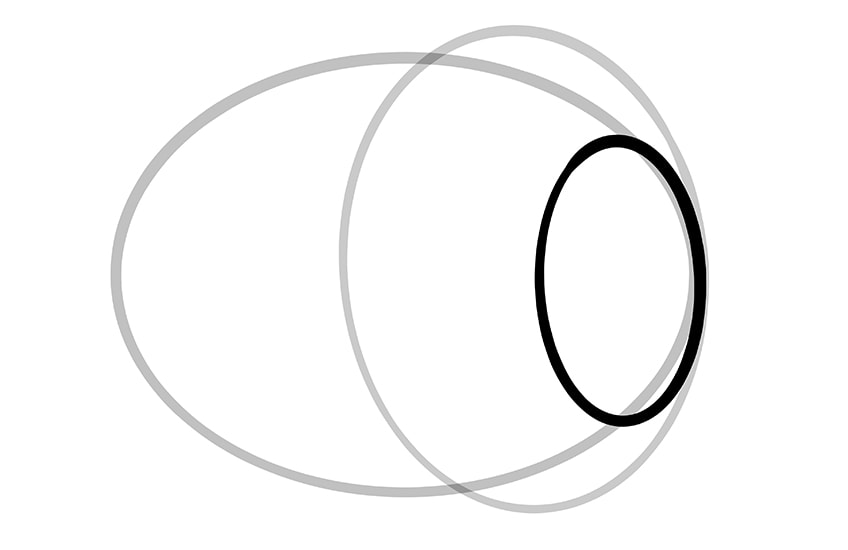
Compared to the other construction shapes that you have drawn so far, the head shape is going to be significantly smaller. Draw this smaller head oval on the very right side of your water buffalo sketch.
You want the head oval to overlap the main body shape almost entirely.
Step 4: Shaping the Horns in Our Water Buffalo Drawings
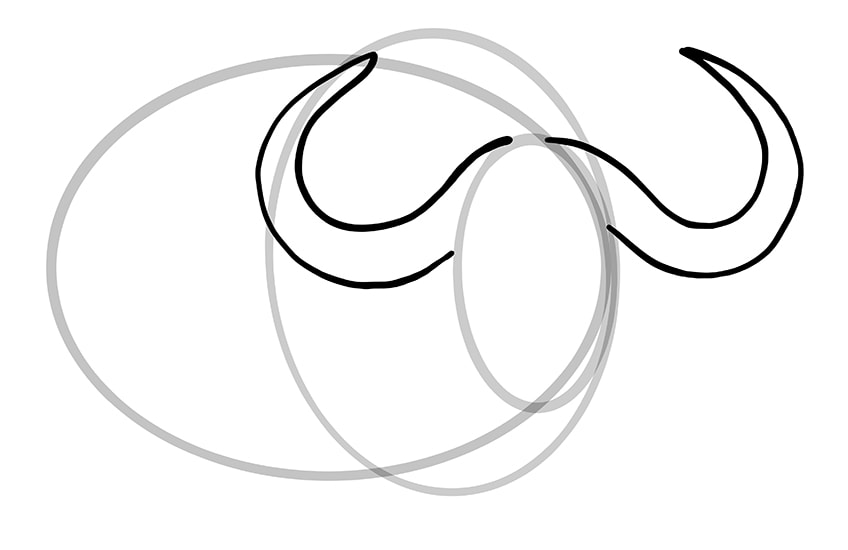
The large and intimidating horns are one of the most significant characteristics of a water buffalo. In this step, we are going to create the shape of these horns, using two curved “U” shapes, extending out from either side of the head. The top lines of both of these horns should begin right on top of the head oval shape, and they should curve out and up quite a lot.
These horns are the first freehand shapes that you are creating for your water buffalo sketch, so they may be slightly unsymmetrical. This lack of symmetry is actually great because it will create a more realistic impression.
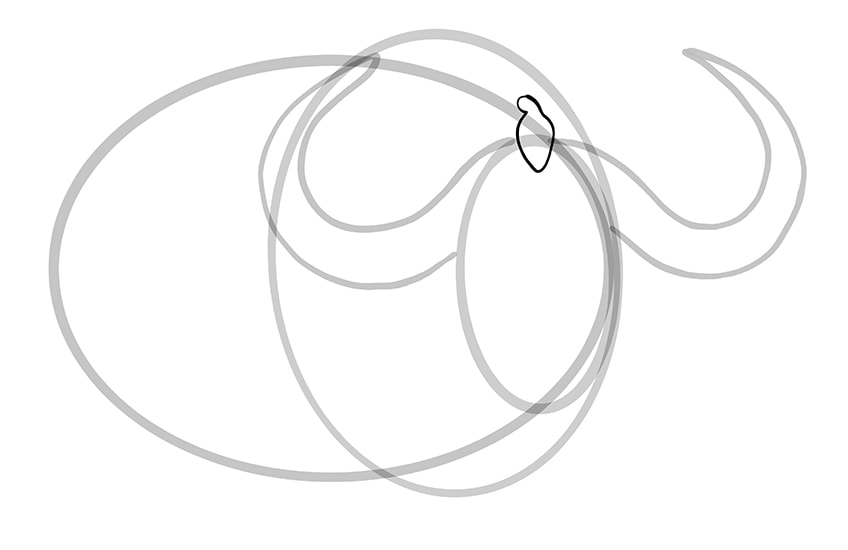
Step 5: Drawing the Little Bird
Our water buffalo sketch also features a small little bird friend perched on top of the buffalo’s head. In this step, we are going to quickly outline the shape of this little bird.
Simply draw a little bird shape right between the two horns on the top of the water buffalo’s head.
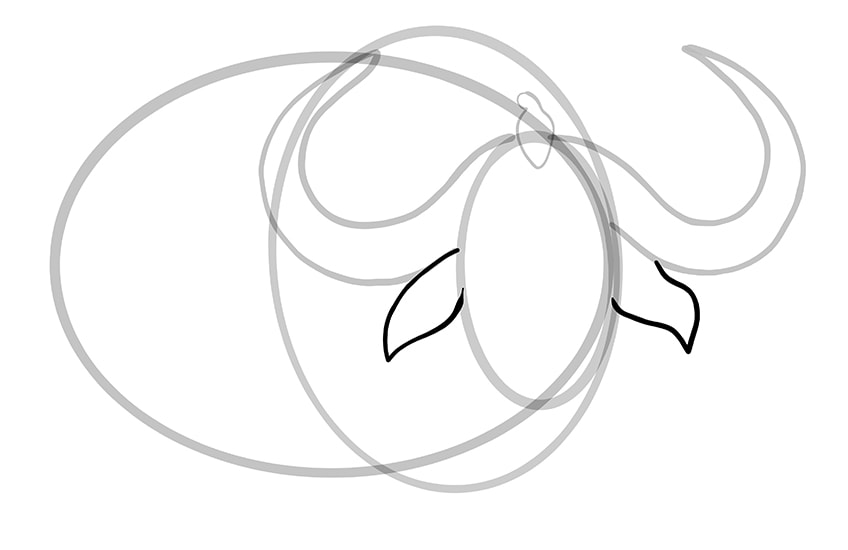
Step 6: How to Draw a Water Buffalo’s Ears
In this step, we are going to draw the long curving ears of our water buffalo sketch. These ears sit just below both of the horns and are shaped a little bit like leaves. Begin with the left ear, starting it right on the outline of the head oval.
For the right ear, you want it to begin on the head oval, and then finish on the underside of the horn.
Step 7: Creating the Outline of the Back Legs and Rump
Now, we are going to use a few different lines to create the general shape of the back legs and rump of our water buffalo drawings. Begin by shaping the rump, beginning on the top of the main body oval. Create a few lumps and bumps in this rump outline, before taking it down to begin drawing the very back leg. This leg is most visible to us so you will see the entire shape of the leg. After creating a slightly triangular hoof shape on the end of the leg, take it back up to join the bottom of the main body oval. Create a small rounded triangle just after this first leg joins the bottom of the main body oval to represent the one udder.
You can then draw the second leg beginning on the other side of this udder, curving the top back towards the other, and then forward slightly. Finish this step by drawing another udder shape.
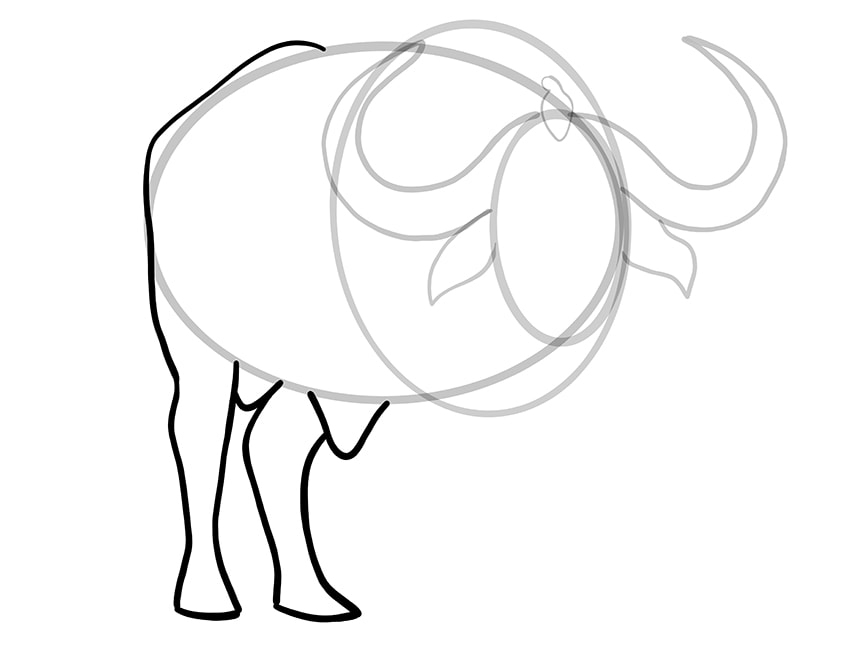
Step 8: Shaping the Front Legs of the Water Buffalo Sketch
The two front legs of our water buffalo drawings can be created with a single line. Begin this line at the point where the second udder you drew in the last step meets the main body oval. Take the line down and create the large triangular hoof at the bottom, and then take the line back up, creating a flame-like shape at the peak of the separation between the two legs. You can then finish the second leg outline, creating a hoof and then joining the line to the bottom of the head oval.
The hooves of the very right leg and the right-back leg should be pointed forwards slightly to create the right perspective.

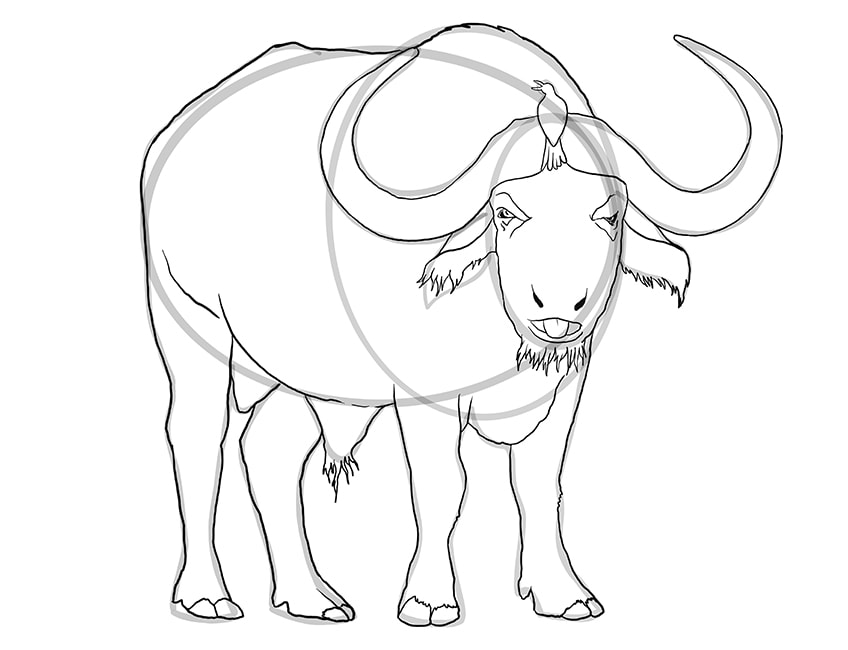
Step 9: Outlining Our Water Buffalo Drawings
In this step, we can finally put all of the construction lines to use to help us create the final outline of our water buffalo sketch. You are also going to begin adding a little bit of texture and detailing to the buffalo’s face. Begin by outlining the shape of the bird, adding a little open beak and a fan of tail feathers. You can then outline both of the buffalo’s horns and ears. For the ears, you can follow the top of the construction lines closely, but you can create the impression of fur on the bottom side.
Finish the ears by adding a small curved line just below the top line to create the separation between the inside and outside ear.
As you move down to the face of your water buffalo sketch, you can begin to add some facial details, including the eyes, nostrils, mouth, and hairy chin. The eyes should be placed right on the edge of either side of the face and should have an outline around them. For the mouth, draw the tongue of your water buffalo sticking out of its mouth. For the rest of the body of our water buffalo drawings, you can follow the construction lines fairly closely, adding a few bumps for additional realism. On the second udder, between the set of front and back legs, use some small flame-like shapes to create the impression of fur.
Finish your outline by creating two toe splits on each hoof with a small uneven oval. You can then erase any remaining construction lines.
Step 10: Creating Texture in Your Water Buffalo Sketch
Before we move on to adding any color to our water buffalo drawings, we need to create some texture. Water buffalo have a great deal of texturization throughout their bodies, and the particular texture depends on the part of the body. Let us begin with the face of the buffalo, creating a small spot in the center of the forehead and using long lines that extend from this point to create a furry texture.
These hairlines should be shaped around facial features like the eyes and nose.
For the nose, use some small dots to create a texture around the nostrils and mouth. You can then fill in the beard and the inner ears with curved hairlines. For the horns of your buffalo sketch, use a range of short and squiggly lines to create texture throughout, and you can also add some texture to the bird. On the very top and back of your buffalo drawing, create slightly long fur lines that extend down on either side from the top point. As you go further down the body, these lines can become shorter and a little more squiggly. Try to create some vertical lines of texture down the side body and chest of your water buffalo sketch.
Finish this step by adding furry hairlines to the feet just above the hooves, and a few little dots and squiggles on the toes.
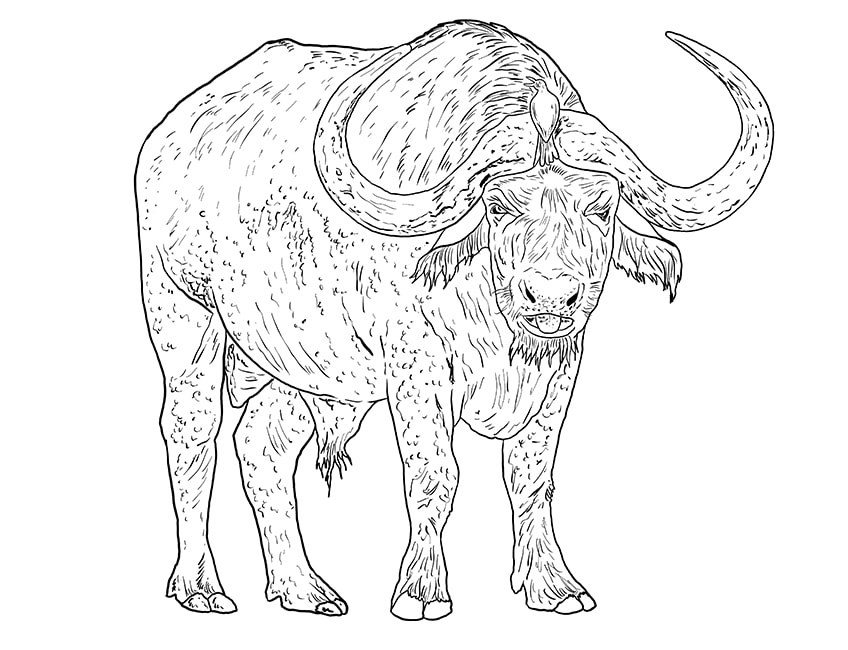
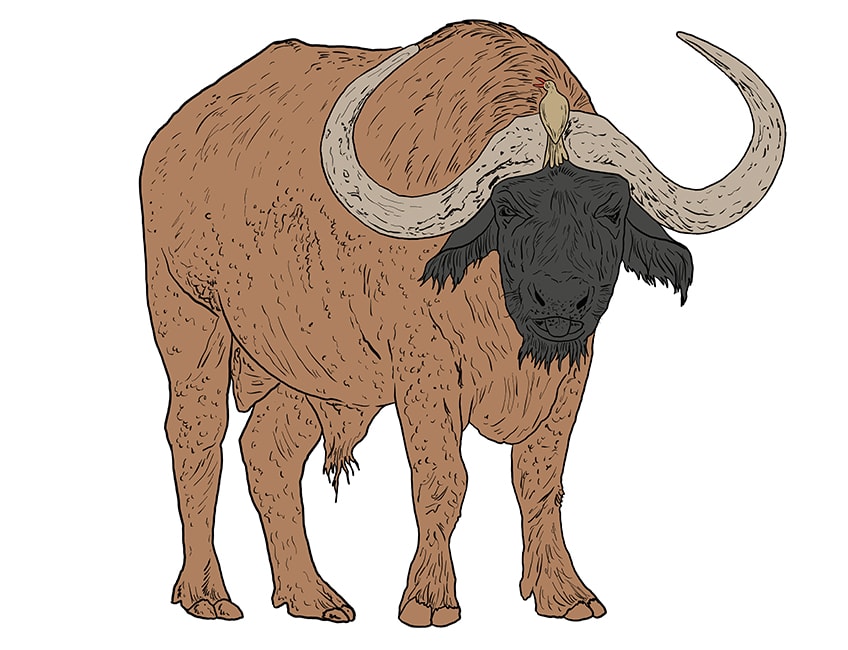
Step 11: Applying the Base Color Coat
To build up our realistic coloring for the water buffalo drawings, we are going to use several layers of different colors. We begin with a fairly neutral base shade. Choose a light brown shade, and use a regular brush to fill the entire body of your water buffalo sketch.
Whichever medium you are using, make sure that this base coat is even and without blotches.
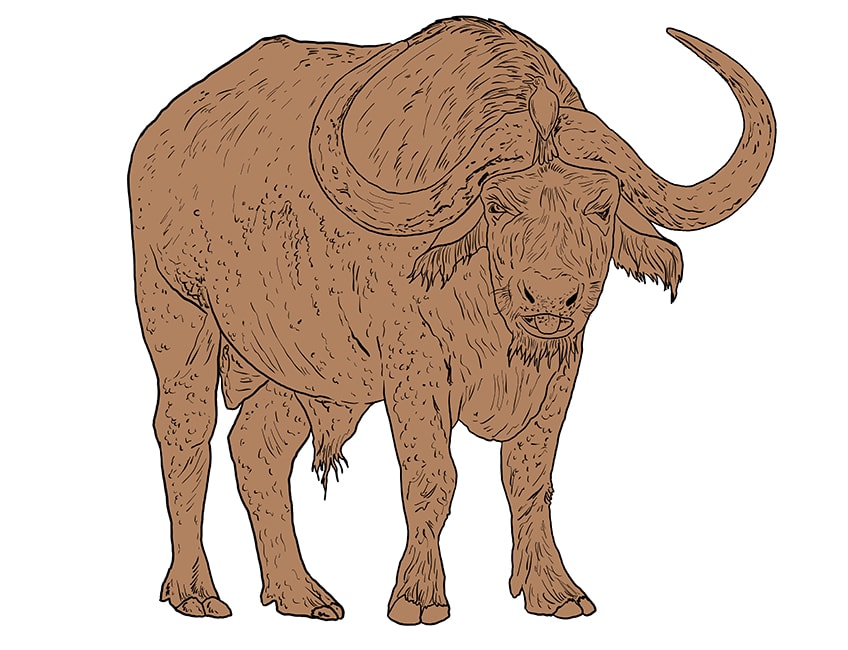
Step 12: Define the Buffalo’s Horns with Color
In this step, we are going to use a different color to create a definition between the horns and the rest of the body of your water buffalo sketch.
Choose a khaki or light gray shade and fill both of the horn shapes with this shade.
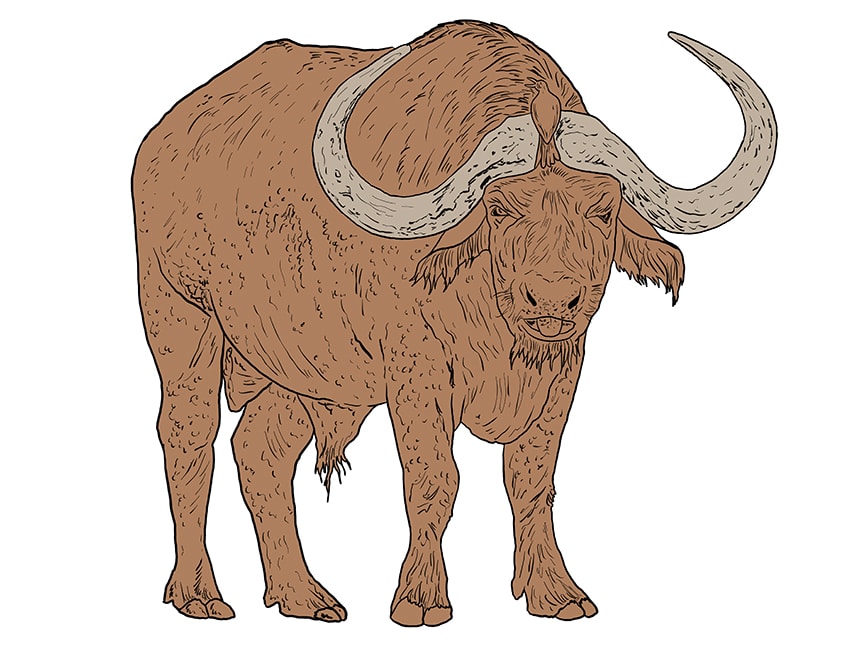
Step 13: Adding Color to the Head
We are now going to define the head of our water buffalo drawings by adding a distinct color.
Choose a dark gray shade and use a regular brush to fill the entirety of the head, including the ears and beard.
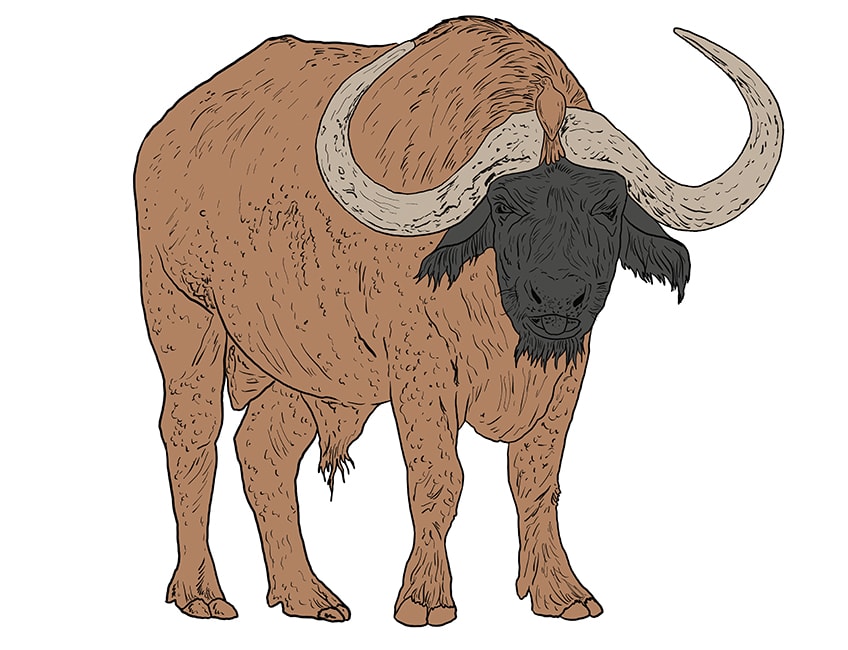
Step 14: Adding Color to the Bird
In this quick and easy step, simply choose light orange paint and use a sharp fine brush to color the beak of the bird.
You can then color the body of the bird with a tan color.
Step 15: Contouring the Shape of the Water Buffalo Sketch
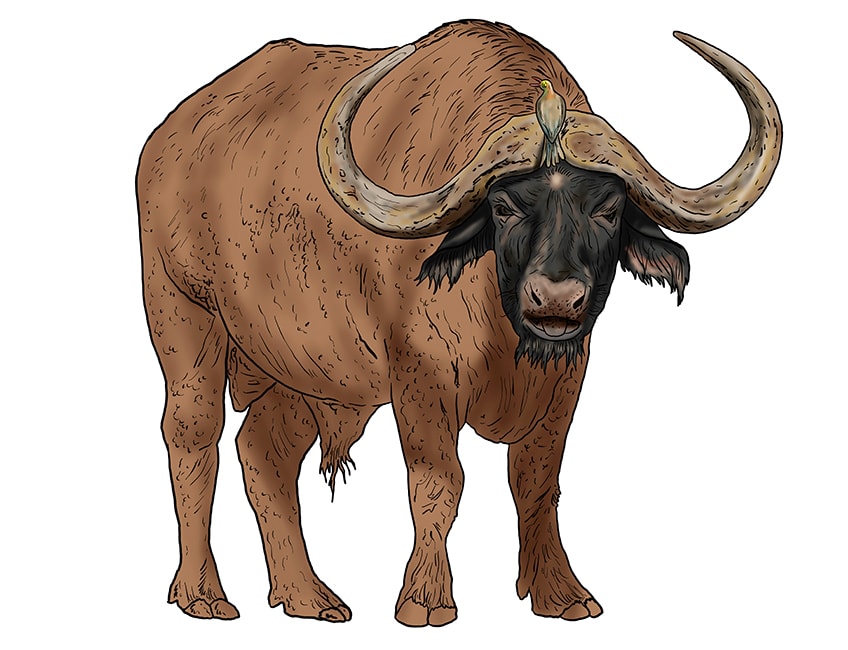
One of the best methods for creating realistic proportions is to contour the shape with a darker color. For our contouring, we are going to use a very soft blending brush and black paint to outline the structure of the body and face. The most important parts to focus the black contouring on are the side of the main body, the underside of the belly, between the legs, on the chest, and around the sides of the face.
The best way to contour is to find a natural light point, and then focus the shadows on the places which would naturally be hidden from this light source.
You can then use a finer soft brush and some gray paint to add a contour around the shape of the bird’s body and tail. You can repeat this with a light yellow and orange paint, gently blending the head color into the rest of the body. Next, use some yellow paint and a soft brush to add hints of highlights to the horns, blending it into the base shade.
Finish this step by using a light shade of tan to color the inner parts of the ear, around the eyes, nostrils, and mouth. You can then do the same process using light brown paint.
Step 16: Creating a Final Layer of Shading
In this step, you are going to use another layer of dark shading to emphasize the shaded areas from the previous step. Focus this final shading on the chest, upper back, lower belly, and between the legs.
As always when using black to shade, start lightly and then add more if necessary.

Step 17: Creating Highlights on Your Water Buffalo Sketch
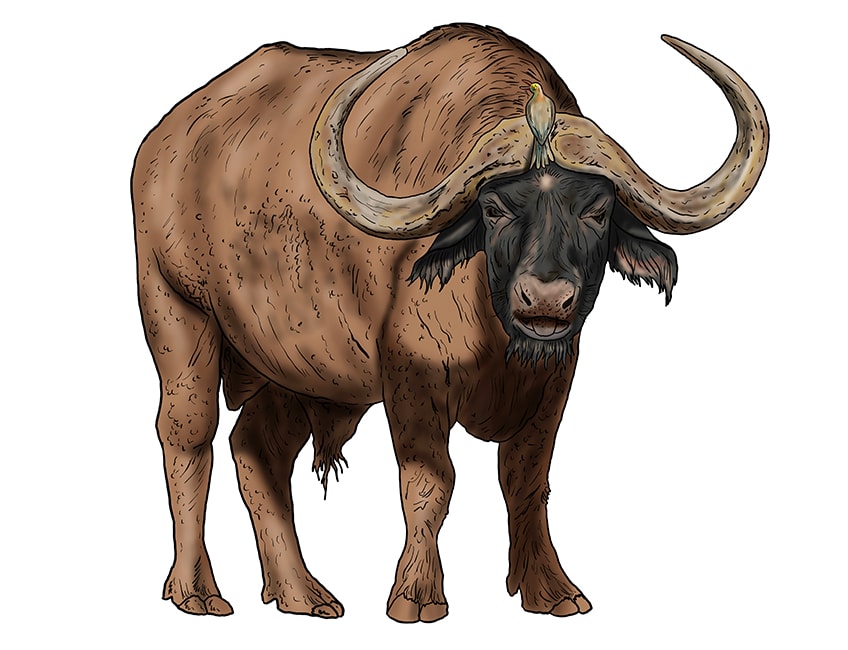
To counter the shading we have done in the last two steps, you are now going to add some highlights. Use a small soft brush and a touch of white paint to gently add highlights in the areas between the first color coat and the areas of contour.
Add a small touch of highlight in the center of the water buffalo’s forehead.
Step 18: Finishing Our Water Buffalo Drawings
We are now going to add the finishing touches to our water buffalo drawings. Begin with a small fine brush and some bright orange paint to highlight the beak of the bird, and add a finishing highlight to the bird’s head. Next, use a touch of white paint and a sharp brush to add a glint of white to each of the eyes.
Finally, you can erase the outlines of your water buffalo sketch by tracing over them with the corresponding color.
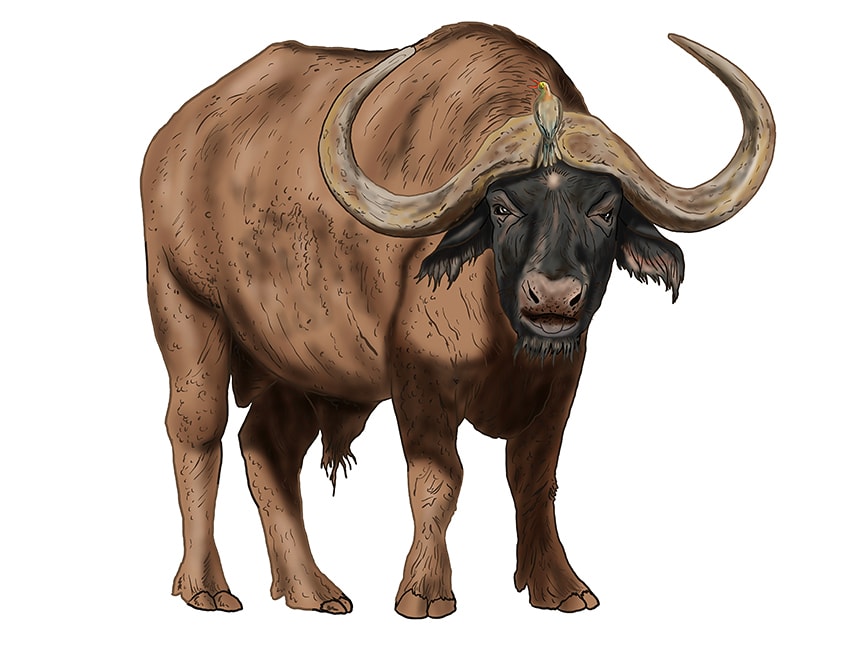
You have now conquered the intimidating water buffalo by creating your very own realistic water buffalo sketch. Despite the unique and interesting perspective, you have nailed this drawing and hopefully you are feeling more confident in your drawing abilities!
Frequently Asked Questions
Can You Show me How to Draw a Water Buffalo Easily?
Absolutely, this tutorial is the number one guide to creating a realistic and detailed water buffalo sketch. With our helpful tips and tricks, you will be able to create a very detailed water buffalo drawing with ease.
Is It Difficult to Create Realistic Water Buffalo Drawings?
Although the water buffalo is not the easiest animal to draw, our tutorial gives you everything that you need to create a realistic drawing in just a few simple steps. Beginning with construction lines, we help you get the perfect perspective and proportions, and then take you through the steps to create realistic coloring.
Matthew Matthysen is an educated multidisciplinary artist and illustrator. He successfully completed his art degree at the University of Witwatersrand in South Africa, majoring in art history and contemporary drawing. The focus of his thesis was to explore the philosophical implications of the macro and micro-universe on the human experience. Matthew uses diverse media, such as written and hands-on components, to explore various approaches that are on the border between philosophy and science.
Matthew organized various exhibitions before and during his years as a student and is still passionate about doing so today. He currently works as a freelance artist and writer in various fields. He also has a permanent position at a renowned online gallery (ArtGazette) where he produces various works on commission. As a freelance artist, he creates several series and successfully sells them to galleries and collectors. He loves to use his work and skills in various fields of interest.
Matthew has been creating drawing and painting tutorials since the relaunch in 2020. Through his involvement with artincontext.org, he has been able to deepen his knowledge of various painting mediums. For example, watercolor techniques, calligraphy and lately digital drawing, which is becoming more and more popular.
Learn more about Matthew Matthysen and the Art in Context Team.
Cite this Article
Matthew, Matthysen, “How to Draw a Water Buffalo – The Best Water Buffalo Sketch Tutorial.” Art in Context. October 11, 2021. URL: https://artincontext.org/how-to-draw-a-water-buffalo/
Matthysen, M. (2021, 11 October). How to Draw a Water Buffalo – The Best Water Buffalo Sketch Tutorial. Art in Context. https://artincontext.org/how-to-draw-a-water-buffalo/
Matthysen, Matthew. “How to Draw a Water Buffalo – The Best Water Buffalo Sketch Tutorial.” Art in Context, October 11, 2021. https://artincontext.org/how-to-draw-a-water-buffalo/.


