How to Draw a Snail – A Realistic Snail Drawing Tutorial
Snail drawings are remarkable for their visual versatility and can be integrated into various artworks. A snail is such a strange creature which makes them a unique addition to various artwork genres, such as fantasy, natural landscapes, or even as a subject matter on its own. Snail sketches are also a great drawing exercise because of how the shell and slug-like composition juxtapose in texture. Learning how to create the smooth texture on the shell and the scaly slug-like features are drawing skills that can be translated into various other drawings. There are many benefits that can come from learning how to draw a snail, and in this easy snail drawing, we will learn both how to create a snail drawing as well as an extra few skills along the way.
An Easy Guide to Drawing a Snail With Colored Pencils
In this easy snail drawing tutorial, we will find that the process of creating a realistic snail is quite simple when broken up into digestible steps. Snails have a simple structure, however, giving the snail sketch details in both the shell and its body is what will be most challenging. That being said, we will break down the drawing process into a few simple steps that are easy to follow. We will learn how to develop a simple snail sketch into a more refined and realistic snail drawing with the use of a few simple tools.
Necessary Materials
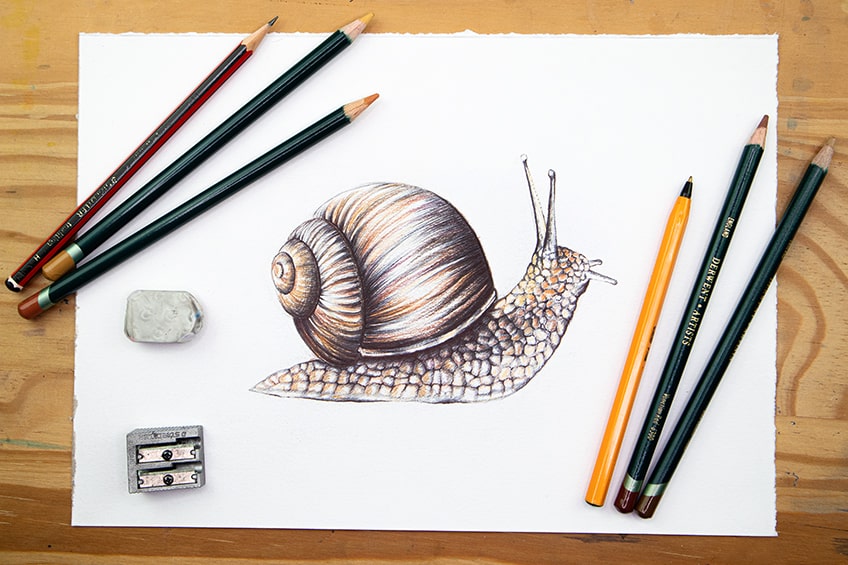
There are many different snails to draw inspiration from, but perhaps none as iconic as the classic vineyard snail. We will learn how to draw this beautiful little creature with the use of some pencils, a pen, and colored pencils. This combination of drawing tools is great for capturing the illustrative qualities of smaller creatures and insects. We will also want to make sure that we have an eraser and sharpener for any silly mistakes we make along the way.
We want to make sure that once we have all the necessary materials, we should begin to prepare ourselves for the drawing process within an environment that is conducive to focusing. All materials can be found through the links below:
- HB Pencil
- Ballpoint Pen
- Marker Pen
- Eraser
- Sharpener
- Derwent Coloring Pencils
- Good Paper (200 g/m – 250 g/m recommended)
How to Draw a Snail Step by Step
In this tutorial on how to draw a snail, we will begin with a basic snail sketch using our HB pencils. Once we have made a simple snail sketch with our pencils, we want to then slowly start adding in some light pencil detailing and shading. From there, we will begin to use some colored pencils and ballpoint pens to strategically create a beautiful coloration in the snail. We will start with the body of the snail until we have completed the snail to our satisfaction, then we will move on to the shell of the snail and proceed to do the same. By the end, we should be left with a realistic snail drawing and now that we know what to expect, let’s get into this tutorial on how to draw a snail.
Step 1: Sketching the Snail
We want to start by making a light sketch of the snail using our HB pencils. The best way to establish the initial shape is to draw a circle with a narrow leaf shape placed at the bottom of the circle.
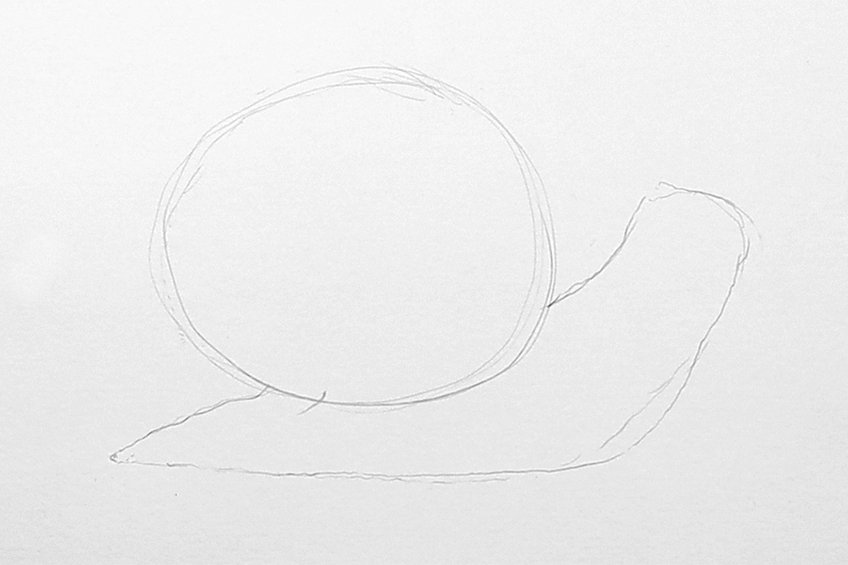
As we start to refine the snail’s shape, try to imagine its shells as a croissant. Think of it as a curling circular shape that gets smaller and smaller. This can be drawn as a smaller cylindrical shape at the end of the snail’s shell.

The body of the snail can also be slightly refined, which we can do by making the bottom straighter. This suggests that the snail is moving along a horizontal axis.
As we work out the form of both the shell and body of the snail, remember to use your eraser, slowly tweaking as we go. Remember to consider the shell as a croissant shape, curling in on itself as it gets smaller and smaller.
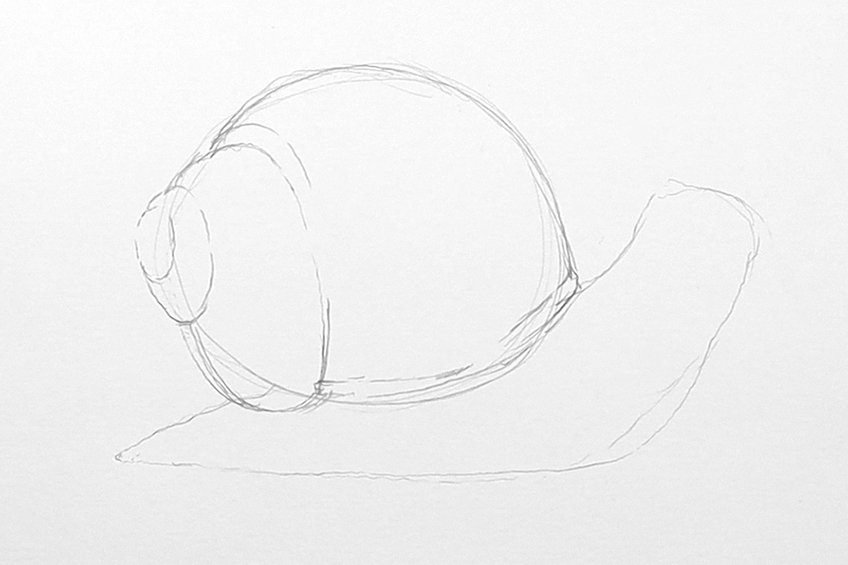
We really want to imagine the shell as a series of smaller circles placed on one another, or as a spiraling shape that shortens as it spirals. With the body, we want to make sure that the head area arches in an upward direction.
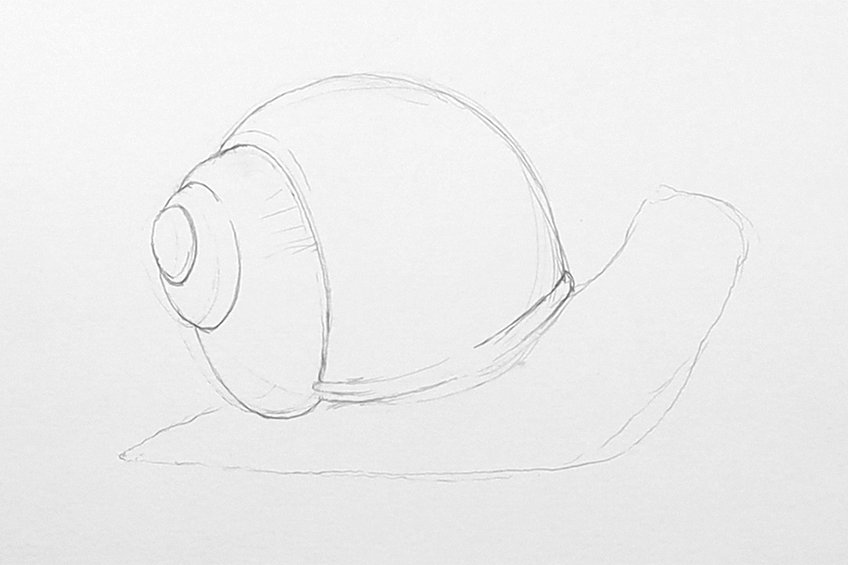
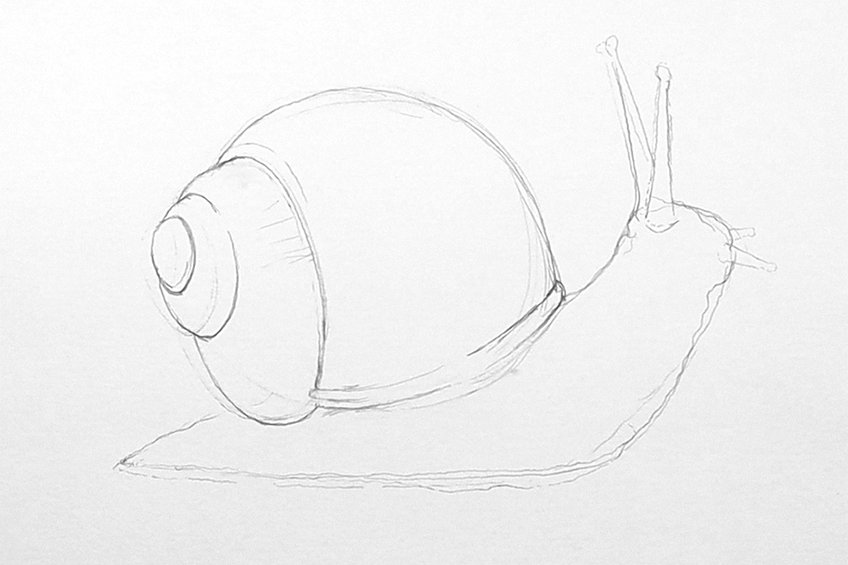
At this point, we can proceed to add some tentacles to the snail, which look similar to an insect’s antennae. We can draw these as two thin cone shapes with small bulbs at the end of each, sprouting from the top of the head.
The two larger tentacles are placed toward the back area of the top of the head. We also want to make sure that the head shape is quite rectangular or square.
From here, we can add in two shorter tentacles that sprout from the front of the snail’s face. Think of it as a mustache for the snail, as they sprout from the lower curved part of the face.
Step 2: Adding Color to the Body of the Snail
Now that we have the general shape of the snail, we want to work on adding color to the body first. Using a light and dark brown pencil, we want to begin adding some coloration along the back of the snail, near the bottom of the shell.

We will proceed to add some patterns to the body of the snail, suggesting a more realistic texture. The way we can approach this is to imagine if we were drawing stone shapes onto the snail’s body.
The vineyard snail has a textured body, and the best way to replicate this is by drawing little shapes stacked together in the body of the snail. Think of it as drawing little stone shapes, as if you were drawing a stone wall.

With three different shades of brown, allow yourself to draw these stone shapes with different colored pencils. Creating different color gradients within the body of the snail will give it a more organic feel.
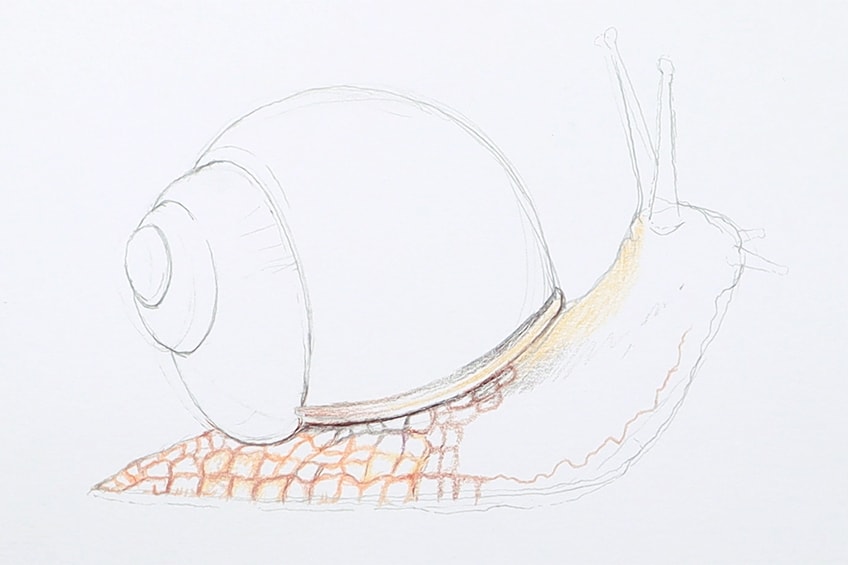
Play around with drawing these shapes into the snail with different colored pencils. A good suggestion is to keep the darker colored shapes near the bottom of the shell to suggest shadowing.

Proceed with this process until you feel that you have utilized three different tonal values of brown within the body of the snail. Take your time adding in these shapes.
You can also keep the bottom of the snail lighter when adding in these patterns. Keeping the bottom area of the snail lighter suggests a translucent slimy quality in the snail.
Step 3: Adding Pen Shading to the Body of the Snail
Now that we have drawn these colored shapes, we want to work with our ballpoint pens and slowly go over the shapes. Starting from the head, slowly add in some light penwork along the colored lines.
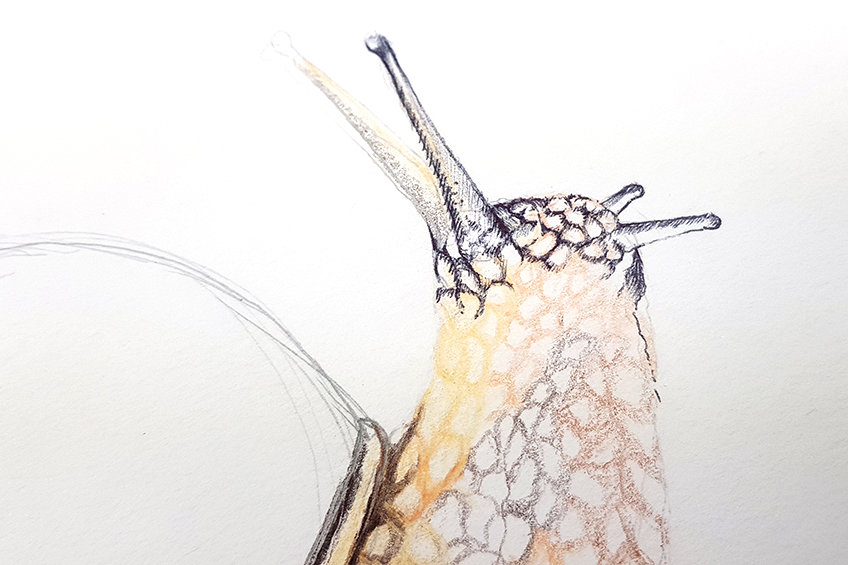
As we do this, we will start to see that the colors peer through, whilst the pen marks define the structure of the snail a little more effectively.
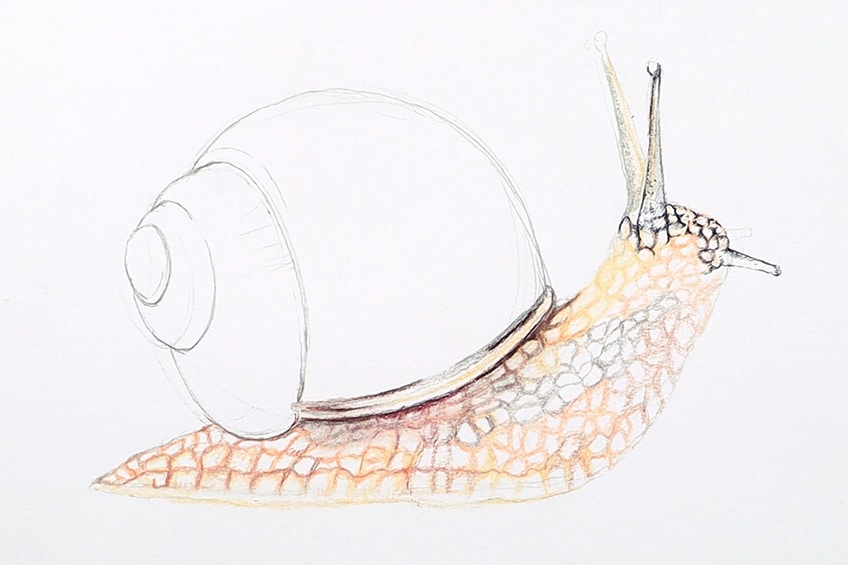
We don’t need to draw hard lines with our pens, we want to simply add in some light line work along the stone shapes in the snail. We can also make these dotted lines or broken lines.
The pen work will slowly start to bring more dimension to the texture of the snail’s body. Take your time, going through the snail, slowly working with your ballpoint pens.
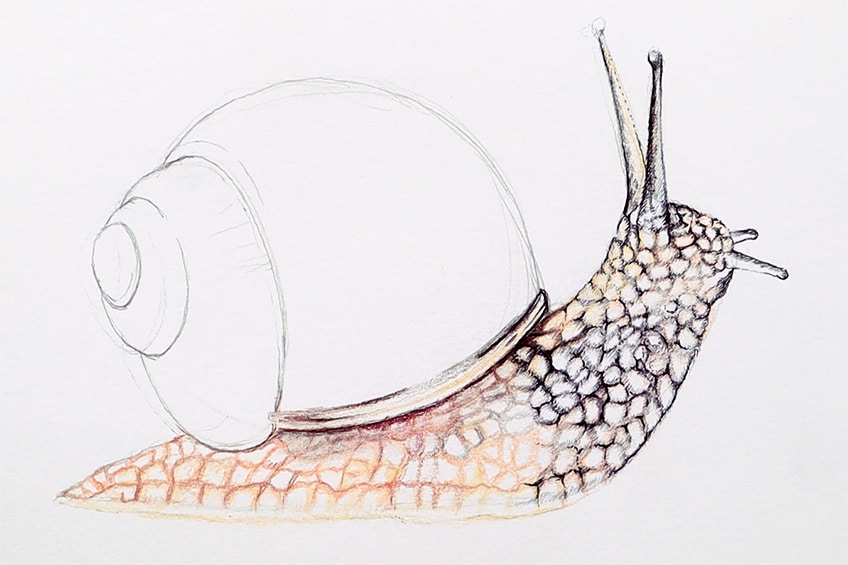
The aim of this step is to work in subtle lines with your pen along the colored lines you created with your colored pencils. You can also allow yourself to add little bits of shading into each little shape.
A good suggestion is to work with the colored pencils simultaneously whilst working in subtle pen work. You can use the colored pencils to add some coloration to the shapes as well as you go.
As you work your way through the entire snail’s body, adding in pen work slowly and cautiously, you can also add some shading near the bottom of the shell. By doing this you create the effect of shadowing near the shell area.
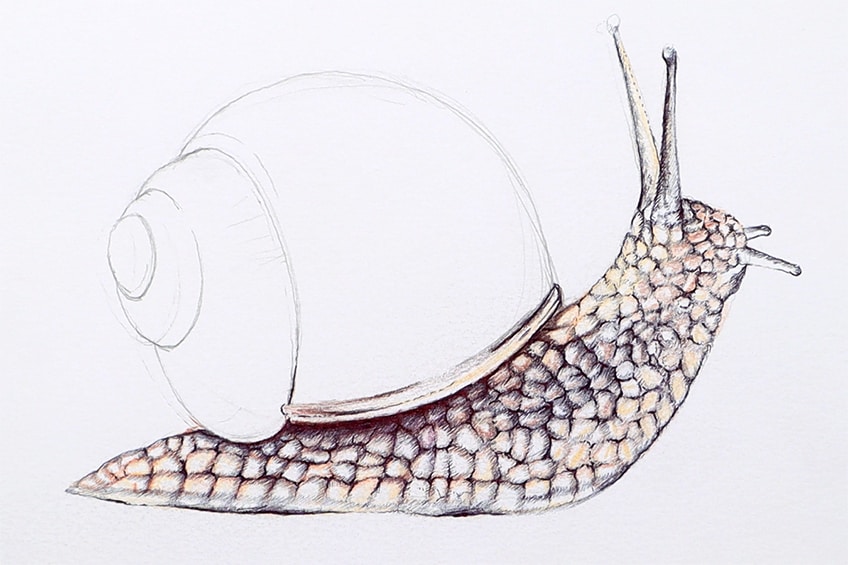
The more you take your time, the more likely you will have a better result. So, take a break if you find the process feeling a little straining.
Step 4: Adding Color to the Shell of the Snail
We now will move on to the shell, where we utilize the same sequence of drawings, starting with our colored pencils. Again, we want to work with three different brown coloring pencils. As you consider the form of the shell, proceed to add in-line work that flows along the curvature of the shell.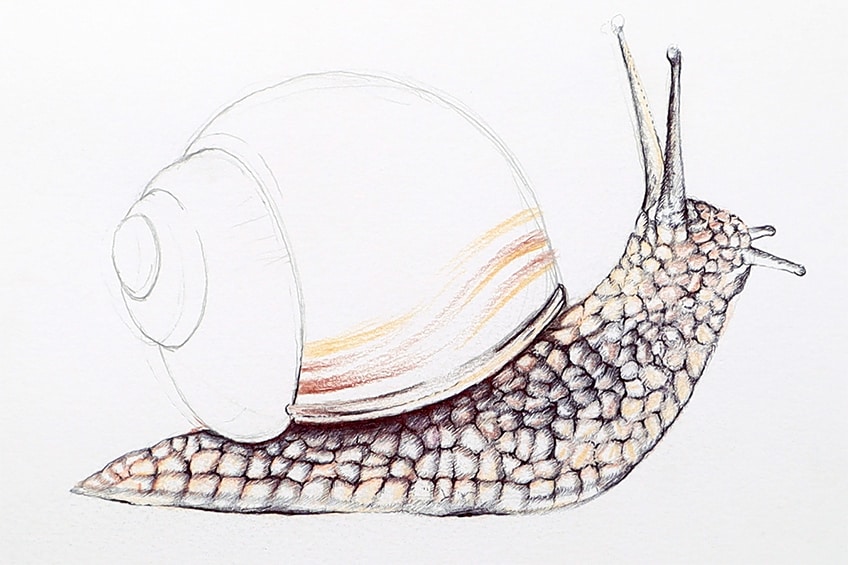
You want to add line work as if you were making strokes from either end of the section in the shell. We really want to utilize all our colored pencils, allowing ourselves to be sporadic with which colors we use, not sticking to a specific arrangement.

Again, we want to use line-styled mark-making that flows along the curvature of the shell’s surface. By doing this we emphasize the form and three-dimensionality of the shell.
Allow yourself to play around with different browns, another good suggestion is to also leave a little negative space in the middle of the shell. By doing so you will have created a highlight effect on the surface of the shell.
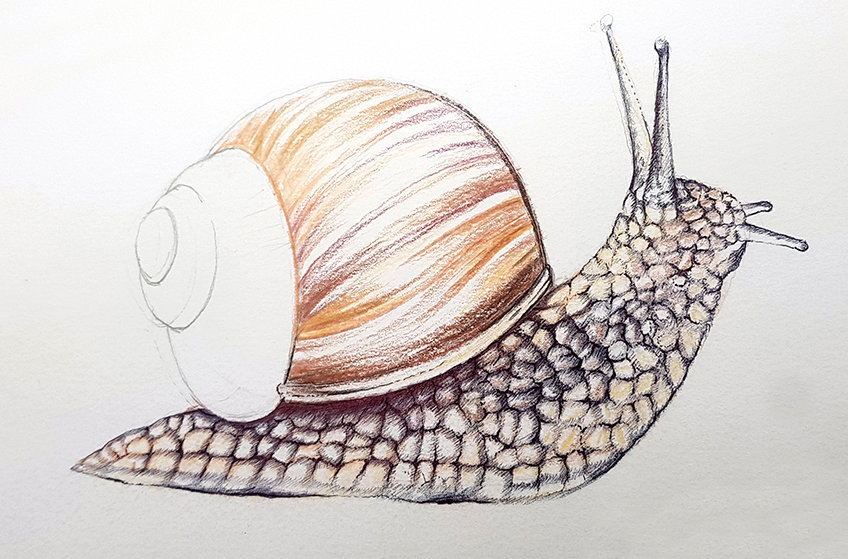
As we move through the smaller cylindrical shapes of the shell, we can follow the same process. Again, the most important part is to emphasize the curvature within the linework, this way we define the three-dimensionality of the shell.
Step 5: Adding Pen Shading to the Body of the Snail
Once we have worked our way through the different sections of the shell with colored pencils, we can now add in some pen work for contrast. Using your ballpoint pens, you want to work through each section at a time, slowly adding in line work.
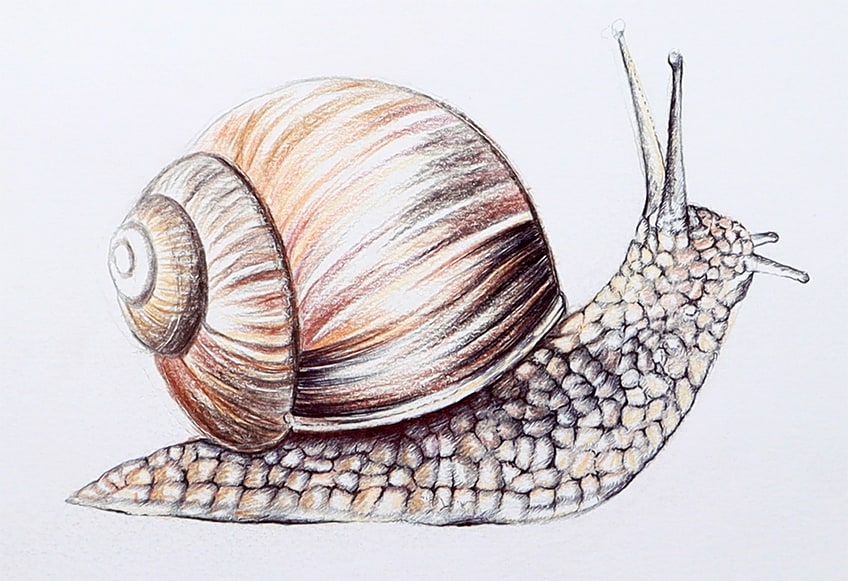
Work from the edges of each section within the shell, adding strokes of lines that move into the shell. As you do this and leave negative space in the middle, we will darken the edges and create a shining effect on the surface of the shell.
Adding in line work is a great way to capture the smooth texture of the shell. As we leave negative space in the middle of each section. This further emphasizes the smooth, hard surface quality of the shell.
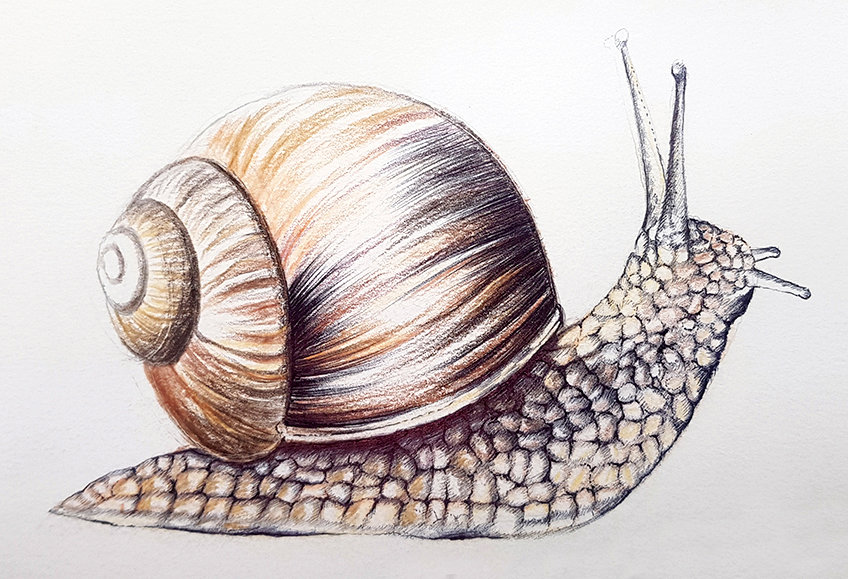
Take your time working in lines with your ballpoint pen. As you complete the larger section in the shell, proceed to do the same within each smaller section as you go. Adding in these pen lines is a unique way of shading that both adds contrast to the snail and defines the texture of its shell.
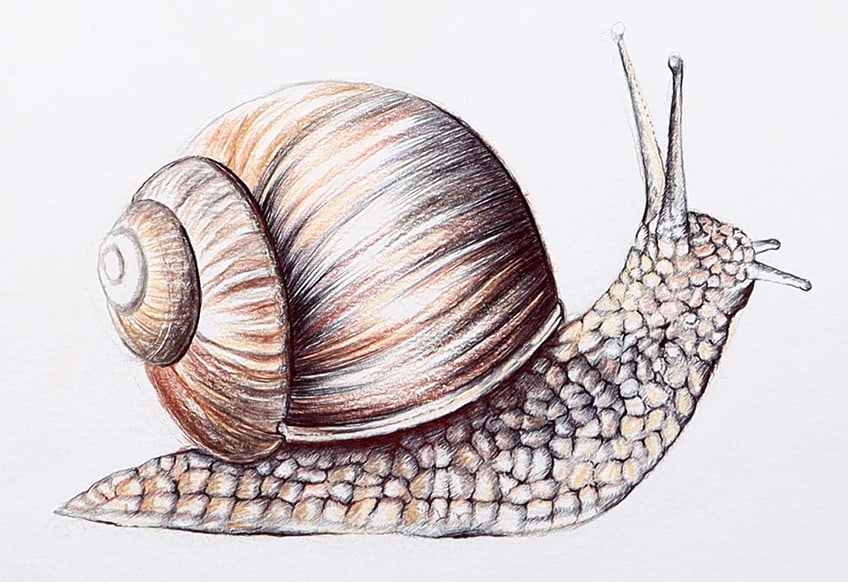
Remember that as you work on the smaller sections in the shell try to keep the strokes slightly smaller every time. Continue with this process until you have worked your way through the entire shell of the snail.
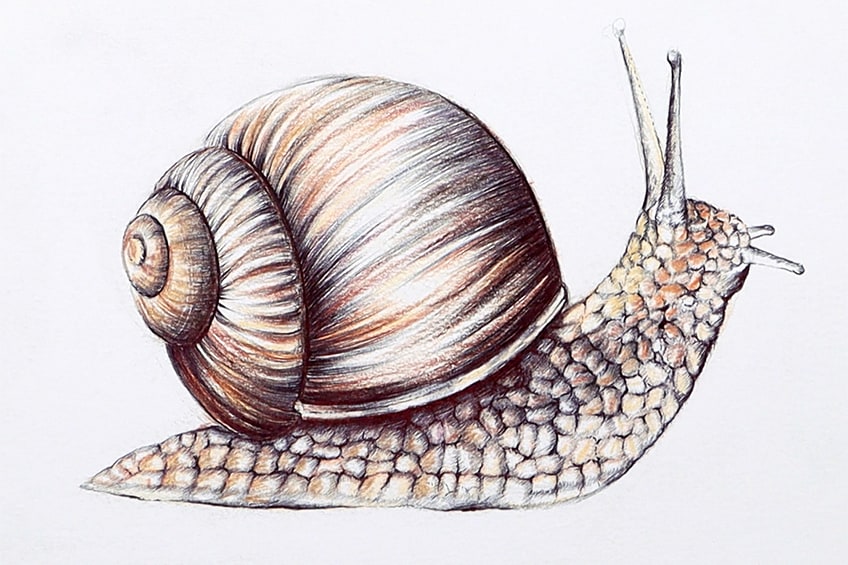
And there you have it, how to draw a snail in a few simple steps! The combination of colored pencil and pen is a great way to create a realistic and refined snail drawing.
Tips to Remember
- Spend time on the pencil sketch. You want to make sure you have captured the form of the snail before using colored pencils and a pen.
- Take your time with the details. As you add in details with pen, really take your time on the different aspects of the snail.
- Think about your color combinations. The vineyard snail has a unique brown coloration, so try to consider the gradients of brown within the snail drawing.
- Consider different drawing styles for different effects. Utilizing line work can be a great way to capture the smooth quality of the shell, and cross-hatching can be really useful for the textures within the body of the snail.
- Enjoy the process. Once you find yourself in the flow of things, enjoy the process of learning how to draw a snail, it’s a unique and fun drawing exercise.
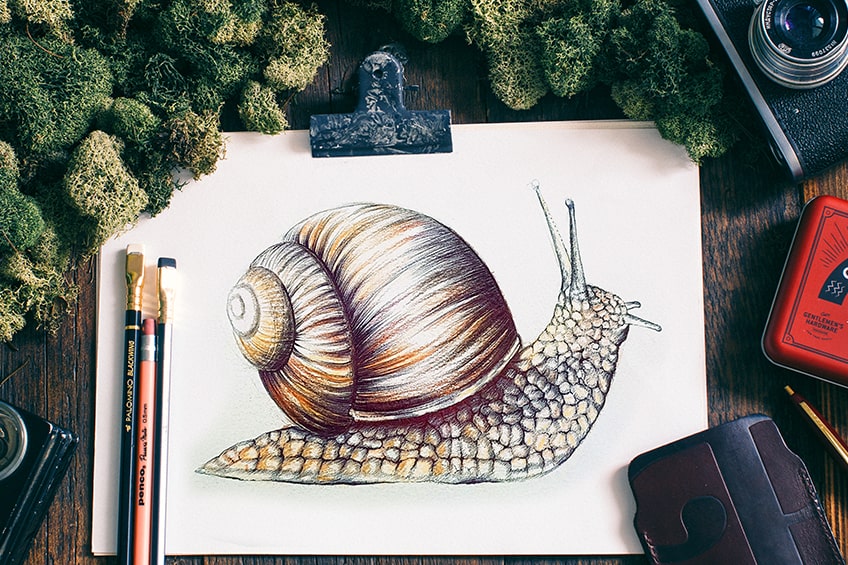
A realistic snail drawing is not difficult but more a matter of understanding the creature and the tools at hand. Colored pencils and pens work really well to create vivid details and contrast, making them ideal for a snail drawing. There are many ways to learn how to draw a snail but, in this tutorial, you learn the unique process of utilizing color and penwork to create a beautiful snail drawing.
Frequently Asked Questions
How Do You Color in a Vineyard Snail Drawing?
In this tutorial, we work with colored pencils as a means of adding color to the snail. It is important to consider its coloration in real life. The vineyard snail has a variety of browns that shift and change from lighter to darker browns. This quality is different for the different structures within the snail. For instance, there is a seamless gradient of browns within the slug-like body structure, which tends to be lighter around the edges of the snail and darker in the middle. The shell of the snail is more like a set of rings, similar to that of a tree, which curves along the plane of the shell surface. The colors in the shell can be added through the process of drawing lines that flow along the shell’s curved form, which can be added more sporadically with lighter and darker brown rings. For the body, you want to be more careful with how you add color to the little bumps and scaly indentations within the snail, making sure you keep the color gradients more seamless.
How Do You Draw the Body of a Snail?
The snail has a simple body structure as it resembles almost a spearheaded leaf shape that falls under the shell. The body of the small consist mostly of the foot and tail that merge seamlessly and resemble a single structure. This structure flows into the upper head area of the snail that consists of four tentacles, two upper tentacles, and two lower tentacles. The body shape is narrowed near the tail end and slightly thickens in the body (foot area), which then narrows slightly again into the head area which becomes more square-like. The head also arches upward and often is the most mobile part of the snail, allowing it to move in all sorts of directions. Drawing the upper head area arched in an upward direction is a great way of suggesting movement within the snail.
Matthew Matthysen is an educated multidisciplinary artist and illustrator. He successfully completed his art degree at the University of Witwatersrand in South Africa, majoring in art history and contemporary drawing. The focus of his thesis was to explore the philosophical implications of the macro and micro-universe on the human experience. Matthew uses diverse media, such as written and hands-on components, to explore various approaches that are on the border between philosophy and science.
Matthew organized various exhibitions before and during his years as a student and is still passionate about doing so today. He currently works as a freelance artist and writer in various fields. He also has a permanent position at a renowned online gallery (ArtGazette) where he produces various works on commission. As a freelance artist, he creates several series and successfully sells them to galleries and collectors. He loves to use his work and skills in various fields of interest.
Matthew has been creating drawing and painting tutorials since the relaunch in 2020. Through his involvement with artincontext.org, he has been able to deepen his knowledge of various painting mediums. For example, watercolor techniques, calligraphy and lately digital drawing, which is becoming more and more popular.
Learn more about Matthew Matthysen and the Art in Context Team.
Cite this Article
Matthew, Matthysen, “How to Draw a Snail – A Realistic Snail Drawing Tutorial.” Art in Context. February 13, 2023. URL: https://artincontext.org/how-to-draw-a-snail/
Matthysen, M. (2023, 13 February). How to Draw a Snail – A Realistic Snail Drawing Tutorial. Art in Context. https://artincontext.org/how-to-draw-a-snail/
Matthysen, Matthew. “How to Draw a Snail – A Realistic Snail Drawing Tutorial.” Art in Context, February 13, 2023. https://artincontext.org/how-to-draw-a-snail/.


