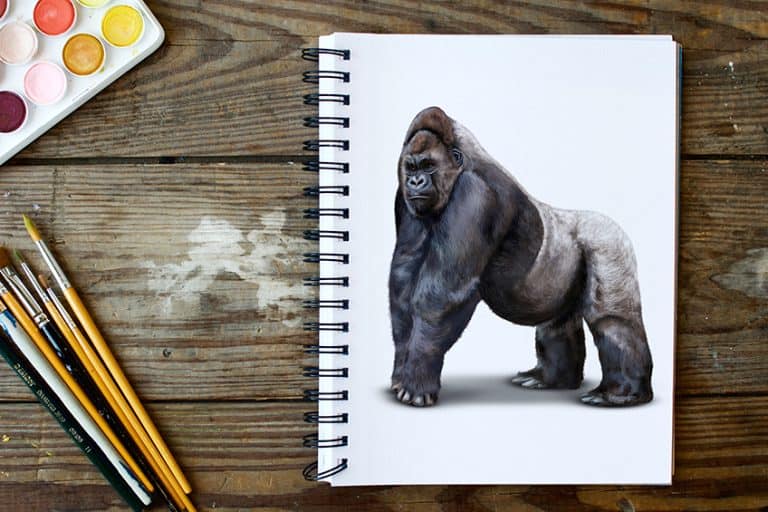
How to Draw an Octopus – A Guide to Creating an Octopus Sketch
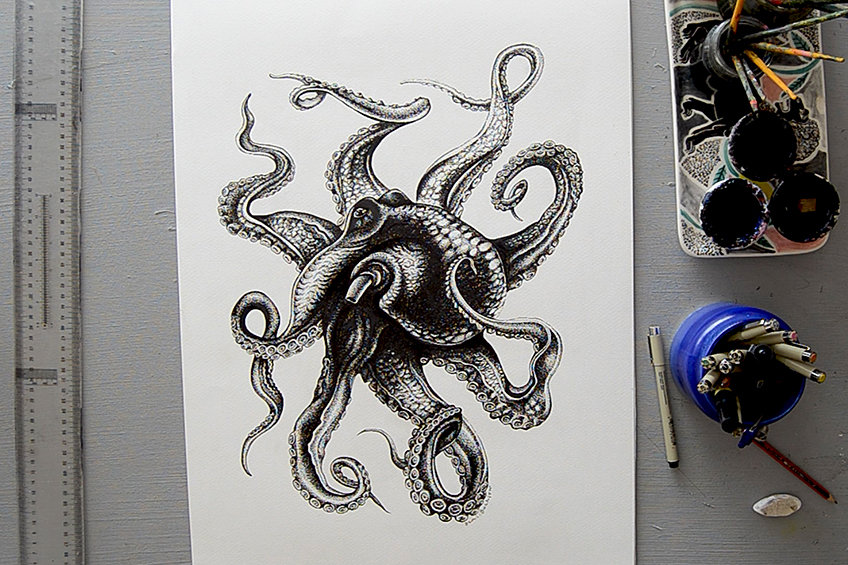
If you have ever seen an octopus move in water, you will understand the fascination most people have with them. It only makes sense that artists are drawn to create artworks that feature octopuses as the subjects of their artworks. In this tutorial, we will learn how to draw an octopus by working through a simple pencil sketch, to create a realistic octopus drawing with ink and pen.
The Wonders of the Octopus
Octopuses, octopodes, or octopi, have appeared in historical artworks since before 1900 BC. These incredible mollusks of the ocean have eight arms, no bones, and can squirt ink as a defense mechanism. Octopuses are also unbelievably smart.
They can contort and re-shape themselves to camouflage and fit into almost any possible space.
They are natural wonders of the ocean with truly unique characteristics. In this tutorial, we will look closely at the anatomy of the octopus to learn how to draw a realistic octopus drawing with striking dimensions and perspective.
How to Create an Octopus Sketch
Before you start, there are a few important things you will need to gather. This tutorial uses a variety of media, but you are encouraged to simply use what you have available to create a unique octopus sketch.
List of Tools and Materials
In this tutorial, you will learn how to draw an octopus with a few tools and materials. If you have any items missing from the materials listed below, it is recommended to go ahead and simply use what you have.
- Your choice of paper
- Pencils (HB – 3B)
- Eraser
- Compass
- Pens or fine liners of your choice
- Drawing ink
- Ruler
- Masking tape
What Is the Difference Between Pens and Drawing Ink?
Drawing ink is a water-based media made up of dyes. It comes in the form of a small bottle and can be diluted with water. This means it can be used in different concentrations to create large-scale drawings. While pens and calligraphy inks are pigment-based and come in the form of liners, drawing ink is great for planning your drawing before adding the finer details with a pen or fine liners.
It can be used to paint over a larger surface area with contrasting tonalities to show the shadow areas within your drawing.
Step-by-Step Instructions on Creating a Realistic Octopus Drawing
There are many ways that you can learn how to create an octopus drawing – from easy to more advanced levels of skill. Although this tutorial will focus on creating a large-scale octopus drawing, the same guide can be used to create a simple octopus drawing by starting small and basic.
This tutorial will cover simple step-by-step guidelines for how to create a realistic octopus drawing using different techniques of texture, line-work, and dot-work using ink and pen.
Step 1: Observe Your Octopus
It is important to observe the animal closely, either from life or from a reference image. This will help you capture the true essence of the animal and the way it moves through the water. If you have the chance to visit an aquarium, it is encouraged to do so.
If you are far too excited to get started, go ahead and find an image of an octopus that you think will translate well as a drawing!
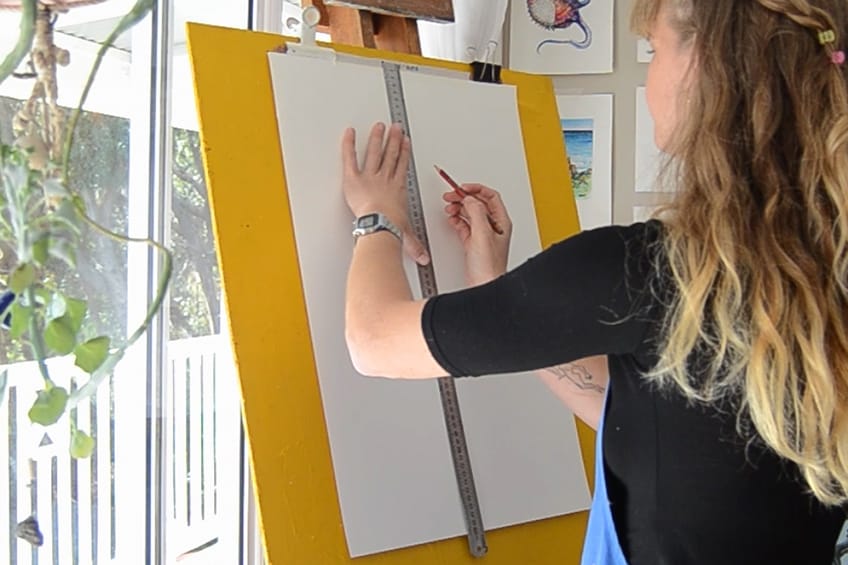
Step 2: Divide the Page into Four Equal Parts
Using a pen and ruler, divide the page into four equal parts. This will help you identify the center of the page and where to sketch each arm of the octopus.
Step 3: Draw an Accurate Circle the Size of the Octopus’ Head
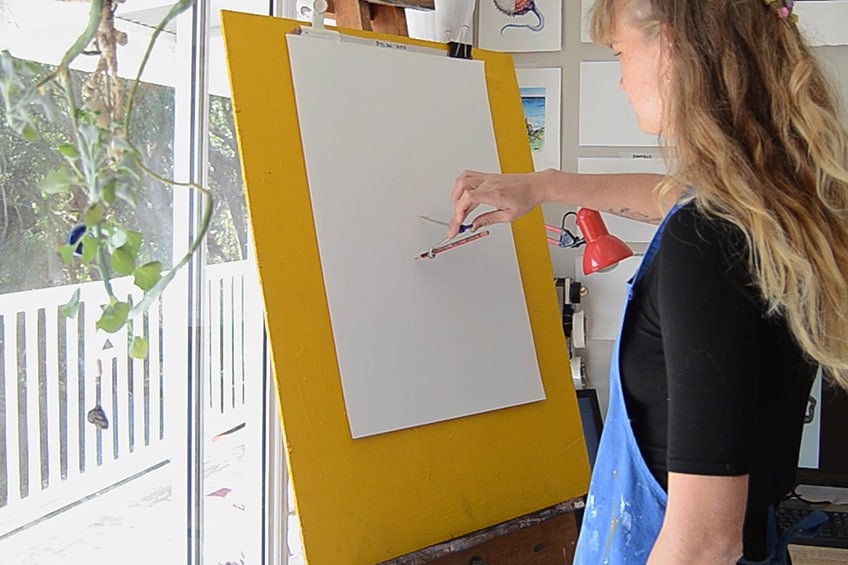
Place a compass and pencil at the middle point of your page and draw an accurate circle the size of the octopus’ head. Make sure to leave enough space around the page for the eight arms and their tentacles. This circle will help structure the main shape of the octopus’ body.
Step 4: Sketch the Shape of the Head and Its Eight Arms
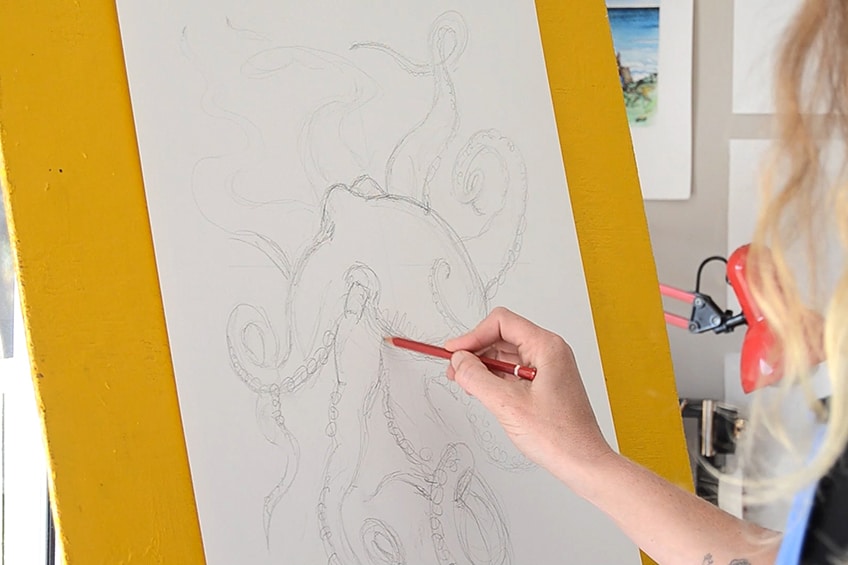
Start sketching in the shape of the head of the octopus with a pencil. The head should be slightly oval and “sack” shaped. Next, sketch each arm by referring to your octopus and the way its arms are floating in the water. You can place two arms within each section of the page which has been split into four.
The tentacles should be rounded at the ends and a few of them may be curled and toiled.
Step 5: Add More Detail with a Darker Pencil
Add more details with a darker pencil, including the outline of the eyes, the siphon or breathing pipe, as well as the suckers on the tentacles. The eye should be oval-shaped, the siphon should be pipe-shaped with an opening at its end, and the suckers should be staggered and protrude in places.
You can also add darker lines and shades to the arms and head to finalize your octopus sketch.
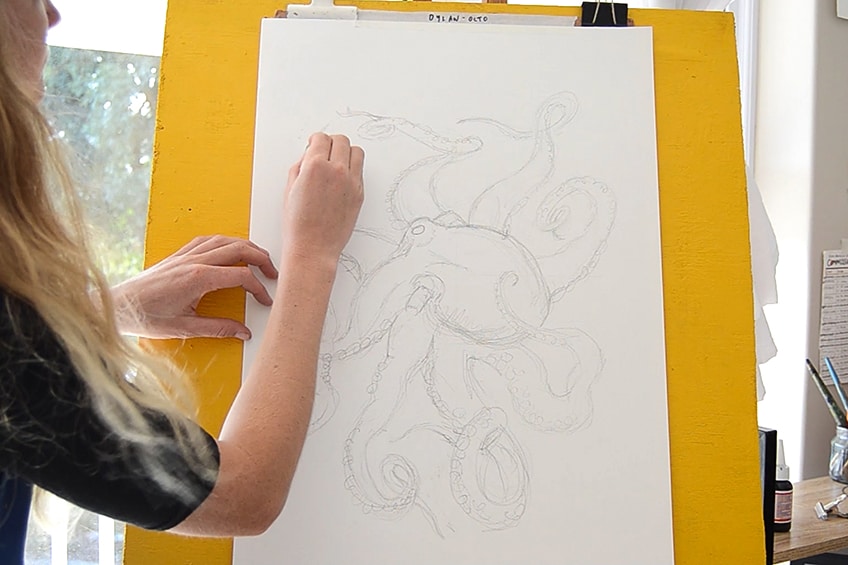
Step 6: Erase Any Unnecessary Pencil Lines
Go ahead and erase any unnecessary pencil lines from your initial octopus sketch. This includes the planning from step two and any unwanted lines, marks, or mistakes. This will help you place a foundational sketch before finalizing your octopus drawing with ink and pen.

Step 7: Draw Thick Lines with Drawing Ink or Pen
Identify the darker areas in your octopus. Once you have done that, begin drawing or painting thick lines with undiluted drawing ink in the shadow areas of your octopus. This will help place the areas of detail in your drawing.
From these areas, you work outwards towards the highlights.
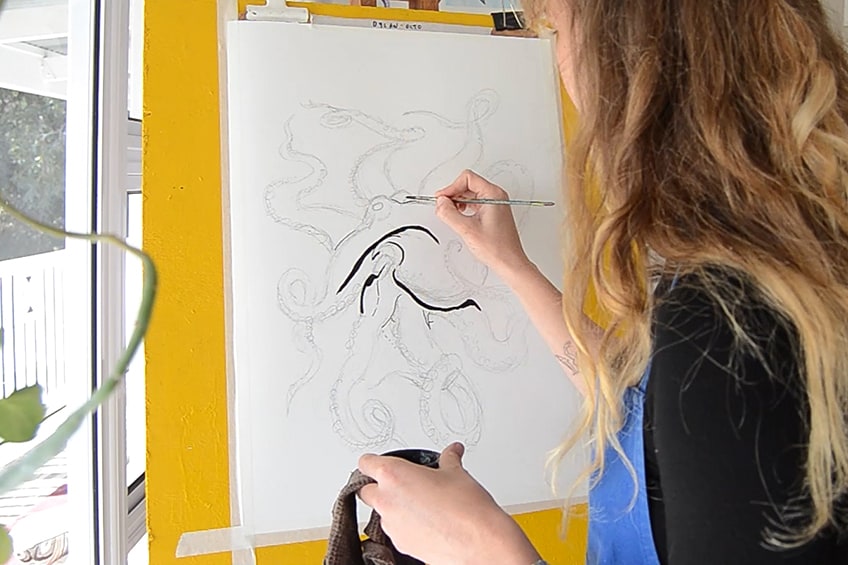
Step 8: Draw Thinner Lines with a Pen
Begin extending your thicker lines made in the previous step with a pen to create thin lines. Continue working on your octopus drawing with the pen by defining the shape of the head, eyes, arms, and tentacles, until you have a full outline of your octopus’ body.
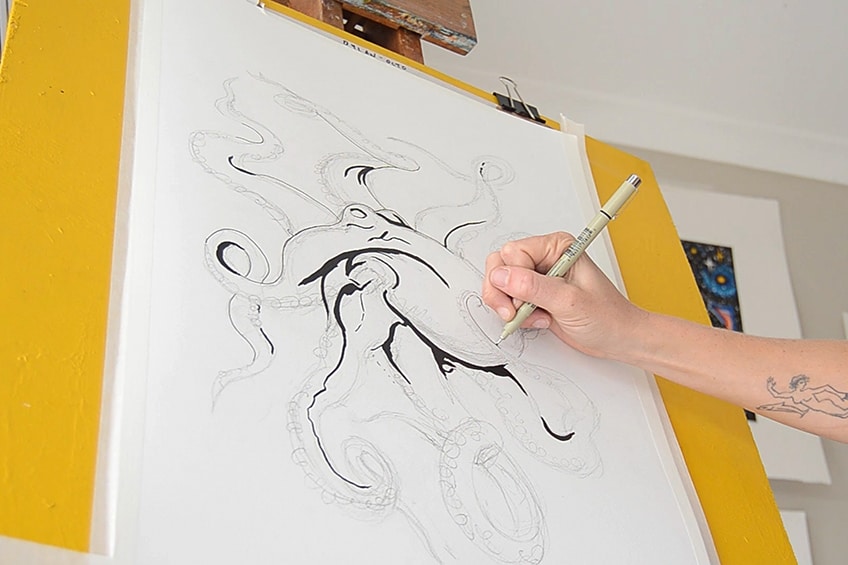
Step 9: Erase All Pencil Lines
Erase all of your pencil lines and any initial planning by working from left to right. Once all lines are erased, you will notice that the final drawing will start coming together before your eyes!
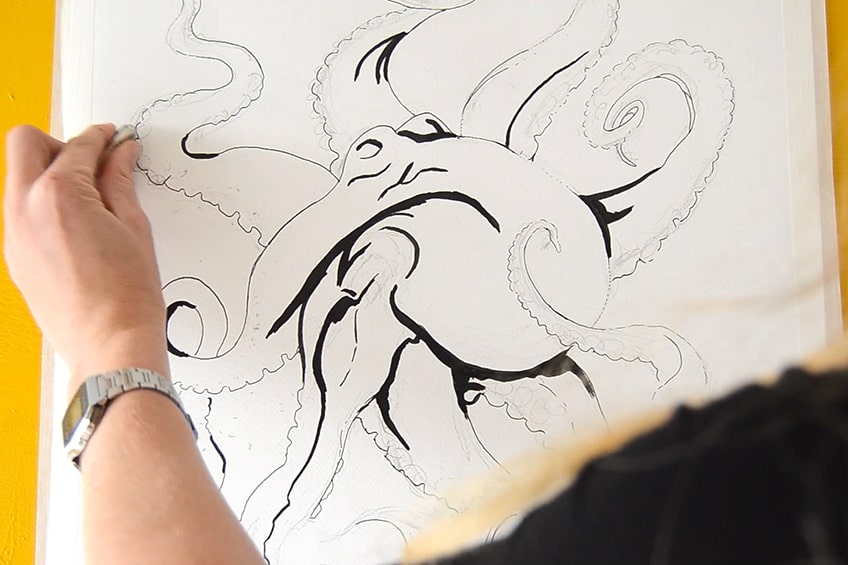
Step 10: Draw the Eye with a Slit-Shaped Pupil
Draw the eye with a slit-shaped pupil. Next, fill the dark or shaded areas of the eye with points and marks. Leave the highlighted areas white, such as the shine of the eye and protruding areas, by fading your shadows gradually with the dot-work technique to reveal highlights. The other eye of your octopus may be hidden.
If your octopus’ second eye is visible, study where the eye is positioned and how the light falls on it. Follow the same steps to create another eye with dimension and shape.
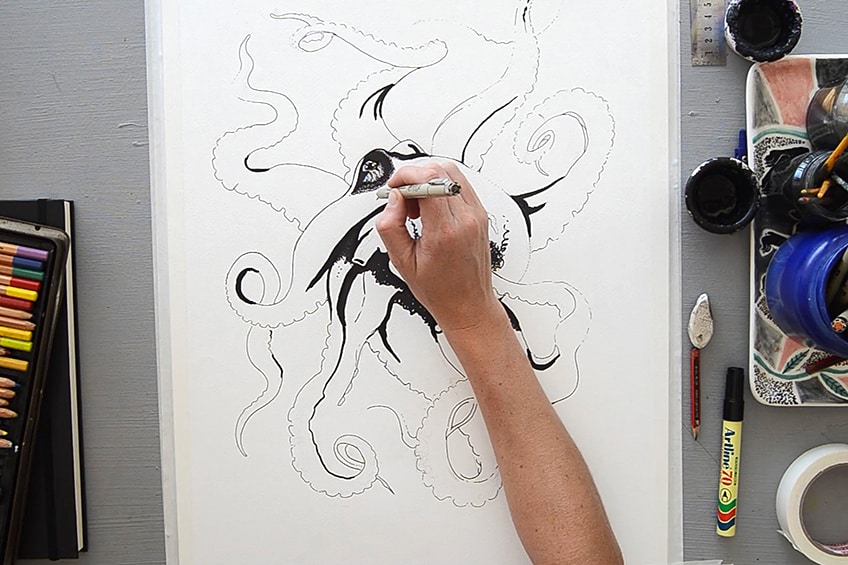
Step 11: Add Shading to the Siphon and Head
Begin adding shading to the siphon first by creating the illusion of a curved, hollow breathing pipe. Next, focus on the patterns on the head of your octopus. Notice that these patterns contain oval shapes on the skin that run across the whole head.
Using techniques of pointillism and dot-work, gradually fade your shadows into the highlights according to how the light is falling on its head.
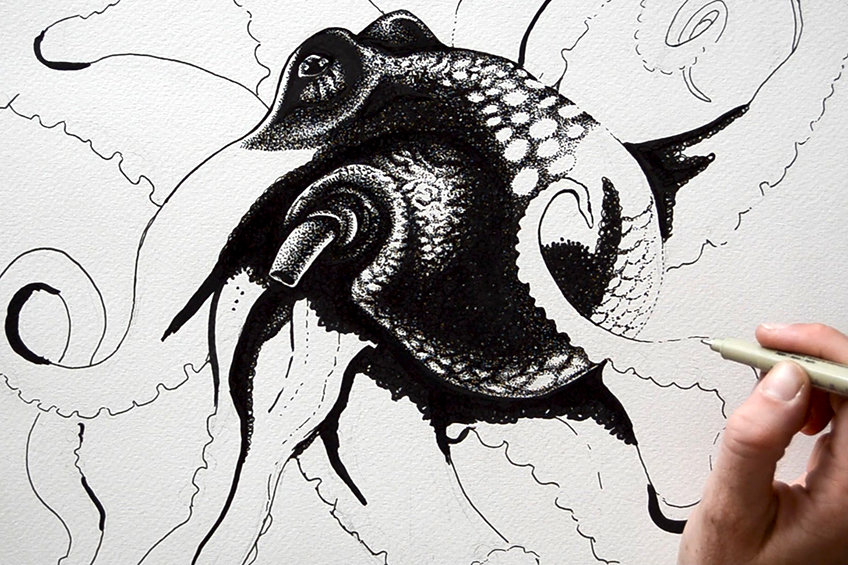
Step 12: Draw the Suckers on Each Arm
Draw all visible suckers on each arm. To do this, draw scattered ovals or circles in two rows along each arm. If you want to add a high degree of realism to your octopus drawing, add another small circle within each sucker and a small dot in the middle of the same sucker.
This will make the octopus’ suckers more dimensional and show how much they protrude on the tentacles.
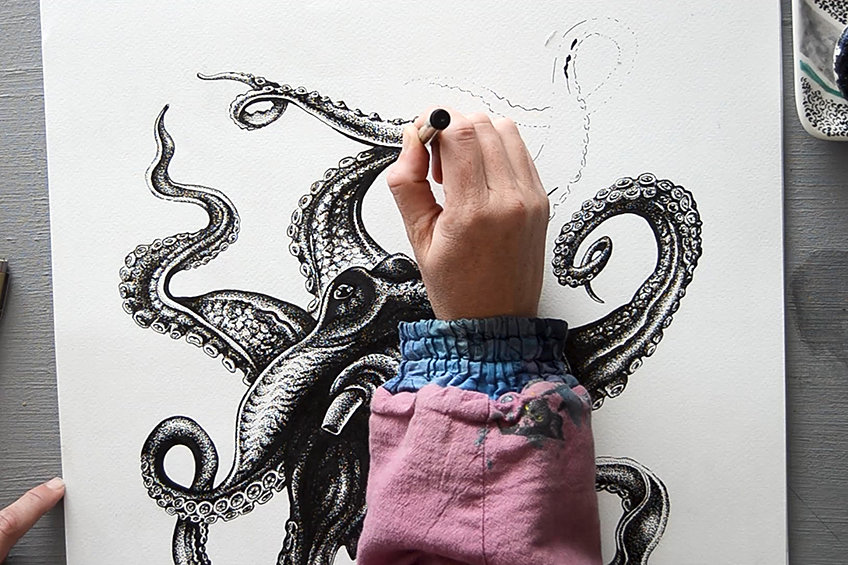
Step 13: Add More Detail to Each Arm
Now that most of your foundational work is done, you can start adding detail to each arm working from the base of the arm to the tip of the tentacle. To avoid smudging, try drawing anti-clockwise if you are right-handed and clockwise if you are left-handed.
This step will take a while to complete because you will spend time drawing the details of each arm. It is recommended to watch the video tutorial below if you get a bit stuck.
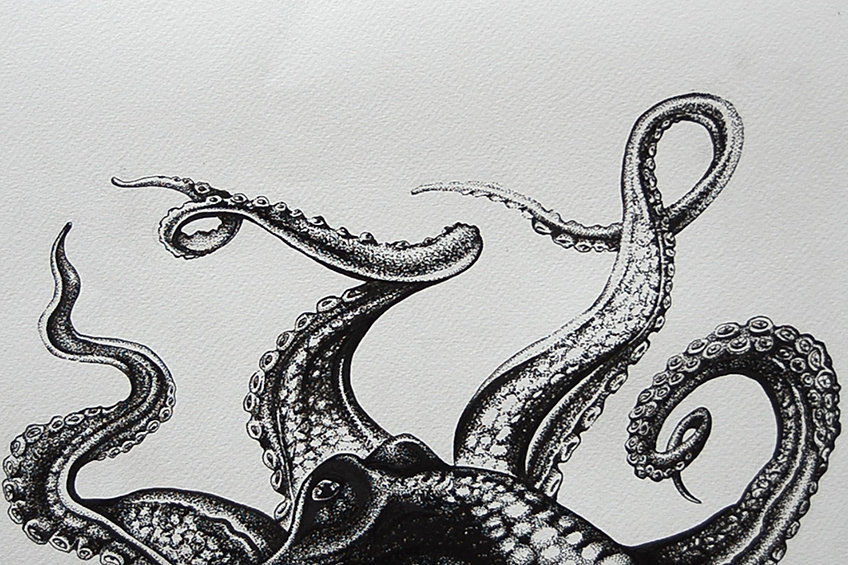
Step 14: Round the Tips of Each Tentacle
Next, ensure that each tentacle is rounded and soft at the tip. The tentacles are quite important characteristics of the octopus drawing to capture. They will illustrate what the octopus looks like while floating in the water.
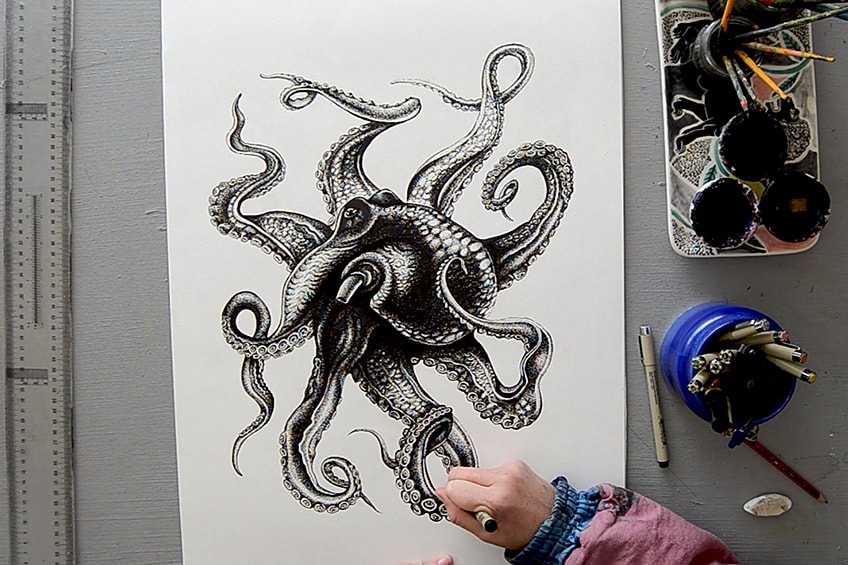
Step 15: Add the Final Details and Sign Your Octopus Drawing
Lastly, add the final details to your octopus drawing. Make sure you are completely happy with your artwork and the incredible creation you have made! Go ahead and sign your octopus drawing if you really want to finalize your work.
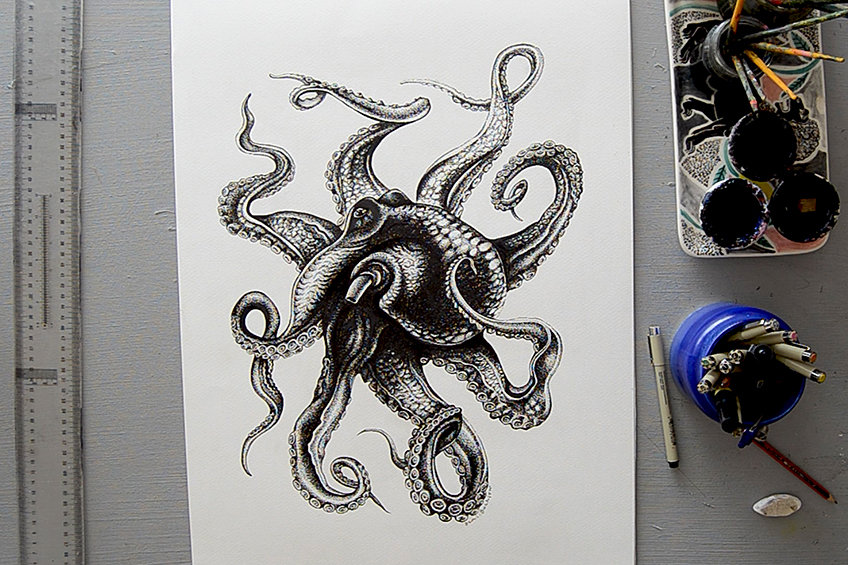
Drawing octopuses and all their details may seem like quite a complicated task at first but – like most natural wonders – they are made up of basic shapes, patterns, and textures. By following the steps in this tutorial, you will notice that you can work to a high degree of detail to create a realistic octopus drawing, although you can also create quite a simple octopus drawing just by capturing its main features. We hope you enjoyed learning how to draw an octopus!
Frequently Asked Questions
Is It Easy to Create an Easy Octopus Drawing?
Octopuses come in all shapes and sizes. They may seem like complex animals to draw, but they are incredibly easy to sketch! Octopuses are made up of simple shapes with eight arms and other important characteristics. Once you have the basic outline of an octopus drawn, it becomes really easy to add detail to your sketch. By following the tutorial above, you will learn how to draw an octopus step by step.
How Do You Draw an Octopus?
Drawing an octopus can be a very simple and crafty task. All you need to know to draw an octopus is that it has eight arms and a circular head. You can draw an octopus from many different angles and perspectives with, or without, dimension. You can create a really simple octopus drawing by following the basic steps in this tutorial.

Demi Bucklow is an independent artist and photographer living in Cape Town, South Africa. Since graduating from the University of Cape Town in 2018 from Michaelis School of Fine Art with a degree specializing in fine art photography, she currently works as a freelance artist, content creator and writer. Demi’s particular interests explore a range of multimedia illustration, collage art, photography and videography, darkroom processing and stop-motion animation. Her work is an exploration of nature and its phenomenon – somewhere between art and space.
Artistic practice presents the ability to communicate a vision. It is through techniques of pointillism and realism that form, and substance are explored as a metaphor for matter; super-imposing a thousand marks and points until an image is formed before our eyes. From illustrations to surrealist landscapes, Demi translates corporeality – mixing the obtuse and vacuous with the astute and expressive which leads to a mixture of irrevocable pondering over what is and what could be.
Learn more about the Art in Context Team.
Cite this Article
Demi, Bucklow, “How to Draw an Octopus – A Guide to Creating an Octopus Sketch.” Art in Context. June 25, 2022. URL: https://artincontext.org/how-to-draw-an-octopus/
Bucklow, D. (2022, 25 June). How to Draw an Octopus – A Guide to Creating an Octopus Sketch. Art in Context. https://artincontext.org/how-to-draw-an-octopus/
Bucklow, Demi. “How to Draw an Octopus – A Guide to Creating an Octopus Sketch.” Art in Context, June 25, 2022. https://artincontext.org/how-to-draw-an-octopus/.


