How to Draw a Duck – An Easy Duck Drawing Tutorial for All Artists
Have you ever wanted to draw a duck but you just do not know where to start? If this sounds like you, then you have come to the right place. As part of our farmyard animal series, we have created this really easy-to-follow duck drawing tutorial to help you create a realistic duck sketch. Whether you are an experienced artist, or you are just beginning your drawing journey, this tutorial is designed for everyone who loves to create beautiful pieces of art.
How to Draw a Duck in 15 Easy Steps
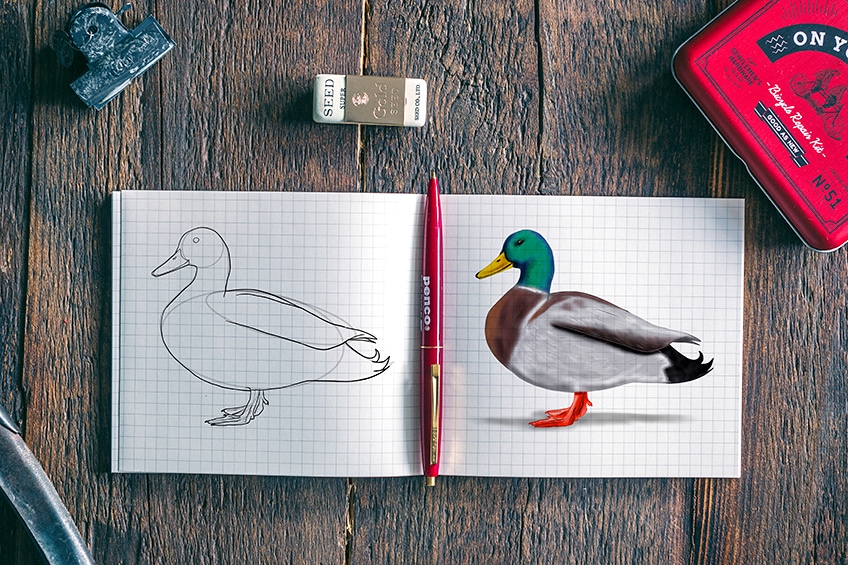
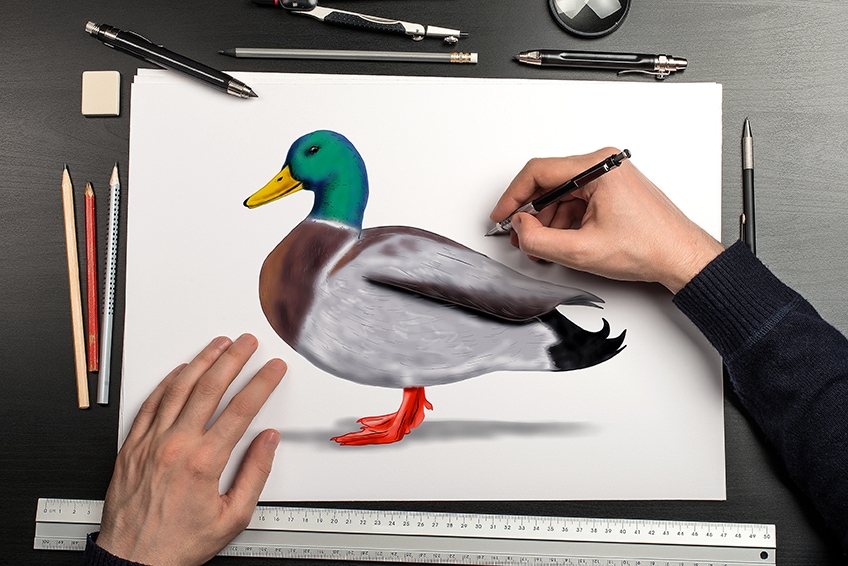
Before you know it, you will have a beautiful, realistically textured, and colored duck sketch. There are many different types of duck throughout the world, each with its own unique coloring and pattern. For this tutorial, we are going to show you how to create a realistic mallard duck drawing. Mallard ducks have the signature green and blue head with a bright yellow beak and brown body coloring.
Not only is this tutorial designed to be achievable by any artist, but it is also adaptable for a range of different creative mediums. If you normally work with a graphic tablet or you prefer acrylic paint, you can achieve the same result.
A Word on Construction Lines
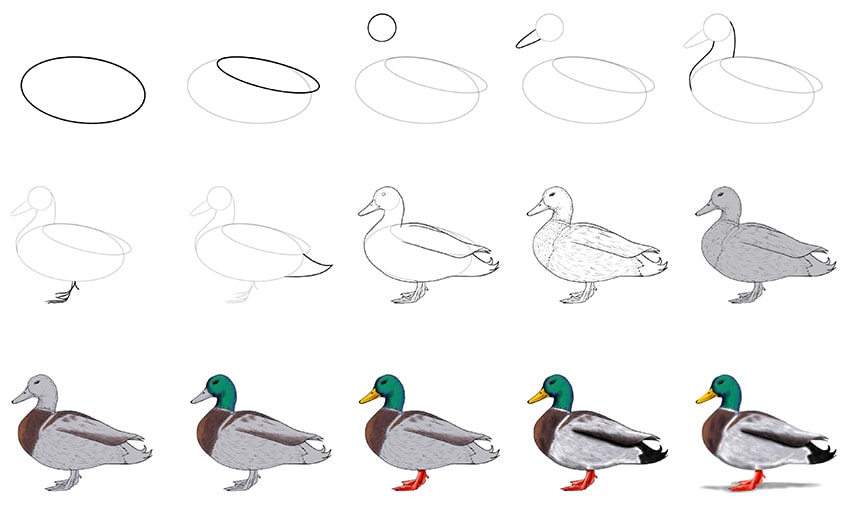
Before we begin the first step of our duck drawing, we need to discuss the importance of construction. In all of our drawing tutorials, the first few steps focus on laying down the foundations for the final shape. With animal drawing, in particular, construction shapes and lines can help you perfect the dimensions and perspective of your drawing before you get stuck into the details. You can see a breakdown of all of the steps in this tutorial below, noting that steps 1 to step 7 all focus on construction.
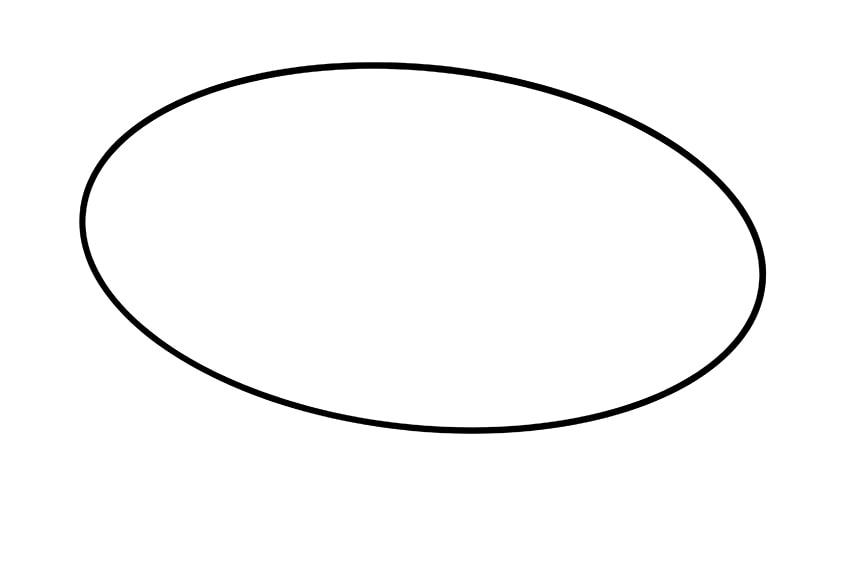
Step 1: Drawing the Shape of the Main Body
The first construction shape that we are using in this tutorial is a large elongated and slightly sloped oval. You want to make sure that the left side of the oval is slightly higher than the right, as the body of the duck is sloped. If you are using a physical medium rather than a drawing tablet, we also advise using a very light pencil for construction lines so that you can easily erase them later.
In this first step, make sure that your main body oval is at the very center of your canvas and that there is plenty of space on all sides for the rest of the duck’s body.
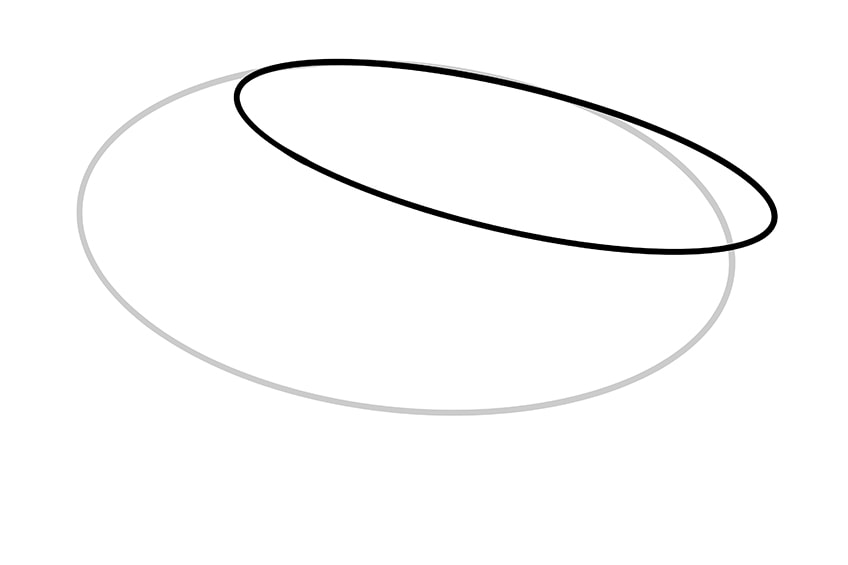
Step 2: Creating the Base of the Wing
Ovals are definitely the most popular construction shapes and we use different sizes to create the various elements of our duck sketch. For the base of the wing, you can draw a much more narrow oval that overlaps with the main body oval significantly.
The duck’s wing sticks out slightly above it’s tail, so you want the end of the wing construction circle to extend slightly further back than the main body oval.
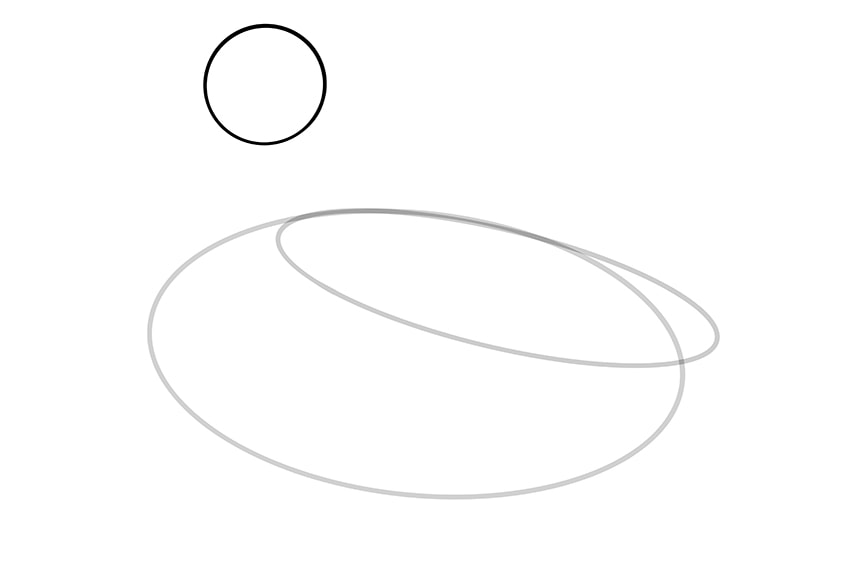
Step 3: Positioning the Duck’s Head
Ducks have very round heads, so we are going to use a small circle as the base shape. Find the point on your main body oval where the wing begins to overlap. Now draw the small circle just above this point.
Ducks have quite short necks, so you do not want the head to be too far away from the body.
Step 4: Drawing the Beak in Your Duck Drawing
This step is very simple and quick. Using a very long “U” shape, draw a beak that faces slightly downwards from the front of the head.

Step 5: Connecting the Head and Body with the Neckline
It is now time to join the body and head of your duck sketch by drawing on the neck. Using two lines, you want to create a seamless and smooth connection between the head and body. Begin at the bottom of the head circle, and draw a line that curves back and then around the front of the main body oval. For the other neckline, draw a curved line from the back of the head down onto the body oval.
At this point, you should be able to see the final shape of the duck peeking through.

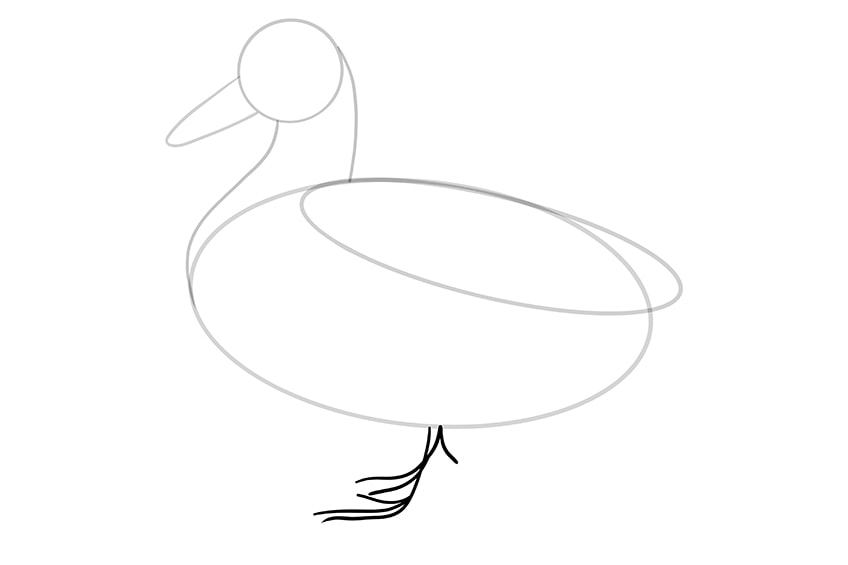
Step 6: Creating the Basis for the Legs and Feet
For the legs and feet of your easy duck drawing, you can use single lines to plan them out. Most of the construction lines that you have drawn so far have been shapes, but the legs and feet require more free-form lines. Beginning at the midpoint of the main body underside, draw two separate lines that flow down and forward. On the ends of each of these lines, create three toes.
The back leg line should be significantly shorter than the front. This difference is due to the perspective of our drawing, where the back line is further away from us and therefore appears to be shorter.
Step 7: Shaping the Tip of the Tail
The shape of a duck’s tail is very iconic, so this is another very easy step to complete. Beginning at the point of intersection between the main body and wing at the back of the duck, draw a little, curved tail shape that ends on the bottom side of the main body oval.
Make sure that the tip of your tail has that signature sharp point.

Step 8: Creating the Final Outline for Your Duck Drawing
It is now time to create the final outline for your duck drawing. Using all of the construction shapes that you have drawn so far, you can outline the head, body, and wings, and draw some facial details.
Begin at the head, following the construction lines quite closely. For the beak, add a small curved line at the base to separate it from the rest of the head, and create a line within the beak to show the two halves. You can now add a small nostril near the top of the beak, and add a circular eye within the head.
When it comes to outlining the neck and the majority of the body, you can follow the construction lines very closely.
For the wings, you can dip your outline slightly below the construction shape, adding a few points at the end and a line at the top. For the outline of the tail, you can add a few little additional feather flicks. Use the leg and feet construction lines as a center point for your outline. Remember to add curved lines between the feet to create the webbing. You can finish the feet by adding small claw details to each toe.
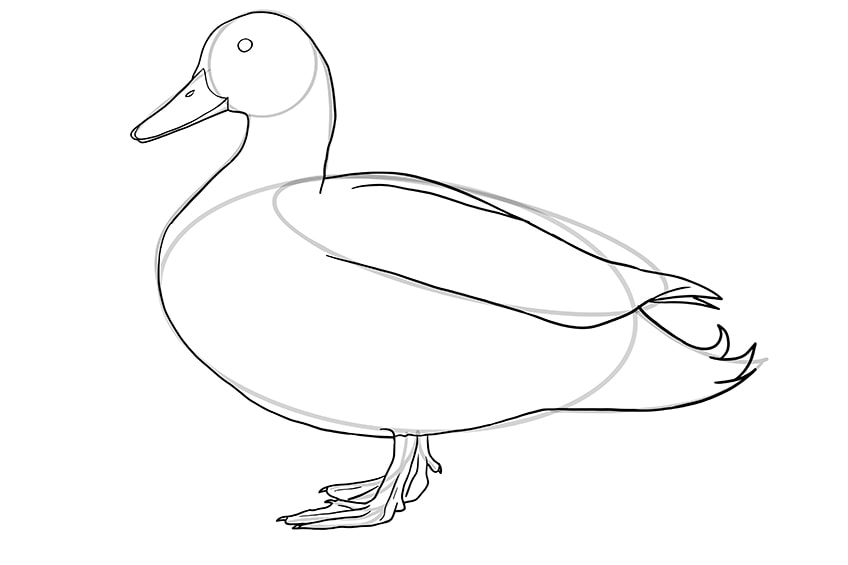
Step 9: Adding Feather Details
In this step, you are going to use a range of different textural lines and dots to create the impression of realistic feathers. Begin by adding details to the beak, including some small thin lines around the bottom of the beak. You can also color in the nostril and add a touch of shadow to the very tip. You can continue onto the head of your easy duck drawing, adding small dots and lines around the beak and down the neck where shadows would naturally fall. While you are working on the head, you can color in part of the eye and add some shading around it.
To make your texturing as realistic as possible, it is a good idea to follow the shape of the body when adding textural drawings of duck feathers.
For the body of your duck sketch, you can create a separation between the chest and the rest of the body with a line of small lines. On the chest, your feather lines should flow downwards following the curved shape. On the rest of the body and the wings, you can follow the shape of the duck using slightly longer lines. You can leave the tip of the tail and the legs and feet blank.
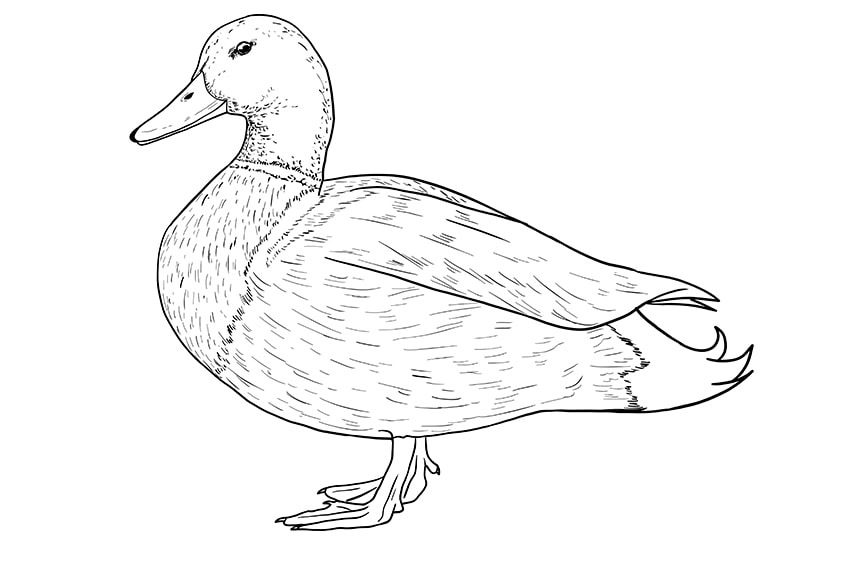
Step 10: Time for Color
Mallard ducks have very iconic coloring, and the best way to achieve realistic coloring for any drawing is to build the different shades up gradually. The first color that we are going to use for our duck drawing is a light gray hue. You can fill the entire body of the duck with this shade.
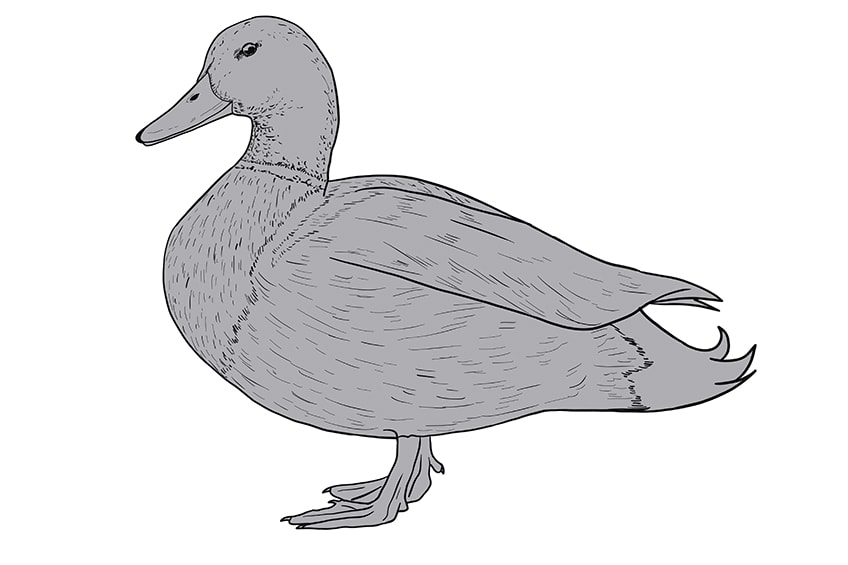
Step 11: Applying the Second Coat of Color
The second color you are going to add to your duck sketch is light brown. To get the difference in shades that you can see below, you are going to apply two layers of brown in different areas. Use a medium brush to shade the breast area, the top of the back, and the bottom of the wing brown.
The very front of the duck’s chest should be lighter than all of the other brown areas. To achieve this look, apply a second coat of light brown to all the other brown areas.
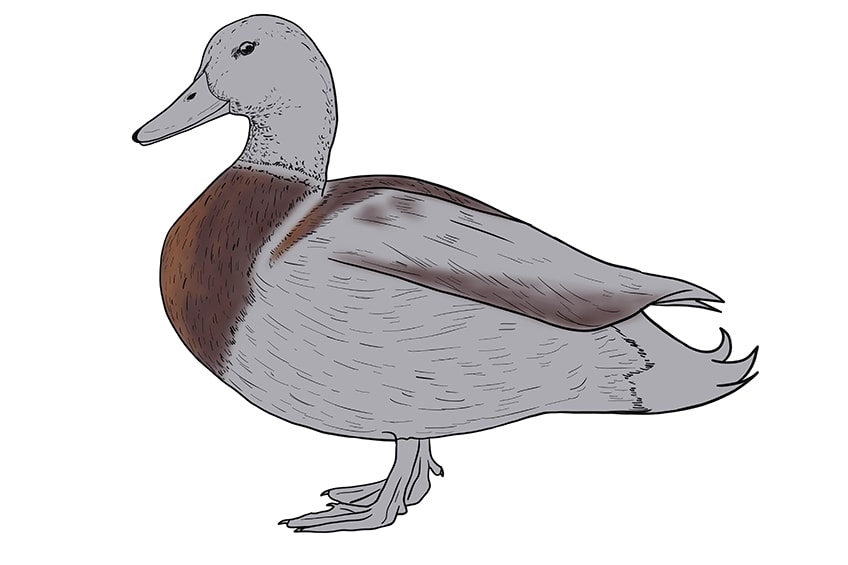
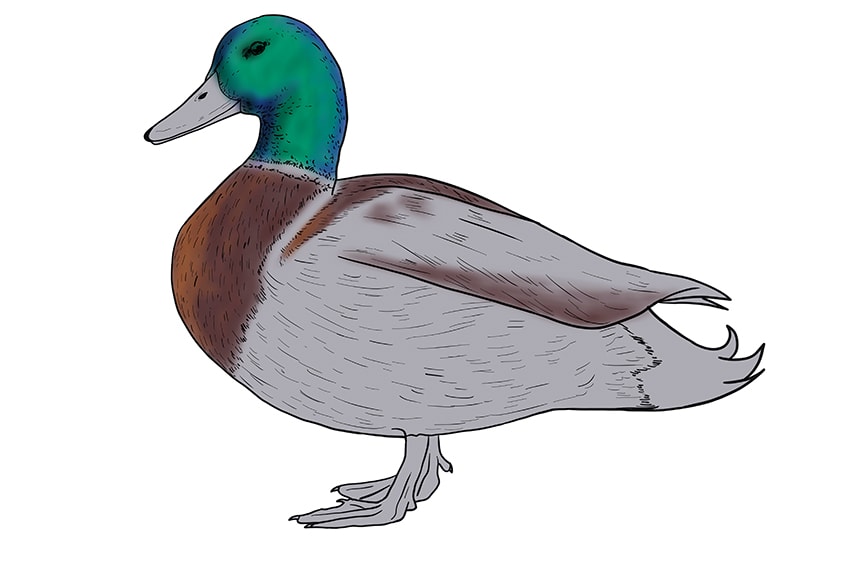
Step 12: Coloring the Bright Green Head
There are two different colors that you are going to use in this step to create the signature iridescent green head. These two shades are light green and cool purple shade. Begin by coloring the whole head with your light green shade. Then, you can go in with a soft brush and blend the purple paint into the green all around the edges of the head. Use an inward motion to blend the two shades together.
Focus quite a lot of purple just below the head in the crook of the neck. Shadow will naturally lie in this area and the purple is a wonderful shading color.
Step 13: Coloring the Feet and Beak
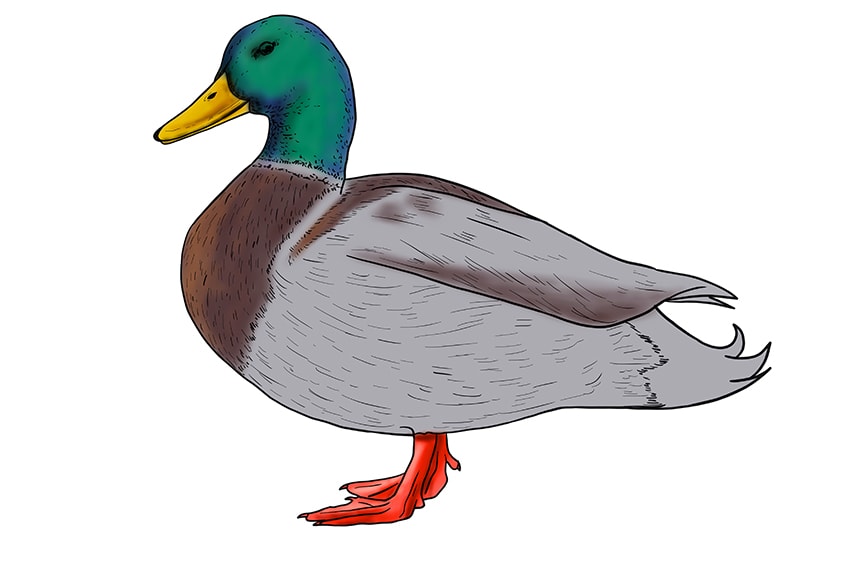
Begin this step with a yellow shade and color the entire beak. You can then use a light brown shade to add shadow and contouring to the beak. For the duck’s feet, find a reddish-orange shade and color the feet completely. You can finish the feet by adding a second layer of white highlight on the front sides of the legs and feet.
Step 14: Shading and Highlighting Your Duck Drawing
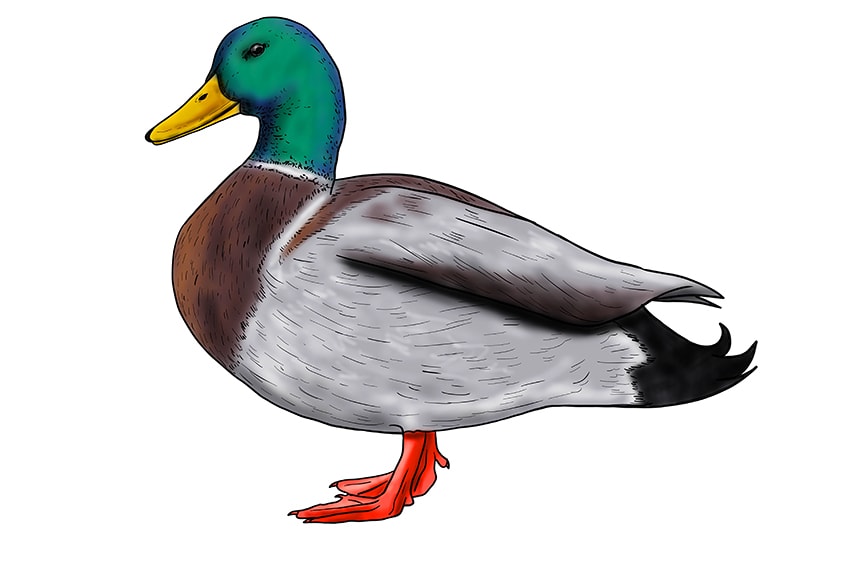
Highlights and shadows are essential for creating realistic coloring and dimensions. Begin the highlighting by using a shade of white to add dabs of light throughout the main body of the duck. Make sure that your brush strokes follow the textural lines for additional realism. You can also add white highlights to the neck and add a little glint in the duck’s eye.
For the shading, use a soft brush to add a light layer of black paint to the bottom of the wing, around the bottom of the duck’s belly, and the whole tail.
Step 15: Finishing Touches
The final step is not compulsory, but the removal of the outlines creates a more seamless and realistic drawing. The best way to remove the outlines is to trace them with the corresponding color. You can do the same for some of the textural lines within the duck’s body, retracing these details with gray and light brown shades.
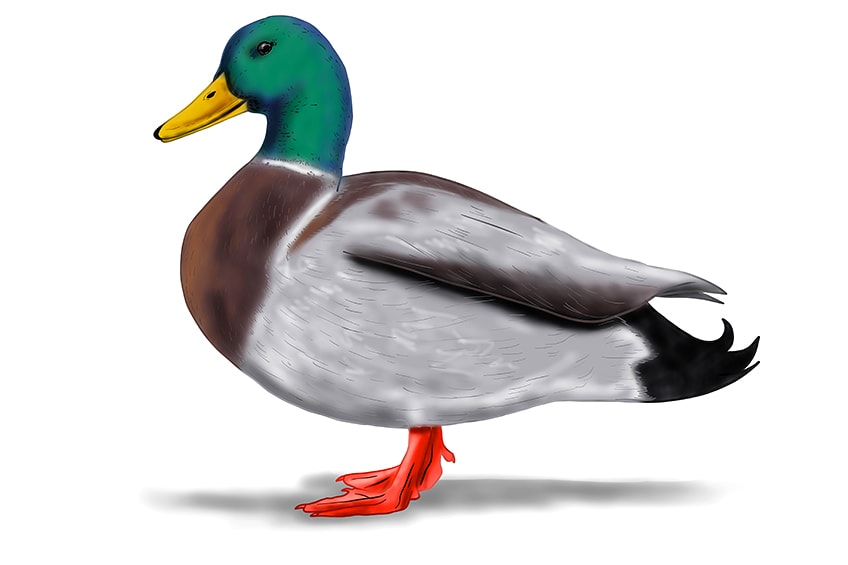
You have come to the end of the duck drawing tutorial and hopefully you are pleased with your final result. Hopefully you will go on to create other drawings of duck types by altering the colors.
Also have a look in our Duck Drawing Webstory.
Frequently Asked Questions
How do You Add Realistic Colors to Your Duck Sketch?
There are many different kinds of duck, each with its own unique coloring. If you follow our easy duck sketch tutorial, you will learn how to create realistic duck coloring and texture.
Is It Difficult to Learn How to Draw a Duck?
Although the different colors and feather textures of a duck may make it appear tricky to draw, with a few easy steps, you can create a beautifully realistic duck sketch. Our step-by-step tutorial makes duck drawing easy for artists of any and all levels.
Matthew Matthysen is an educated multidisciplinary artist and illustrator. He successfully completed his art degree at the University of Witwatersrand in South Africa, majoring in art history and contemporary drawing. The focus of his thesis was to explore the philosophical implications of the macro and micro-universe on the human experience. Matthew uses diverse media, such as written and hands-on components, to explore various approaches that are on the border between philosophy and science.
Matthew organized various exhibitions before and during his years as a student and is still passionate about doing so today. He currently works as a freelance artist and writer in various fields. He also has a permanent position at a renowned online gallery (ArtGazette) where he produces various works on commission. As a freelance artist, he creates several series and successfully sells them to galleries and collectors. He loves to use his work and skills in various fields of interest.
Matthew has been creating drawing and painting tutorials since the relaunch in 2020. Through his involvement with artincontext.org, he has been able to deepen his knowledge of various painting mediums. For example, watercolor techniques, calligraphy and lately digital drawing, which is becoming more and more popular.
Learn more about Matthew Matthysen and the Art in Context Team.


