


How to Draw a Rooster – Our Fun Cockerel Drawing Tutorial
Beautiful and, let us face it, slightly scary, roosters are the top dog in the farmyard birdhouse. Known for their vibrantly colored plumage and sharp beaks, roosters make wonderful subjects for farmyard drawings. In our latest drawing tutorial, we take you through an easy-to-follow drawing process to help you create your own unique and realistic drawing of a rooster. Our tutorials are designed for anyone to follow, so if you are excited to begin learning how to draw a rooster, gather your creative supplies and let us get going!
The Best Step-by-Step Rooster Drawing Tutorial
Whether you are familiar with roosters or not, they make fantastic drawing subjects. In this tutorial, we will focus on helping you get great proportions and dimensions in your rooster drawing, as well as guide you through the process of adding realistic texture and coloring. By the end of this tutorial, you should have a beautiful drawing of a rooster. In the image below, you can see an overview of the 17 simple steps that we are going to follow to create this rooster drawing.

We begin with construction steps in which we lay down the foundational shapes and lines to help us create the most realistically proportioned drawing of a rooster possible. You are welcome to follow this tutorial with your favorite drawing medium, whether that be coloring pencil, acrylic paint, or digital mediums. Just remember for the first eight steps, you should use a light pencil that can easily be erased.
With that being said, let us dive right into this fun and realistic rooster drawing tutorial.
Step 1: Drawing the Chest of Your Rooster
If you have followed our chicken drawing tutorial, you may be expecting us to start this rooster drawing in a similar way. There is, however, a big difference in the stature of chickens and roosters. Roosters tend to stand much taller and more upright than chickens, and we are going to begin reflecting this difference in this first step.
Before you put pen to paper, make sure that you draw this first construction line at the very center of your canvas. It is also important to make sure that there is plenty of space on all sides of this first construction shape for all of the other elements of the rooster’s body.
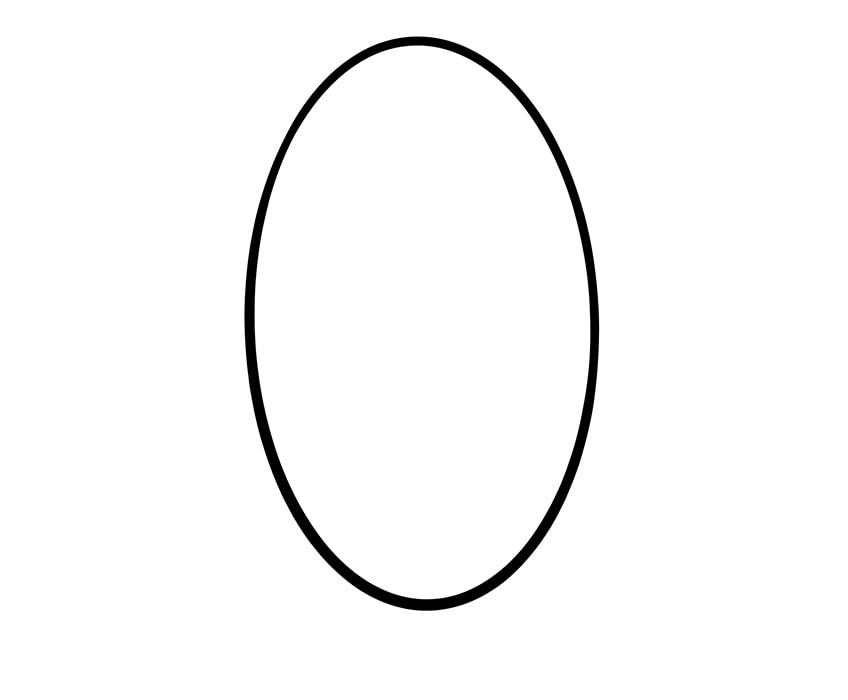
For the chest of your rooster drawing, you want to create a large upright oval shape. This oval should be fairly long and narrow, like an elongated egg.

Step 2: Constructing the Main Body
Now that we have the rooster’s chest and neck area constructed, it is time to turn our attention to the main body shape. The main body of the rooster slopes downward slightly toward the bottom left corner of the canvas.
To create this effect, draw a slightly fatter oval that overlaps the bottom half of the chest oval and slopes down toward the left corner of the canvas.

Step 3: Creating the Shape of the Tail
Roosters are known for their large and extravagant tail plumage, and in this third step, we are going to use another large oval construction shape to help us plan out the tail. The tail oval shape should be roughly the same as the main body oval. The tail construction shape should begin on the bottom side of the main body oval and should be angled upwards slightly.
At the end of this step, your rooster drawing should be looking something like the example below.

Step 4: Outlining the Rooster’s Head
So far all of the construction shapes that we have used have been large ovals. It is now time to take a different turn and use a small circle to represent the foundations of the rooster’s head. The head should sit ever-so-slightly forward of the top point of the chest oval, and just a touch above it too.
Tip: Keep some distance between the head and the chest as we will soon be adding the Wattle underneath the head.

Step 5: Giving Your Rooster a Comb
In this step, we are going to lay down the construction shape for the comb on the top of the rooster’s head. This bright red and fleshy appendage is characteristic of roosters, and the larger they are, the stronger and more impressive the rooster. Beginning on the top of the head circle, freehand draw the rooster’s comb, creating curvy dips and peaks.
You can join the other end of the comb to the front side of the rooster’s face, where you imagine the top of the beak to be.

Step 6: Drawing the Wattle
You are going to do two things very quickly in this step. The first thing you are going to do is draw the rooster’s beak, beginning on the front line of the comb, and after coming to a sharp point, curving back and down to join the wattle. The rooster’s wattle consists of two slightly oval shapes hanging from below the head circle.
The one closest to our perspective should begin under the head circle and join with the beak. The other wattle can be represented by half of an oval extending from this first wattle.

Step 7: Creating the Shape of the Upper Thighs
Step 7 is very quick and easy. In this step, you are going to use a freehand curve to create the shape of the upper legs and thigh area. This area is where the legs will start to become visible from underneath the feathers.
Begin at the bottom point of the main body oval, and draw a line that curves around and down, then dips even further, and finally extends upward to meet the main body oval again.

Step 8: Laying the Foundations for the Legs and Feet
In our last construction steps, we are going to use some single lines to create the base shape of the rooster’s legs and feet. Beginning at the bottom of the last shape you drew, draw a straight line that goes down and then curves toward the left of the canvas in an “L” shape. Repeat this step to draw the second leg, and then draw three additional lines on the foot that is closest to us. The first additional line should be at the base of the “L”, and the other two should be on the back of the legs, with the highest one being very short.
For the second leg, you can add only this small upper line.

Step 9: Drawing the Final Outline of Your Rooster Drawing
When you decided that you wanted to create a drawing of a rooster, you probably did not picture all of the construction steps that we have just gone through. Now that we have these construction shapes, however, you will see how easy it becomes to create the final, perfectly proportioned outline for your rooster drawing.
Using all of the construction lines, you are going to shape the final outline of your rooster drawing. Begin at the head, outlining the head and wattle, taking the wattle up into the head slightly and adding a separating line in the beak. You can also add an eye to the head, made up of concentric circles. Behind the comb, add some lined feather details.
Continue to outline the rest of the rooster’s body, following the construction shapes quite closely but ensuring that you include some variations to create a smooth and natural shape.

In some places around the body, including on the back of the neck, around the top of the chest, and on the top of the tail, you can use short strokes to give the outline a feathery impression. On the tail area, create a flow of different sized and shaped feathers around the bottom of the construction shape. Some of these feathers can be pointy or smooth, and they should overlap each other slightly.
When you come to the legs and feet, use the construction lines as your center point and outline them on either side. Add pointy nail details to the tip of each toe, and for the finishing touch, you can add a curve inside the main body to represent the rooster’s wing.
When you are happy with your final outline, you can erase any remaining visible construction lines.
Step 10: Adding Details and Feather Texture
When you first look at the example below, you may be overwhelmed by the sudden amount of detail, but we promise that this step is simpler than it appears. Begin at the head of your rooster, and use small dots and lines to add texture to the comb and wattle. Next, following the curve of the rooster’s body, continue throughout the head and down the next using small lines to create the impression of feather details.
As you get further into the main body, these lines should become increasingly longer. Draw these lines one at a time, and ensure that they do not overlap for the most realistic feathery look.
As you reach the wing-line on the main body, you can start to use the short lines to create larger feather shapes, and continue to add line details to the large tail feathers. Draw a central line through each of these large feathers and then add little strokes on either side. To finish this step, color the center of the eye black, and use small incomplete circles and scribbles to add texture to the rooster’s legs and feet.

Step 11: Coloring the Base Coat
Our drawing of a rooster includes a range of different colors in different parts of the body. The best way to build up each of these colors and keep them vibrant and realistic is to build the color up gradually. The first color that we are going to use is a light ochre brown. Using this color, you can fill in the rooster’s head, neck, and upper body.
Remember to leave the rooster’s face, chest, wing, bottom, and tail blank, as these are going to be different colors.

Step 12: Coloring the COmb and Wattle
For this step, use a small brush and a light pink or ruby shade of paint to color in the comb, wattle, and face of your rooster drawing. In later steps, we are going to add highlights and shadows to this area of your drawing of a rooster.

Step 13: Adding the Second Color Coats
Although the name of this step indicates that we are only adding one more color in this step, we are actually using three different colors to finalize the base shades for the entire body of your rooster drawing. Begin by using a navy blue shade to color in all the remaining blank parts of the rooster’s chest area. Next, for the tail feathers, find a dark green-blue hue to color them all in evenly.
Finally, you can use a light shade of pink or beige to color in the legs and feet of your drawing of a rooster.

Step 14: Using Highlights and Shadows to Add Depth
In this step, we are going to use shadows and highlights to add a sense of realistic depth and texture to some parts of our rooster drawing. Begin by using a soft brush and a touch of white paint to create little specks of highlight on the wattle, comb, and face of your rooster, focusing the white paint on the areas that would naturally catch the light.
Next, still using your shade of white, add some highlights to the top of the navy blue shading on the wing and chest area, and along with the separate tail feathers. Focus a splash of white paint on the rooster’s back at the point where the body and tail meet. You can also add a touch of highlight to the front part of the rooster’s feet and legs.
For the shadows, use a tiny amount of black paint to add some shading around the base of the rooster’s chest, legs, and tail. In the tail, try to focus the black shadows on the feathers that would naturally be hidden by others, to create a more three-dimensional appearance.

Step 15: Adding the Final Highlights and Shadows
In this step, we are adding the finishing touches to the coloring of your drawing of a rooster. Begin by using white to color in the patch right below the rooster’s head. Next, use a touch of black paint to add shadows around the top and bottom edges of the rooster’s head.
You want to use this black or a darker brown paint to create shading on the yellow portion of the rooster’s body, focusing most of the shadow on the lower part of the back and wing shape.

Step 16: Making Your Rooster Drawing Seamless
If you are happy with your rooster drawing, this step is completely optional. In this step, we are going to erase the outlines and textural lines within your rooster drawing to create a more seamless and realistic look. The best way to do this is to use the corresponding at each point of the outlines and texture marks to paint over them. For the feather textured details within the rooster’s body, use a sharp brush and a darker brown paint.

It is now time to step back and admire your rooster drawing. Hopefully if you came into this tutorial wanting to know how to draw a rooster, you now have all the knowledge and skills necessary to go on and create many unique and beautiful rooster drawings.
Frequently Asked Questions
Is It Difficult to Create a Drawing of a Rooster?
With our easy-to-follow rooster drawing tutorial, we take you step-by-step through the process making it fun and very easy to create a beautiful and realistic drawing of a rooster. Using construction steps and different layers of color, it is so simple to learn how to draw a rooster.
Is Learning How to Draw a Rooster Different from Drawing a Chicken?
As they are both the same bird, there is a great deal of overlap between the drawing process for a chicken and a rooster. For our drawing of a rooster, we create the distinction by the large tail and bright feather colors.

Matthew Matthysen is an educated multidisciplinary artist and illustrator. He successfully completed his art degree at the University of Witwatersrand in South Africa, majoring in art history and contemporary drawing. The focus of his thesis was to explore the philosophical implications of the macro and micro-universe on the human experience. Matthew uses diverse media, such as written and hands-on components, to explore various approaches that are on the border between philosophy and science.
Matthew organized various exhibitions before and during his years as a student and is still passionate about doing so today. He currently works as a freelance artist and writer in various fields. He also has a permanent position at a renowned online gallery (ArtGazette) where he produces various works on commission. As a freelance artist, he creates several series and successfully sells them to galleries and collectors. He loves to use his work and skills in various fields of interest.
Matthew has been creating drawing and painting tutorials since the relaunch in 2020. Through his involvement with artincontext.org, he has been able to deepen his knowledge of various painting mediums. For example, watercolor techniques, calligraphy and lately digital drawing, which is becoming more and more popular.
Learn more about Matthew Matthysen and the Art in Context Team.


