

How to Draw a Cat – Step-by-Step Tutorial to Make Cat Drawing Easy
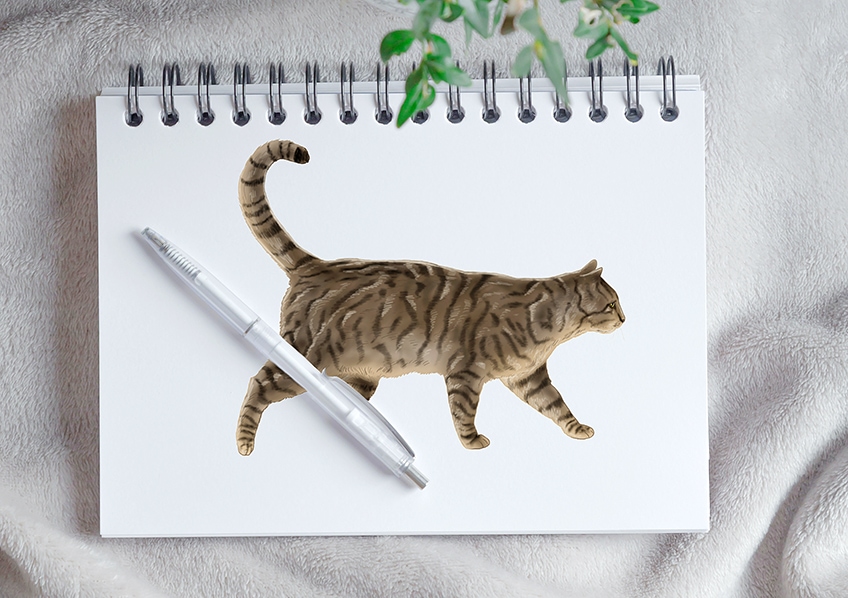
Cats are one of the most popular pets around the world, and they are incredibly smart creatures. With their bright eyes, perky ears, and playful tails, cats make wonderful subjects for drawing. Whether you are a cat person or a dog person, there is so much that you can learn and practice by drawing a cat, including proportions, perspective, and fur detailing. In this tutorial, we show you how to draw a tabby cat. If you would like to render your own furry friend in your realistic cat drawing, you can easily adjust the color pattern in the last few steps. If you are ready to learn how to draw a cat, then gather your supplies, get comfortable, and let us dive right in!
How to Draw a Realistic Cat Step-by-Step
We love cats, what is there not to love? Cats make wonderful companions but they are also highly individual and look after themselves. Agile and elegant, cats have impeccable balance thanks to their long tails. Cats can also squeeze through very small spaces, and they determine whether they can fit with the highly sensitive whiskers on their faces and the back of their front legs. Cats also walk in a very unique way, with giraffes being the only other mammals that move both right feet first and then both left feet.
Step 1: Constructing the Cat’s Main Body
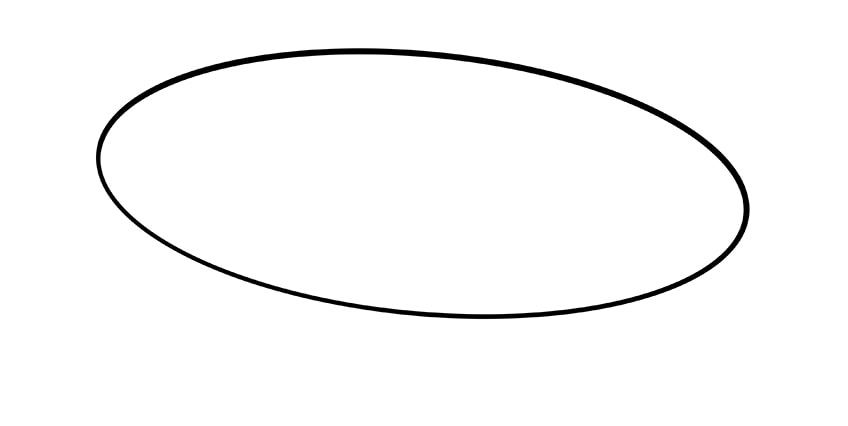
If you have followed any of our other animal drawing tutorials, you will know that we always start by using construction lines. Construction lines are incredibly helpful for any artist, whether you are an accomplished artist or a beginner. Starting a drawing with construction shapes and lines is a great way to make sure your dimensions are perfect before you start adding details. For our cat drawing, we are going to begin with an elongated oval shape. Ideally, this oval should be slightly angled down towards the right.
The most important part of this first step is to make sure that your oval is in the center of your canvas. There are many other elements to the cat, including the head, tail, and legs, that you will draw in the next few steps and these need plenty of space.
Step 2: Constructing the Cat’s Head
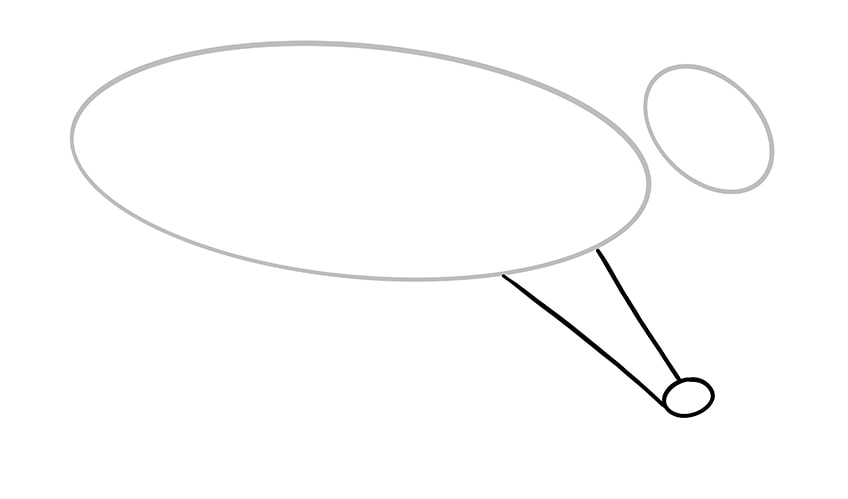
In this second step, you are going to use another construction oval to represent the head of your drawing of a cat. The head oval should be much smaller than the body oval you drew in the last step, and it should be more steeply angled down to the right.
You want to place this head oval at the front of the cat’s body oval, but you do not want the two to touch or overlap.

Step 3: Constructing the Cat’s First Front Leg
The next part of the cat’s body you need to construct is the front leg. The leg we are starting with is the front leg that is furthest away from us. Because of this perspective, you can begin the lines for the leg right on the body oval. At the bottom of the main body oval, just behind the front point, draw two straight lines that extend out toward the front. You want the two lines to get closer together as they get to the bottom.
At the bottom of this leg, draw a small oval angled upwards. You will use this oval to draw the cat’s paw in later steps.
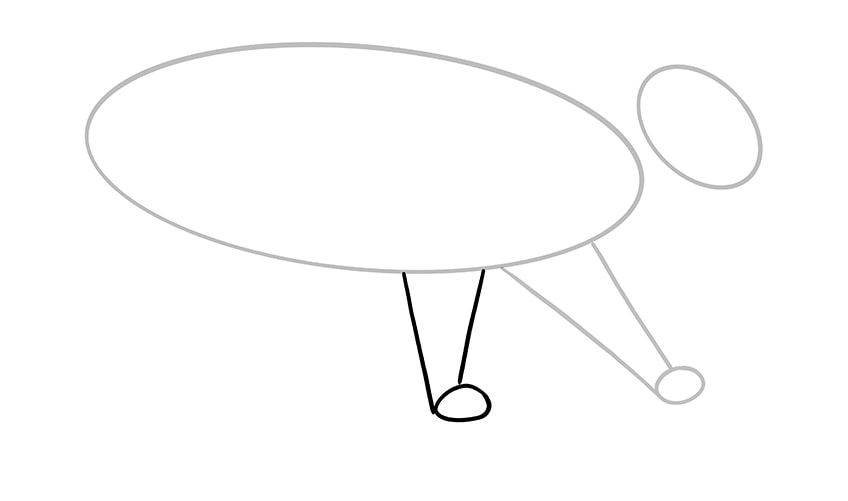
Step 4: Constructing the Cat’s Second Front Leg
In this fourth step, use the same process that you did for step three. For this front leg, however, you need to draw the lines straight down, rather than facing forward. Add a little uneven circle at the bottom of this leg to represent the paw.
Step 5: Constructing the Cat’s First Back Leg
This step and the next focus on drawing the first back leg in your drawing of a cat. Begin this back leg just in front of the back of the body oval. Draw a square “U” shape that faces the back. The cat’s back legs have a knee joint, so it is easier to draw this leg in two stages. This first construction shape is going to represent the cat’s thigh.

Hopefully you can now see the shape of the back leg, and in the next few steps we will start to flesh it out.

Step 6: Constructing the Cat’s Second Back Leg
For the second back leg, you are going to follow the same basic steps that you did for the first back leg. Start with another square “U” shape, but draw this one facing straight down rather than to the back. You want to make sure that the rear line of this “U” shape begins on the “U” shape of the other back leg, to capture the right perspective.

To finish this final back leg, you are going to use two short lines and an uneven circle. To capture the correct angle of the cat’s back leg, you want these two lines to be angled towards the front of the cat’s body. You also want to make sure that the uneven circle faces forwards.
At this stage of the how to draw a realistic cat tutorial, you should start to see the basic shape of your cat coming together, and it should look something like our example below.

Step 7: Constructing the Cat’s Tail
It is now time to draw the construction line that you will use to draw the tail. For the tail, you can simply use a single curved line, extending from just above the back point of the body oval. For that signature curved tail, draw the line so it looks slightly like a “2.”

Step 8: Drawing Your Cat’s Ears
This is the last construction step before we move on to create the final outline for your drawing of a cat. The perfect placement for the cat’s ears is right on the top of its head, just after the top point of the head oval. Begin by drawing a pointed triangular shape on the top of the cat’s head oval, and then draw a slightly more rounded one behind it.
You want to make sure that the front ear overlaps the back one, to get the perspective right.

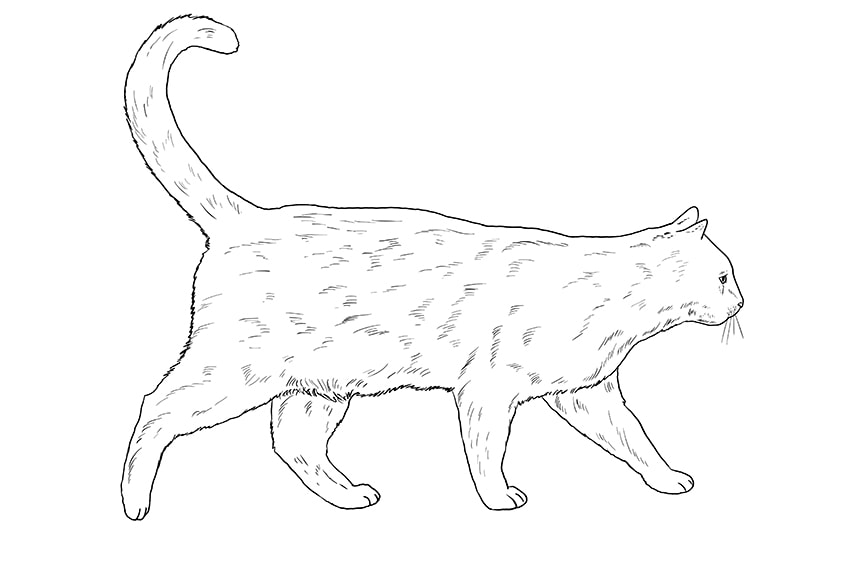
Step 9: Fine Lining the Outline of Your Cat Drawing
After all these steps using construction lines, it is finally time to put them to use and draw the final outline for your drawing of a cat. The best place to begin drawing your outline is at the head. Using the oval shape to help you, trace the ears and then flatten the top of the head slightly, before dipping down into the oval just a touch. You can then follow the bottom of the head curve, creating a slight bump for the nose. After you have outlined the chin, take the line straight across to meet the main body oval just below the front point.
You can follow the other construction lines pretty closely for the rest of the outline. For the cat’s tail, outline the construction line on either side. Do not be afraid of not sticking to the construction lines perfectly, a few bumps and curves will add texture and realism to your drawing of a cat.
You can use short hair-like strokes to complete some of the outlining to give the impression of fur. Along the belly in particular, you can make the furry lines a little longer. For added realism, draw a few curved lines to separate the toes in the paws.
Once you are happy with your outline, you can erase all the remaining construction lines.

Step 10: Adding Texture and Details
Now that you have your outline drawn, you can move onto adding texture and facial details. This step is the first of two detailing stages, and the second will be done with paint.
To create the eye of your cat drawing, begin by drawing a tilted “V” shape and adding a half-circle inside of it. After you have drawn the circle, color in a smaller circle to create the iris. Use a few very small streaks to create a small eyebrow above the eye, and do the same below the eye for some texture. Add some more small lines to represent the nostrils, and around the nose, you can draw some whiskers.
Throughout the rest of the cat’s body, use short strokes to create the impression of fur.
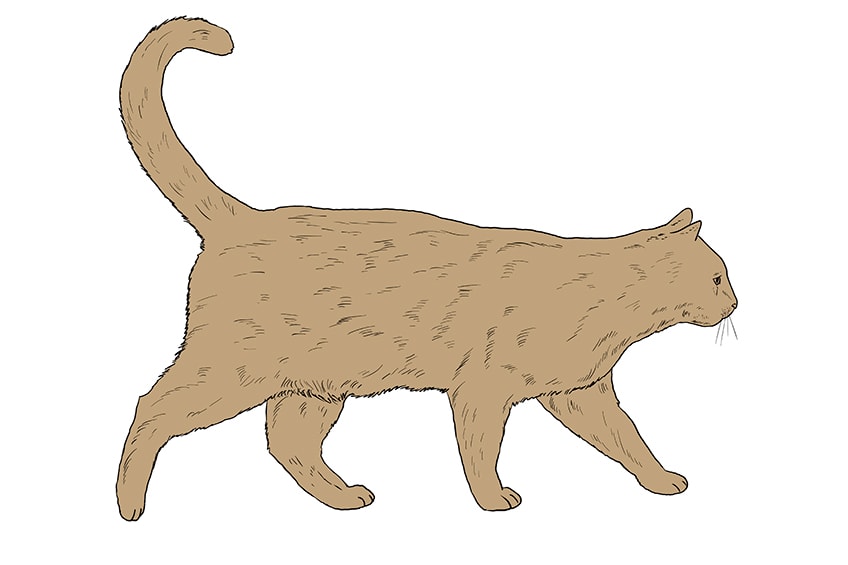
Step 11: Adding the First Coat of Color
The cat drawn is a tabby, but if you want to capture your own pet’s unique coloring, this is the step where you have artistic freedom. If you are going to give your cat tabby coloring, you can follow along with us and use a light brown shade as the base color for the whole body.
You want this first coat of color to be light, as you will use a couple of darker shades to add the pattern in the next few steps.
Step 12: Adding the Second Coat of Color
For this next coloring step, you need to choose a light grey color. Add a very light coat of this color to most of the cat’s body, leaving areas of the light brown shade around the cat’s nose, under its belly, and around its legs.
At the end of this step, your cat’s coloring should look a little something like this.
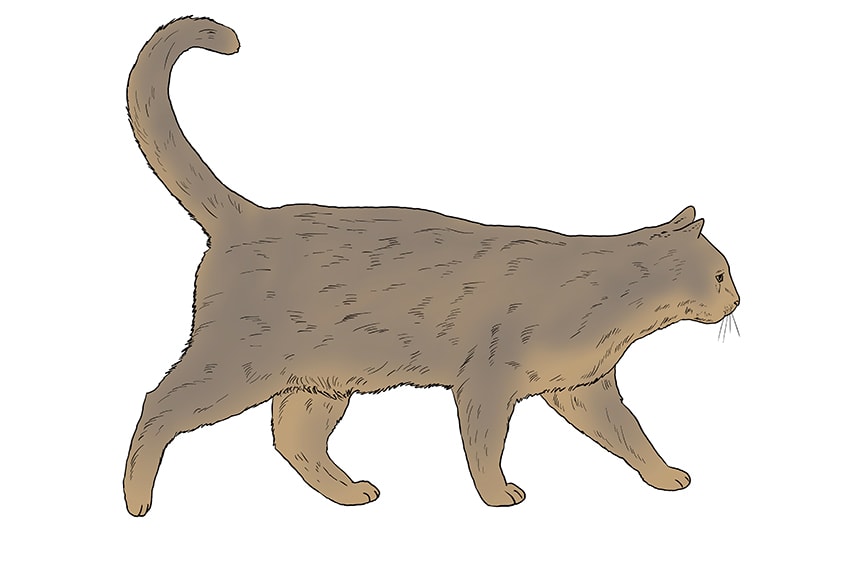
Step 13: Blending Shades and Adding the Third Coat of Color
Using a soft brush, lightly add a third coat of a slightly darker shade of brown. Again, like the grey, you want to focus most of this brown on the upper half of the cat, leaving the lighter brown shades on the bottom.
For a realistic fur effect, you can make this coat a little more patchy. Patches of lighter and darker color help to make your drawing of a cat more realistic.

Step 14: Adding the Tabby Stripes
Tabby cats are known for their tiger-like stripes, and so to make your drawing more realistic, you can use a darker shade of grey or black to create these stripes. You want your stripes to be very narrow and quite parallel. You do not, however, want to have pure parallel stripes all the way down your cat’s body. Make some of your lines slightly curved, put some in a different direction, and make sure that none of them are joined together.
To make the stripes on the tail and legs look realistic, draw them horizontally so that they wrap around the legs and tail.
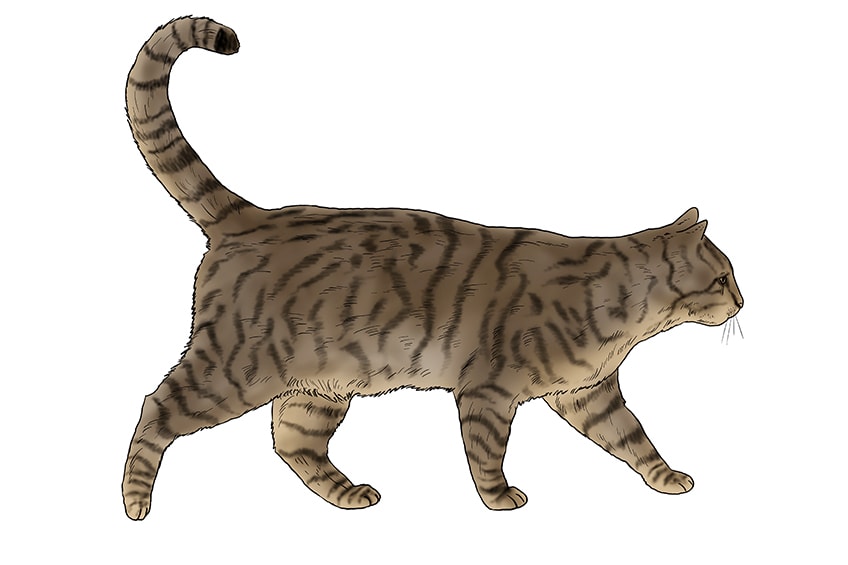
Step 15: Adding Highlights
To make any drawing look realistic, it is essential that you add highlights and shadows. These two tools help give your drawing dimension and perspective. Using a light cream shade, follow some of your tiger stripes, to help contour the appearance of your cat. You can use the cream shade to blend out the lighter areas of color under your cat’s belly and face, and along the top of your cat’s back.
When it comes to adding hightlights, it can be helpful to decide where your light source would be in your composition. If, for example, your light source is above the cat’s head, you could add highlights to the top of the cats head, along its back, and on its tail.

Step 16: Adding Shading
In this final step, you are going to use a shadow shade of dark grey or black to do the opposite of what you did for the highlighting. Add general shading on the parts of the cat’s body that would be shielded from your light source, like under the eyes, on the back of the neck, behind the legs, on the tail, and on the inside of the legs.
Be very careful with your shading, as too much shadow can very quickly ruin a good drawing. You can always add more, but it is very hard to take it away.
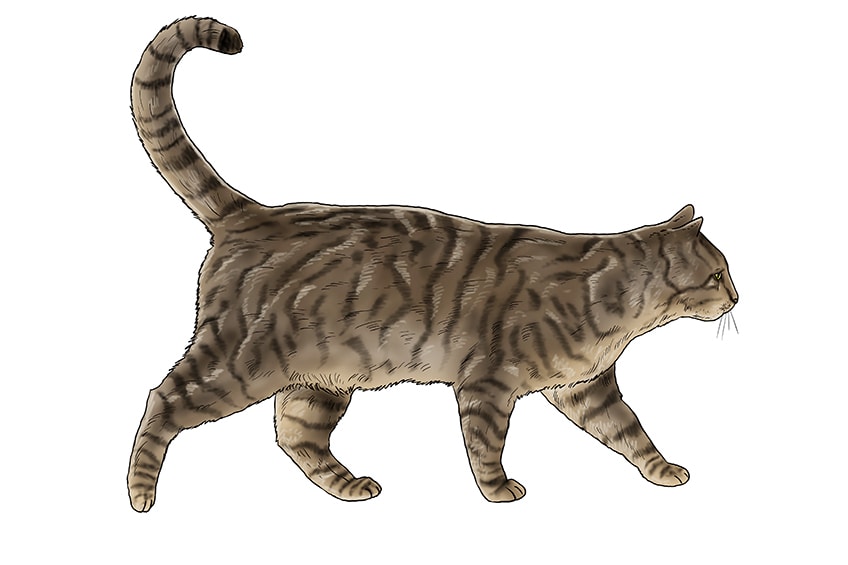
Just like that, you have successfully completed our in-depth how to draw a realistic cat tutorial. Hopefully you are happy with your final drawing and you have had the chance to practice some essential drawing and coloring skills. It is so easy to create a cat drawing when you take it step-by-step, and now you have all the knowledge to draw cats in a range of other positions and patterns.
Frequently Asked Questions
Does It Take a Lot of Time to Make a Cat Drawing?
Not at all. In fact, it might take you much less time than you would expect. With our in-depth cat drawing tutorial, you can easily and quickly create a realistic cat drawing. If this is your first time drawing animals of any kind, the tutorial may take a little longer, but through this process, you will learn some important drawing skills.
Can You Use Paint to Complete this Tutorial?
Absolutely! You can complete this tutorial using any medium you like. If you are a graphic artist, you can easily adapt this cat drawing tutorial for a drawing tablet, or you can use paint, colored pencils, or pen and ink.

Matthew Matthysen is an educated multidisciplinary artist and illustrator. He successfully completed his art degree at the University of Witwatersrand in South Africa, majoring in art history and contemporary drawing. The focus of his thesis was to explore the philosophical implications of the macro and micro-universe on the human experience. Matthew uses diverse media, such as written and hands-on components, to explore various approaches that are on the border between philosophy and science.
Matthew organized various exhibitions before and during his years as a student and is still passionate about doing so today. He currently works as a freelance artist and writer in various fields. He also has a permanent position at a renowned online gallery (ArtGazette) where he produces various works on commission. As a freelance artist, he creates several series and successfully sells them to galleries and collectors. He loves to use his work and skills in various fields of interest.
Matthew has been creating drawing and painting tutorials since the relaunch in 2020. Through his involvement with artincontext.org, he has been able to deepen his knowledge of various painting mediums. For example, watercolor techniques, calligraphy and lately digital drawing, which is becoming more and more popular.
Learn more about Matthew Matthysen and the Art in Context Team.


