How to Draw Grass – A Step-by-Step Drawing Guide
Grass drawing is often an easily overlooked skill that should be within every artist’s repertoire. Learning how to draw grass is essential for every artist as it is such a versatile skill that can be incorporated into most artworks. Learning how to make a grass sketch can enhance a landscape and it is a great way to fill space within a scene. Learning how to draw different types of grass, such as long weed grass and larger fields of grass are two different things. In this tutorial, we will explore how to draw grass on both a large scale and a smaller scale. Learning how to draw grass is a subtle art that, once understood, is very useful for all sorts of artworks.
Step-by-Step Instructions on How to Draw Grass
A grass sketch seems complicated because of its abstract nature, it seems very busy and therefore overwhelming. When it comes to drawing grass, creating the effect of mass or fine overlapping moments of grass is simpler than one might think. There are a lot of tricks to learn when it comes to drawing different types of grass, and in this tutorial that is exactly what we will learn. Whether it be weed grass in a close-up scene or a field of grass with depth, both are easier than you think and we will go through each of them one digestible step at a time.
In this tutorial, we will look at how to draw grass close up as well as grass within a field. We will look at how we can work with lines to create the effect of grass in mass. We will also explore how to use negative-styled drawings for grass that is in close range. We will work with pencil and focus predominantly on our shading
How to Draw Grass at a Close Range
In many instances, a grass drawing is very useful when it is part of a scene at a close range. Drawing grass close-up is a great skill to have because in many instances it can be used to see the scale of a landscape.
We want to know not only how to draw a field of grass but also how to create weeds drawing where the grass is interacting with a smaller object and space.
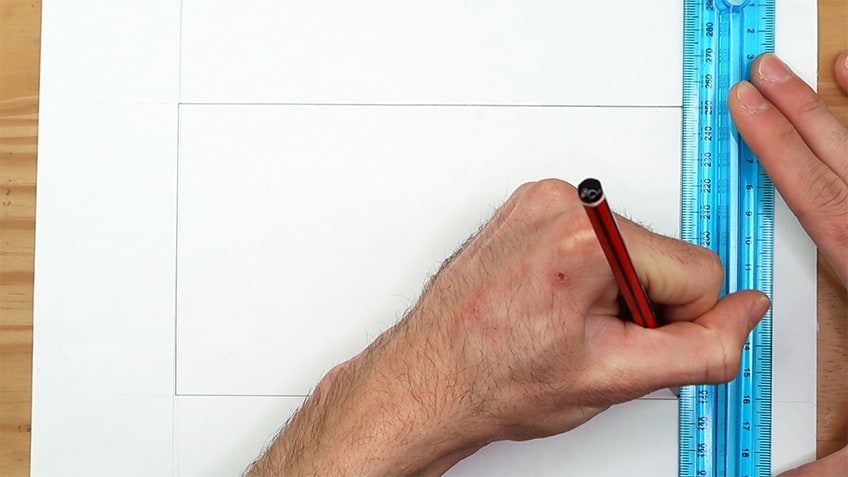
Step 1: Creating a Border
We want to begin by drawing a border around our page with our pencils and ruler. This can be however large you would like.
Step 2: Creating a Scene
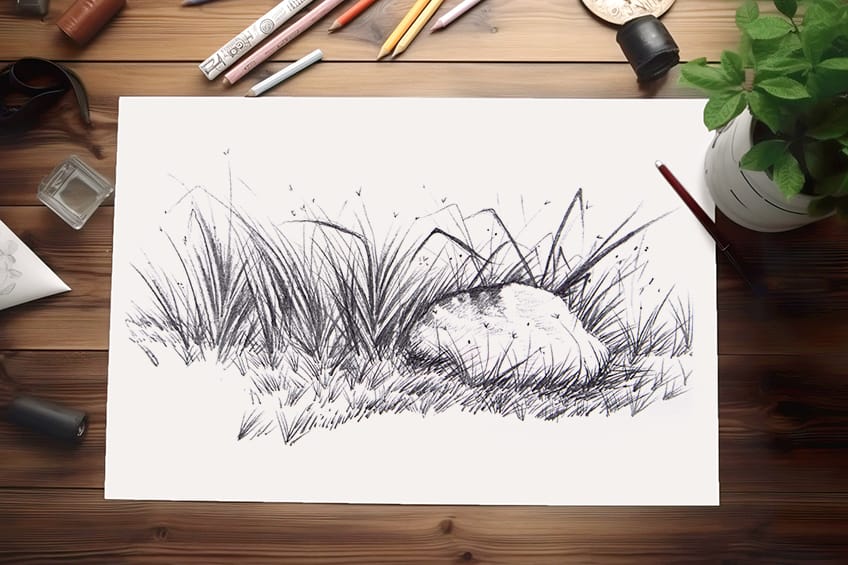
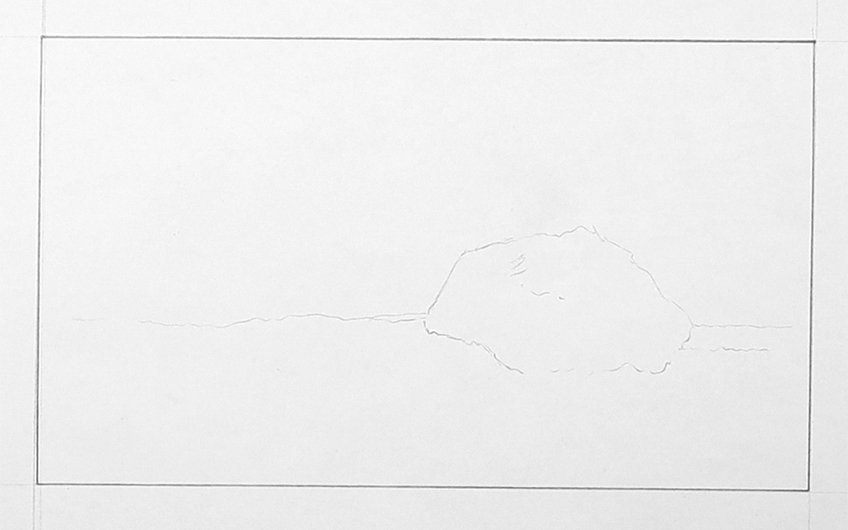
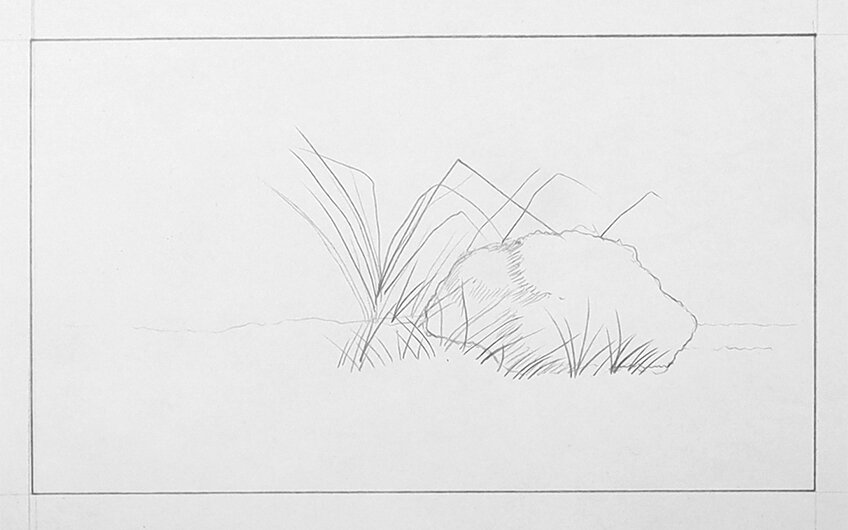
With our pencils, we want to draw a horizon line as well as a rock. The reason we draw a rock is to set up a reference for scale as we draw the grass around it. Drawing an object amongst grass is often a great way to define the scale of the landscape.
From here, we want to lightly make strokes around the rock shape to suggest some form of grass. A good way to think about weeds drawing or grass in the close-up range is to imagine as though you are planting clumps at a time.
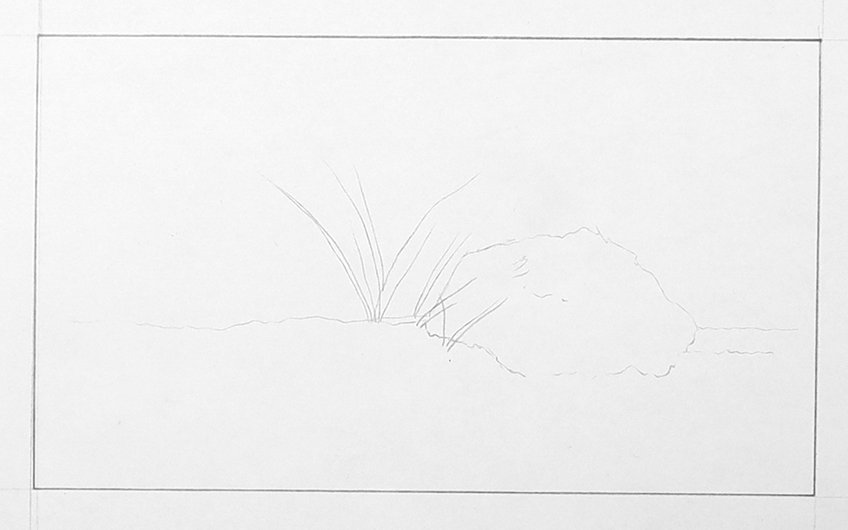
This means that for longer weed-like grass, you can draw the strokes in a way that all stem from a single point and flow outwardly. This weed-like grass should also curve outward, suggesting a slant.
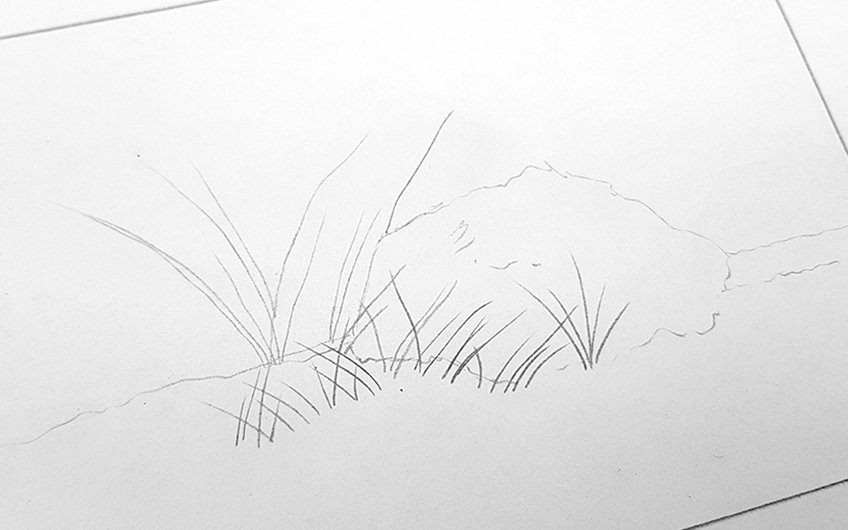
We also want to play around with different sizes of grass around the rock. For instance, we can have shorter grass in front of the rock that can be drawn as swift short strokes.
Step 3: Drawing the Grass
We will now start refining the grass sketch. We want to use a lot of negative shading when it comes to grass at a close-up range. What this means is we will make these dark and thick shading lines in between the grass.
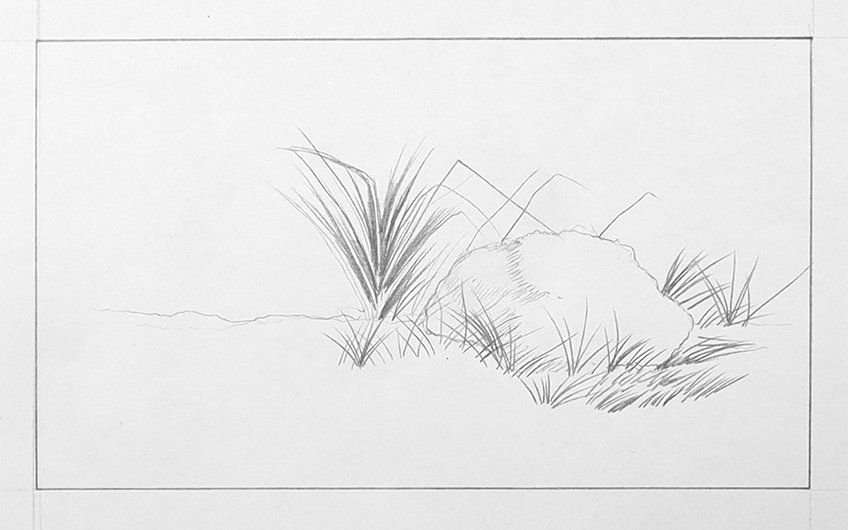
The idea is to make strokes of grass with simple linework, then to shade in some of the overlapping sections in between the lines. This will create light and dark strokes within the grass, giving the effect of depth.
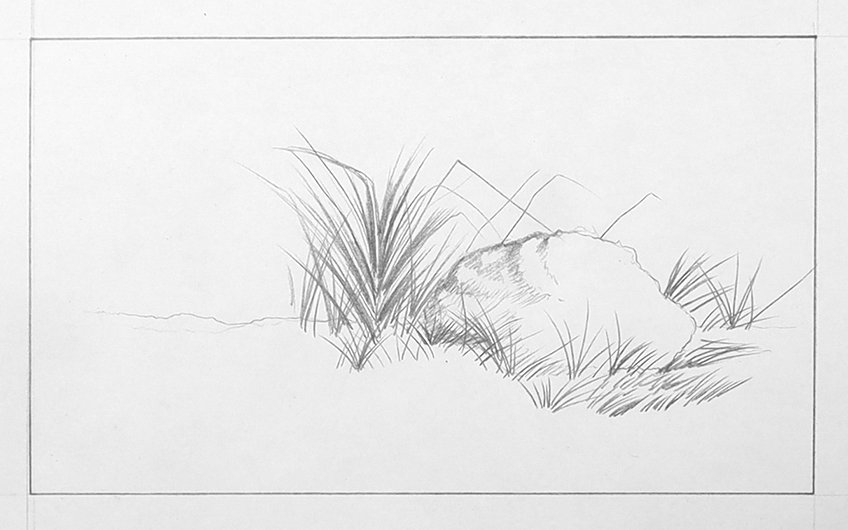
We also want to create bolder grass lines with a blunt, darker pencil, where we give the grass blade an arched shape that curves downward. These weed-like blades of grass can start from behind other clumps of already drawn grass.
Step 4: Refining Your Grass Drawing
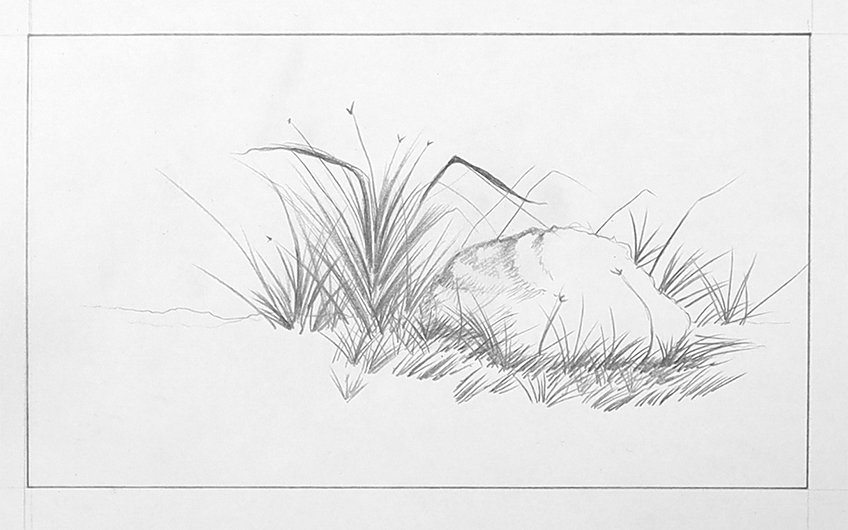
A technique that works really well is the aforementioned negative drawing. This is where you shade around lines to give the effect of highlights within the grass. This means that when you draw a bunch of lines, shade around them here and there leaving some dark and some light.
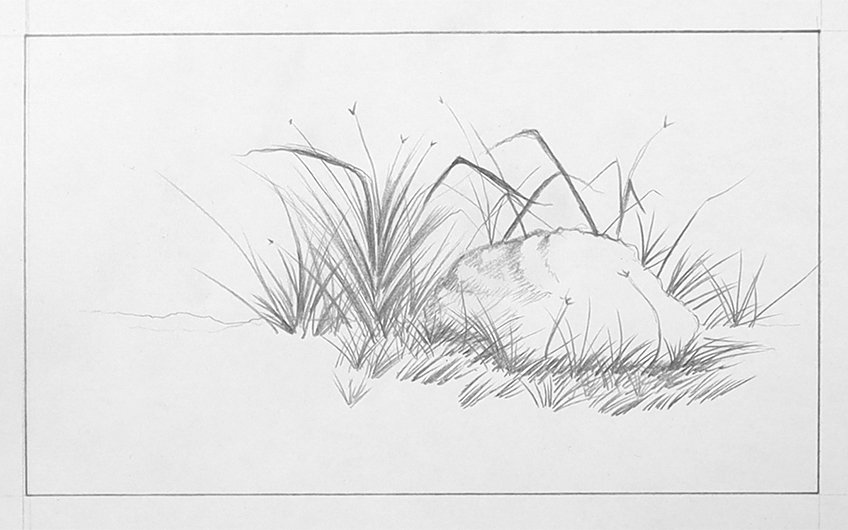
This means that when we draw grass in a clump, we can make both dark and bold strokes. We can also carefully shade around some of the lines, to suggest blades of grass that are lighter.
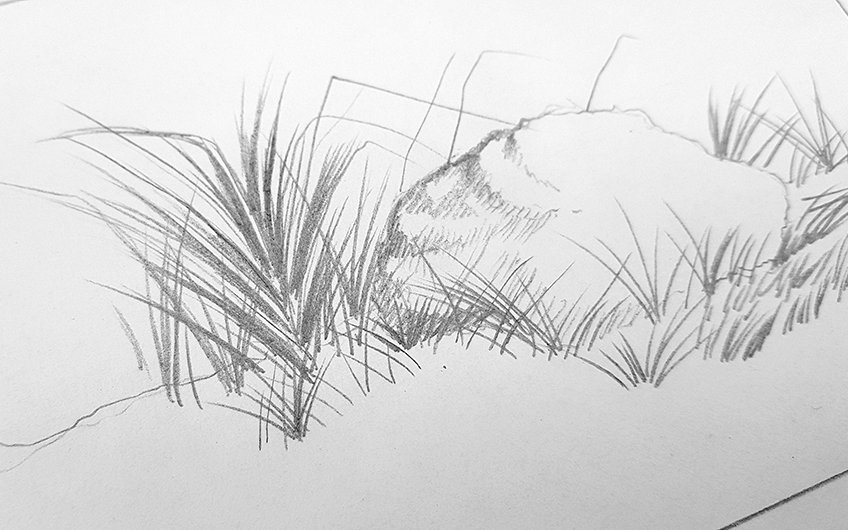
The form of the grass is really important as well. We want to make sure we have a curve to the strokes we make for the long weeds. For the shorter grass, it’s a more short-handed, swift stroke. We want to use the rock as a reference for how to form the grass, as using an object in the scene is a great way to navigate the flow of the drawing.
Another good suggestion is to darken the shorter grass around the base of the rock, suggesting a shadow around the rock.
Step 5: Details Within the Grass
We want to give the grass a realistic quality, and this includes little details. For instance, we can include little dots or V-shaped marks at the tips of some grass lines, giving the effect of little flower heads.
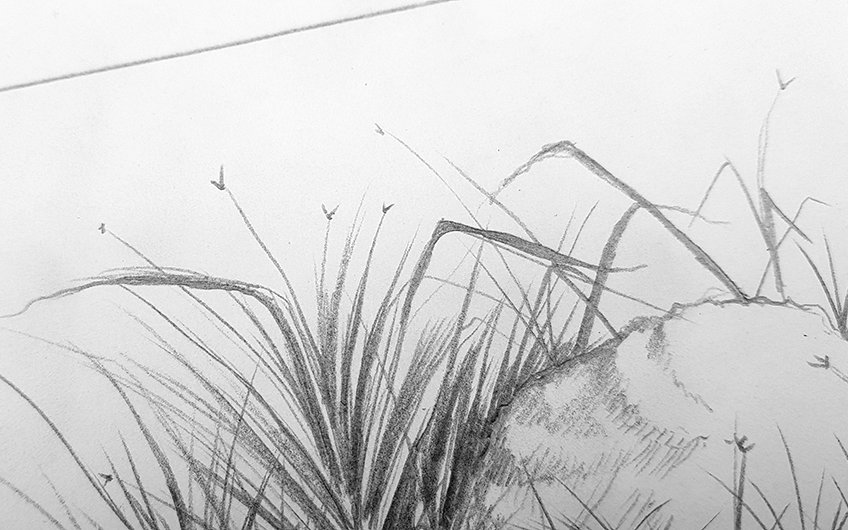
As you proceed to draw both longer grass and shorter grass, you can add in these little flower details, which give the grass drawing more detail. We can also include longer arching weed grass blades sporadically through the grass drawing.
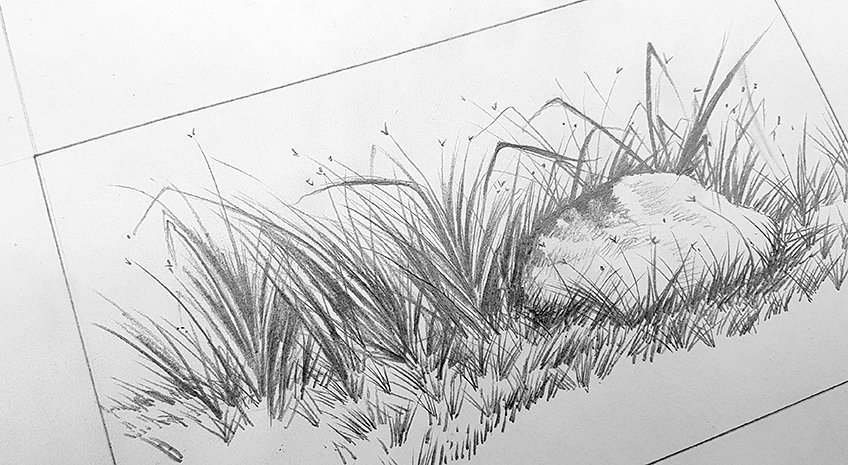
Step 6: Creating Variety
Once you understand the basic elements and how to construct them, you want to work them around the rock creating different styles of grass. Having shorter grass in the foreground with long grass in the background gives the drawing a nice variety.
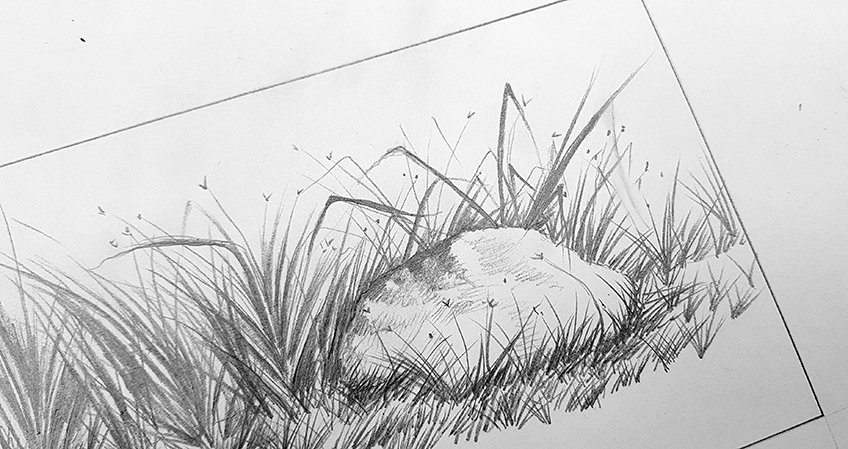
Make sure you work with the different techniques and details as you slowly construct different styles of grass around the rock. And there you have it, a few basic steps on how to draw grass at a close-up range!
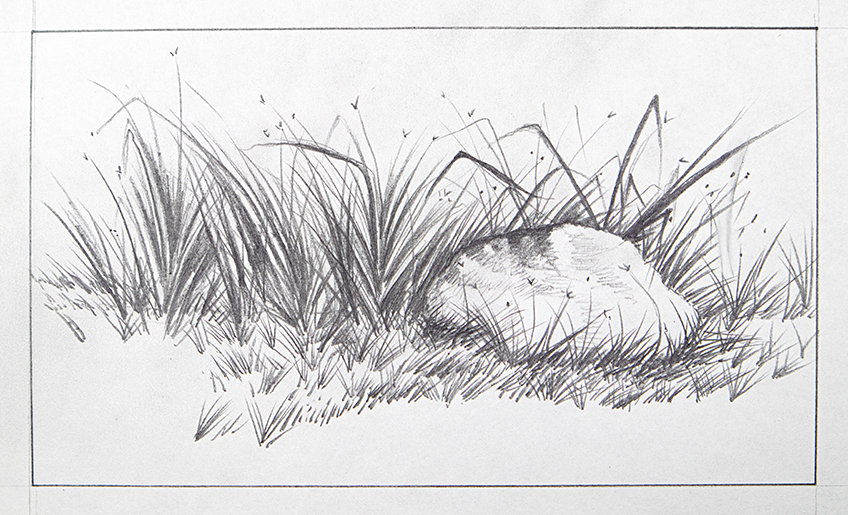
How to Draw Grass in a Field
Grass is quite abstract when it is seen on a mass scale like a field, which in many ways makes the drawing process easier. Realistic grass drawing is always much simpler than it appears and this is the case for a field of grass as well.
Step 1: Creating a Border
Again, we want to begin by making a border around our page with our ruler and HB pencil.
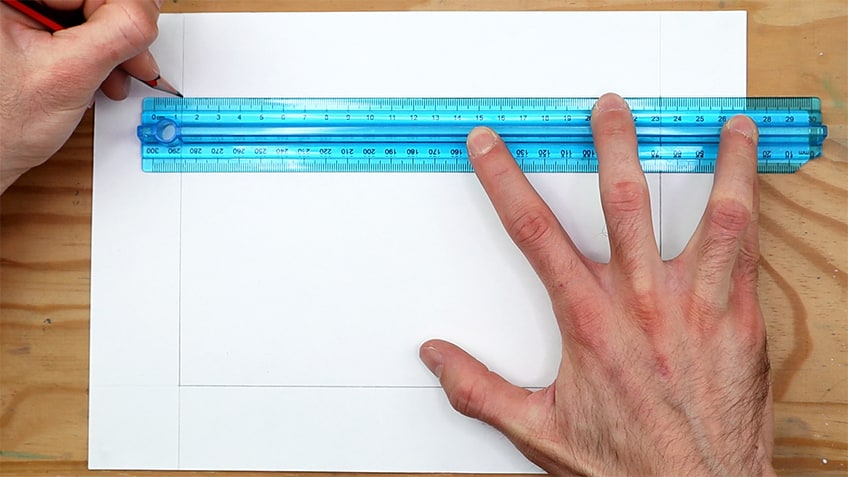
Step 2: Sketching the Grass
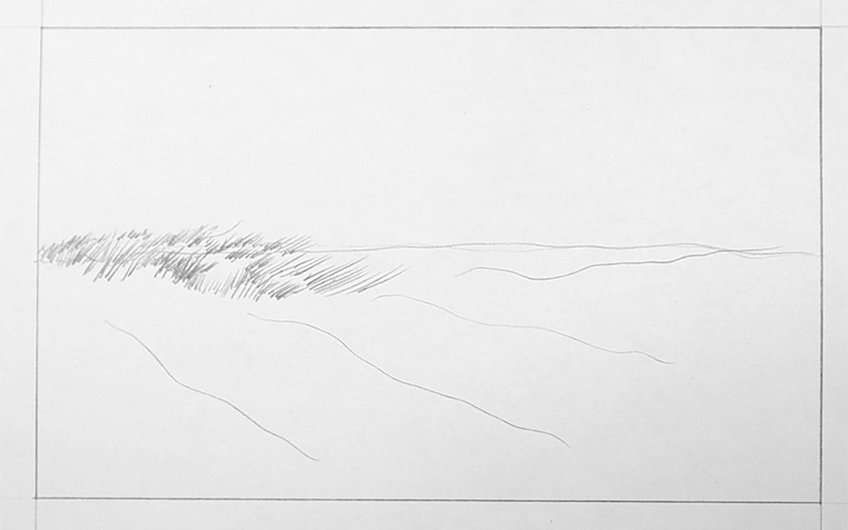
Start by creating a basic horizon line to set the scale off the landscape. We are going to begin by making tiny little strokes of lines with our pencils along the horizon line.
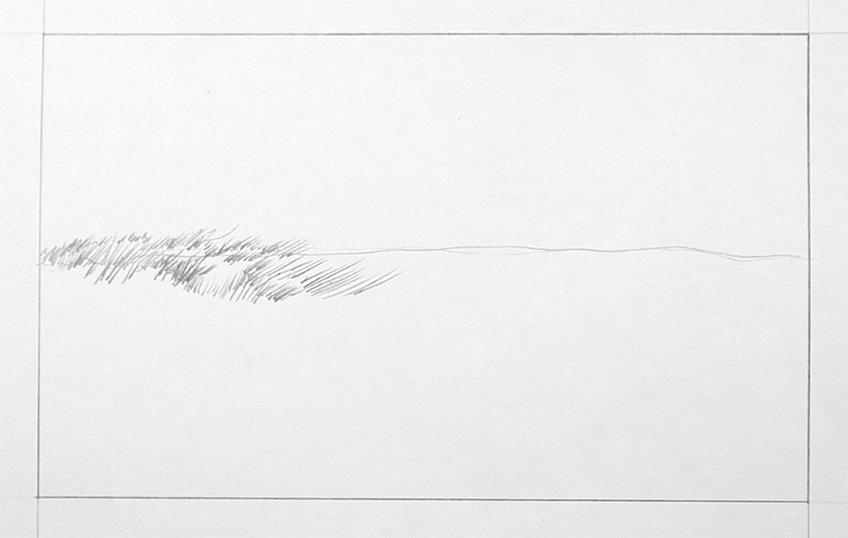
What we will learn is that we will create depth with different-sized lines. We can also draw lines along the bottom of the page to set the flow of the field; these lines will give us a good indication of where we wild raw the grass lines.
Step 3: Creating Depth With Different Line Sizes
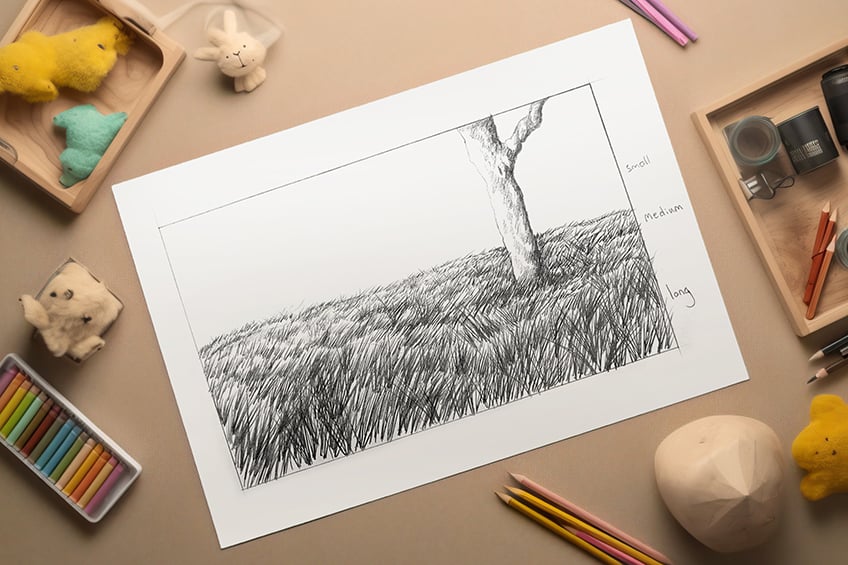
We will be drawing different-sized lines, going from smaller ones in the background to larger ones in the foreground. This is going to create a sense of depth within the field. You can write, “small”, “medium”, and “long” on the side of your page to indicate what size of lines go where.
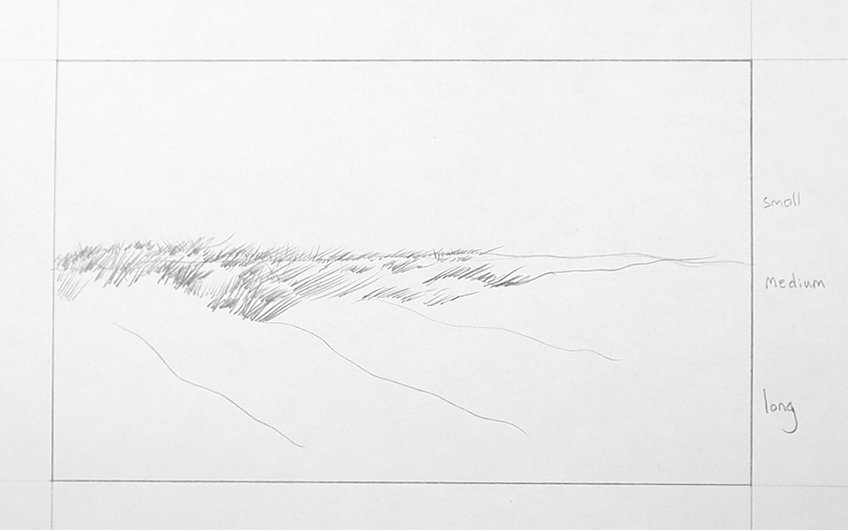
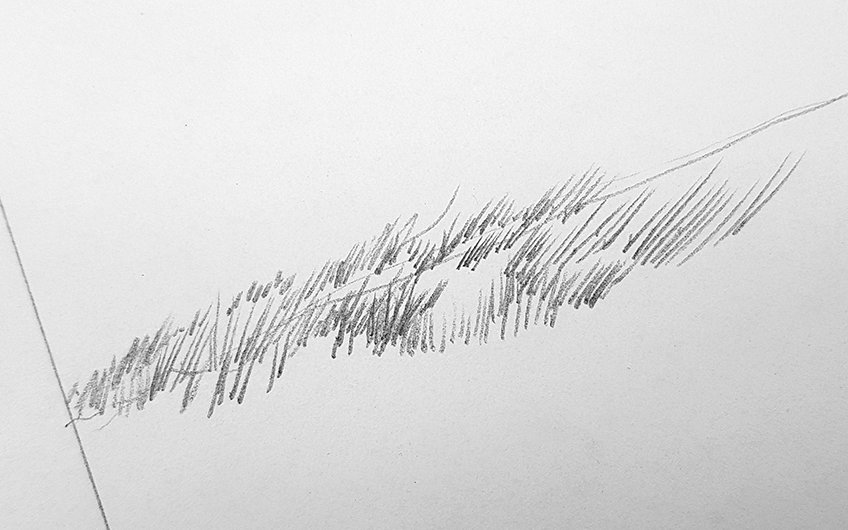
Something important to note is that the line should flow predominantly in a single direction, which can be made with swift little strokes. These strokes will get larger as they move into the foreground.
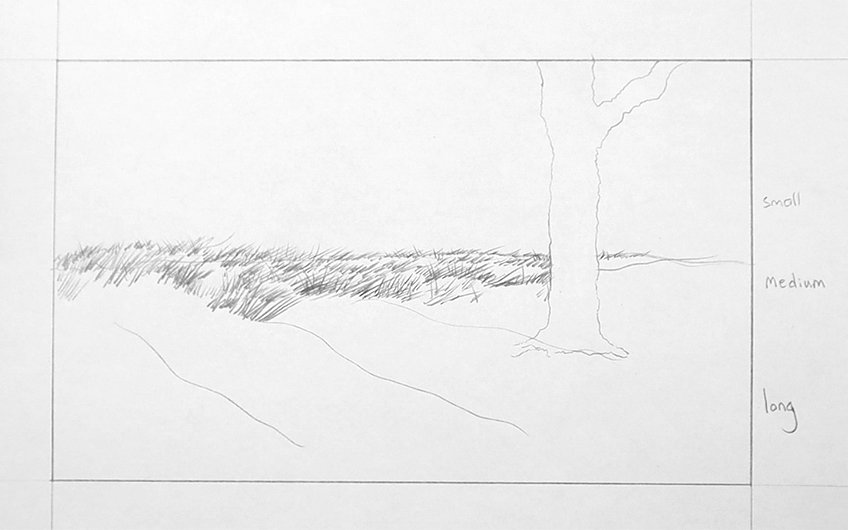
At this point, we will draw a tree within the scene, perhaps in the midground, to help contextualize the scale and setting of the landscape. For now, just draw an outline of the tree- we can add details to it at the end.

Step 4: Slowly Adding in Lines
Now that we have set the scale and depth of the scene, we want to work with our pencils slowly adding in grass lines. We want to work from the background to the foreground, slowly enlarging the lines as we move to the foreground.
As we draw our lines, we can also add in little moments of darker scribbles, which can be a great way to create shadows. We just want to make sure that we keep them the correct size, correlating with the correct area of the landscape.
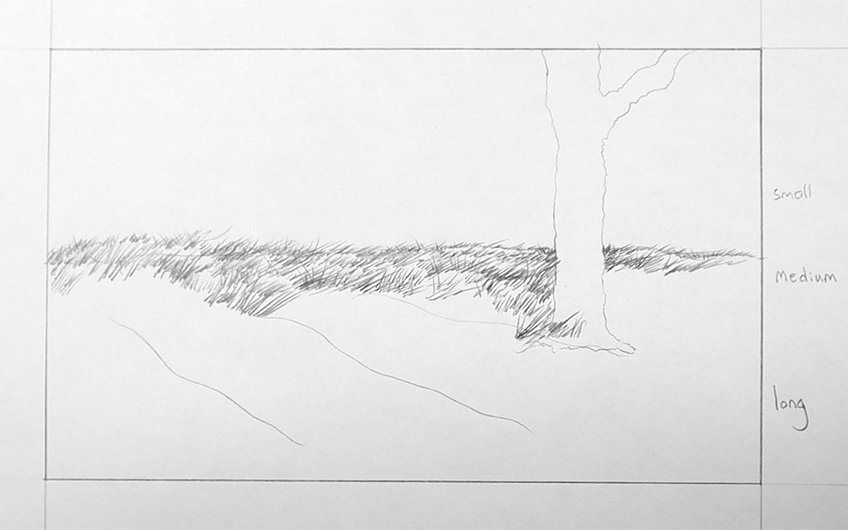
We want to make sure that as we draw lines they predominantly flow in the same direction. We can have little moment of grass areas that go in the opposite direction, but we want to create a good flow.
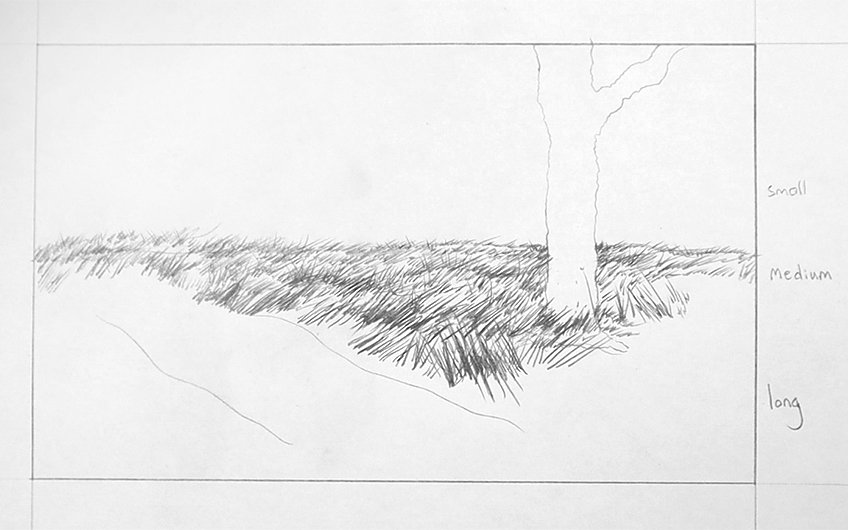
Again, as you work around the tree, you can create these little dark scribble moments. By doing so, they give the effect of shadowing among the grass. Just make sure they are jagged like a grass shape and flow with the other grass lines.
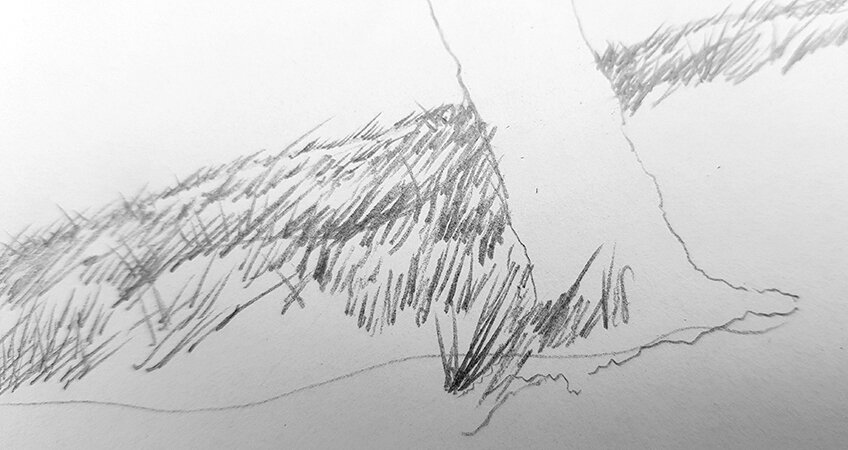
This process also requires patience- think of it as slowly planting rows of grass. So, remember to take a break if you feel fatigued.
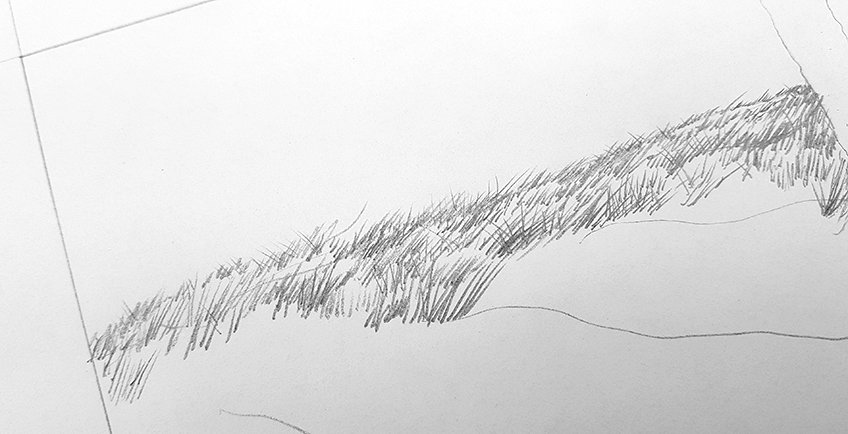
You want to take your time slowly elongating your strokes as you work your way to the foreground. A good suggestion is to keep one sharp pencil and one blunt pencil to create different qualities in the grass.
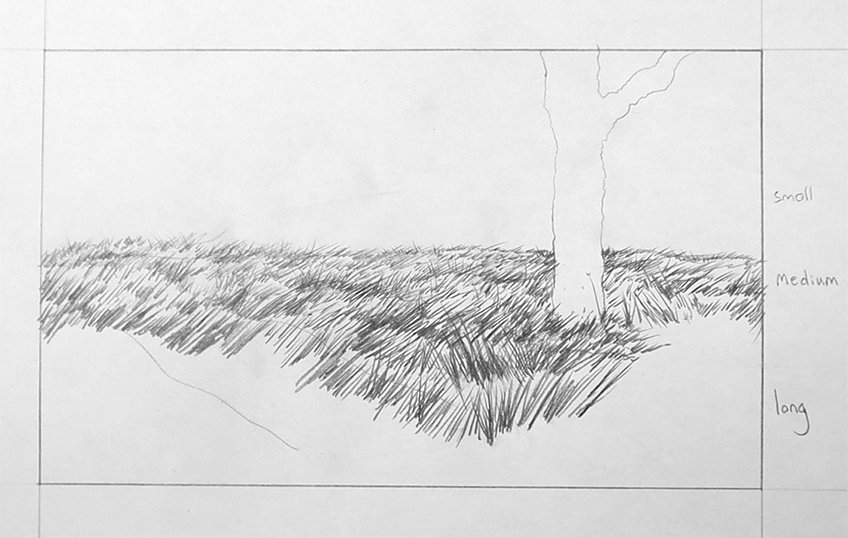
A dark blunt pencil is good for longer strands of grass in the foreground, as it suggests that they are closer in proximity.
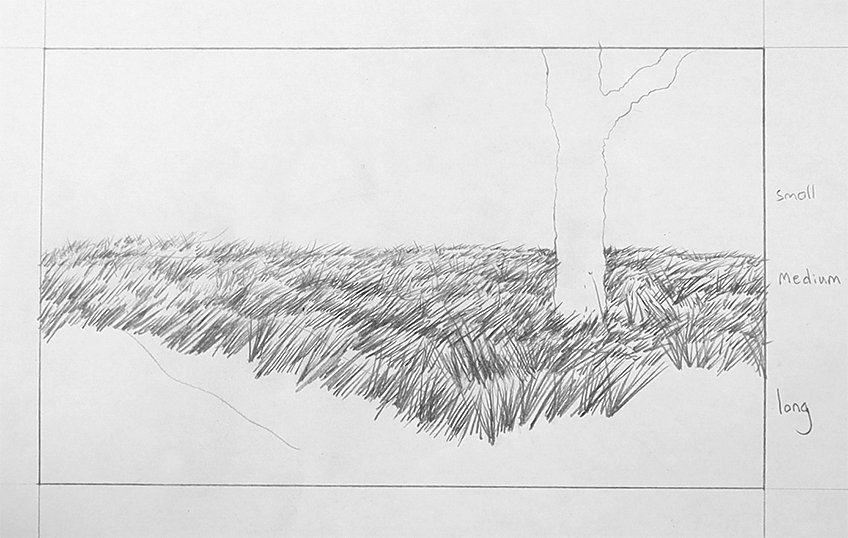
Make sure you take your time slowly making strokes as you go through the different depths within the field. Use the little word key to assist you in the lengths of grass required for different areas of the page.
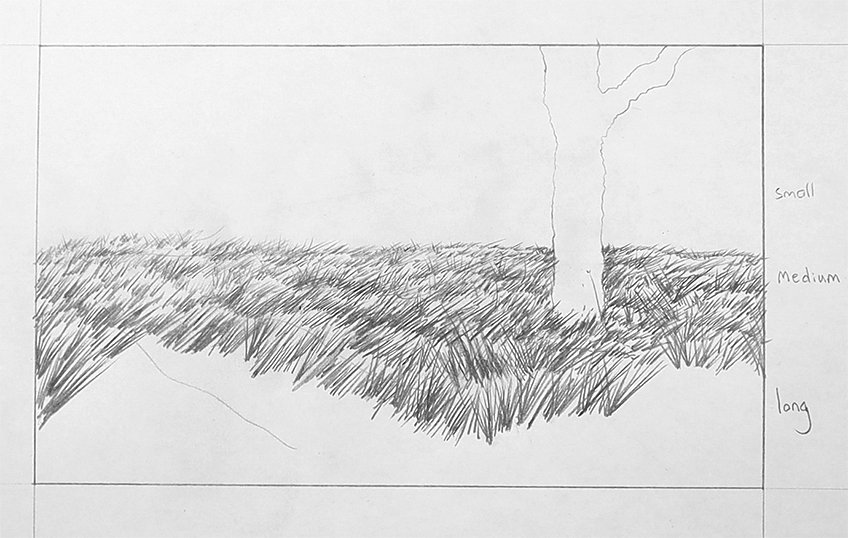
Step 5: Patient Repetition
The thing about drawing grass is that it simply requires patience. You want to make sure you draw each stroke with a nice swift, flowing movement to give that seamless gradient of thick to thin.
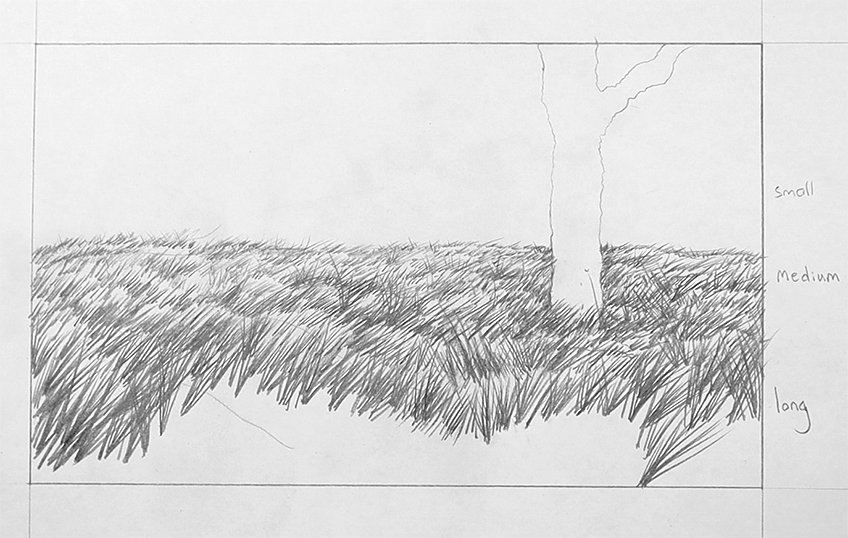
This can get fatiguing and laborious, so remember to take a break. This will allow you to come back with a fresh mindset and engage with the drawing process.
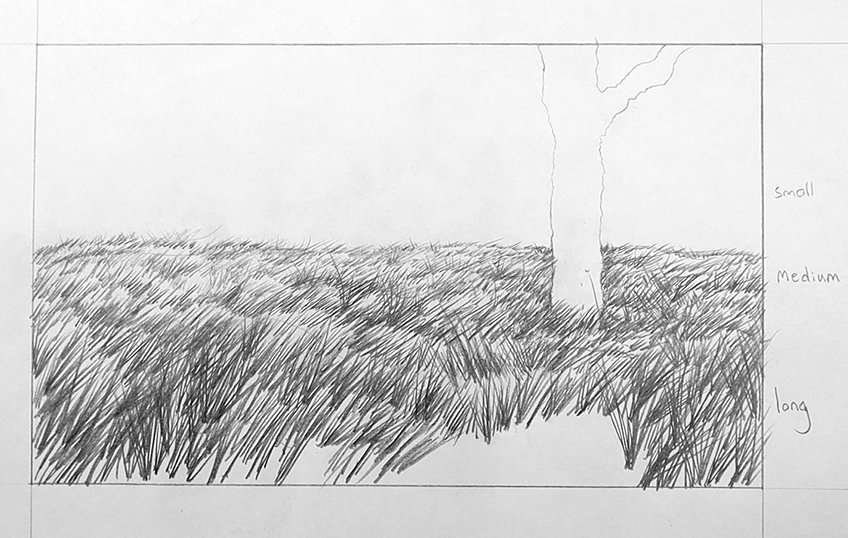
Again, you can have blades of grass flowing in another direction, as long as it makes sense. As you come to the foreground, try to create a seamless transition between the different directions from which the grass flows.
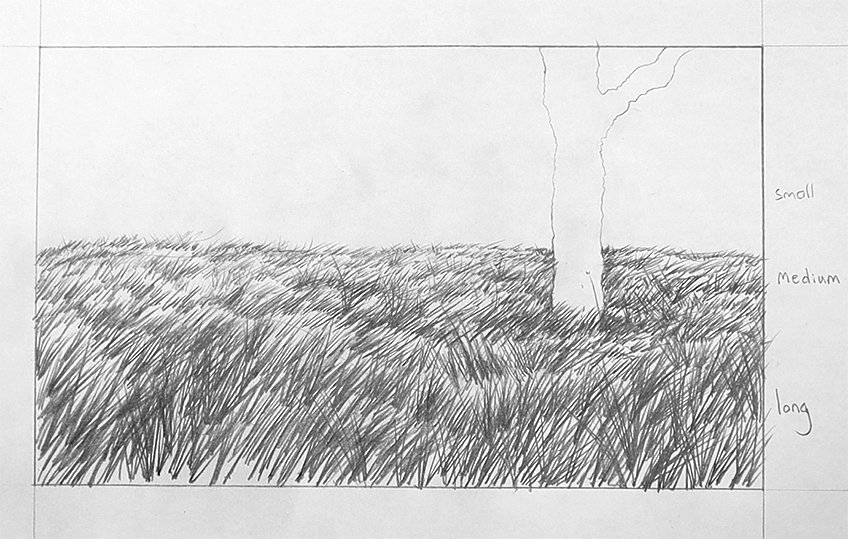
Lastly, make sure you have a good density within the foreground. You don’t want too much to the point where you cannot see the overlapping qualities of the grass, but you also don’t want too little.
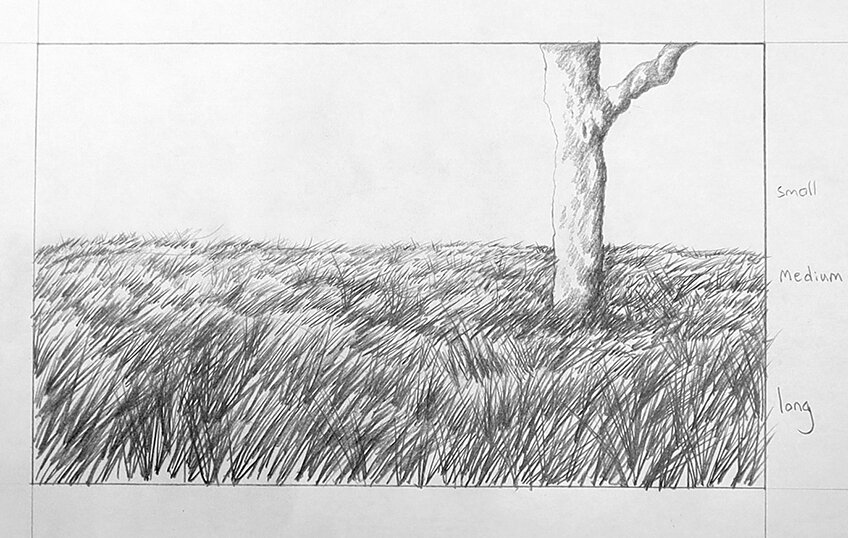
We can continue this process until we have completely gone over the entire scene from background to foreground. From there, we can add detailing to our tree, keeping the details correct in scale according to the grass surrounding it. And that’s how you draw a field of grass! The process is not difficult but does require some patience.
Now that you know how to draw grass, explore how you might be able to incorporate it into your own work.
Tips to Remember
- Try your best to be patient. The process can take longer, and being attentive to each stroke really matters.
- Take a break. The process of a grass drawing can get strenuous, so take a break and come back with a refreshed mind.
- Keep your pencil sharp. Having your pencil sharp is really helpful for keeping the grass strokes clean and crisp.
- Remember the flick of the wrist. Use that flick-of-the-wrist action to create a seamless thick-to-thin ratio within the lines.
- Use these skills and apply them to your own drawings, and see how they can be used for different scenarios.
- Use negative space. Play around with thick and dark strokes to create that sense of negative space within your grass drawing.

When something appears abstract in its mass scale form, such as grass, there is often a lot of freedom that one has with the drawing process. Once we understand it in its basic form and how light and shadow are formed, we can be quite gestural. This allows us to make simplistic gestural marks that imply the form of grass rather than needing to draw perfect blades. This applies to both the large- and small-scale versions of drawing grass and often results in a realistic grass drawing.
Frequently Asked Questions
How Do You Draw Long Weed Grass?
To create the effect of weed grass, you want to work with negative space strategically. On one hand, you want your pencil sharp for clean strokes of lines to represent blades of grass. On the other hand, you want to have your pencil somewhat blunt, whereby you shade strokes sparingly, between blades of grass. By shading around the blades in a few areas of the grass, you end up creating a quality of depth. Another cool trick is to have long and short blades of grass which give a nice disheveled quality in the grass. Lastly, you can also add in long and bent darker strokes that are thicker at the base and thinner at the tip. Weeds often get long and slant over, so having bent weeds is a great trick for creating a weed drawing.
How Do You Draw a Field of Grass?
The first thing you want to do is establish the horizon line, by doing so you set the field of depth. From the horizon line to the bottom of the page, you want to be mindful of the size of strokes you make for your grass drawing. You can make a little key along the side of your page, with labels for small, medium, and long, thus helping you navigate what length of stroke should be placed where on the page. By having a key along the side of your page, you allow yourself to set up the background, midground, and foreground for your grass drawing. From there, you want to patiently work from top to bottom, making short strokes, then medium strokes until you get to the foreground where you will draw long strokes of grass.
Matthew Matthysen is an educated multidisciplinary artist and illustrator. He successfully completed his art degree at the University of Witwatersrand in South Africa, majoring in art history and contemporary drawing. The focus of his thesis was to explore the philosophical implications of the macro and micro-universe on the human experience. Matthew uses diverse media, such as written and hands-on components, to explore various approaches that are on the border between philosophy and science.
Matthew organized various exhibitions before and during his years as a student and is still passionate about doing so today. He currently works as a freelance artist and writer in various fields. He also has a permanent position at a renowned online gallery (ArtGazette) where he produces various works on commission. As a freelance artist, he creates several series and successfully sells them to galleries and collectors. He loves to use his work and skills in various fields of interest.
Matthew has been creating drawing and painting tutorials since the relaunch in 2020. Through his involvement with artincontext.org, he has been able to deepen his knowledge of various painting mediums. For example, watercolor techniques, calligraphy and lately digital drawing, which is becoming more and more popular.
Learn more about Matthew Matthysen and the Art in Context Team.
Cite this Article
Matthew, Matthysen, “How to Draw Grass – A Step-by-Step Drawing Guide.” Art in Context. July 31, 2023. URL: https://artincontext.org/how-to-draw-grass/
Matthysen, M. (2023, 31 July). How to Draw Grass – A Step-by-Step Drawing Guide. Art in Context. https://artincontext.org/how-to-draw-grass/
Matthysen, Matthew. “How to Draw Grass – A Step-by-Step Drawing Guide.” Art in Context, July 31, 2023. https://artincontext.org/how-to-draw-grass/.


