How to Draw a Car – An Exhilarating Car Drawing
Cars have revolutionized the way we live, work, and play. They provide unparalleled freedom and convenience, allowing us to travel long distances quickly and comfortably. From the sleek curves of a sports car to the rugged frame of an SUV, cars come in all shapes and sizes, each with its unique personality. Whether you’re commuting to work, taking a road trip, or simply enjoying a leisurely drive, cars offer an experience that is unmatched by any other mode of transportation. In this step-by-step drawing tutorial, we show you how to draw your own car in just a few steps.
An Easy Step-by-Step Drawing of a Car
Drawing cars can be a fun and exciting challenge that will not only help you improve your artistic skills, but also allow you to create detailed and realistic illustrations. Throughout this tutorial, you’ll learn about perspective, shading, and proportions, all of which are essential skills for any aspiring artist. By the end of this tutorial, you’ll have the skills necessary to draw a car that looks like it’s ready to hit the road! You only need a pencil, pen, eraser and some colors.
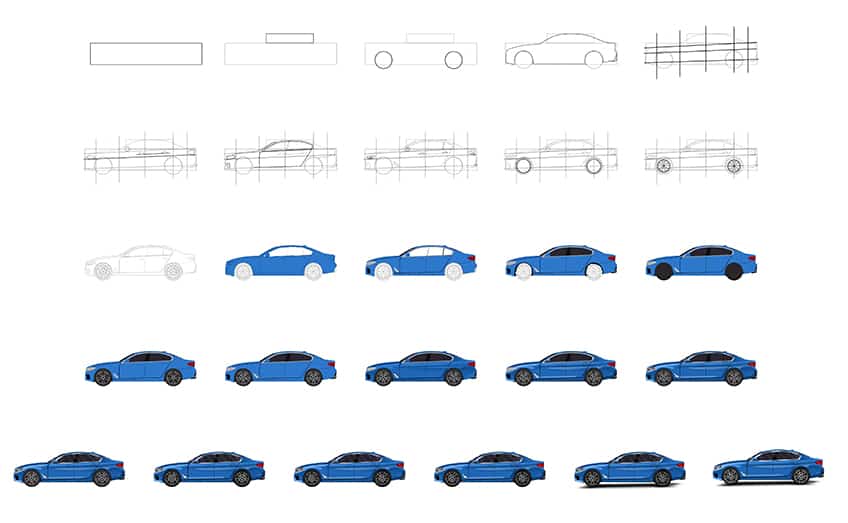
Follow along with the steps depicted in the below car drawing collage, and you’ll gain the skills necessary to draw a realistic car!
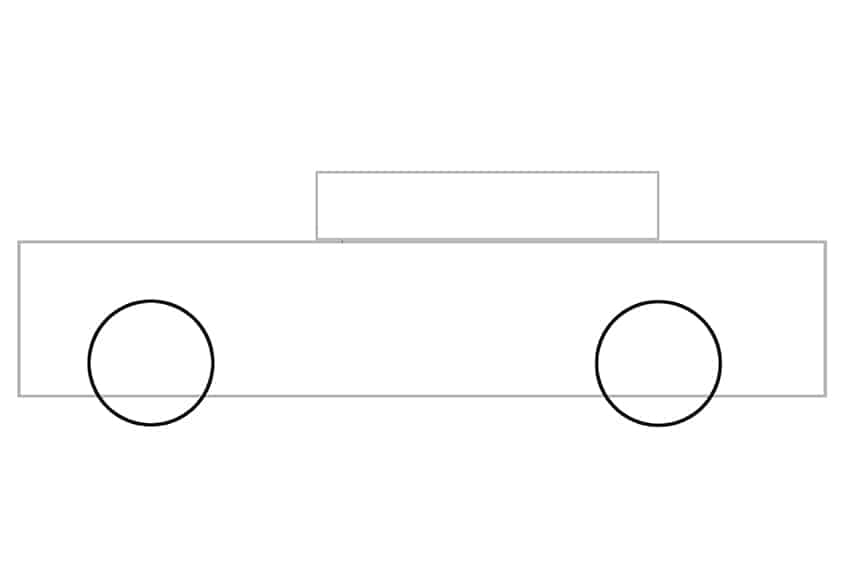
Step 1: Draw the Plam of Your Car Outline
Begin our tutorial on how to draw a car, by drawing a horizontal laying rectangle that will represent the main shape of your car drawing.

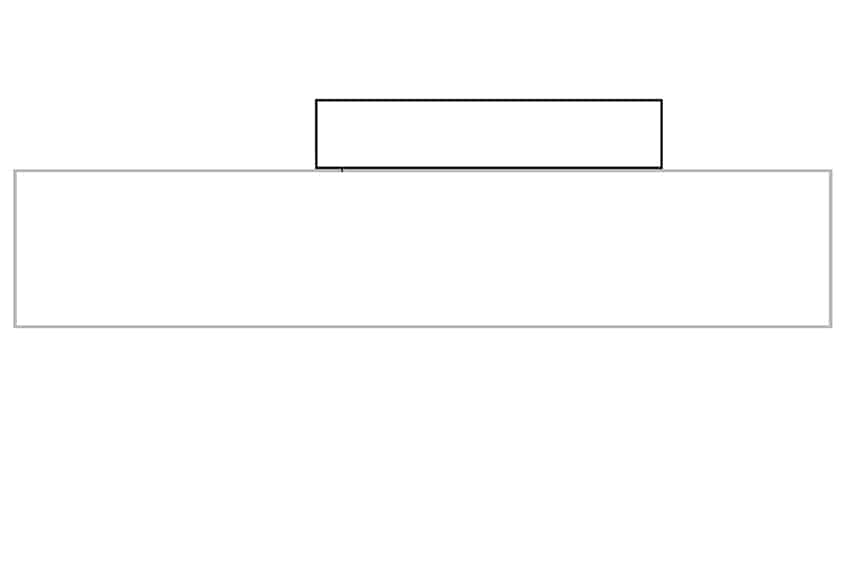
Step 2: Draw the Cabin
The cabin is the area where the passengers and driver sit. Draw the cabin represented by a small rectangle shape to the left of the main body.
Step 3: Add the Wheels to Your Car Outline
Draw a large circle at each end of the rectangular shape, overlapping the main body, to represent the wheels on your car drawing.
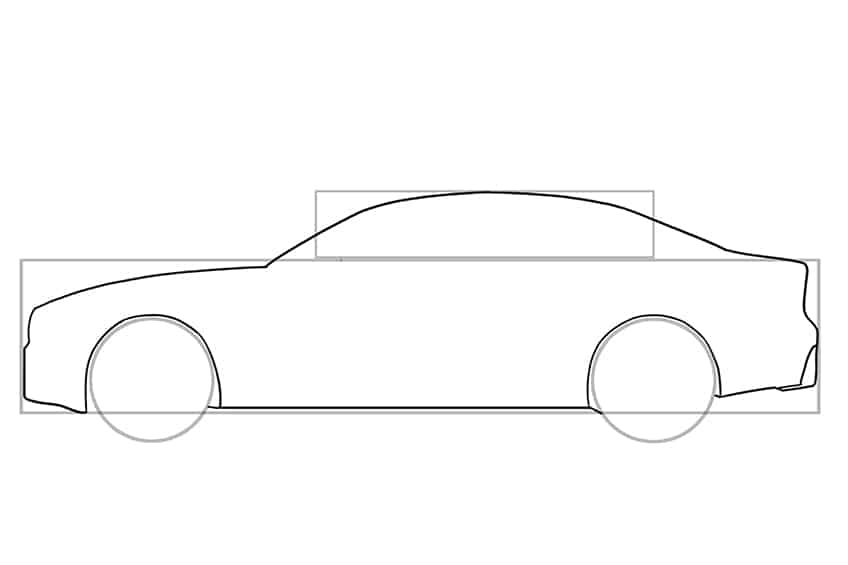
Step 4: Outline the Main Body
Use the previously drawn construction lines to aid you in outlining a more realistic car shape. The type of car we are drawing has a curvy shape to it, so apply fine curved lines and less rigid-looking lines to the main body and wheel arches.
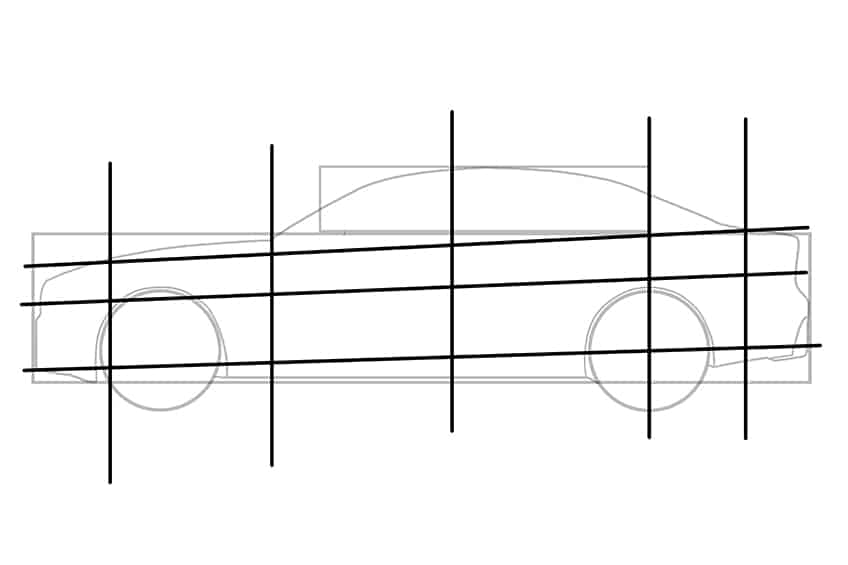
Step 5: Add Guidelines to Your Car Sketch
In this step, you will be adding guidelines to your car sketch. Begin by using a ruler and draw fine separation lines that divide the car body into sections.
Note! We will use these guidelines to add details such as the car door handles, front and rear lights, and door panels.
The main horizontal guidelines should align with the angle of the car from the rear to the front. The vertical lines should separate the car into six portions.
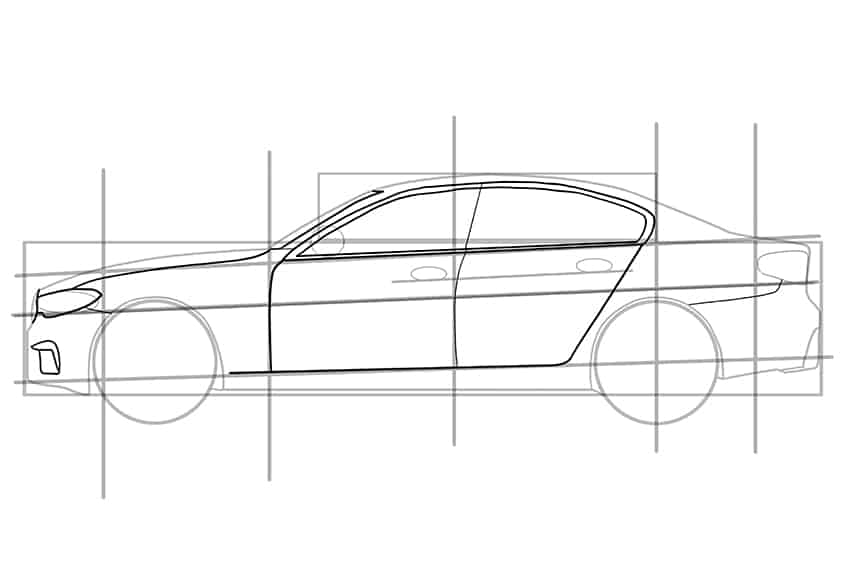
Step 6: Draw the Additional Inner Detail
Begin by drawing a horizontal line between the two top horizontal guidelines added in the previous step. On top of this line, draw a single oval shape, within the third and fourth frame, to represent the door handle on each door side. Continue by drawing a small circle, within the top third portion, to represent the mirror.
At the front of the car on the center horizontal guideline, draw a narrow oval shape to represent the front headlight. Repeat the step on the rear of the car by drawing the rear tail light.

Step 7: Outline the Inner Body of Your Car Drawing
Use the previously drawn construction lines to aid you in outlining a symmetrical and realistic-looking inner body for your car drawing. Begin by outlining the front and rear doors, the door panels, the body panels, the front windscreen, and the headlights.
Note! The rear door panel should not go past the fourth vertical guideline added in step five.
Step 8: Add the Final Details to Your Drawing of a Car
In the headlight, draw three layers of half circles, spaced apart, to create a realistic-looking headlight design. Continue by outlining a more realistic shaped mirror, and a door handle. Draw the rear door window panel represented by two parallel lines.
On top of the roof, draw a shark-like fin that doesn’t overlap the cabin. Detail the rear tail light using a series of free-hand curved lines. Complete the step by drawing the final side body air vent beside the front wheel, and the rear visible exhaust.
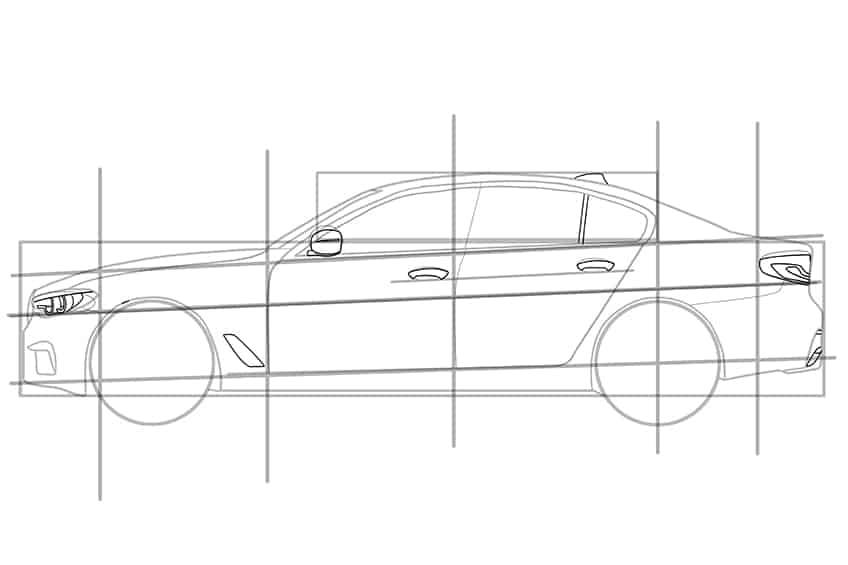
Step 9: Detail the Wheels
Draw a smaller circle within each wheel, between the space of the inner circle and the outer outline of each wheel, and draw short lines surrounding the circle to represent the wheel thread.

Step 10: Add the Rims to the Wheels
Draw two more circles within the wheel. Follow this by drawing a thick center circle, and surrounding this draw several sharp ‘U’ shapes to create the rim design. The rim design should overlap the inner circle of the rim. Complete the step by drawing five additional small circles within the center circular area of each rim to represent the lug nuts.
Once completed you may erase any visible overlapping construction and guidelines.
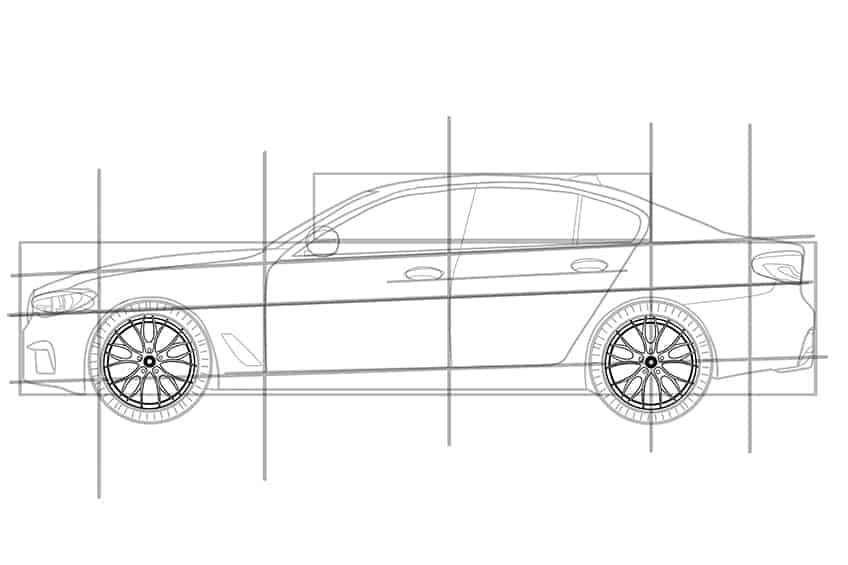
Step 11: Draw the Brake Discs
In this step, you will draw the partially visible brake pad and disc behind the rim. Within the brake disc draw several small circle patterns. Draw the attached brake pad onto the brake disc to the right end of the brake disc, this should look like a half-moon shape. Repeat the step onto the second wheel. That’s it, there you have your outline of the car drawing.
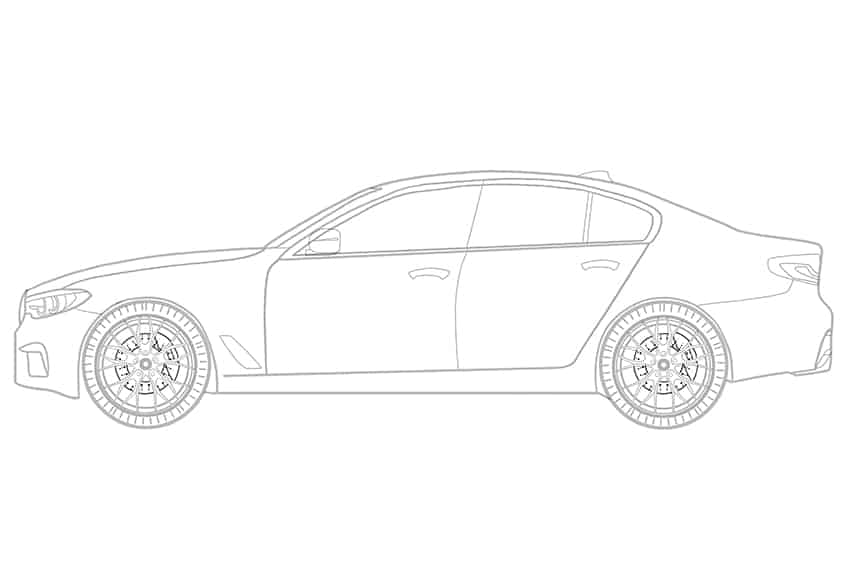
Step 12: Add the First Color Coat
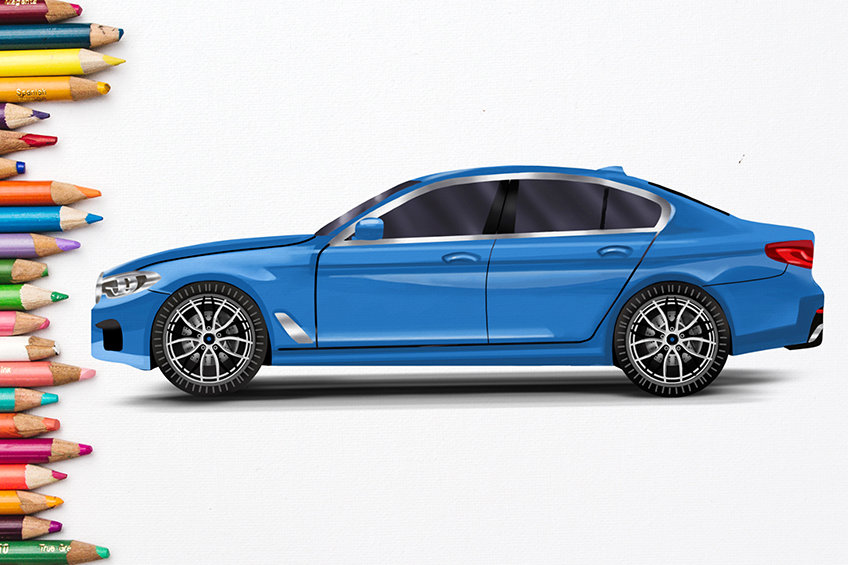
Select a fine, sharp brush and blue paint, and evenly coat the main body of your car sketch.

Step 13: Color the Accents
Use the same brush as previously and switch to black paint, and trace the rear window panel, edges of the doors, the front bonnet, the front, and rear windscreens, and the front air vent. Continue using gray paint to fill the trim around the window frames, the front headlight, the side body air vent, and the rear exhaust.
Complete the step using red paint to color the rear tail light and bottom marker.

Step 14: Shade the Windows of Your Car Sketch
Select a thin brush and a dark shade of purple paint to evenly coat the windows. Switch to black paint, and add the window pillar that will separate the front and rear windows. Complete the step by filling in the wheel arches and rear bumper.
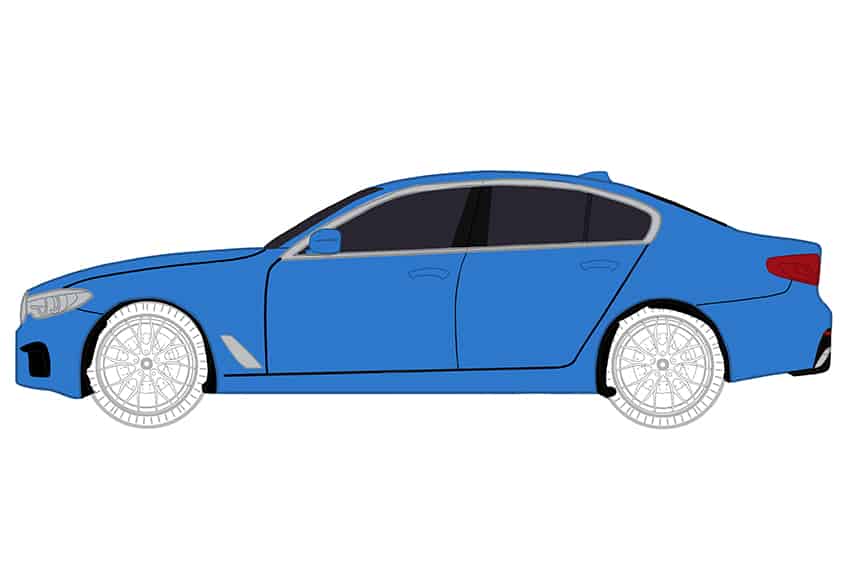
Step 15: Color the Wheels
Begin by painting both wheels using dark gray paint and a fine, sharp brush. Switch to a shade of blue paint, and begin coloring the center hub cap of each wheel.
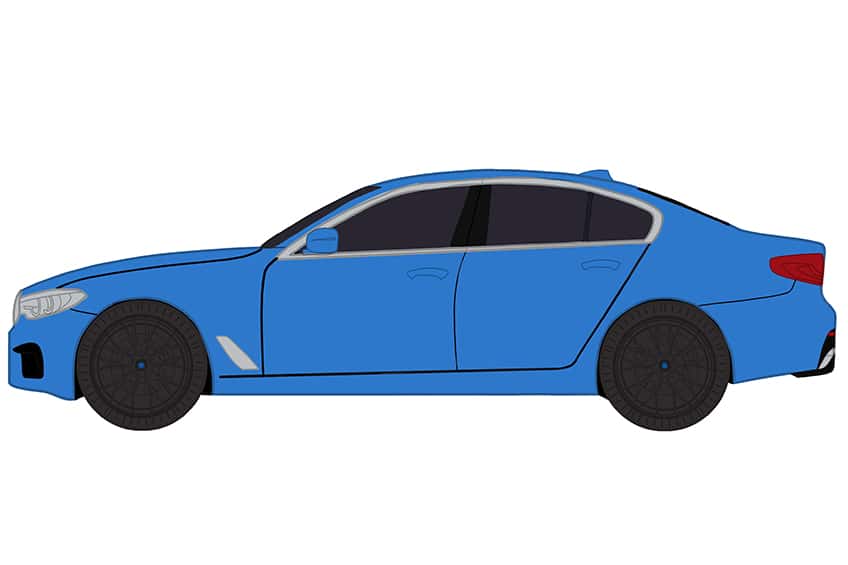
Step 16: Color the Rim Design on Your Car Drawing
Use the same brush as previously and switch to white paint, and trace the two inner circles within the rim. Follow this by using black paint to trace the first layer of the rim design. Trace each lug nut with white paint, and trace the tire thread lines with gray paint.
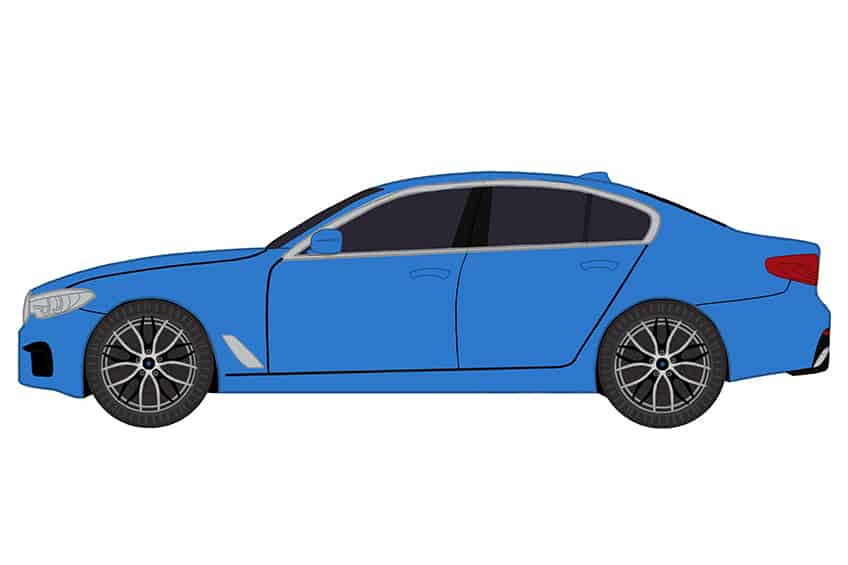
Step 17: Add Color to the Brake Discs
With a thin, sharp brush, evenly coat both brake discs with black paint. Switch to a dark gray paint and fill each hole pattern on each brake disc.
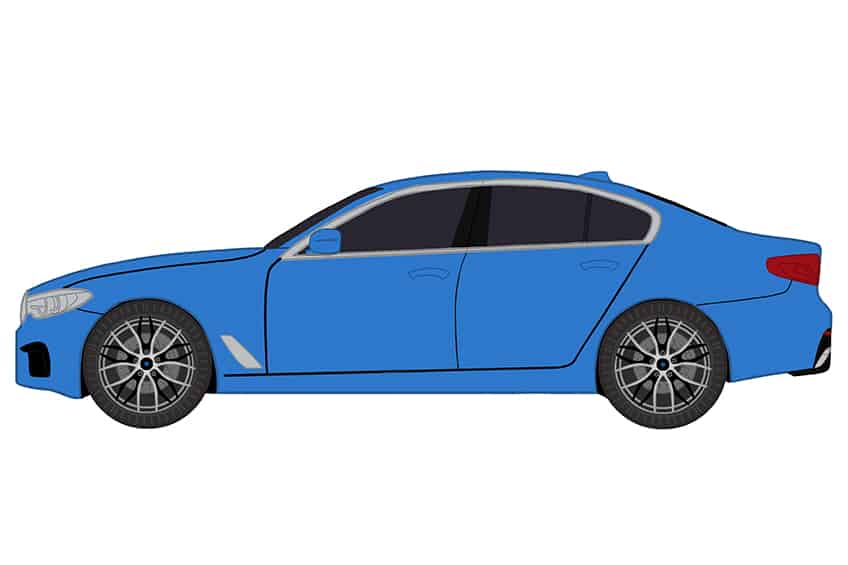
Step 18: Shade the Body of Your Car Drawing
Use the same brush as previously and a darker shade of blue paint, and apply fine but subtle shaded lines within the main body of the car. This will also add structure to your car drawing.
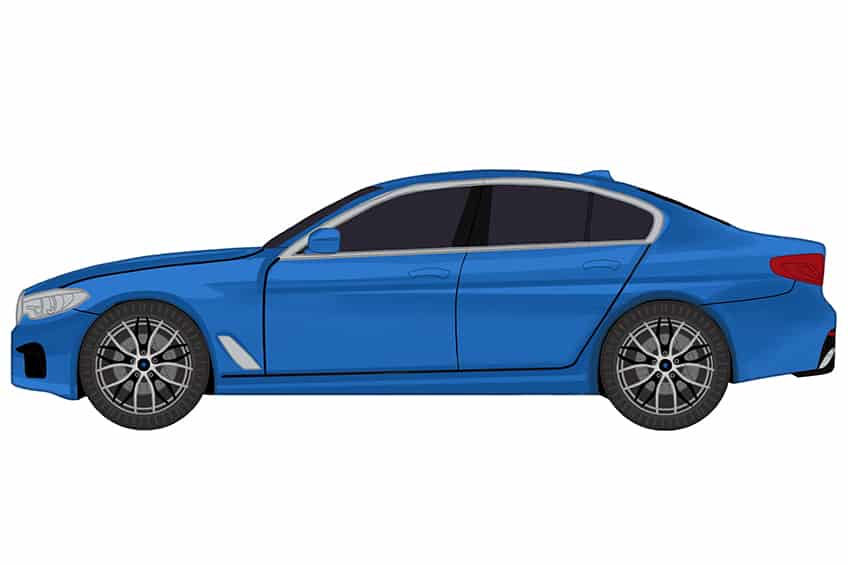
Step 19: Highlight Your Car Sketch
With a small, soft brush and white paint, add soft and minimal highlight touches along the body of your car. Use a blending brush to soften and spread these highlights. Switch to a thin brush and add thin highlight lines along the edges and body panels of your car drawing.
Complete the step using a fine, sharp brush and a dark shade of blue paint, and sharply paint a structural line on the rear bumper.
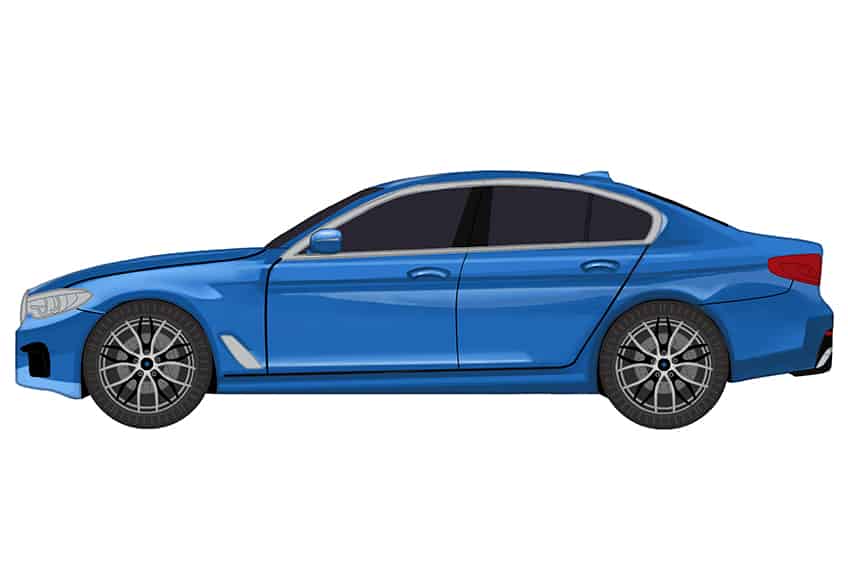
Step 20: Highlight the Details
Select a soft brush and dark gray paint, and add several spots along the window frame trim. Repeat using white paint to enhance the highlight, this will help us achieve a realistic chrome look to your car. Repeat on the side body air vent, front headlight, and rear exhaust. Using white paint, add several soft highlights onto the front windshield.
Switch to a thin brush and dark gray paint, and fill the top half of the front bumper air vent. Using a brighter shade of red paint, fill the inner design of the rear tail light. Complete the step using black paint to add soft shading around the tail light design.
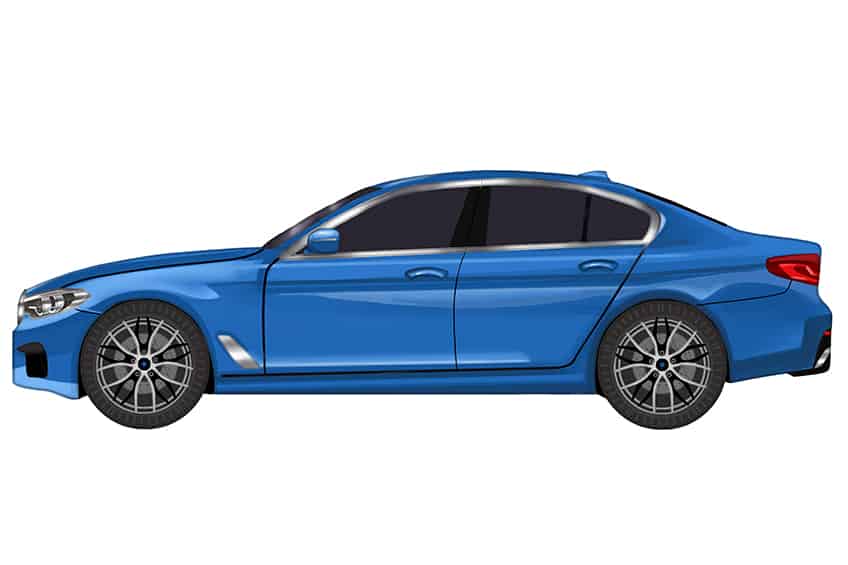
Step 21: Highlight the Windows
Use a soft brush and white paint to softly apply diagonal brush strokes along all of the windows creating a realistic reflective highlight.

Step 22: Shade the Wheels
Use the same brush as previously and switch to black paint, and add shading within each tire.
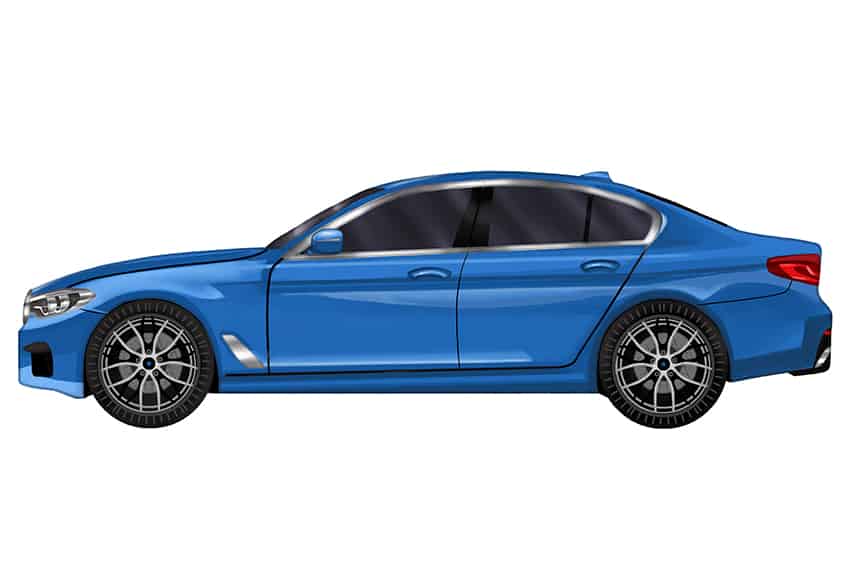
Step 23: Add Shading to the Brake Discs
In this step, you will select a small, soft brush and black paint, and add shading around each brake disc. Switch to a blending brush to soften and spread the shading inwards. The first color coat should still be somewhat visible.
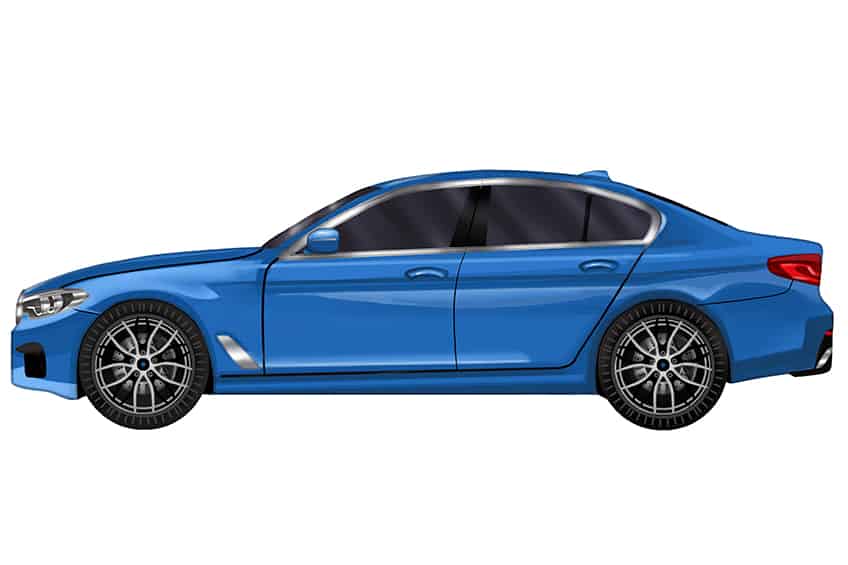
Step 24: Structure the Rims
Within each rim design, use a fine, sharp brush and dark gray paint, and add fine structure lines within the design. Repeat this step using white paint.
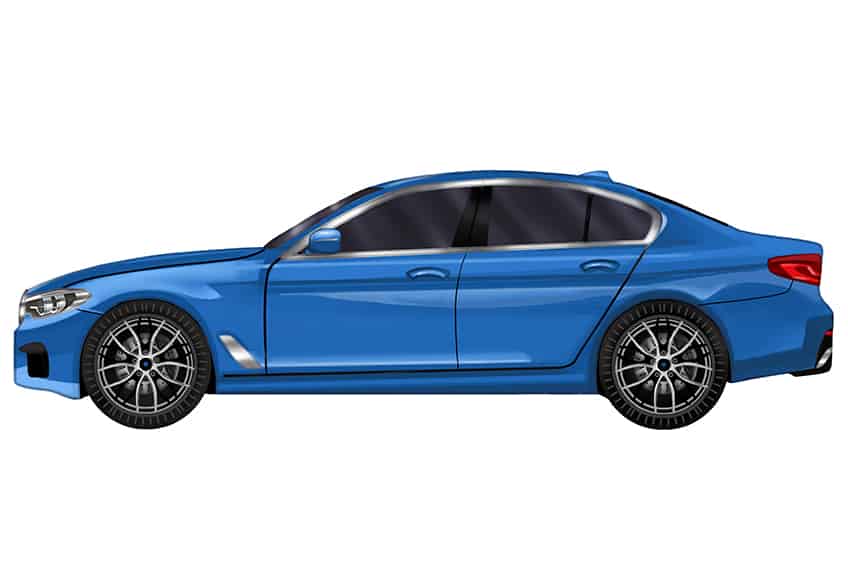
Step 25: Add a Ground Shadow
You are one step closer to finishing your drawing of a car! Select a fine brush and black paint, and add shading below the car. Use a blending brush to spread and soften the shading.

Step 26: Finalize Your Drawing of a Car
You have reached the last step of our tutorial on how to draw a car! To complete your car drawing, begin by erasing any visible harsh outlines. Finish this step with a fine brush and the corresponding colors to trace your car outline and create a final seamless result!
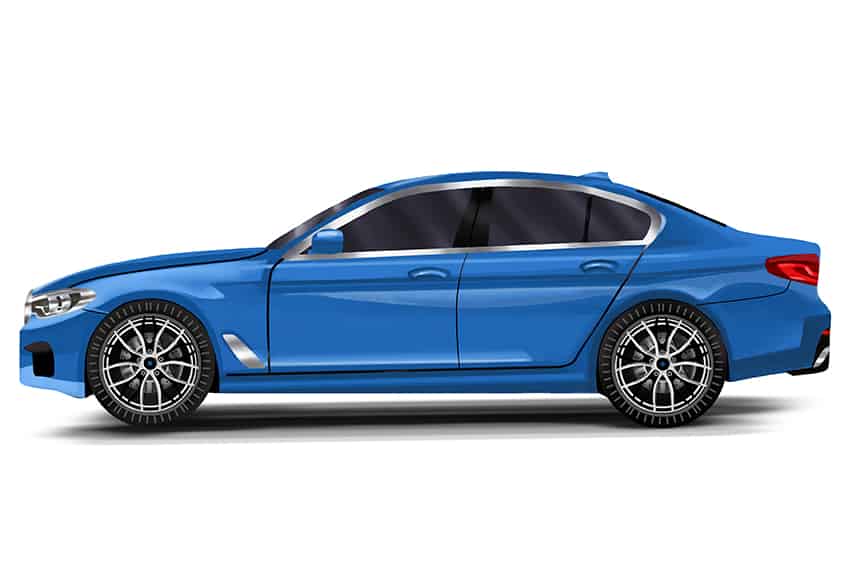
Congratulations on completing our easy step-by-step drawing of a car! You’ve done an amazing job and should feel proud of your accomplishment. We hope that this tutorial helped teach you new drawing skills and techniques that you can use in your future projects. Remember, drawing is all about practice and experimentation, so don’t be afraid to try new things and push your boundaries.
Frequently Asked Questions
How to Draw a Car Realistically?
To draw a car realistically, it’s important to start with the basic shape and then add details such as the wheels, windows, and doors. Begin by sketching out the car’s basic shape and add details such as the car’s body lines, contours, and shading. Pay attention to the proportions of the car, making sure that each part is accurately sized and positioned. Practice your shading techniques to create a sense of depth and dimensionality in your drawing. With practice and patience, you’ll be able to draw a car realistically and impressively!
Is It Easy to Draw a Car?
Drawing a car can be challenging for beginners, as it requires a good understanding of proportion, perspective, and shading. However, with practice and patience, anyone can learn how to draw a car! Starting with simple shapes and gradually adding details can help make the process more manageable. Additionally, using reference images and studying real-life cars can help with accuracy and realism. While it may not be easy to draw a car at first, with practice and dedication, it can become a fun and rewarding skill to master!
Matthew Matthysen is an educated multidisciplinary artist and illustrator. He successfully completed his art degree at the University of Witwatersrand in South Africa, majoring in art history and contemporary drawing. The focus of his thesis was to explore the philosophical implications of the macro and micro-universe on the human experience. Matthew uses diverse media, such as written and hands-on components, to explore various approaches that are on the border between philosophy and science.
Matthew organized various exhibitions before and during his years as a student and is still passionate about doing so today. He currently works as a freelance artist and writer in various fields. He also has a permanent position at a renowned online gallery (ArtGazette) where he produces various works on commission. As a freelance artist, he creates several series and successfully sells them to galleries and collectors. He loves to use his work and skills in various fields of interest.
Matthew has been creating drawing and painting tutorials since the relaunch in 2020. Through his involvement with artincontext.org, he has been able to deepen his knowledge of various painting mediums. For example, watercolor techniques, calligraphy and lately digital drawing, which is becoming more and more popular.
Learn more about Matthew Matthysen and the Art in Context Team.


