How to Draw an Anchor – Learning to Draw a Nautical Symbol
Amidst the tempestuous waves of uncertainty, the anchor stands unwavering, a steadfast guardian of ships and dreams. Its iron embrace reaches deep into the abyss, grounding vessels in a dance with the mercurial sea. Each link in its chain tells tales of daring voyages, of battles against fierce gales and hidden perils. As the sun paints the horizon in hues of gold, the anchor’s quiet strength emerges as a beacon of hope, a symbol that even in the wildest storms, there exists a force that holds us steady. So get ready and grab your drawing kit, as we take you through an exciting step-by-step tutorial on how to draw an anchor!
Table of Contents
- 1 Learn How to Draw an Anchor Step-by-Step
- 1.1 Step 1: Draw the Stock on Your Anchor Drawing
- 1.2 Step 2: Add the Ring and Shank
- 1.3 Step 3: Outline the Ring in Your Anchor Sketch
- 1.4 Step 4: Begin to Outline the Stock
- 1.5 Step 5: Outline the Anchor Shank
- 1.6 Step 6: Draw the Anchor Arms
- 1.7 Step 7: Add the Rope to Your Anchor Sketch
- 1.8 Step 8: Begin to Add Detail to the Rope
- 1.9 Step 9: Apply the First Color Coat
- 1.10 Step 10: Color the Rope in Your Anchor Sketch
- 1.11 Step 11: Begin to Shade the Anchor
- 1.12 Step 12: Highlight the Anchor
- 1.13 Step 13: Shade and Highlight the Rope
- 1.14 Step 14: Finalize Your Anchor Drawing
- 2 Frequently Asked Questions
Learn How to Draw an Anchor Step-by-Step
Embarking on the journey to learn how to draw an anchor is like setting sail on an artistic adventure filled with discovery and creativity. Just as an anchor steadies a ship, your determination will be your anchor, guiding you through the waves of uncertainty. Remember, every stroke of your pencil or brush is a step towards mastering this symbol of strength and stability. Embrace each line and curve as they come together to form the embodiment of maritime history. Just like a sailor gaining confidence at sea, you’ll gain confidence with every attempt, finding your own unique style and perspective along the way. So, set your imagination adrift, let your creativity set sail, and enjoy the art of bringing an anchor to life on your canvas!
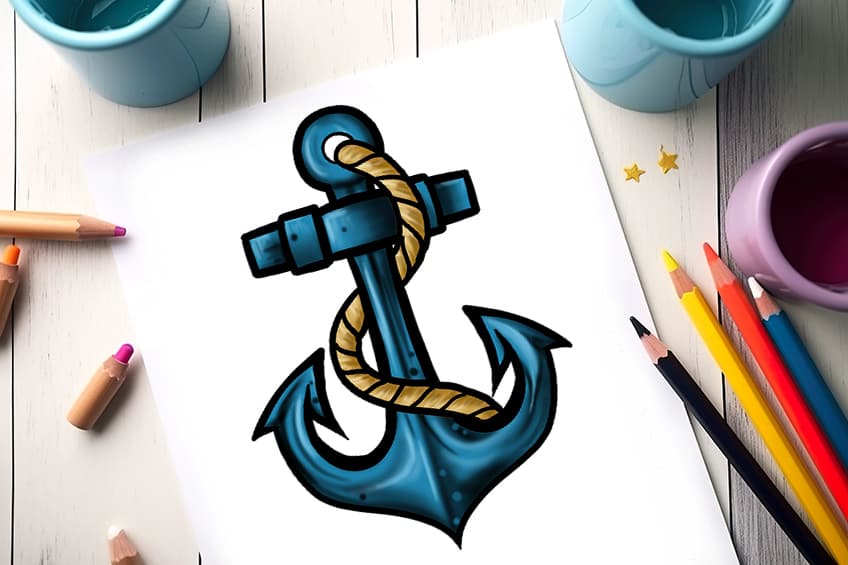
Below is a detailed illustration of the steps you will follow to achieve your very own anchor drawing!
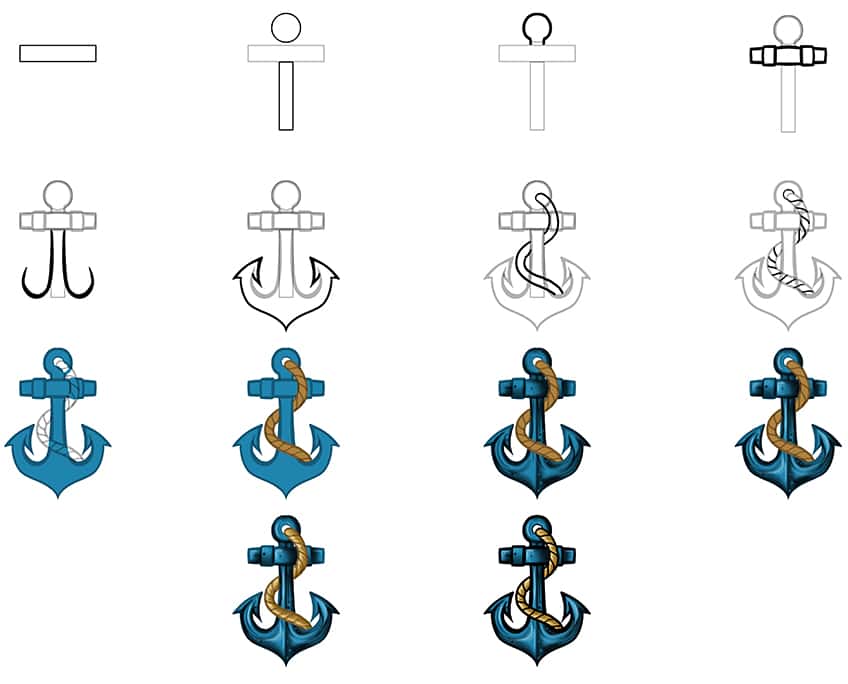
Step 1: Draw the Stock on Your Anchor Drawing
Start by identifying the midpoint of your drawing space. From here, sketch the anchor’s shank, which is depicted as a horizontally oriented rectangle.

Step 2: Add the Ring and Shank
Above the previously drawn stock, draw a circle to represent the ring of the anchor. Beneath the stock, draw the shank of the anchor, also represented by a rectangle, however, this time it is laying vertically.

Step 3: Outline the Ring in Your Anchor Sketch
Utilize the construction lines you drew earlier to guide you as you trace the outline of the anchor’s ring and connect it to the shank.
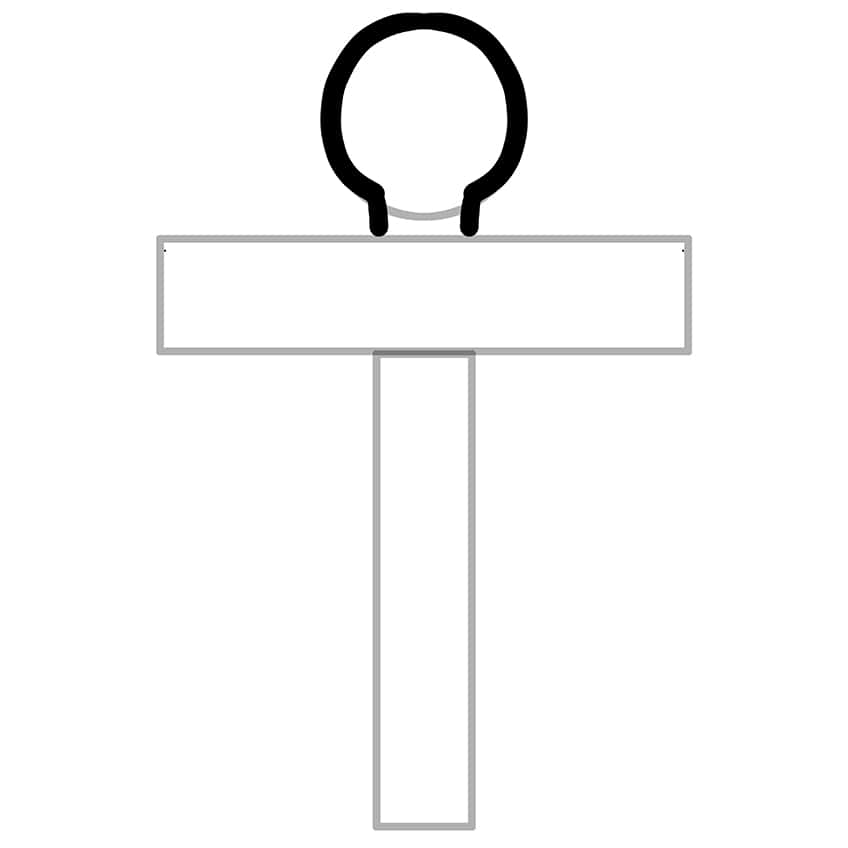
Step 4: Begin to Outline the Stock
Continue to outline the stock of the anchor by adding two additional weight blocks to your anchor sketch.

Step 5: Outline the Anchor Shank
Use the construction lines you sketched earlier to assist you in defining the curved shape of the anchor’s shank.

Step 6: Draw the Anchor Arms
Complete your anchor drawing by drawing both arms and end pieces also known as the palms.

Step 7: Add the Rope to Your Anchor Sketch
Begin this step by drawing the rope within the top ring and looping it around the shank. Finish off the rope by drawing it behind the anchor arm. After finishing, eliminate any remaining visible construction lines.

Step 8: Begin to Add Detail to the Rope
Draw the split ends on the rope split leading from the top to the bottom of the rope.
Note! The split ends should curve with the rope’s curvature.

Step 9: Apply the First Color Coat
Utilize a fine, sharp brush and navy-blue paint to achieve an even coating across the anchor.

Step 10: Color the Rope in Your Anchor Sketch
Continue using the same brush and a shade of khaki paint, and evenly coat the rope on your anchor drawing.

Step 11: Begin to Shade the Anchor
Select a small, soft brush along with black paint to gently shade the anchor’s edges. By employing this technique, you are defining the anchor’s shape. To enhance the anchor’s structure further, repeat the process using a fine, sharp brush and black paint to incorporate more intricate detailing lines.

Step 12: Highlight the Anchor
Begin with a small, soft brush and white paint to delicately accentuate the edges of the anchor. Follow up by employing a fine, sharp brush to add even more refined highlights for a polished effect.
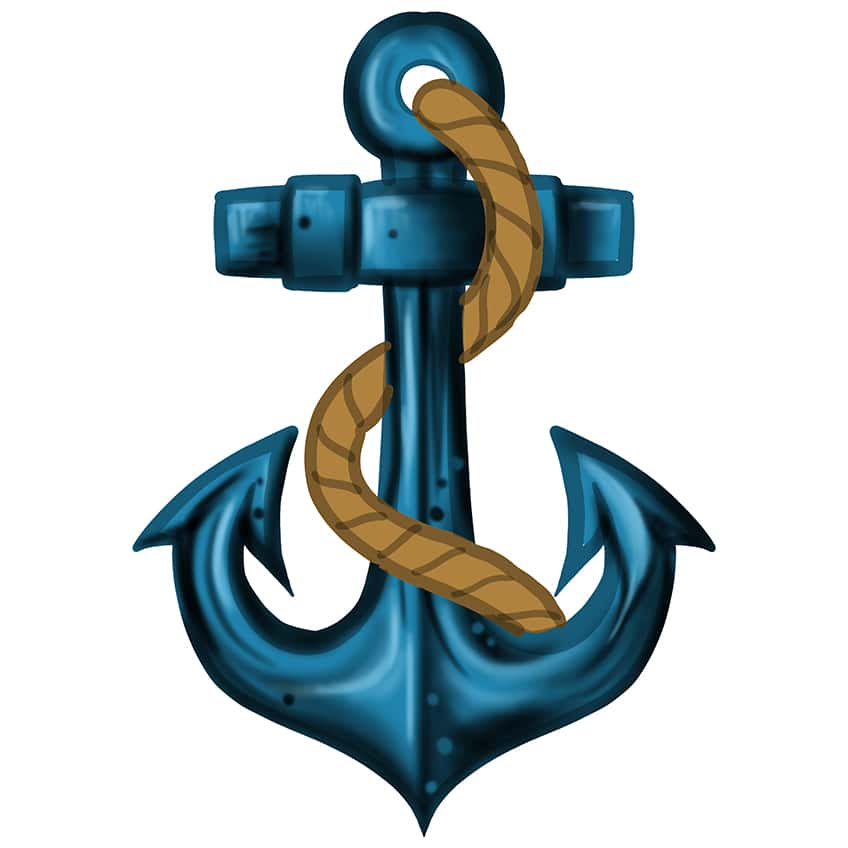
Step 13: Shade and Highlight the Rope
Select a small, soft brush and white paint to incorporate gentle, highlighting brush strokes along the entire rope. For added depth, repeat the process using a fine, sharp brush and a slightly darker khaki paint to introduce textured lines with a darker hue.

Step 14: Finalize Your Anchor Drawing
To finish off our drawing tutorial on how to draw an anchor, select a fine, sharp brush along with black paint and carefully follow the outlines of both the anchor and the rope. Now you are left with a stunning anchor sketch!
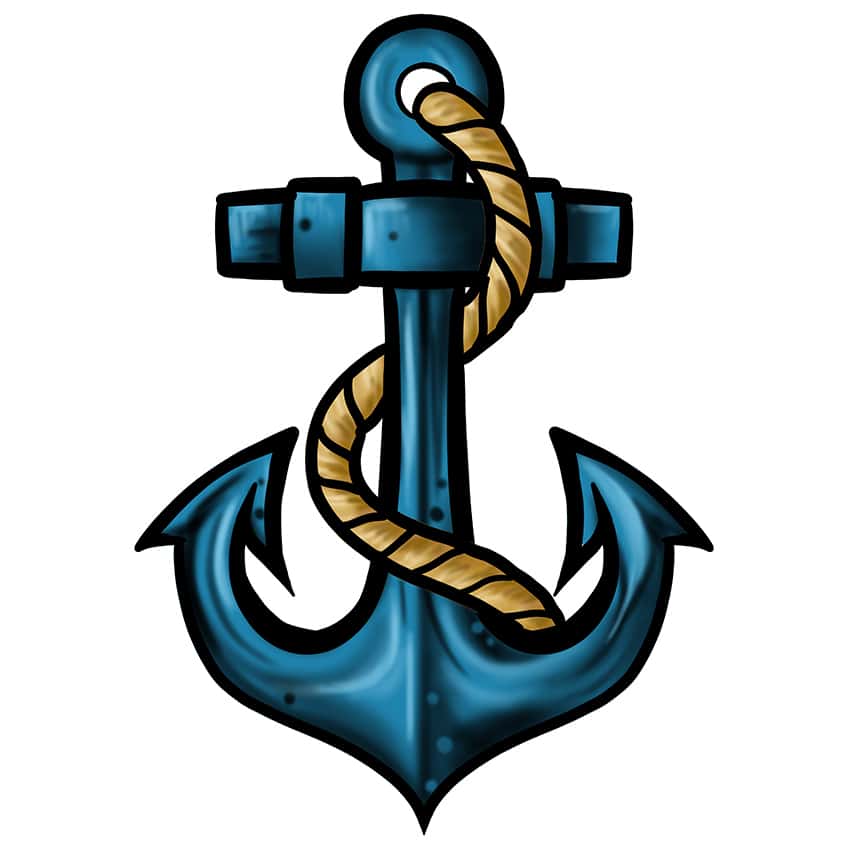
Congratulations on completing our easy drawing tutorial and successfully creating your very own anchor masterpiece! You’ve navigated through each step with creativity and dedication, and now you possess a symbol of strength and stability captured on your canvas. Remember, every stroke you made tells a story of your artistic journey. Whether you’re a seasoned artist or just starting, this achievement is a testament to your commitment to learning and creating. As you look at your finished drawing, may it serve as a reminder that with patience and practice, you can turn even the simplest tutorial into a work of art that’s uniquely yours. Well done!
Frequently Asked Questions
What Are the Basic Steps to Draw an Anchor?
Drawing an anchor involves a step-by-step process that begins with sketching its foundational shapes. Start by lightly drawing a horizontally laying rectangle for the stock and a curved line for the shank. Then, connect the shank to the stock with a ring shape. Next, outline the anchor’s arms, ensuring they mirror each other in shape and size. To finish, add the flukes at the bottom, completing the anchor’s iconic form. Remember, these are just the initial steps, and you can refine and add details as you progress through the drawing. Follow along with our how to draw an anchor drawing tutorial and you will be able to draw a realistic anchor in no time!
How to Add Realistic Texture to the Anchor’s Chain and Rope?
Achieving proportion and balance in your anchor drawing is crucial for its overall appearance. Begin by sketching light construction lines to establish the anchor’s basic shape and position. These guidelines will help you maintain consistency in the size and placement of different elements. Regularly compare and adjust the lengths of the shank, stock, arms, and flukes to ensure they harmonize and align correctly. Take time to step back and assess your drawing from a distance to catch any potential discrepancies. Remember, practice and observation are key – the more you draw and analyze your work, the more intuitive achieving proportion and balance will become.
Matthew Matthysen is an educated multidisciplinary artist and illustrator. He successfully completed his art degree at the University of Witwatersrand in South Africa, majoring in art history and contemporary drawing. The focus of his thesis was to explore the philosophical implications of the macro and micro-universe on the human experience. Matthew uses diverse media, such as written and hands-on components, to explore various approaches that are on the border between philosophy and science.
Matthew organized various exhibitions before and during his years as a student and is still passionate about doing so today. He currently works as a freelance artist and writer in various fields. He also has a permanent position at a renowned online gallery (ArtGazette) where he produces various works on commission. As a freelance artist, he creates several series and successfully sells them to galleries and collectors. He loves to use his work and skills in various fields of interest.
Matthew has been creating drawing and painting tutorials since the relaunch in 2020. Through his involvement with artincontext.org, he has been able to deepen his knowledge of various painting mediums. For example, watercolor techniques, calligraphy and lately digital drawing, which is becoming more and more popular.
Learn more about Matthew Matthysen and the Art in Context Team.


