How to Draw a Bee – A Step-by-Step Tutorial to Make Bee Drawing Easy
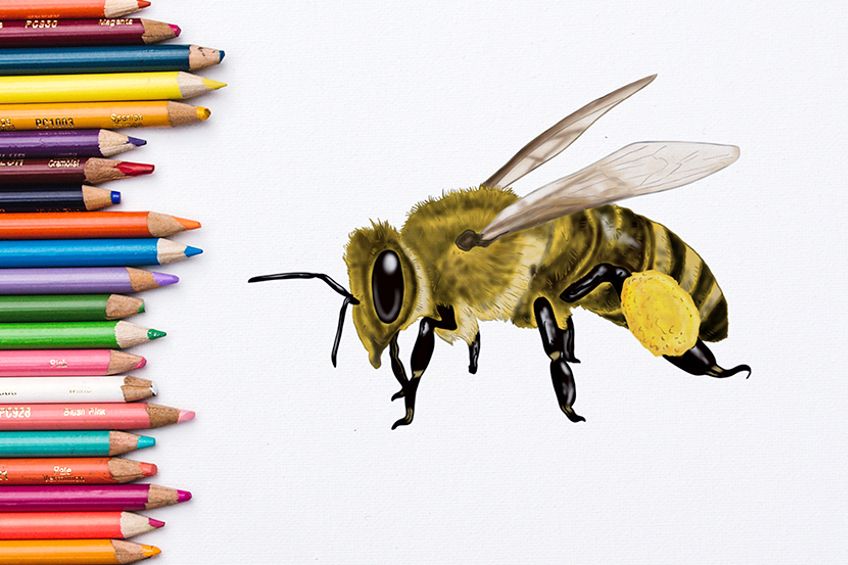
Bees are the foundation of many of the systems on earth, and we have a lot to thank them for. These powerful and organized little insects are loved throughout the world, with their light gauze wings and signature striped bodies. In this tutorial, we guide you through the steps to create an easy bee drawing. Our bee drawing tutorial is suitable for artists of any level, making it easier than ever to learn how to draw a bee in a few simple steps.
Creating a Realistic Bee Drawing in 20 Simple Steps
Before beginning this tutorial, you likely have the impression that learning how to draw a bee is a difficult process reserved for only the most professional artists. We hope to change your mind about this by the end of our easy-to-follow tutorial when you will have a stunning and realistic bee drawing. When it comes to making bee drawing easy, you are welcome to use any type of medium you like. Whether you love to use soft coloring pencils, or you prefer a painting medium like watercolor or acrylic, you can easily modify the coloring stages to suit your preferences.
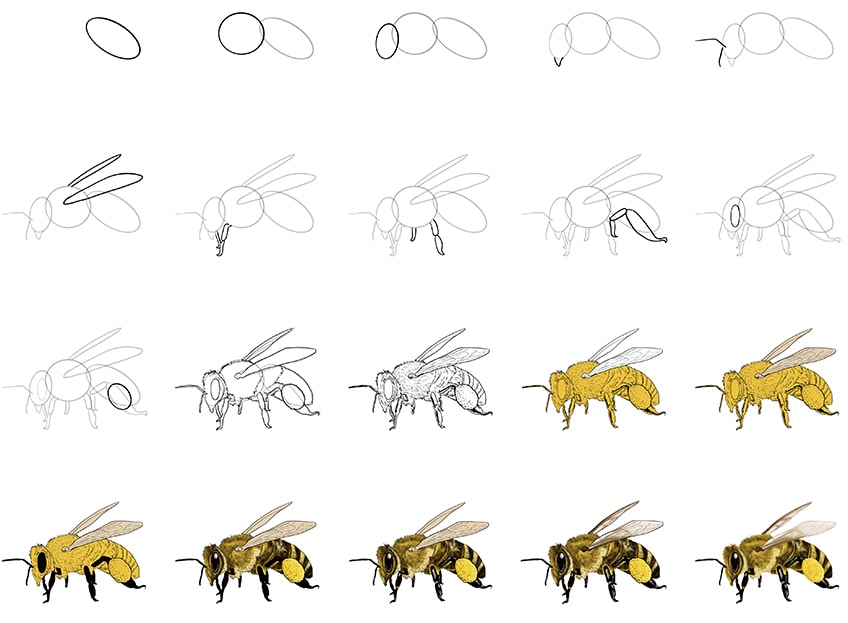
Another way that we make bee drawing easy is by using construction shapes and lines to map out the basic shape of your bee before you start adding textural and coloring details. As bees are quite complex insects with a lot of different and delicate body parts, our first 11 steps are purely focused on construction. You can see the general outline of our easy bee drawing tutorial above.
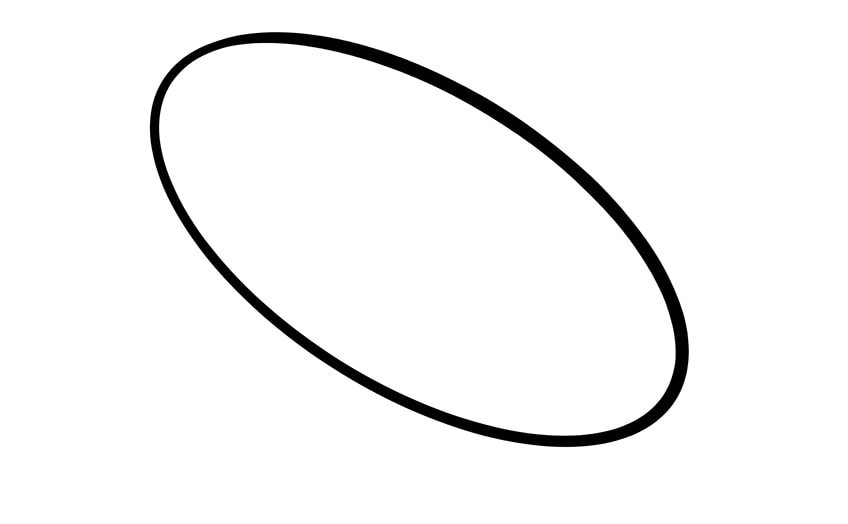
Step 1: Constructing the Shape of the Abdomen
When it comes to using construction lines, it is always best to start with the largest part of the animal’s body. As such, for our bee drawing, we are going to start by constructing the abdomen. For the abdomen, use a long and quite narrow oval to represent this part of the bee. The oval should be diagonally angled and should sit slightly off-center on your canvas as we are going to be drawing the rest of the bee on the left side of this abdomen.
The most important thing to consider in this first step is making sure that there is plenty of space all around this construction step so that you do not end up with a slightly squished bee.
Step 2: Drawing the Thorax of Your Bee
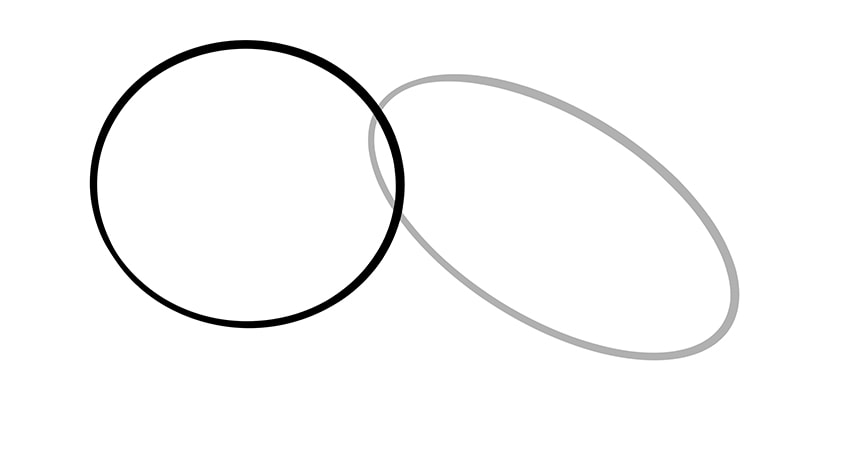
For the thorax of your bee, you are going to use a large circle. This circle should overlap slightly with the abdomen oval and the top of it should be slightly higher than the highest point of the abdomen.
In terms of positioning, the thorax circle should sit in the center of your canvas.
Step 3: Outlining the Shape of the Head
The head of our bee drawing is long and narrow, so to construct it we are going to use a small narrow oval. The head oval should be ever-so-slightly angled towards the back of the canvas.
Once again, the head oval should overlap slightly with the thorax circle.
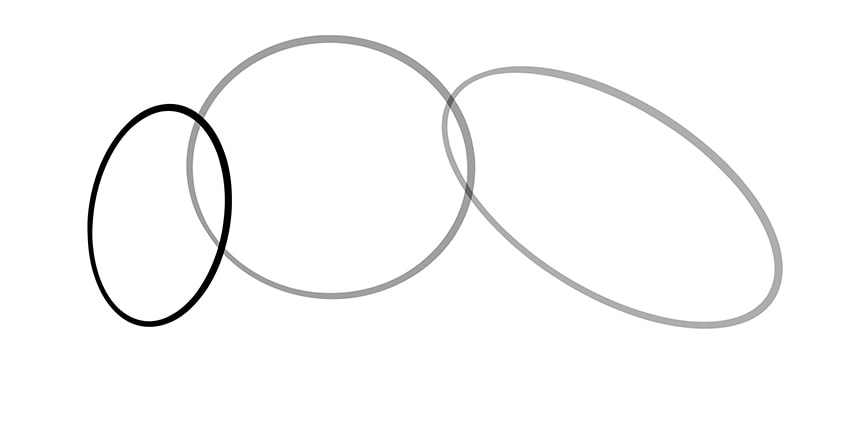
Step 4: Adding the Bee’s Proboscis
Bees are the most important pollinators in our ecosystem, and they do this by brushing against pollen while sucking the nectar out of the flowers. To suck up this sweet nectar, bees use their pointy proboscis, which is what we are going to draw in this step.
Using a slightly curved “V” shape, attach the mouth to your bee drawing at the very bottom point of the head oval.

Step 5: Outlining the Bee’s Antennae
As we continue to focus on construction, we are going to move on to laying down the basic shape of the bee antennae. Using two simple bent lines, attach the antennae to the left side of the bee’s head, just below the halfway point.
To capture a realistic perspective, the top antenna should begin within the head oval and should be significantly longer than the other. The lower antenna can extend almost directly down from the side of the head oval and should be much shorter.
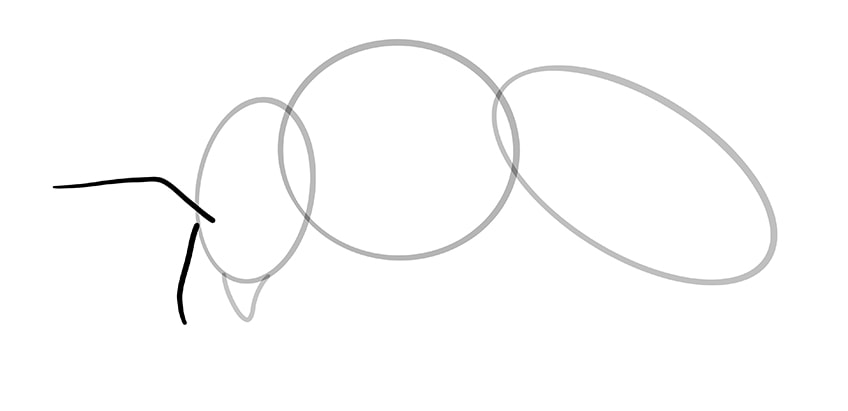
Step 6: Drawing the Wings of Your Bee Sketch
For the wings of your bee, you are going to use two long oval shapes. Begin with the upper wing which is significantly more narrow than the other and should begin and end at the upper point of the thorax circle. For the second wing, you can use a larger and slightly thicker oval shape that begins within the thorax circle.
The positioning and size of these two wings are essential for capturing a realistic perspective in your easy bee drawing.

Step 7: Laying the Foundations of the Front Legs
Bees, like most insects, have segmented legs just like their segmented bodies. Start by drawing the front leg that is closest to us via our perspective. Begin by drawing a sausage-like shape extending down from the thorax circle just behind the intersection of the head and thorax. At the bottom of this sausage, draw another slightly more “S” shaped sausage that curves forward at the bottom.
The second front leg is mostly hidden behind the head, so we are only going to draw the bottom more curvey segment poking out from the head oval just below the mouth.
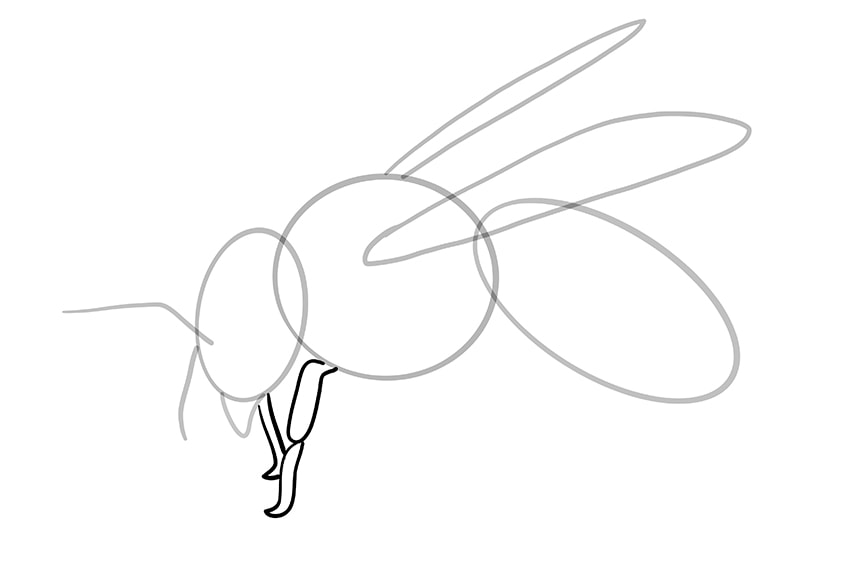
Step 8: Crafting the Middle Legs
Bees, like other insects, have six legs, two at the front, two in the middle, and two at the back. It is now time to construct the middle legs which extend from the thorax circle. Begin with the middle leg that is closest to the front of the body, and extends from the center of the bottom line of the thorax circle. This leg is the one furthest from our view, so it will be like the second front leg we drew in the last step.
For the larger of the two middle legs, you can use the same pattern as for the big front leg, but this leg should be angled slightly towards the back of the canvas.
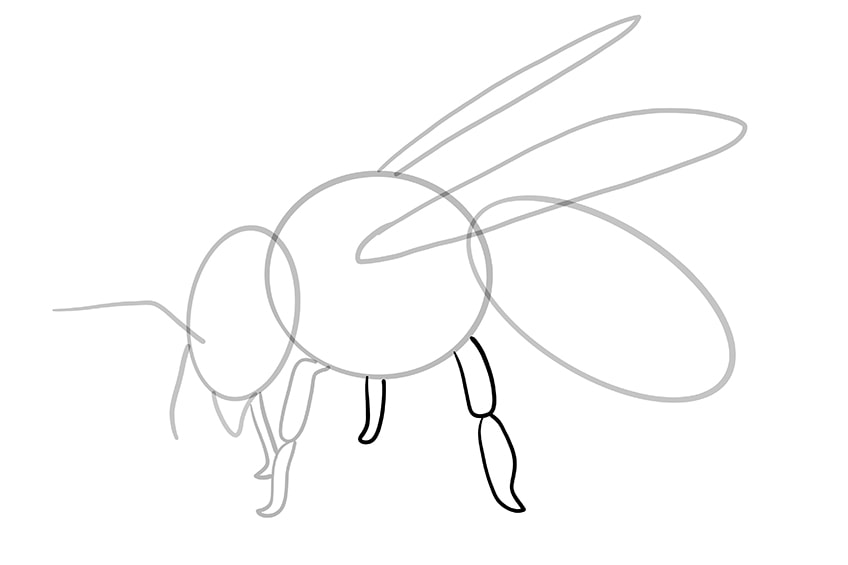
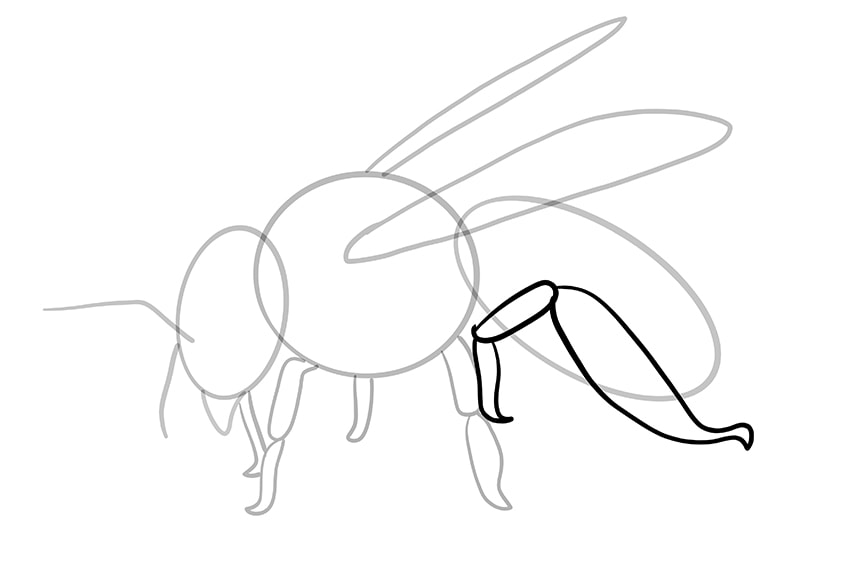
Step 9: Outlining the Back Legs
The back set of the legs is the largest and begins inside the abdomen. Overlap the back abdomen drawing both legs at an angled joined together at the base. The back leg should be much larger than all of the other legs you have drawn so far and should end with a pointy curve.
At the end of this step, your drawing should look a little something like our example below.
Step 10: Drawing the Eye of Your Bee
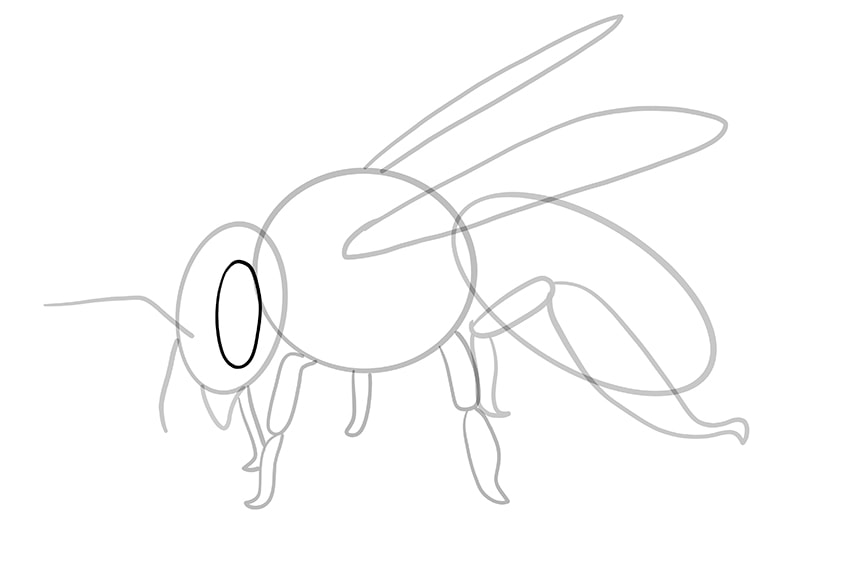
Bees have very large eyes, only a little smaller than the head oval. Within the head oval, draw a slightly smaller oval that is slightly more vertical than the head.
Step 11: Outlining the Pollen Ball
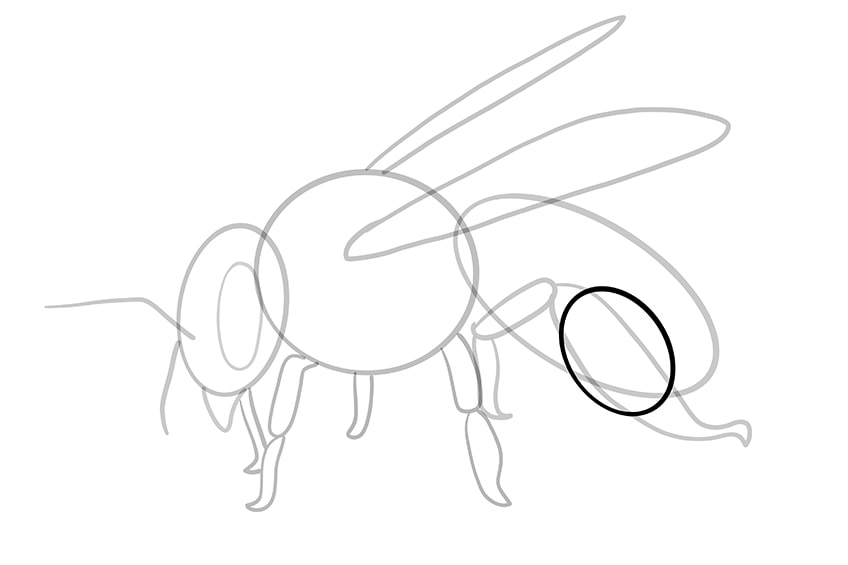
To make our bee drawing as realistic as possible, we are going to draw on a pollen ball. Pollen typically gathers on the large back leg, so over the largest part of this leg, draw an angled oval.
Step 12: Drawing the Final Outline of Your Bee Sketch
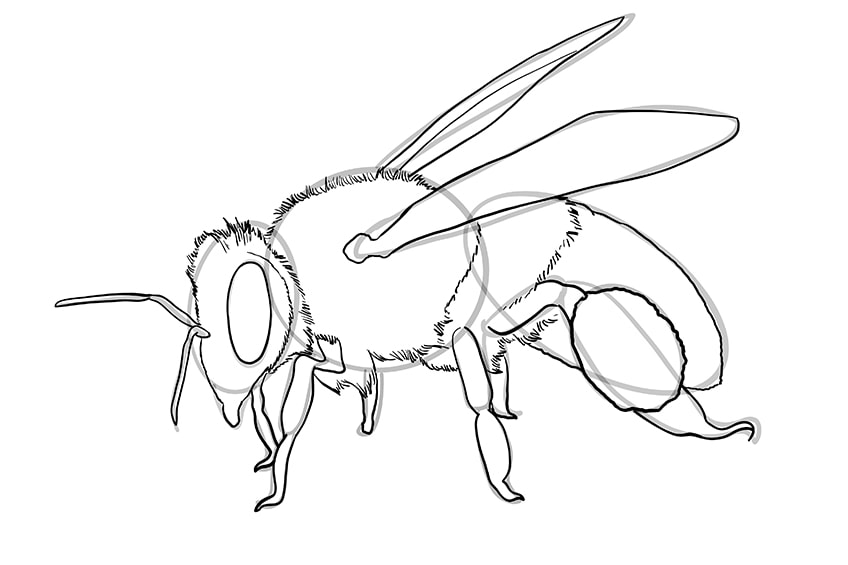
Now that we have our bee constructed, we can use these lines to create the final outline of our easy bee drawing. For the most part, you can follow the construction lines very closely. Begin with the antennae, using the construction lines as a middle line. You can then outline the bee’s head, making it a little more pointy towards the mouth. When it comes to outlining the top and back of the bee’s head, use short feathery strokes to create the impression of fur, as bees have a fluffy appearance.
You can continue to outline the rest of the bee’s body using these same short hairlines. You can also create some divisions on the thorax and abdomen with this furry texture.
Use smooth lines to craft out the shape of the wings, and you can outline the abdomen with a smooth line, bringing the bottom to a slight point. The legs should also be outlined with smooth lines, and you do not have to draw in the segmenting line but remember to make the lines narrower at these joints to maintain the segments.
Upon completing this step, you are now ready to erase any still visible construction lines.
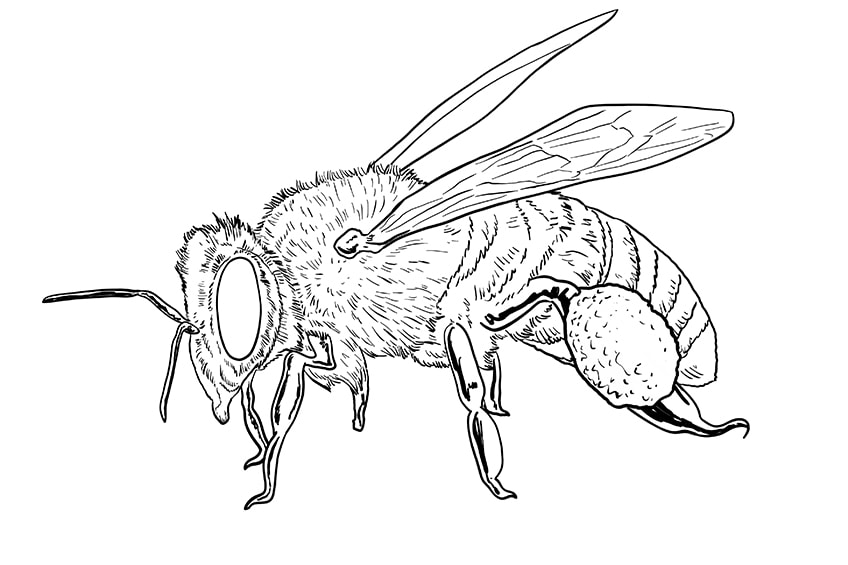
Step 13: Creating Fur Texture and Details
In our final step before adding color, we are going to add fur textures and other details to our bee sketch. Begin by using short lines to create a segmented texture to the wings. These freehand line patterns should follow the direction and angle of the wing. While you are working on the wing, you can add some small textural dots and blobs to the base of the wing to give it more depth.
Next, move onto the thorax of your bee, using fur strokes to create texture. These fur lines should extend in an outward direction from the base of the largest wing. Continue to fill the rest of the bee’s body with these fur lines, following the shape of each segment carefully.
When you get to the abdomen, you can begin to use these short lines to create the signature striped patterns. For the head, the fur lines should extend in a couple of rings around the eye. You can also add some darker shading to the antennae, and do the same for the legs. These areas on the legs will be painted black in our coloring steps. To finish the detailing step, add a few squiggly lines to the pollen sack, creating a bumpy texture.
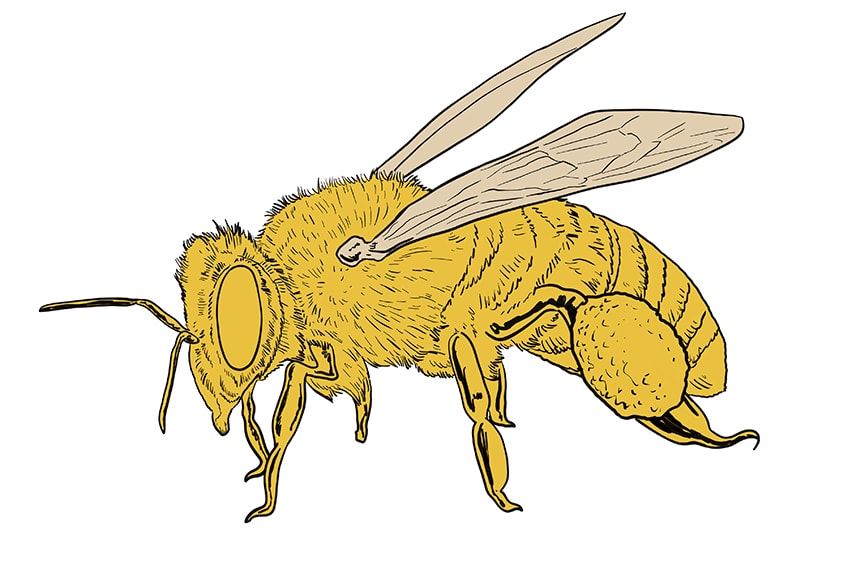
Step 14: Laying Down the First Color Coat
For the base color coat, you are going to use a single layer of yellow to fill the entire body of your bee except for the wings.
Whichever medium you are using, make sure that this base coat is smooth and consistent.

Step 15: Coloring in the Bee’s Wings
For the wings, we are going to use a very light beige color as a base. Use a fine brush to create a smooth and consistent coat of color, remembering not to make it too dark.
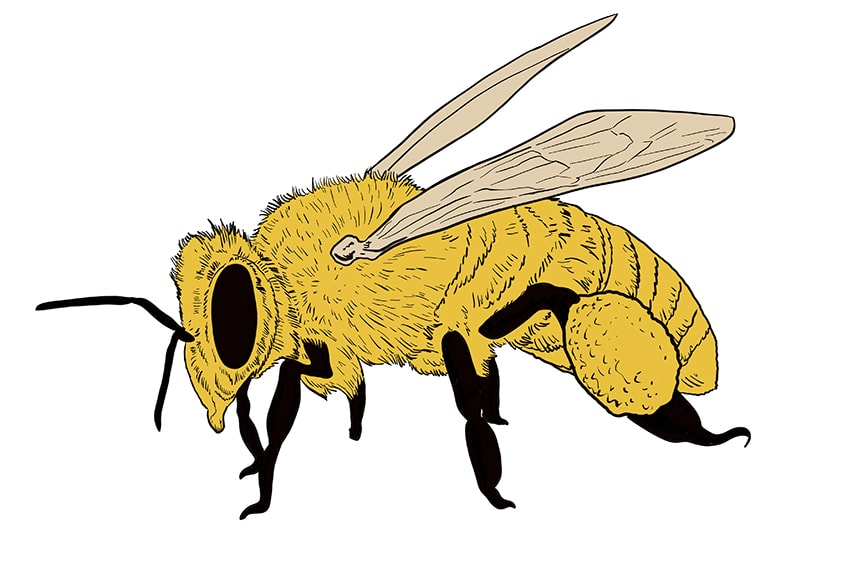
Step 16: Painting Black Details
The second prominent coloring in bees is black. In this step, take a shade of black and a fine brush, and color in the parts of the bee that are the most black.
Add this black shade to the antennae, eye, and legs.
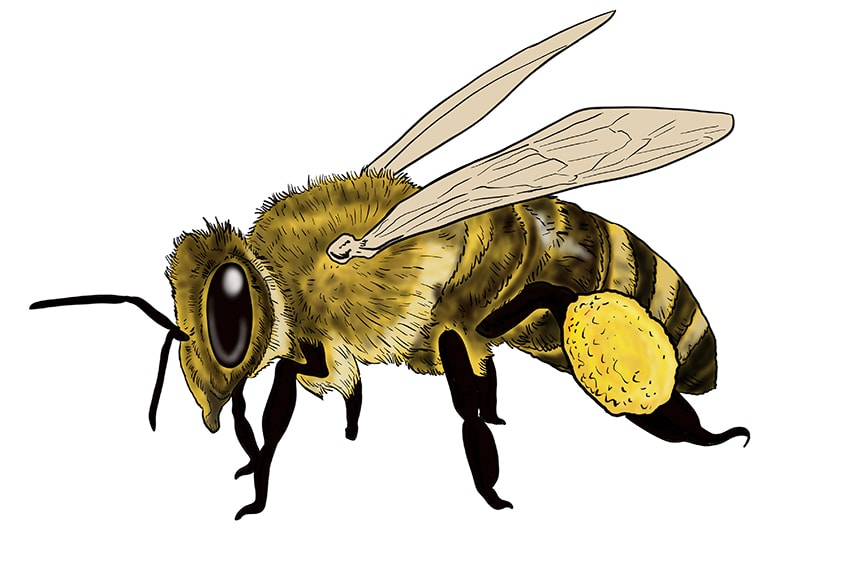
Step 17: Adding Dimension with Shadows and Highlights
You can see immediately that there is a significant difference between the previous step and this step, but do not be overwhelmed. This difference is thanks to shading which adds dimension and creates the right perspective. Begin by using a touch of white paint and a soft brush to lighten the neck area that separates the bee’s head and thorax. You can do the same at the separation between the thorax and abdomen.
While you are using white paint, add a softly blended highlight to the top of the bee’s eye and create a very light “U” shaped reflection that follows the bottom of the eye curve.
It is now time to focus on shadows. Use a small but soft brush to add black shading to the fur around the head of the bee. Focus the black particularly on the parts of the head and body that will naturally be hidden from the light, including the underside of the neck, and just after the separation highlight between the head and thorax. As you move onto the abdomen of your bee drawing, use black shading to create alternating lines of black and yellow.
To get the smoothest blend possible, lightly dab your brush onto the canvas and gently smear it into place.
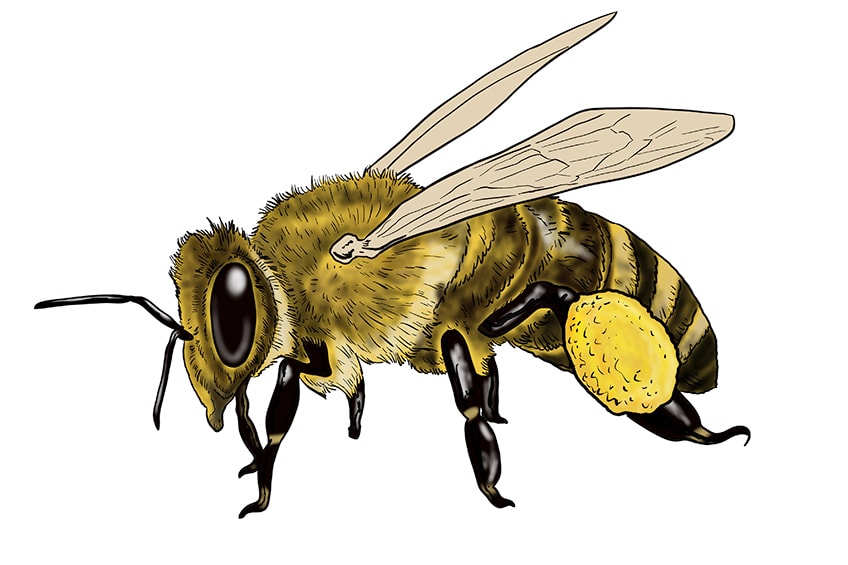
Step 18: Adding Yellow Highlights
In this step, we are going to use yellow and white to create some additional highlights along the antennae and legs of your bee drawing. It is up to you where you would like to focus the highlighting, but it is best to consider where the natural light would be hitting the bee and use that to guide your highlight choices. One place we do suggest adding highlights is on the joint areas between the leg segments. This highlight placement will emphasize the segmentation of the bee’s legs.
If you need some guidance for where to place your highlights, take a look at our example below for inspiration.
Step 19: Blending Out the Color in the Wings
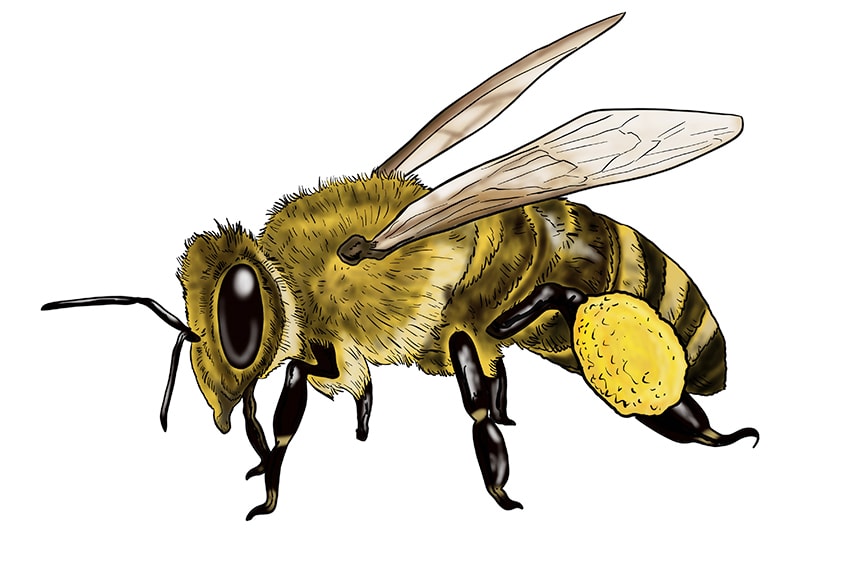
To blend out the color of the wings and make them appear more opaque, you are going to use a shade of dark brown. Begin by focussing a light shade of dark brown along the wing bone that is attached to the bee’s main body. You can then continue to softly blend this shade up into the wings, focussing most of the shadow along the bottom edge of the largest wing, and ensuring that it gets lighter as you move up the wing.
For the smaller wing, blend the darker shade up along the top segment as in our example below, once again making sure that the color blends into the lighter shade as you go up the wing.
Step 20: Adding the Finishing Touches
The last step in this tutorial is optional, but it is a lovely way to create a smooth and seamless bee drawing. You simply want to erase all of the outlines in your bee drawing by painting over them with the corresponding color of the area.
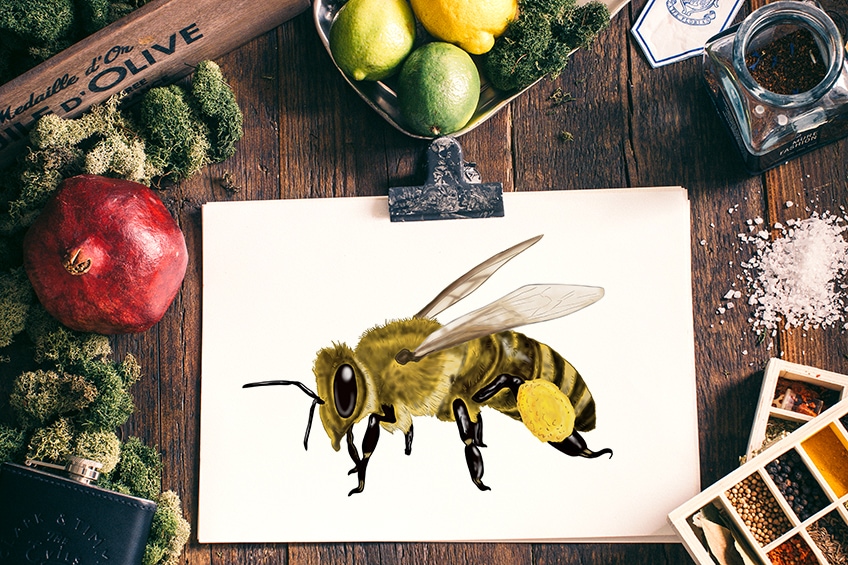
Well done for making it to the end of this detailed but easy bee drawing tutorial. We hope that you have taken a lot from our guide, and that you now feel more confident with drawing insects, using construction lines, and building up realistic layers of color.
Frequently Asked Questions
What are the Best Tips to Make Bee Drawing Easy?
If you want to know how to create an easy bee drawing, there are a few things you should consider. The first is to spend some time laying down the shape of your bee sketch with construction lines and shapes. Using construction lines will make bee drawing easy because you will have the basic shape down before you need to start adding detail. The second is to build the color up in layers, which will help you make your bee drawing realistic.
Do You Need any Special Supplies to Make a Bee Drawing?
There is no special equipment or other drawing supplies needed to follow our easy bee drawing tutorial. You can use any drawing medium you like to create a beautiful and realistic bee sketch.
Matthew Matthysen is an educated multidisciplinary artist and illustrator. He successfully completed his art degree at the University of Witwatersrand in South Africa, majoring in art history and contemporary drawing. The focus of his thesis was to explore the philosophical implications of the macro and micro-universe on the human experience. Matthew uses diverse media, such as written and hands-on components, to explore various approaches that are on the border between philosophy and science.
Matthew organized various exhibitions before and during his years as a student and is still passionate about doing so today. He currently works as a freelance artist and writer in various fields. He also has a permanent position at a renowned online gallery (ArtGazette) where he produces various works on commission. As a freelance artist, he creates several series and successfully sells them to galleries and collectors. He loves to use his work and skills in various fields of interest.
Matthew has been creating drawing and painting tutorials since the relaunch in 2020. Through his involvement with artincontext.org, he has been able to deepen his knowledge of various painting mediums. For example, watercolor techniques, calligraphy and lately digital drawing, which is becoming more and more popular.
Learn more about Matthew Matthysen and the Art in Context Team.


