Watercolor Poppies – How to Paint Poppies in Watercolor
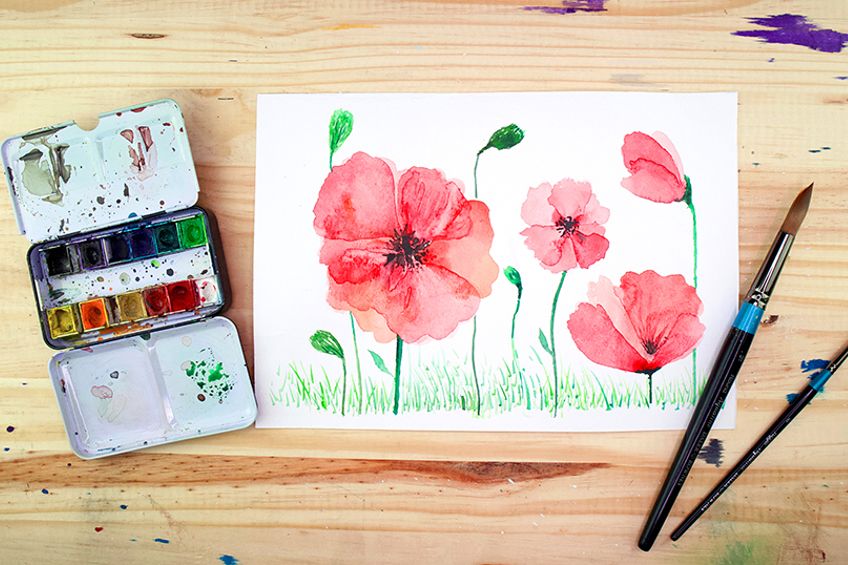
Painting watercolor poppies is a great watercolor painting exercise. Not only is it really simple, but it also teaches you some useful watercolor tips and tricks that you can use in other paintings. A watercolor poppy is quite a simple-looking flower to paint. As we learn how to paint poppies, we will find that the structure of the poppy flower is made up of really simple shapes. Poppies are a great feature that can also be used in a variety of different landscape scenarios. So have fun as you go through this tutorial as you learn how to paint poppies in watercolor.
An Easy Guide to Painting Watercolor Poppies
Learning how to paint poppies in watercolor is an easy task, this tutorial breaks down the simple process of painting watercolor poppies with lighter and darker washes of paint. We will also look at how to paint watercolor poppies from different angles. A watercolor poppy can also vary in color combinations which means that we can be playful with how we use our colors. Watercolor poppies are contextualized with a stem and pistil that is easy to paint. We want to make sure we have the right materials, so let us see what we will need:
Necessary Materials
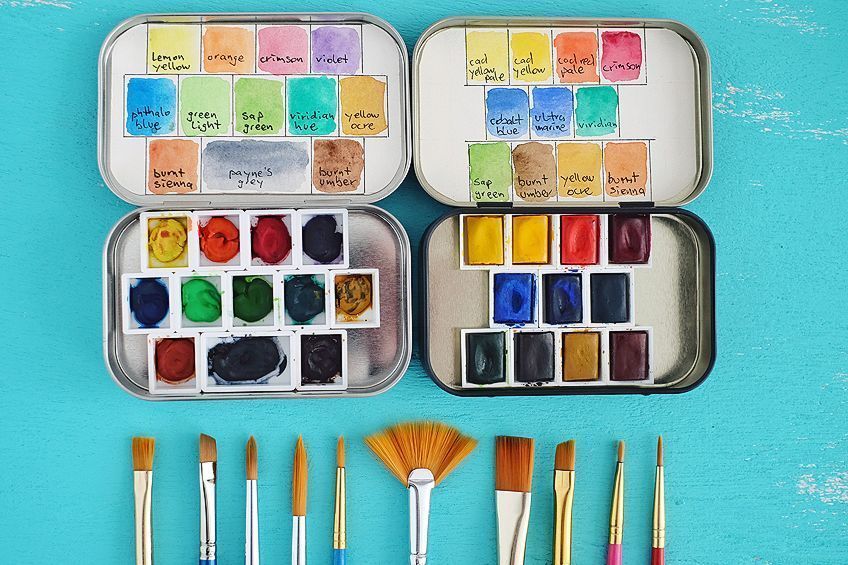
We do not need much for this tutorial as the process is quite simple. We want to make sure we have the right watercolor brushes. Secondly, we want to make sure we have the correct watercolor paints. We will be using a set of pan paints in this tutorial. We also want to have the correct paper, the correct paper makes a difference, we want to make sure that we have the paper that is thick enough, preferably around 300GSM in thickness. Lastly, get some scotch tape to secure your page to the surface that you will be painting on. All items you can get online through the links below:
Preparation
Now that we have all the correct materials, we can begin to prepare ourselves for this tutorial. We do this by placing ourselves in a quiet environment that is conducive to focusing. This is quite an easy tutorial to follow which means you can go through this tutorial whilst listening to music or a podcast. Try to engage and set aside a good portion of time for this tutorial but most importantly try to have fun with it.
With everything ready for this watercolor poppies tutorial, let us get into it.
Step-by-Step Instructions on Painting Watercolor Poppies
As we get into the steps of this tutorial, we will find that the process is quite simple. However, whilst we wait for one flower to dry, we will begin to paint another so that we save some time. Painting watercolor poppies is easy and it is a fun activity, so don’t put too much pressure on yourself to perfect your painting. Painting takes time and requires practice. As we go through this tutorial, we will also contextualize the flowers by painting stems and greenery around the flowers themselves. With that said let’s go through the various steps on how to paint watercolor poppies.

Painting Petals From Different Angles
Let us begin by painting a petal from the front view. The poppy flower can be painted in various colors however, the original color scheme of the poppy is generally this vivid red color. In this tutorial, we will be a little more playful. Let’s begin with making a light wash of red which we will then proceed to paint a spear-head triangular shape.
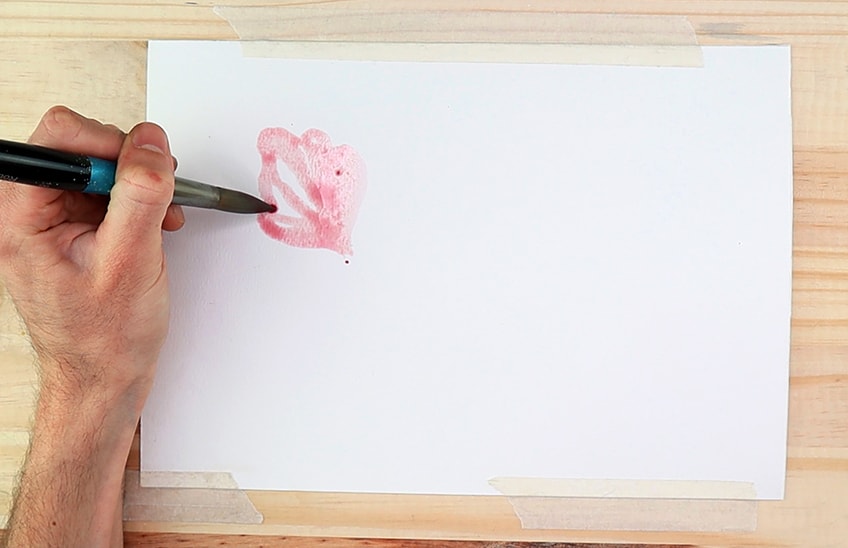
The petal shape of the poppy flower is quite triangular. However, the petal has subtle curves along its ridge. This means it’s not straight and curves outwardly. We want to paint the first set of petals. We do this by painting three curved-triangular-shaped petals with each of the tips of the petals coming into a center point. This is where the pistil will be.

Whilst the petals are still wet, we will then load our brushes with red paint and proceed to dab the bottom parts of the flower. This is going to allow a bleed of red paint to flow into the rest of the flower. This will give the petal a little more definition by creating a seamless gradient as the different petal colors will dry together.
Again, whilst the petals are still wet, we want to take some orange paint and again dab along one side of the petal.
Dilute the color with some water a little bit so that the color is not too vivid. As we add color to the wet petal, we are giving it a little more vibrancy in its composition.
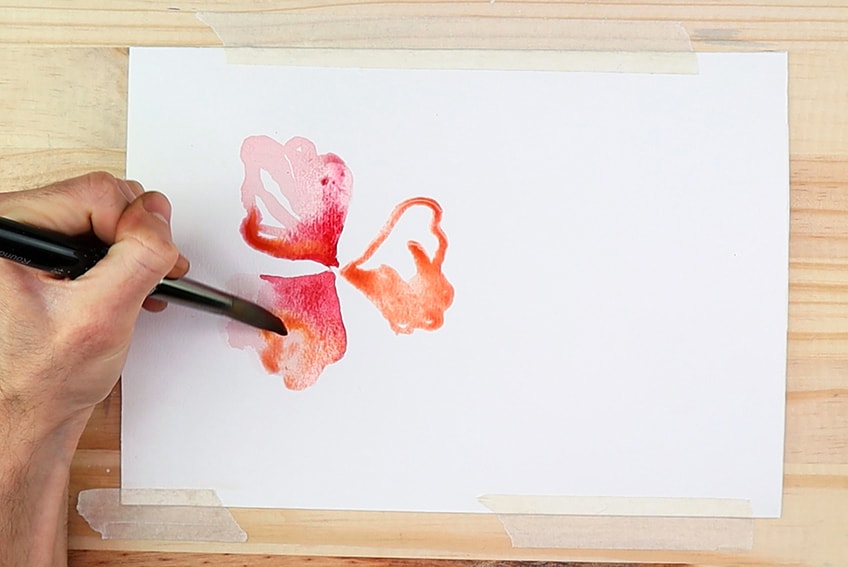
Once you have filled the petals with a light wash of red and some hints of orange allow that first layer to dry completely. As it is drying, let us move on to a new flower, beginning to paint petals from a different angle. Similarly, we will proceed to paint a triangular shape with a light wash of red paint.
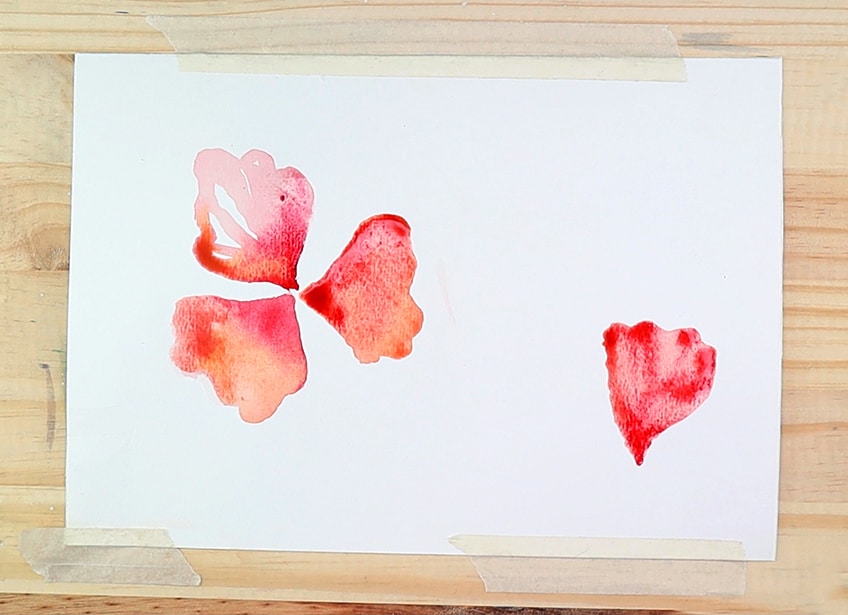
The views of the poppy can vary, this is because flowers are quite abstract in their form. This means that there are several ways of depicting a poppy in a painting. In this view, we want to depict the poppy from the side view of a poppy facing upward.
We do this by creating that triangular shape again, which we will overlap with new layers once it has dried completely.
Painting New Petals and the Second Layer Over the Dry Petals
As we carry on with painting petals, we want to simultaneously add new petals into our watercolor poppy painting whilst waiting for previous petals to dry. Working on the first poppy, we can now begin to do the same process of adding curved triangular shapes of washed-out red. We want to do this in the gaps of the first three petals.
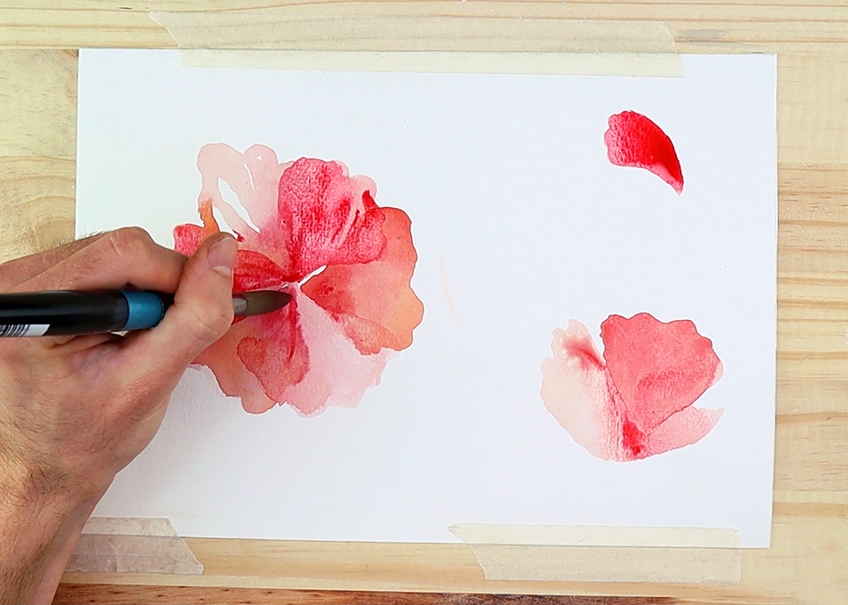
Allow the shapes of each petal to overlap with the dry petals. We can do a similar thing for the second poppy that we have painted, however, the overlap of these new triangular shapes must be bunched together as opposed to spreading out circularly. This is to depict the side view of a poppy. We can begin to paint another poppy in our painting whilst other poppies are busy drying.

Let us paint another poppy from the side view. The thing about watercolor poppies is that you can play around with how you paint them. The general principle that we want to keep in mind is that they have a triangular shape with curved ridges, which are uniform in color. We can paint a few petals, allow them to dry, and then proceed to paint new petals over the ones that have dried
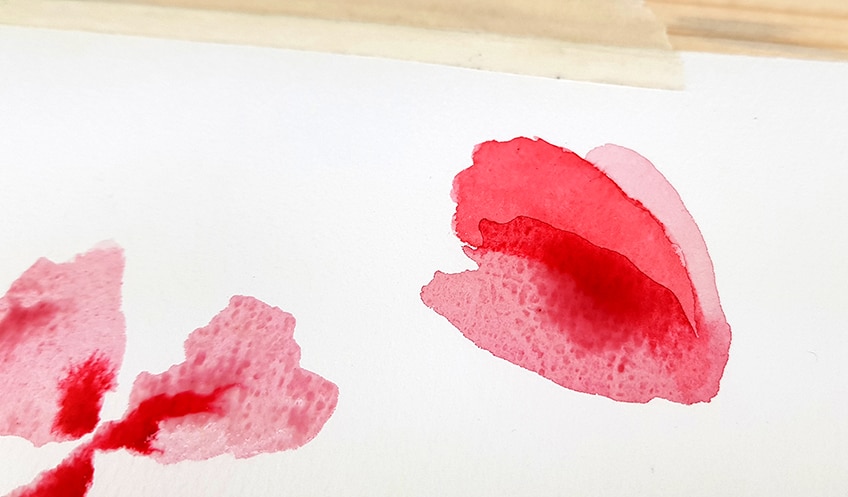
Painting New Petals and Adding Features to Our Dry Poppies
The two key components we want to keep in mind are that the pistil or the center of the flower is black and the stem is a thin light green branch. These two components contextualize the poppy flower as a poppy flower. We can begin to add some black dots in the center of our dried poppy flowers
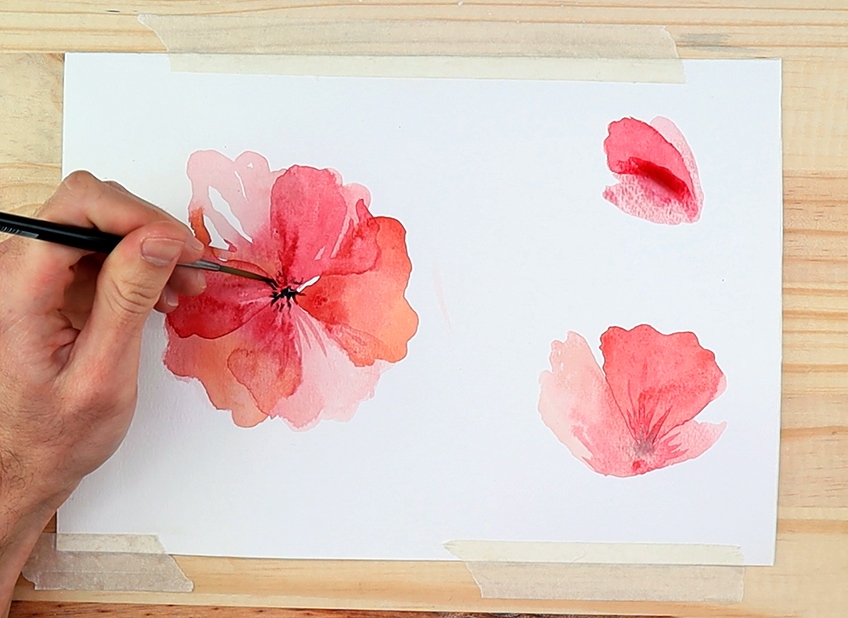
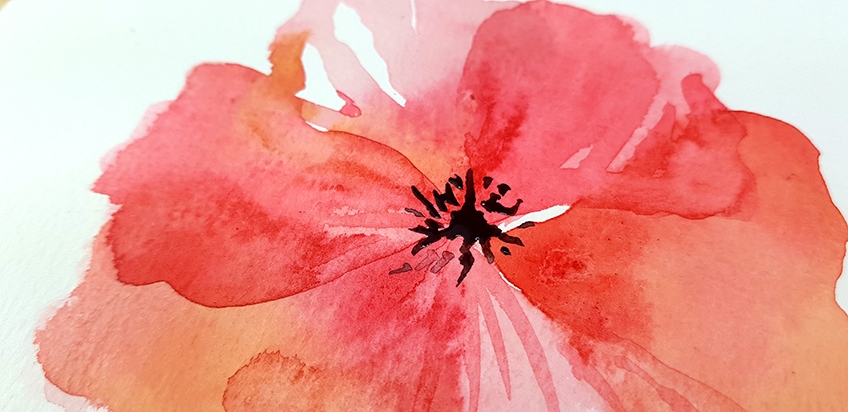
We do this by making a black circular mark in the center of the watercolor poppy that is depicted in a direct front view. We can then add little black strokes around that black circular center to give it a little more texture.
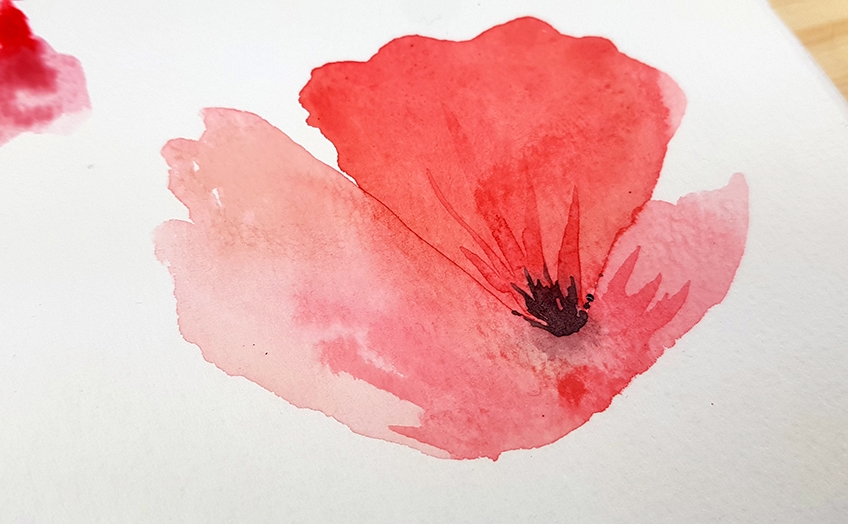
With the second poppy, we want to try and understand how the flower is shaped. We can see that the petals are depicted from the side view, which would only give us a glimpse of the pistil inside of the flower. This means we want to imagine peering through the petals and seeing the black pistil in the center of the flower.
Painting New Poppy Flowers
Again, we are at a point where you should understand the basic process of painting the poppy flower. This means that now you have the freedom to paint as many poppies as you like in your landscape. Try to visualize different angles and distances in which the poppy flower will be seen within your painting.
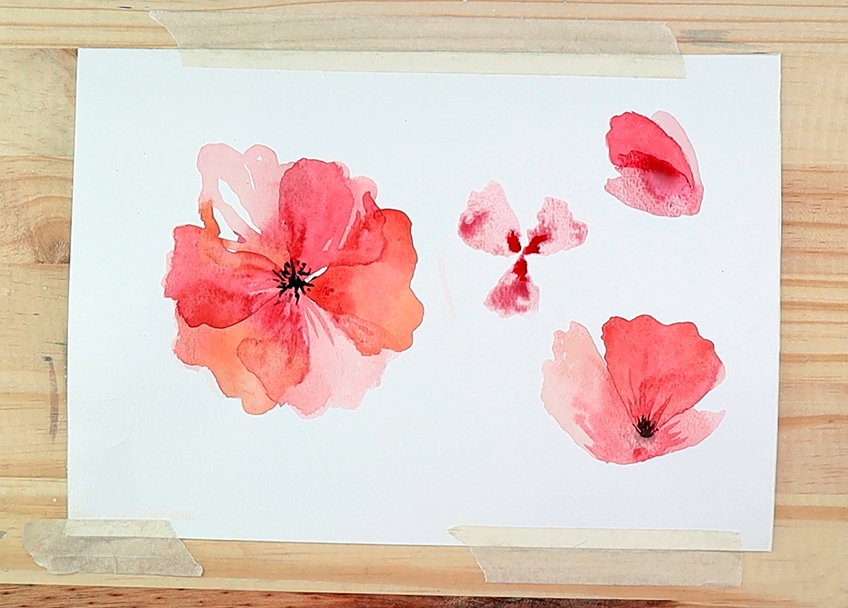
You can also keep adding new petals to existing poppy flowers that you have already painted. Just make sure the previous petals that were painted are completely dry. You also want to make sure that you don’t add too many petals, keep it to a maximum of about six petals.

Remember the concept of the angle from which the flower will be viewed. This means in some cases we only slightly see the pistil or do not see the pistil of the flower at all. This can be true about the poppy that is viewed from the side view whereby the petals can cover and hang, leaving the pistil out of view.
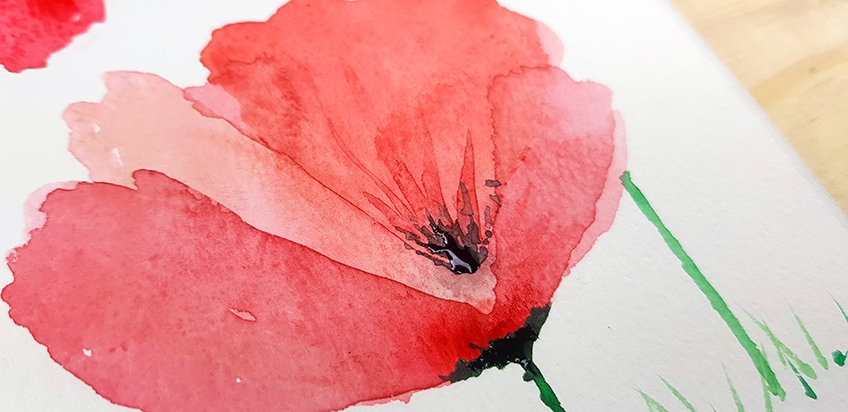
Remember that as you paint your poppy flowers, always allow for the first layer of petals to dry completely. You can then add new petals to the flower, allowing them to overlap. This overlap quality is unique to the watercolor medium, making the flower look more painterly as opposed to drawing.
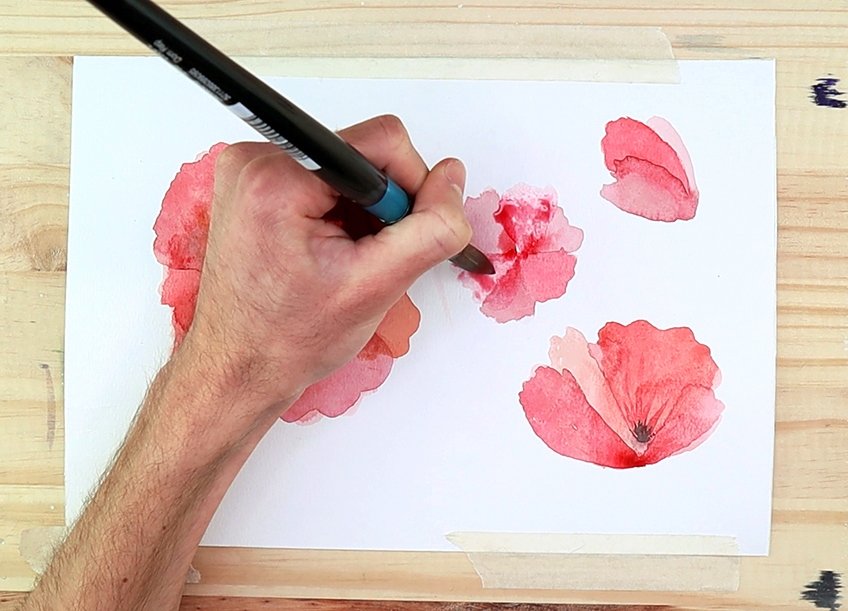
Painting the Stems of the Flower
The stem of the poppy flower is so simple. What we want to do first is make a mix of light green paint with a touch of dark green. We want the stem to have a light green color, this resembles a more realistic color quality of the watercolor poppy stem. We then proceed to paint thin lines that connect to the bottom of each flower.
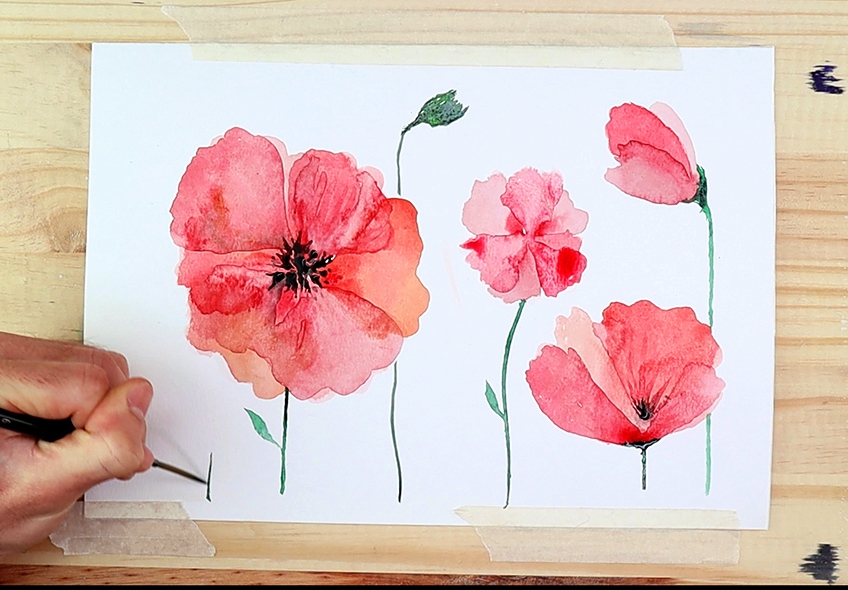
Again, consider the different angles of your flowers. If your watercolor poppy is hanging over and we can see this from the side view, we want to connect the stem to the bottom of the flower in a way that makes sense. Painting different poppies is also a good exercise for figuring out shape and form, so try experimenting with how you paint your watercolor poppy petals.

Painting Greenery and Blooming Poppies
Now that you have the full skill set of how to paint watercolor poppies, you can add as many poppies to your landscape as you would like. However, once you are satisfied with the number of flowers in your watercolor poppy scene, we want to contextualize the landscape with some greenery and blooming poppies.
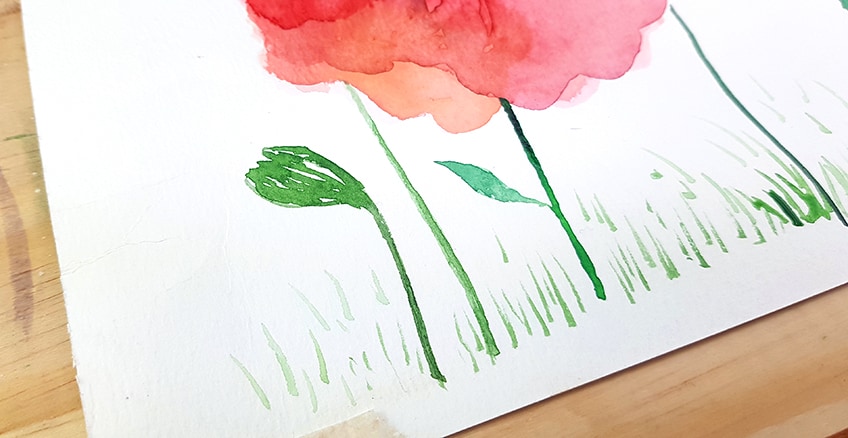
We do this by painting thin green stems that run through the background of our painting. As we paint the stems, we will then proceed to paint an upside-down teardrop shape at the end of each stem. Think of it as a flower that is in the process of blooming, this is an easy feature to paint that contextualizes the painting to be in some sort of garden setting.
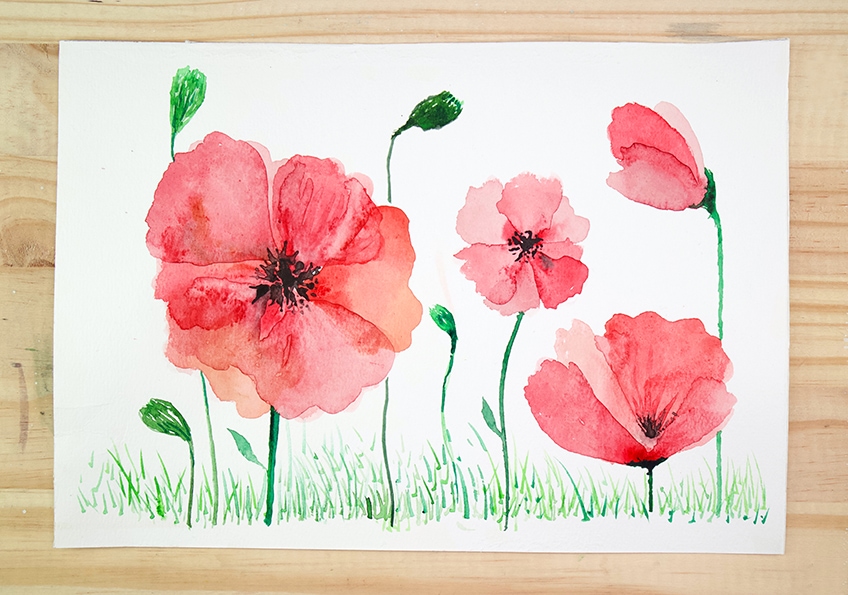
Lastly, we can add some green strokes in our painting to give a grass-like scene. This is a nice quality to add to the painting allowing the flowers to exist in a setting as opposed to existing in a void. We can add as many of these blooming poppies as we would like.
We can do the same with the grass, it’s simply a matter of preference.
Key Components to Remember
The first thing to remember is that when you paint the petals allow for the first layer of petals to dry completely before painting new petals over them. We want an overlapping quality that is unique to the watercolor medium. This gives the poppy the unique watercolor feel and is a key component of the watercolor poppy flower.
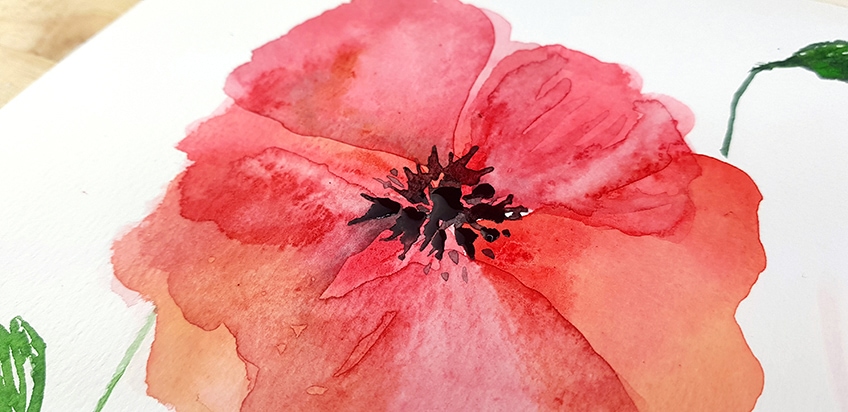
The second key component is that the pistil is always black. Not only is it black but it consists of two features: a single black point in the center of the flower and a few spots, dots, or lines that are painted around that center point. This will also differ slightly, depending on the angle the flower is painted from.
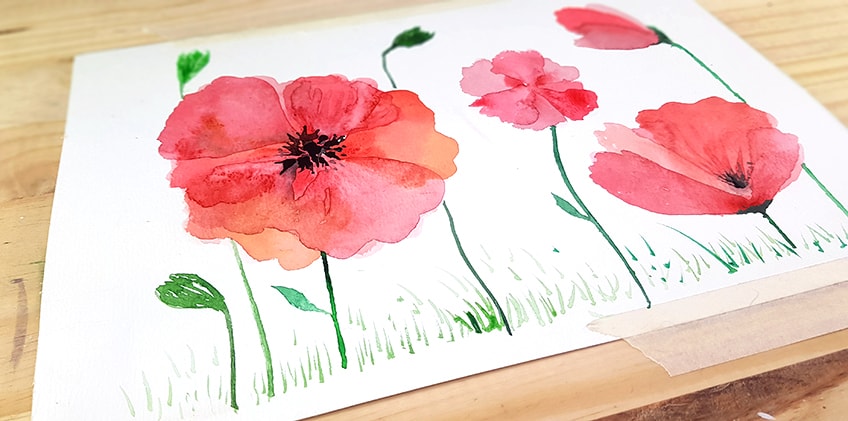
Lastly, is the stem of the watercolor poppy. The stem is always a thin light green stick-like structure that is connected to the bottom of the flower. This means that as we paint the stem, we want to add some green strokes around the bottom of the flower to indicate that the stem is connected to the flower. We can also add little spearhead leaves on the stem, just not too many.
There you have it! A guide on how to paint watercolor poppies. With a few simple key concepts to remember you can practice your watercolor poppy skills and use them in an array of different landscape paintings or simply as a single subject on its own. Either way, this tutorial breaks down the fundamentals of how to paint a watercolor poppy flower, helping you gain confidence in your watercolor skills.
Tips and Tricks
Learning how to paint watercolor poppies is simple but does take time. This is because we will apply new washes of paint over dry washes. The process requires a little patience. You can also speed it up by using a hair-dryer to dry your work quicker.
- Have a palette for mixing colors, a good suggestion is to use a ceramic plate from your kitchen.
- Don’t worry about perfecting the painting the first time, painting takes time and practice.
- As you learn how to paint watercolor poppies, you want to make sure you have at least two jars of water for cleaning your brushes.

- Don’t worry too much about using a single color, however, this tutorial does go through the basic color palette for poppy flowers.
- Just try to have fun and remember to take breaks in between the process.
- You can use a hair-dryer if you want to dry your paint marks quicker in between each application.
A watercolor poppy can be a really beautiful feature in other paintings or exist on its own as a single subject in a painting. Either way, this tutorial breaks down the basics of how to paint watercolor poppies, allowing you to gain some confidence in your skills on how to paint poppies in watercolor.
Frequently Asked Questions
How Do You Paint Loose Watercolor Poppies?
There are many ways to paint watercolor poppies, in this tutorial we go through the basics on how to paint the general shape of the poppy as well as how to paint the poppies with a consistent color scheme. However, with poppies, because they are simple flowers, you can be playful with your petal shapes and color palette. The single most important feature of the poppy is the black pistil in the center of the flower as well as the thin green stem. These features often contextualize the flower as a poppy. This means the process of painting the petals loosely and playing around with various colors can be freely expressed. As long as the two common features that make the poppy a poppy are present, you have the freedom to be playful.
How Do You Paint Watercolor Poppy Petals?
The petals of the poppy are quite triangular. However, they are very subtle in the way they curve around their edges which makes them not sharp but rather soft-edged. The way to paint watercolor poppy petals is by the application of different petals layered over one another. We do this by painting three triangular shapes with the narrow tips connected in the center. We then allow these to dry, and once they have completely dried, we will then apply a new layer of petals that overlap with the first layer. This is the general process of painting the poppy petal. If we were to paint the petals from a side angle, we consider the triangular shape and how it can either stay firm or droop downward. Even though the petals have this curved triangular shape, gravity can cause various deviations in the body of the petals, allowing them to curve in all sorts of ways. This is a concept you want to keep in the back of your mind as you paint petals from various angles.
How to Paint a Poppy Field in Watercolor?
Painting a whole field of poppies is simply a task of first understanding how to paint a poppy flower at all. Which you can then repeat within a landscape multiple times to create a field of them. This tutorial breaks down a few ways how to paint watercolor poppies. Painting watercolor poppies from a front view to a side view and other angles in between can help nuance the variety of how we have them exist in a landscape. We also want to have some idea of scale as we paint larger ones that represent the foreground and then smaller ones that represent the background. Another aspect of painting a watercolor poppy field is the contextualization of the greenery around the poppies. This tutorial breaks down how we add greenery to the scene as well as other unsprouted poppies, giving the impression of the blooming process of poppies. Simply put, understand how to paint a poppy flower, then play around with angles, shapes, and contextualizing features.
Matthew Matthysen is an educated multidisciplinary artist and illustrator. He successfully completed his art degree at the University of Witwatersrand in South Africa, majoring in art history and contemporary drawing. The focus of his thesis was to explore the philosophical implications of the macro and micro-universe on the human experience. Matthew uses diverse media, such as written and hands-on components, to explore various approaches that are on the border between philosophy and science.
Matthew organized various exhibitions before and during his years as a student and is still passionate about doing so today. He currently works as a freelance artist and writer in various fields. He also has a permanent position at a renowned online gallery (ArtGazette) where he produces various works on commission. As a freelance artist, he creates several series and successfully sells them to galleries and collectors. He loves to use his work and skills in various fields of interest.
Matthew has been creating drawing and painting tutorials since the relaunch in 2020. Through his involvement with artincontext.org, he has been able to deepen his knowledge of various painting mediums. For example, watercolor techniques, calligraphy and lately digital drawing, which is becoming more and more popular.
Learn more about Matthew Matthysen and the Art in Context Team.
Cite this Article
Matthew, Matthysen, “Watercolor Poppies – How to Paint Poppies in Watercolor.” Art in Context. February 9, 2022. URL: https://artincontext.org/watercolor-poppies/
Matthysen, M. (2022, 9 February). Watercolor Poppies – How to Paint Poppies in Watercolor. Art in Context. https://artincontext.org/watercolor-poppies/
Matthysen, Matthew. “Watercolor Poppies – How to Paint Poppies in Watercolor.” Art in Context, February 9, 2022. https://artincontext.org/watercolor-poppies/.


