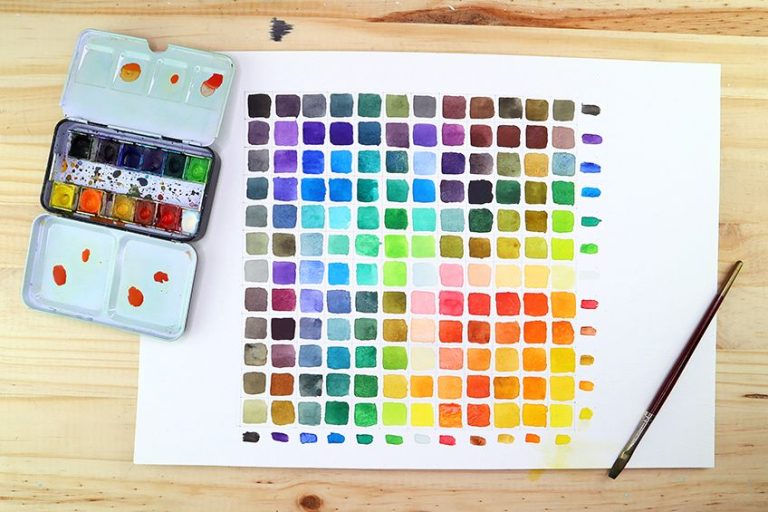
Watercolor Mountains – How to Paint Mountains for Beginners
Painting mountains with watercolor is a great way to practice with the watercolor medium. Watercolor can achieve some great effects that can be very useful for painting mountains. This tutorial teaches how to paint mountains for beginners in a way that is simple and still very beautiful. Mountain watercolor painting is not as hard as one might think and can be done so through various application methods. Painting mountains is also a great skill for watercolor landscapes in general and is worth adding to the watercolor repertoire of skills.
Step-by-Step Instructions on How to Paint Mountains
Painting watercolor mountains is all about understanding the layering qualities of watercolor. Learning how to paint mountains in watercolor comes with understanding how watercolor works.
Since it is a water-soluble medium it will inevitably have a transparency quality which makes the paint much lighter when it’s dry than when it is wet. As we paint this watercolor landscape we will find that we will allow various layers to dry before moving on. With that said, let us go through the various steps on how to paint mountains with watercolor.
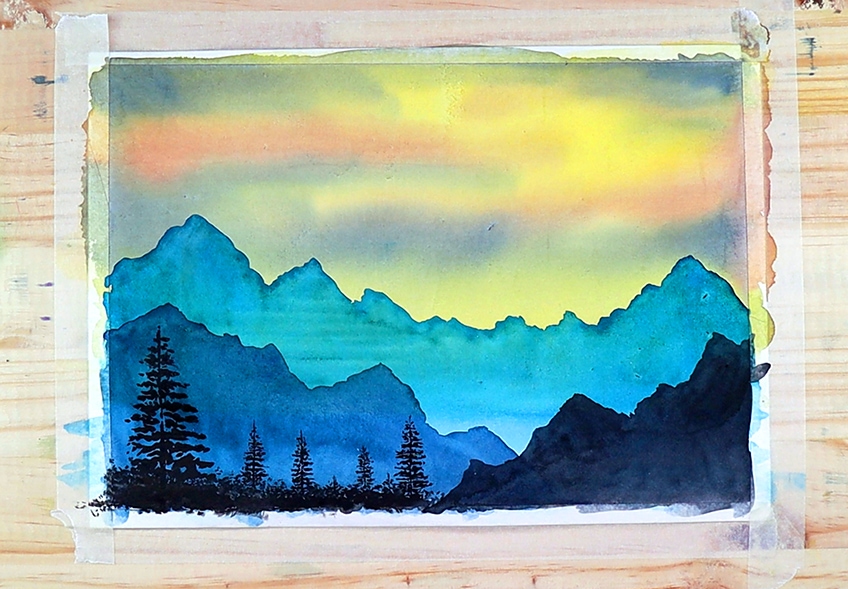
Step 1: Painting the Sky
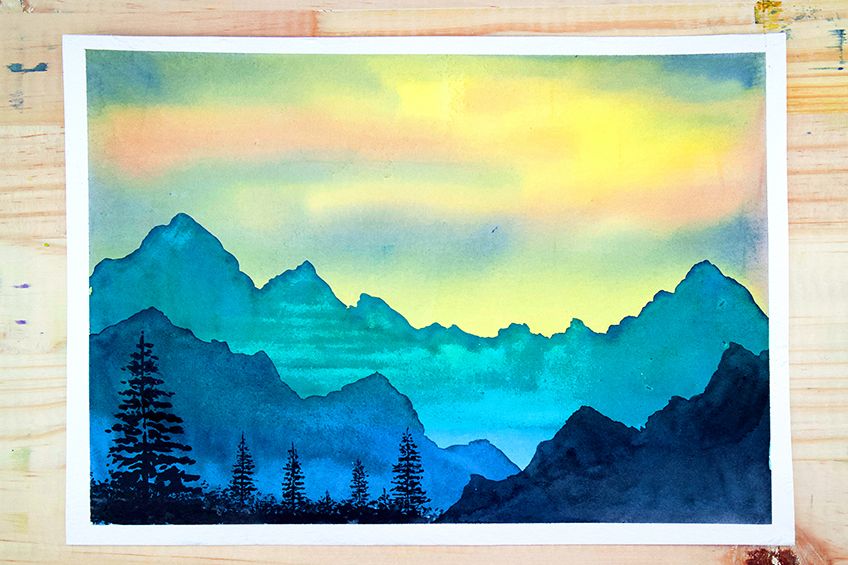
We begin with our mountains watercolor with the background. This means that we will be painting the sky first as we wait for the sky to fall behind our mountain range. Painting mountains is always best contextualized by the sky. We can begin to do this by priming the surface of our page with a thin layer of water.
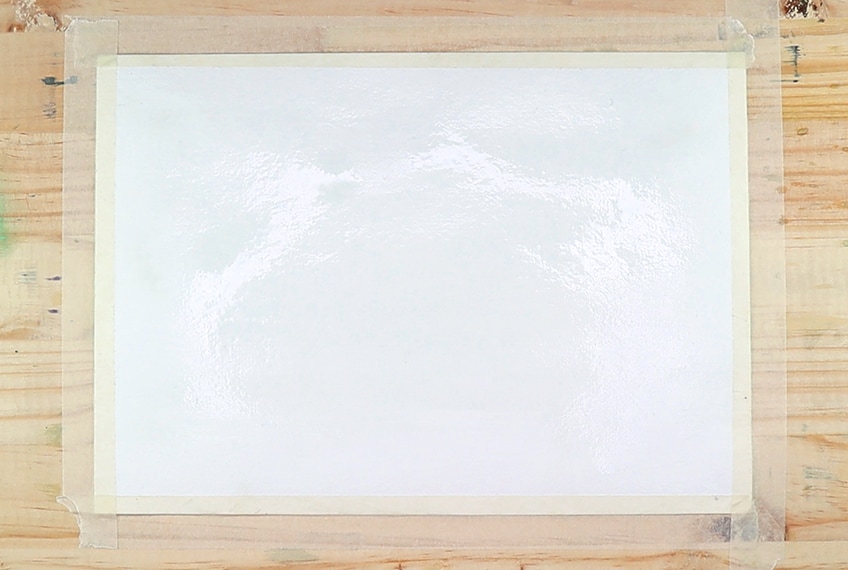
Let us begin painting the sky using our lightest colors first. A good suggestion is to always start with yellow which we can then add darker colors into whilst it is still wet.
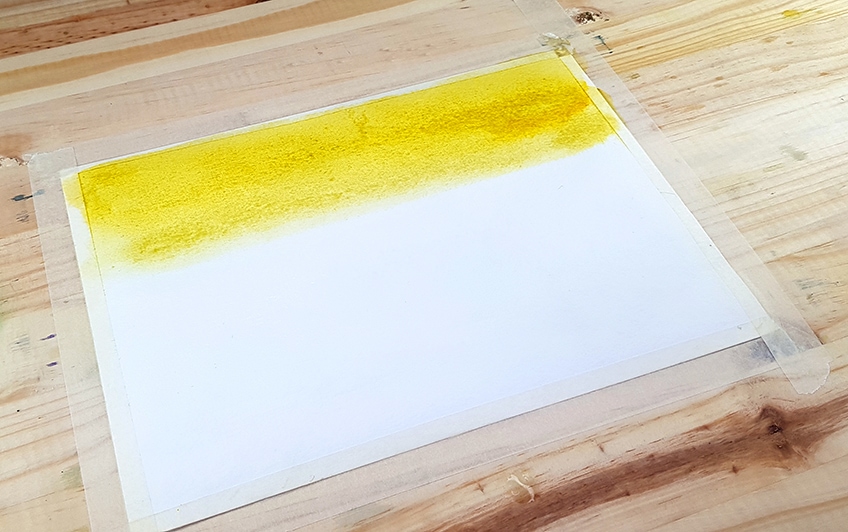
A nice color to add to the sky usually is red. Putting some red strokes in the sky can give some definition in the sky which could gesture at clouds in the sky.
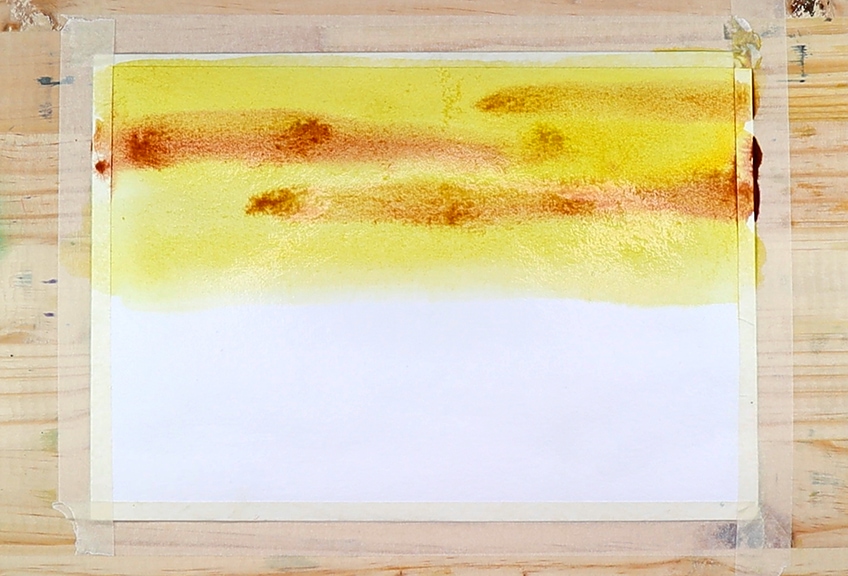
Perhaps add some blue strokes within the sky as well. Adding blue strokes within the sky represents the qualities of the sky that would have faded over the day. The idea here is to create a sunset type of sky that is slowly falling behind the mountain.
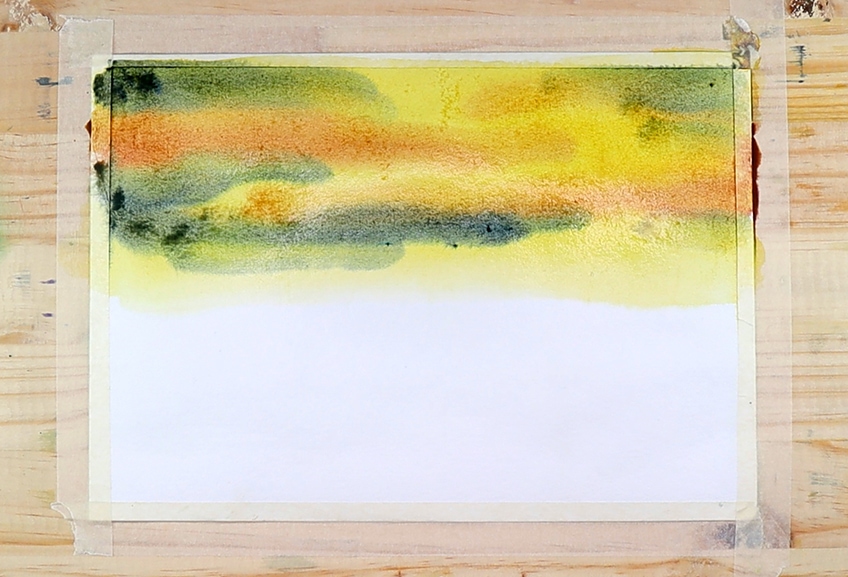
Once we are satisfied we should allow our sky to completely dry allowing for all the colors to seamlessly merge into one another. By doing so, we create a more natural-looking sky that will seem warm behind the cooler colors of our mountains.
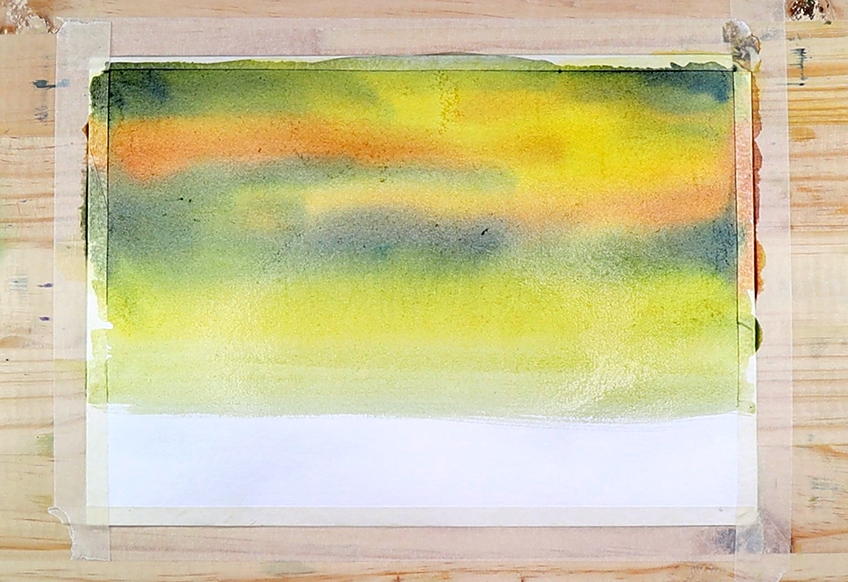
Step 2: Painting the First Mountain Range
We will now begin to paint the various mountain ranges. We do this by building each layer of the mountain with a variation of a single color. Since we have a more bright and warm sky, let us begin to paint the mountains with some cooler colors like blue. We begin by painting a mountain ridge across our page with a light blue.
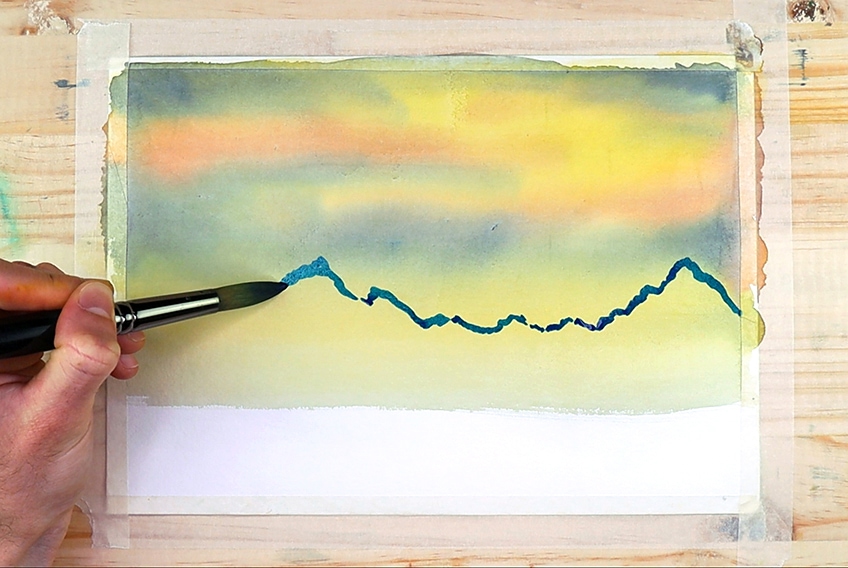
We will then proceed to paint our mountain range by filling in the part of the page that falls under the mountain ridgeline that you have painted. We don’t need to bring that paint to the bottom of the page, however, we do want to paint down most of the page.
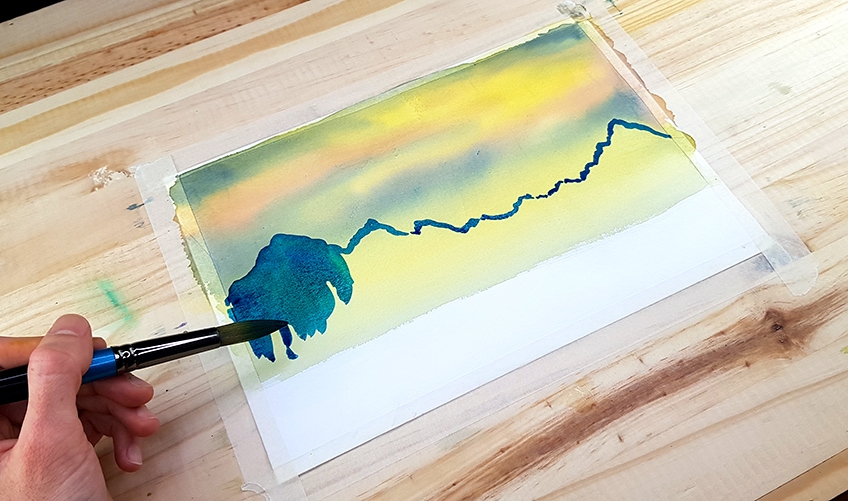
Try to keep your mix of this first mountain range quite light. As we paint each mountain range you will find that the lighter tone mountains should fall behind the darker tone mountains. We do this by starting with the lighter tone blue for this first mountain range.
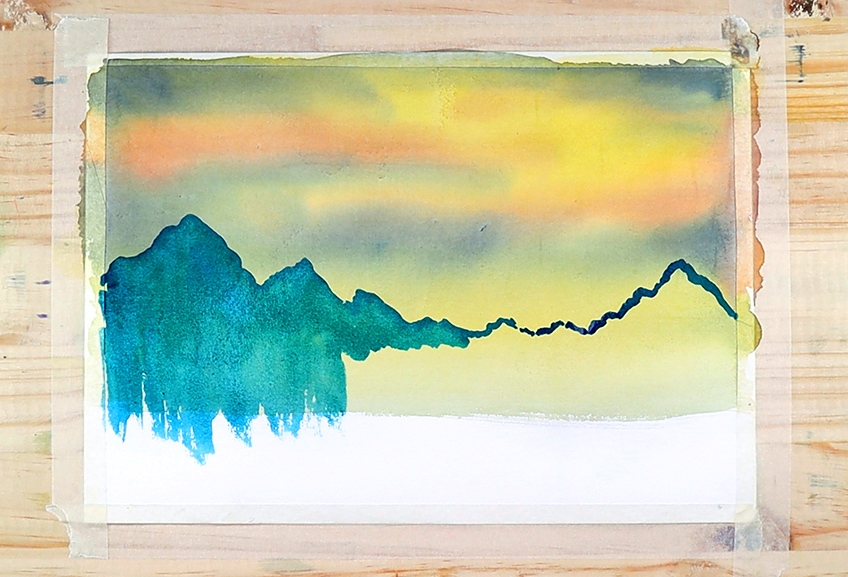
The aim here is to make sure we keep our paint wet through the painting of the whole mountain. The reason for this is because we want to have an even dry once the paint is dry, this way the mountain has a more seamless color composition without any strange color gradients or distinct lines.
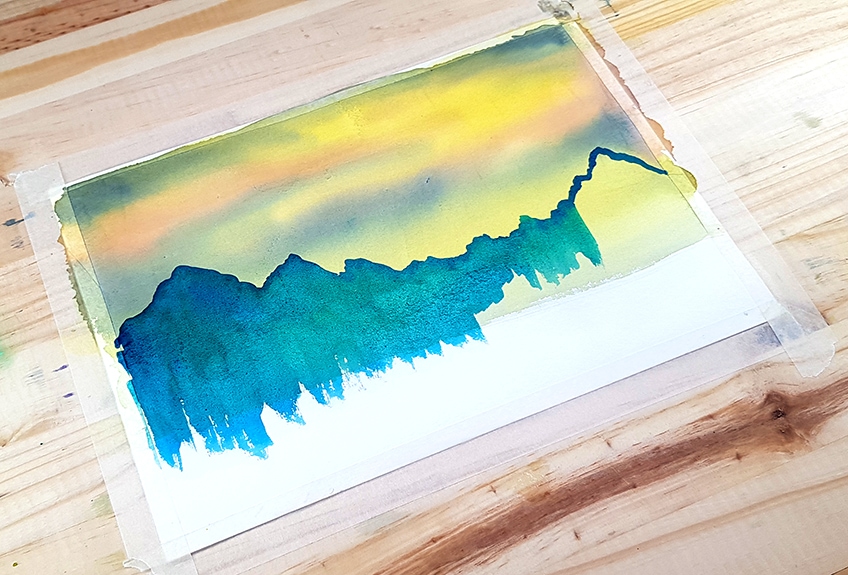
Make sure you paint toward the edges of the masking tape as you paint toward the sides of the painting. We want to make sure we do this to make it seem as if the mountains extend beyond the frame of the picture. Once you are done with the first mountain range you want to allow it to dry completely.
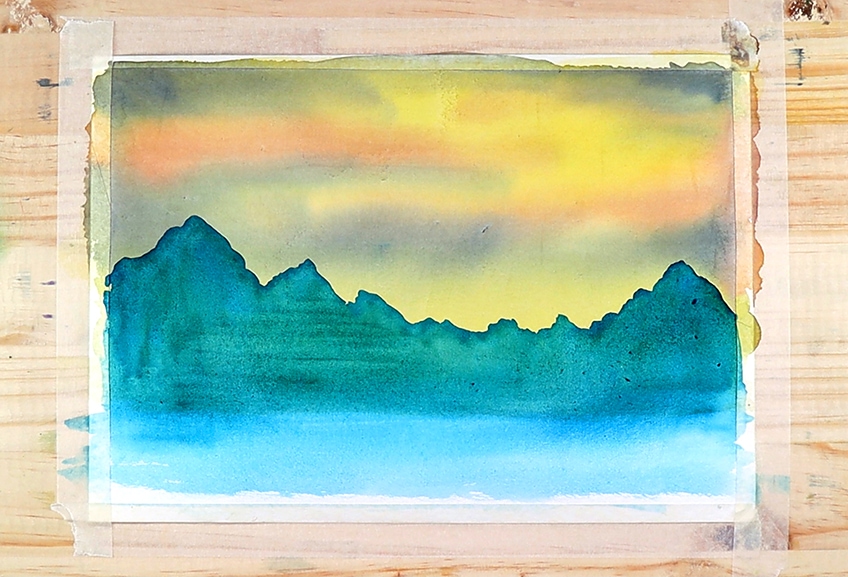
Step 3: Painting the Second Mountain Range
Once our first mountain range is completely dry we can now begin to slightly darken our already existing blue or make a new mix of blue that should be slightly darker than the blue used for the first mountain range. Once we have this we can begin to paint a line through our page indicating the ridge of the next mountain range.
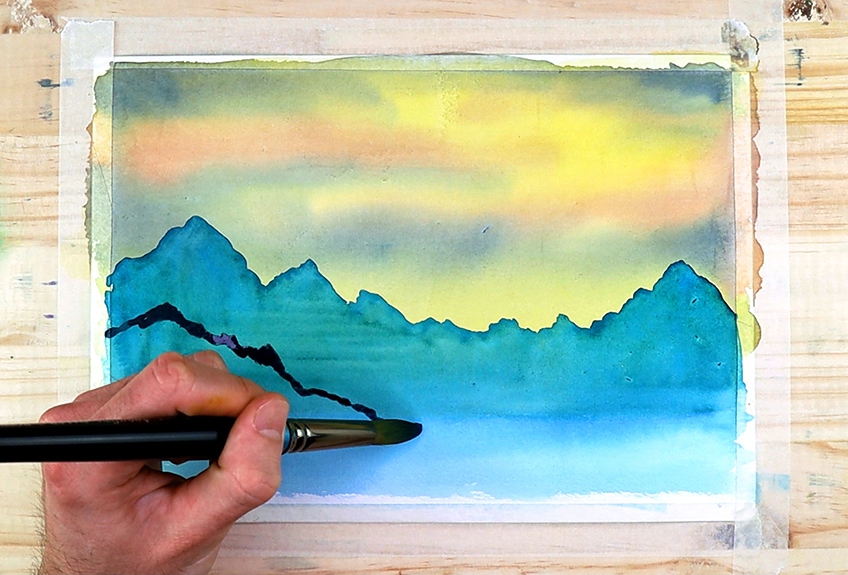
With this next mountain range try to keep it slightly below your first mountain range. Another good suggestion is to not paint it completely through the whole page. Perhaps begin on one side of the page and paint toward the center of the bottom part of the page.
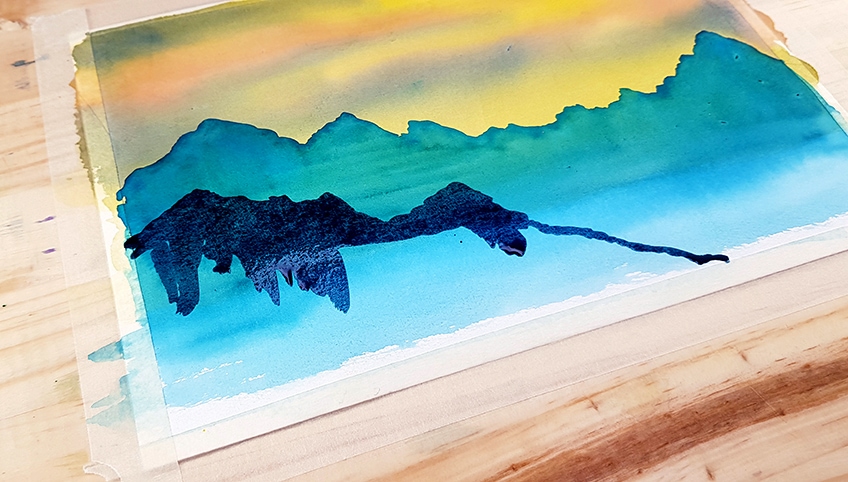
By doing this we create a sense of height in our landscape allowing the view to be depicted as one from a more heightened vantage point. Like the previous step, Once we have defined the ridgeline on our page we want to fill in our mountain with our darker blue.
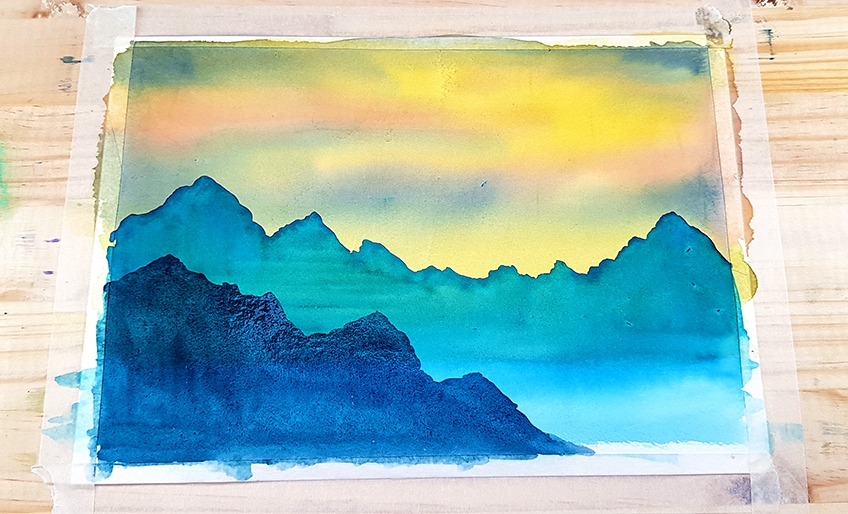
This time make sure you bring your paint to the bottom of the page. We want the mountain to seem like it extends beyond the frame of the painting. This creates a more pleasing and realistic aesthetic for the view of the mountains.
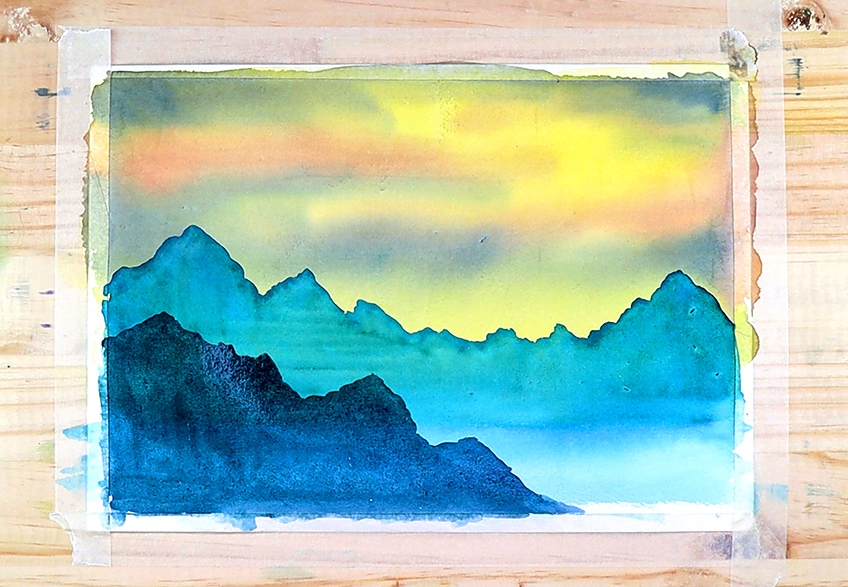
Lastly, make sure that the pint is wet throughout this process of filling in the whole mountain with your darker blue. This is so that once the paint has dried it has a more seamless look at the end with no strange areas that seem different in color tone.
Once you have done that, allow it to dry completely before moving on.
Step 4: Painting the Last Mountain Range
We will now do the same for the last mountain range by starting with darkening our blue one last time. This should be the darkest blue as each mountain range should be darker than the last. We can begin by painting a smaller mountain range beginning on the opposite side of the page from the last mountain range.
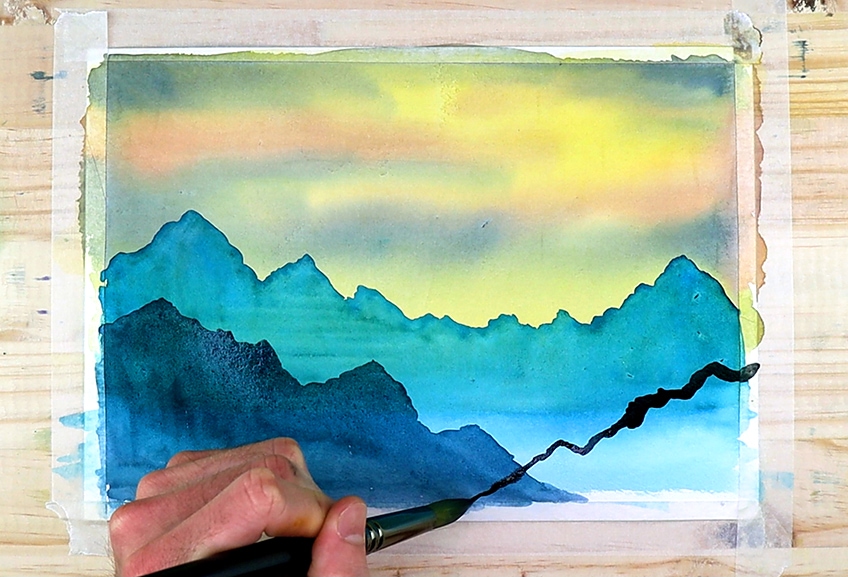
Try to keep this last mountain range smaller, by doing so we create a nice sense of distance from the closest to the furthest mountains. Watercolor mountains do well when layered both in color and size variations, this makes for a more pleasing composition.
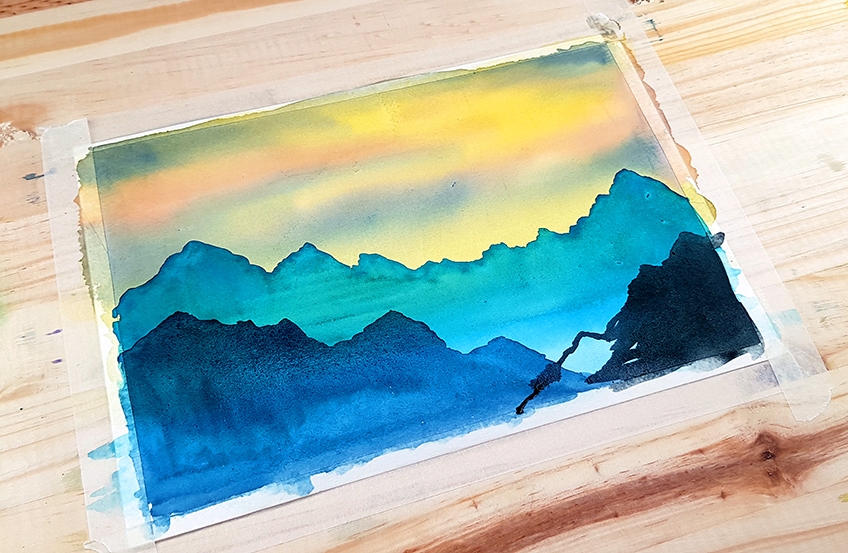
Lastly, Make sure you are filling in the whole mountain with an even distribution of paint. We want to do this with all the mountains, painting the color wet onto the page and allowing for the whole mountain to dry evenly.
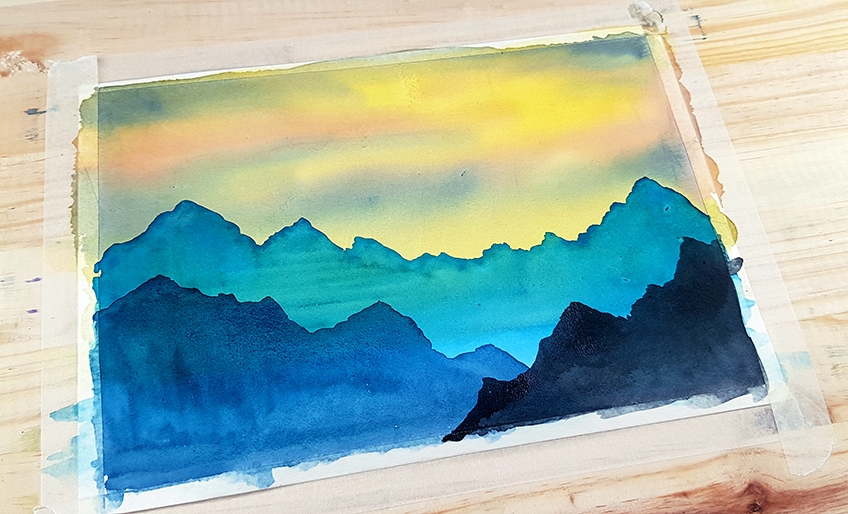
Step 5: Painting the Forest in the Foreground
Once all our mountain ranges have completely dried we can move on to contextualizing the landscape with some trees in the foreground. Painting trees in the foreground is quite simple. We start with dabbing one of the bottom corners of our painting with black paint to create a sense of foliage.
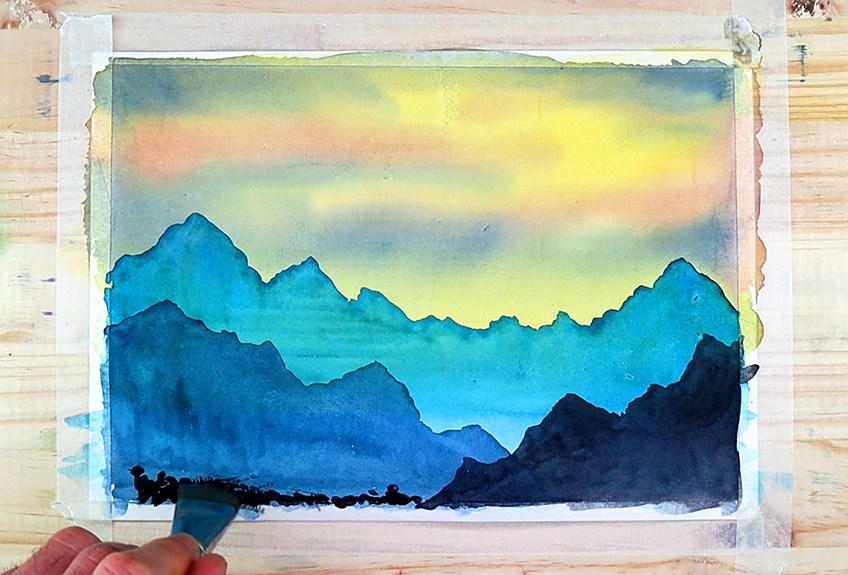
Perhaps use a dry brush with some black paint to create more of a non-wet type of mark. We want to use black because at this point the trees will sit in the foreground of the image and the closer the objects the darker they should be. This creates a good sense of depth in the image. Begin by making a vertical stroke for the tree.
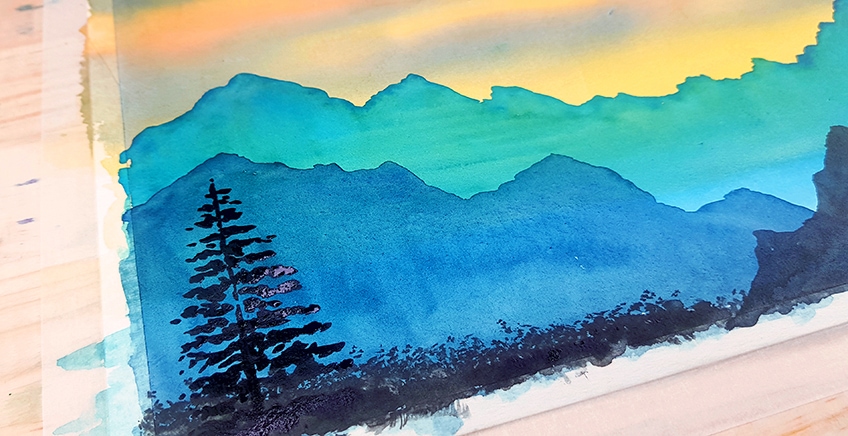
Proceed to make little dabbing marks around that vertical line, However, try to create a set of marks that define an arrow-head shape which gives the impression of a pine tree. Making pine trees work well with mountainous landscapes as they create a Forest quality in the landscape.
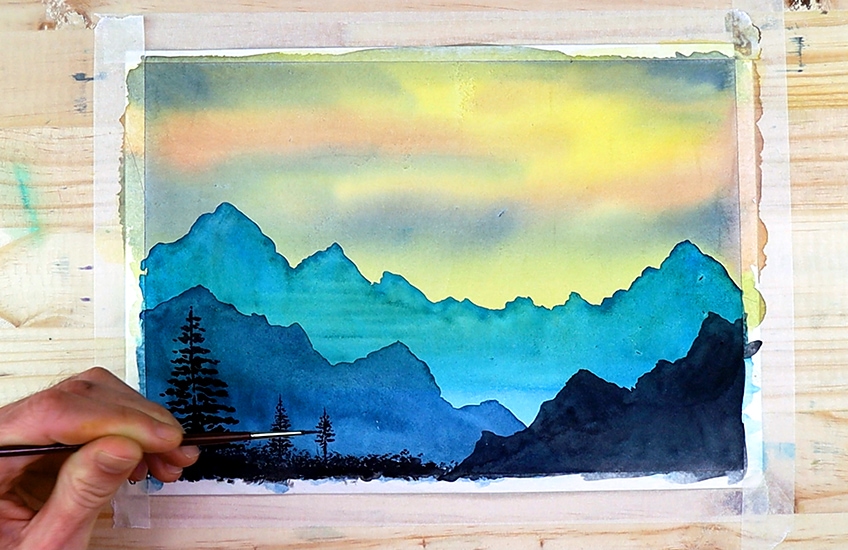
Proceed to paint one or two more trees to give a sense of variety. A good suggestion would be to paint different sizes which gives a sense of various distances at which the trees are located. This also helps to create more depth in the image, allowing for the landscape to seem more expansive.
Step 6: Removing the Tape
Once your painting has completely dried it is time to remove your tape from your image. Try to do this quite slowly, you don’t want to tear your paper. ALways tear outwardly from the page.
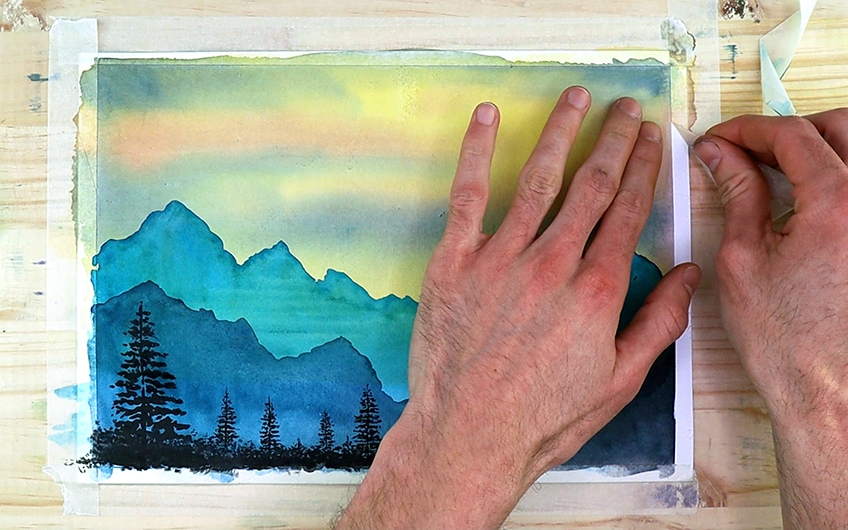
There you have it, watercolor mountains. This is a great and easy way to learn how to paint mountains in a watercolor landscape. Painting mountains is super easy when you are patient and slowly go through each step.
This tutorial breaks down a simple way to paint mountains for beginners and what we should be left with is a beautiful mountain watercolor painting.
Tips to Remember
Painting watercolor mountains is a really fun task and can be done so through various methods. In this tutorial, we will find that the process of painting watercolor mountains is quite simple as we slowly build layer upon layer until we get the darkest and final details of our watercolor landscapes. Here are some additional tips
- Always tape your paper down when painting with watercolor. This way we have our paper firmly placed on our surface for better control.
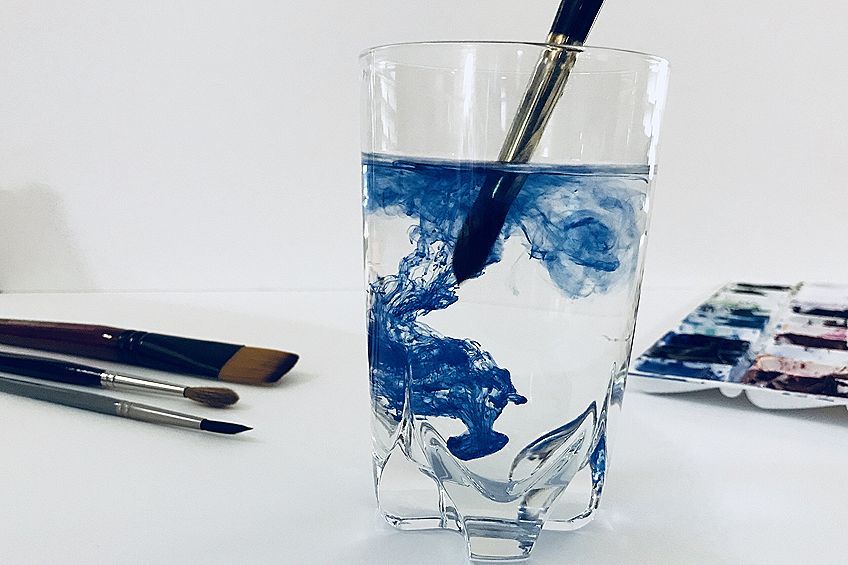
- Always have two jars of water when doing watercolor. One for an initial rinse after using the paint and the other for a second cleaning of the brush for assurance that it is clean.
- Sometimes watercolor requires speediness as some moments in watercolor need to be attended to whilst the paint is still wet. However, sometimes it is the complete opposite such as the case within this tutorial.
- Painting mountains is simply about layering shapes and colors over one another. It is about doing so from darker to lighter colors.
We should remain patient, allowing for each layer to dry before the next application of paint when painting mountains. Painting mountains lighter in the background and darker in the foreground also creates the real-life effect of objects fading in the distance. Thus it is a great skill to have in the pocket for future watercolor landscapes. We have also a separate tutorial on how to draw mountains.
Frequently Asked Questions
How Do You Paint Distant Mountains in Watercolor?
This quality of painting mountains in the distance is often achieved in both the opacity of the paint and the scale of the mountain on the page. One way to paint watercolor mountains in the distance is to make them small on the landscape that you paint. This will often mean that they will be on the horizon line but will also be small on the page compared to larger objects you might paint in the foreground such as trees. Painting larger mountains in the distance often are done so by making very light washes that resemble the quality of a faded object. This mimics the quality of how objects fade in the distance and works well with mountains in a mountain watercolor painting.
What Is the Easiest Way to Paint Mountains?
In this tutorial, you will find that when you learn how to paint mountains with watercolor, we are making an emphasis on understanding a very vague idea of a mountainous shape. We want to understand the general structure of a mountain ridge. Once we have that, we paint that ridge across the page and slowly fill it in completely with a light color all the way down the page. We repeat this process with darker colors layered over each color as we apply new mountains in the painting. Each layer should get darker, by doing so it will create a sense of depth until you get to the foreground of your painting where you can put your final and darkest details in your watercolor mountain painting.
How Do You Paint Mountains Step by Step?
This tutorial breaks down how to paint mountains with watercolor step by step, however, it is simply about layering the different aspects of your painting. We begin with the lightest layer which is the sky and we paint this from top to bottom of the page filling almost the entire page. Once that has dried you slowly begin to paint mountains with a light color. You then allow that first mountain to dry and then proceed to do another mountain with a darker color. You then allow that mountain to dry and repeat the process until you’re satisfied with the range of mountains you have in your painting. We do this until we get to the foreground of our paintings where we then paint the darkest and final details within our watercolor mountains painting.
Matthew Matthysen is an educated multidisciplinary artist and illustrator. He successfully completed his art degree at the University of Witwatersrand in South Africa, majoring in art history and contemporary drawing. The focus of his thesis was to explore the philosophical implications of the macro and micro-universe on the human experience. Matthew uses diverse media, such as written and hands-on components, to explore various approaches that are on the border between philosophy and science.
Matthew organized various exhibitions before and during his years as a student and is still passionate about doing so today. He currently works as a freelance artist and writer in various fields. He also has a permanent position at a renowned online gallery (ArtGazette) where he produces various works on commission. As a freelance artist, he creates several series and successfully sells them to galleries and collectors. He loves to use his work and skills in various fields of interest.
Matthew has been creating drawing and painting tutorials since the relaunch in 2020. Through his involvement with artincontext.org, he has been able to deepen his knowledge of various painting mediums. For example, watercolor techniques, calligraphy and lately digital drawing, which is becoming more and more popular.
Learn more about Matthew Matthysen and the Art in Context Team.
Cite this Article
Matthew, Matthysen, “Watercolor Mountains – How to Paint Mountains for Beginners.” Art in Context. February 7, 2022. URL: https://artincontext.org/watercolor-mountains/
Matthysen, M. (2022, 7 February). Watercolor Mountains – How to Paint Mountains for Beginners. Art in Context. https://artincontext.org/watercolor-mountains/
Matthysen, Matthew. “Watercolor Mountains – How to Paint Mountains for Beginners.” Art in Context, February 7, 2022. https://artincontext.org/watercolor-mountains/.


