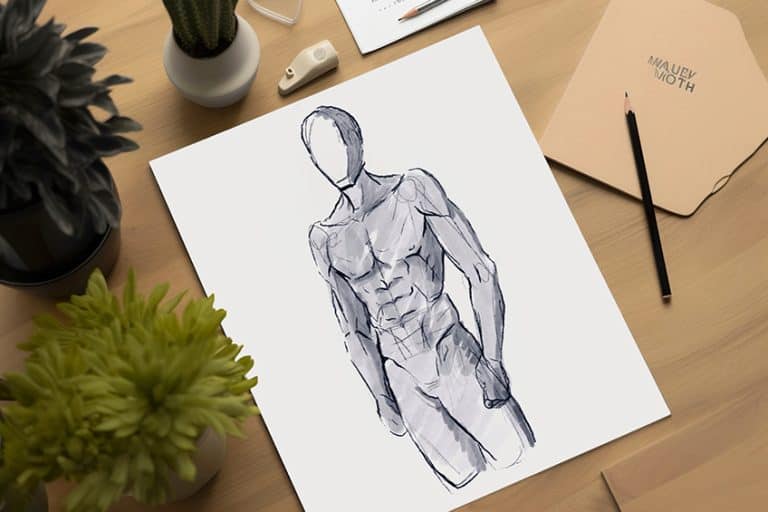
Human Proportions Drawing – Learn to Create a Human Anatomy Drawing
Human body proportions are very interesting to draw because bodies all differ in their height, widths, and ape-indexes. This means that there is a general rule of thumb, however, this rule can be altered to suit different human figures. Capturing the human figure in its correct human body proportions is quite an easy task. This is a great skill to learn because once you understand how to capture the human body proportions you can tweak and adjust the variables to create all types of body shapes. However, in this tutorial, we will be drawing the body proportions of a male and female. Understanding how to create a female and male body drawing that is comparable to one another is a helpful exercise that teaches you how to gauge height and width in their generalized structures for both the male and female body. Again, body types differ in various ways, however, understanding the general process of forming the male and female body can be tweaked and changed in various ways to create different body variations for both the male and female structures.
An Easy Guide to Correctly Drawing Human Proportions
Working out human body proportions through a simple body sketch is a simple and easy activity that can be quite fun once you start to understand and capture the proportions correctly. Once you have the information on how the human figure is sized in its different parts, it unlocks a lot of potential for human drawing. Human anatomy drawing can always seem difficult but it is quite easy once you break it down into its diagrammatical formation.
Working with simple measurements and lines will help to establish the human proportions drawing accurately, which can be changed and tweaked to your liking from thereon.
In this tutorial, we will be creating a generic female and male body drawing, to establish the general rules of scale for each body type. Having this information as a human proportion drawing guide will enable you to create all types of body shapes, making the process of people drawing a little easier. That being said, let’s take a look at what materials we will need.
Necessary Materials
A human proportion drawing is something that should be practiced with a pencil as it provides the artist with the opportunity to rectify any little mistakes as they create a body sketch. Human drawings are always complicated, however, doing a human figure drawing where you explore human body proportions should be done in pencil. Drawing body proportions requires simple materials such as a pencil, ruler, eraser, sharpener, and some good paper. All of these items can be found through the links below:
- Pencil
- Eraser
- Sharpener
- Ruler
- Good paper (200 g/m – 250 g/m recommended)
Instructions on How to Draw Human Body Proportions
We want to start by looking at how to form the male drawing, working out the body proportions. We will then do the same for the female body proportions, focusing on how the female body proportions are formed. We can then do a comparative drawing between both the female and male bodies, seeing how the different scales and forms can be achieved and compared to one another.
Once we have drawn the male and female human figures, we can draw them next to one another, giving us the opportunity to see how they can look together.
By doing this we explore the human body proportions comparably, as we can see how to scale the male to the female body. That being said let us get into the steps of this human proportions drawing tutorial.
How to Draw the Male Body – Male Anatomy Drawing
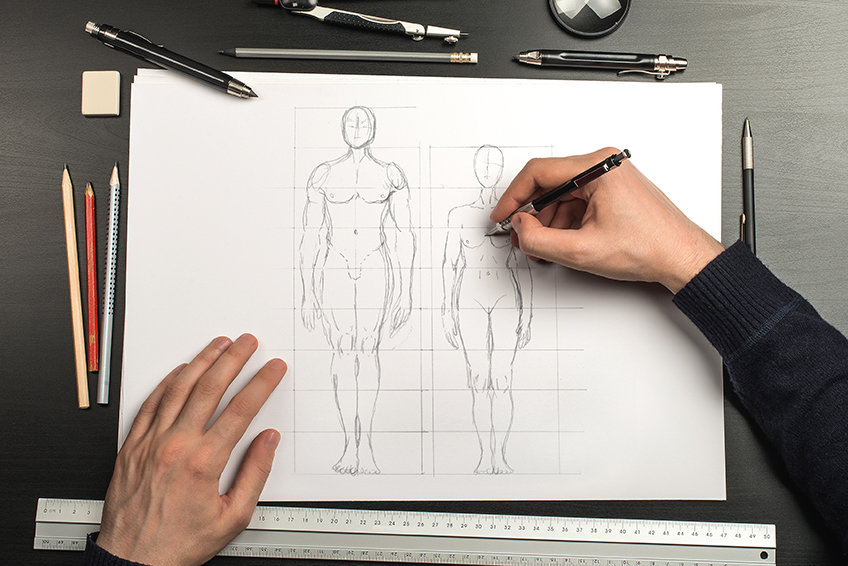
We want to start with a male anatomy drawing, working out the general process of forming a human figure using a grid divided into eight equal sections. This will be the guiding force that will help us to accurately draw both the male and female human figures.
We want to use the grid to work out how long and wide we want our figure to be in stature.
Step 1: Drawing the Grid
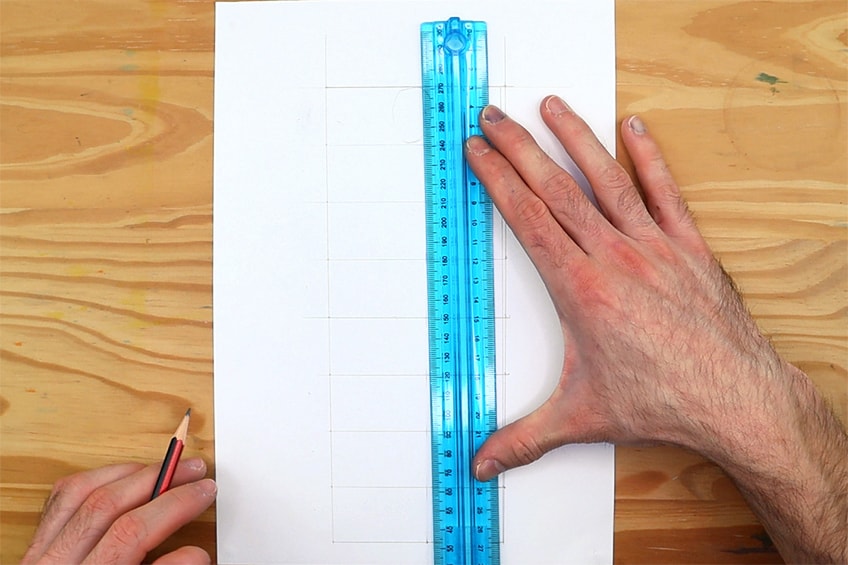
We can begin by drawing a vertical styled grid that will have eight rows and two columns. The grid will have a vertical line down the center of it, dividing the grid of eight rows in half so that we are left with sixteen blocks. The grid can be however wide you would like and however long you would like.
However, try to keep the rows equal in height and the columns equal in width. This way we will be able to accurately draw our human figure as symmetrical as possible.
Step 2: Drawing the Upper Section of the Human Figure
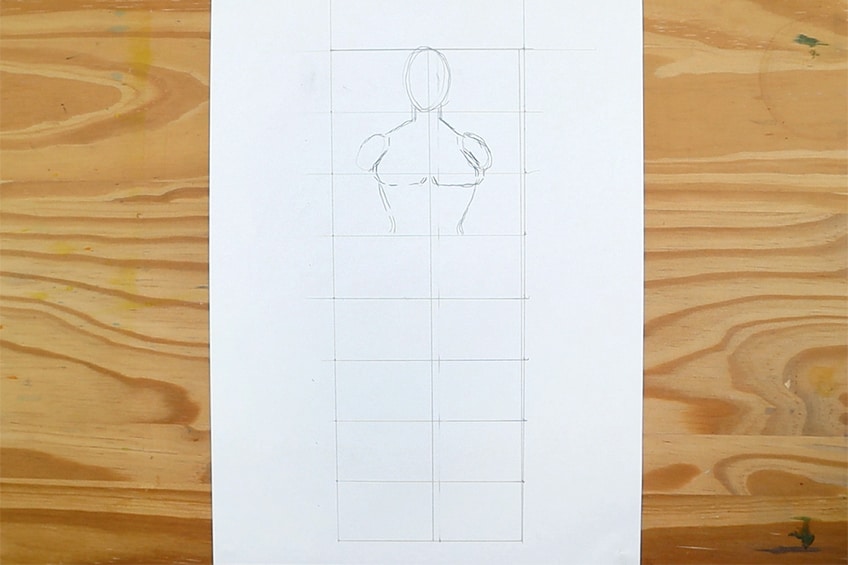
Once we have drawn our grid, we can begin by drawing the head in the first row from the top. We want to make sure that the head is in the center of the vertical line that divides the columns into two. We want to keep each body part equally drawn.
We can achieve this on either side of the column as we work our way down the body.
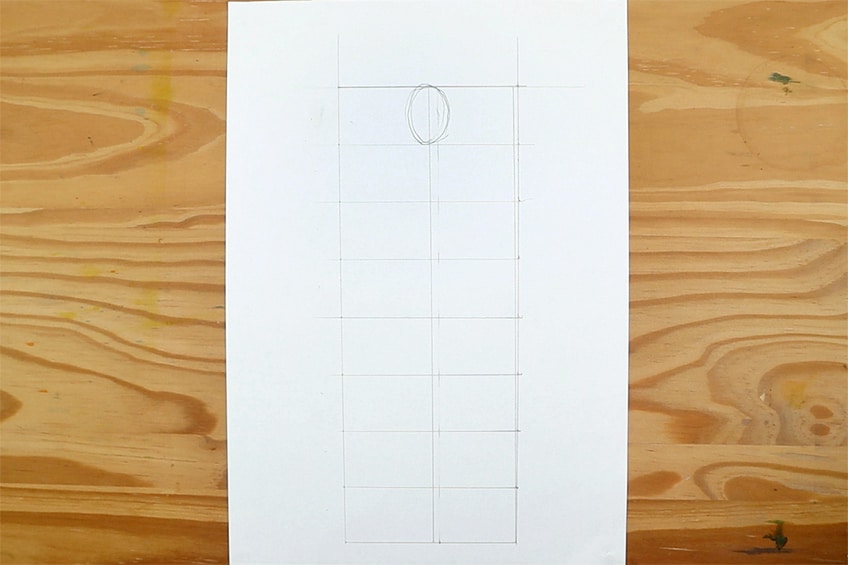
From there we can work our way down the rows, where we can draw the shoulders and chest. The lower chest slightly extends into the third row, where the torso’s rib area will be drawn. Toward the lower section of the third column, we can start to draw the hips of the human figure.
Step 3: Drawing the Mid-Section of the Human Figure
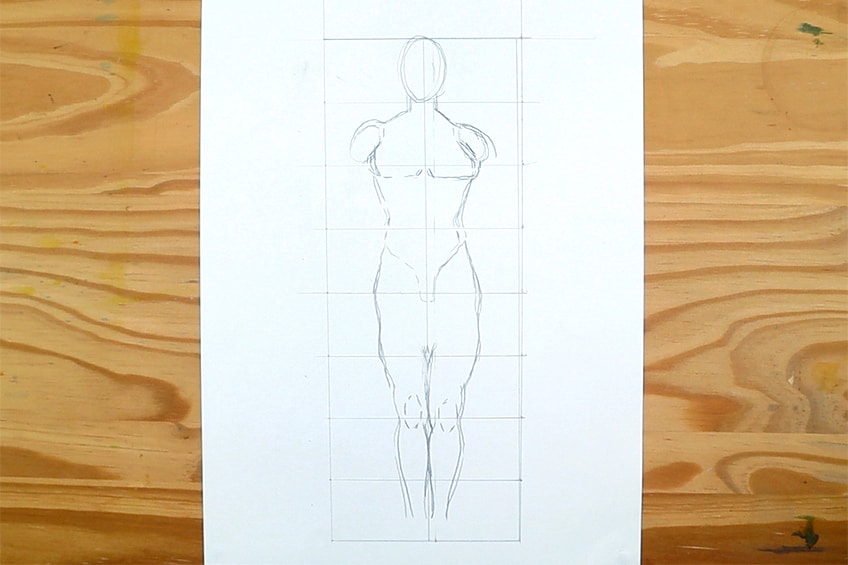
From the fourth row into the fifth row is where the naval area will flow into the groin and crotch area of the body. We want to make sure that our hips flow into the upper thigh area as symmetrically as possible.
Spend some time going through the sections slowly, tweaking and correcting the form as you go.

Step 4: Drawing the Lower Section of the Human Figure
The figure’s hips should flow into the upper knee area, moving from row five into row six. The knees should exist between the sixth and seventh row. This means the upper thigh will be drawn between the fifth and sixth whilst the knees should be placed between the sixth and the seventh row.
The shins will then flow from the seventh row into the eighth where the ankles and feet will be drawn.
Step 5: Drawing the Arms
We want to keep the arms for last as they act as a separate member that should be drawn according to the thigh placement. The arms start with the shoulders in the second row, which is down the body, and end with the hands.
These end in the fifth row next to the upper thigh.
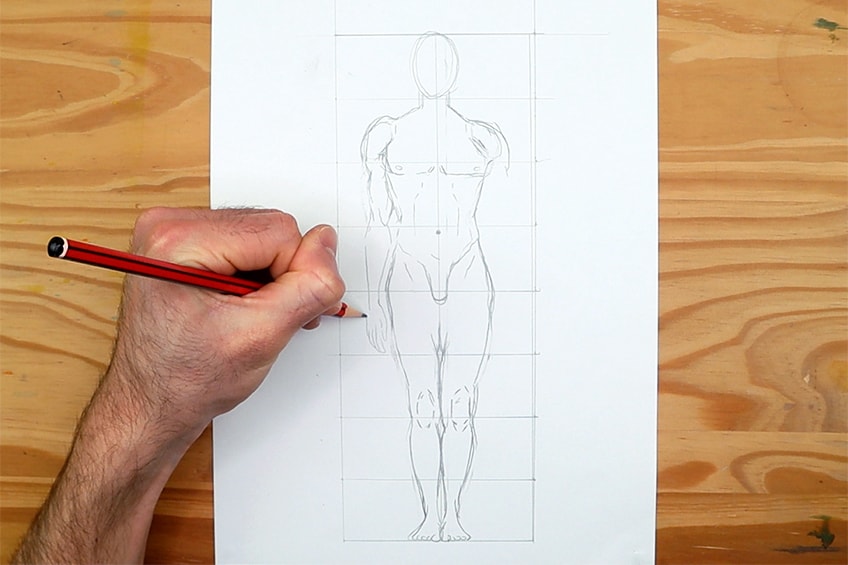
You can then use the first arm you drew as a way to measure how long the other arm should be drawn. Again, always try to keep your figure as symmetrical as possible, using the vertical line in the center of the grid to help you place the different body parts correctly.
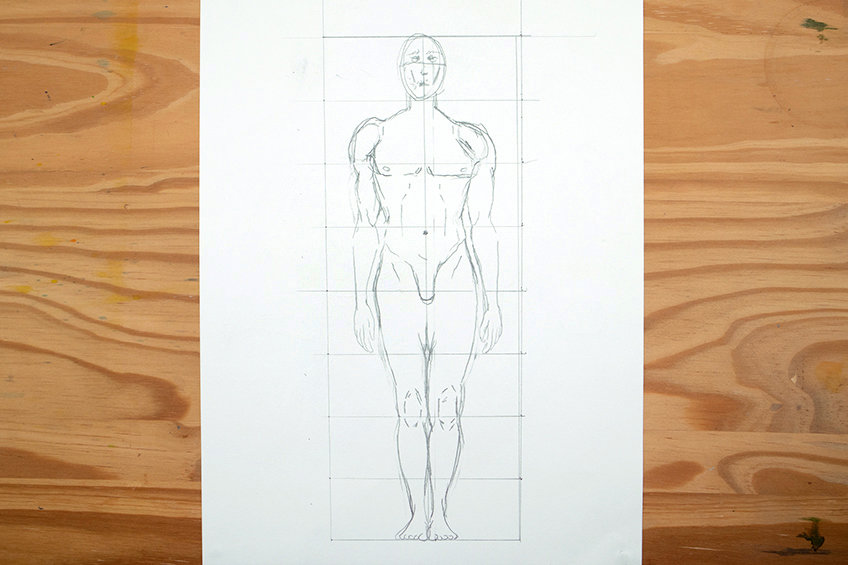
That’s how you accurately draw a male body. Remember, the eight rows should be equal in height – this height is determined by the size of the head. This is called the rule of the head, where the head determines the height of the rows.
The body is then distributed into eight sections all the size of the head as a gauge for scale.
How to Draw the Female Body
The process for the female body is exactly the same, we can now take the same process and apply it exactly to the grid formation of the female body. We want to use the rule of head to establish the height of each row, which will be divided into eight.
From there we will divide the grid in half with a vertical line, creating a series of sixteen blocks.
Step 1: Drawing the Grid
We want to begin the same way as we did for the male body drawing. To accurately achieve a human body drawing, we need to use a grid to help us. Draw the grid with your pencils and rulers as you did for the male body drawing.
We want to have eight rows divided down the middle equally by a vertical line.
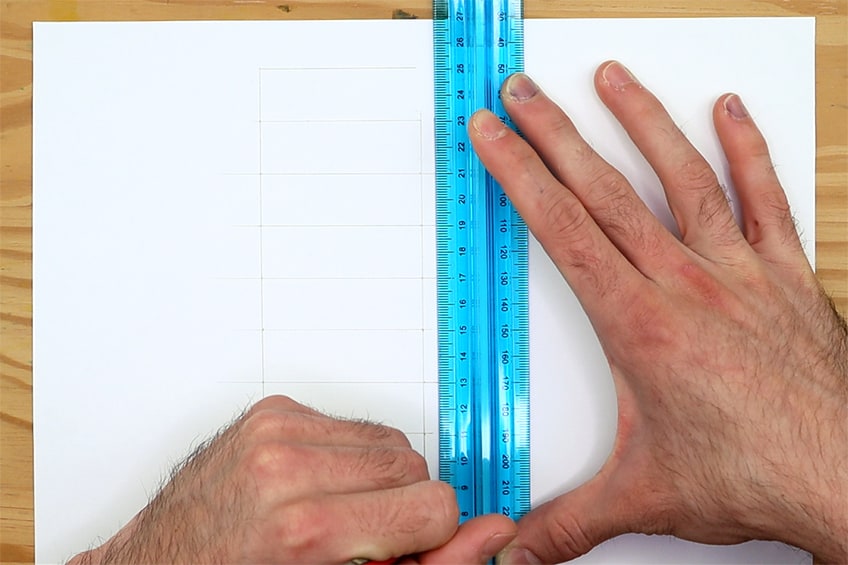
We want to have the same eight rows as we did for the male drawing, divided into two columns which should result in sixteen equal blocks. From there we will proceed to apply the body parts, starting with the head. Remember the head will fill the height of a row, and works as the height rule for each row.
Step 2: Drawing the Upper Section of the Human Figure
We can proceed to draw the head in the first row, centering it in the middle of the vertical line that distinguishes the two columns. We want to make sure that we are drawing the head big enough that it touches both lines within the first row.
We can also begin to draw the shoulders into the second row.
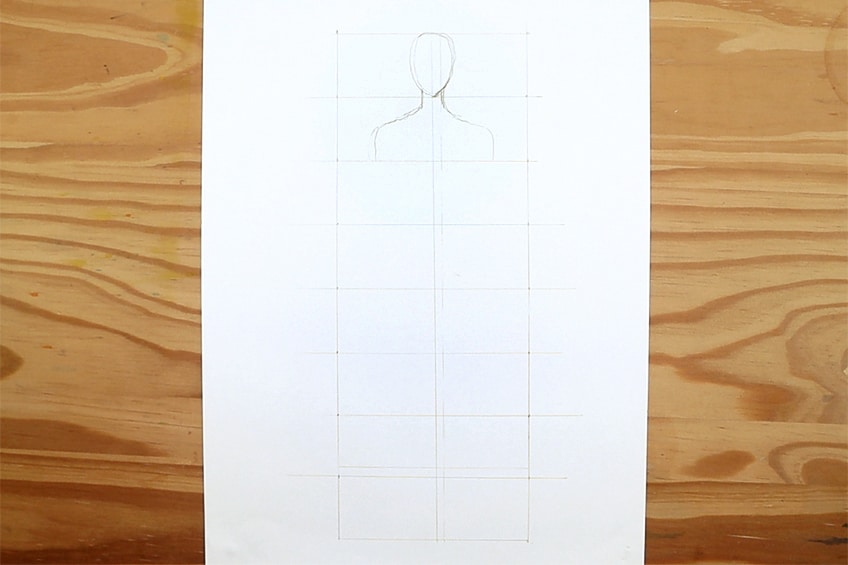
Again, we can follow the same process as we did for the male body, however this time we want to make sure that we place the breasts in the right position for the female figure. The breasts will fall slightly into the third row, we want to aim for symmetry within the chest and shoulders. We can also then proceed to draw the hips and naval area within the upper section of the fourth row.

Step 3: Drawing the Mid-Section of the Human Figure
As we carry on drawing, working our way down the human figure, we can draw the naval in the upper section of the fourth row. From there we can work our way down by drawing the hips in the fourth row, with the crouch area on the bottom line of the fourth row.
The crotch area can be placed in the center, directly on the vertical line, keeping the figure symmetrical in the hips area.
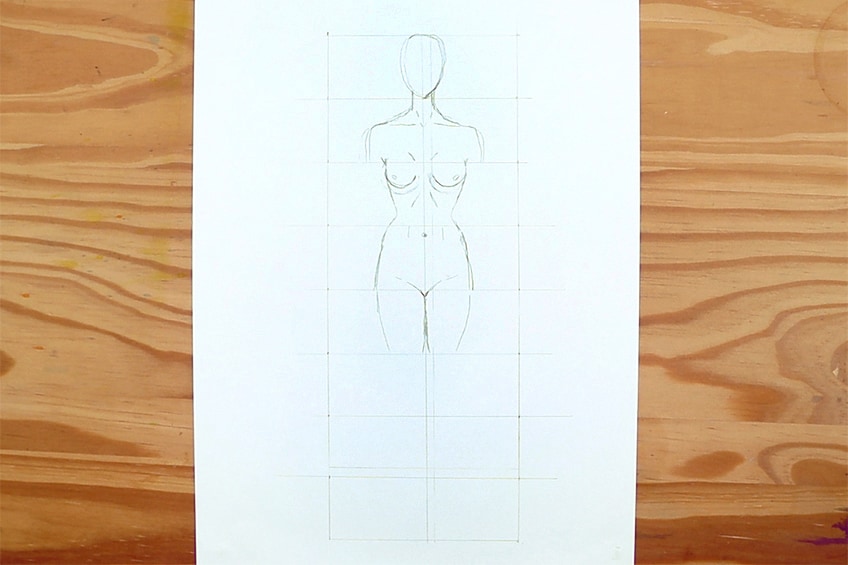
Step 4: Drawing the Lower Section of the Human Figure
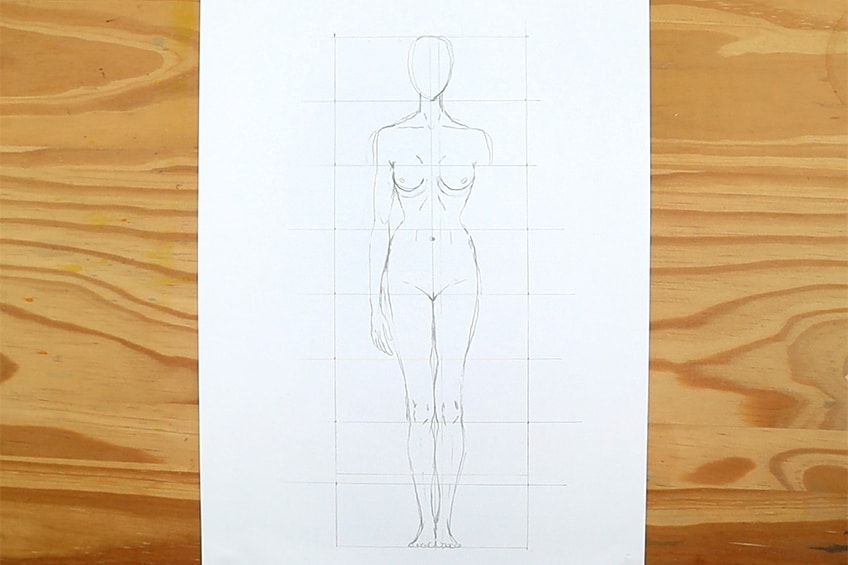
We want to use the male body drawing as a reference for our female drawing. We follow the same process, however, this time we want to soften some features and accentuate others. As you proceed to the lower half you can add in the knee and lower thigh area in the sixth row of the grid.
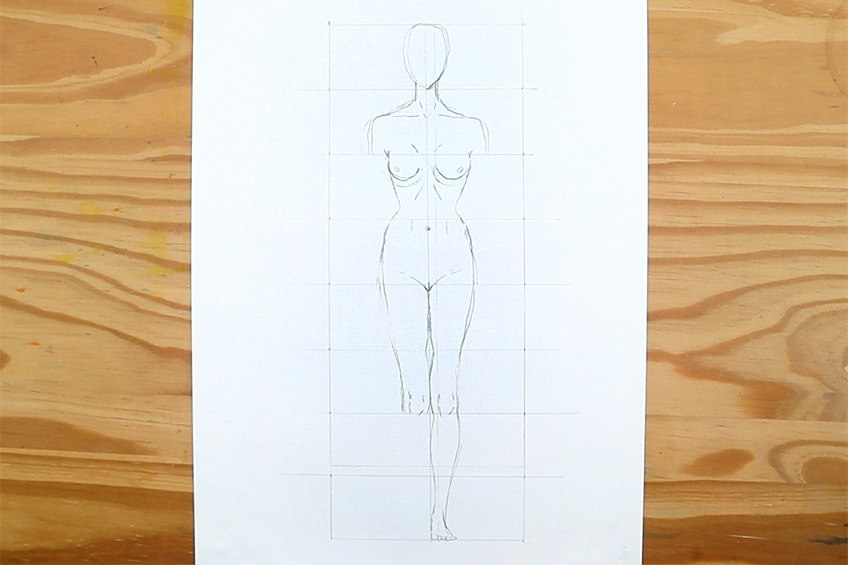
As you continue to add in the rest of the legs, use the same process as you did for the male body sketch. You can continue to draw the shins and feet moving from the seventh row into the eighth where the ankles and feet would be placed.
From there you can start to add in the arms, once again starting from the second row, with the hands reaching the fifth near the upper thigh.
Step 5: Drawing the Arms
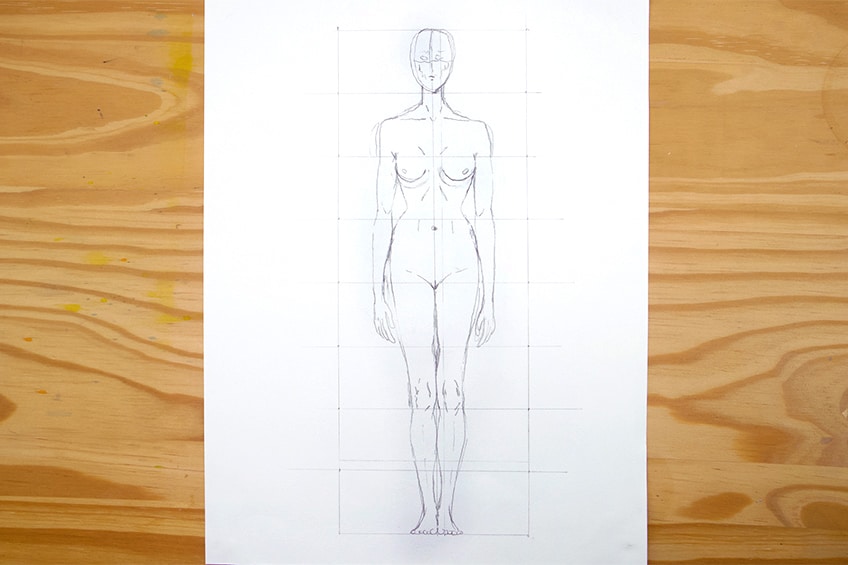
As you proceed to draw the female figure’s arms, you can also allow yourself to tweak any areas as you go. Remember, the arms start in the second row with the shoulder sand should fall next to the upper thigh area in the fifth row.
You can also tweak any details, using your eraser and pencil.
How to Draw Human Figures Within Scale of Each Other
Now that we understand how to draw each figure, we can explore how to draw them in the same space, giving the human figure contextual information on how they fit together. Drawing the male and female figures together defines how they would coexist in the same space.
This is a helpful skill for drawing male and female figures in various artworks. Let us take a look at the different steps
Step 1: Drawing the Grid
We want to proceed as we have been by drawing a grid, in which the male figure will be constructed. However, instead of eight rows for the male figure, we can make nine rows. We will still keep the grid as two columns.
However, this time we will just be adding another row for the male body drawing grid.
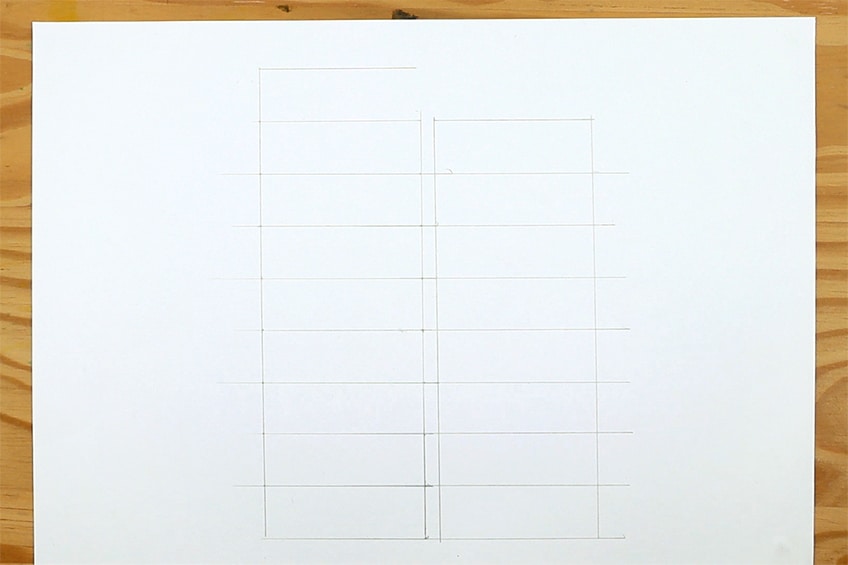
We can then proceed to draw another eight-row and two-column grid right next to the nine-row grid. We can start them both from the bottom, as the bottom row will be indicative of the foot placement. The ninth row at the top for the male figure is a way to heighten the male figure in comparison to the female figure.
Step 2: Drawing the Male Figure
As you did in the first stage of the tutorial with the male body drawing, you can proceed to do the same for this male figure. We can start with the head in the first row from the top, placed in the center, moving onto the shoulders that will be placed in the second.
The chest will fall in the second row as well with the body flowing from the third to the fourth.
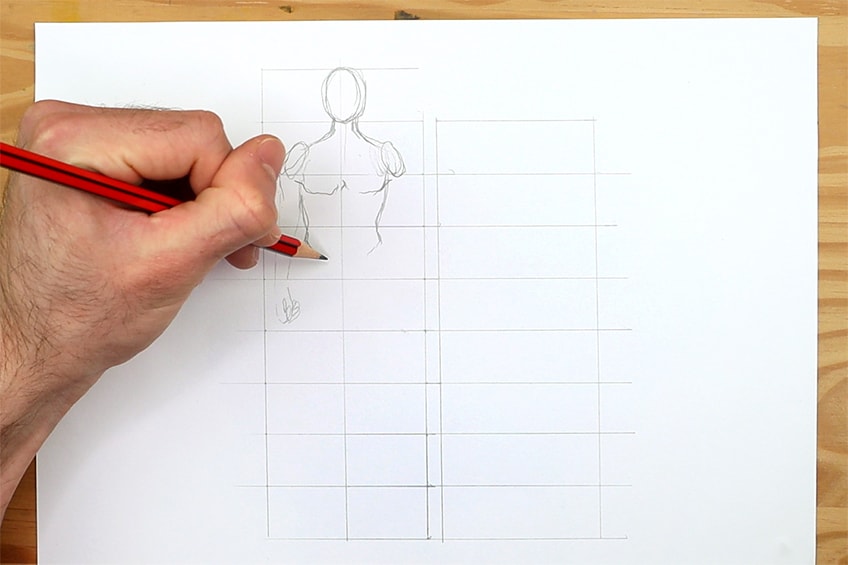
Again, the crotch area will be drawn in the same place as well, which should be within the fourth and upper fifth row. Within the fifth row, we start to draw the hips which flow into the upper thigh area within the sixth row of the grid.
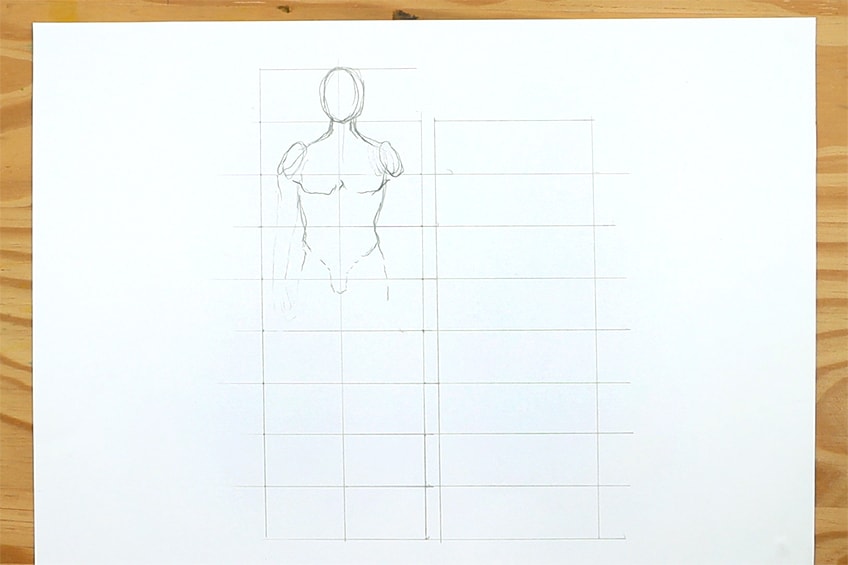
Step 3: Elongating the Legs of the Male Figure
The only thing we will do slightly differently is elongate the legs slightly, giving a heads difference in height. This means the thighs can flow from the fifth into the sixth row. Everything else about the figure will be as you drew it earlier in the tutorial.
This is just a way of subtly changing figures to give them height.
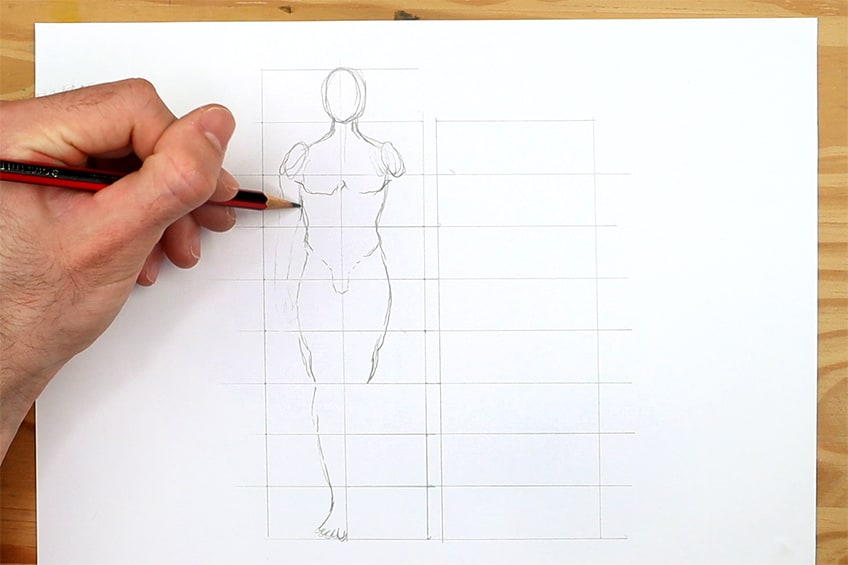
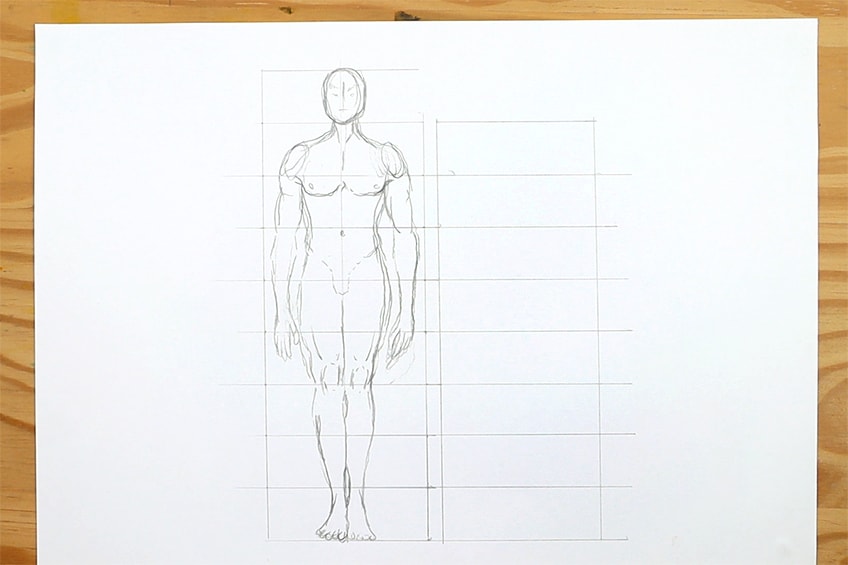
As you proceed to draw the legs, the knees will be positioned sixth and seventh row, where the calf and shin area will also flow a little longer. The ankles and feet will remain in the last row, in this case, the ninth row. The hands will still fall next to the thighs which means that they will fall in between the fifth and sixth row.
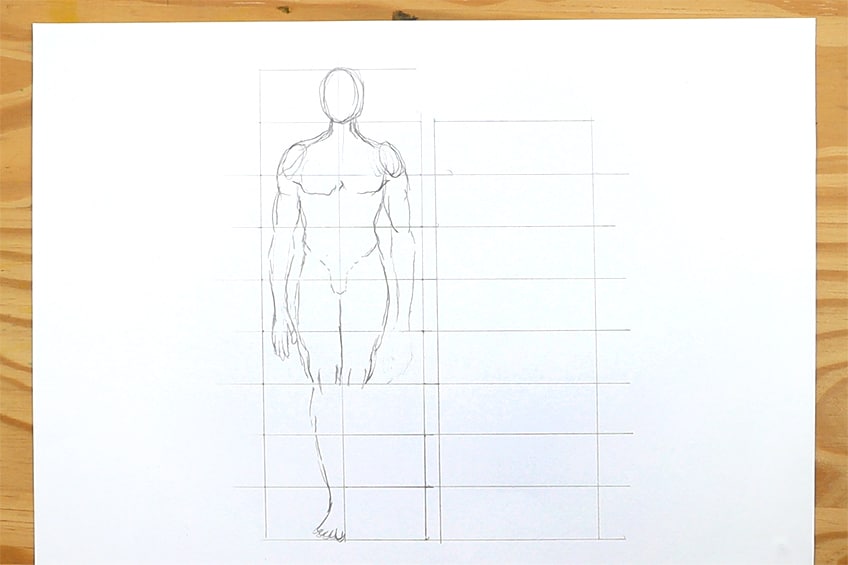
Body types all differ and some figures have shorter torsos and longer legs. Working out how to adjust certain parts of the body to give them height or shorten them can be completely up to you. Adjusting your grid is just another way of adjusting the height of a figure.
You could also lengthen the torso and shorten the legs; however, you should experiment and explore.
Step 4: Drawing the Female Figure for Comparison
We can now draw the female figure in the grid next to the male body drawing. We can draw the female figure in the normal method of eight rows. We can do this simply to demonstrate how the figure will now be scaled next to the male figure.
This gives you insight into how to create a difference in the male and female human body proportions.
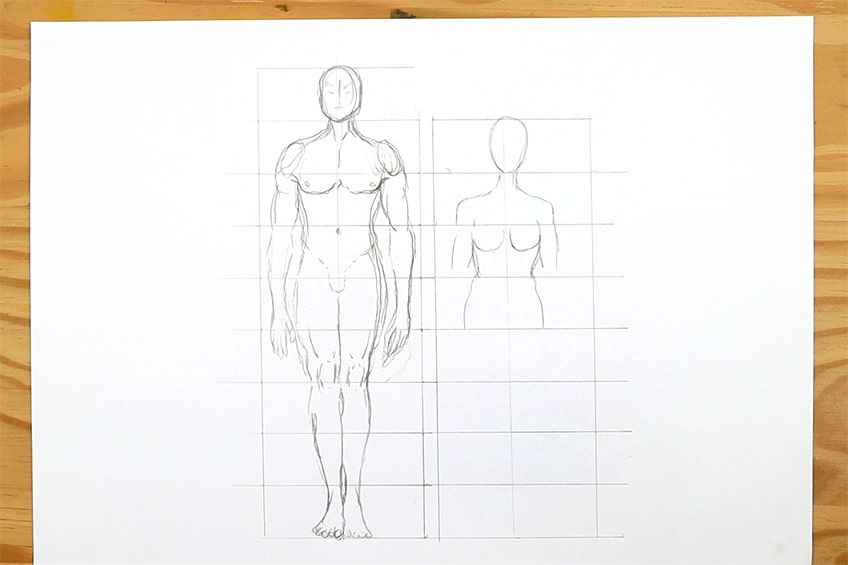
As you follow the normal process of drawing the female figure within the eight rows, using the rule of the head, we can see how the female figure starts to look adequate smaller in size. This technique is a realistic way of scaling the human figures in comparison to one another.
As you continue to draw the female figure, we can see that the male figure is significantly taller than the female figure. Another way of drawing a female figure in comparison to a male figure is by drawing the eight-row grid for both.
With that being said, you can shorten the height slightly of each row for the female grid.

This is just a different way of sizing the male figure in comparison to the female figure. This technique is also just a different way of creating a taller figure. This process can also be applied to the female figure, to give her body structure height.
Again, these drawing processes are modular and can be used in reverse for both the male and female figures.
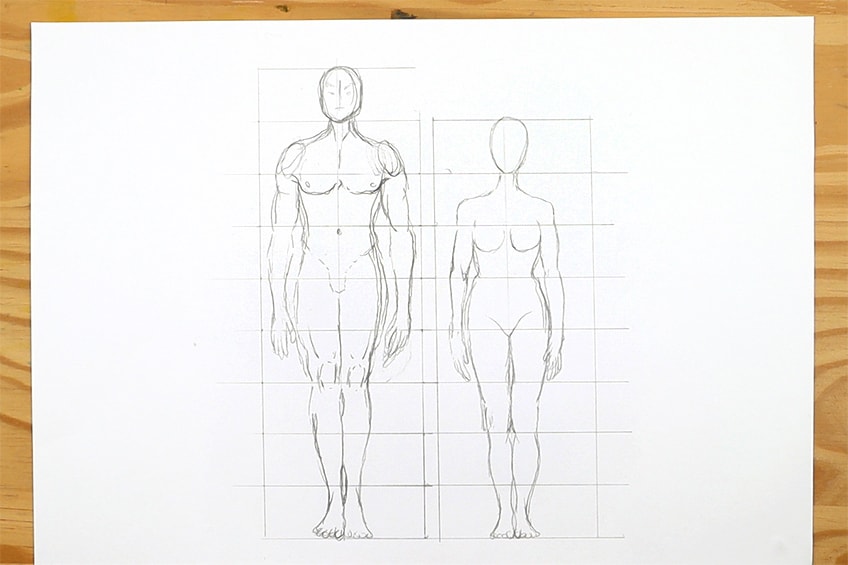
However, this is one specific way to adjust the heights of figures and you can always use the normal process of eight rows, except shortening them for the female or male to make the human figure smaller. That is the general process of drawing adequate human proportions.
Experiment with different heights, as long as each row is the height of the head then you will come out with a realistic human figure drawing.

Tips to Remember
- Work on symmetry. Use the guidelines to make your human figure as symmetrical as possible.
- Experiment with scale. Once you understand the basic process of human body proportions, allow yourself to experiment.
- Take your time. Take your time working out each step, making sure that human anatomy drawing is as accurate as possible
- Make sure you practice; drawing is a skill that needs to be practiced consistently.
- Most importantly, enjoy the process. Learning how to make a human proportion drawing is fun and can be a great addition to many artworks
- The head determines the height of the rows. The head should always fill the height of a row, and all rows should be the same height as the head.
The process of realistic people drawing requires you to capture the lengths correctly. Using the rule of the head as a metric that determines the height of each segmented row for different body parts will give you an accurate human figure. You can also shorten these rows, as long as the head fills it or as long as they are all the same height the figure will look adequate in its human body proportions. Another way of drawing body proportions is by adding the ninth row, but this is specifically for creating taller figures. Again, as long as the rows are all the same in height and equally divided by a vertical line then you can play around with height, ape index, torsos, and so on. Now that you have the knowledge you can explore human proportions drawings.
Frequently Asked Questions
How Do You Draw Body Proportions Accurately?
Using the rule of the head is a great way to accurately represent the human figure in human proportions drawing. The rule of the head is when you decide how large the head is, you can then use that length and make eight equal sections in a vertical grid. From there you can draw a vertical line that runs through the middle of each of the eight sections. This line will help you to achieve symmetry in the body sketch. From the head of the human drawing, you want to work your way down the body, using the sections to divide the body into eight parts. From the top, the first section is the head, the second section is the upper chest, neck, and shoulders and the third section is for the upper ribs area, above the naval. The naval will then be in the fourth section, near the top with the groan area. Then the crotch area is between the fourth and fifth section, with the upper thighs within the fifth section. Then the knees are present in the sixth section, the shins in the seventh, and lastly the feet and ankles in the lowest and eighth sections. The arms will start from the shoulders in the second section and finish with the hands in the fifth section, next to the upper thighs.
How Long Should the Arms Be in a Human Figure Drawing?
From shoulders to hands, the human figure normally will have hands that sit next to the upper thigh area. However, some people have a lengthier ape index, which means that their hands can extend a little further down the legs. The best way to explore the different arm lengths is to work out a normal human figure with a light sketch using the rule of the head for scale. From there you can play around with shortening and lengthening arms to explore different body proportions. However, it is always useful to create a normal people drawing working with basic human body proportions, which you can then change and adjust from there. However, a good way to gauge how hands fit in normal human proportions drawing is by letting them fall next to the upper thigh.
Matthew Matthysen is an educated multidisciplinary artist and illustrator. He successfully completed his art degree at the University of Witwatersrand in South Africa, majoring in art history and contemporary drawing. The focus of his thesis was to explore the philosophical implications of the macro and micro-universe on the human experience. Matthew uses diverse media, such as written and hands-on components, to explore various approaches that are on the border between philosophy and science.
Matthew organized various exhibitions before and during his years as a student and is still passionate about doing so today. He currently works as a freelance artist and writer in various fields. He also has a permanent position at a renowned online gallery (ArtGazette) where he produces various works on commission. As a freelance artist, he creates several series and successfully sells them to galleries and collectors. He loves to use his work and skills in various fields of interest.
Matthew has been creating drawing and painting tutorials since the relaunch in 2020. Through his involvement with artincontext.org, he has been able to deepen his knowledge of various painting mediums. For example, watercolor techniques, calligraphy and lately digital drawing, which is becoming more and more popular.
Learn more about Matthew Matthysen and the Art in Context Team.
Cite this Article
Matthew, Matthysen, “Human Proportions Drawing – Learn to Create a Human Anatomy Drawing.” Art in Context. June 17, 2022. URL: https://artincontext.org/human-proportions-drawing/
Matthysen, M. (2022, 17 June). Human Proportions Drawing – Learn to Create a Human Anatomy Drawing. Art in Context. https://artincontext.org/human-proportions-drawing/
Matthysen, Matthew. “Human Proportions Drawing – Learn to Create a Human Anatomy Drawing.” Art in Context, June 17, 2022. https://artincontext.org/human-proportions-drawing/.


