Loomis Method – Master Portrait Drawing with Proven Techniques
Amongst the many features of the human body, the head is a particularly unique feature that can seem rather difficult to represent through a drawing. However, the loomis head method is a unique drawing process that assists you in shaping and defining features more accurately. This head drawing method can also help you understand how to form the features from more general shapes into refined detailed features that are unique to different heads. Understanding the rules of the loomis method can be a great asset, which can help you to draw different head shapes more accurately and confidently.
Tutorial on How to Use the Loomis Method
What distinguishes this particular face-drawing process from others is that it helps you to understand fundamental shapes that are used to define different features of the human head. Naturally, there are different head shapes, however, all of them can be refined into their unique form from the more common main shapes. The loomis method helps you to break up the head into its basic shapes for more accurate placement of unique features of the face. By the, we have a separate article about William Andrew Loomis.
Step-by-Step Guide on How to Draw Faces With the Loomis Method
As we explore the loomis method in this tutorial we will start with the fundamentals of how to use the loomis method to shape different heads. From there we will look at how we can apply the loomis method step by step, to create a unique profile of a female. This is where we see how to utilize the loomis method for a more detailed representation of a head. Then lastly, we will look at how these concepts can then be taken further to be utilized with color choices that shape facial features. Now that we know what to expect, let us take a look at what the loomis method is.
Understanding the Fundamentals of the Loomis Method
We want to first understand what the loomis method is in its most simplified form by lightly sketching different profiles. By doing so, we will see how to apply the concepts of the loomis drawing method to create different head shapes. Once we have the basics down, we can then utilize these concepts in our drawings.
Working With the Rule of Thirds
The intention is to always start with a circle, which is what makes up most of the head. Once we have a circle, we then play around with the placement of a smaller oval inside the first circle to orient the head.

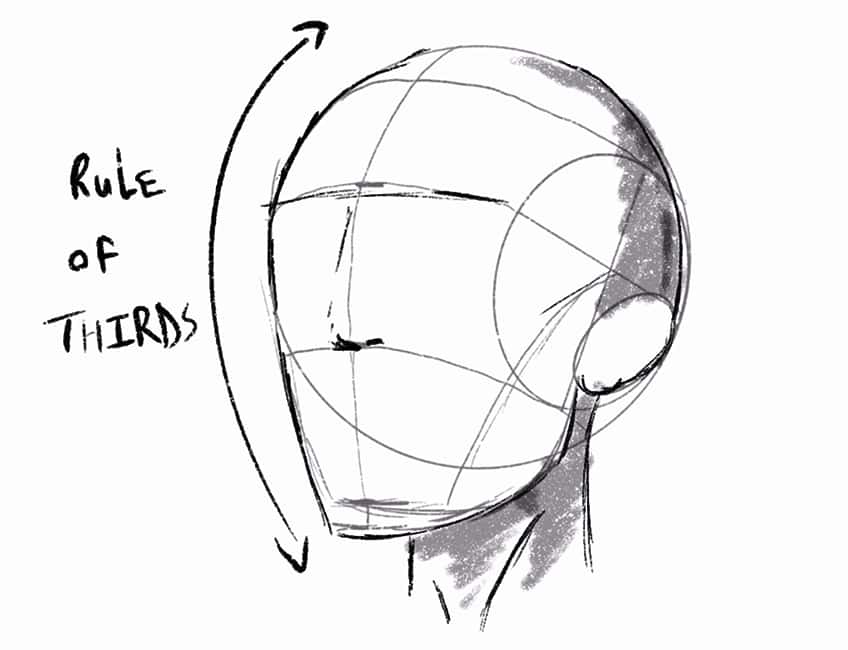
We then utilize that smaller circle to establish the side of the head, which will break the head up into three main sections. Utilizing a rule of thirds to establish the hairline, eyes, and nose are the three main guidelines of the loomis method.
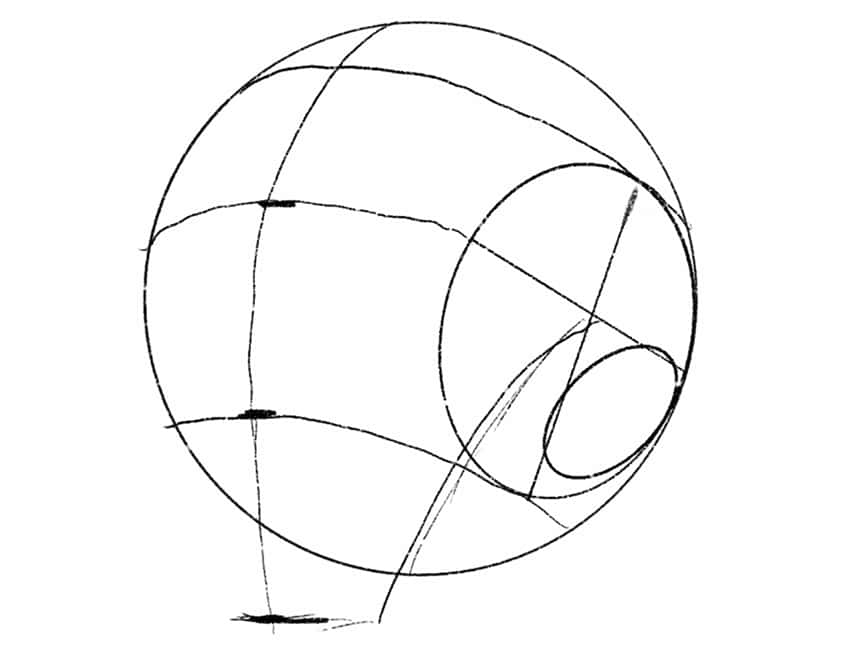
Once we have the three main lines that establish the main facial features, we create a central line running through the face, down towards the chin. The chin will then flow into the smaller circle along the side of the profile, connecting to what will become the ear.

This is the basic guide of what will be used to determine various head shapes and profile poses. Once you understand these guidelines, you can then utilize them to become more specific for various poses.
Exploring Different Poses
Once again, you start with a basic circle, and from there, depending on the placement of your smaller circle, will determine the angle at which the profile is seen.

Remember to utilize the smaller circle as a way of establishing the spacing for the three guidelines that define the hairline, eyes, and nose.
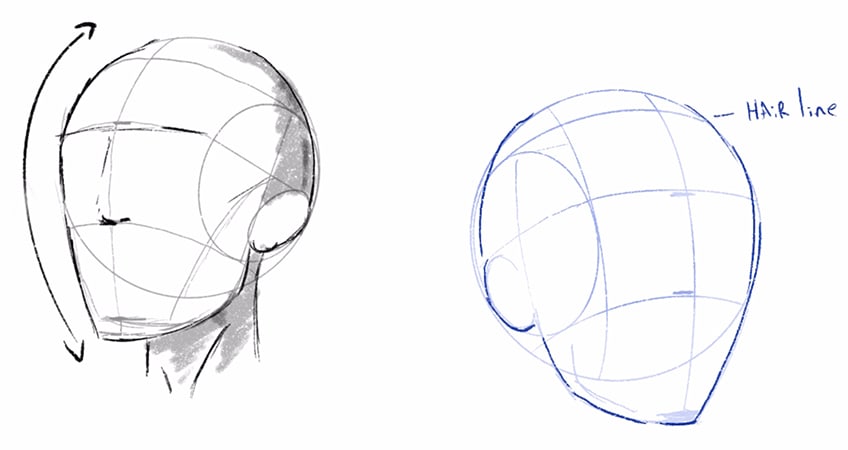
The smaller circle should also be divided into four even segments along the surface area that defines the position from which the head is seen. Once we have those lines established in the smaller circle, they should flow into the larger circle to establish the eyeline.
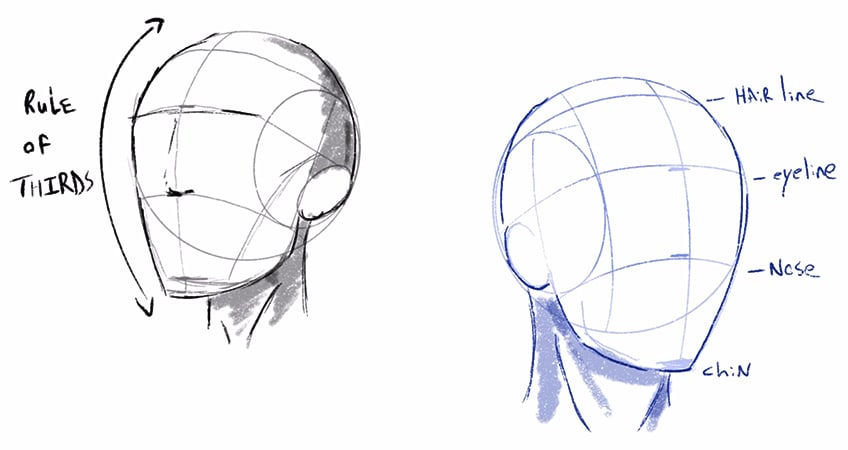
The intention now is to experiment with different perspectives for various profile angles. Naturally, the facial position will change due to the placement of the circles and guidelines.
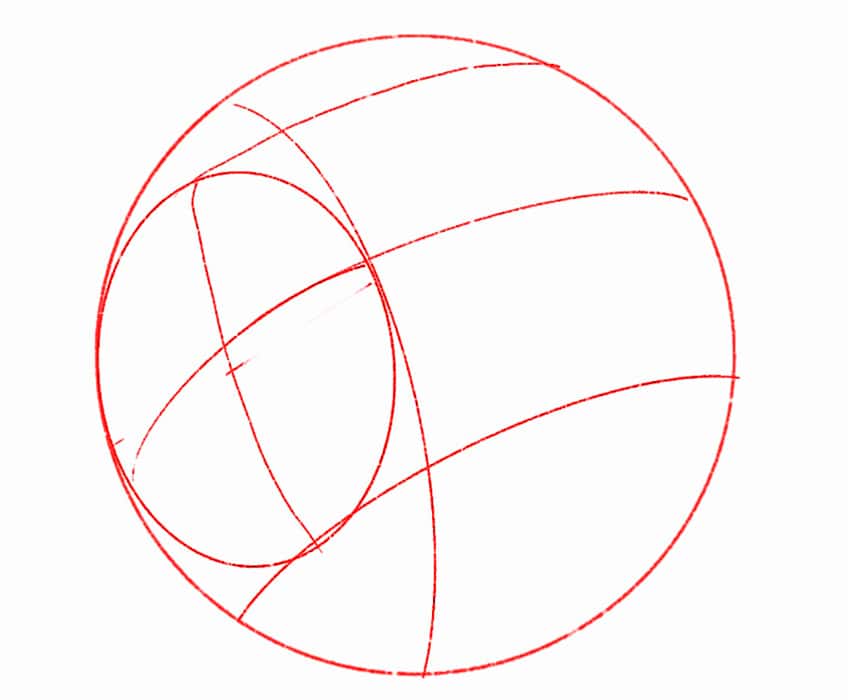
When creating loomis head drawings from scratch, it is a good suggestion to allow the guidelines to navigate how the head is angled. By this, what is meant is that a face will naturally form simply by the placement of these various guidelines.
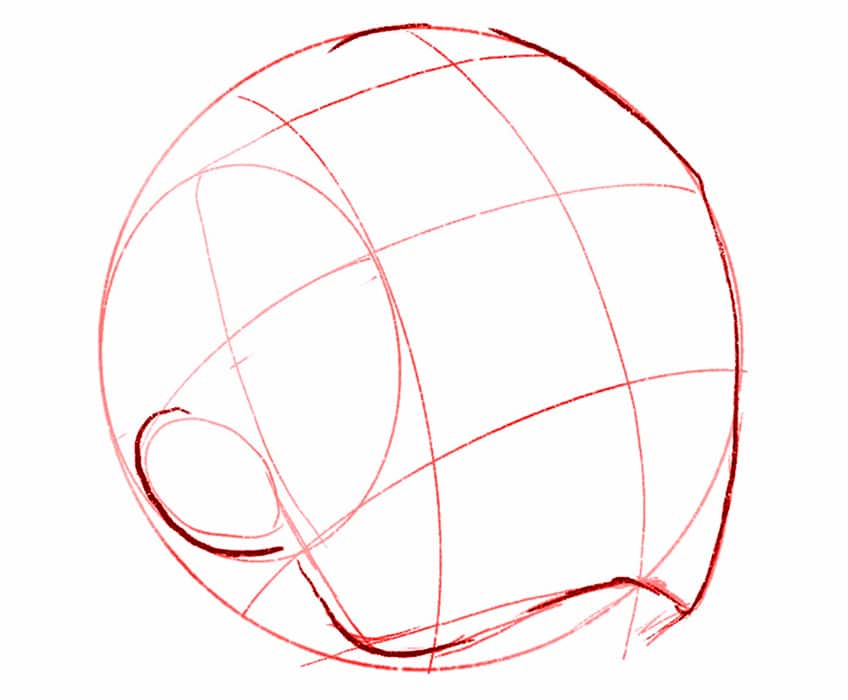
The intention is to also be creative with facial shapes, thinking about how the guidelines can be used to create more feminine or masculine shapes within the face.

As you slowly build up the essential guidelines, you can start to work with linework to create unique head shapes. The guidelines are to be used to assist you in forming heads, but you may shape the head in various ways to suit a particular style.
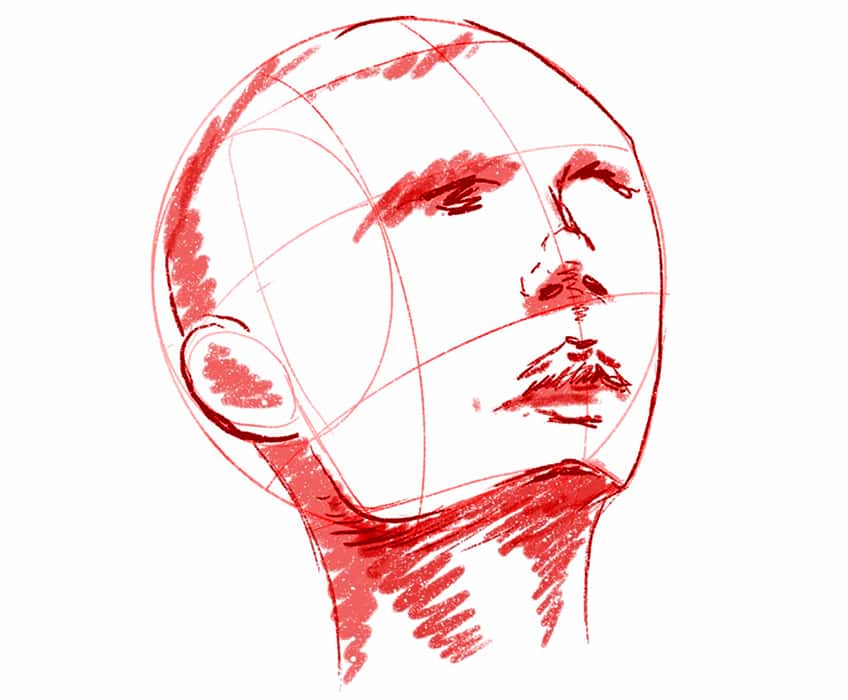
As you continue, try to pose heads in different ways from the last drawn head. Again, the orientation will be determined by the guidelines and how they form along the curved surface area of the sphere.
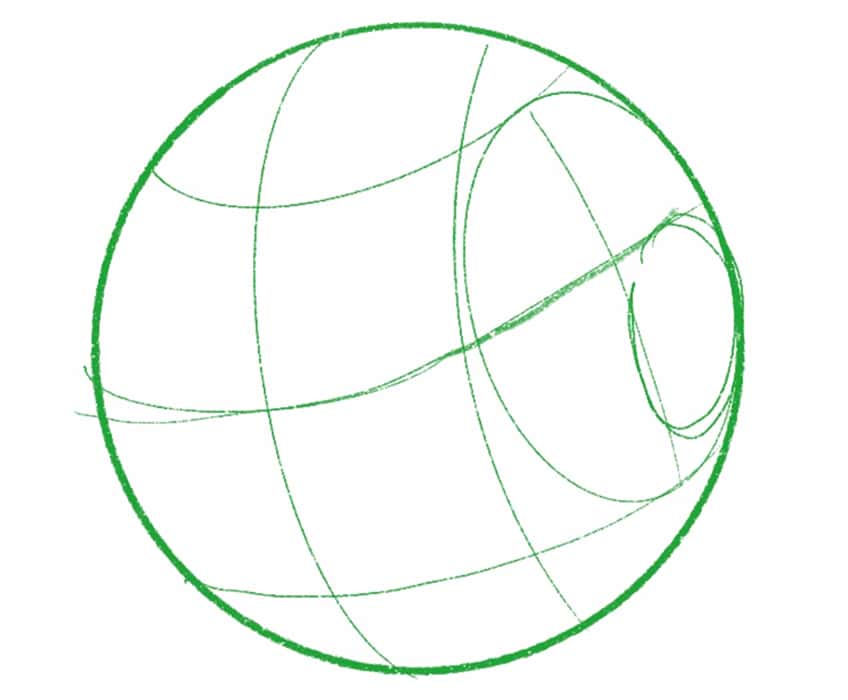
As you attempt to draw heads from various perspectives, the rules become a lot more seamless as you use them. Naturally, you will find that the formation of head shapes becomes simple.

The intention is to practice with the concepts of the loomis method in mind, and as you do so, to get more comfortable with these unique guidelines.
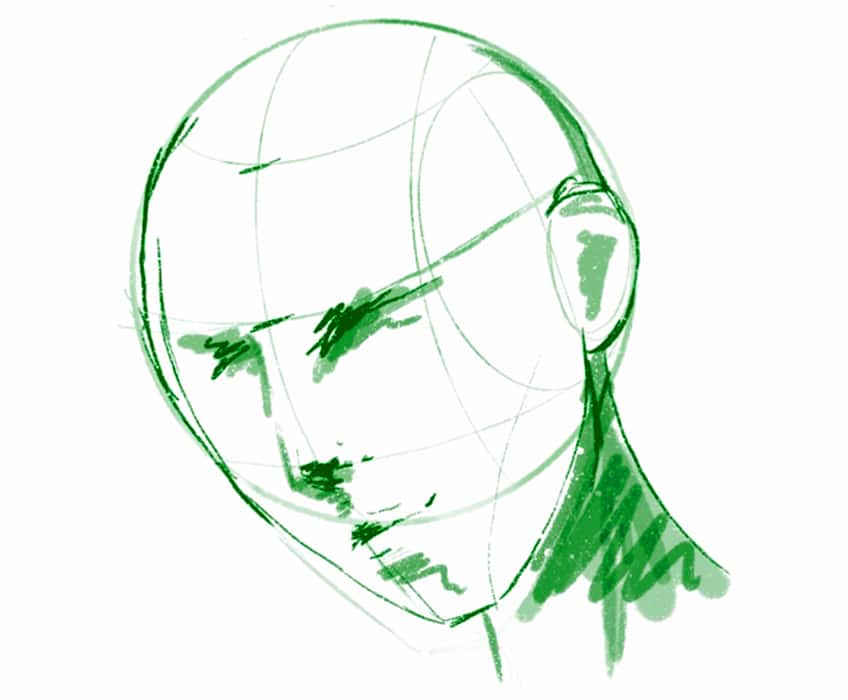
The side view is another unique way to utilize the loomis method, but the guidelines remain the same. However, you want to think about the smaller circle as being seen inside the larger circle because it is seen from a side view.

The same rules apply, where the smaller circle will determine the spacing for the hairline, eyeliner, and nose. From there we can extend the jaw below to a length that suits the character design.

Naturally, we will find that the jaw can then flow into the point where the ear and neck meet. The rules will always remain the same, they simply just shift due to the orientation of the head.

Then lastly, remember that it’s about getting used to the rules and experimentation. Once comfortable, you can then utilize these rules to create unique contours and shapes within the face.
Using the Loomis Method to Draw a Realistic Face
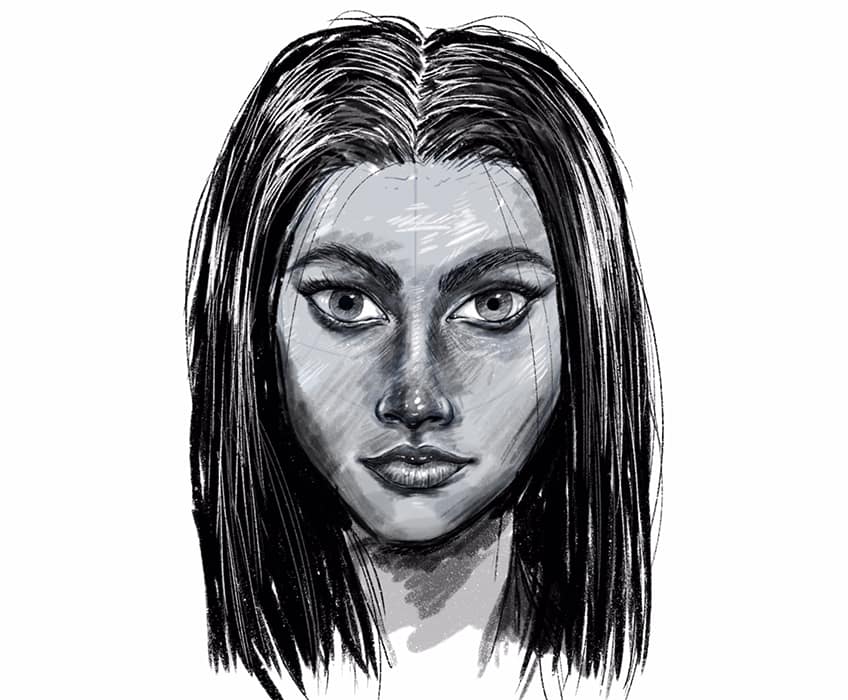
Once you are more comfortable with the concepts of the loomis method you can then apply these concepts to a realistic head drawing, where you work with shapes to define shadows within the face. Now let us take a look at the loomis method step by step within a realistic head drawing.
Step 1: Establishing the Guidelines of the loomis Method
In this case, let us draw the face from. front view, which we can start by establishing the basic circle divided into four equal parts with perpendicular lines.

From here we can proceed to add in the circular structures to establish the position of the ears, as well as an extending line to define the length of the jaw.

Step 2: Lightly Sketching Out the Features
Once we have the general positions of the guidelines, we can proceed by lightly sketching out the features of the face. This is where we work on the positioning of various facial features.
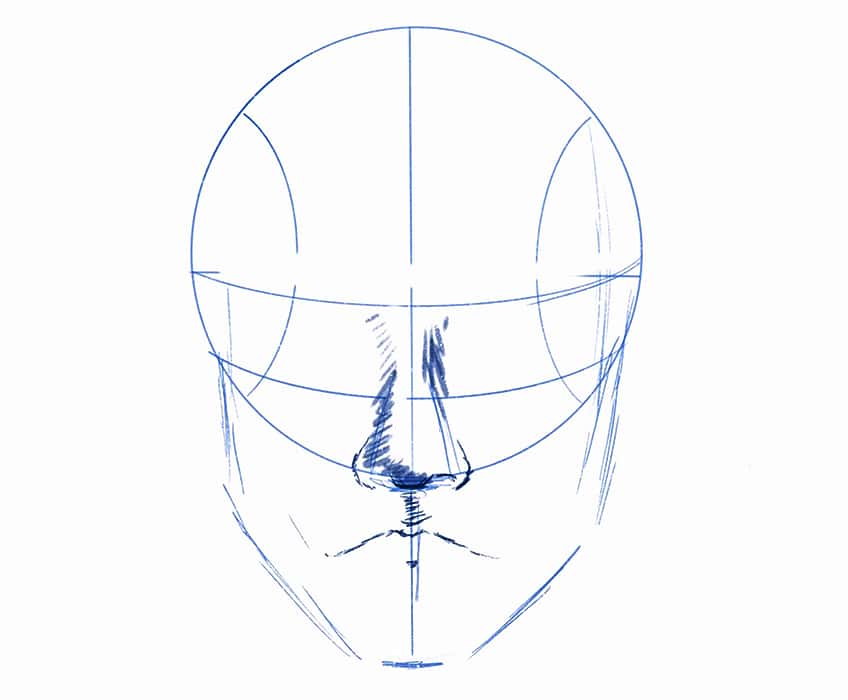
The intention here is to be a little loose with the placement and shape of various features. This is also depending on whether you are drawing. more feminine or masculine face. In this case, we are working with more feminine features, so the intention is to give different features a more feminine quality.
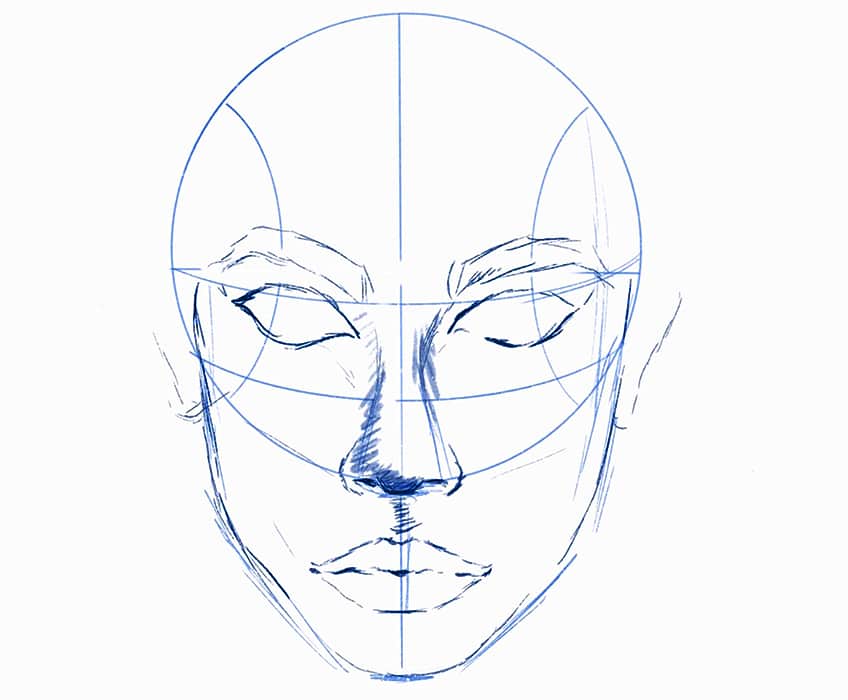
Step 3: Refining the Features
Once we have established the shape and position of various features we can then erase the light sketch and start refining each of the facial features. This is where we can make their shape and structure more specific.
Once again, the intention from here on out is to be intentional about your head drawing. The guidelines should be less visible and the features should start to become more prominent.

Step 4: Adding Shading and Detail
Once we have the general shape of the various facial features, we can then refine the features with some detailed linework and shading.
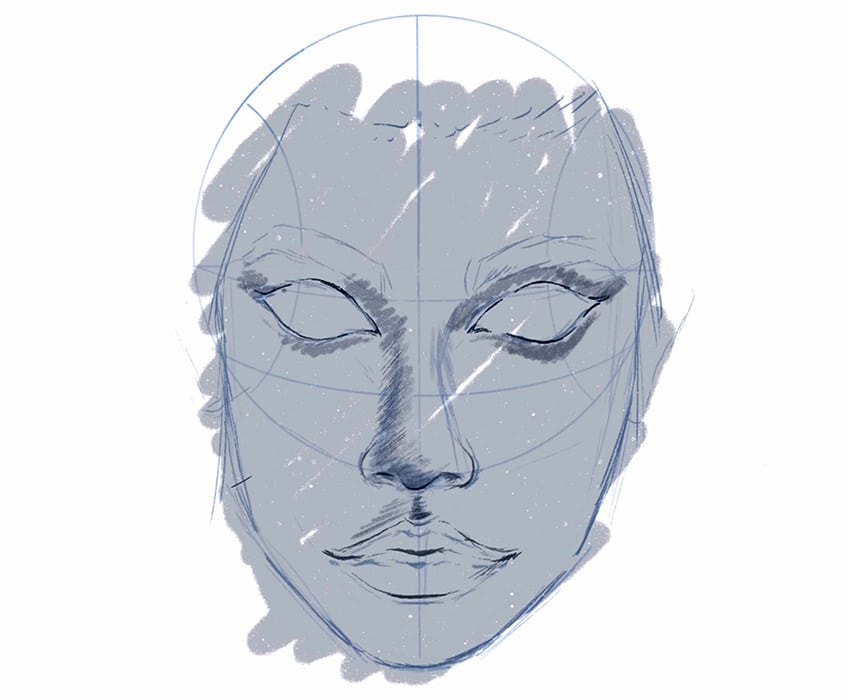
The loomis head method helps to also shape the face and how its three-dimensional qualities will develop various shadow formations. This is where features such as the nose, eyes, and mouth start to have unique shadow formations around them. This is where our shading starts to become important for emphasizing the shape and form of the various features.

take your time working through the different features within the face, making sure you spend a good portion of time refining them.

As you work through the different facial features, you should find that the Loomis method has helped you establish their positions in a proportionally correct way.

However, the intention to make the various features more three-dimensional is now up to your creative decisions. by this what is meant is that you can make the eyebrows thicker or thinner, enlarge the eyes if you choose to do so, and so on.

Allow yourself to work through the entire facial structure thinking about the protruding qualities of various features, including bone structure along the jaw. To further the quality of the drawing you can start working in highlights along various protruding features.

Lastly, the hairstyle will be a major contextualizing feature that is subject to your character design or if you are using the loomis method to assist you in drawing a profile from an image or life.
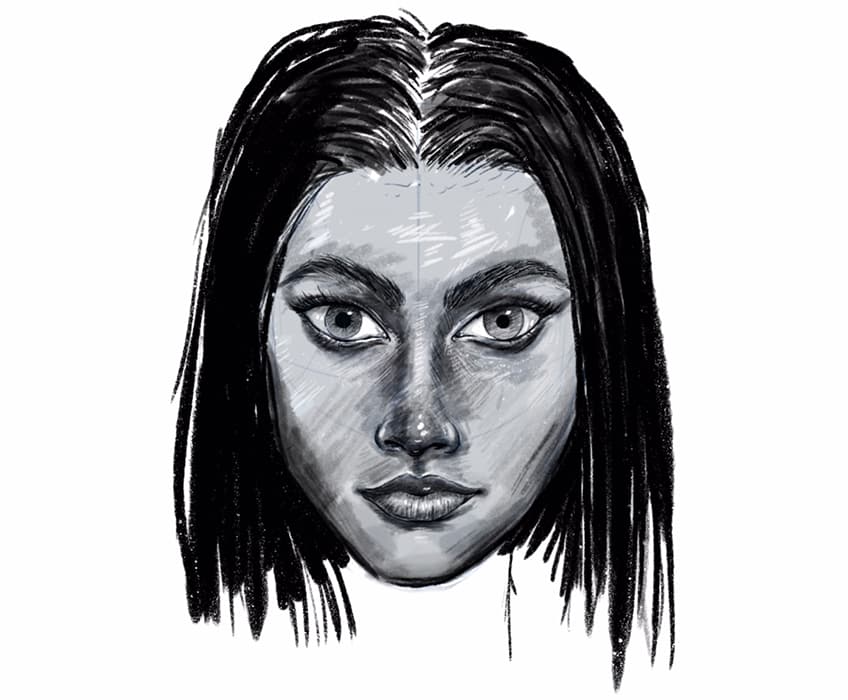
Most importantly, use the loomis method for placement and proportions. From there, your drawing process to create a defined and realistic representation of a figure should take time through the integration of shading and details.

Using the Loomis Method for Color Portraits
Now that the loomis method has been broken down in detail, you can start to think about the use of the loomis method for colored profiles. This is where the concept of shading and shaping the three-dimensional qualities can be used with color variation rather than different tonal values in a monochromatic process.
Step 1: Establishing the Guidelines of the Loomis Method
We start the same way as before by establishing the guidelines of the loomis method, helping us to shape and place the different features accurately.
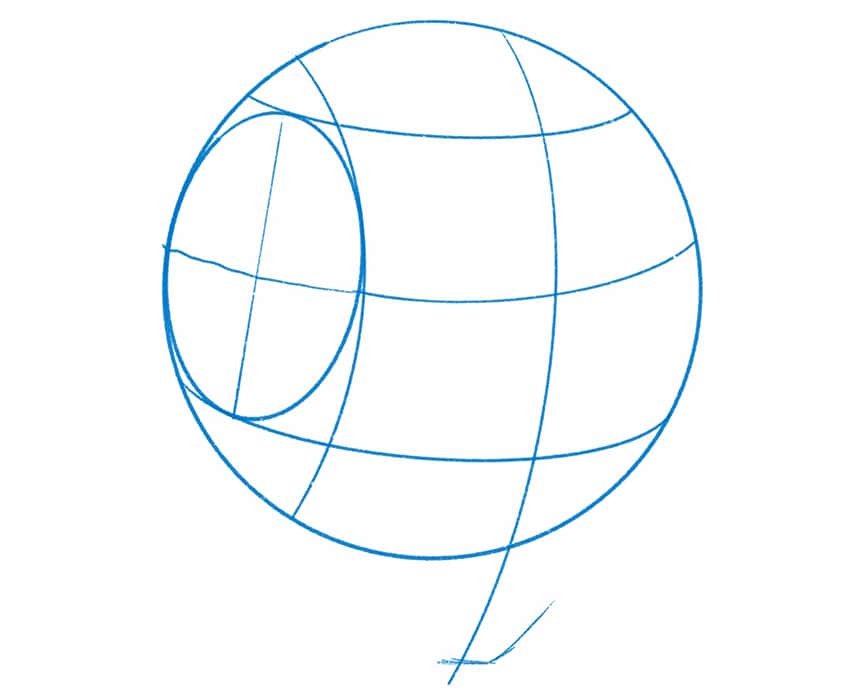
In this case, you can explore drawing the head from various angles, finding one that seems unique and challenges you.

Step 2: Sketching the Head
Once we have worked out the different facial features we can then proceed by refining the features, giving them their unique attributes. The intention is to always spend time on shaping the face, with the assistance of the Loomis guidelines.

Take your time lightly sketching the features, making sure that you work through the entire face. As you work your way through all the features you can then lightly erase them before refining them.
Step 3: Refining the Features
Again, we proceed by going through all the features and refining them. This is where we can go over the lightly erased drawing with a darker medium, slowly bringing a more refined shape to the different areas in the face. As you slowly work through the entire drawing, you should start to see how it takes on a more realistic shape with the use of the loomis method guidelines.

Remember, using the loomis head method to help establish features in the early stages of the drawing. The rest of the drawing should take time and careful consideration as you work through the different features.

Step 4: Integrating Color
Naturally, at this point, your guidelines should be gone, however, we want to make a mental note of how they formed the contours of the face. These shapes can then be used with color to establish tonal values between shadows and highlights.
This is where we think of the concepts we used for the monochromatic drawing and apply them to a colored version of the head drawing. By doing so we can play around with darker colors in highly shadowed areas and lighter colors in highlighted areas.

Naturally, color choice is subjective, however, thinking about the three-dimensional qualities of the face can assist you in the choices of your color palette. We can utilize the full spectrum of single colors for both highlights and shadows.
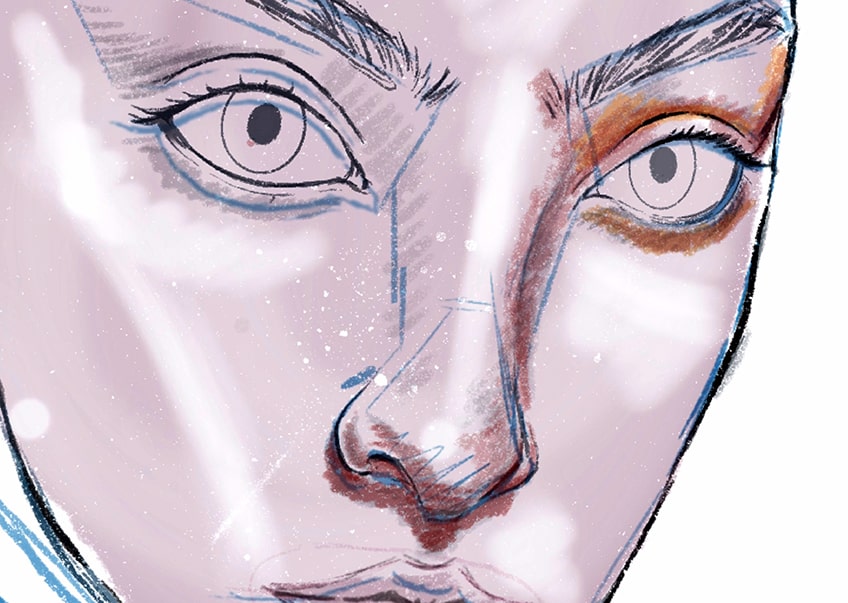
The intention should always be to think about how the face is a three-dimensional structure and therefore has moments of protrusion which inevitably cause shadow formations.

This process of thinking through light and shadow should be considered in all elements of the drawing, including the hair. The hair has these moments of shine, which have high contrast. Naturally, thinking about the shape of the hair and how it falls on the head defines the overall aesthetic of the character significantly.

But as you proceed, make sure you take time going through the face thinking about lighter and darker tonal qualities of color palettes you find favorable. Again, considering highlights and shadows in various areas.
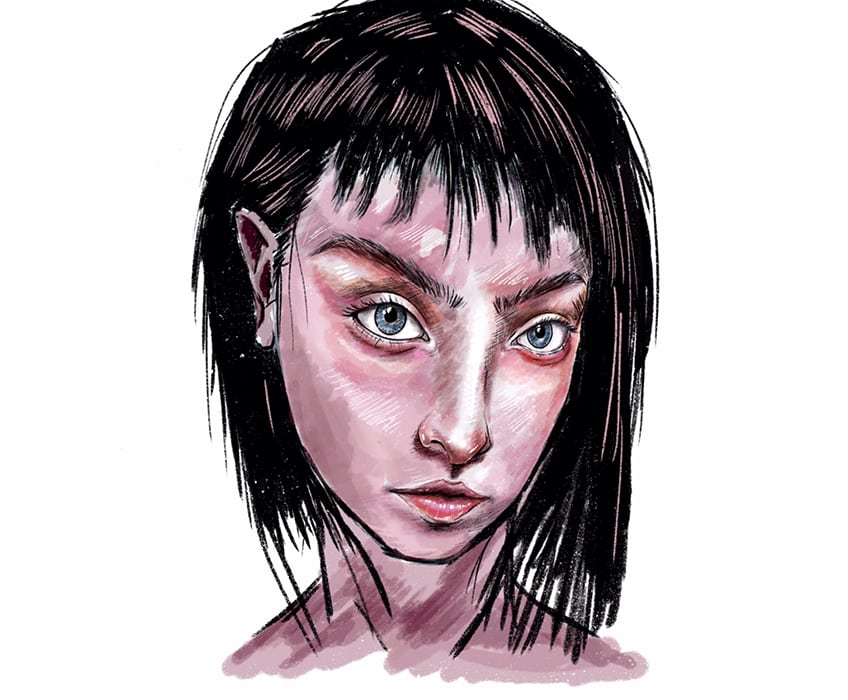
Most importantly, always consider the qualities of the loomis guidelines and how this forms the three-dimensional qualities of the features and how it places them accurately along the surface area of the face.
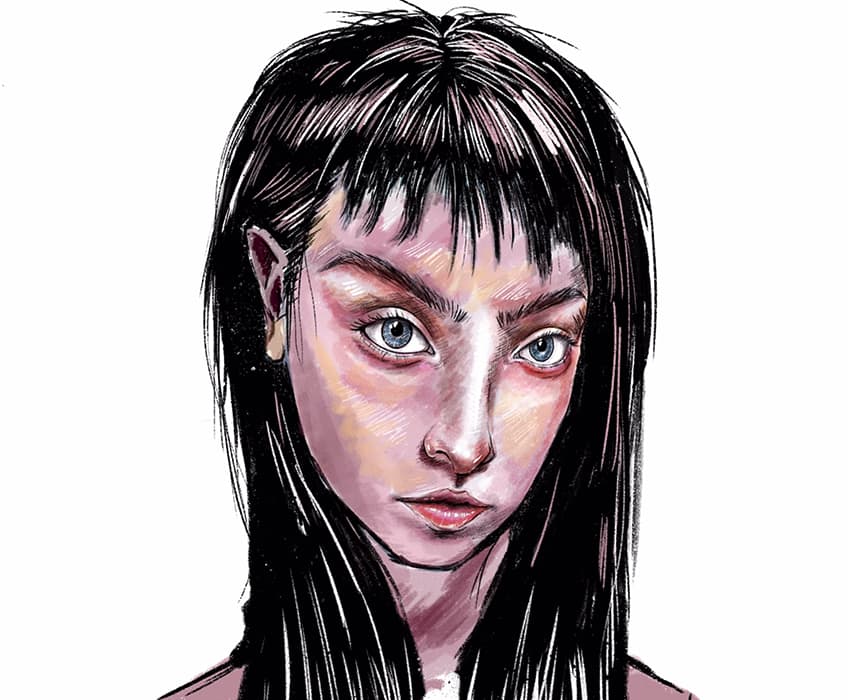
And there you have it! The loomis method step-by-step, helps you to understand its fundamental qualities and how to apply it to different representations of a face.
Tips and Tricks to Remember
- Understand the fundamentals first. Try to sketch out different head poses with the loomis method.
- Work with simple poses. Apply the concepts of the loomis head method to more refined drawings of heads.
- Start experimenting with unique poses. Once you are comfortable, try to challenge yourself with unique head positions.
- Use the guidelines to assist you in shading and details. The guidelines also demonstrate the planes along which you can add shading to represent shadows and highlights with color.
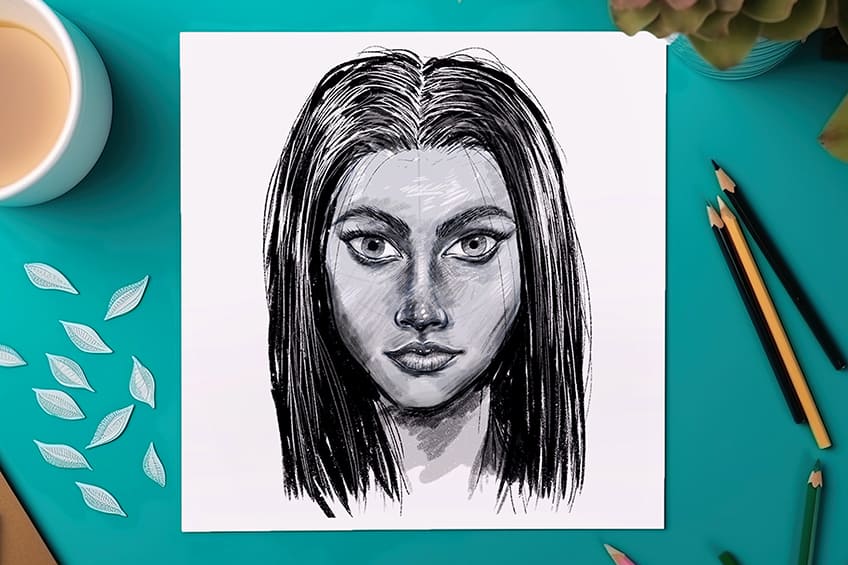
As we have explored the details of the loomis method, we can see that it is a versatile framework to develop unique head drawings. As you get more comfortable, you will also find that it becomes more natural to create variations in head shapes and the perspectives from which they are seen.
Frequently Asked Questions
What Are the Different Parts of the Loomis Method?
The loomis method is a set of guidelines that divide the head into various sections, which allows you to place features much more accurately along the surface area of the head. We establish the head with a large circle, which we then draw a smaller circle inside to establish the plane along which the ear will be drawn. Three main lines are established from the smaller circle, which creates the length between the hairline, eyes, and nose. Moving vertically down the center of the larger circle, we can then draw a vertical line that extends beyond the bottom of the larger circle to establish the edges of the chin. This point can flow towards the side of the head towards the smaller circle, providing us with a jawline. From these main guidelines, we can start to form a face in various poses.
What Is the Loomis Method Used For?
The loomis method is a set of guidelines that help to establish the features of a face, as well as the head shape, more accurately. Often, it can be quite difficult to draw faces because they are so unique in their features. However, the loomis method provides a set of guidelines that make the drawing process much easier and digestible. Using the loomis method step-by-step can be a great way to understand the exact positioning of facial features, and how to accurately draw them in a face. Faces have different shapes and forms, which means we can also apply the loomis method to an actual reference of a face and then use the guidelines placed on top to assist us in a more accurate representation of that face within a drawing.
Matthew Matthysen is an educated multidisciplinary artist and illustrator. He successfully completed his art degree at the University of Witwatersrand in South Africa, majoring in art history and contemporary drawing. The focus of his thesis was to explore the philosophical implications of the macro and micro-universe on the human experience. Matthew uses diverse media, such as written and hands-on components, to explore various approaches that are on the border between philosophy and science.
Matthew organized various exhibitions before and during his years as a student and is still passionate about doing so today. He currently works as a freelance artist and writer in various fields. He also has a permanent position at a renowned online gallery (ArtGazette) where he produces various works on commission. As a freelance artist, he creates several series and successfully sells them to galleries and collectors. He loves to use his work and skills in various fields of interest.
Matthew has been creating drawing and painting tutorials since the relaunch in 2020. Through his involvement with artincontext.org, he has been able to deepen his knowledge of various painting mediums. For example, watercolor techniques, calligraphy and lately digital drawing, which is becoming more and more popular.
Learn more about Matthew Matthysen and the Art in Context Team.
Cite this Article
Matthew, Matthysen, “Loomis Method – Master Portrait Drawing with Proven Techniques.” Art in Context. December 20, 2023. URL: https://artincontext.org/loomis-method/
Matthysen, M. (2023, 20 December). Loomis Method – Master Portrait Drawing with Proven Techniques. Art in Context. https://artincontext.org/loomis-method/
Matthysen, Matthew. “Loomis Method – Master Portrait Drawing with Proven Techniques.” Art in Context, December 20, 2023. https://artincontext.org/loomis-method/.


