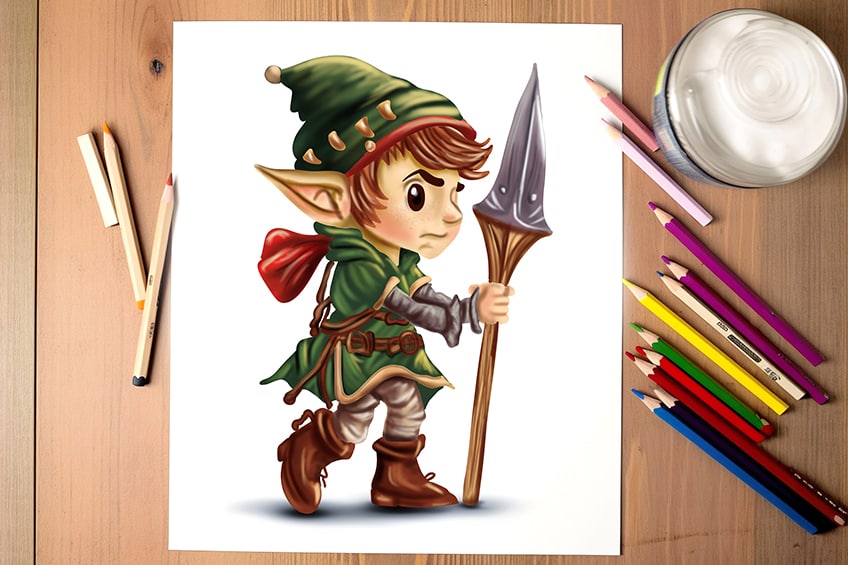
How to Draw an Elf – Create an Enchanting Elf Sketch
Elves, the mythical creatures known for their pointy ears and magical abilities, have captured the imagination of people for centuries. Legends and folklore depict them as nimble and graceful beings, often associated with nature and the supernatural. Some believe that they are mischievous tricksters, while others see them as benevolent helpers who assist humans in times of need. From J.R.R. Tolkien’s elves in “The Lord of the Rings” to Santa’s elves in popular Christmas stories, these mystical beings have become an integral part of fantasy literature and pop culture. Whether you envision them as beautiful and ethereal or quirky and mischievous, there is no denying the enduring allure of elves. Get your drawing kit ready as we take you through this step-by-step tutorial on how to draw an elf!
How to Draw an Elf That Is Enchanting and Magical
Congratulations on your decision to learn how to draw an elf! Elves are mystical creatures that are often depicted as beautiful, graceful, and magical beings with pointed ears, slim physiques, and a sense of whimsy. If you are new to drawing elves, start with basic shapes and focus on proportion and symmetry. Pay close attention to the shape of the head, the position of the ears, and the elongated limbs. It is important to keep in mind the different features of an elf, such as the shape of the eyes, the curve of the eyebrows, and the flow of the hair. Consider the clothing and accessories, too, as they can add to the character of your elf. Remember to have fun and allow your imagination to run wild as you bring your elf to life on the page. With practice and patience, you’ll be drawing captivating elves in no time!
Check out the below collage that depicts each step you will take to create a magical elf drawing!

Step 1: Draw the Head of Your Elf Drawing
Begin your easy elf drawing, by drawing a circle to represent the elf’s head.

Step 2: Draw the Main Body
Attached to the bottom of the head, draw the main body of the elf. This should be smaller in size compared to the circle previously drawn.

Step 3: Add the Arms
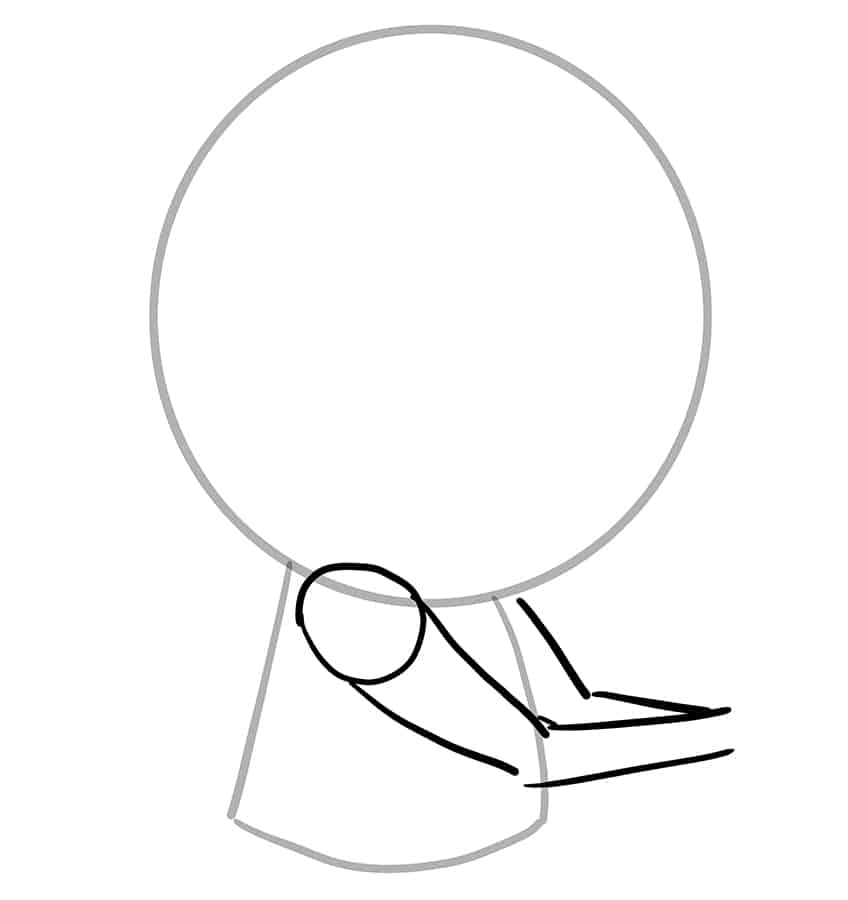
Draw a circle overlapping the head and the main body, this will represent the arm joint. Now draw the leading arm and partially visible second arm.
Step 4: Draw the Legs on Your Elf Sketch
In this step, draw each of the legs at a different stance. To do this, the rear leg should be slightly more bent, compared to the front that is standing straight.

Step 5: Attach the Boots and Hands
Attached to the bottom of each leg, draw the visible boot according to the stance of each leg. Complete the step by drawing the hand figure.

Step 6: Draw the Facial Guidelines
Draw a vertical center line within the head and four horizontal lines overlapping it.

Step 7: Add the Facial Features to Your Elf Sketch
Draw the long horn-like elf ear on the side of the head. Finish off by drawing the eye and nose within the guideline positions.

Step 8: Draw the Outfit on Your Elf Drawing
Use the previously drawn construction lines to aid you in outlining the outfit on your elf drawing. Do this by surrounding the shoulders, arms, and main body of the elf.
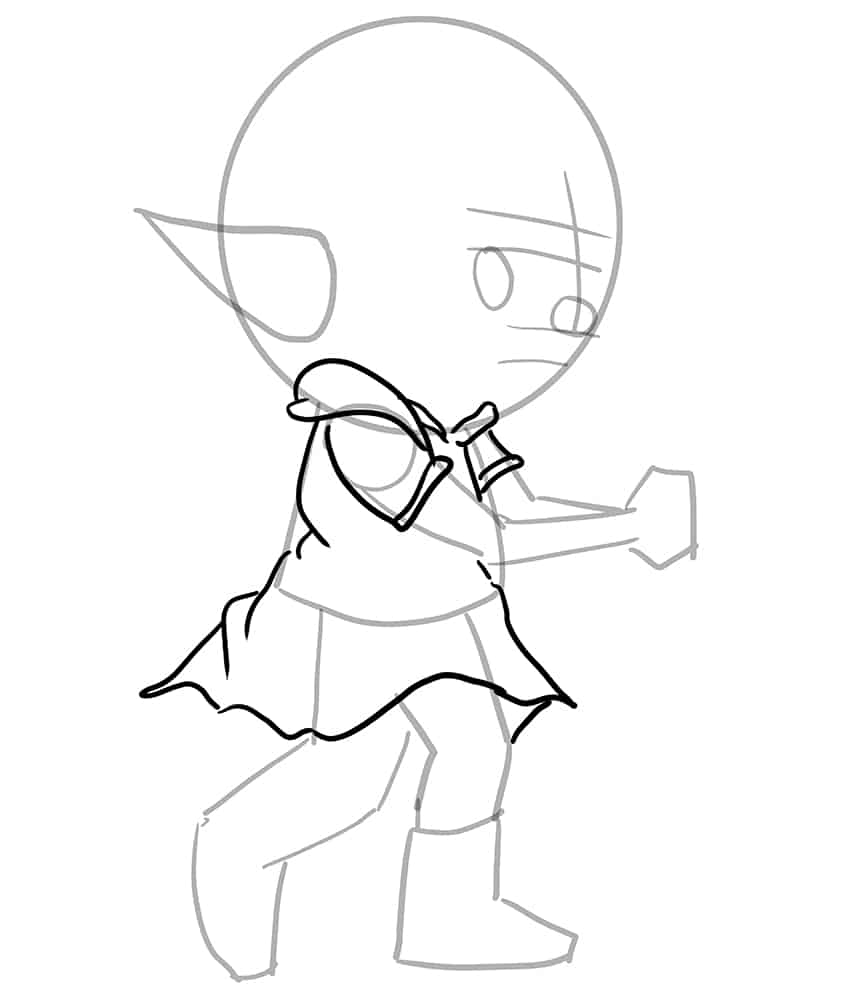
Step 9: Draw the Sleeves
On each visible arm, draw the extended sleeves leading towards the hand figure.

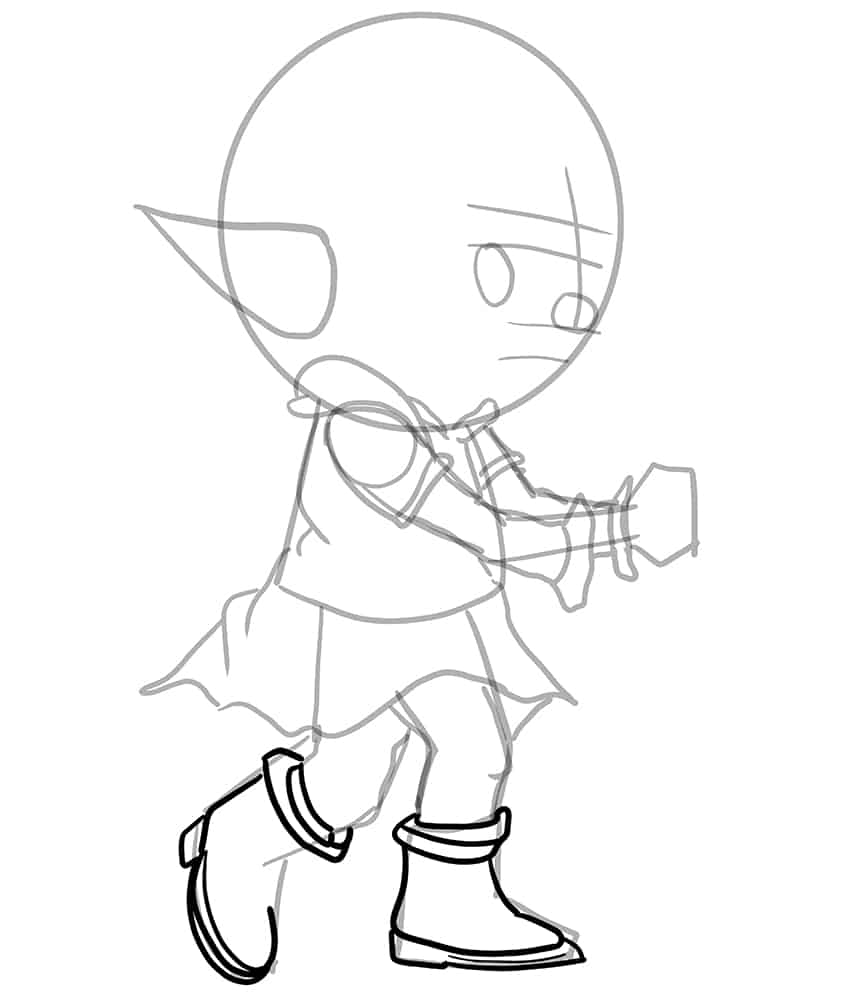
Step 10: Outline the Legs
In this step, begin to outline the legs more realistically, using the previously drawn construction lines to aid you.

Step 11: Outline the Boots on Your Elf Drawing
Begin to outline a more realistic pair of boots on your elf sketch. Add a slight heel and surrounding seam to each boot.
Step 12: Shape the Face
Use the guidelines and construction lines previously drawn to aid you in shaping the face of the elf. This may overlap the head.

Step 13: Draw the Hair on Your Elf Drawing
Begin by drawing a curving line from the ear and wrap it around the head. Below the line, draw the fine hairlines leading outwards.

Step 14: Outline the Ear
Outline the ear and inner earlobe using the previously drawn construction lines to aid you.

Step 15: Draw the Beanie
Above the line drawn in step 13, draw a secondary line curving with the head and behind the ear leading upwards to create the beanie shape.
Complete this step by drawing a circle at the top of the beanie and several detailed figures on the side.

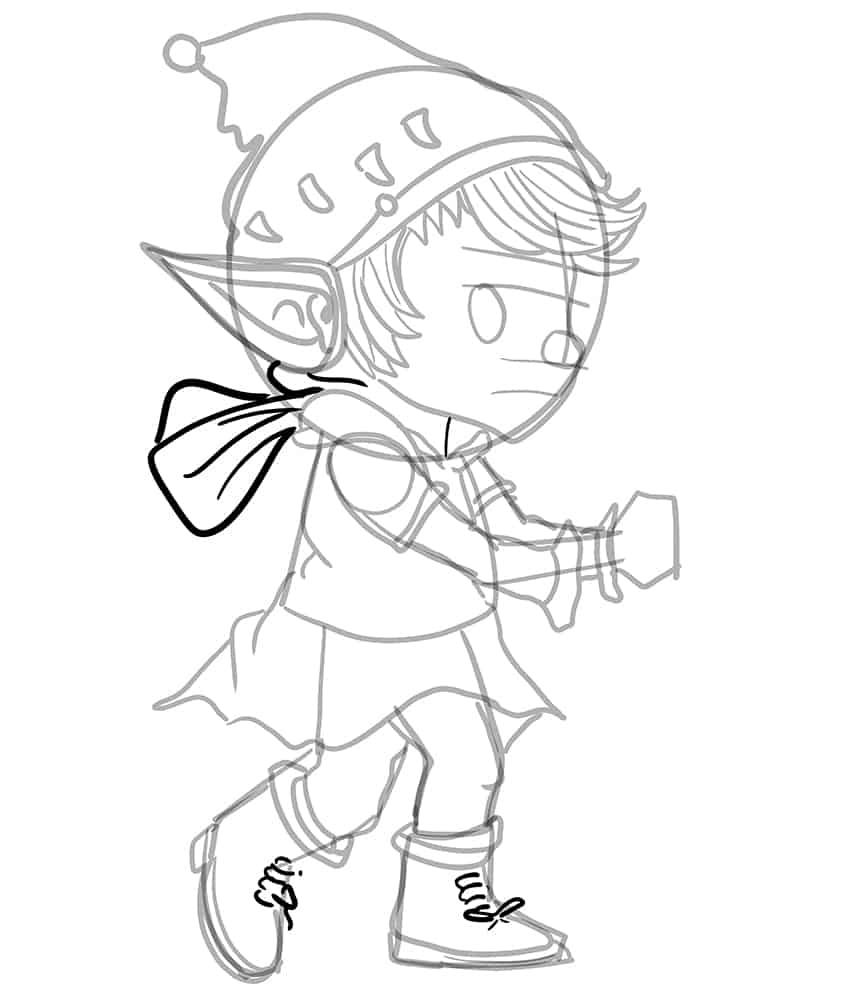
Step 16: Draw the Shoe Laces
Within each shoe tongue, draw the shoe laces. Finish this step by drawing the hood hanging behind the elf.
Step 17: Outline the Hand
Use the previously drawn hand figure to aid you in outlining a realistic hand in a gripping fist position.

Step 18: Draw the Spear
Draw the elf’s spear held by the previously drawn hand. The spear should be sharp at the top and narrow and flat at the bottom half. Once completed, you may erase any construction lines that are still visible.

Step 19: Add the Accessories
Attached to the main body and wrapped around the outfit, draw the accessories which include the belt and strings.

Step 20: Outline the Facial Features on Your Elf Sketch
In this step, use the previously drawn construction lines on the facial features to aid you in outlining the eyes, eyebrows, nose, and mouth lines. Erase any facial guidelines once you have completed this step.

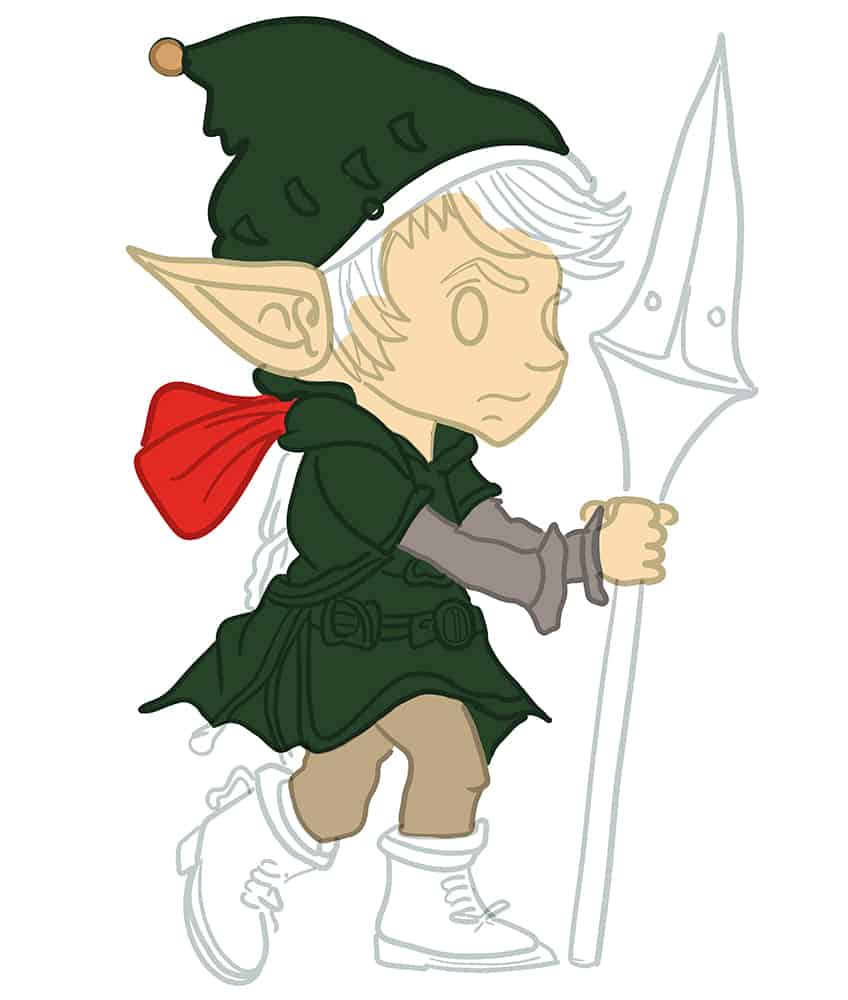
Step 21: Apply the First Coat of Color
With a fine, sharp brush and dark gray paint, evenly coat the elf’s outfit and beanie. Continue using brown paint to evenly coat the bell on the beanie.
Finish this step using a thin brush and light orange paint, and evenly coat the face, ear, neckline, and hands of your elf drawing.

Step 22: Continue to Color Your Elf Drawing
Use the same brush as previously and a shade of khaki-brown paint, and evenly coat the pants. Next, use a shade of gray-brown paint to evenly coat the sleeves. Finish off using red paint to evenly coat the hood.
Step 23: Color the Boots
Begin this step, by painting the boots and shoe laces using a thin brush and brown paint. Using the same colors, evenly coat the accessories such as the belt and strings. Complete the step using yellow paint, and coat the seam lines of the outfit. Switch to red paint for the seam between the beanie and the hair.
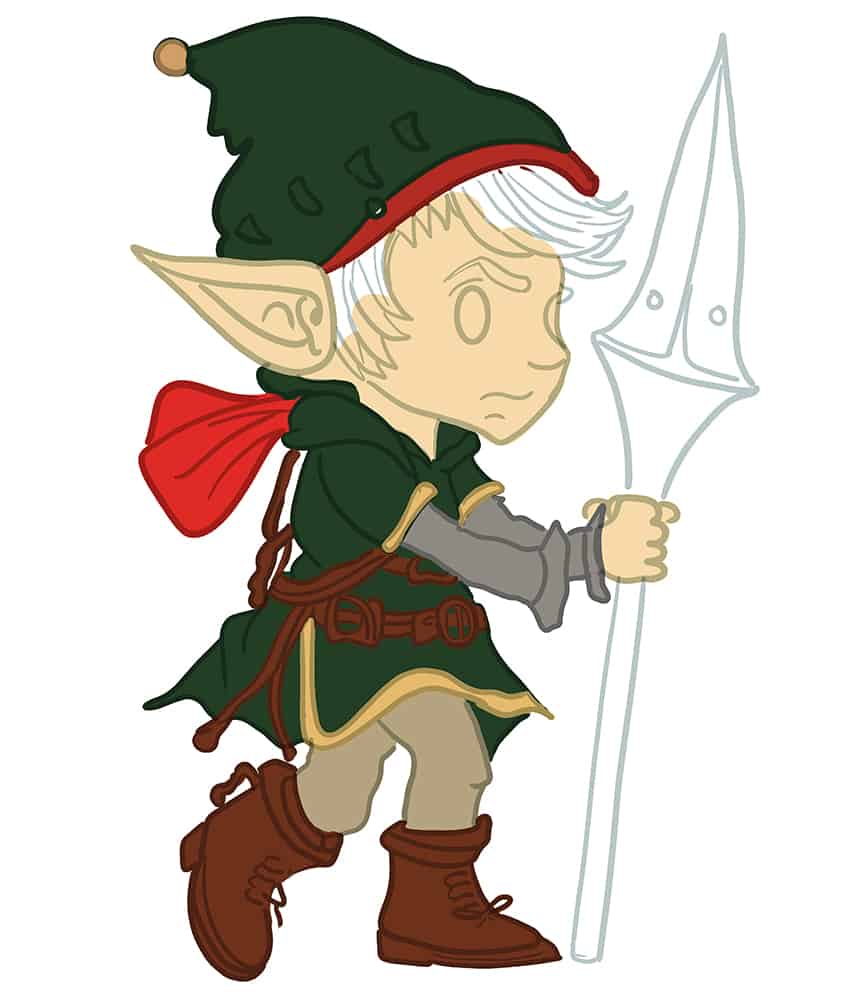
Step 24: Add Color to the Spear
With, a fine sharp brush and a brighter shade of orange paint, evenly coat the spear’s handle. Switch to a shade of gray-brown paint to evenly coat the top of the spear. Continue using a bright shade of brown paint, and evenly coat the hair.
Finish off using a lighter shade of orange paint to color the figures on the beanie.

Step 25: Shade and Highlight the Outfit
Continue using the same brush as previously and switch to black paint, and add shading between the layers of the outfit and the beanie. Repeat using a combination of yellow and green paints and add an enhanced structure between the creases of the outfit and within the beanie. Switch to a blending brush to soften and spread the color coats.
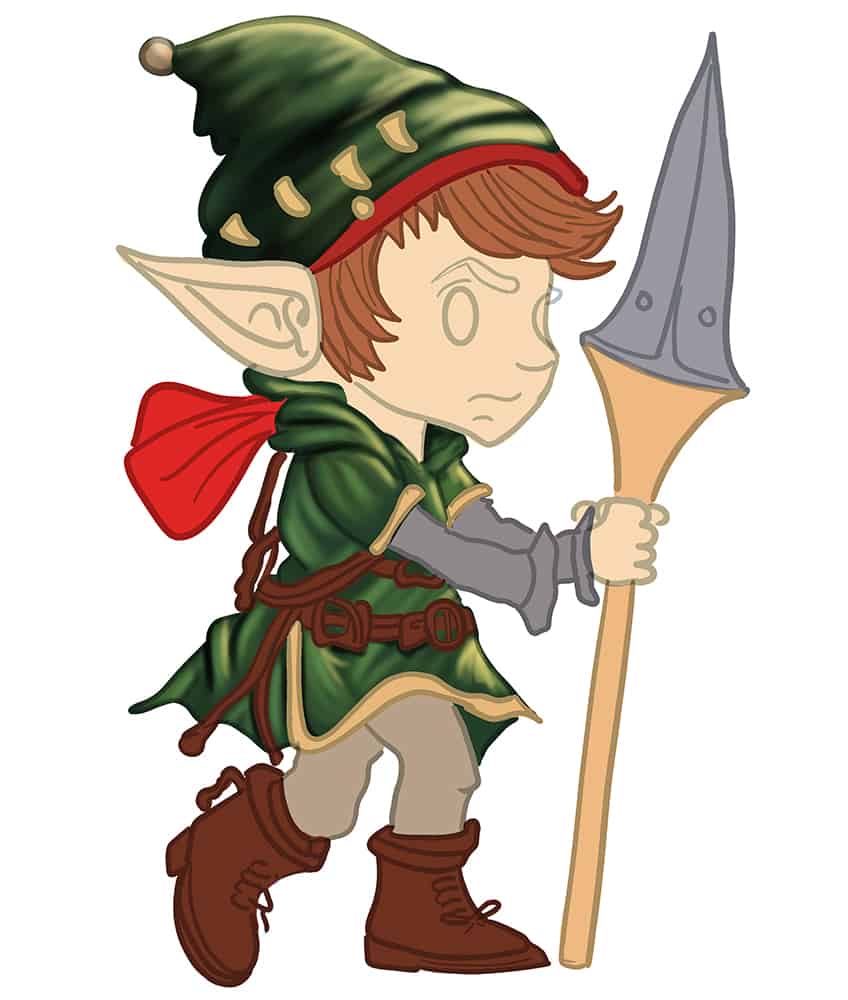
Step 26: Shade and Highlight the Skin on Your Elf Sketch
Begin by using a small, soft brush and black paint, and softly apply shading around the edges of the face, ear, neckline, and hands.
Make sure the first color coat is still somewhat visible.
Continue by using pink paint, and add blush to the cheeks, hands, and ears. Finish off using white paint to add freckles on the face. Repeat using gray paint.
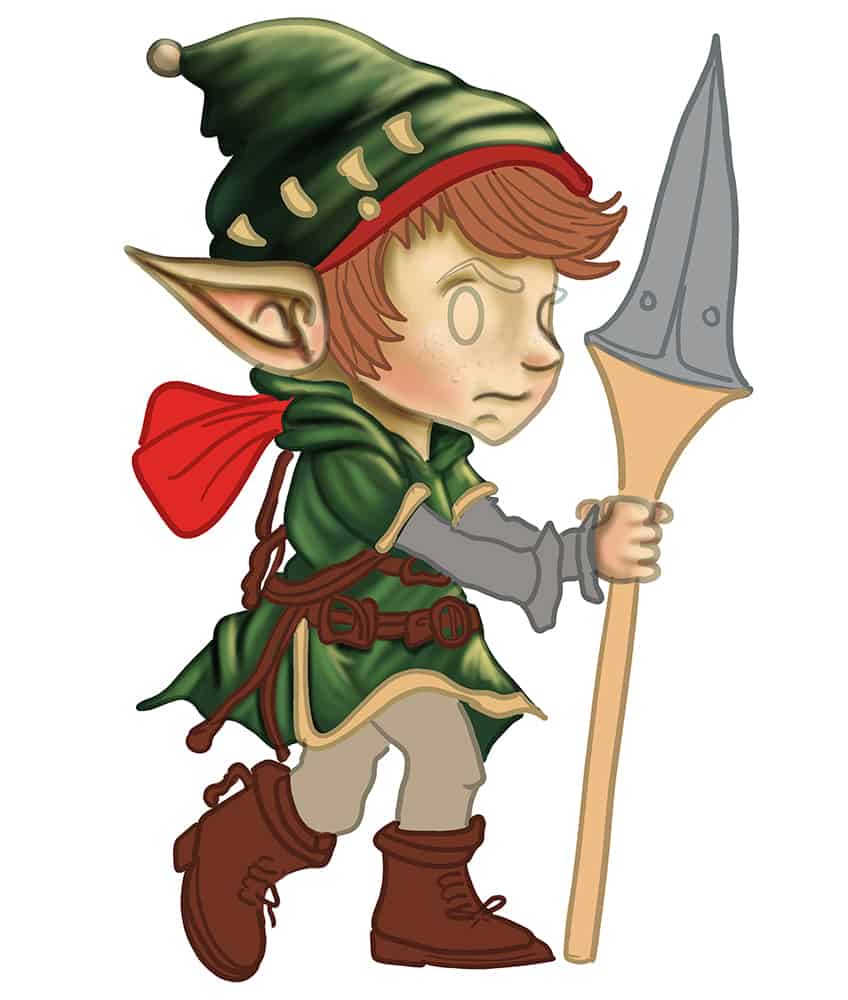
Step 27: Color the Eyes and Eyebrows
In this step, evenly coat the eyebrows and eyes using a thin brush and dark brown paint. Repeat using black paint to color the pupil. Repeat once more using white paint to add a shimmer to the eye.

Step 28: Shade and Highlight the Pants
Select a soft brush and dark brown paint, and softly shade spots of the pants and sleeves. Repeat using white paint to add highlights. Enhance the shading on the structure lines of the hood, using a fine, sharp brush and black paint. Repeat once more using white paint to add fine highlight lines.
With a small, soft brush and a dark shade of brown paint, apply soft shading to the edges of each hairline. Repeat using white paint to add some highlights. Repeat this step on the figures on the beanie.
Continue this step by adding fine structure lines within the spear handle, using a thin brush and brown paint. Switch to black paint and add soft shading to the top of the spear. Repeat once more using white paint to trace the structure lines as highlights.
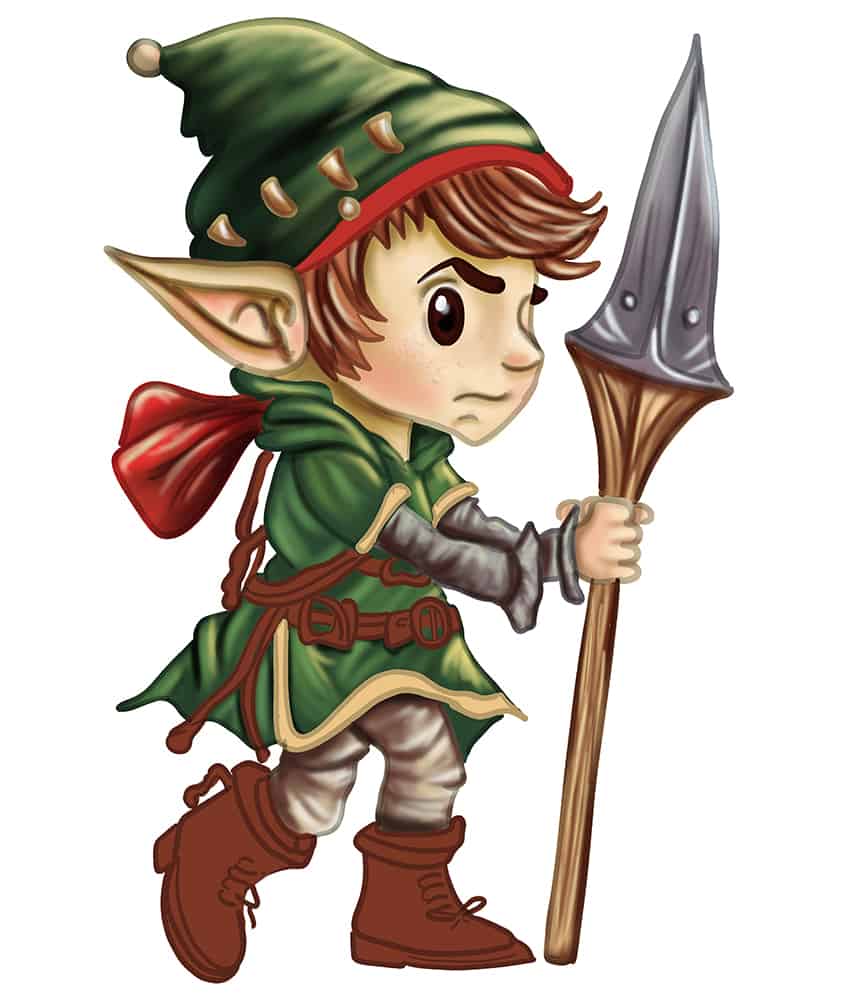
Step 29: Continue to Add Shading to Your Elf Sketch
In this step, shade the edges of each boot, using a small, soft brush and black paint. Continue using tan paint to add highlights to the boots. Repeat this step with the accessories. Complete this step, by adding soft shading to the outfit seam lines using black paint. Repeat once more using white paint for soft highlights.

Step 30: Add a Ground Shadow
Select a small, soft brush and black paint, and add shading beneath each boot and the spear. Switch to a blending brush to softly spread the edges of the shadow.
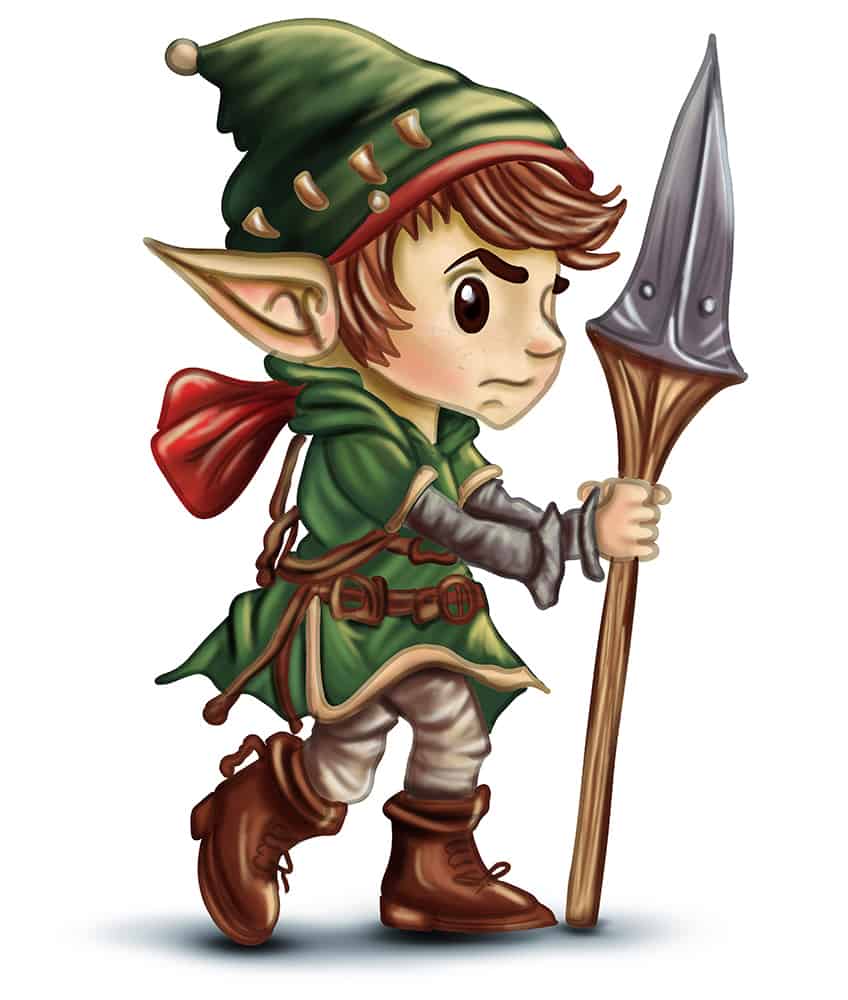
Step 31: Finalize Your Elf Drawing
You have reached the last step of our tutorial on how to draw an elf! To do this, erase any outlines that are still visible. Where this is not possible, simply select a fine, sharp brush and the corresponding colors to trace those outlines.
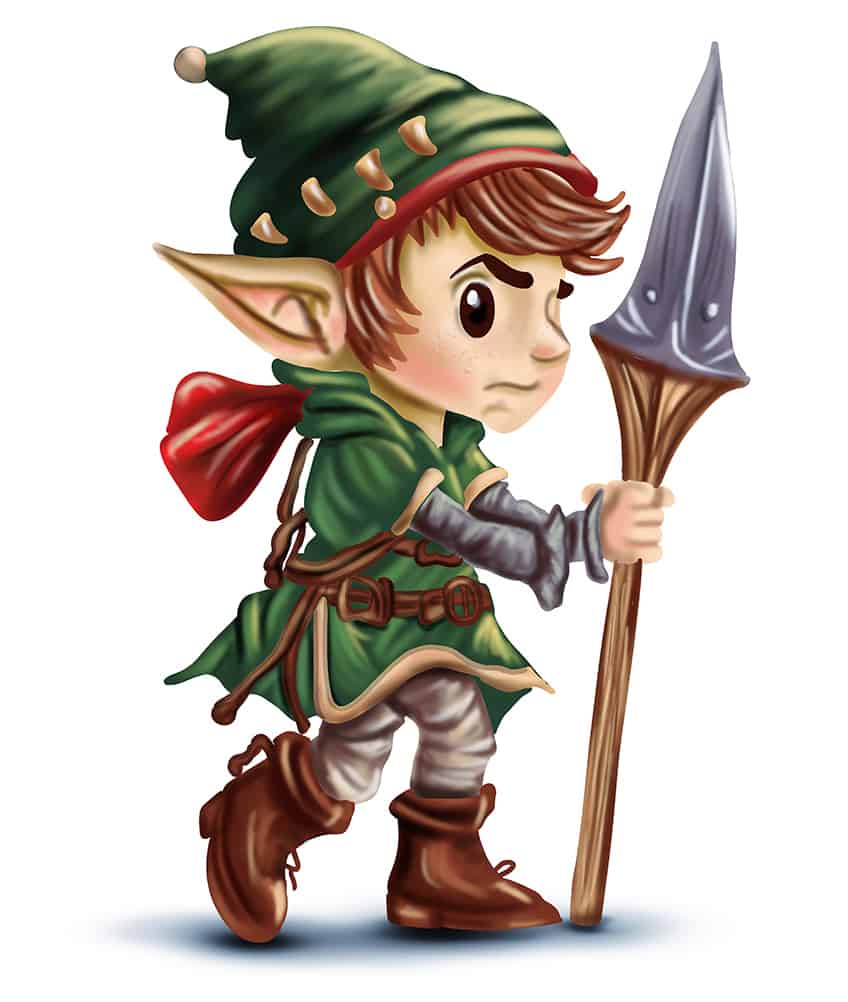
Congratulations on completing your elf drawing! It’s an incredible feeling to bring a mystical creature to life on paper. Take a moment to admire your work and appreciate the time and effort you put into creating this piece of art. You’ve captured the essence of the elf, from its graceful features to its whimsical charm. Remember, drawing is all about practice, so keep experimenting with different techniques and styles to develop your skills even further. Whether you’re sketching for fun or pursuing a career in art, your elf drawing is a testament to your creativity and passion. Don’t be afraid to showcase your work and share it with others. Who knows? Your elf may inspire others to explore the magical world of drawing and fantasy art. Well done!
Frequently Asked Questions
How to Make Sure That the Proportions of My Elf Drawing Are Accurate?
When drawing an elf, it’s important to pay close attention to proportion to create a realistic and appealing final product. One helpful tip is, to begin with basic shapes and sketches, using circles and ovals to establish the head, torso, and limbs. From there, focus on adding details such as facial features, clothing, and accessories. To ensure accurate proportions, you can use reference images or templates as a guide, or simply compare different parts of the drawing to one another as you go along. Another useful trick is to step back from your drawing frequently to assess the overall balance and symmetry, making adjustments as needed. With practice and patience, you’ll be able to master elf proportions and create beautiful drawings that capture the essence of these mystical creatures.
How to Make My Elf Drawing Look More Magical and Whimsical?
To make your elf drawing look more magical and whimsical, you can focus on adding details that emphasize its otherworldly nature. Think about incorporating intricate designs or patterns into the elf’s clothing, using flowing lines to create a sense of movement and grace, or playing with different textures to create depth and dimension. You can also experiment with using bold, bright colors or subtle, muted tones to capture the elf’s unique personality and style. Consider adding other elements such as flowers, butterflies, or animals to the background to add to the fantasy vibe of your drawing.
Matthew Matthysen is an educated multidisciplinary artist and illustrator. He successfully completed his art degree at the University of Witwatersrand in South Africa, majoring in art history and contemporary drawing. The focus of his thesis was to explore the philosophical implications of the macro and micro-universe on the human experience. Matthew uses diverse media, such as written and hands-on components, to explore various approaches that are on the border between philosophy and science.
Matthew organized various exhibitions before and during his years as a student and is still passionate about doing so today. He currently works as a freelance artist and writer in various fields. He also has a permanent position at a renowned online gallery (ArtGazette) where he produces various works on commission. As a freelance artist, he creates several series and successfully sells them to galleries and collectors. He loves to use his work and skills in various fields of interest.
Matthew has been creating drawing and painting tutorials since the relaunch in 2020. Through his involvement with artincontext.org, he has been able to deepen his knowledge of various painting mediums. For example, watercolor techniques, calligraphy and lately digital drawing, which is becoming more and more popular.
Learn more about Matthew Matthysen and the Art in Context Team.


